ServiceNow Setup for Enterprise Search
This page is for the ServiceNow (Next Gen) connector and it can only be configured within the new enterprise search configuration experience explained below.
Please visit this documentation to learn more about Next Gen and Classic connectors.
System Overview
ServiceNow is your organization’s go-to platform for managing IT services and sharing knowledge. It brings together helpful articles, best practices, and insights to make it easy for employees to find the answers they need. Moveworks connects to ServiceNow to index the knowledge articles published on your service portal and attached files —along with its metadata and permissions—so users can quickly discover the right information they’re authorized to access.
Authentication
Moveworks supports two primary authentication methods within ServiceNow: Basic Authentication and OAuth 2.0, which includes the Password Grant, Refresh Token Grant, and JWT Grant types. Both authentication methods enable the ingestion of Knowledge Articles, including custom-templated articles and their associated attachments.
- OAuth 2.0 (Recommended)
- Uses a Service Account and OAuth2 application to authorize with your Service Now instance.
- Supports multiple grant types which can be selected as per your security policy.
- Basic authorization
- Uses a Service Account to authorize Moveworks integration with ServiceNow.
- Requires the username and password of the Service Account configured in your ServiceNow instance.
Permission Enforcement
Moveworks honors the user criteria defined in your ServiceNow instance at both the folder and file levels. For each authentication method, the user criteria are ingested and evaluated against the corresponding file and user records, ensuring that only users with appropriate access permissions can view the content within the Enterprise Search application.
API usage
- Moveworks leverages ServiceNow’s Table APIs to ingest content and a scripted API to retrieve and process user criteria.
Content types
Moveworks supports ingesting Knowledge Articles from all article templates, including both ServiceNow’s out-of-the-box templates and custom templates defined in your instance.
- Knowledge Articles : All knowledge articles within a configured knowledge base
- All out of the box article templates
- Note: Knowledge blocks and custom article templates are not yet supported
- Files : All files attached to a knowledge article
- Supported file formats : doc • docx • pdf • ppt • txt • html
Moveworks delivers comprehensive data coverage—including metadata, identity data, permissions data, and activity data—and keeps content in sync in real time, ensuring that updates and permission changes are immediately reflected in search results.
Access Requirements
Moveworks requires a Service Account with the appropriate roles to authenticate with your ServiceNow instance. To begin, create a Service Account by navigating to the Users table in your ServiceNow instance.
If you’re using OAuth 2.0 with any grant type, additional steps are required to set up an OAuth 2.0 Application Registry. Choose the authentication method that best aligns with your organization’s requirements.
Pre-requisites
Before you begin the setup, ensure that you have the following permissions and information available:
- Administrative access in ServiceNow — You must have permission to add a new user in the Users table and to install update sets within your ServiceNow instance.
- Knowledge Base details — Prepare a list of Knowledge Base IDs that need to be configured in the Moveworks Enterprise Search configuration.
Setting up Moveworks Update Sets
Update Sets in ServiceNow are used to package and transfer configuration changes between different environments, such as from a test instance to production. They make it easy for your to configure the moveworks_user role and a scripted API which Moveworks will use to ingest permission from your instance.
This is an important step in the configuration process. Moveworks can ingest the user criteria configured in your instance only after this step is completed.
There are two update sets that we need to install : Base update set and ACL update set
Installing an Update Set Module
To install a Module, you can follow the three steps below, or watch this video.
- Download the relevant Update Set Module (XML) files from this link.
-
Base update set
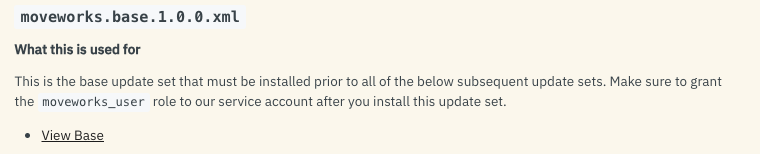
-
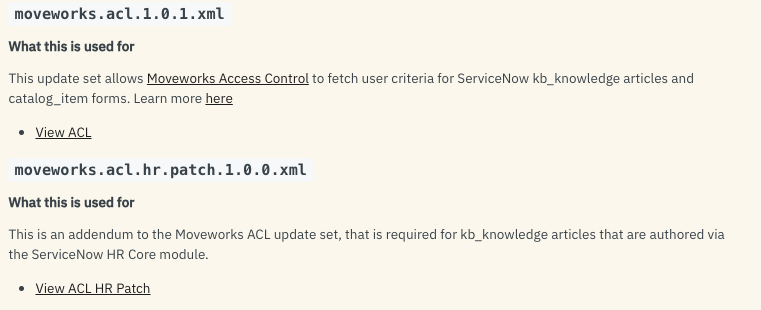
ACL update sets
-
- Import these under “Retrieved Update Sets” in your ServiceNow instance.
- Commit the changes and the app will show up in “My Company Applications”.
Guided steps
-
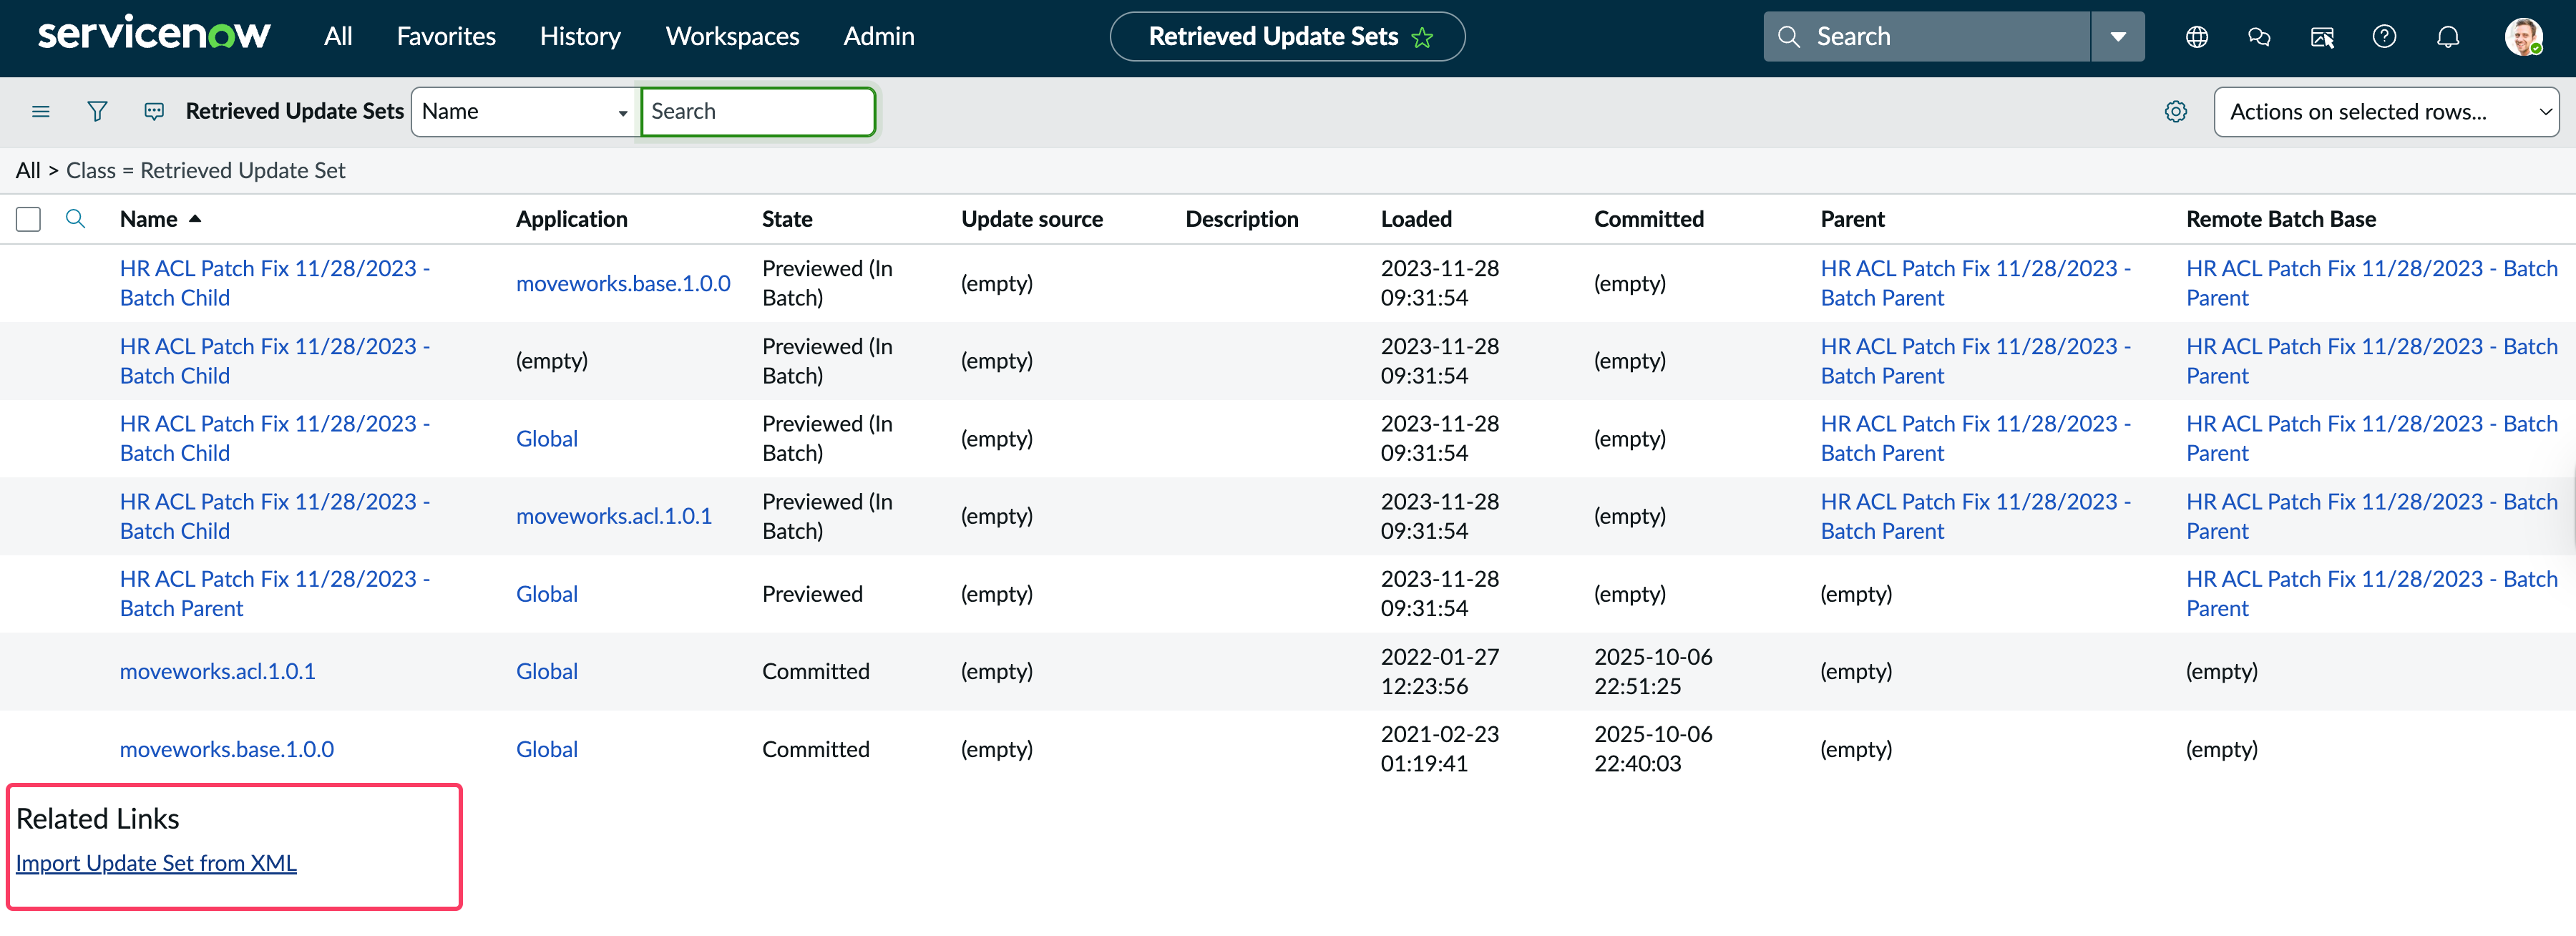
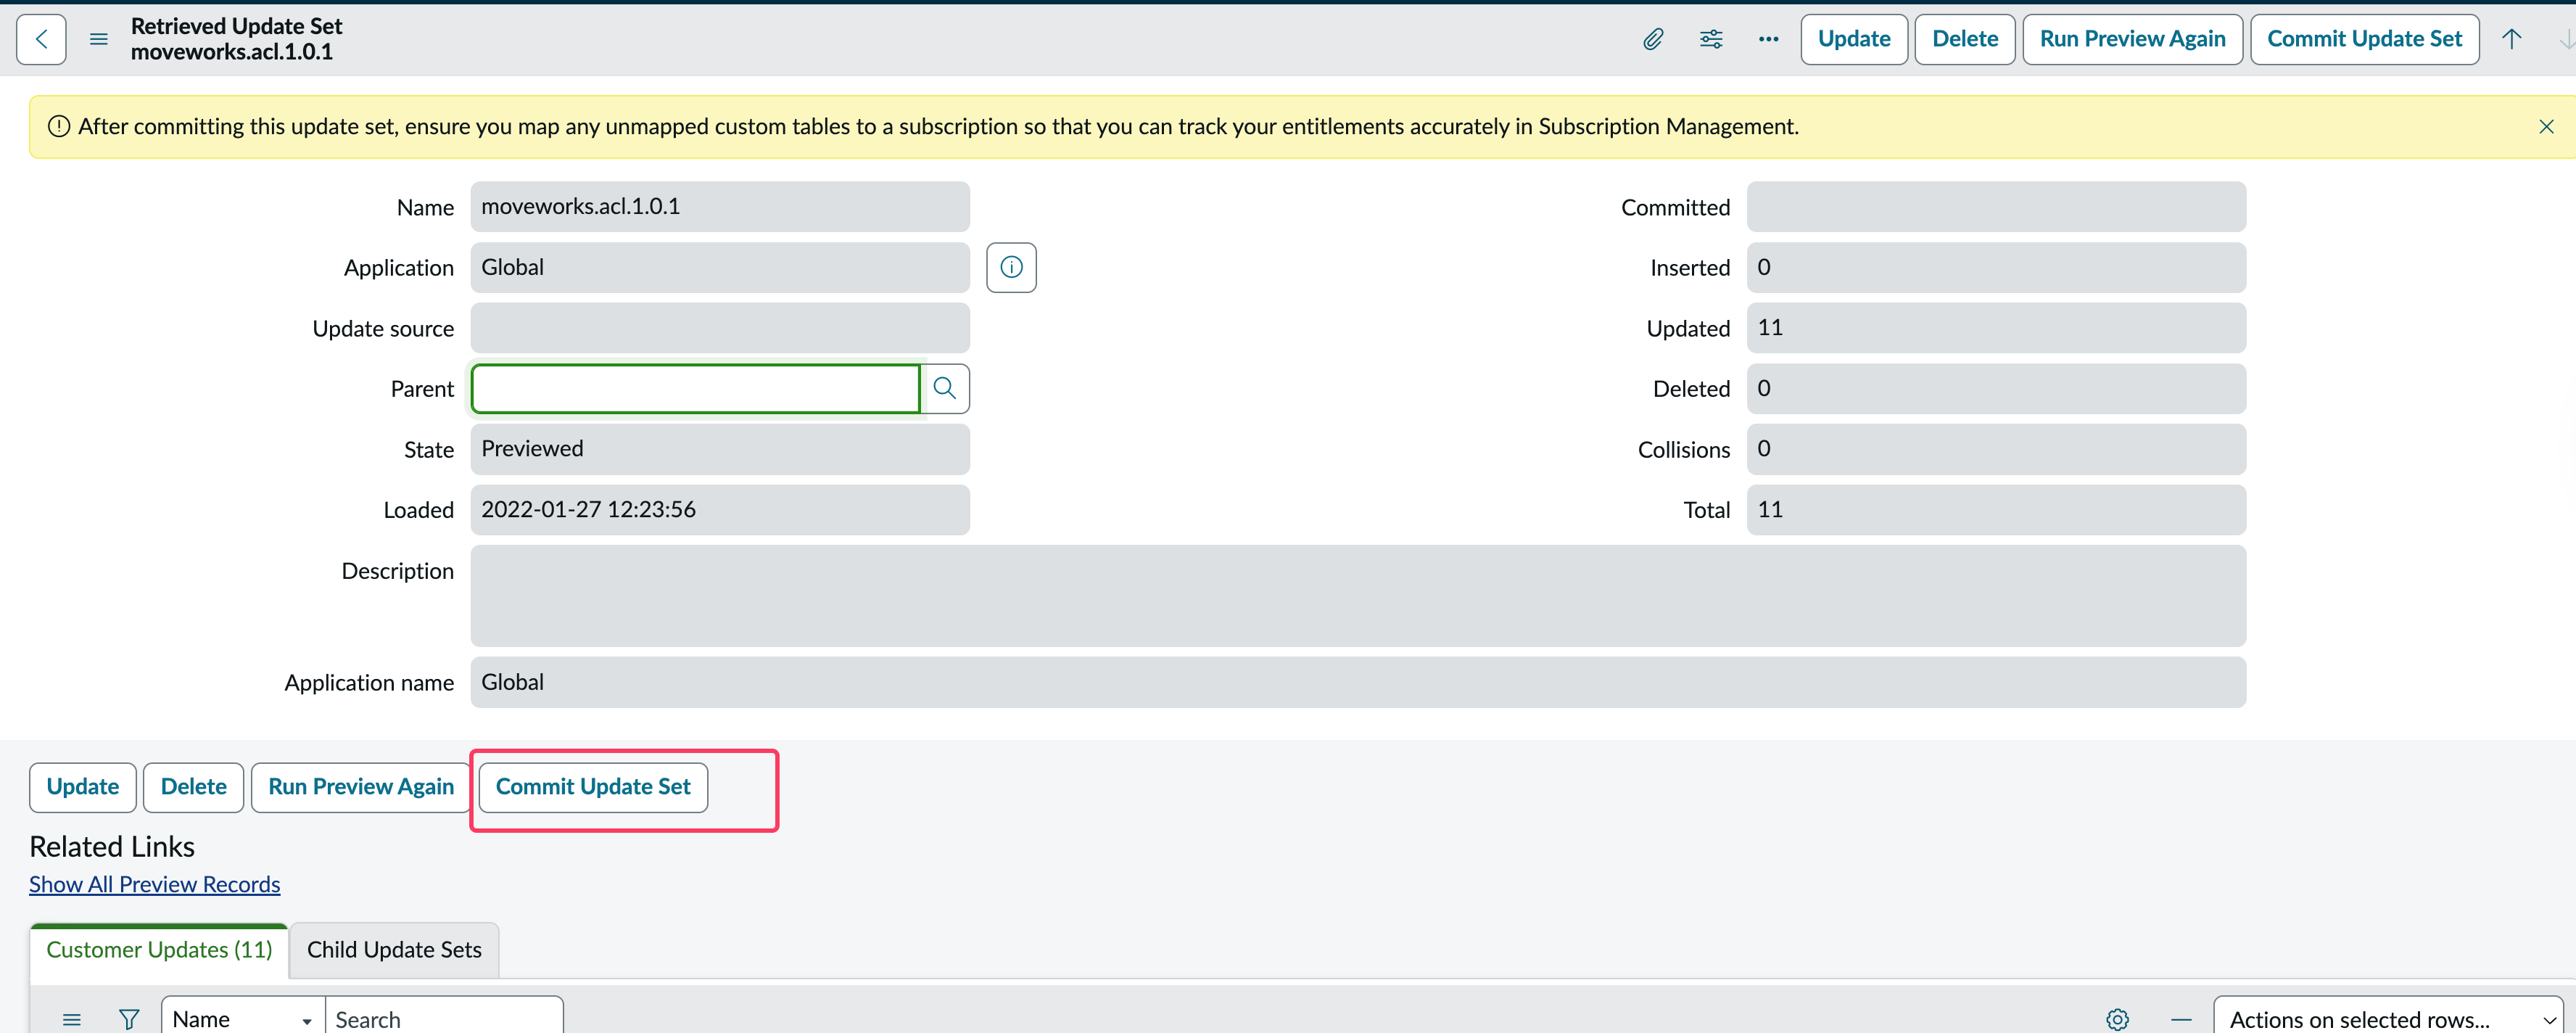
Once you have downloaded the file and stored as XML navigate to the "retrieved update set" table in your ServiceNow instance and click on "Import Update Set from XML"
-
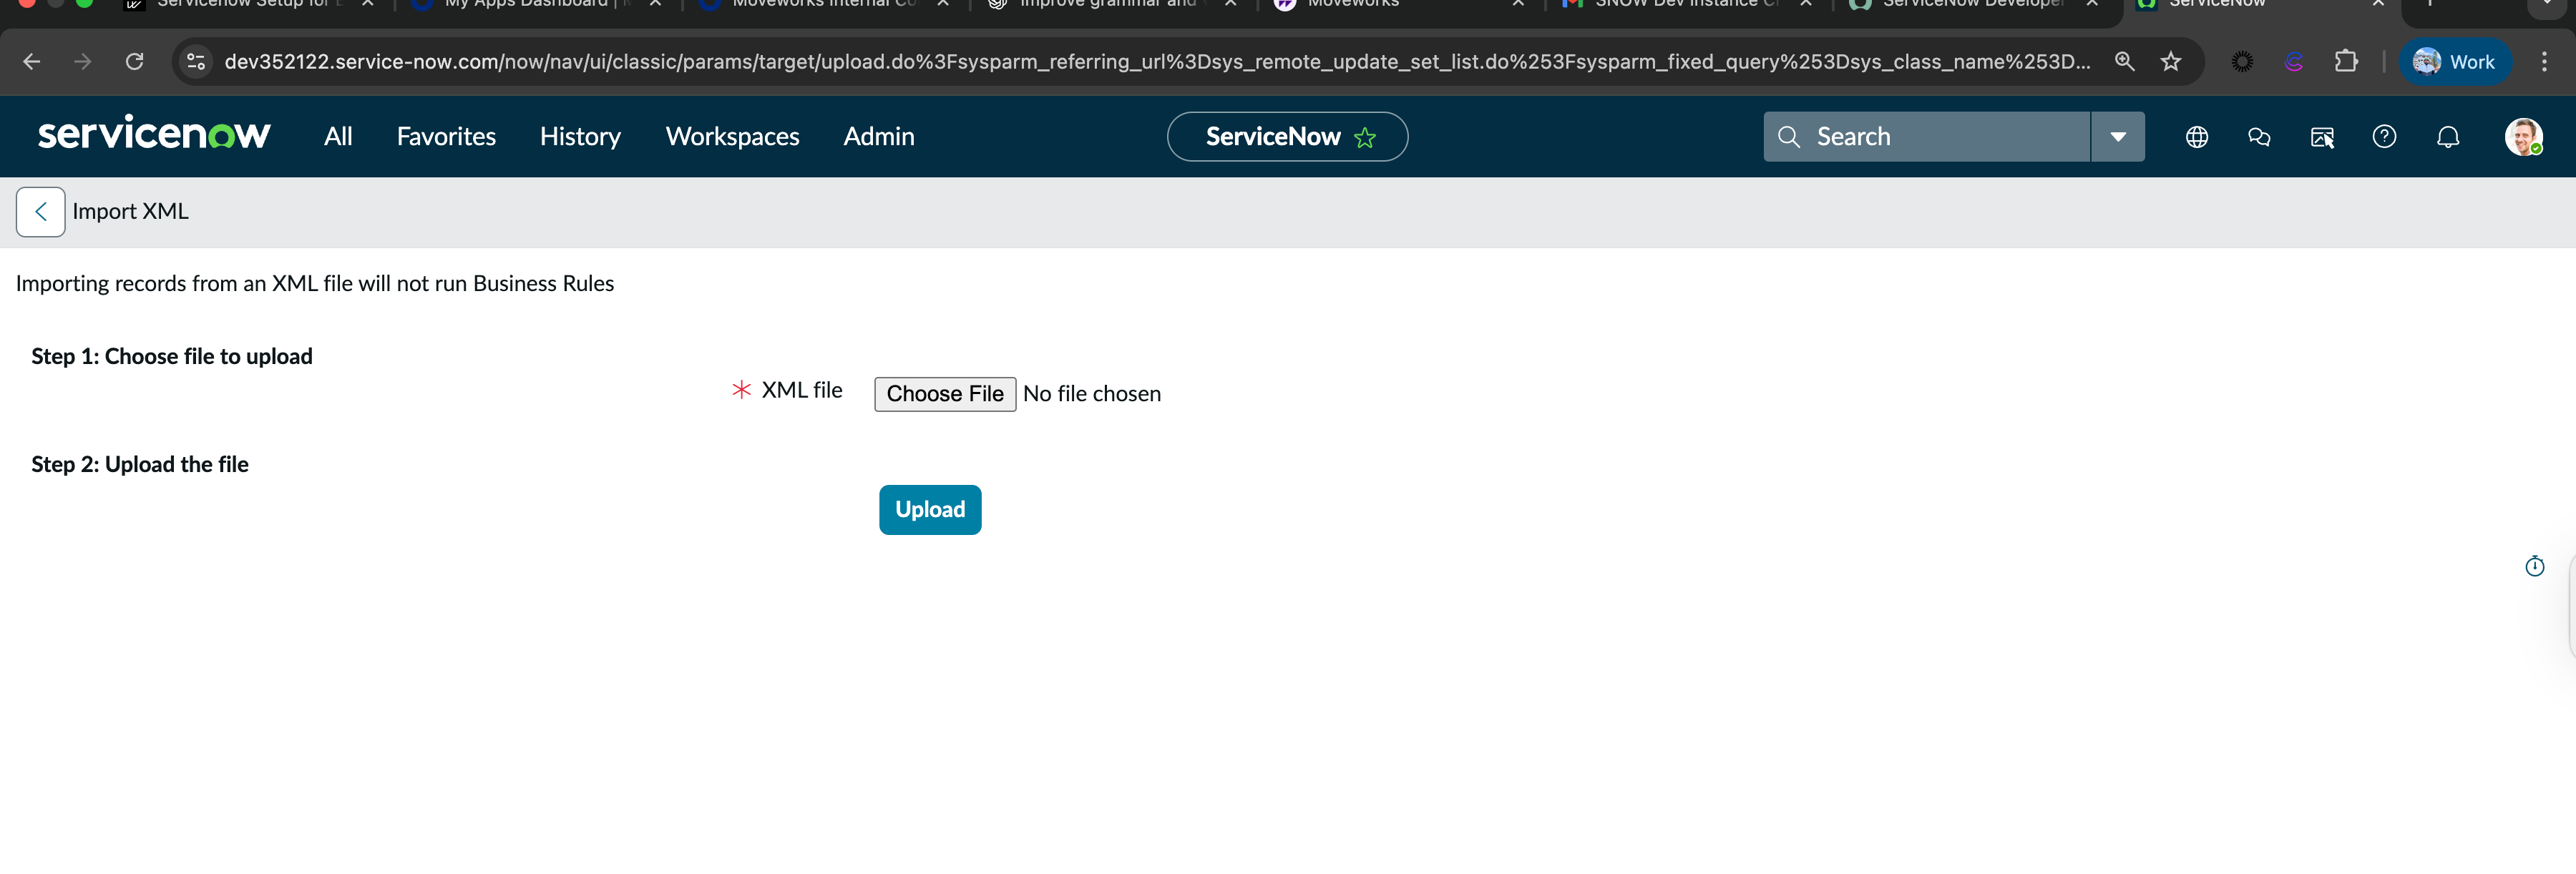
Select the XML files that you have downloaded in the previous step.
-
Commit the update set after running the preview. Once completed, your setup is finished!
Creating a Service Account
The steps below are for a local service account, but you may also use an account synced from your directory system.
-
Go to your ServiceNow instance; the URL of the instance should look like
https://{{instance_name}}.service-now.com -
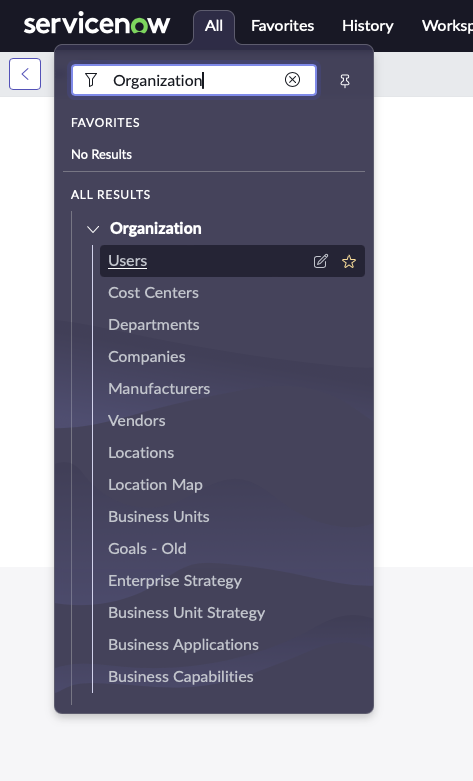
Click on ‘All’, Search for ‘Organization’ in the search bar, and then Click on ‘Users’
-
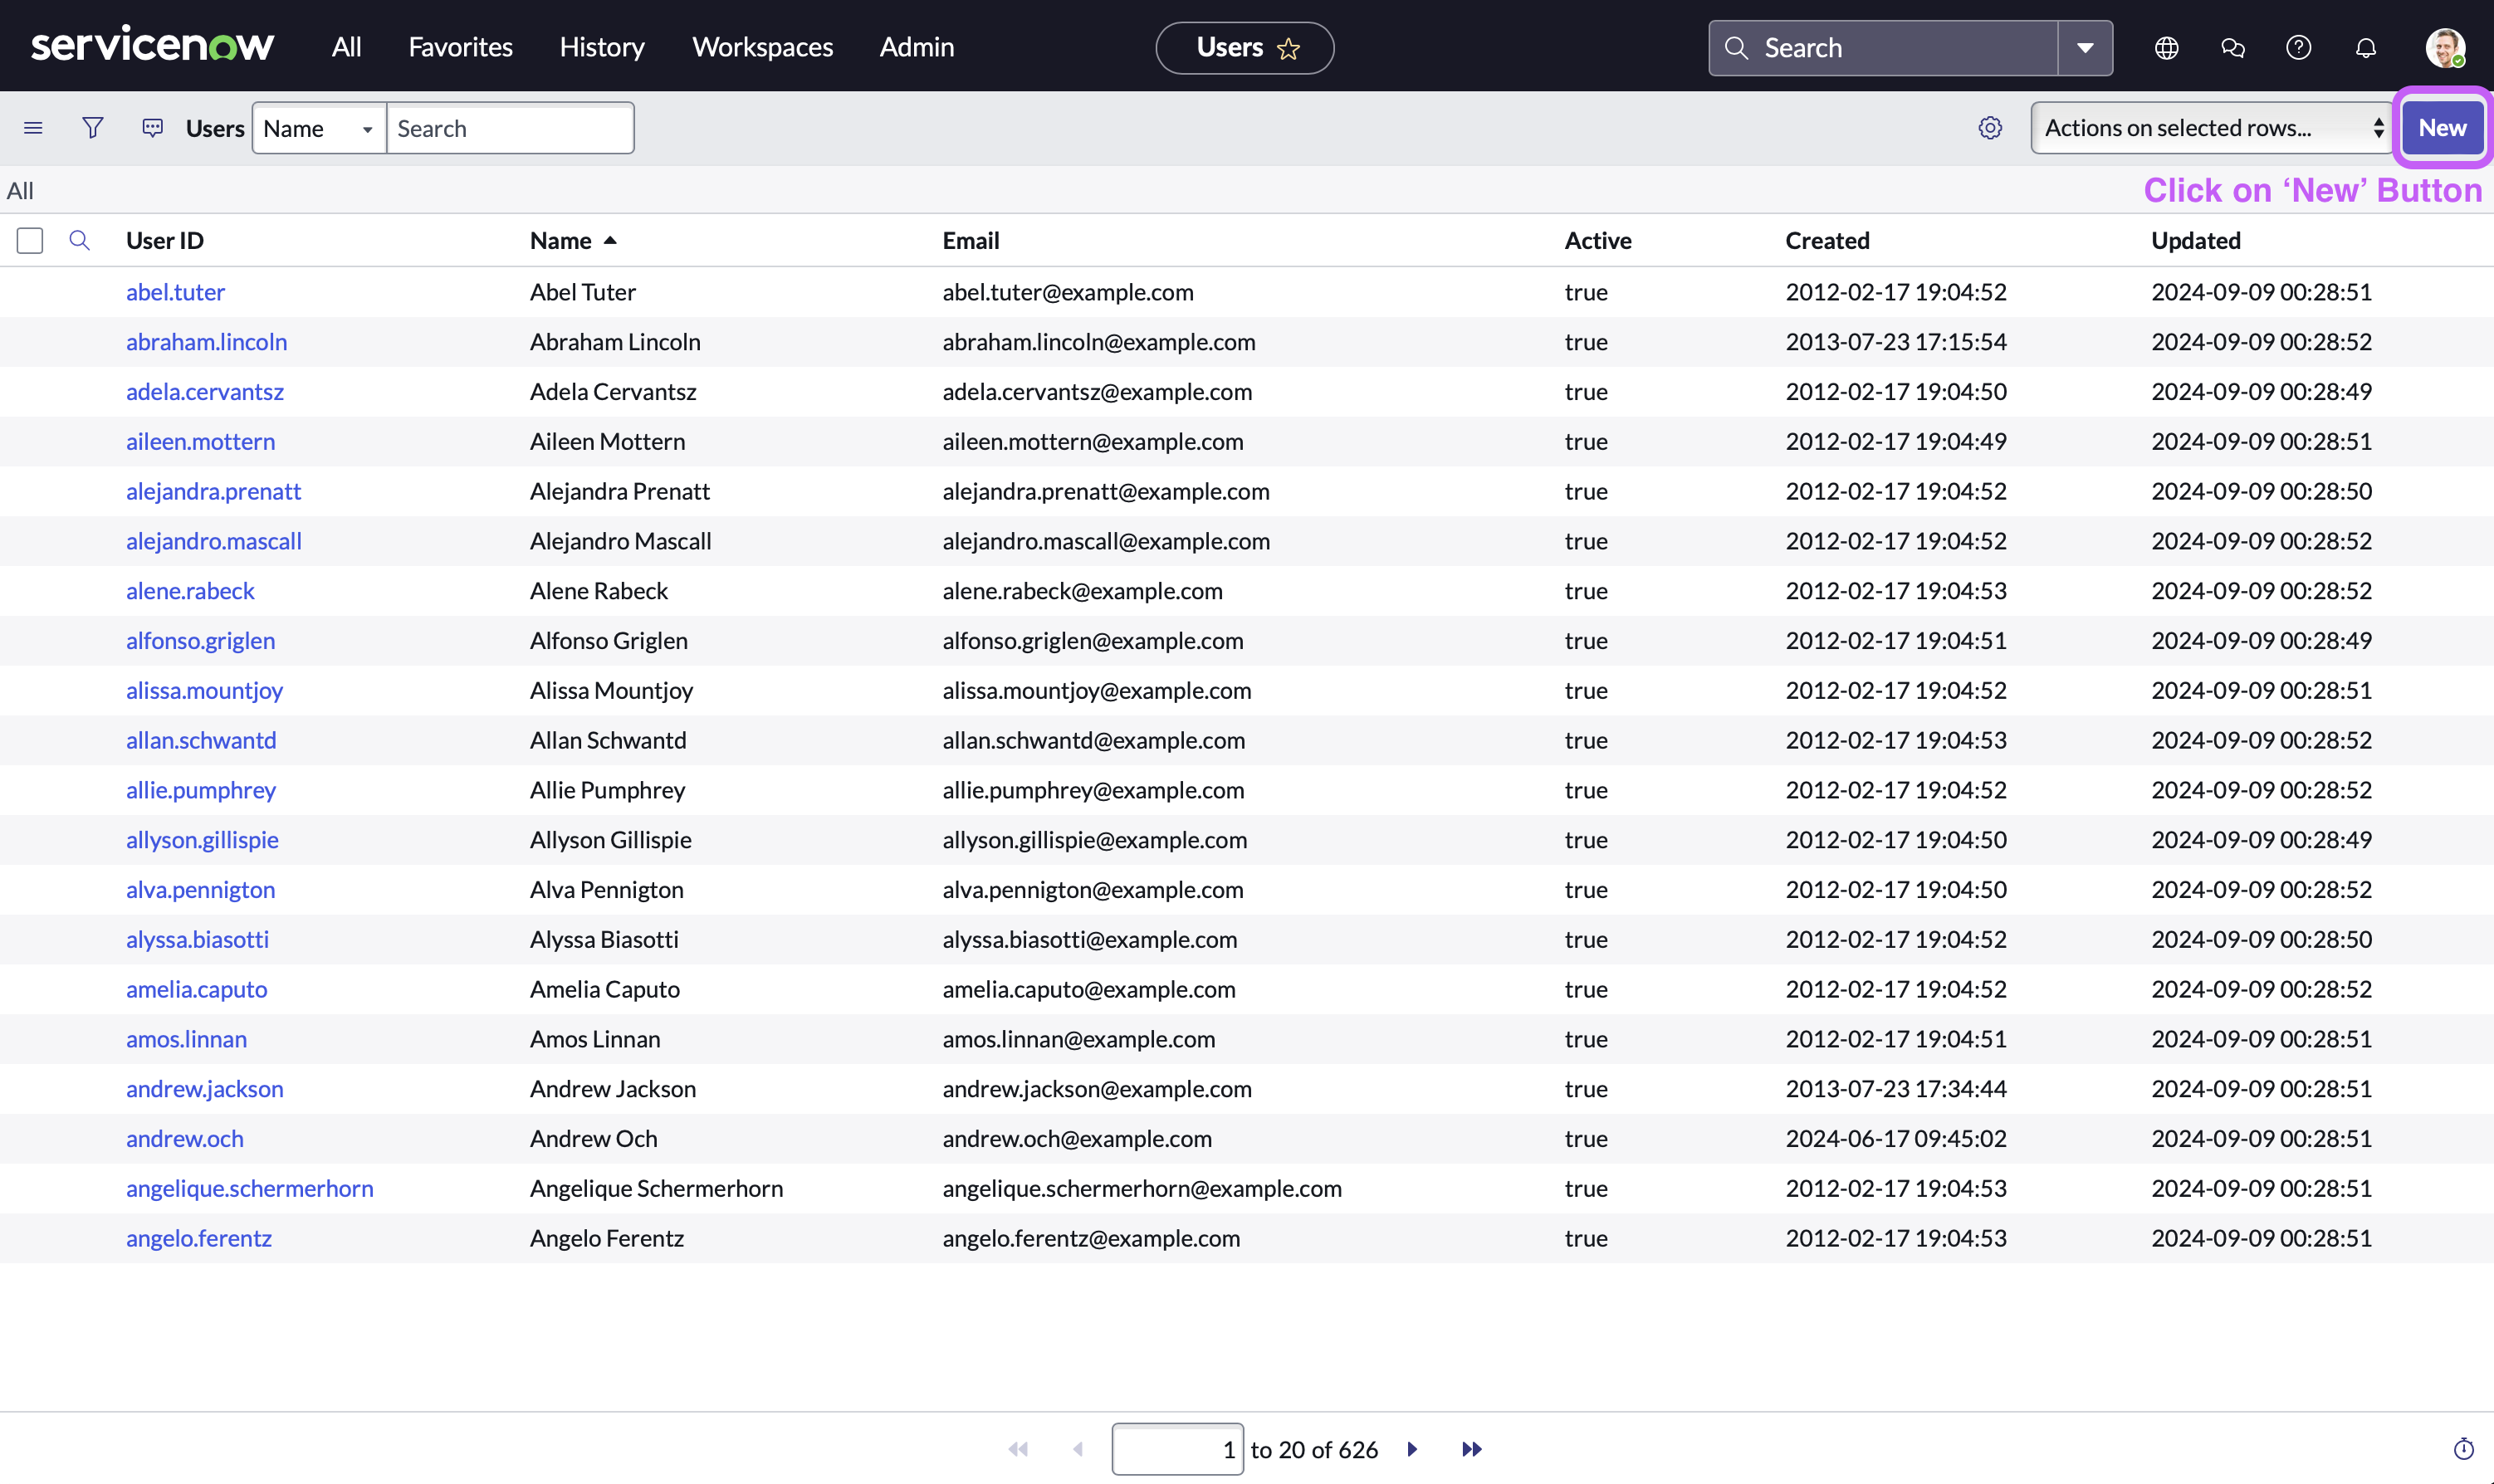
Now, in the user table view, Click on the ‘New’ button located at the top right side of navigation bar
-
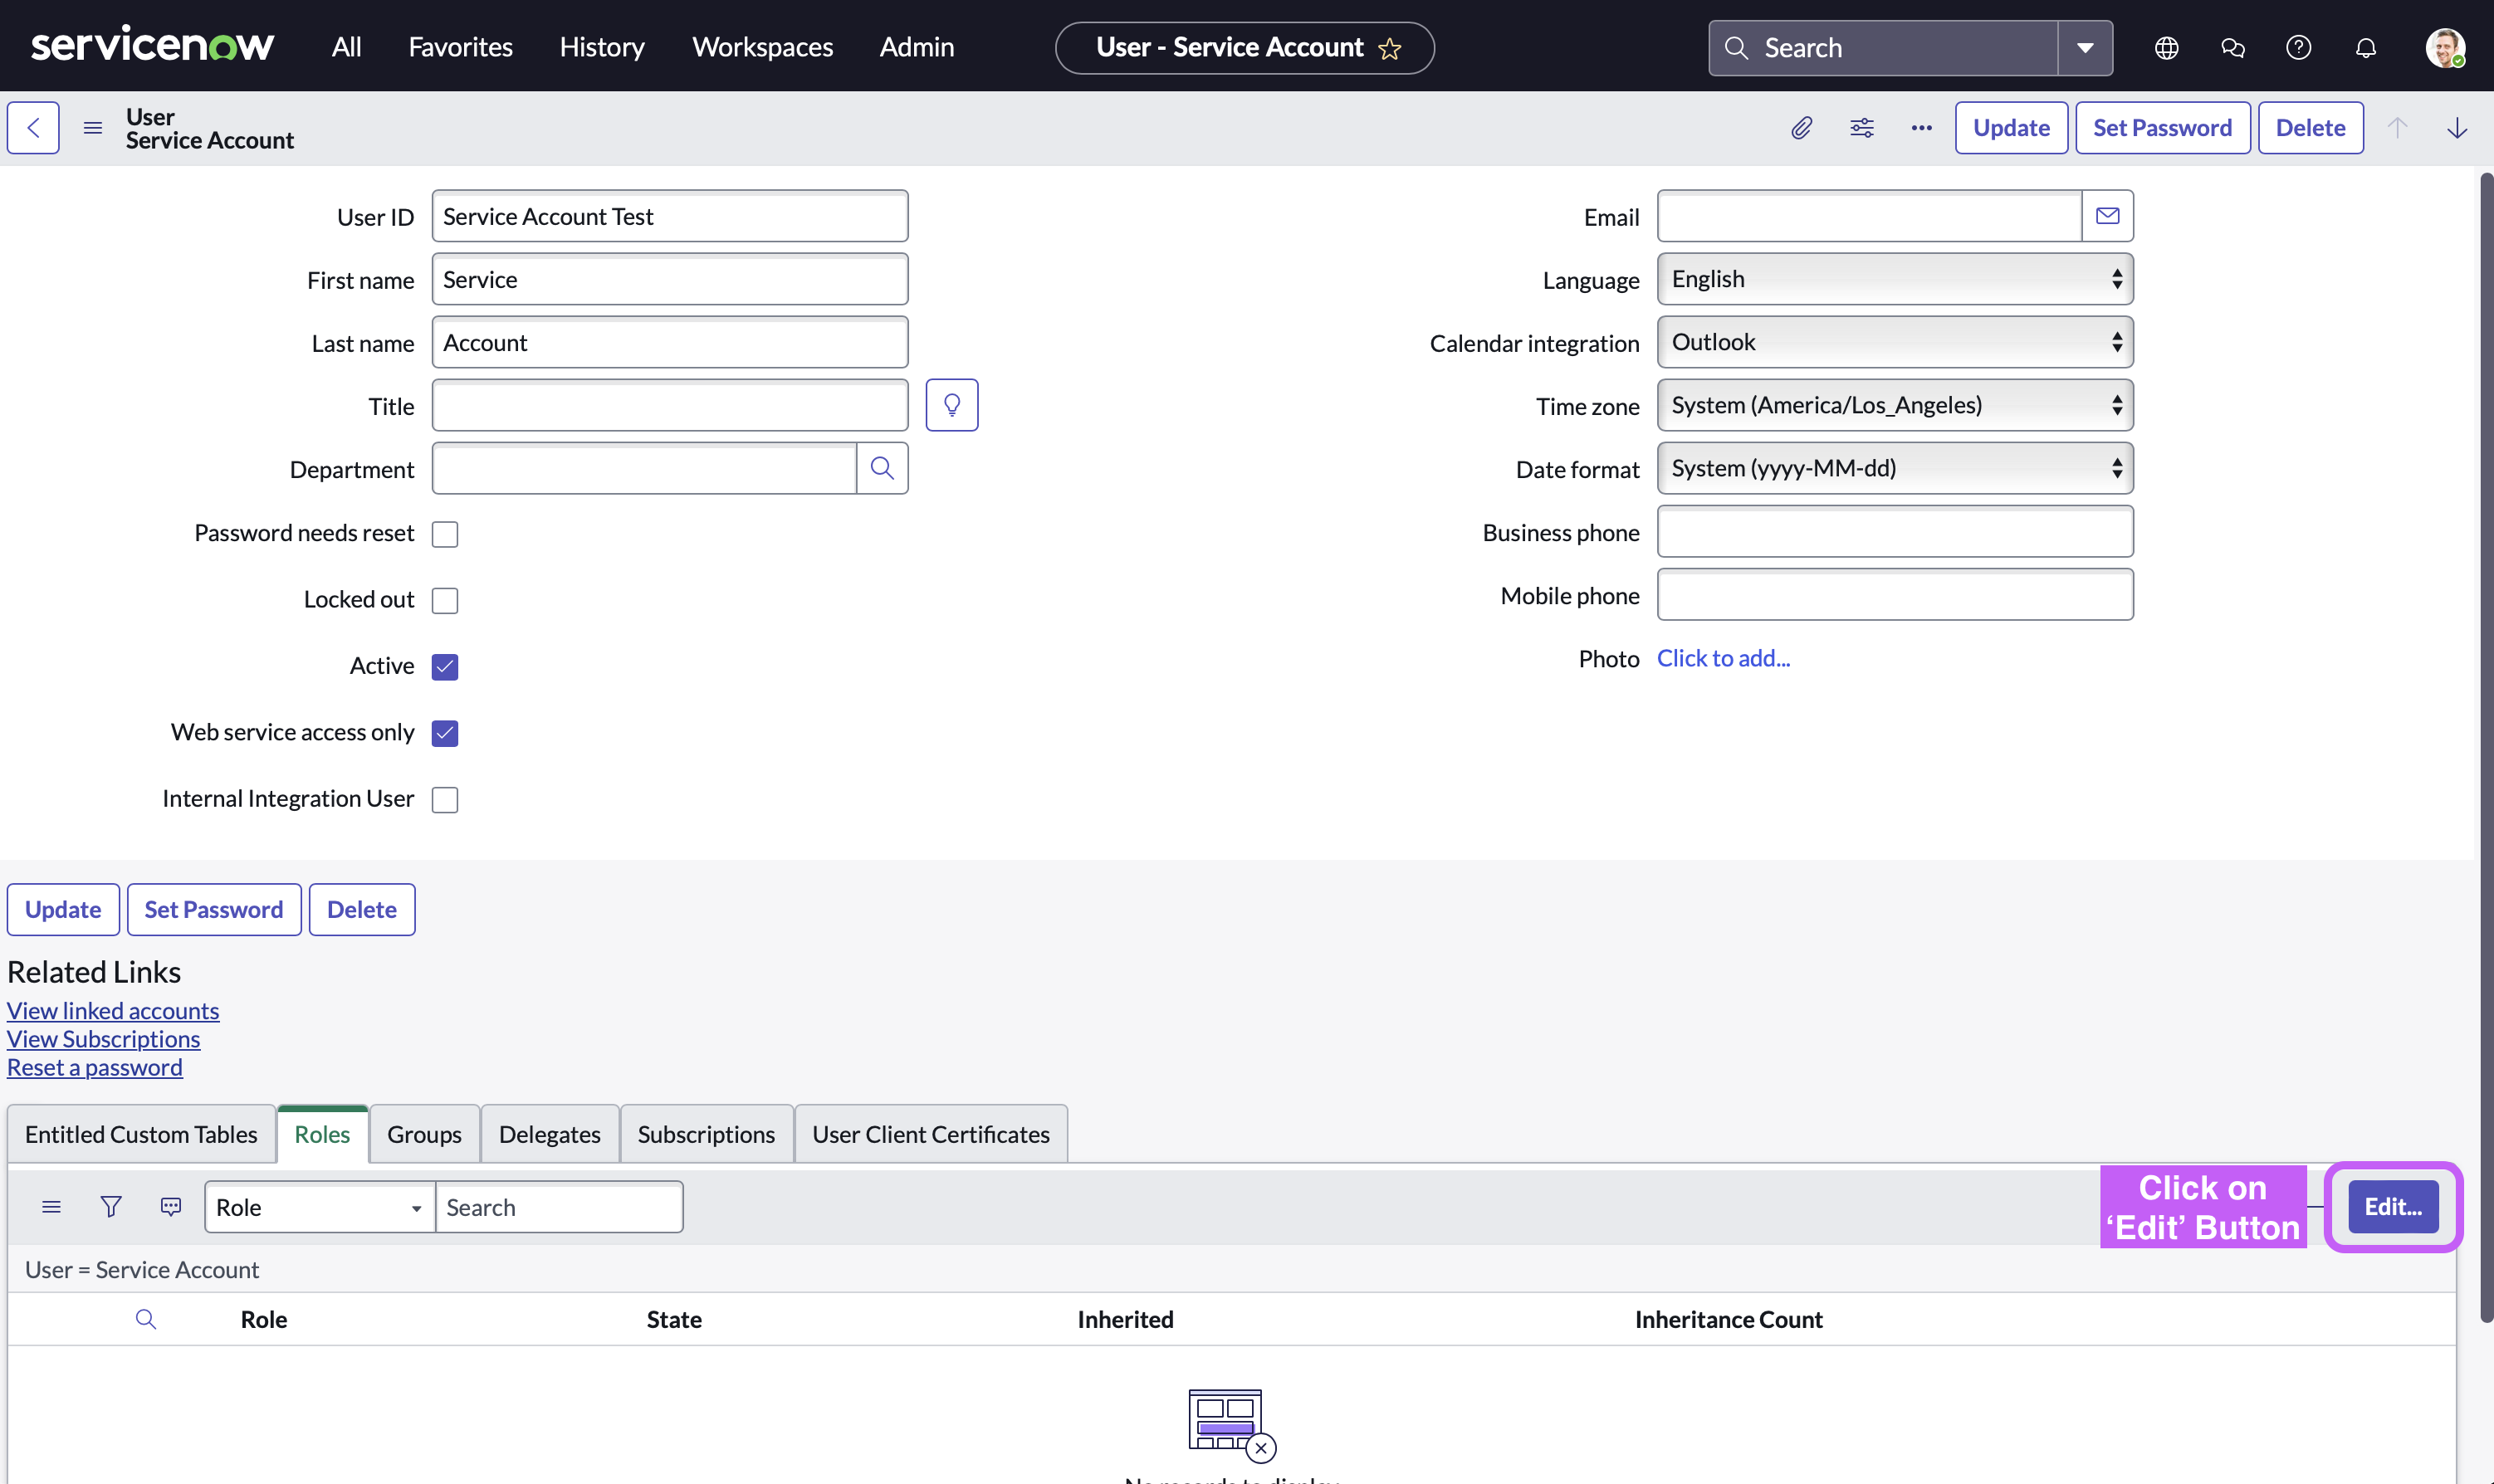
Fill in the service account details. Make sure that ‘Web Service Access Only’ checkbox is enabled
-
First Name/Last Name =
Your Moveworks bot name(otherwise use“Moveworks”) -
Time zone =
GMTPlease ensure that both the Display Value and Value are set to GMT. If Display Value is set to GMT, but Value is set to Greenwich/Universal, then polling will fail. This can be verified on the sys_choice table
-
Date format =
yyyy-MM-dd -
Email (Optional - required for OAuth2.0 with JWT) =
Service account email ID of your choice(otherwise usesvc_snow_mw@your_org.com)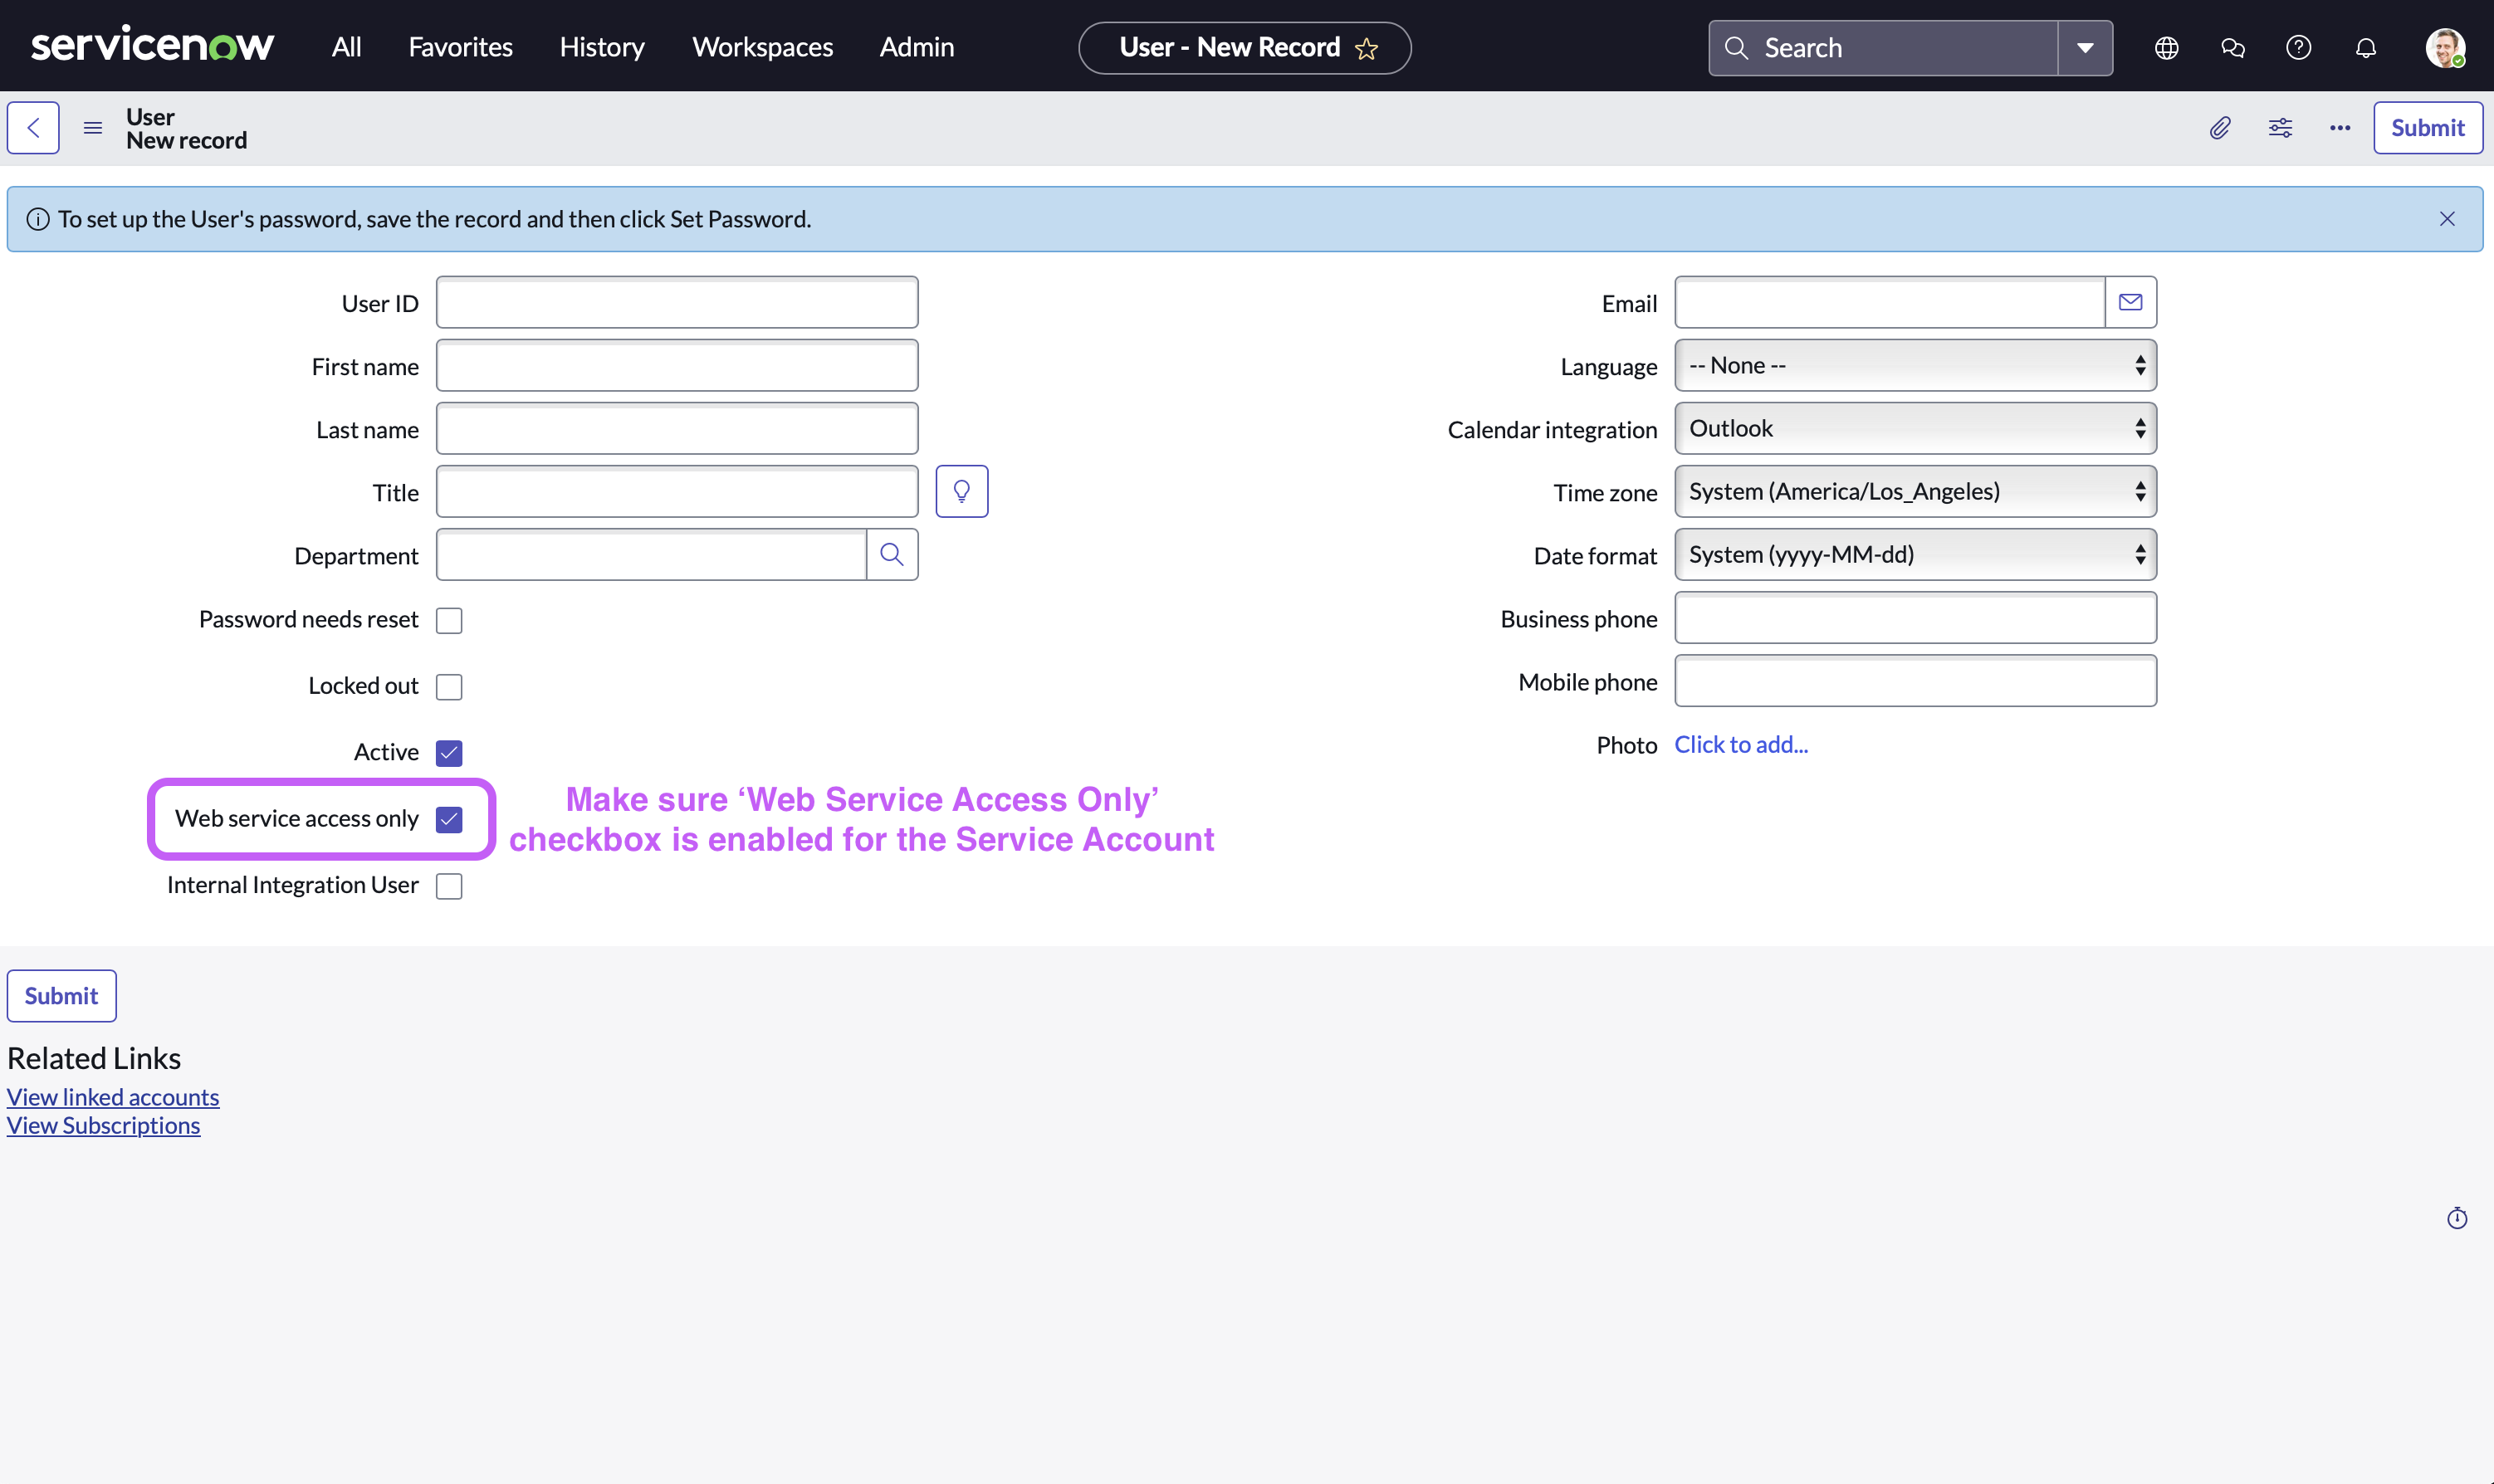
-
-
Click on ‘Submit’
Step 2: Grant Permissions to Service Account
-
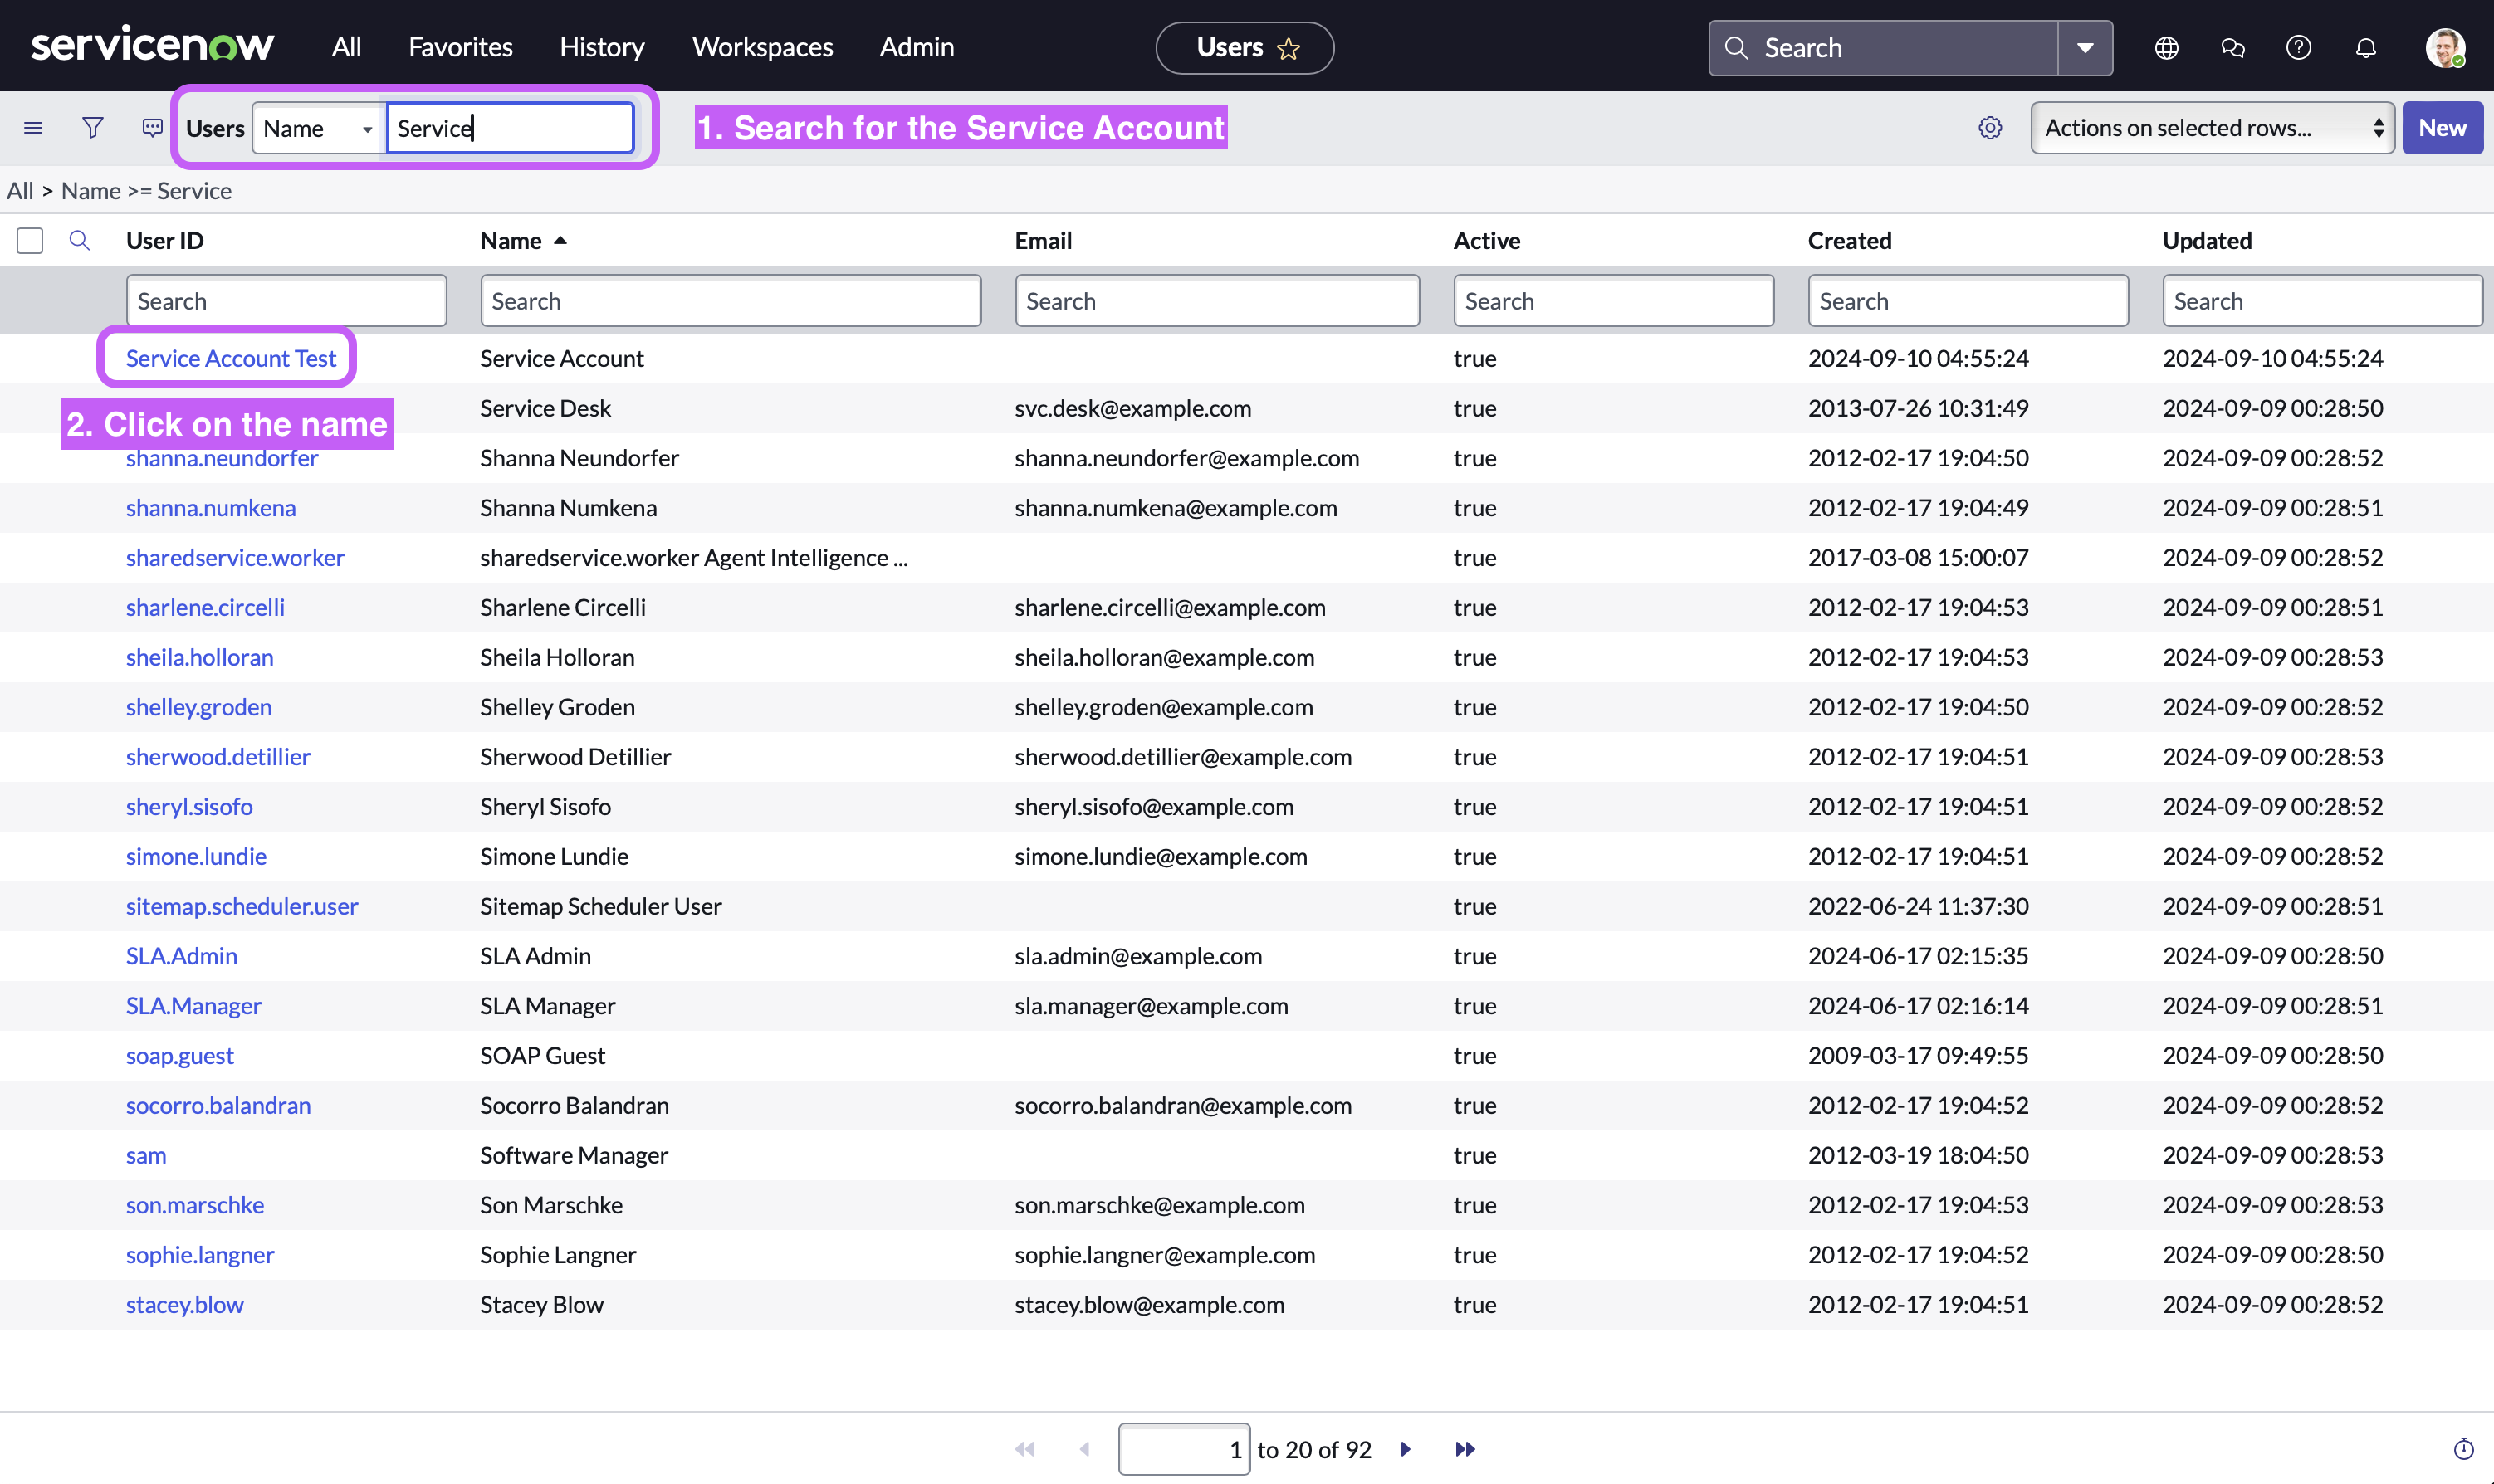
Click on ‘All’, Search for ‘Organization’ in the search bar, and then Click on ‘Users’ (As shown in the previous step)
-
Now, in the user table view, Search for the Service Account you just created and then Click on it
-
Click on the ‘Edit’ button located at the bottom right side
-
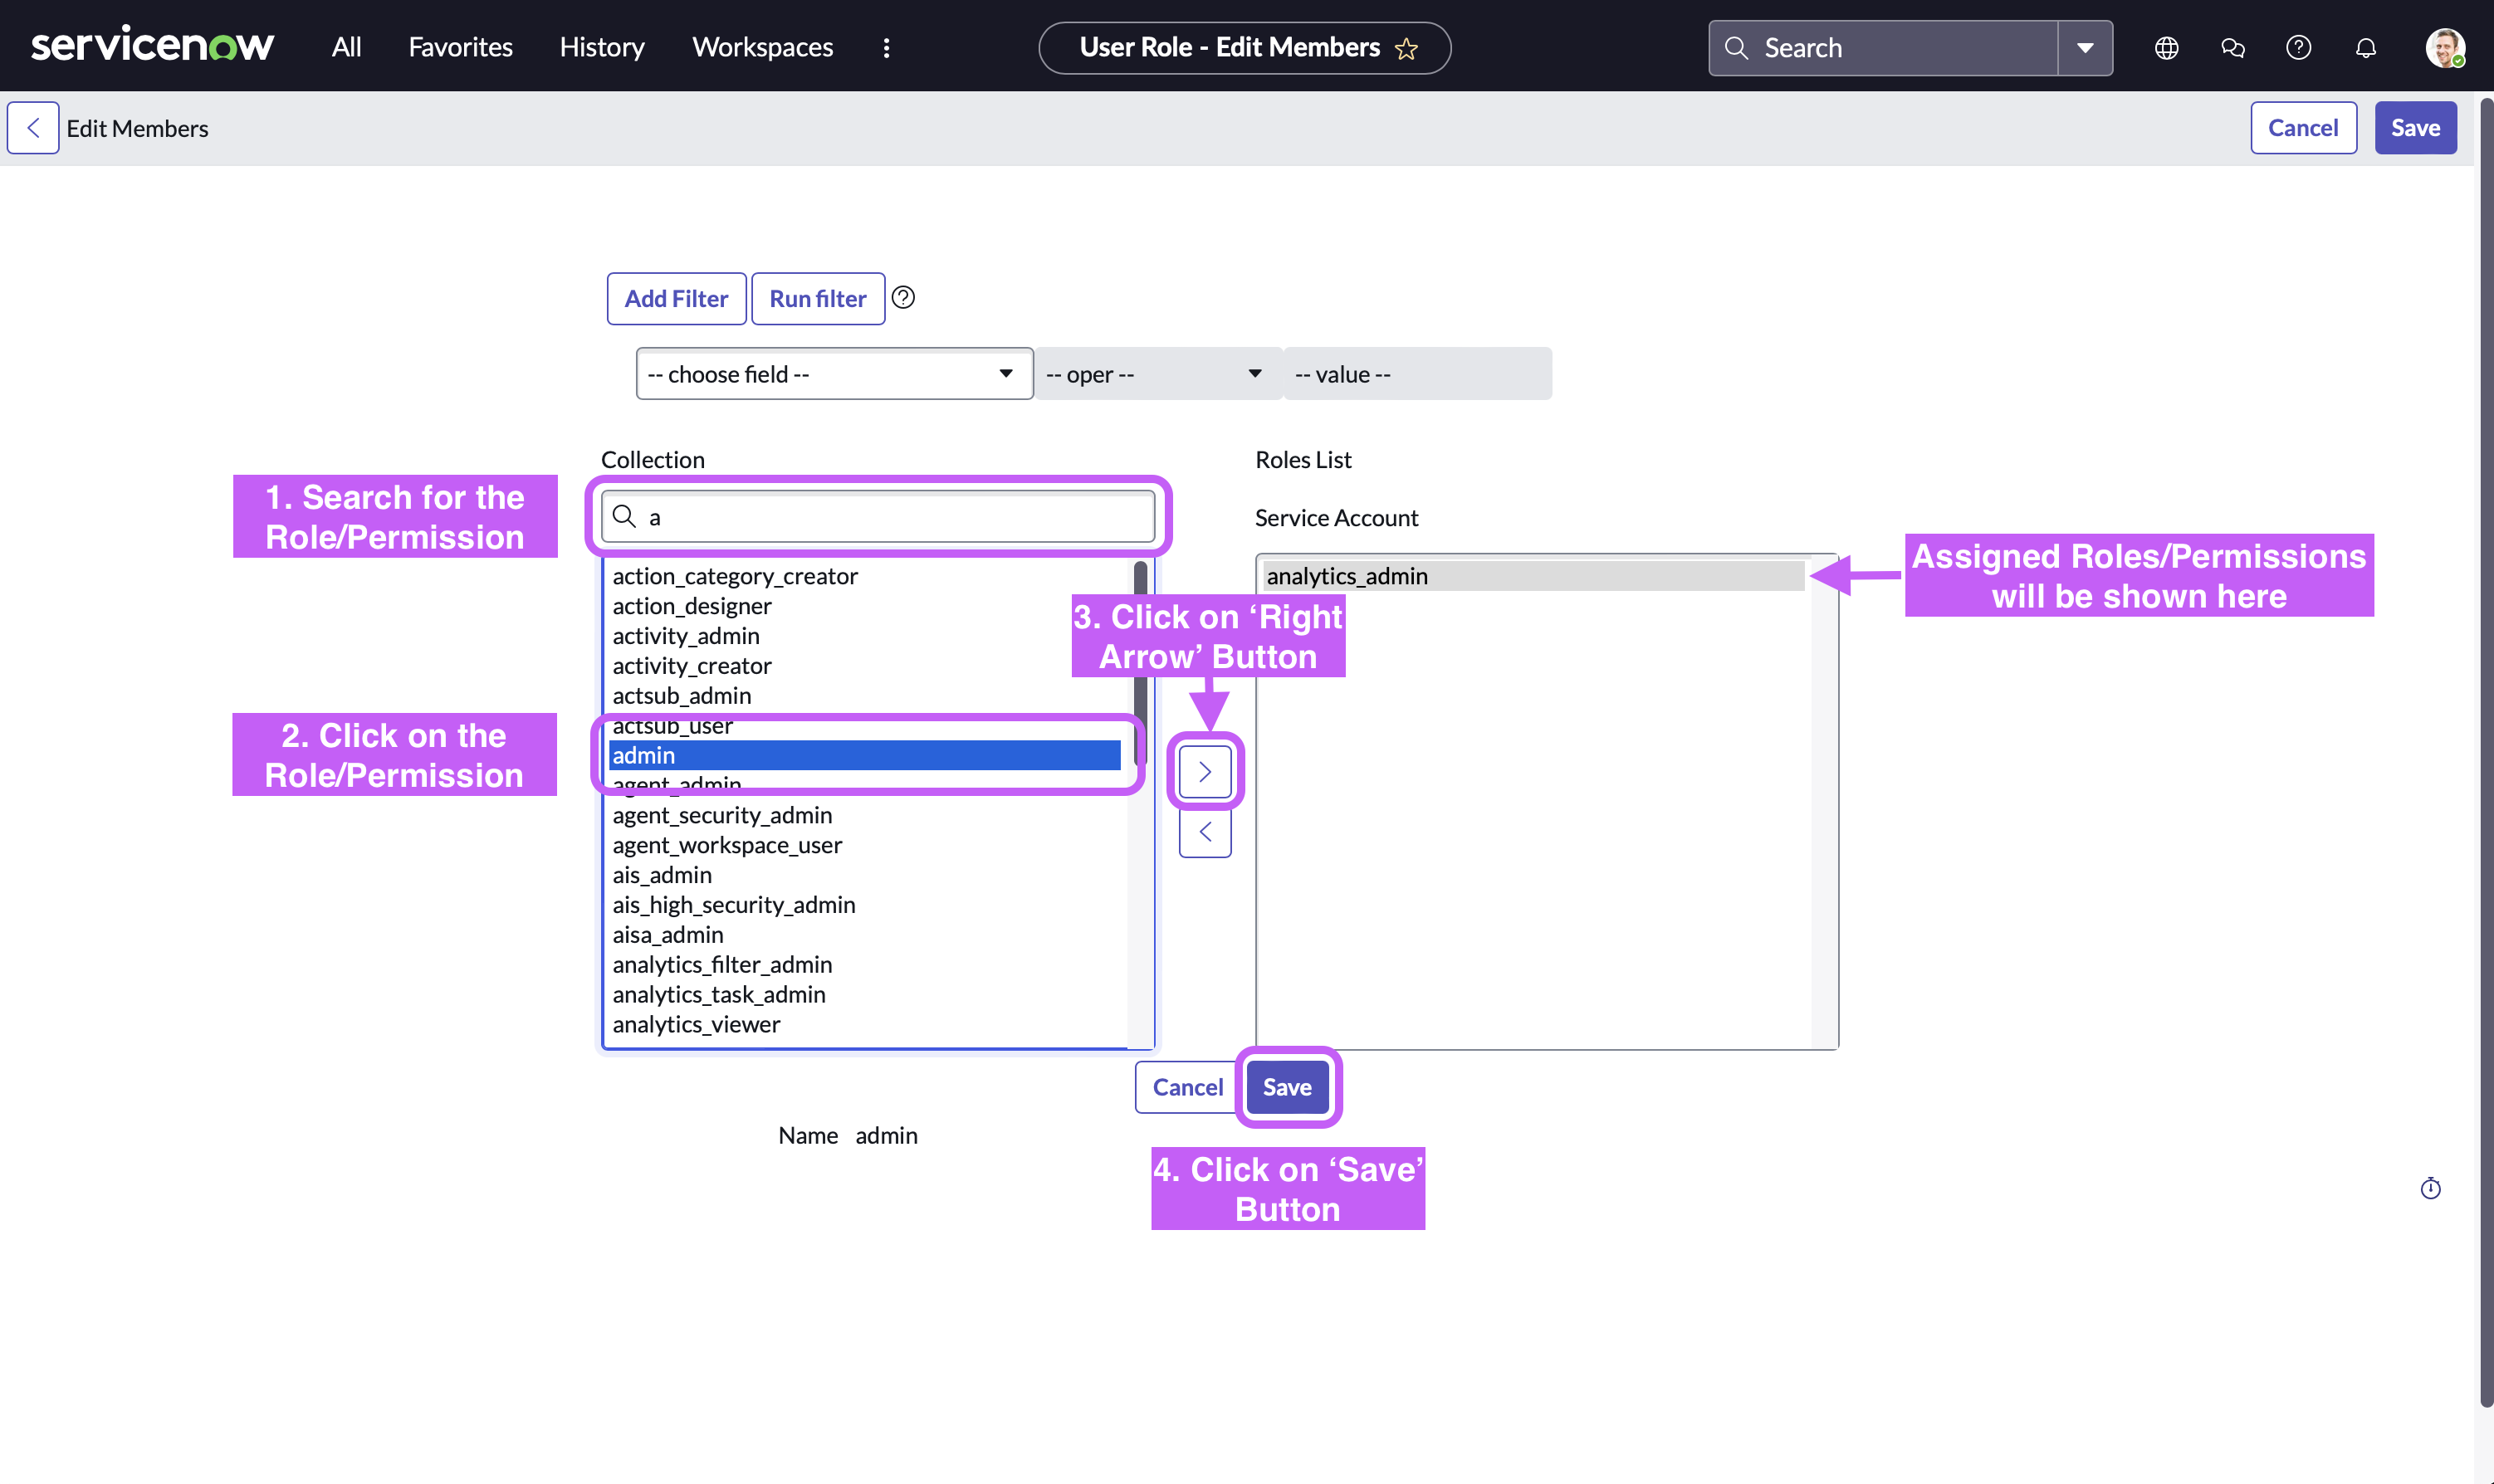
Click on the Permission, Click on the ‘Right Arrow’ button to assign (’Left Arrow’ button removes that permission), and then Click on ‘Save’ button.
Roles required on the Service Account by Moveworks for Enterprise Search
You can choose from the standard roles available in the ServiceNow platform or create a new custom role to assign to the Moveworks user.
Option-1 : Assign these standard roles available out of the box from ServiceNow
| Role name | Use-case |
|---|---|
| knowledge_admin | This is required to enable Moveworks to access Knowledge articles, custom article templates, attachments, and other related content. |
| moveworks_user | This is required to allow the Moveworks platform to access your user criteria at both the knowledge base and article levels. |
Option-2 : Create a custom role with read only access to the following list of tables
- kb_knowledge_base : used to import knowledge base
- kb_knowledge : used to import knowledge
- kb_knowledge_block : used to import repeated knowledge block
- kb_template_how_to : used to import knowledge
- kb_template_kcs_article : used to import knowledge
- kb_template_faq : used to import knowledge
- kb_template_what_is : used to import knowledge
- kb_template_known_error_article : used to import knowledge
- kb_article_template : used to import custom knowledge templates created in your instance
- kb_article_template_definition : used to import custom knowledge templates definitions created in your instance
- custom_article_template_table : used to import knowledge from your custom table (Please not this is just a place holder a custom template in your instance would look like this : "hr_new_policy_2025"
- sys_user : used to import user
- m2m_kb_knowledge_to_block : used to import knowledge article to knowledge block mapping
Even if you are using a custom role - please ensure the
moveworks_useris assigned to the service account. This role is auto-generated in your system once the update sets are installed.
OAuth 2.0 Password grant
Step 1: Register OAuth 2.0 API Client
-
Create a service account user (username & password), and note down the credentials. Your instance name is the prefix of your URL:
https://{{instance_name}}.service-now.com -
Access your ServiceNow instance by navigating to the URL provided in the previous step
-
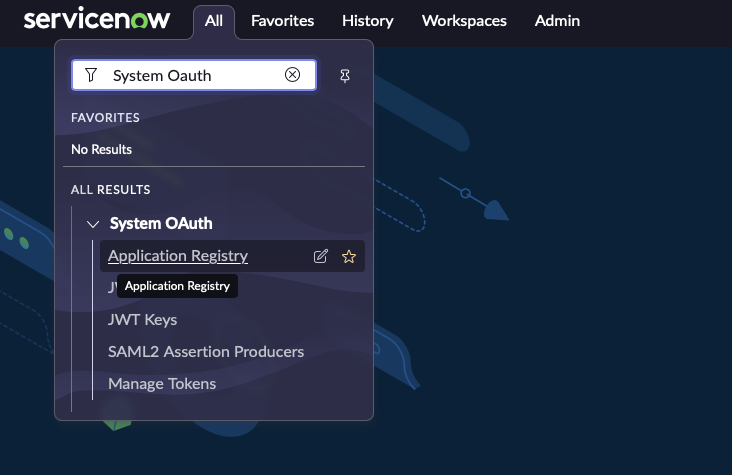
In the top left side of navigation bar, Click on ‘All’, search for ‘System OAuth’ option in the search bar and then Click on ‘Application Registry’ under it
-
Now, in the top right side of navigation bar, Click on the ‘New’ button

-
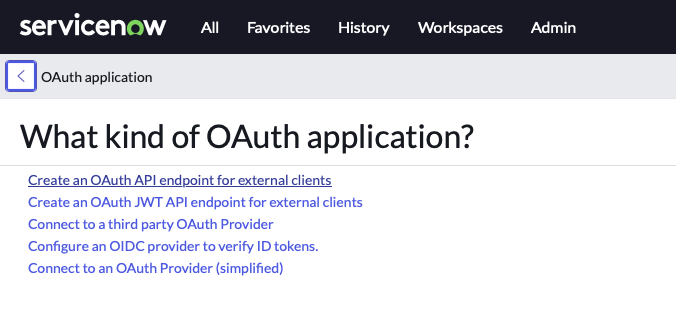
Click on ‘Create an OAuth API endpoint for external clients’
-
Fill in the necessary details and Click ‘Submit’
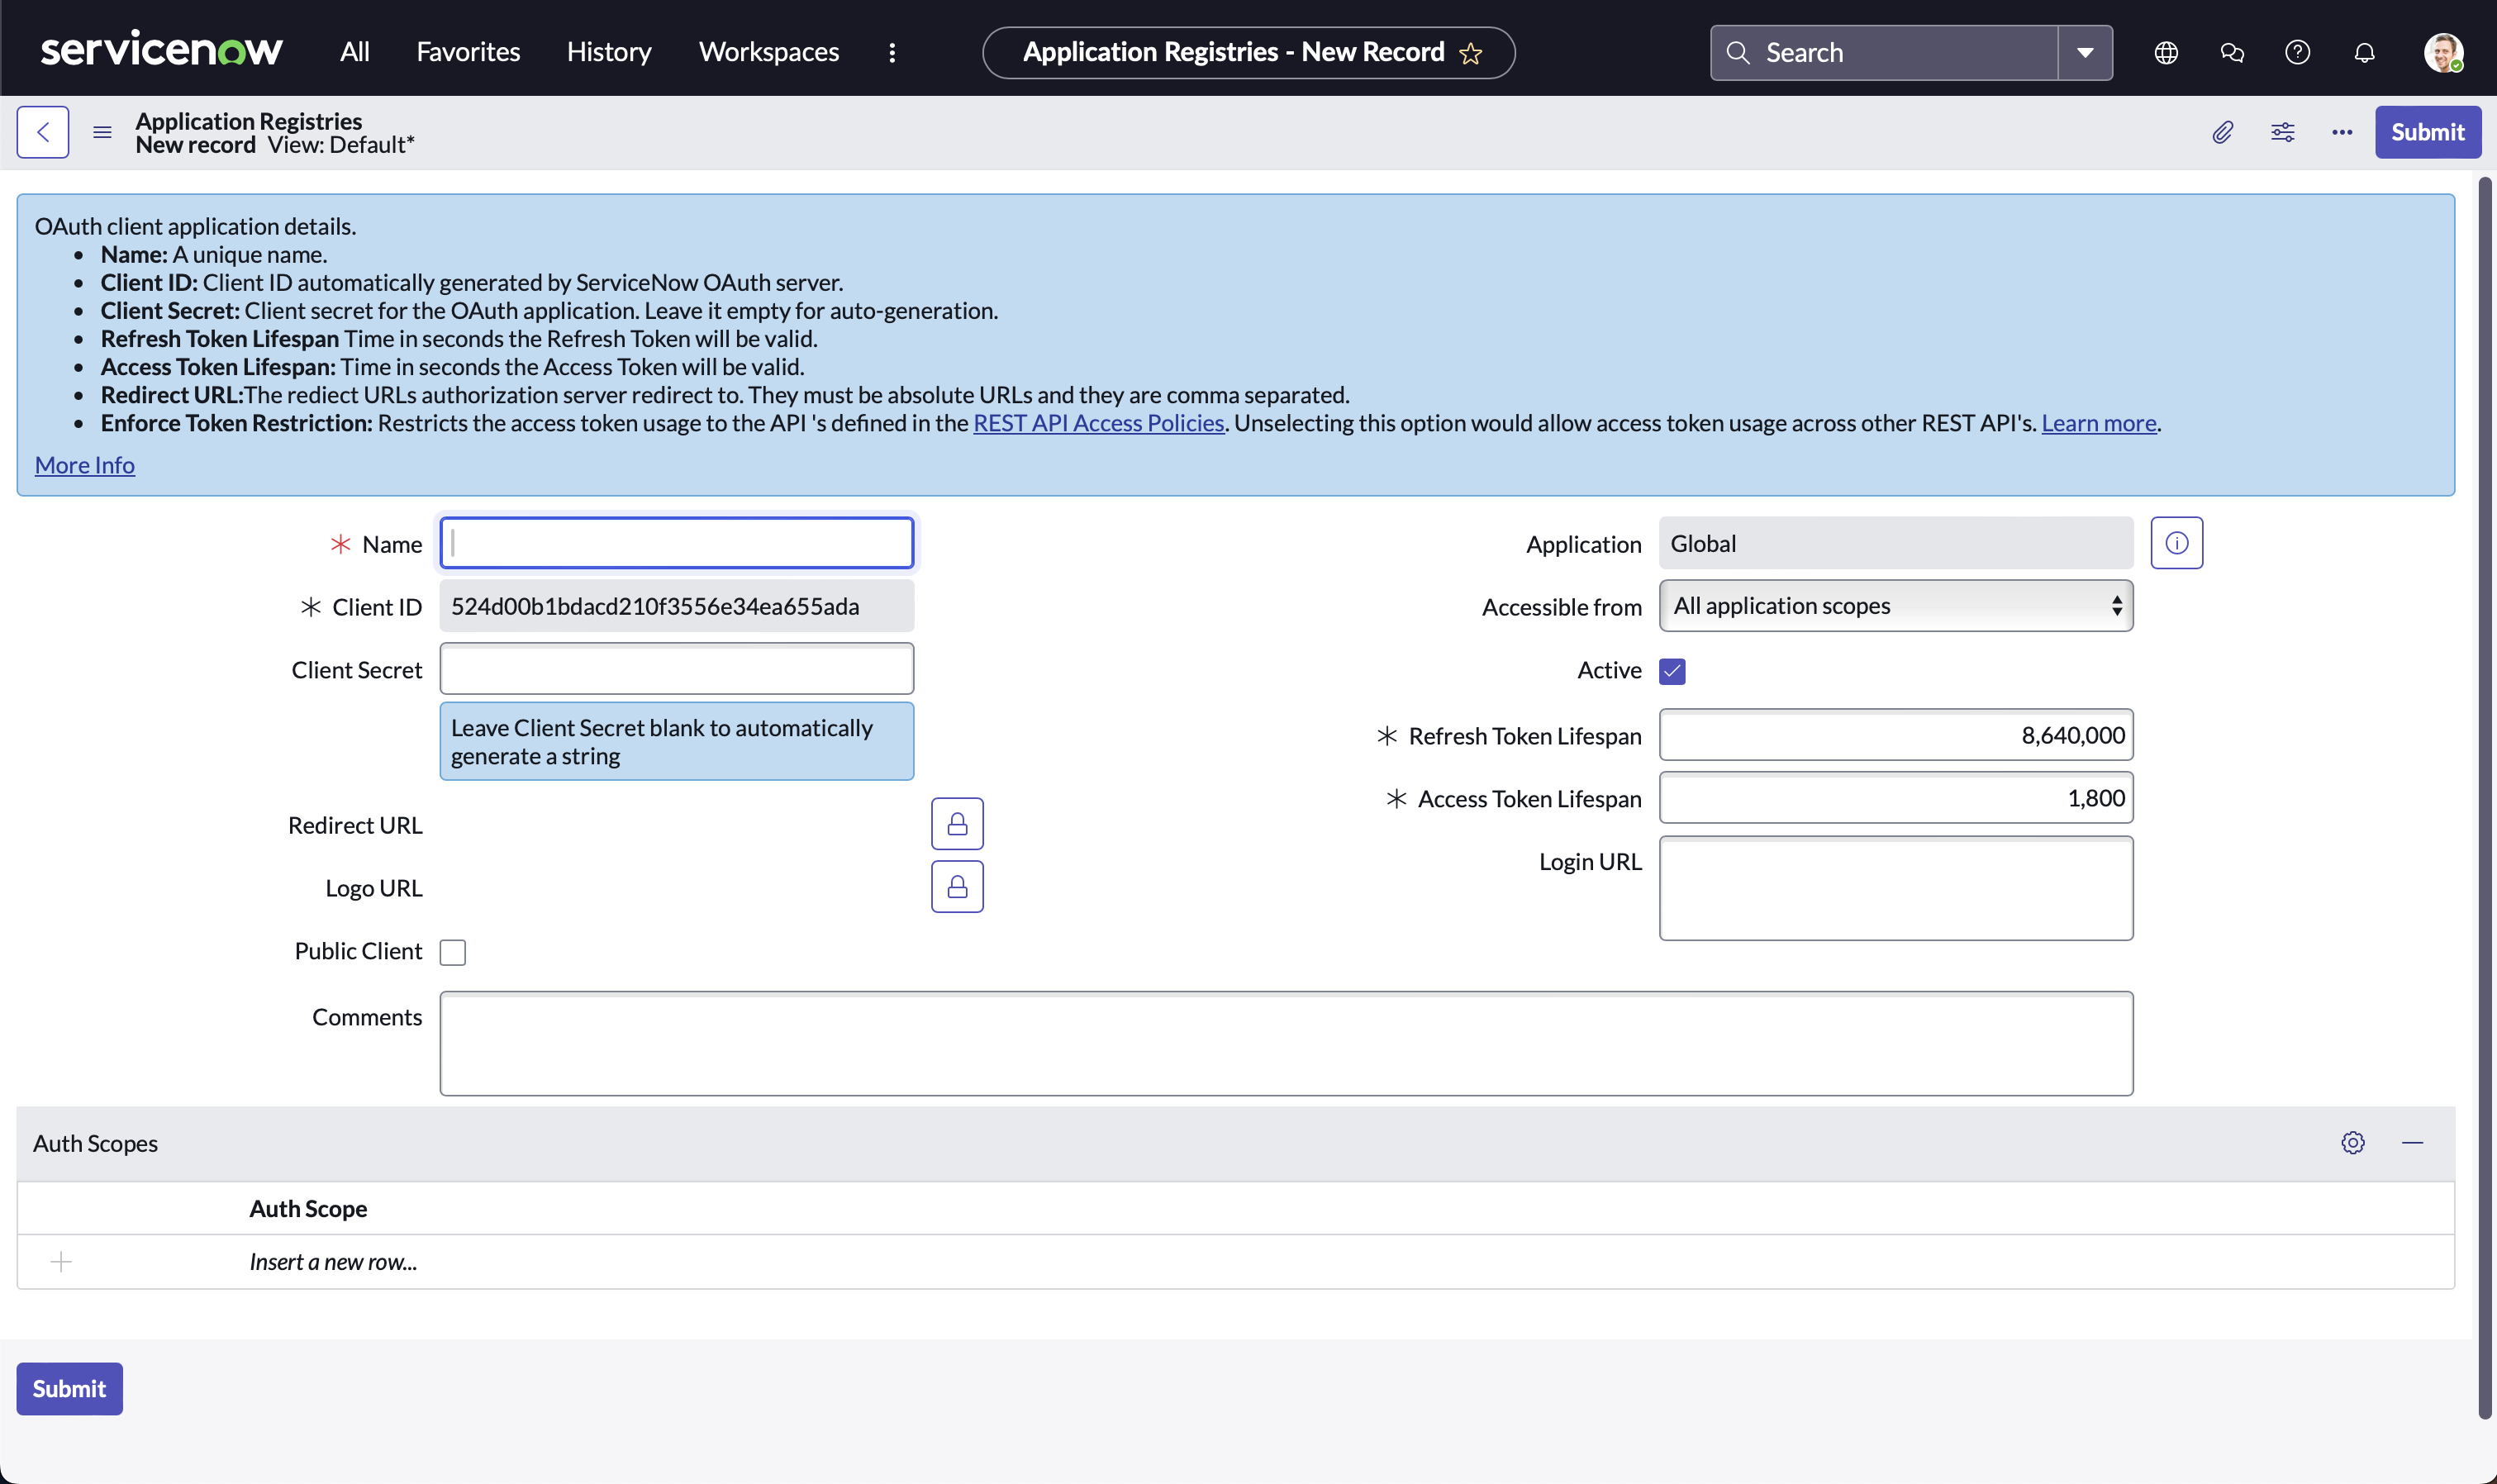
-
Note down Client ID and Client Secret for later use in Step 3
Step 2: Test with Postman (or any other API client)
Choose one of the following options to configure a request in Postman
-
Setup through a new HTTP request
-
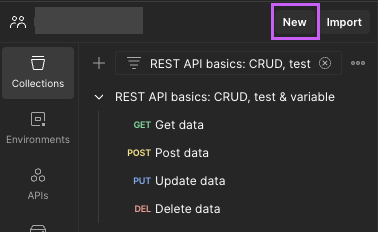
Open Postman, Click on ‘New’
-
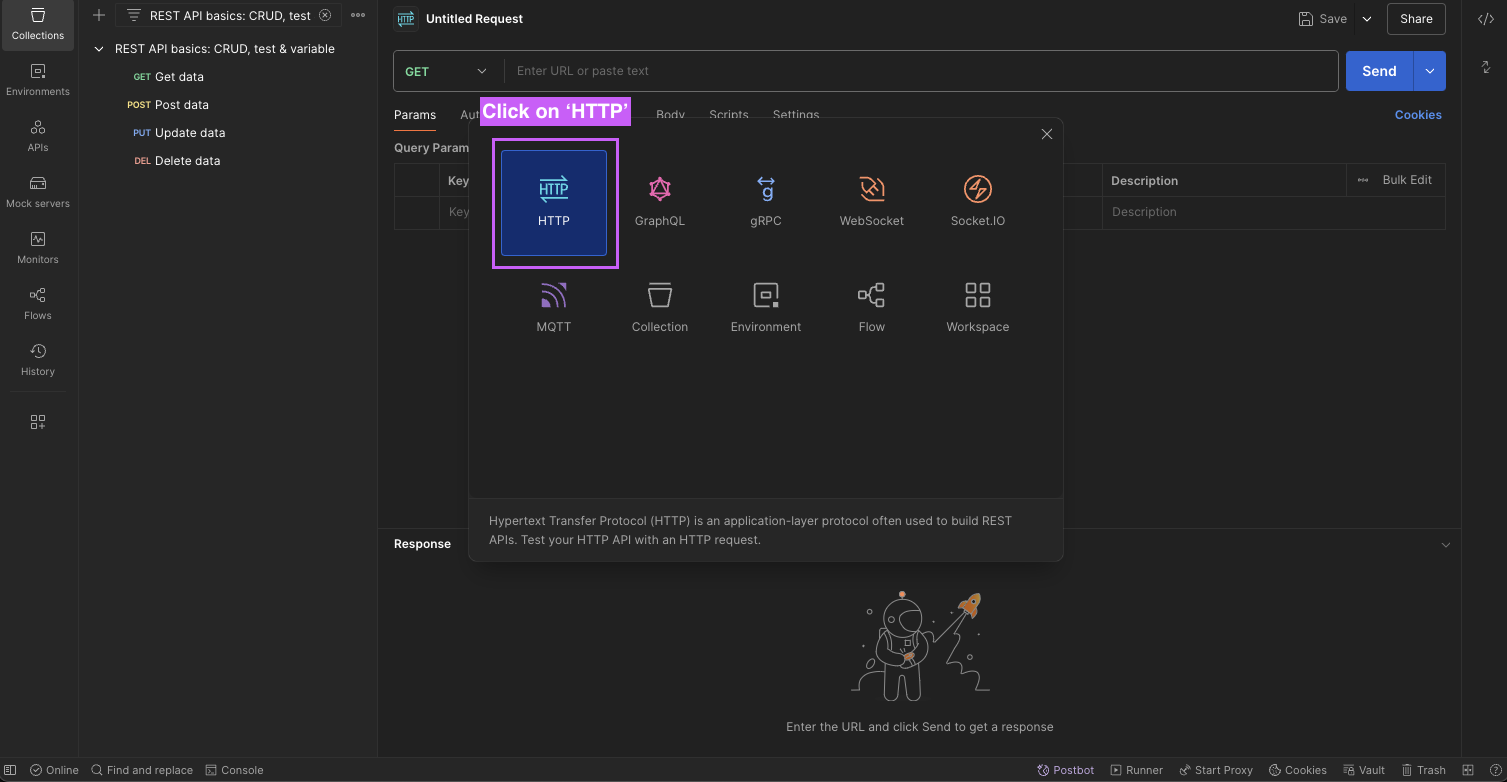
Click on ‘HTTP’
-
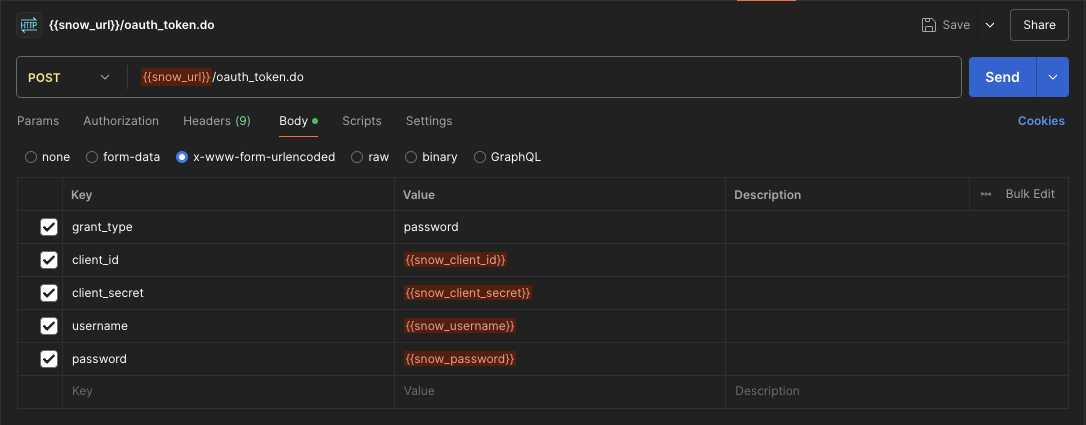
Input your
Instance Namein the URL bar andUsername,Password,Client_ID, andClient_Secretin the Body using x-www-form-urlencoded option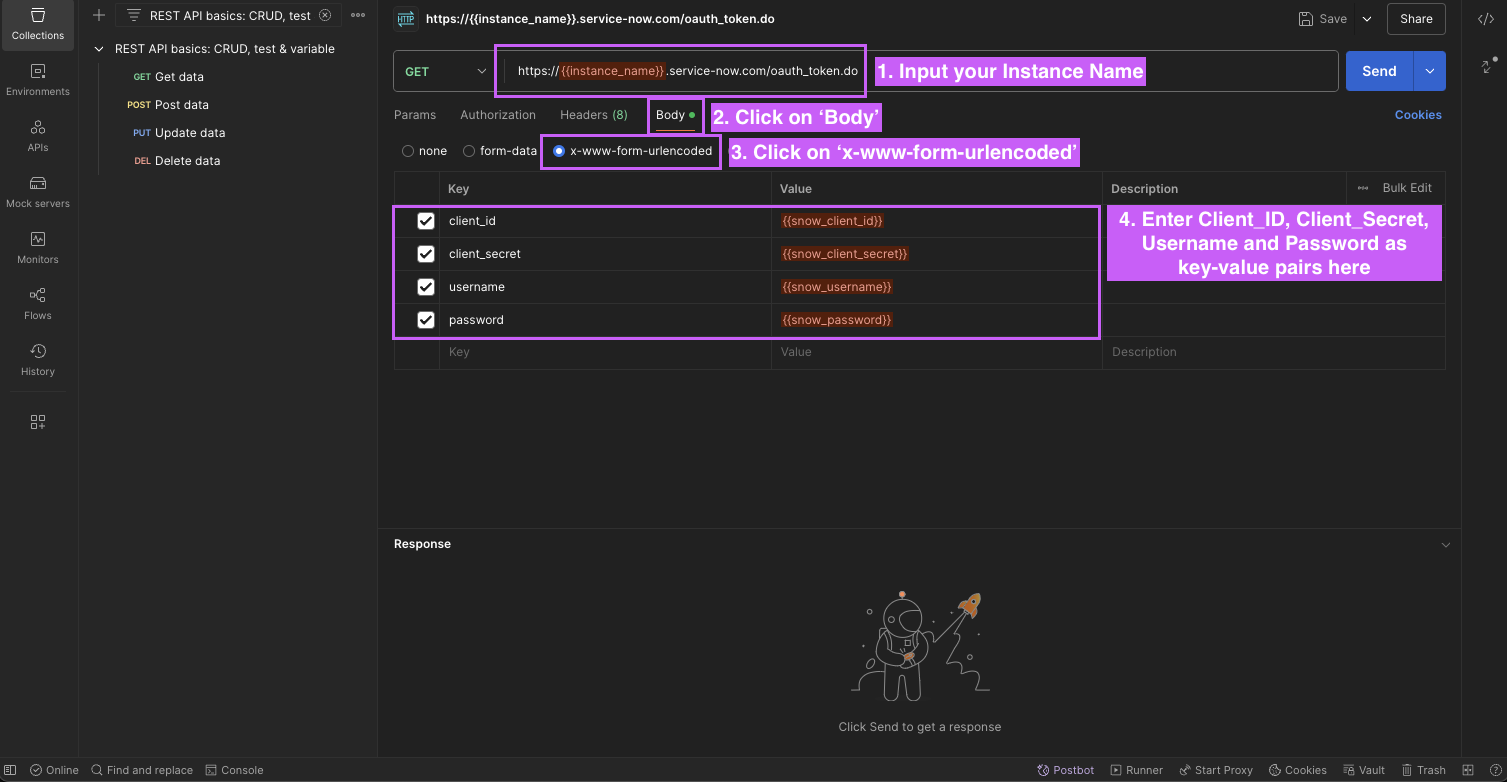
-
-
Setup through cURL command method
-
Copy the following cURL command
curl --location 'https://{{instance_name}}.service-now.com/oauth_token.do' \ --header 'Content-Type: application/x-www-form-urlencoded' \ --user '{{username}}':'{{password}}' --data-urlencode 'grant_type=password' \ --data-urlencode 'client_id={{client_id}}' \ --data-urlencode 'client_secret={{client_secret}}' \ --data-urlencode 'username={{username}}' \ --data-urlencode 'password={{password}}' -
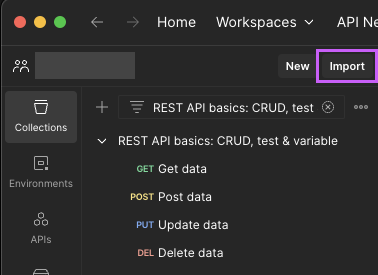
Open Postman, Click on ‘Import’
-
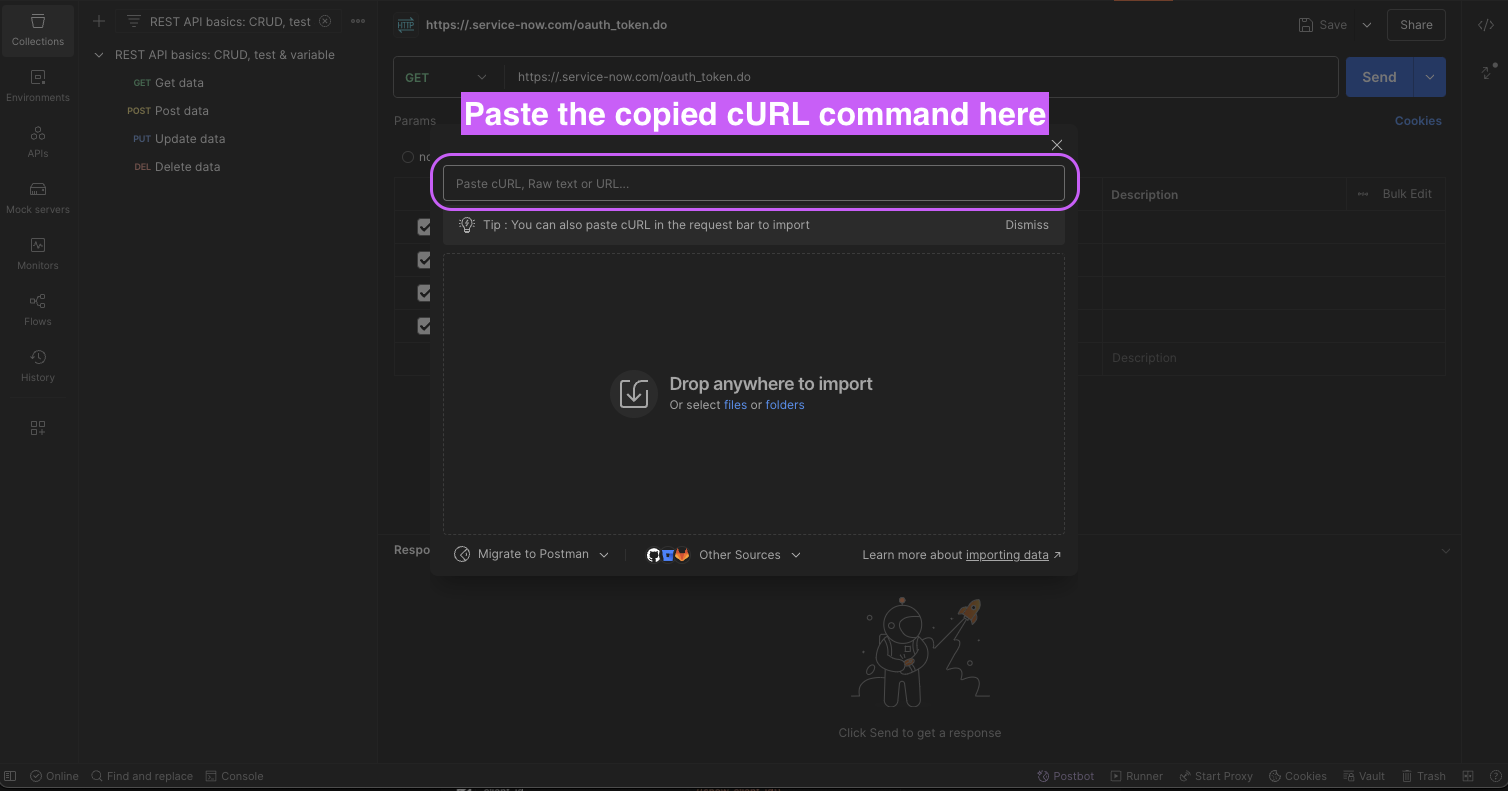
Paste the cURL command
-
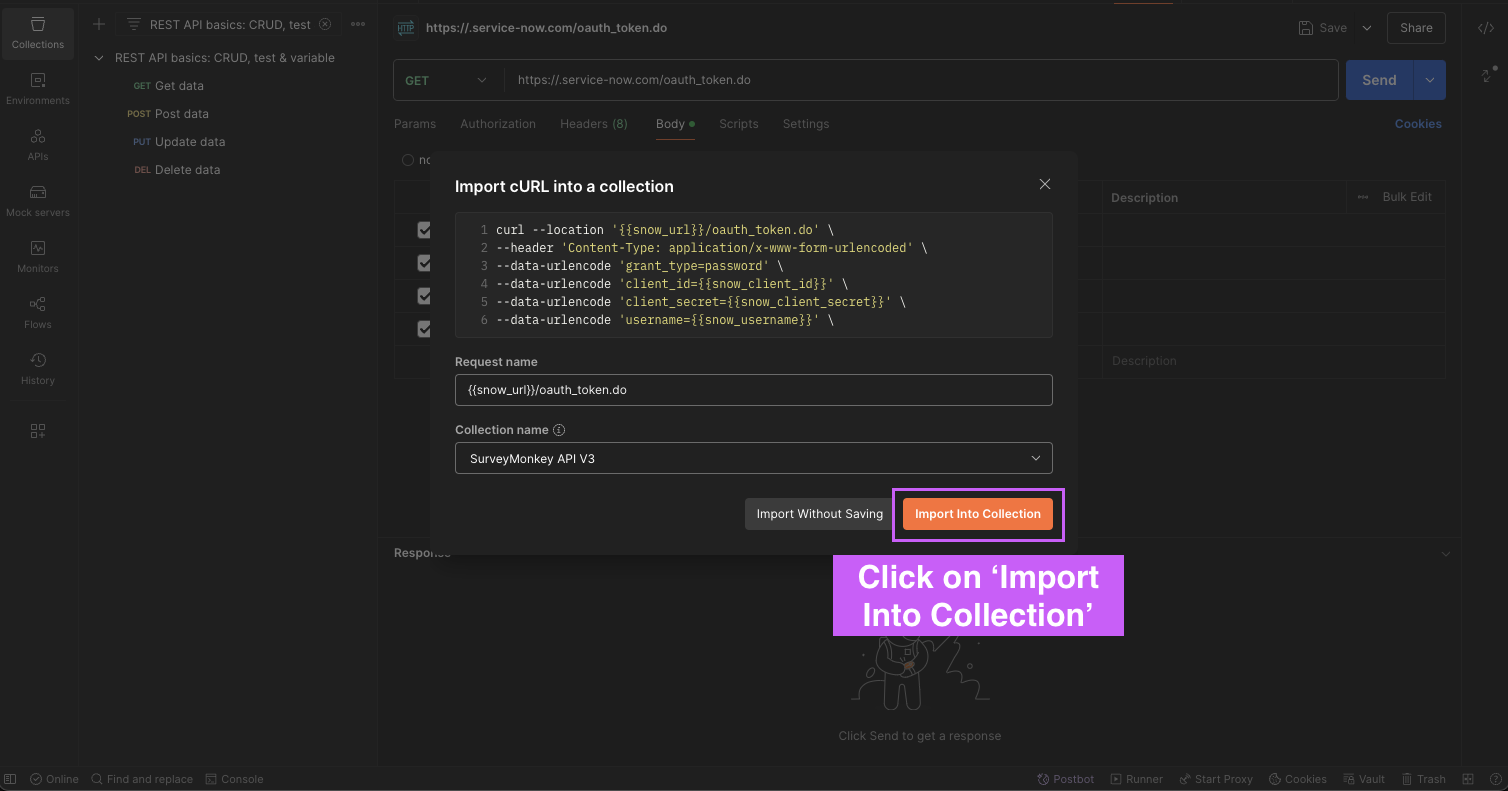
Click on ‘Import Into Collection‘
-
Substitute the saved values from previous steps and Click on ‘Send’
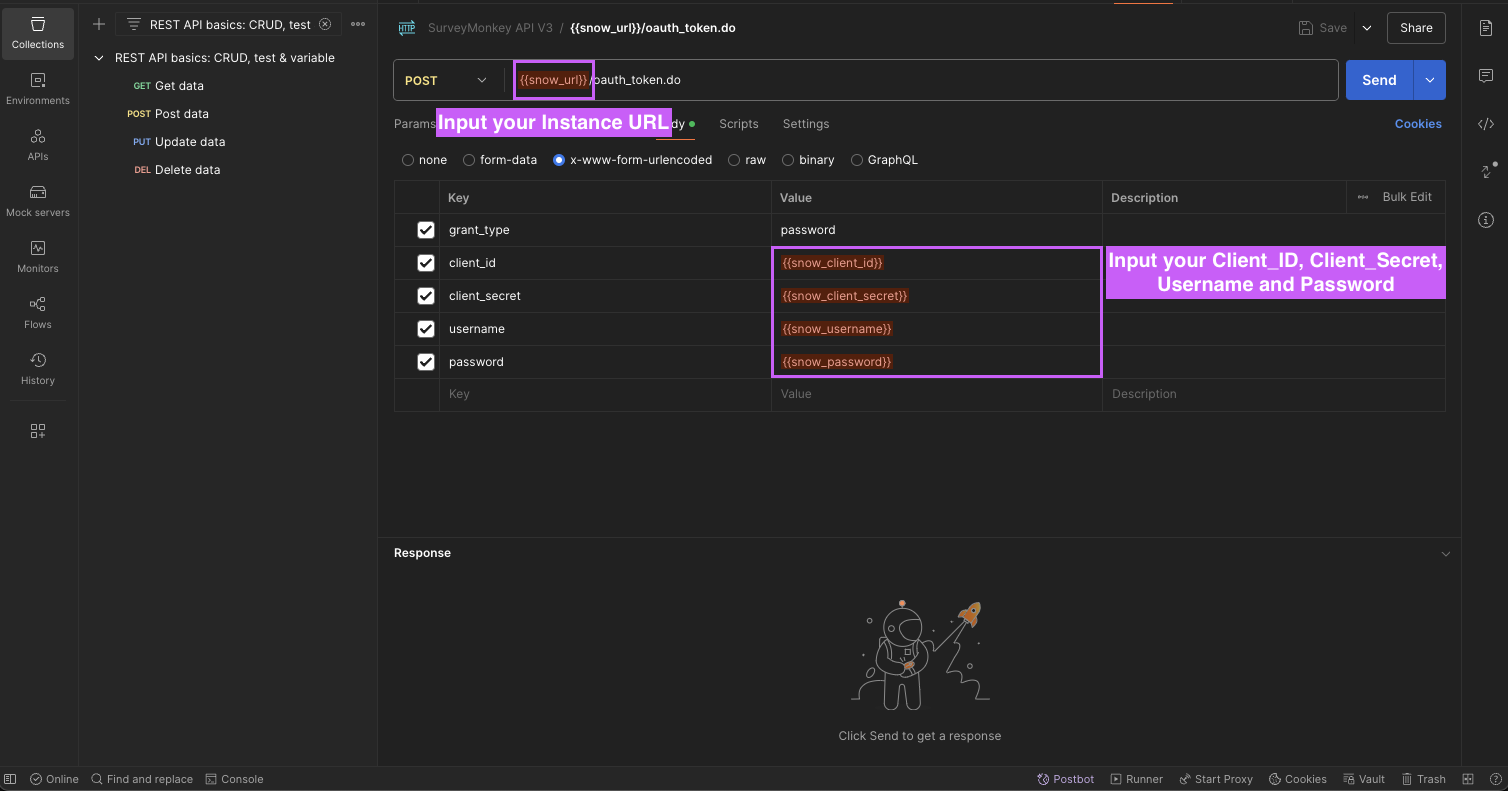
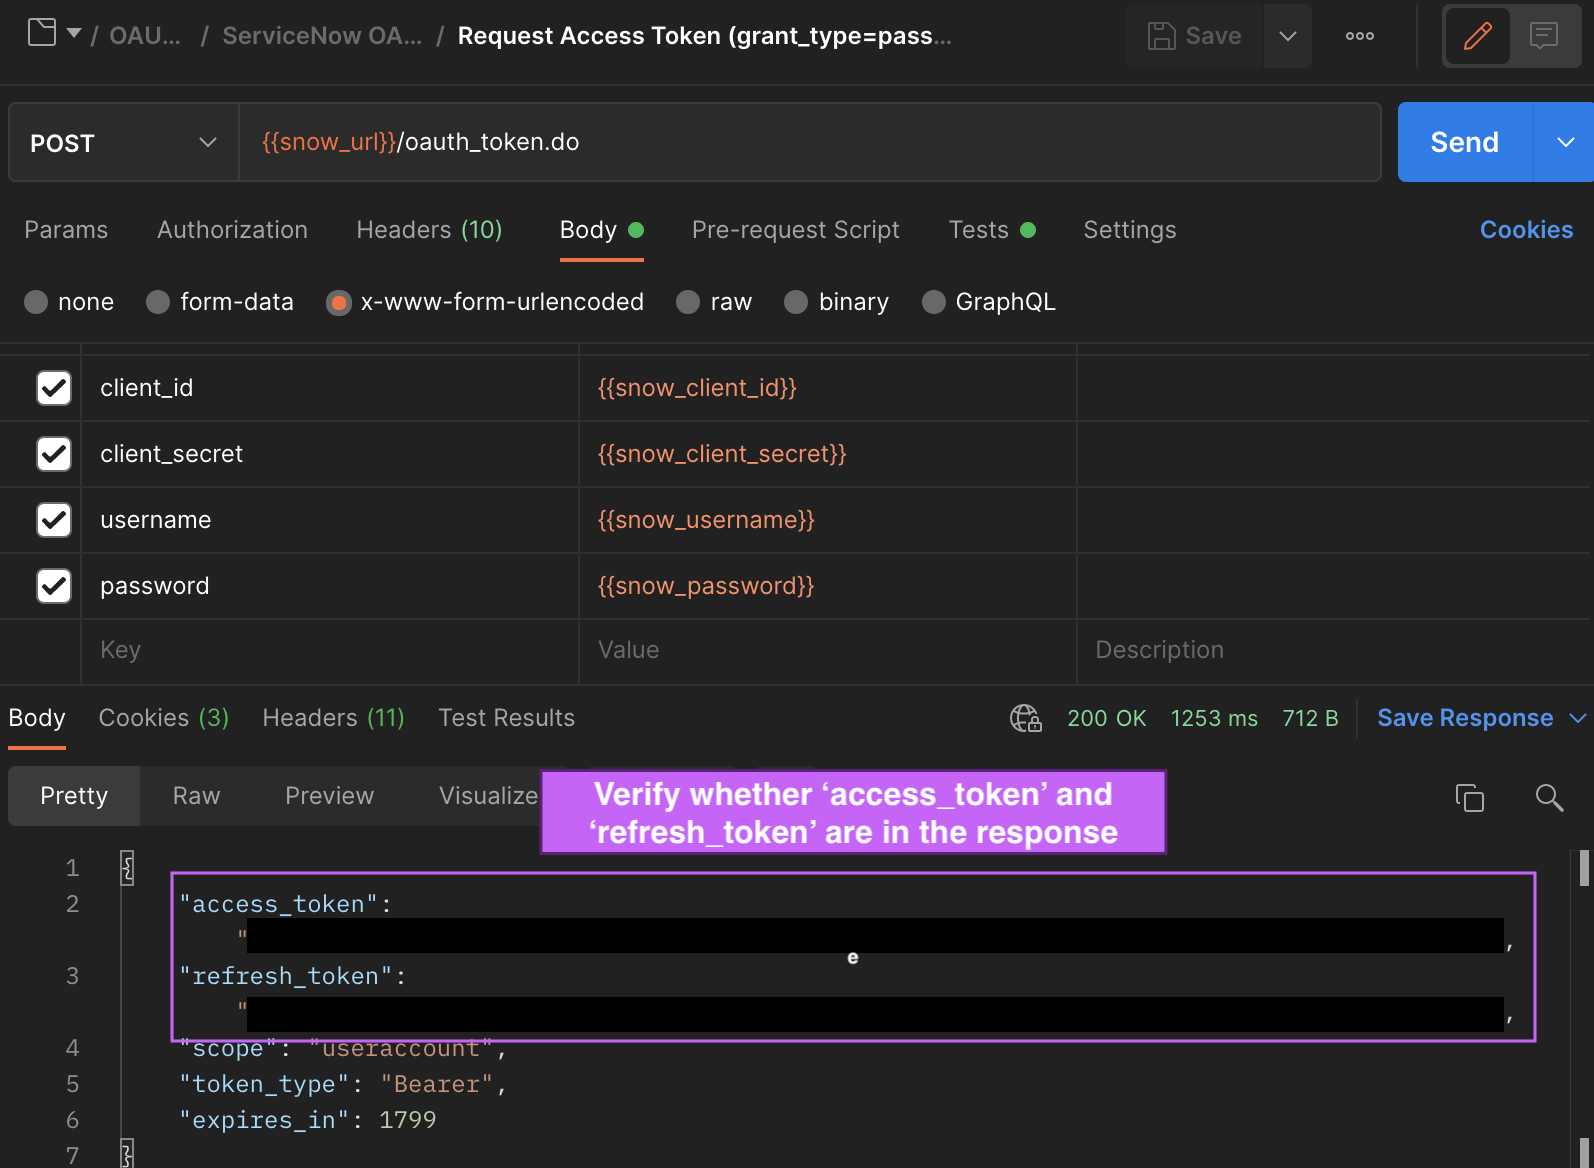
Verify whether the response includes access_token and refresh_token (Applicable to both methods listed above)
-
Step 3: Configure in Moveworks Setup
-
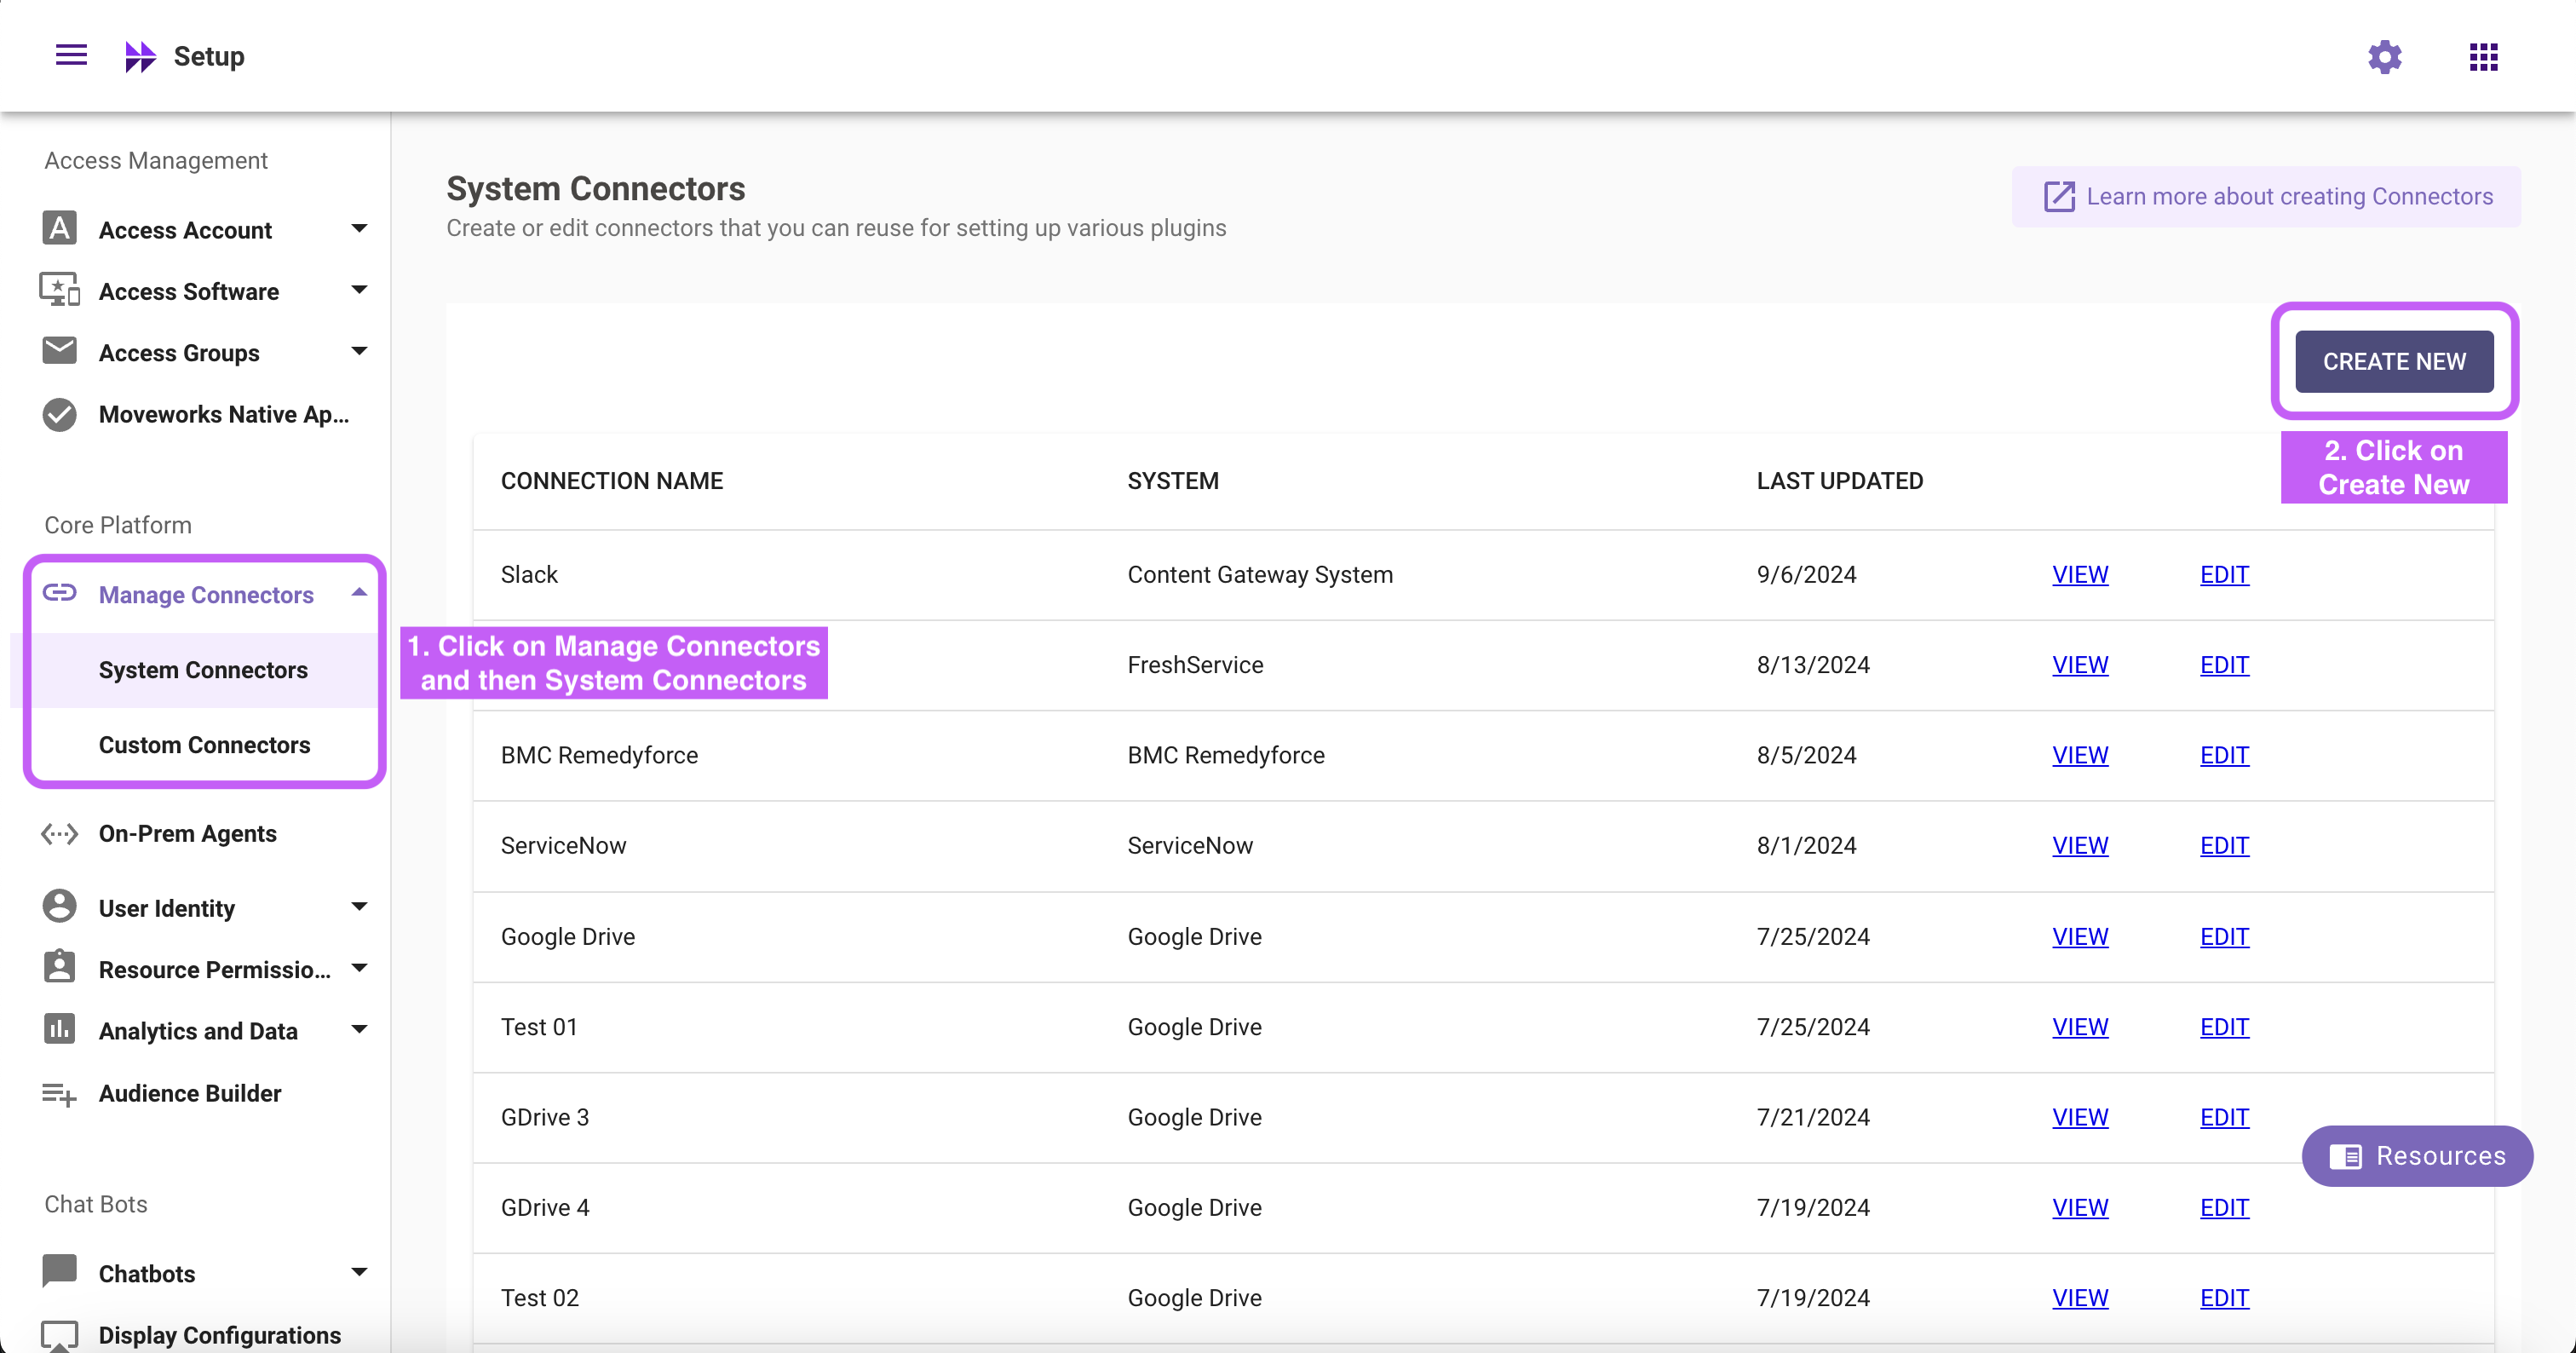
Go to Manage Connectors > System Connectors, then click on ‘CREATE NEW’
-
Click on ‘ServiceNow’ Connector, then click on ‘Next ADD CREDS’

-
Fill in the
Instance Name,Client ID,Client Secret,Username, andPasswordobtained in Step 1-
Instance:
- If ‘Common Base URL’ option is selected, just enter
instance_namethat appears inhttps://{{instance_name}}.service-now.com - If ‘Custom Base URL’ option is selected, enter the Instance URL after ‘https://’
- If ‘Common Base URL’ option is selected, just enter
-
Authentication Type: Select 'Oauth2 Authorization' from the dropdown
-
OAuth2 Grant Type: Select 'Password Grant' from the dropdown
-
Client ID:
Client ID -
Client Secret:
Client Secret -
Username:
Username -
Password:
Password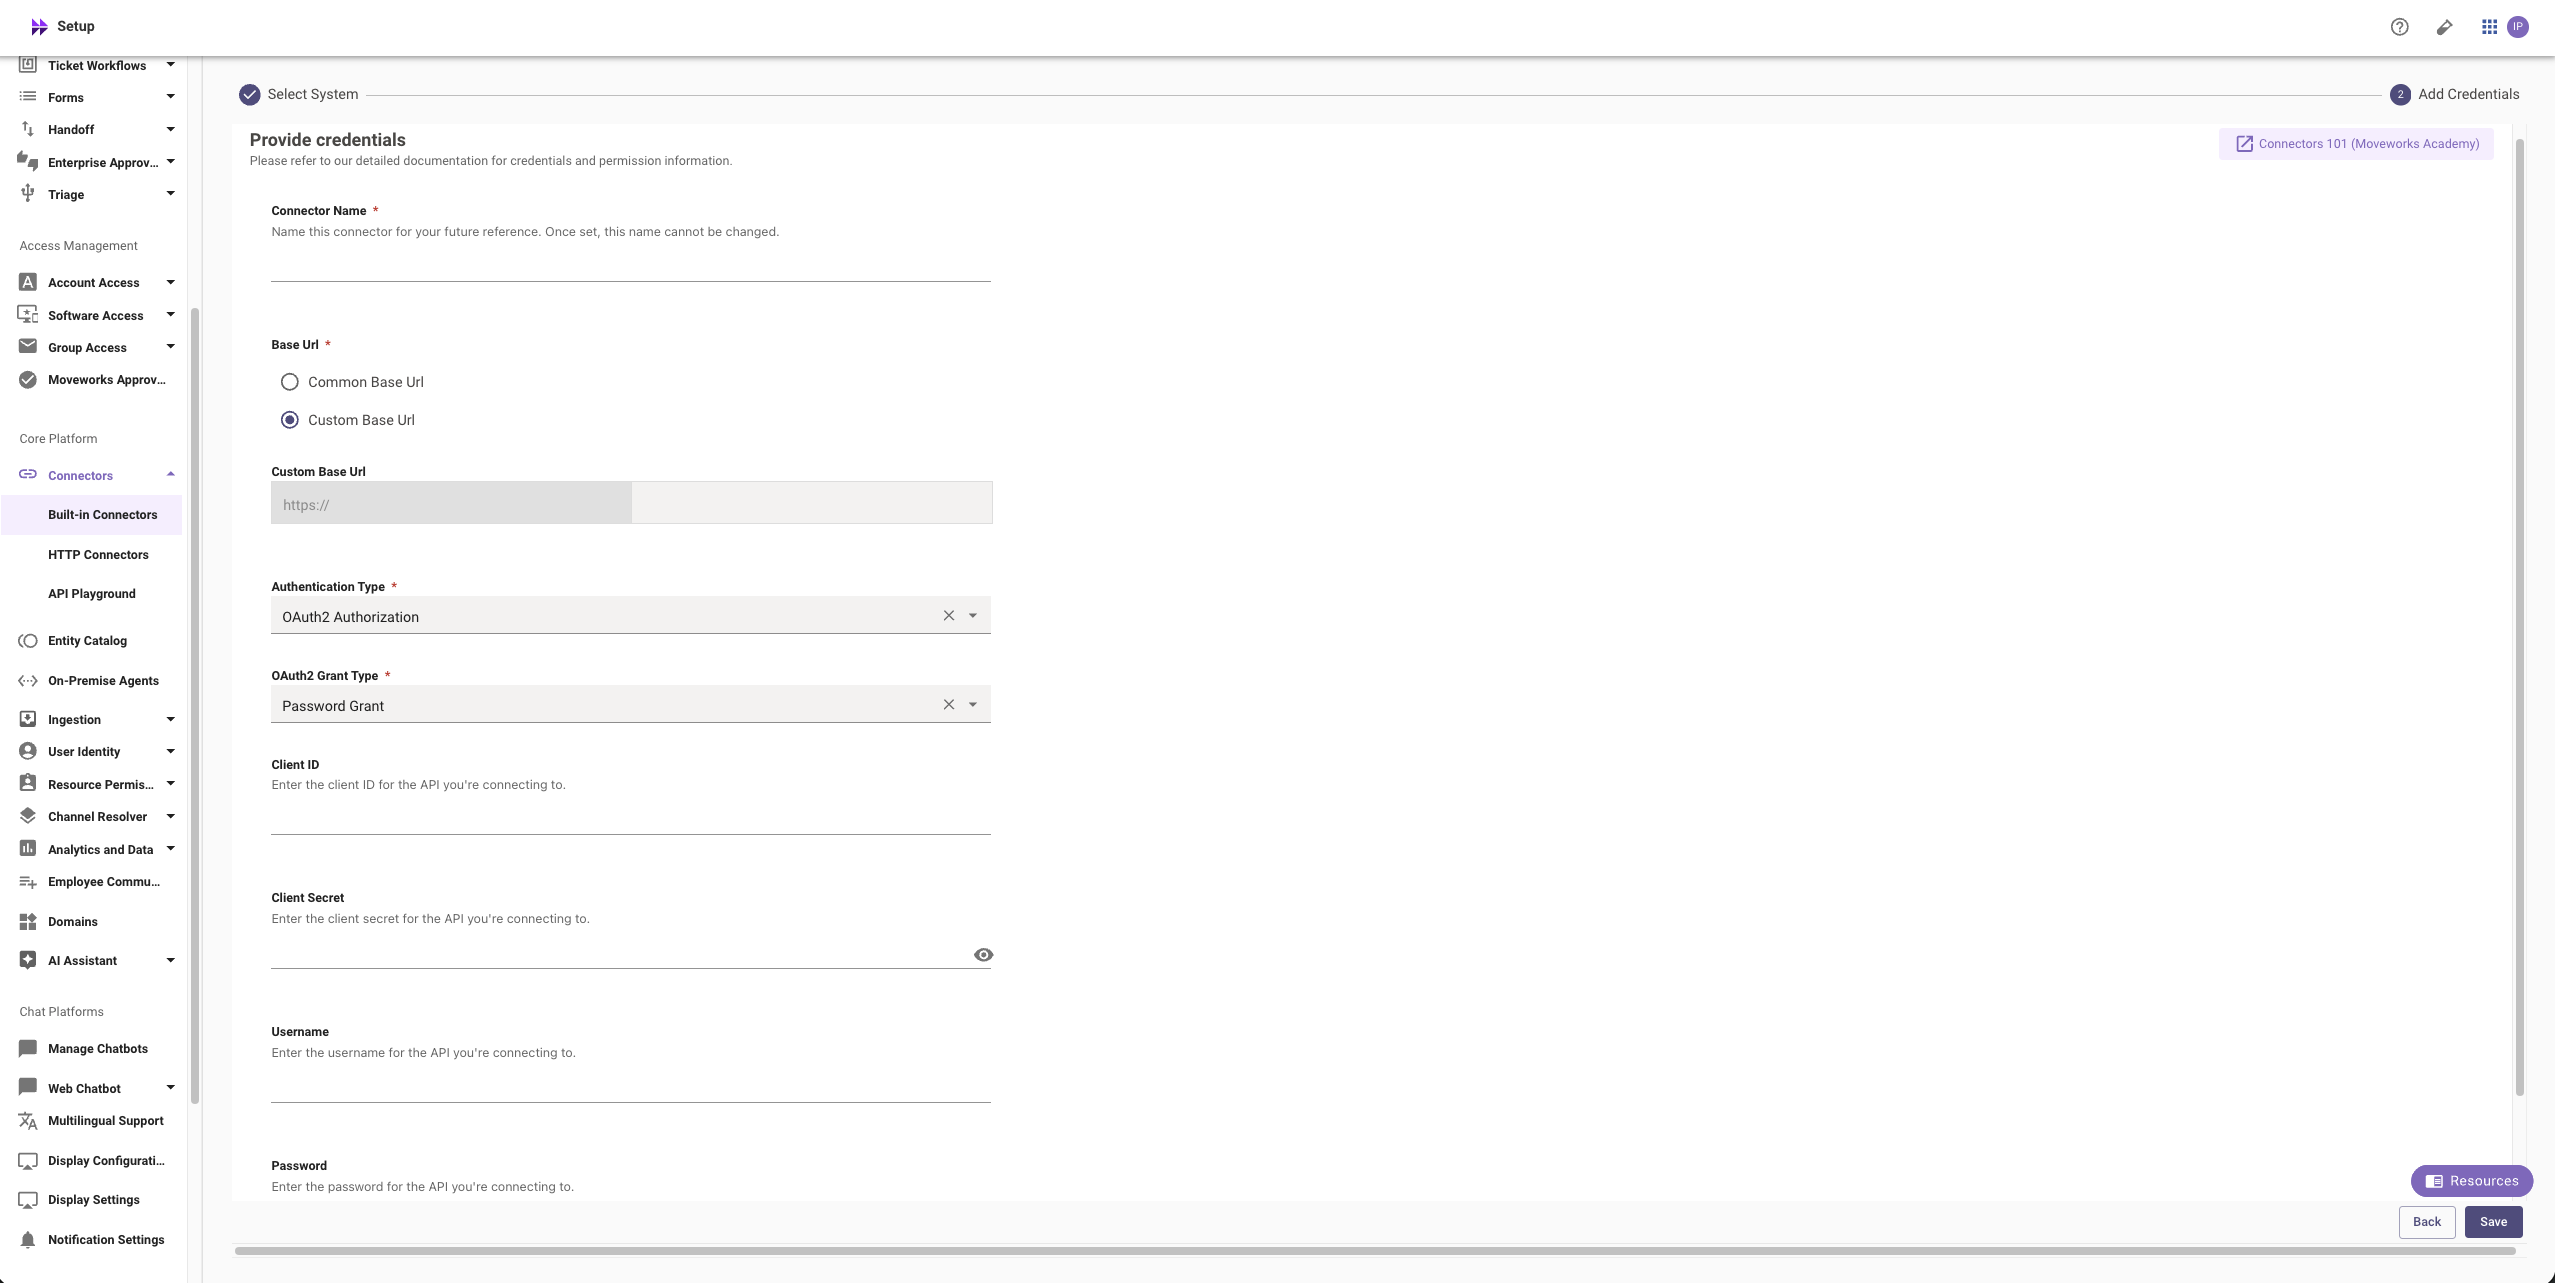
-
-
Click on ‘Save’
OAuth 2.0 Refresh token grant
Step 1: Register OAuth 2.0 API Client
-
Create a service account user (
username&password), note them down. Your instance name is the prefix of your URL:https://{{instance_name}}.service-now.com -
Access your ServiceNow instance by navigating to the URL provided in the previous step
-
In the top left side of navigation bar, Click on ‘All’, search for ‘System OAuth’ option in the search bar and then Click on ‘Application Registry’ under it
-
Now, in the top right side of navigation bar, Click on the ‘New’ button
-
Click on 'Create an OAuth API endpoint for external clients'
-
Fill in the necessary details
NoteRefresh token is only provided if the "Refresh Token Lifespan" field is set to a value greater than 0
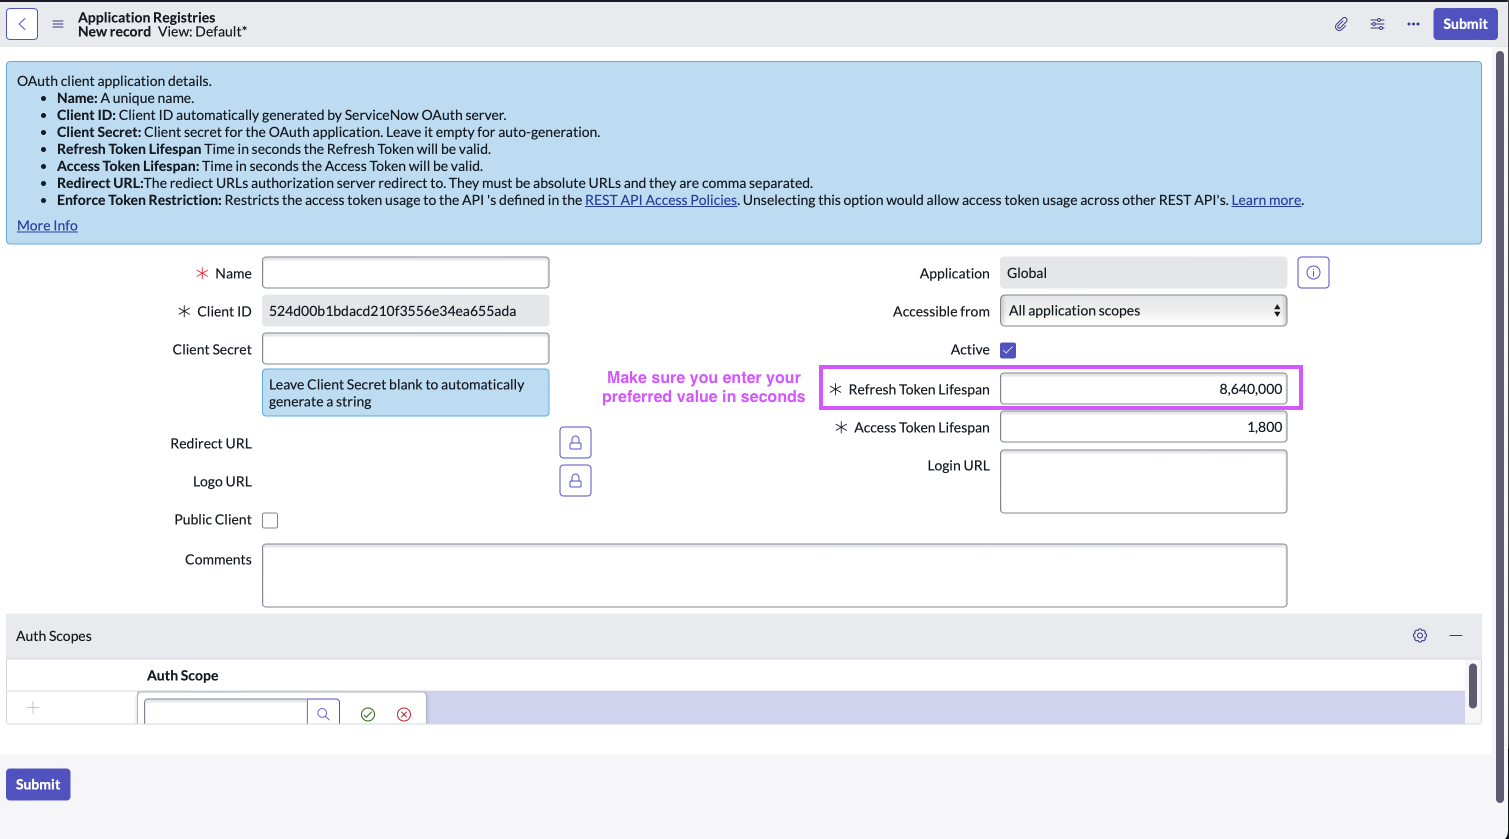
-
Click ‘Submit’
Step 2: Generate Refresh Token
The steps to generate a Refresh Token are similar to the ones mentioned in Step 2 of Setting up OAuth 2.0 with Password Grant
-
Setup through a new HTTP request
-
Setup through cURL command method
curl --location '{{snow_url}}/oauth_token.do' \
--header 'Content-Type: application/x-www-form-urlencoded' \
--data-urlencode 'grant_type=password' \
--data-urlencode 'client_id={{snow_client_id}}' \
--data-urlencode 'client_secret={{snow_client_secret}}' \
--data-urlencode 'username={{snow_username}}' \
--data-urlencode 'password={{snow_password}}'
NoteYou can use the refresh token to get a new access token when the current one expires
Step 3: Configure in Moveworks Setup
-
Go to Manage Connectors > System Connectors, then click on ‘CREATE NEW’ (As shown in Step 3 of Setting up OAuth 2.0 with Password Grant)
-
Click on ‘ServiceNow’ Connector, then click on ‘Next ADD CREDS’ (As shown in Step 3 of Setting up OAuth 2.0 with Password Grant)
-
Fill in the
Instance,Client ID,Client Secret, andRefresh Tokenobtained in the previous steps- Instance:
- If ‘Common Base URL’ option is selected, just enter
instance_namethat appears inhttps://{{instance_name}}.service-now.com - If ‘Custom Base URL’ option is selected, enter the Instance URL after ‘https://’
- If ‘Common Base URL’ option is selected, just enter
- Authentication Type: Select 'Oauth2 Authorization' from the dropdown
- OAuth2 Grant Type: Select 'Refresh Token Grant' from the dropdown
- Client ID:
Client ID - Client Secret:
Client Secret - Refresh Token:
Refresh Token

- Instance:
-
Click on ‘Save’
OAuth 2.0 JWT grant
Before starting the JWT grant configuration you will need to generate the Java KeyStore, certificate and password required to configure a X.509 Certificate in ServiceNow.
Step 1 : Generate JKS file
To generate a JKS file, run the following script in your terminal (for macOS or Linux users). If you’re using a Windows machine, please install Windows Subsystem for Linux (WSL) before running the script.
Installing WSL in your windows machine
Open PowerShell in administrator mode by right-clicking and selecting "Run as administrator", enter the wsl --install command, then restart your machine.
wsl --install- Copy the following content and create a Bash script with a .sh extension named generate_cert.sh.
- Once created, run the script using the following command:
./generate_cert.sh **org** **password - Replace org with your organization’s name and password with a unique key and also remove **
- Important: Store this password securely, as it will need to be configured in multiple locations within your ServiceNow system.
#!/usr/bin/env bash

set -e -o pipefail
# This script generates a certificate intended for use in JWT Tokens for web applications like Moveworks for Web. The generated certificate is valid for 2 years.
# It is designed for Linux and Mac OS. IF you are on Windows, you will need WSL - see here for more info: <https://learn.microsoft.com/en-us/windows/wsl/install>
# The script generates a .key, .pem, .crt, .p12, and .jks file.
# The .jks file is the file you will upload into your environment.
#    Usage: ./generate_cert.sh **org** **password**
#    Example usage: ./generate_cert.sh moveworks Password123!


[ -z "$1" ] || [ -z "$2" ] && echo "No argument supplied - provide org name and password" && exit 1

org=$1
password=$2

domain=$org
country="US"
state="CA"
locality="Mountain View"

organizationalunit="Customer Success"
email="[email protected]"

organization=$domain
commonname=$domain

echo "---------------------------"
echo "Generating key request for $domain"
echo "---------------------------"
openssl genrsa -aes256 -passout pass:$password -out $domain.key 4096

echo "---------------------------"
echo "Generated .pem file"
echo "---------------------------"
openssl req -new -key $domain.key -out $domain.pem -passin pass:$password \\
    -subj "/C=$country/ST=$state/L=$locality/O=$organization/OU=$organizationalunit/CN=$commonname/emailAddress=$email"

echo "---------------------------"
echo "Generating .CRT file"
echo "---------------------------"
openssl req -new -key $domain.key -days 730 -passin pass:$password \\
    -subj "/C=$country/ST=$state/L=$locality/O=$organization/OU=$organizationalunit/CN=$commonname/emailAddress=$email" \\
    -nodes -nodes -x509 -keyout liveOUT.key -out liveOUT.crt

echo "---------------------------"
echo "Generating .p12 file"
echo "---------------------------"
openssl pkcs12 -export -in liveOUT.crt -inkey $domain.key -passin pass:$password -passout pass:$password -certfile liveOUT.crt -out liveOUT.p12

keytool -noprompt -importkeystore \\
    -destkeypass $password -srcstorepass $password -deststorepass $password \\
    -srckeystore liveOUT.p12 -srcstoretype pkcs12 -destkeystore liveCERT.jks -deststoretype JKS
echo  "**liveCERT.jks** is the file you’ll upload into your environment."
- This script will generate 3 files - PEM, CRT and a p12 file which will then be configured in the following steps.
Step 2: Install the certificate and create the JWT provider
First, we will create a JWT provider in your instance that will be responsible for generating authentication tokens for our services to verify that the service account is properly authenticated into ServiceNow. The following steps will walk you through creating the records below:
- MW Java Key Store
- MW JKS Certificate
- JWT Key
- JWT Provider
-
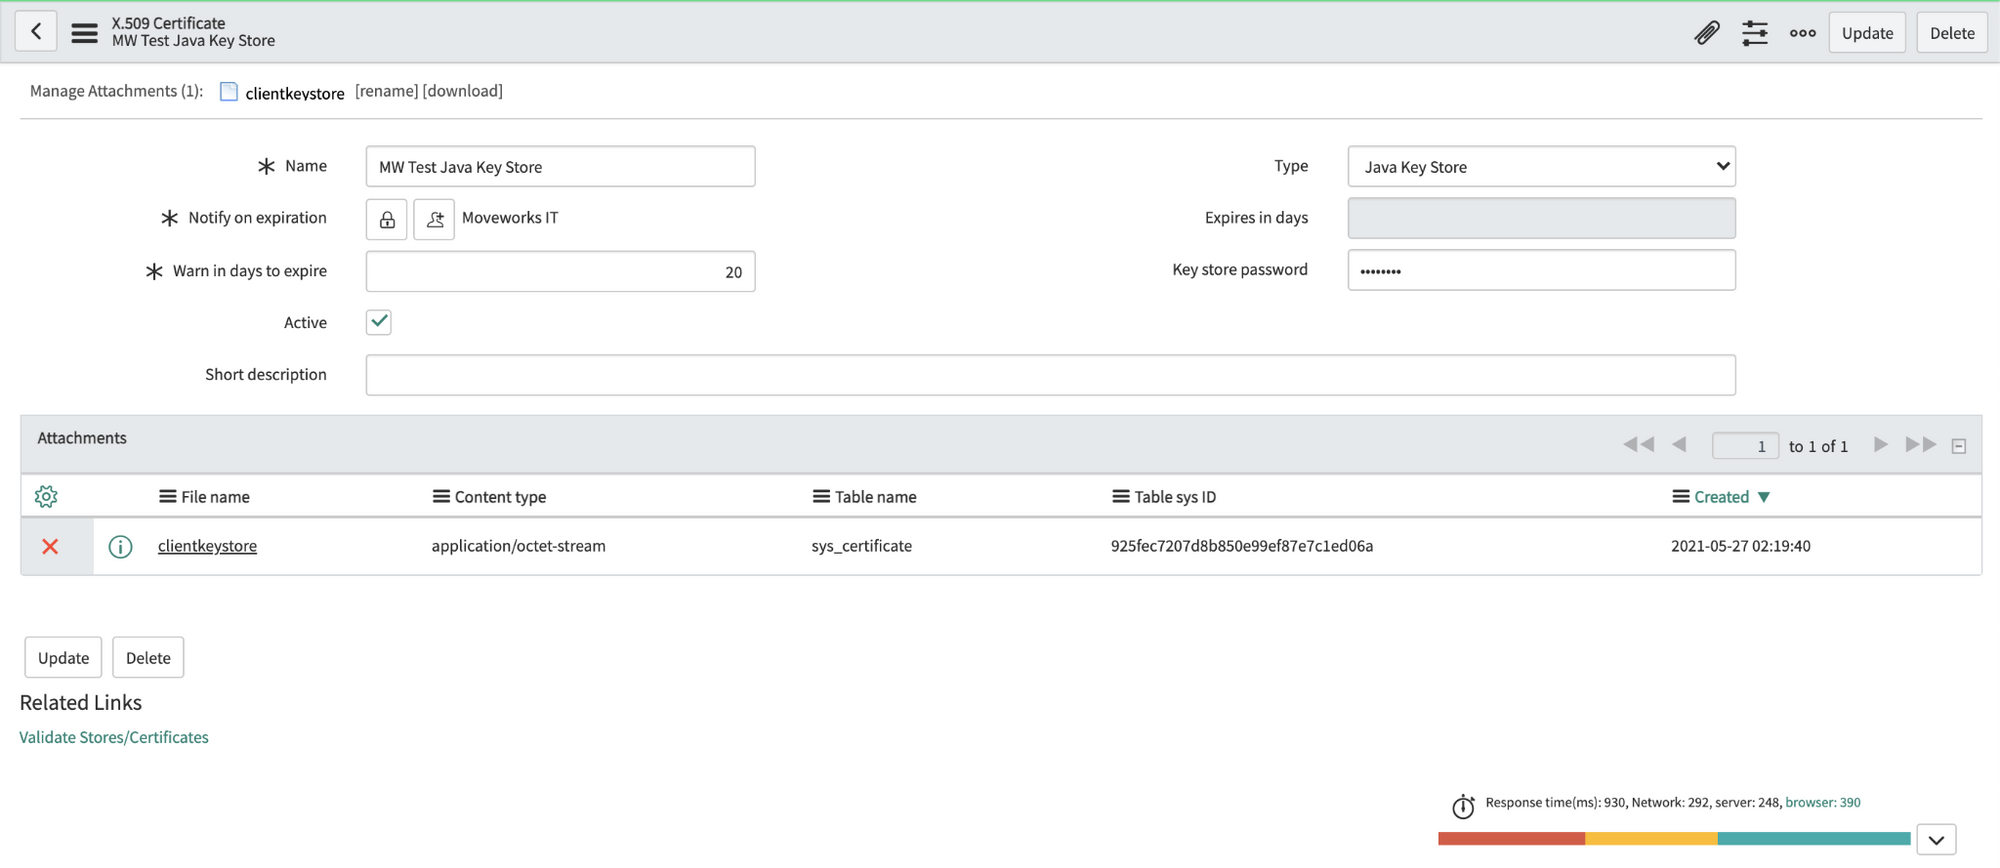
Navigate to the X.509 Certificate table in SNOW (search for "Certificates" to find it), create a new record as follows:
Name: MW Java Key Store Type: Java Key Store -
Click on the paperclip in the upper right to attach the JKS file. The file will have a
.jksextension. -
Enter the password provided by Moveworks. Right click the top gray bar, click save.
Important: If you save before entering the password, it may seem to auto populate the Key-store password. This doesn't always work correctly, so always enter the password manually. -
Click "Validate Stores/Certificates" under Related Links to ensure the record was configured properly.
-
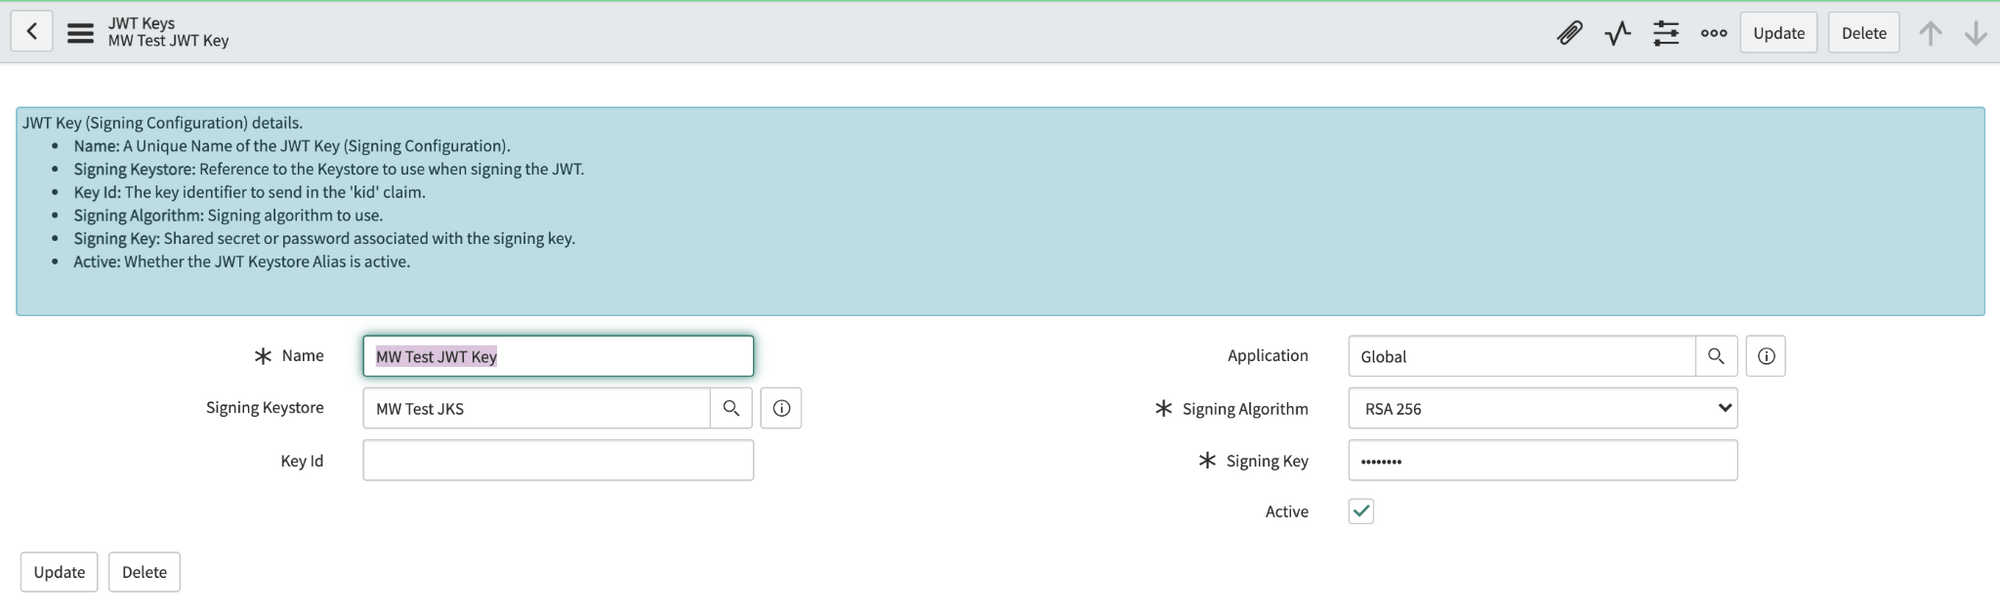
Navigate to the JWT Keys table (under System Oauth). Create a new record and set its Signing Key Store to the certificate record you made in the previous step. Enter the same password Moveworks provided in the Signing Key field. Save this record.
-
Navigate to the JWT Provider table. Create a new record and set its Signing Configuration to the key record you made in the previous step. Update the Expiry Interval from 60 sec to 3600 sec (1 hour).

-
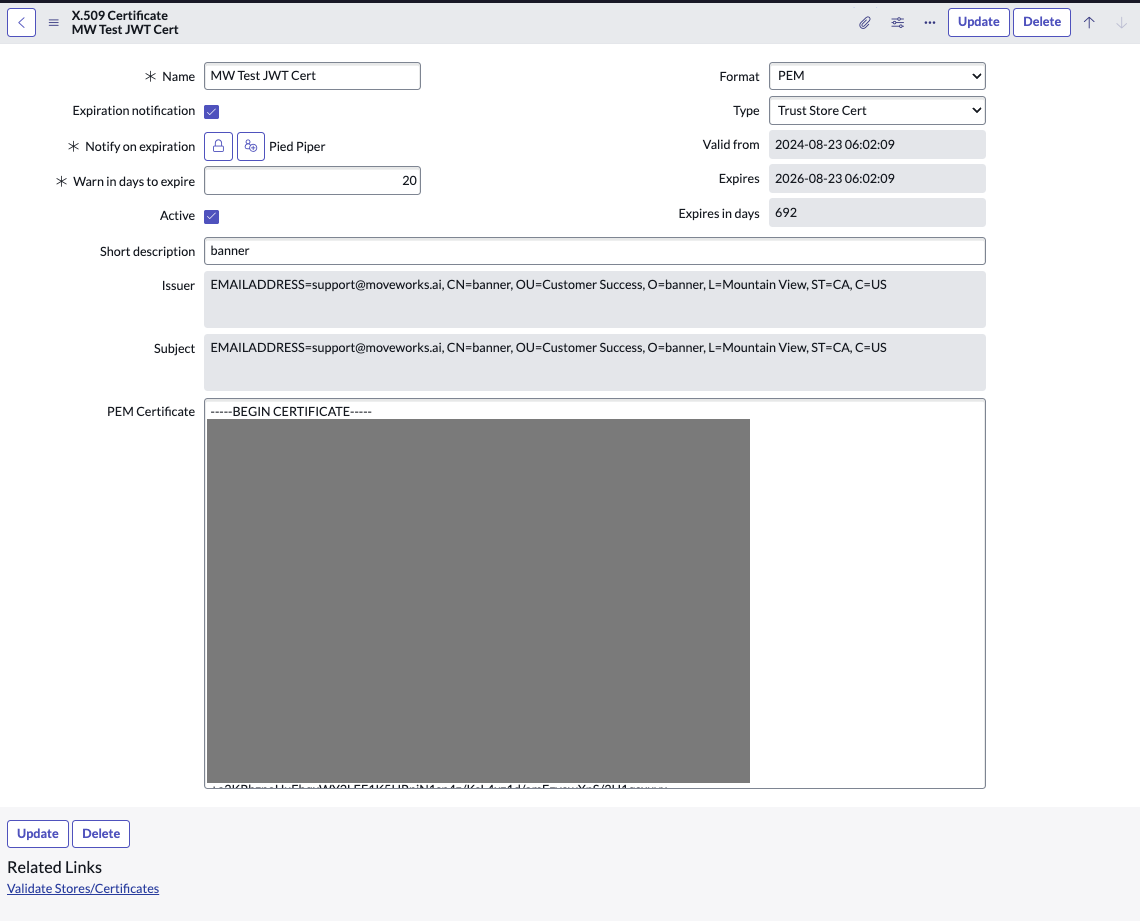
Navigate to the X.509 Certificate table again and create a new record as follows:
Name: MW JKS Certificate Format: PEM Type: Trust Store Cert -
Extract the contents of the JKS Certificate and paste it in the PEM Certificate section. The Certificate file will have a
.crtextension. You can either use your terminal / command prompt or a text editor to view and copy the contents of this file. -
Click "Validate Stores/Certificates" under Related Links to ensure the record was configured properly.
Step 3: Register OAuth 2.0 API Client
-
In the top left side of navigation bar, Click on ‘All’, search for ‘System OAuth’ option in the search bar and then Click on ‘Application Registry’ under it
-
Now, in the top right side of navigation bar, Click on the ‘New’ button
-
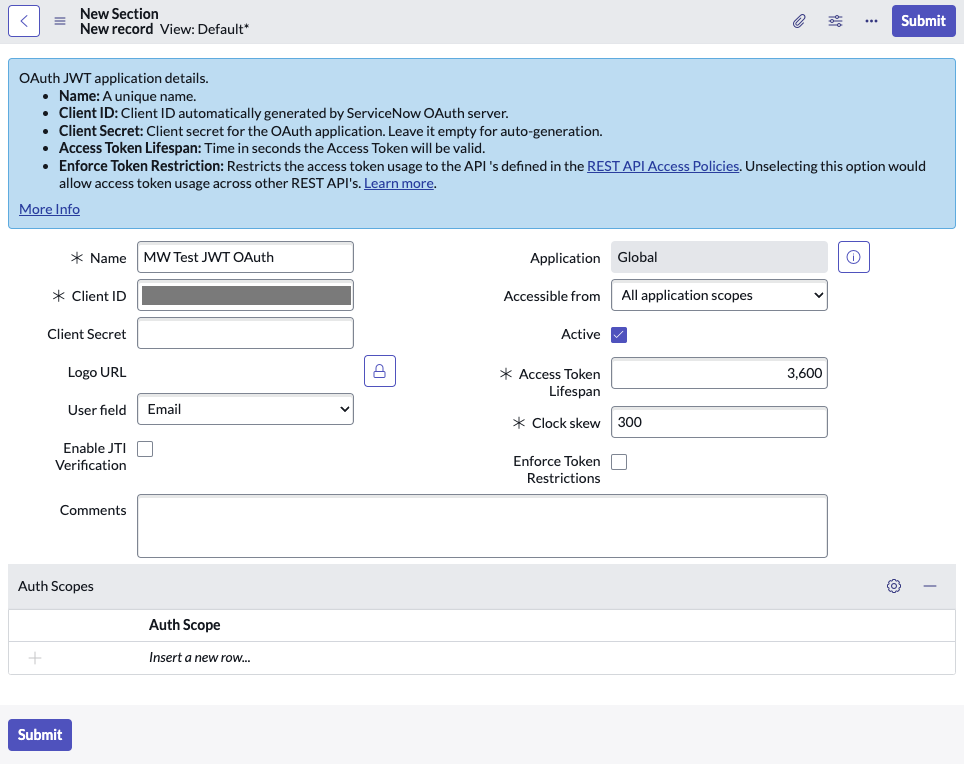
Click on 'Create an OAuth JWT API endpoint for external clients'
-
Fill in the necessary details and click on ‘Submit’
Note- Set Access Token Lifespan to 3600
- Disable JTI Verification
-
Copy the Client ID and Client Secret and store it in a safe storage to use it in the next step.
-
Navigate to JWT Providers(under System OAuth) and update the JWT Provider that you created above with the following claim values:
aud: Client ID of the App Registry record created iss: Client ID of the App Registry record created sub: Email ID of the service account user that you created above
-
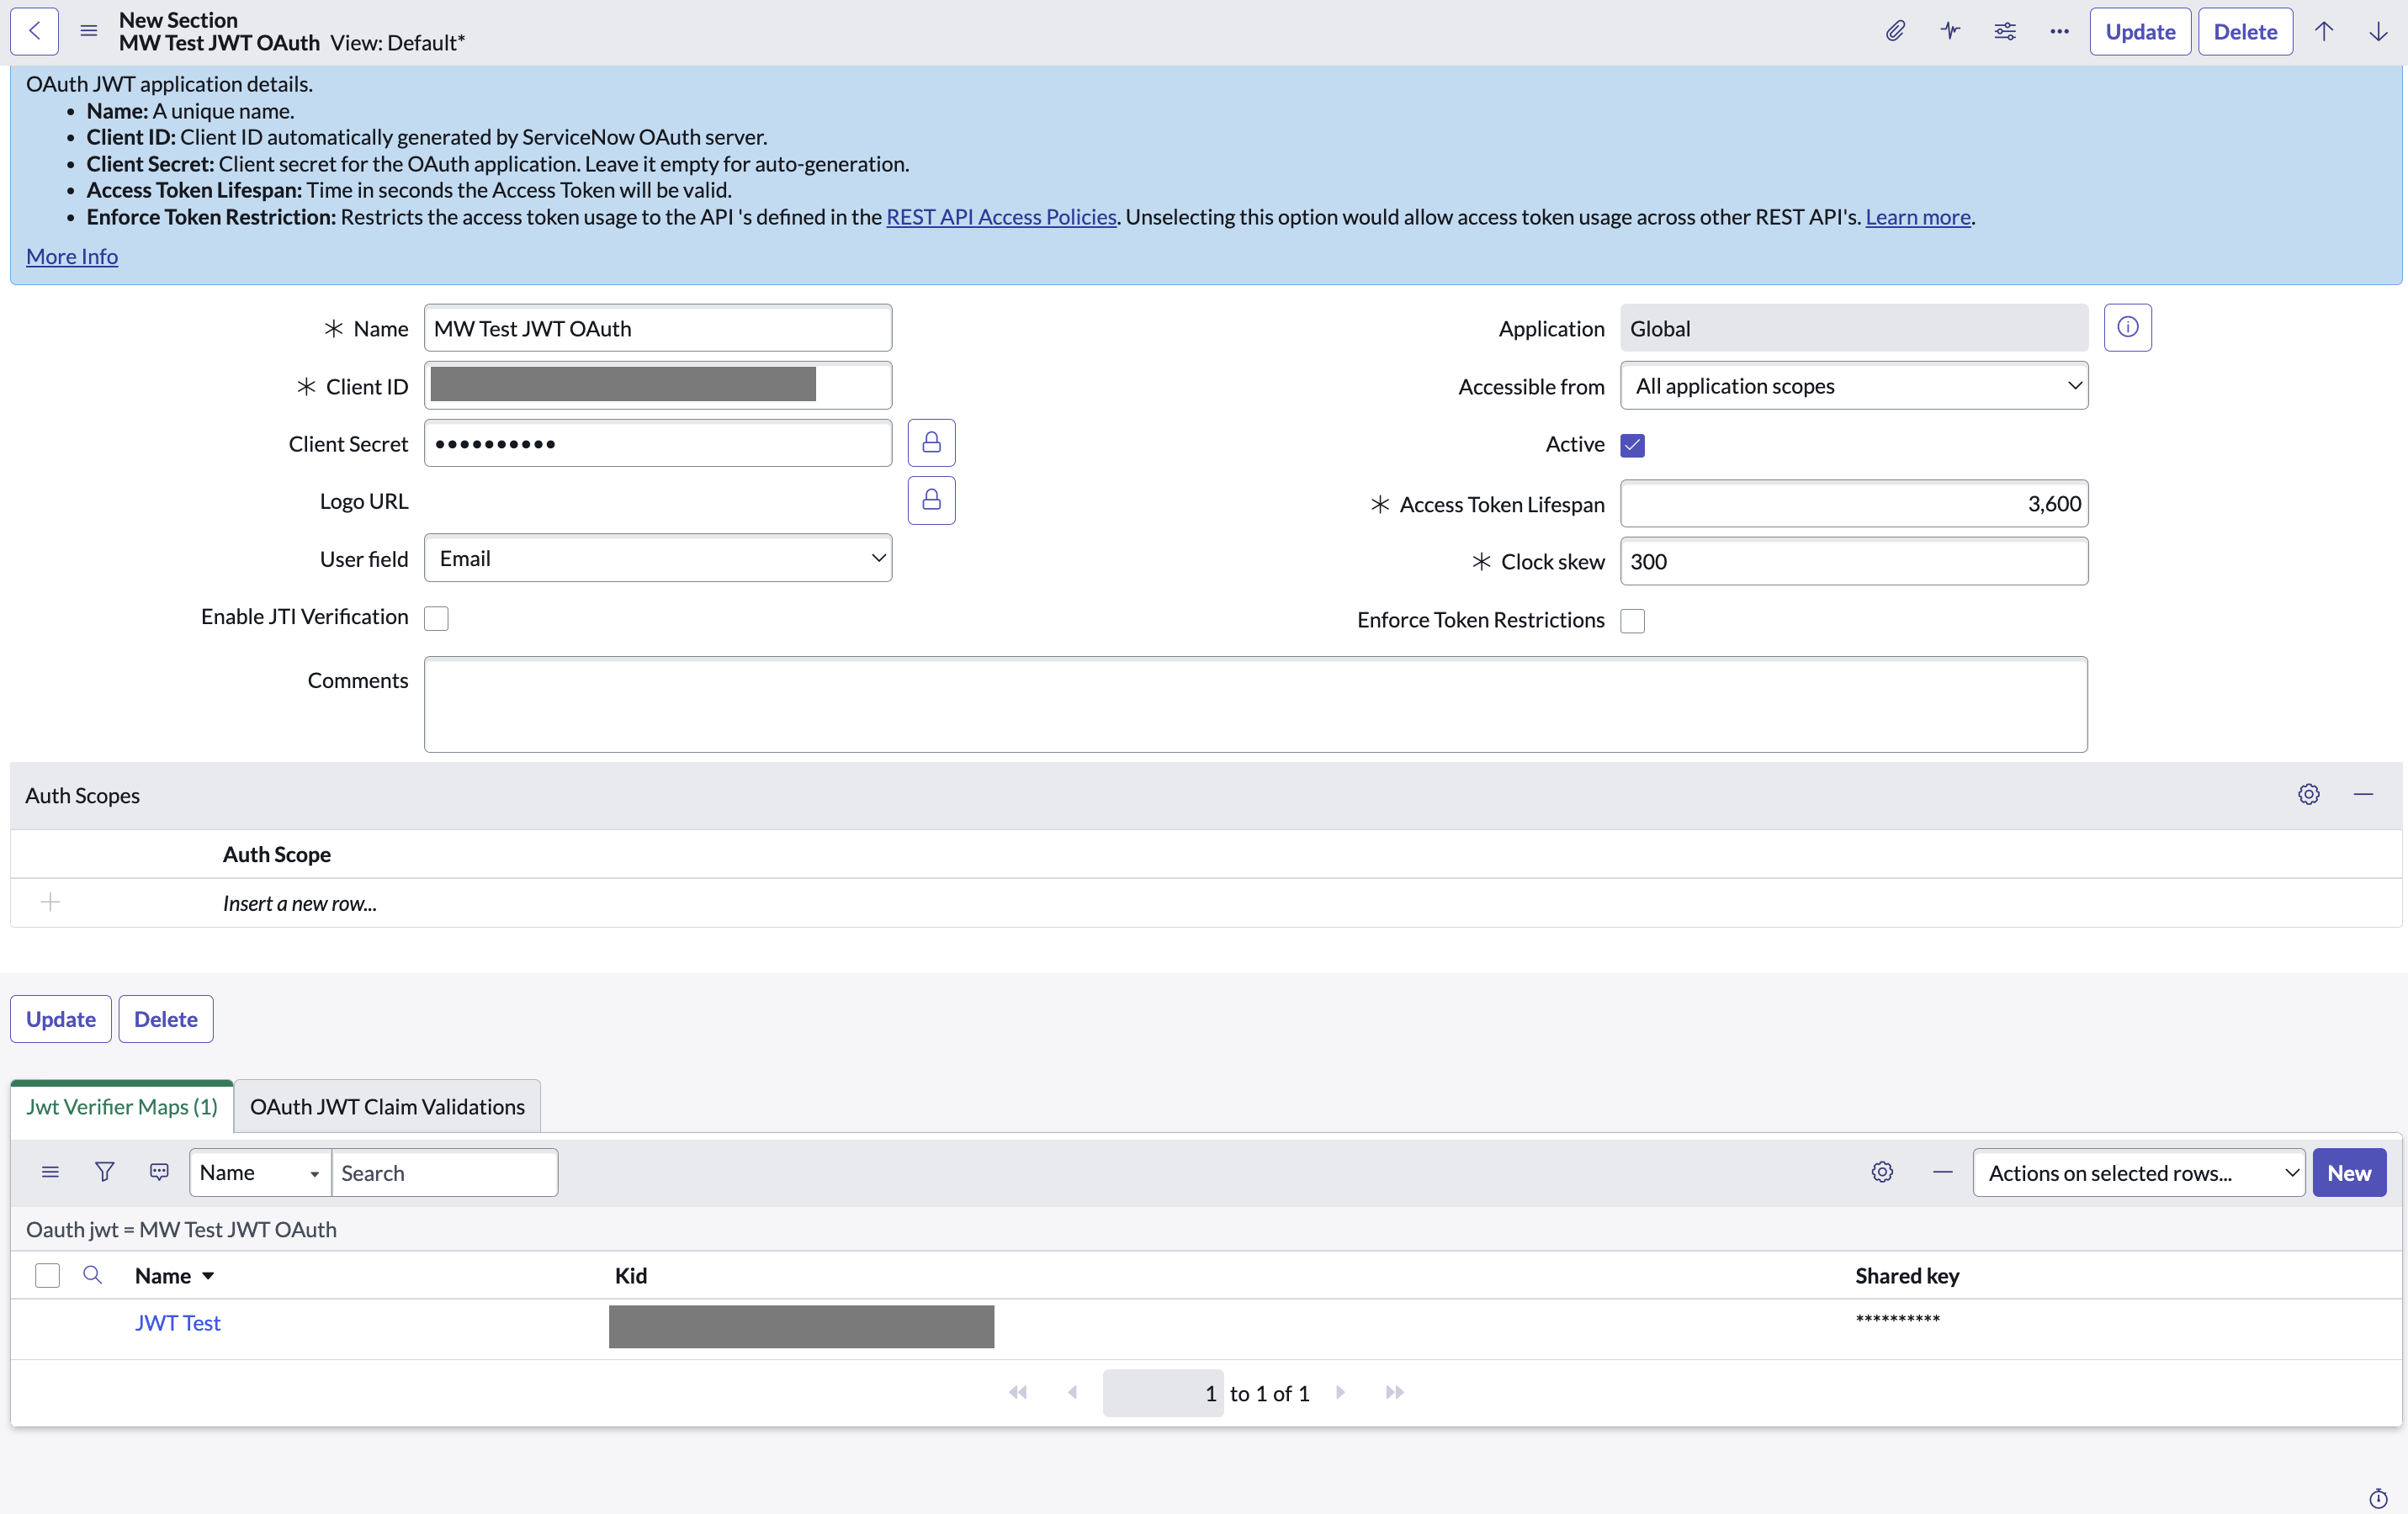
Click on the OAuth Client to open it again
-
In the related Lists under Jwt Verifier Maps, click on New to create a new JWT verifier map.
- Make sure to set the Shared Key value to the same password shared by Moveworks.
-
For Sys certificate, click on the search icon and select the MW JKS Certificate that you created before and click on Submit.
-
Copy the Kid of the newly created Jwt Verifier Map.
-
Navigate to JWT Keys (under System OAuth) and select the JWT Key you created above. Update the Key ID with the Kid that was auto-generated in the previous step.
Step 4: Generate the Private Key file
In this step, you will generate the Private Key file from the Java KeyStore file (.jks file) shared with you. This is crucial for configuring the Connector in subsequent steps.
Requirements:
- Java KeyTool: Available with the Java Development Kit (JDK).
- OpenSSL: Ensure OpenSSL is installed on your system. It's available by default in most Unix/Linux systems and MacOS, but may need to be installed separately on Windows.
Procedure:
-
Open Your Terminal/Command Prompt
- Windows: Search for
cmdorCommand Promptin Start and open it. - MacOS/Linux: Open
Terminalfrom Applications or your preferred method.
- Windows: Search for
-
Navigate to the Directory Holding Your
.jksFileUse the
cdcommand followed by the path to the directory:cd path/to/directory -
Convert
.jksto.p12FileReplace
liveCERT.jkswith your.jksfile name andyour-dest-file-name.p12with your desired.p12file name.keytool -importkeystore -srckeystore liveCERT.jks -destkeystore your-dest-file-name.p12 -srcstoretype JKS -deststoretype PKCS12- Input the source keystore password when prompted. This password should have been shared with you along with the
.jksfile.
- Input the source keystore password when prompted. This password should have been shared with you along with the
-
Extract the Private Key to a PEM File
Ensure OpenSSL is accessible in your system's command line or terminal. Run:
openssl pkcs12 -in your-dest-file-name.p12 -nocerts -out your-private-key-file-name.pem -nodesReplace
your-dest-file-name.p12with your.p12file name andyour-private-key-file-name.pemwith your desired output filename for the PEM.
Now, you will have your-private-key-file-name.pem, which will be utilized in configuring the Connector in the following steps.
Notes
- Windows Users: If OpenSSL isn't installed, you can download it from OpenSSL's official page or use a third-party distribution like Cygwin or Git Bash that includes OpenSSL.
- MacOS/Linux Users: OpenSSL should be pre-installed. If not, you can install it via Homebrew (Mac) or your Linux distribution’s package manager (
aptfor Ubuntu,yumfor CentOS, etc.)- Make sure to replace placeholders (like
liveCERT.jks,your-dest-file-name.p12, andyour-private-key-file-name.pem) with actual file names specific to your scenario.
Step 5: Configure in Moveworks Setup
-
Go to Manage Connectors > System Connectors, then click on ‘CREATE NEW’ (As shown in Step 3 of Setting up OAuth 2.0 with Password Grant)
-
Click on ‘ServiceNow’ Connector, then click on ‘Next ADD CREDS’ (As shown in Step 3 of Setting up OAuth 2.0 with Password Grant)
-
Fill in the
Instance,Client ID,Client Secret,Service account email ID,Key idandPrivate Key fileobtained in the previous steps-
Instance:
- If ‘Common Base URL’ option is selected, just enter
instance_namethat appears inhttps://{{instance_name}}.service-now.com - If ‘Custom Base URL’ option is selected, enter the Instance URL after ‘https://’
- If ‘Common Base URL’ option is selected, just enter
-
Authentication Type: Select 'Oauth2 Authorization' from the dropdown
-
OAuth2 Grant Type: Select 'JWT' from the dropdown
-
Jwt Issuer:
Client ID -
Jwt Audience:
Client ID -
Jwt Subject: Email ID of the service account that you created above
-
Key id: Enter the Key ID that was generated at Step 3.11
-
Private Key: Upload the
.pemPrivate Key file that you generated in the previous step -
Jwt Custom Oauth Request Options Additional Request Data: Scroll to the bottom to configure the following additional data:
Key Value client_id Client ID obtained from Step 3.5 client_secret Client Secret obtained from Step 3.5

-
-
Click on ‘Save’
Configuring ServiceNow for Enterprise search
Initialising setup
-
Log in to your org's MyMoveworks portal
-
Navigate to Moveworks Setup > Answers > Ingestion > Enterprise Search
-
Click on Create New or Get Started
-
Select Service Now from the dropdown list and click on Get Started
-
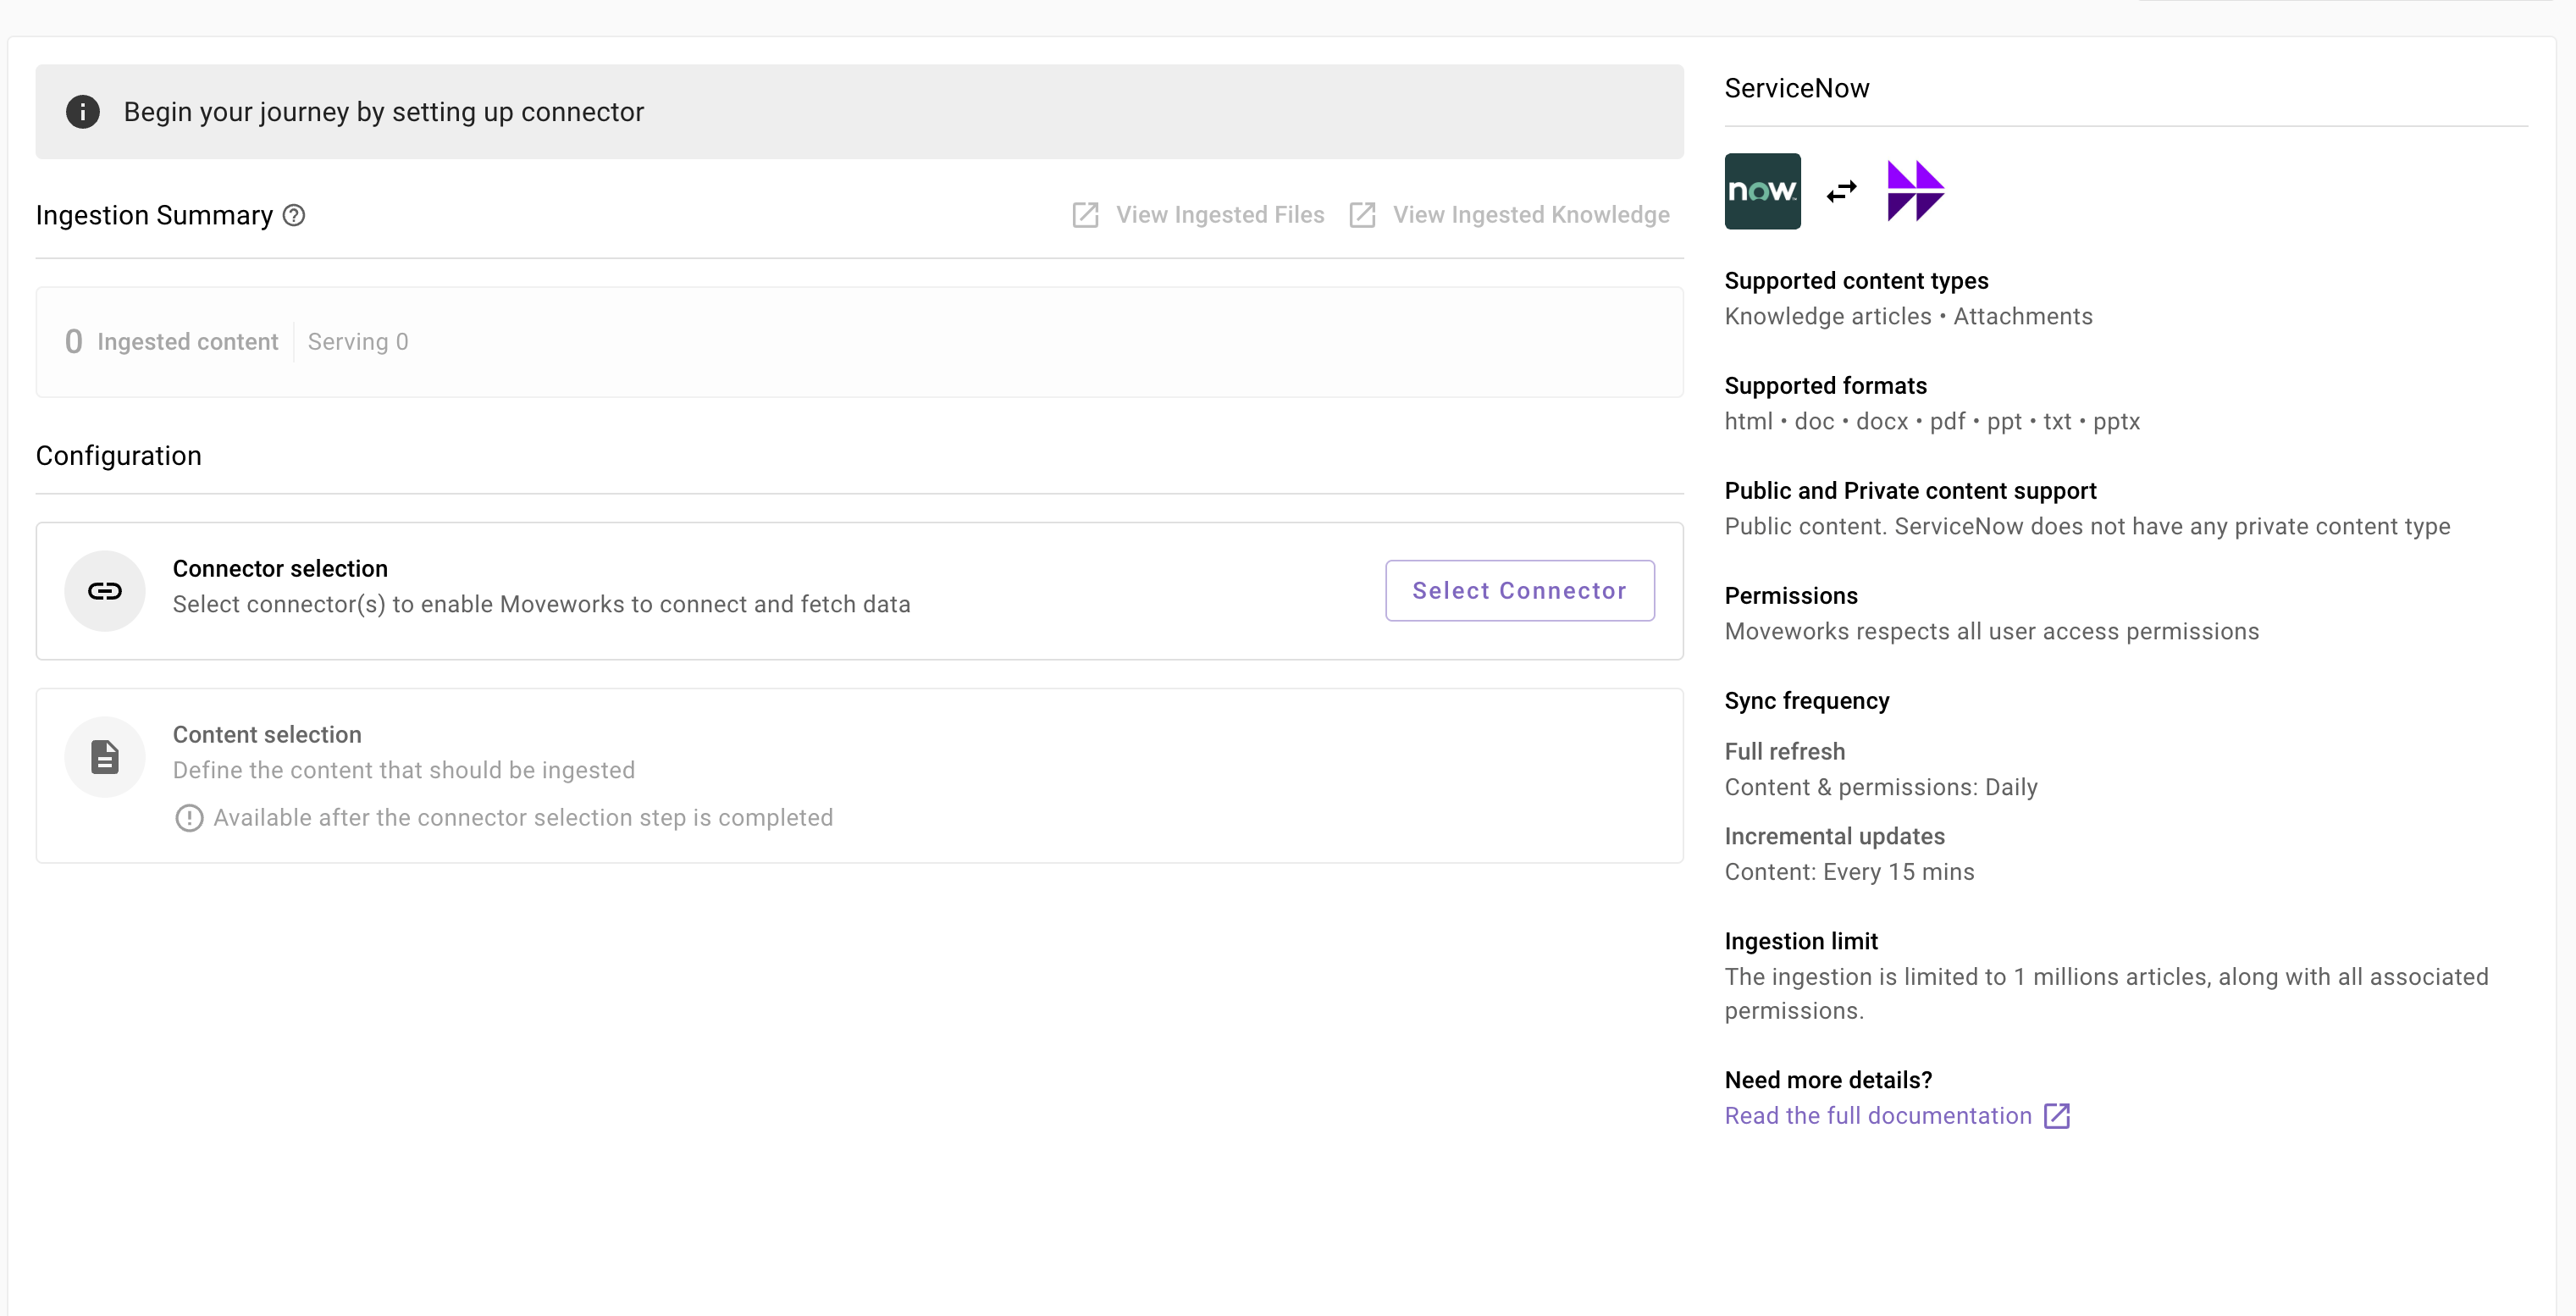
You will be redirected to the ServiceNow ingestion overview page. In the overview page, you will find few info blocks and few configuration blocks.
- System Overview: This presents an overview of ServiceNow support from Moveworks
- Ingestion Summary: This provides information on the count of records that has been ingested and serving. The values will appear after the first successful ingestion run.
- Connector Selection: In this configuration block, you are required to select the required connector to enable Moveworks to connect and fetch data
- Content Selection: In this configuration block, you are required to define the content that should be ingested within Moveworks
Connector selection and validation-
Once you click on Select Connector, a connector setup screen will appear as follows
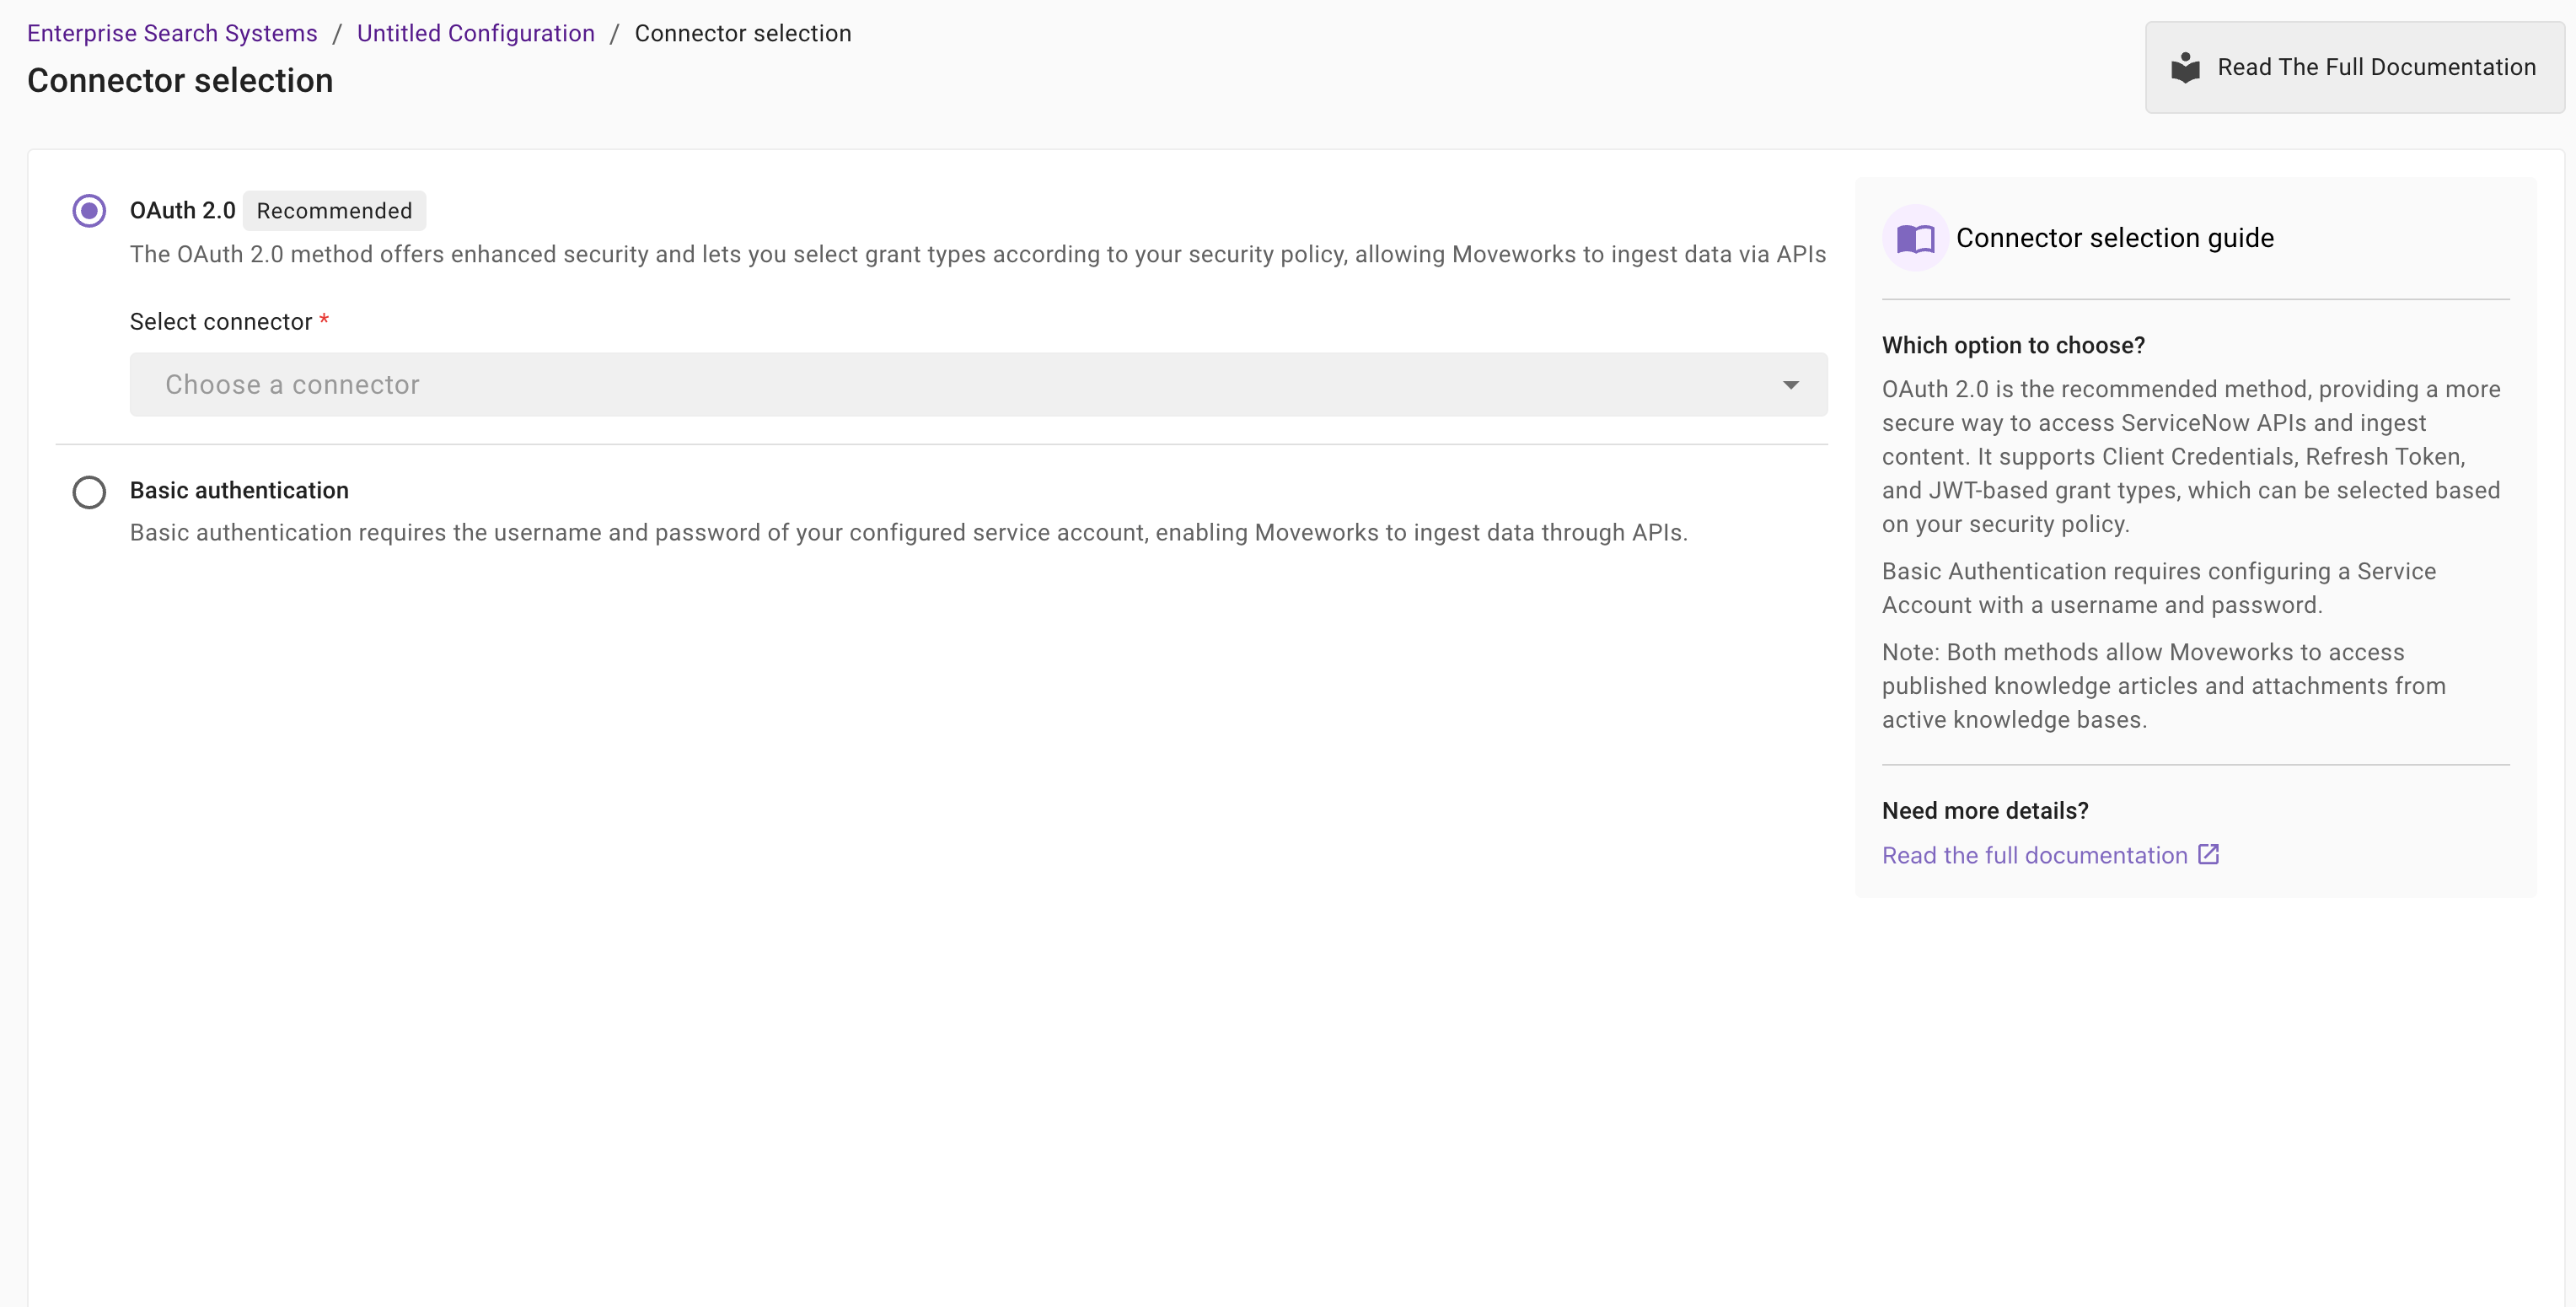
-
Select the connector (from the dropdown) that you have created in the Connector Creation step.
Please note: Only the ServiceNow (Next Gen) connectors will appear in this list.
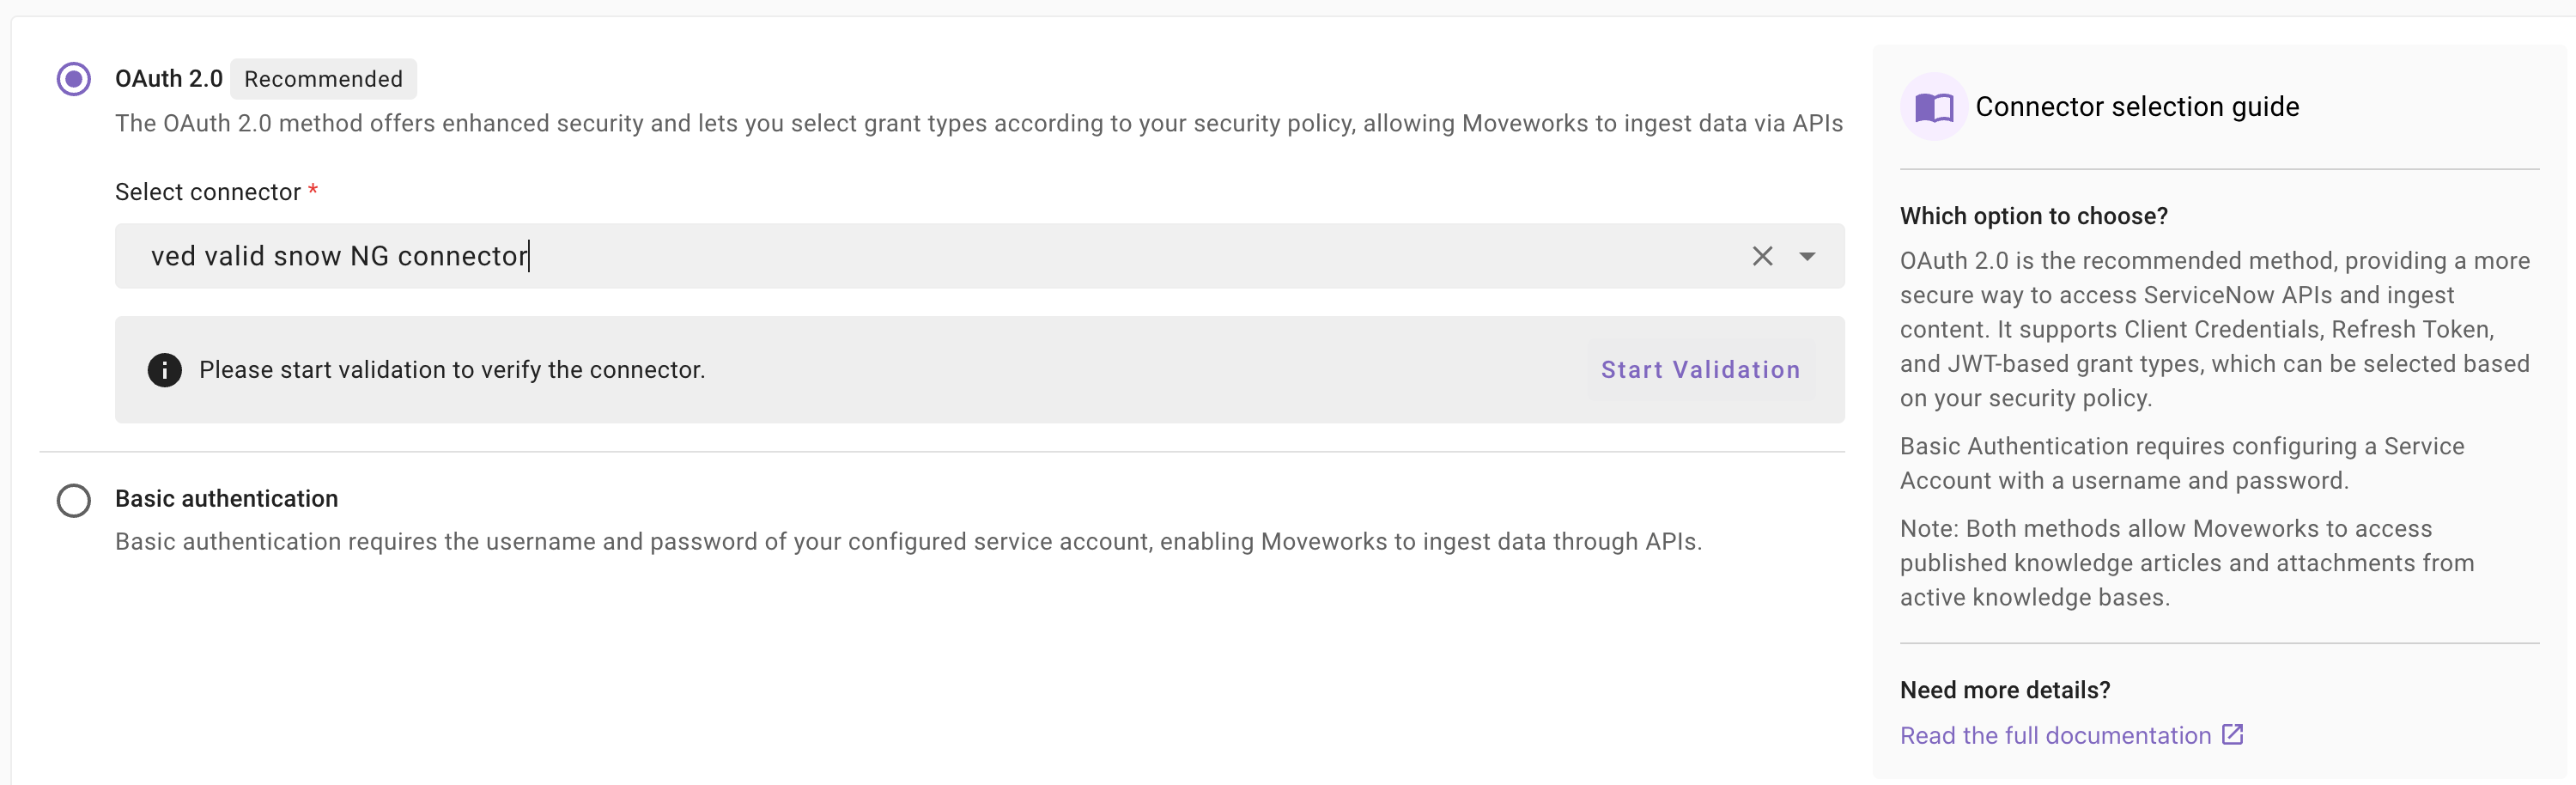
-
Once the connector is selected, you need to click on Start Validation to validate the connector credentials and required scope.
Connector Validation
This is a mandatory step in order to save the configuration and move to the next step.
Moveworks validates the selected connector to check:
- Auth: Moveworks validates if the connector has right credentials to authenticate
- Content: Moveworks validates if connector has right scopes to fetch content
- Permissions: Moveworks validates if connector has right scopes to fetch user permissions
- Users: Moveworks validates if connector has right scopes to fetch user data
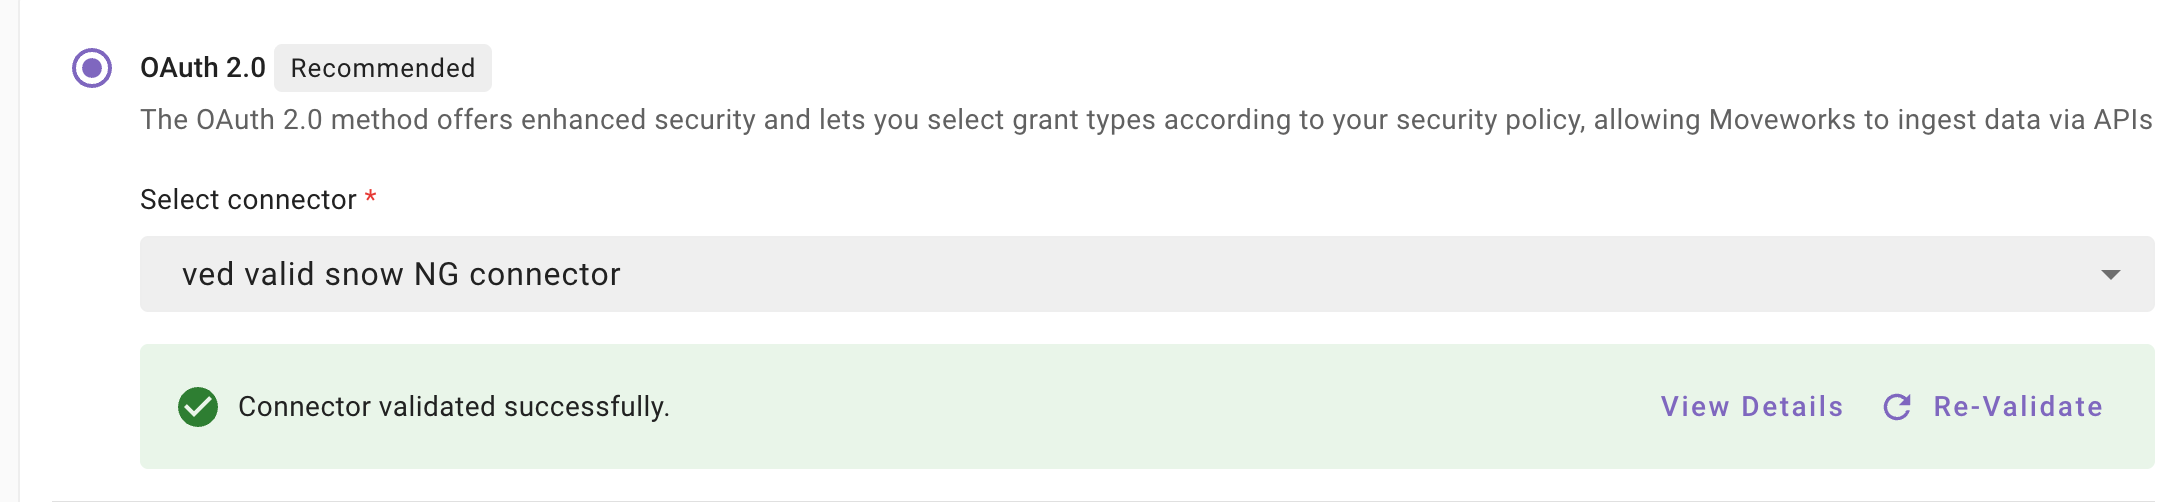
-
If the connector is validated successfully, you will see a green info banner as follows
- If there are any credentials or scope issues, you will receive an error message as follows. Click on View Details to identify the issue. Refer to this step-by-troubleshoot guide (link to be added) to rectify any validation errors.
-
Once the connector is validated successfully, you will be able to Save the configuration.
-
Input the unique configuration name and Save.
-
Once the configuration is saved, you can view the unique configuration name at the top of the screen. You can also click the pencil 🖊️ icon to edit the configuration name.

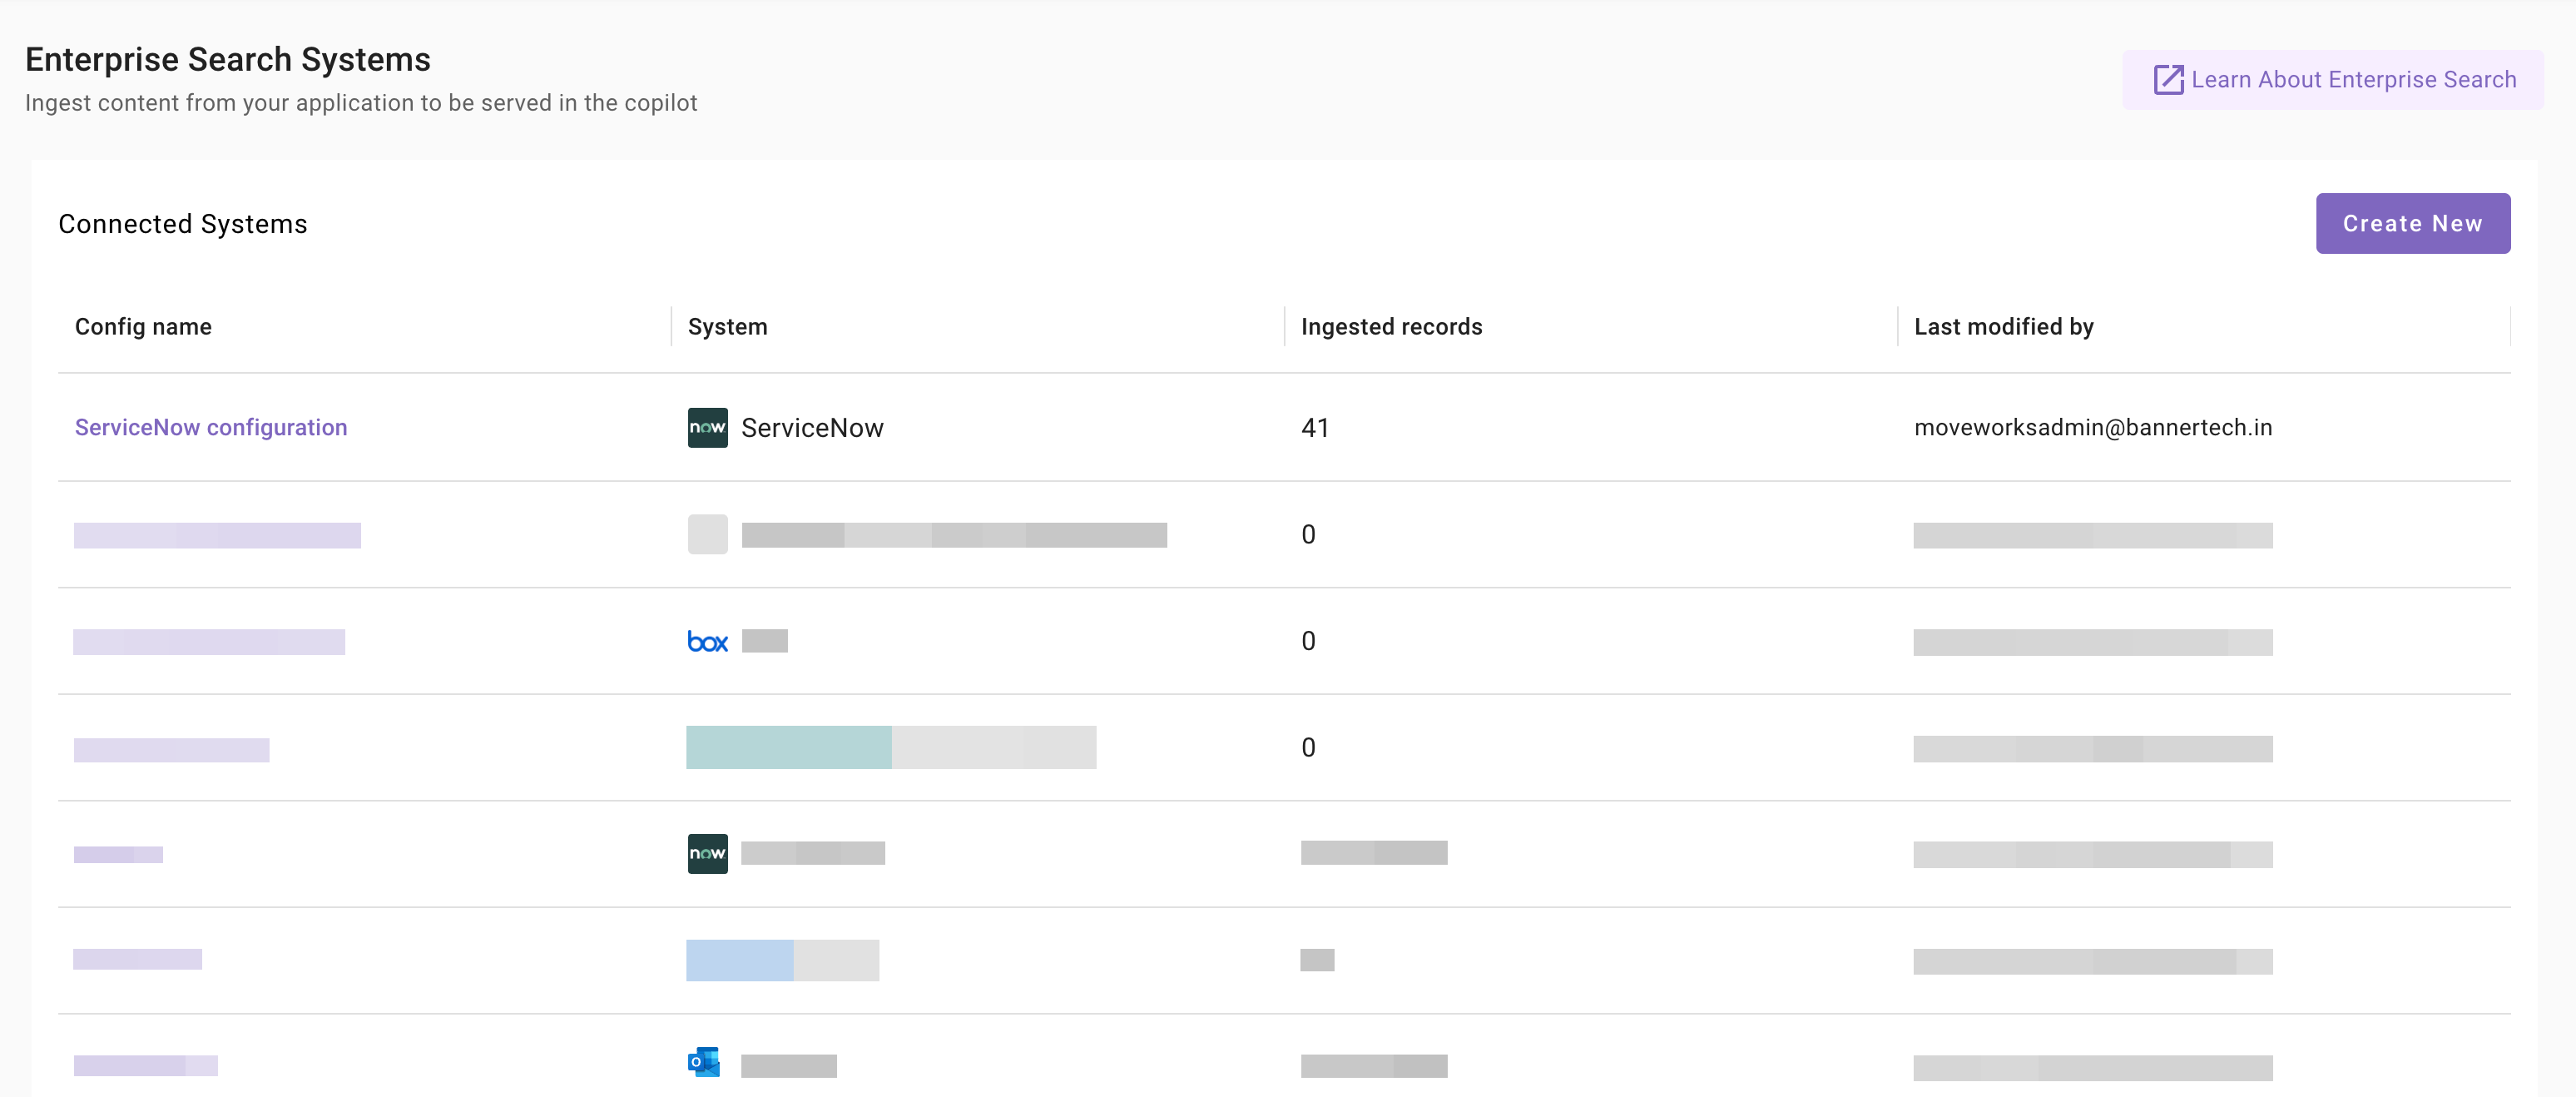
-
Additionally, you will start seeing an entry of your configuration in the Enterprise Search home page. You can click on your configuration to go to edit/ complete the configuration.
-
Content Selection
Once the connector selection step is complete and the configuration is saved, you will now be required to define the scope of content that will be ingested in Moveworks.
-
Once you click on Select Content, a content selection screen will appear as follows
-
In this screen, you are required to define the Knowledge Base from which Moveworks will ingest content and apply filters (optionally) to filter down the content further.
-
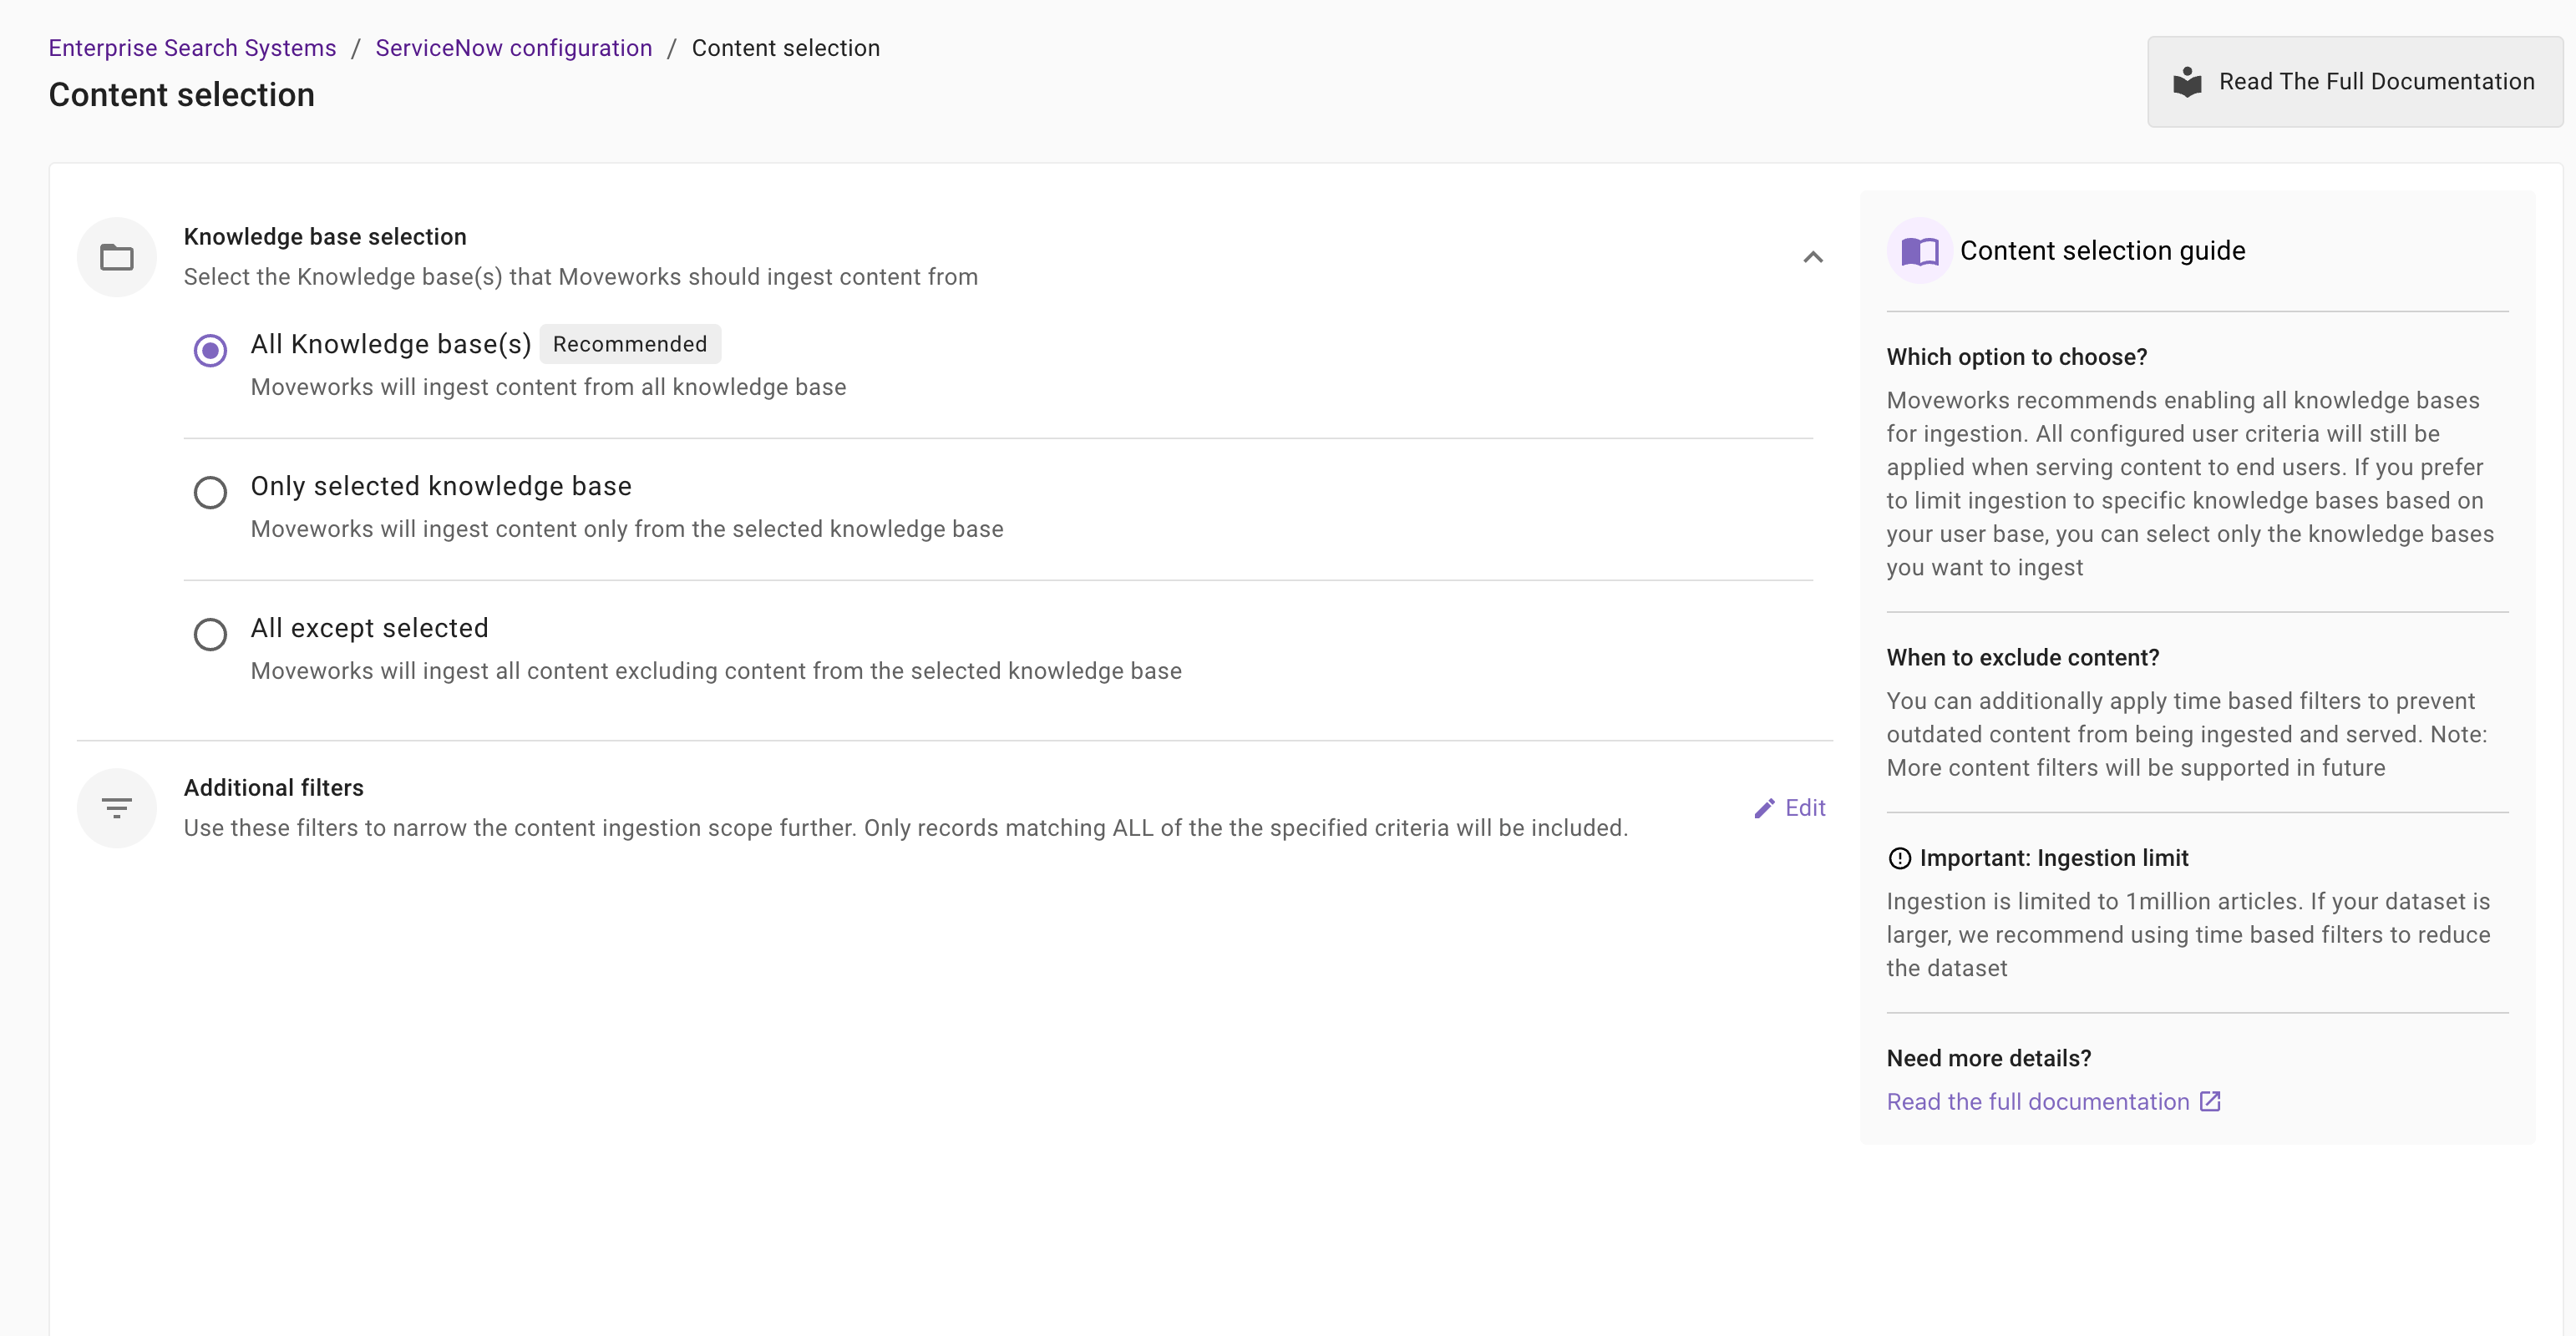
Knowledge Base configuration: This is a mandatory configuration. This configuration defines which Knowledge Base Moveworks will crawl and ingest content from. As an admin, you get three option
-
All knowledge bases (Recommended): Moveworks will ingest content from all knowledge base
When to choose this option?
Choose this option if you want Moveworks to index content from all Knowledge Bases that are accessible to the Service Account or the user configured for integration. For example — if your Service Account has access to 15 Knowledge Bases and you want Moveworks to use all of them for search and responses, select this option.
Important Note: The Service Account (or Integration User) must have read access to each Knowledge Base and its associated articles for Moveworks to ingest content successfully.
How to configure? Simply select the All Knowledge Bases option in the configuration settings.
-
Only selected knowledge base : Moveworks will ingest content only from the selected knowledge base
When to choose this option?
Choose this option if you want Moveworks to index content from a subset of Knowledge Bases. For example — if your Service Account has access to 10 Knowledge Bases, but you only want Moveworks to use 3 of them (e.g., IT, HR, and Facilities), select this method.
Important Note: The Service Account (or Integration User) must have read access to each of the selected Knowledge Bases and their articles.
How to configure? Select the Only Selected Knowledge Bases option and specify the names or sys_ids of the Knowledge Bases you want Moveworks to index
-
All except selected: Moveworks will ingest all content excluding content from the selected knowledge base
When to choose this option?
Choose this option if you want Moveworks to index nearly all Knowledge Bases while excluding a few. For example — if your Service Account has access to 20 Knowledge Bases but you don’t want Moveworks to use 2 internal or restricted ones, select this method.
Important Note: The Service Account (or Integration User) must have read access to all Knowledge Bases that are included for ingestion.
How to configure? Select the All Except Selected Knowledge Bases option and specify the names or sys_ids of the Knowledge Bases you want to exclude.
-
-
Additional Filters: Use these filters to narrow the content ingestion scope further. Only records matching ALL of the the specified criteria will be included.
Currently following filters are supported:
- Modified date: Use this filter to include only those content records whose Modified date is after a specified date.
- Created date: Use this filter to include only those content records whose Created date is after a specified date.

-
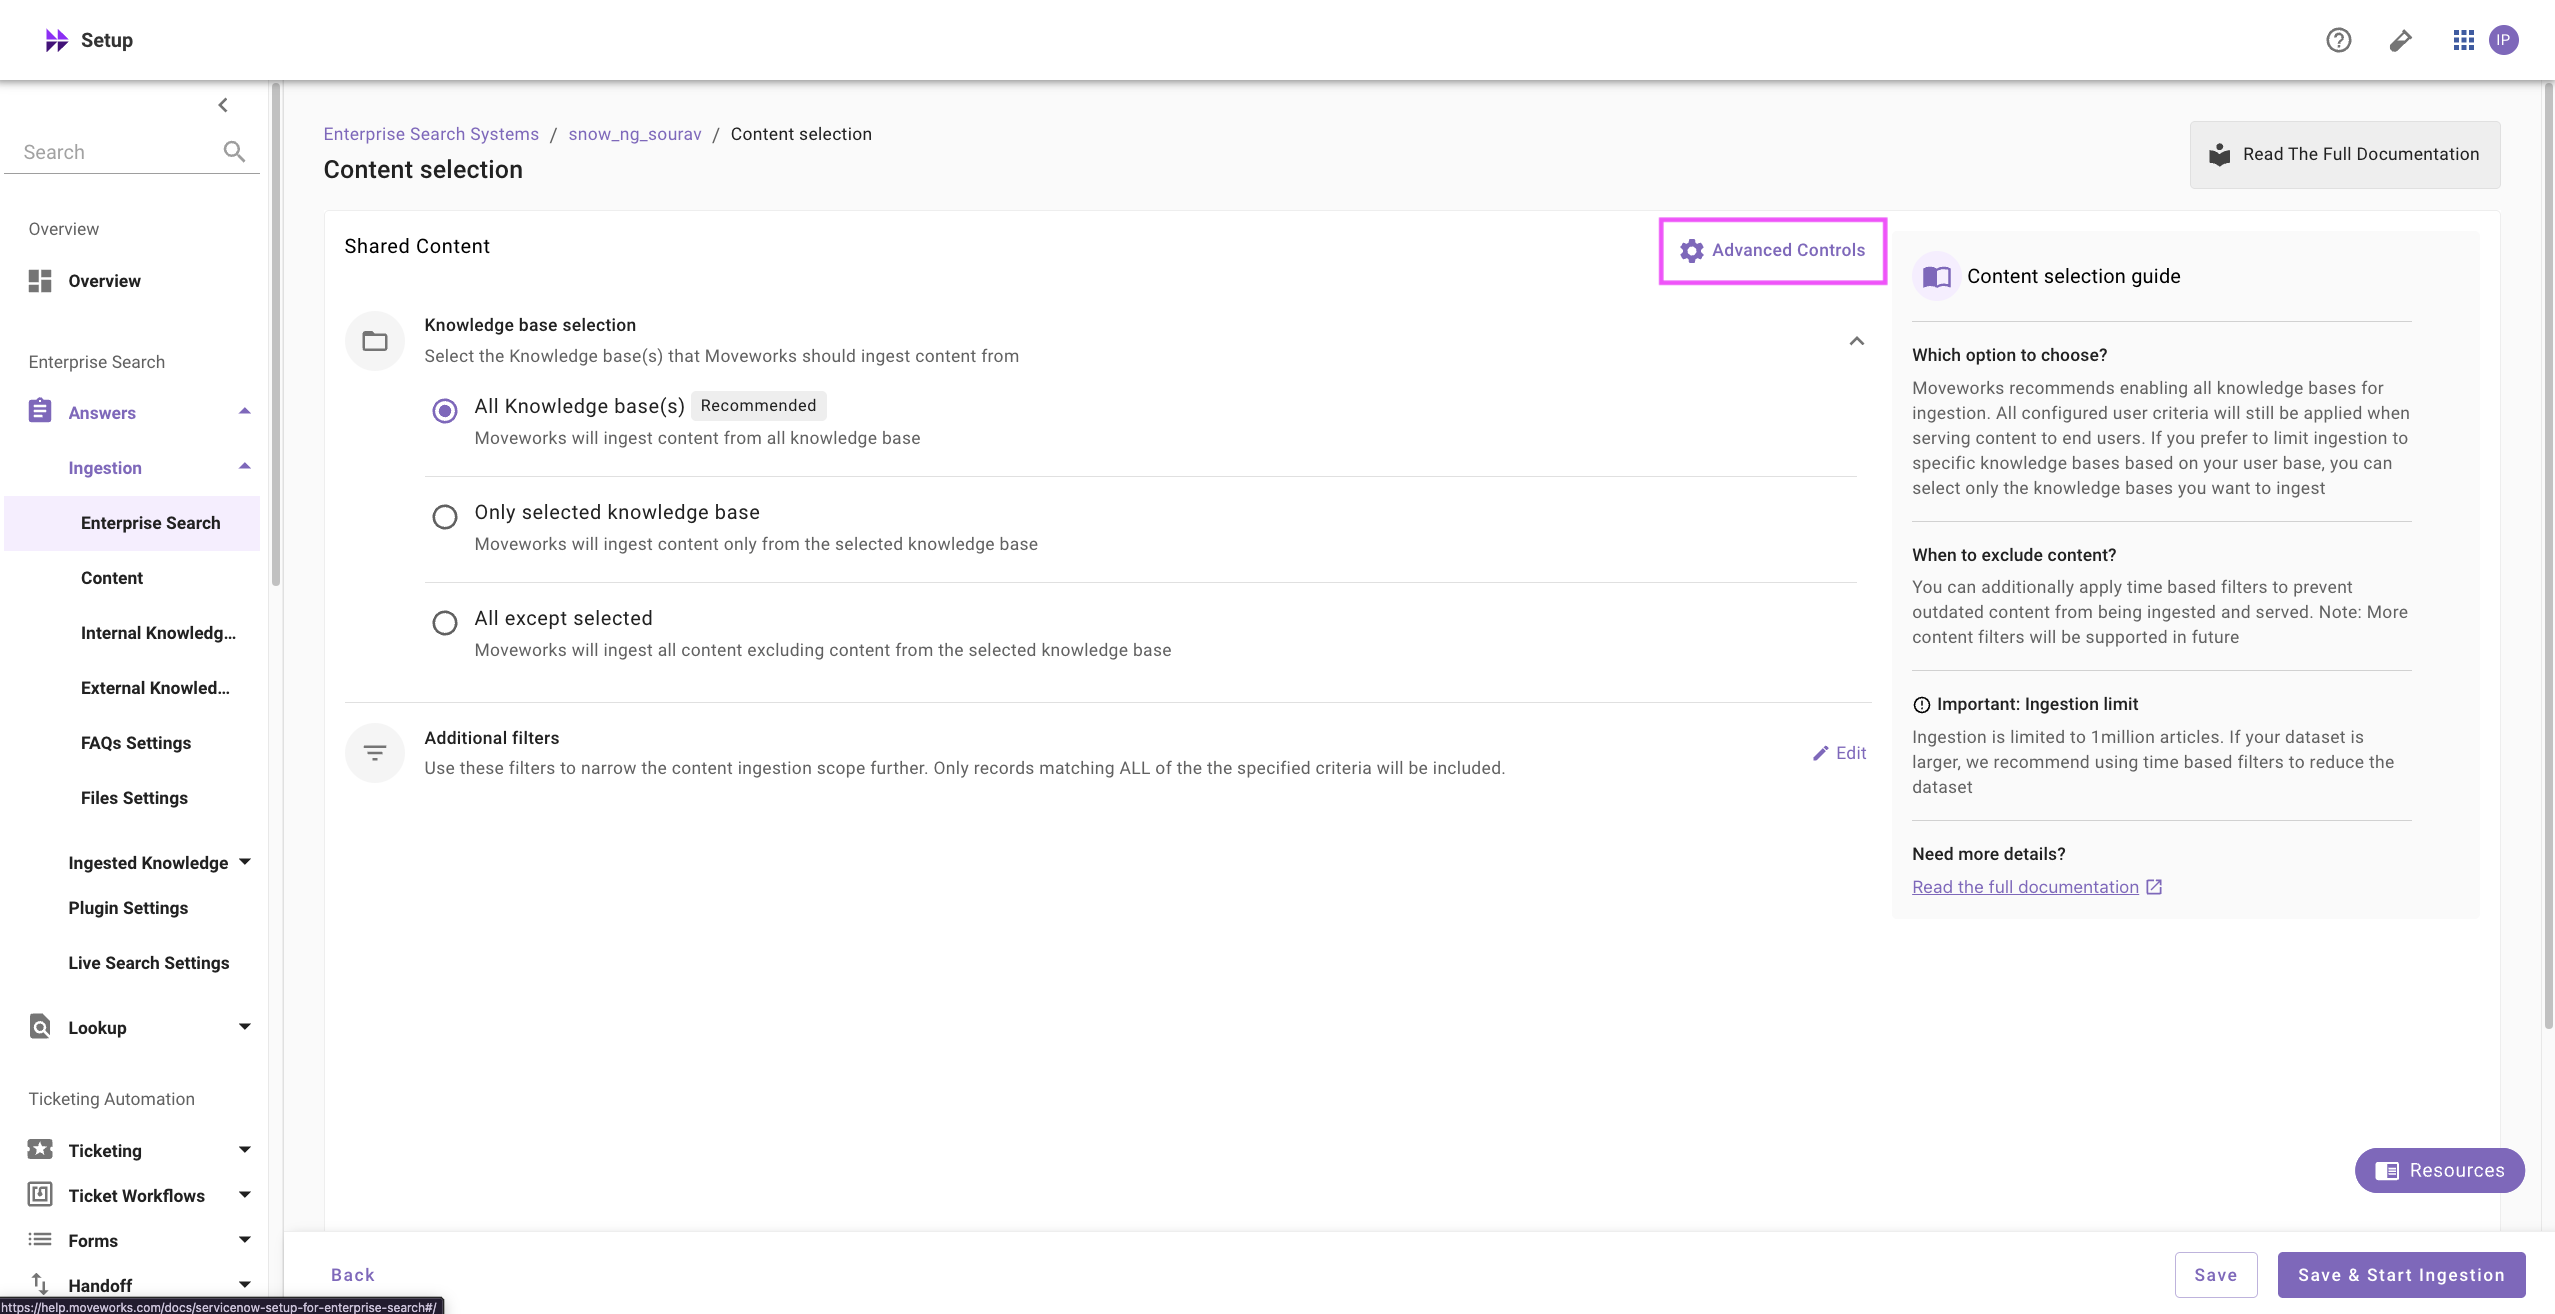
Advanced Controls: Use Advanced Controls to override article URLs. Article URLs in ServiceNow are of the following format:
https://<instance_name>.service-now.com/<slug>?id=<url_id>&number=<kb_number>. Theinstance_nameandkb_numberare fetched automatically during ingestion. The default values for slug and url_id are:slug:spurl_id:kb_articleSo the resultant article URL would be:https://<instance_name>.service-now.com/sp?id=kb_article&number=<kb_number>
However, if your instance has different values configured for either one of these values, you can click on Advanced Controls to specify them.
-
Click on Advanced Controls on the Content selection screen
-
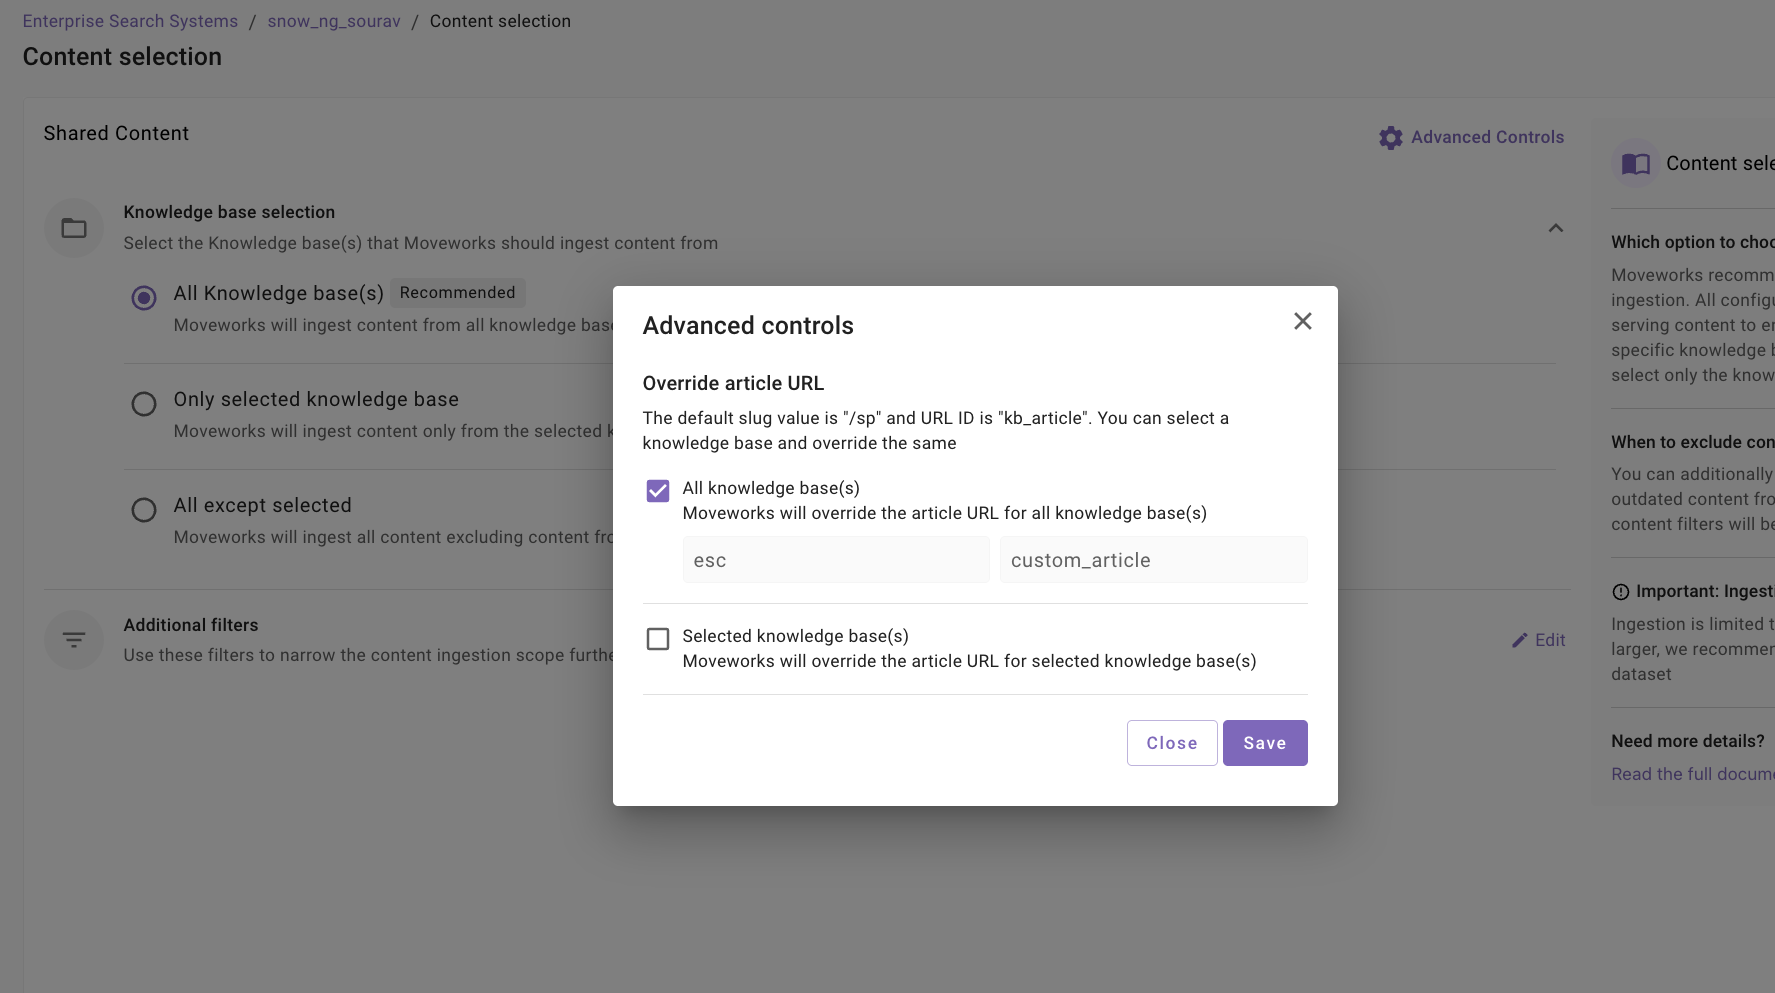
Set the override article URL based on 2 options - either for all of the knowledge bases configured or for a subset of the knowledge bases configured.
-
If you want to update these values for all of the knowledge bases configured:
- Select All knowledge base(s) option
- Set the slug value and/or URL ID accordingly
-
If you want to update these values only for a single / subset of knowledge bases configured:
- Select the Selected knowledge base(s) option
- Click on + Add Knowledge Base(s)
- Set the knowledge base sys_ids in a comma separated fashion to override the values

-
Click on Save
-
Save and Start Ingestion
Once Knowledge Base selection is configured, you have two options:
-
Save: Clicking this will just save the configuration and not initiate the first ingestion crawl. Use this option, if you would want to complete your configuration in multiple sessions/ sittings.
-
Once you click on Save, you will be redirected to the ServiceNow overview screen
-
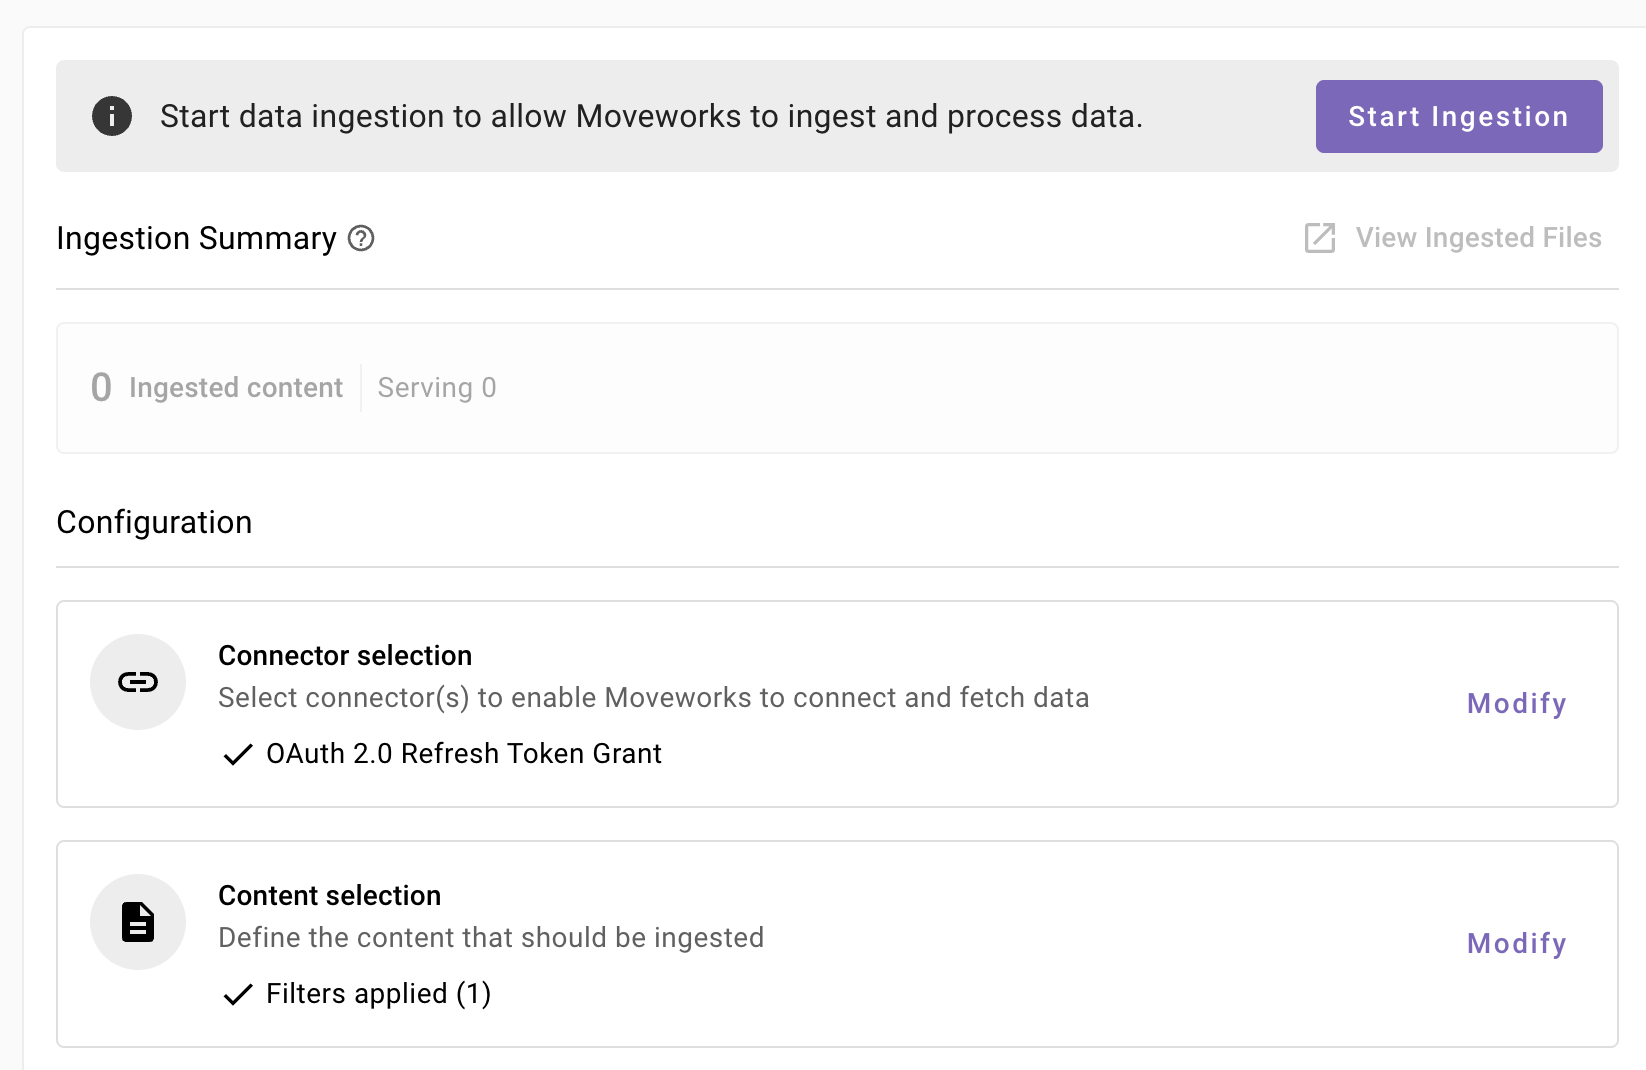
You will notice a banner that prompts you to Start Ingestion
-
Once you are satisfied with your configuration, you can click on Start Ingestion
-
A confirmation popup will come that provides a summary of the configuration

-
Click on Confirm
-
After you click on Confirm, ingestion will start shortly.
-
For the first crawl to complete, this generally takes anywhere from few hours to 48 hours depending upon the size of the data.
-
-
Save and Start Ingestion: Click this option if you have completed and validated your content selection configuration and you are ready to initiate the first ingestion crawl.
-
A confirmation popup will come that provides a summary of the configuration
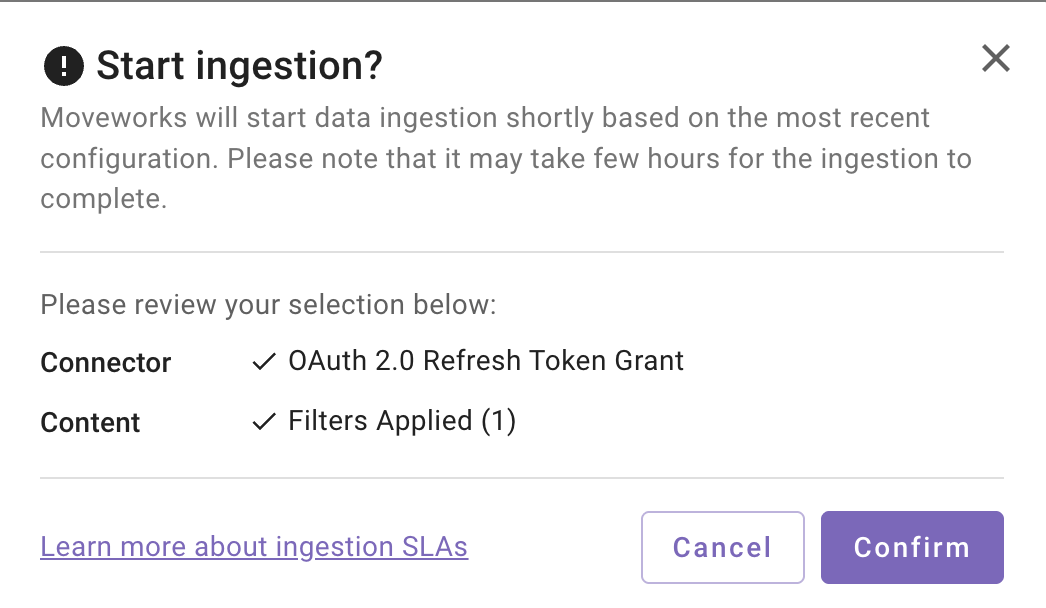
-
Click on Confirm
-
After you click on Confirm, ingestion will start shortly.
Important Note for Admins:
- It generally takes anywhere from few hours to 48 hours for the first crawl to complete depending upon the size of the data.
- You can review the status of ingestion via Data Ingestion Viewer and view ingested record in the Ingested File and Ingested Knowledge screens.
-
Updated 29 days ago