Microsoft Entra Installation Guide (SAML)
SAML not recommendedMoveworks recommends that you set up your Microsoft Entra apps via OIDC. Our OIDC installation will provide a better experience. You can follow the instructions here (🔗).
Prerequisites
Making edits?Before you edit your SSO configuration, make sure you are logged into MyMoveworks. Otherwise, you will not be able to log in and update your SSO configuration details.
Microsoft Entra Prerequisites
- Ensure you have Access to the Azure Admin Portal with the appropriate IAM permissions in Azure to register a new Enterprise Application.
Moveworks SSO Prerequisites
-
Your Moveworks Environment should be initialized in order to continue. (Verify with your Account Team if this has been completed)
-
Note the following values.
-
data_center_domain- the data center where your organization is hosted (see table below).Data Center data_center_domain United States (default) moveworks.com Canada am-ca-central.moveworks.com EU am-eu-central.moveworks.com Australia / Asia Pacific am-ap-southeast.moveworks.com Government Secure Cloud moveworksgov.com -
subdomain- your organization's login subdomain. This should match yourcustomer_id, which can beverified from the General Information Page.WarningMake sure to use the unique subdomain. For example, if you're organization's login subdomain is acme.moveworks.com, then your
subdomainis acme and yourdata_center_domainis moveworks.com which is part of the US Data center. -
customer_id- The unique identifier for your organization . This is stored as Org Name under Organization Details > General Information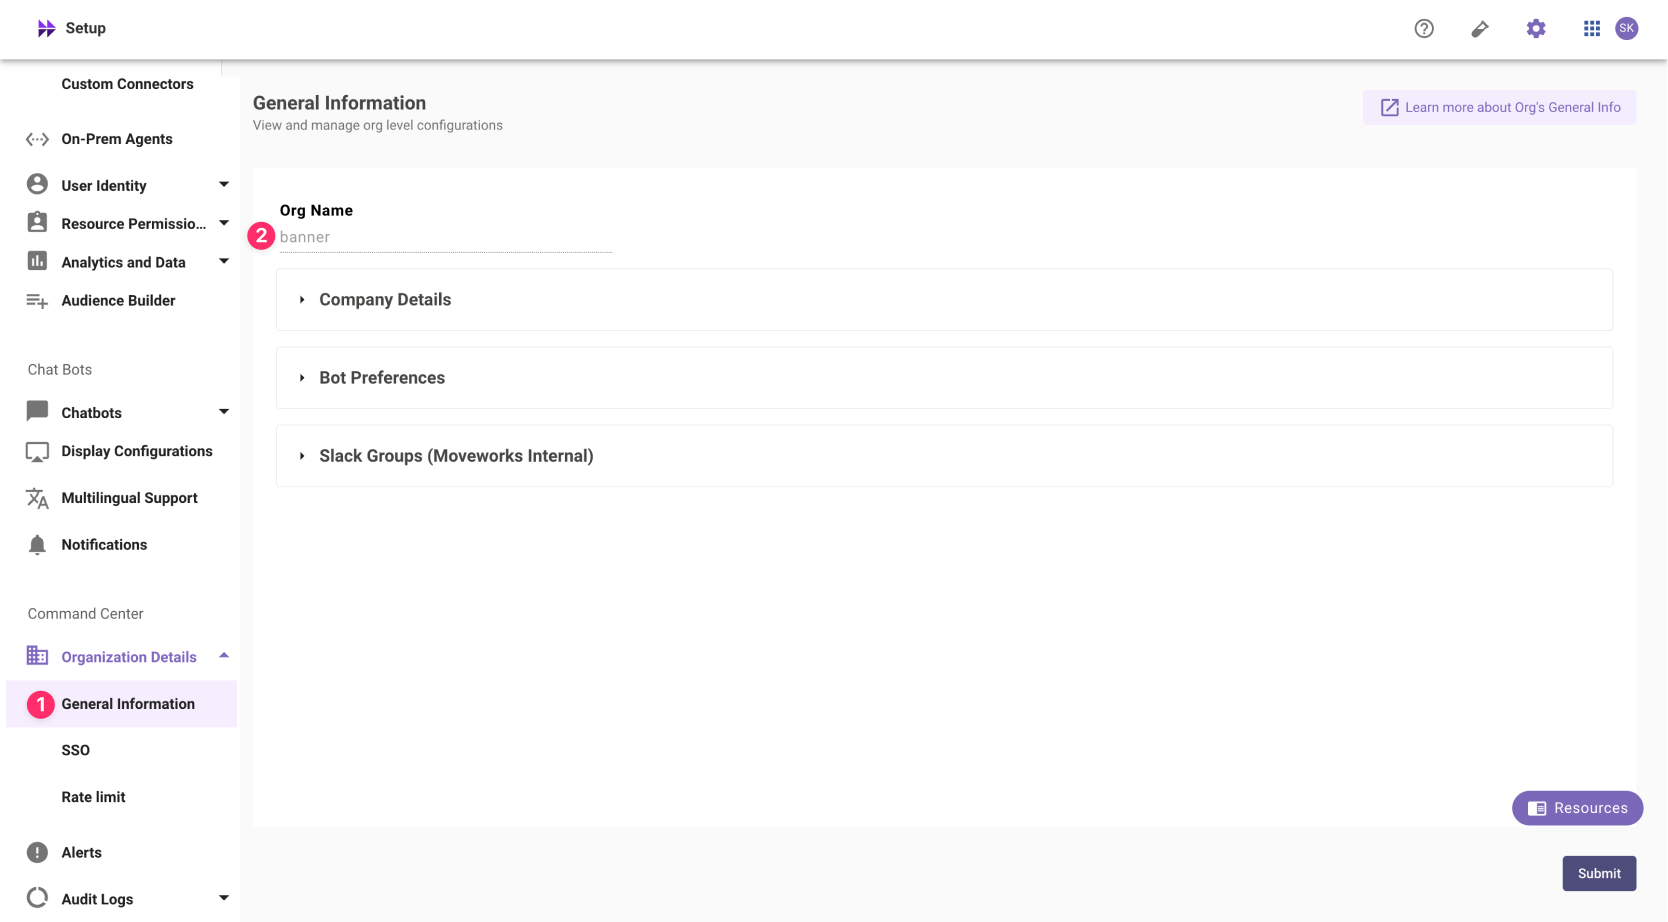 The Org name cannot be changed. Once set, the same value should be used in all cases.
In exceptional cases where you would like Moveworks to support your organisation with a different subdomain value. Please reach out to Moveworks Support.
-
Configuration Steps
Install Application
-
Navigate to https://portal.azure.com
-
Go to Enterprise applications and select New Application
-
Search Moveworks, select our application, and select Create

Configure Moveworks Settings
-
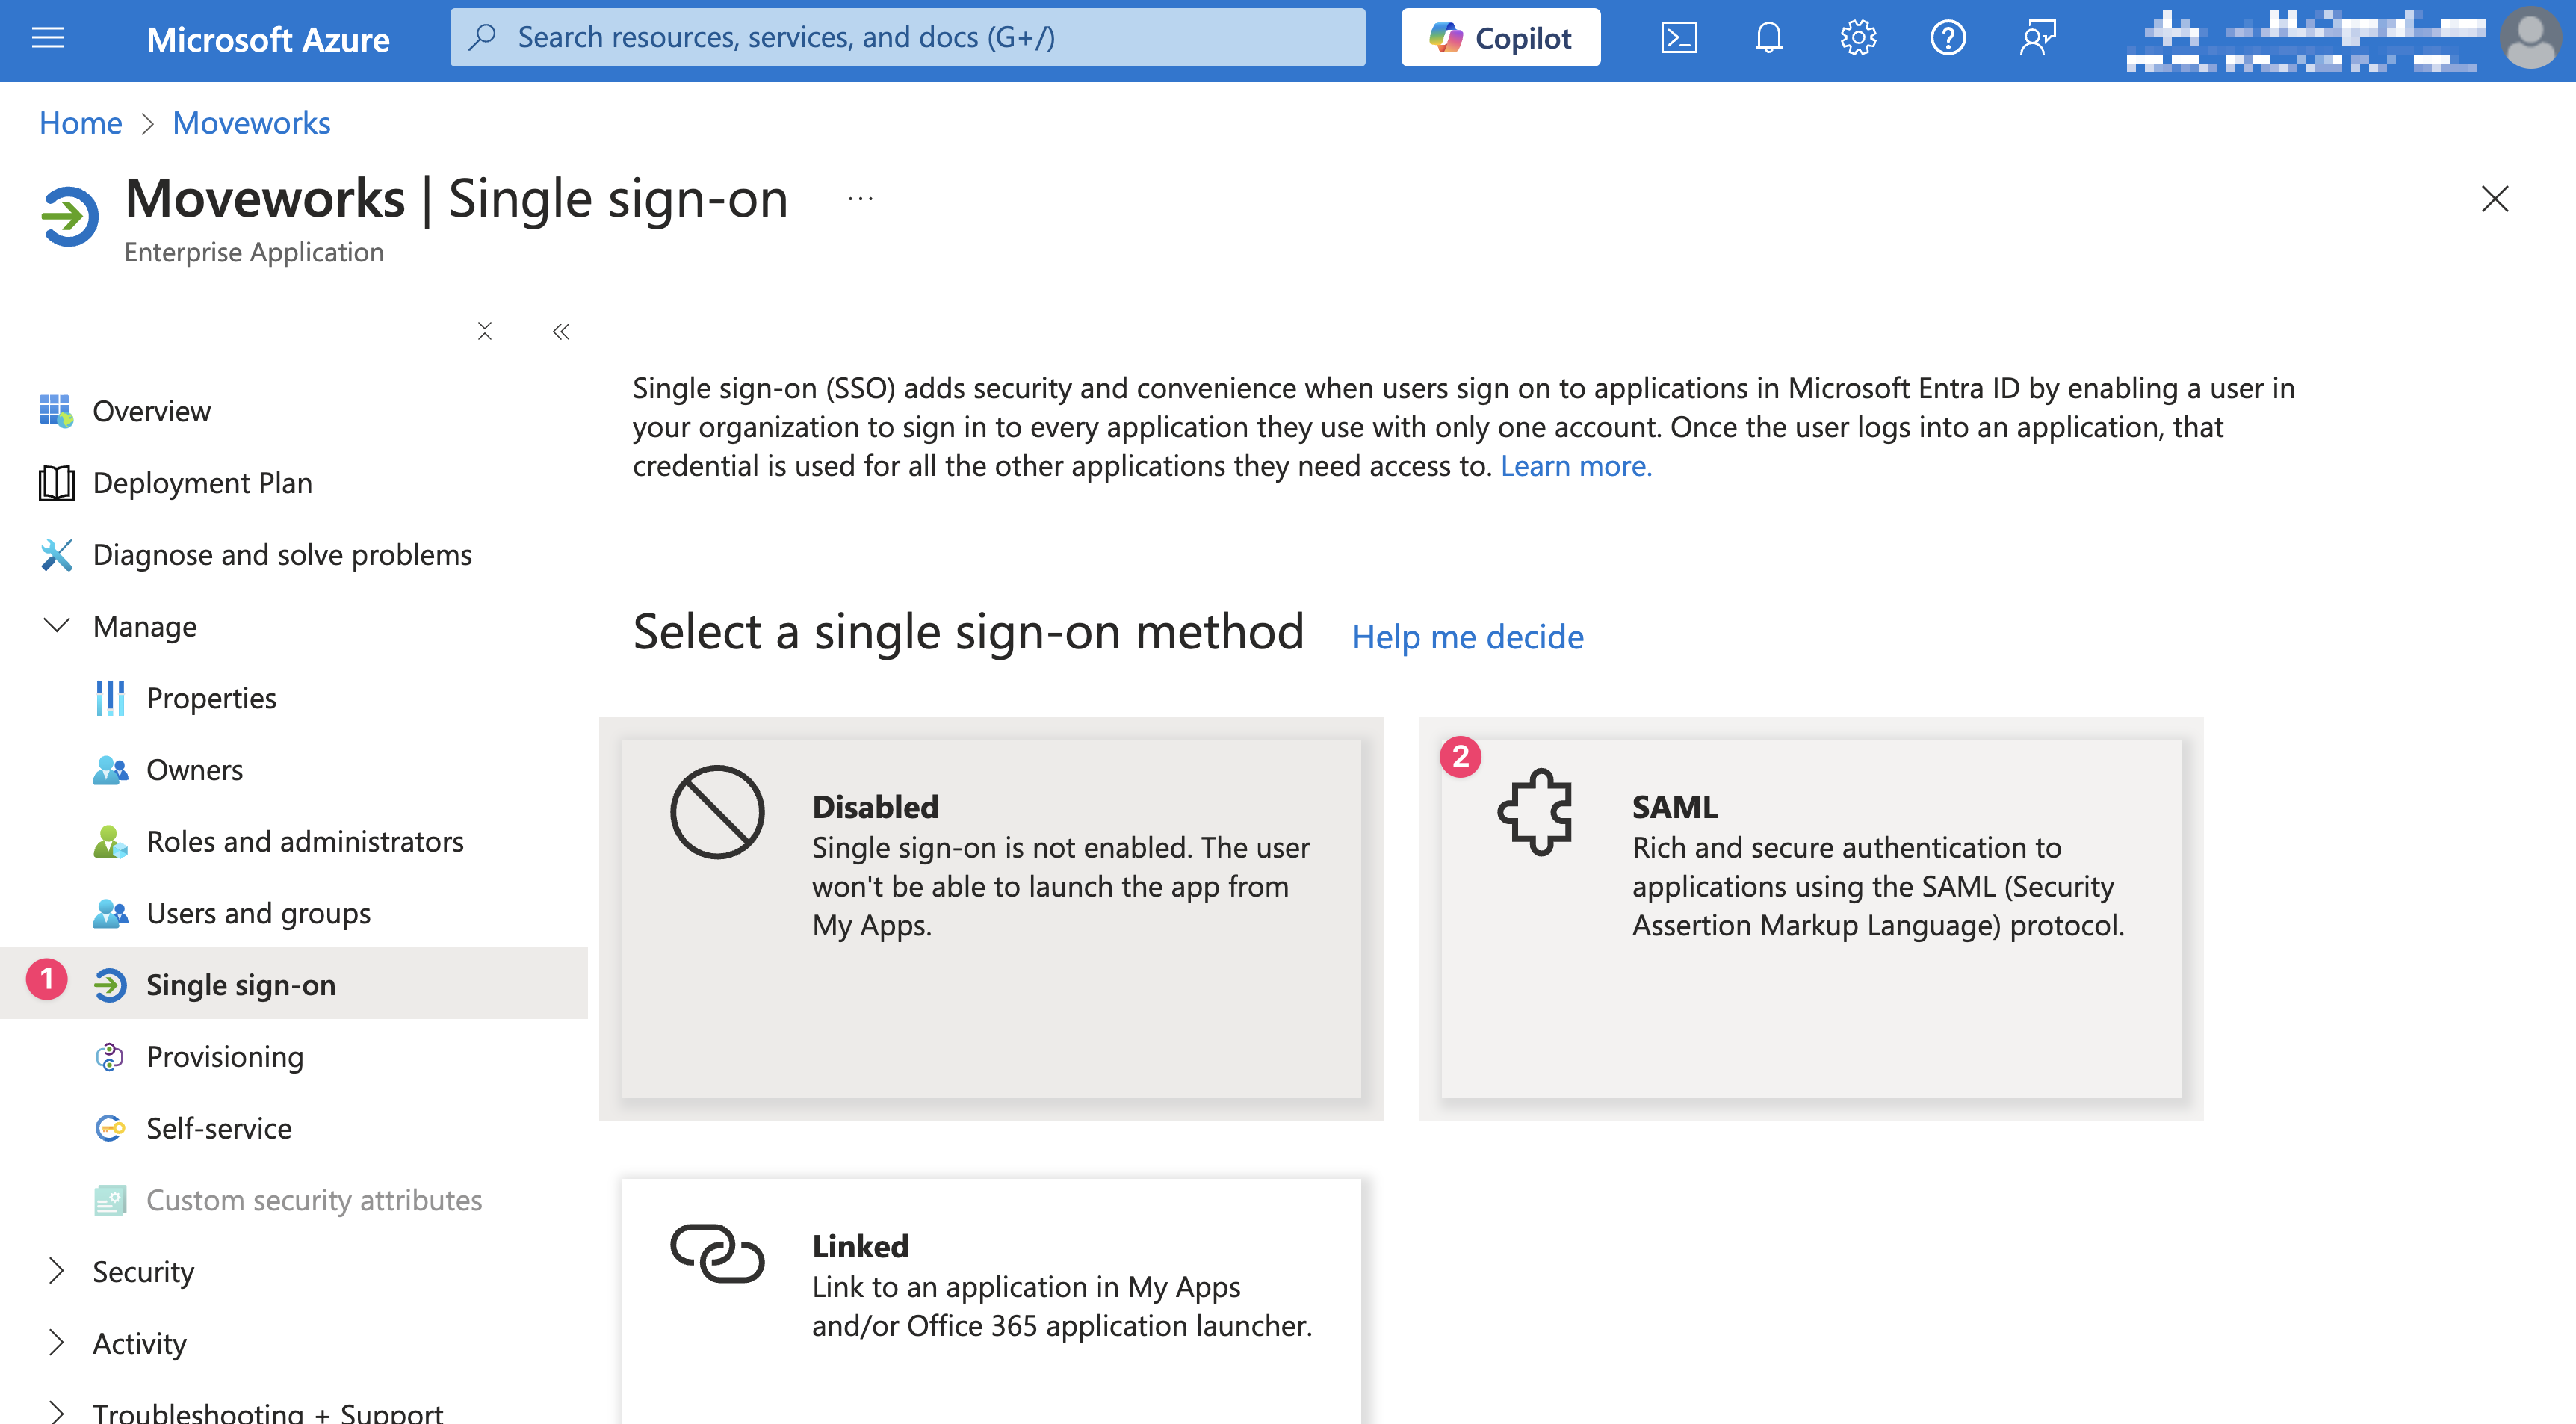
On the Single sign-on tab select SAML
-
Select Edit for the Basic SAML Configuration (Step 1)
-
Configure your SAML variables using your organization's information and hit Save
- Reply URL:
https://{{subdomain}}.{{data_center_domain}}/login/sso/saml - Sign-on URL:
https://{{subdomain}}.{{data_center_domain}} - Relay State: {{customer_id}}
- Reply URL:
-
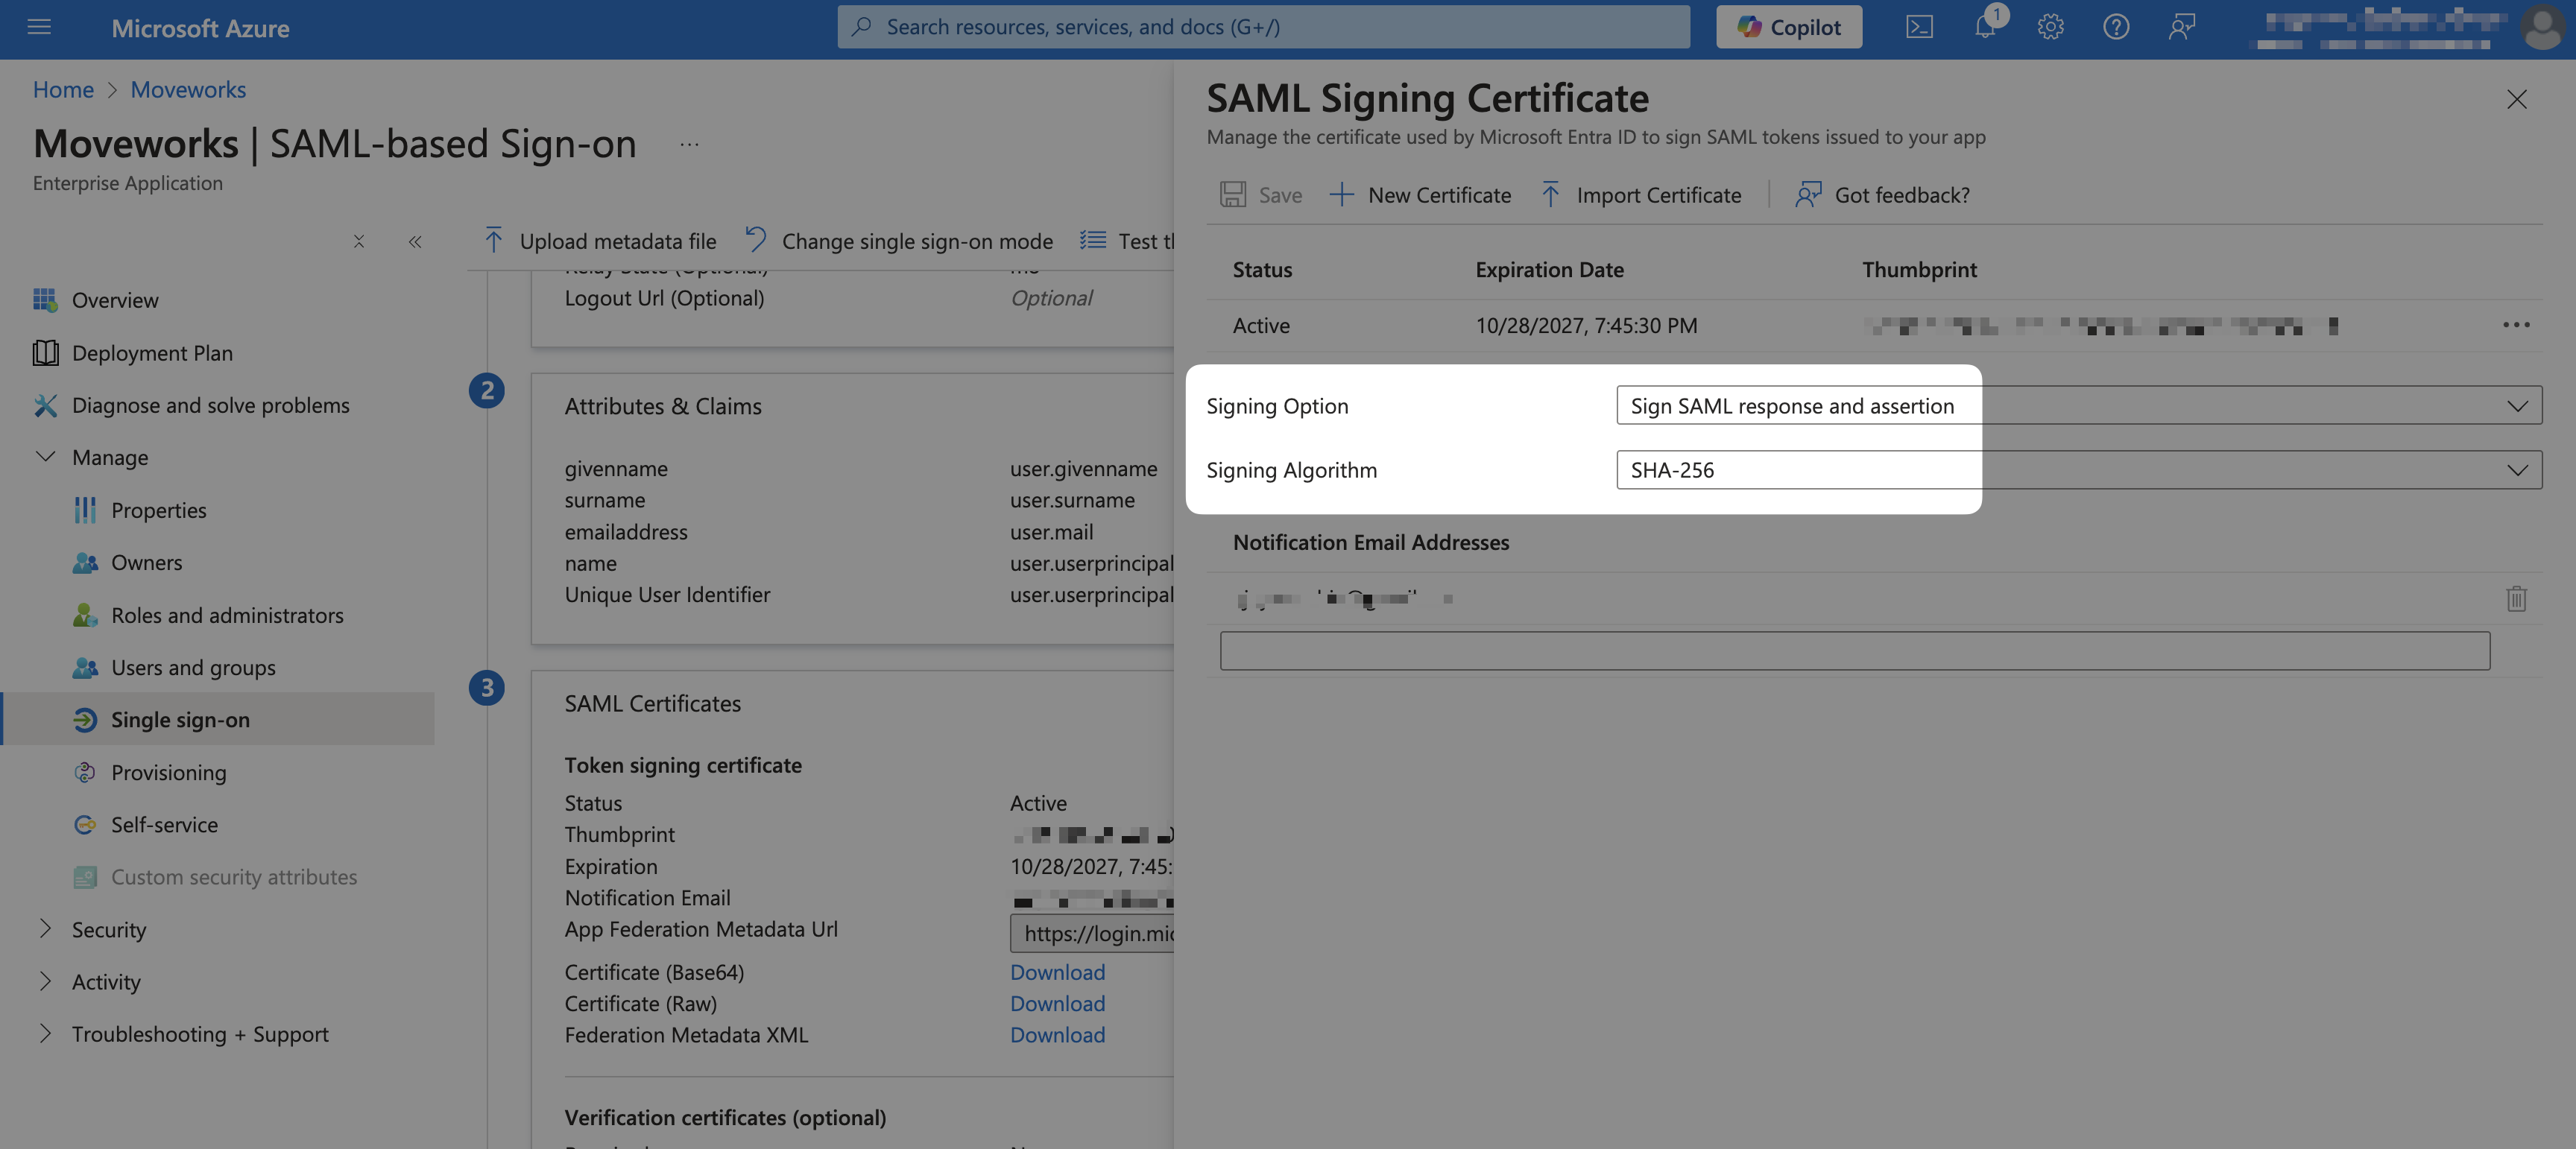
Select Edit for SAML Certificates next to Token signing certificate(Step 3)
-
Validate that the following values are set
- Signing Option:
Sign SAML response and assertion - Signing Algorithm:
SHA-256
- Signing Option:
Enable User Access
-
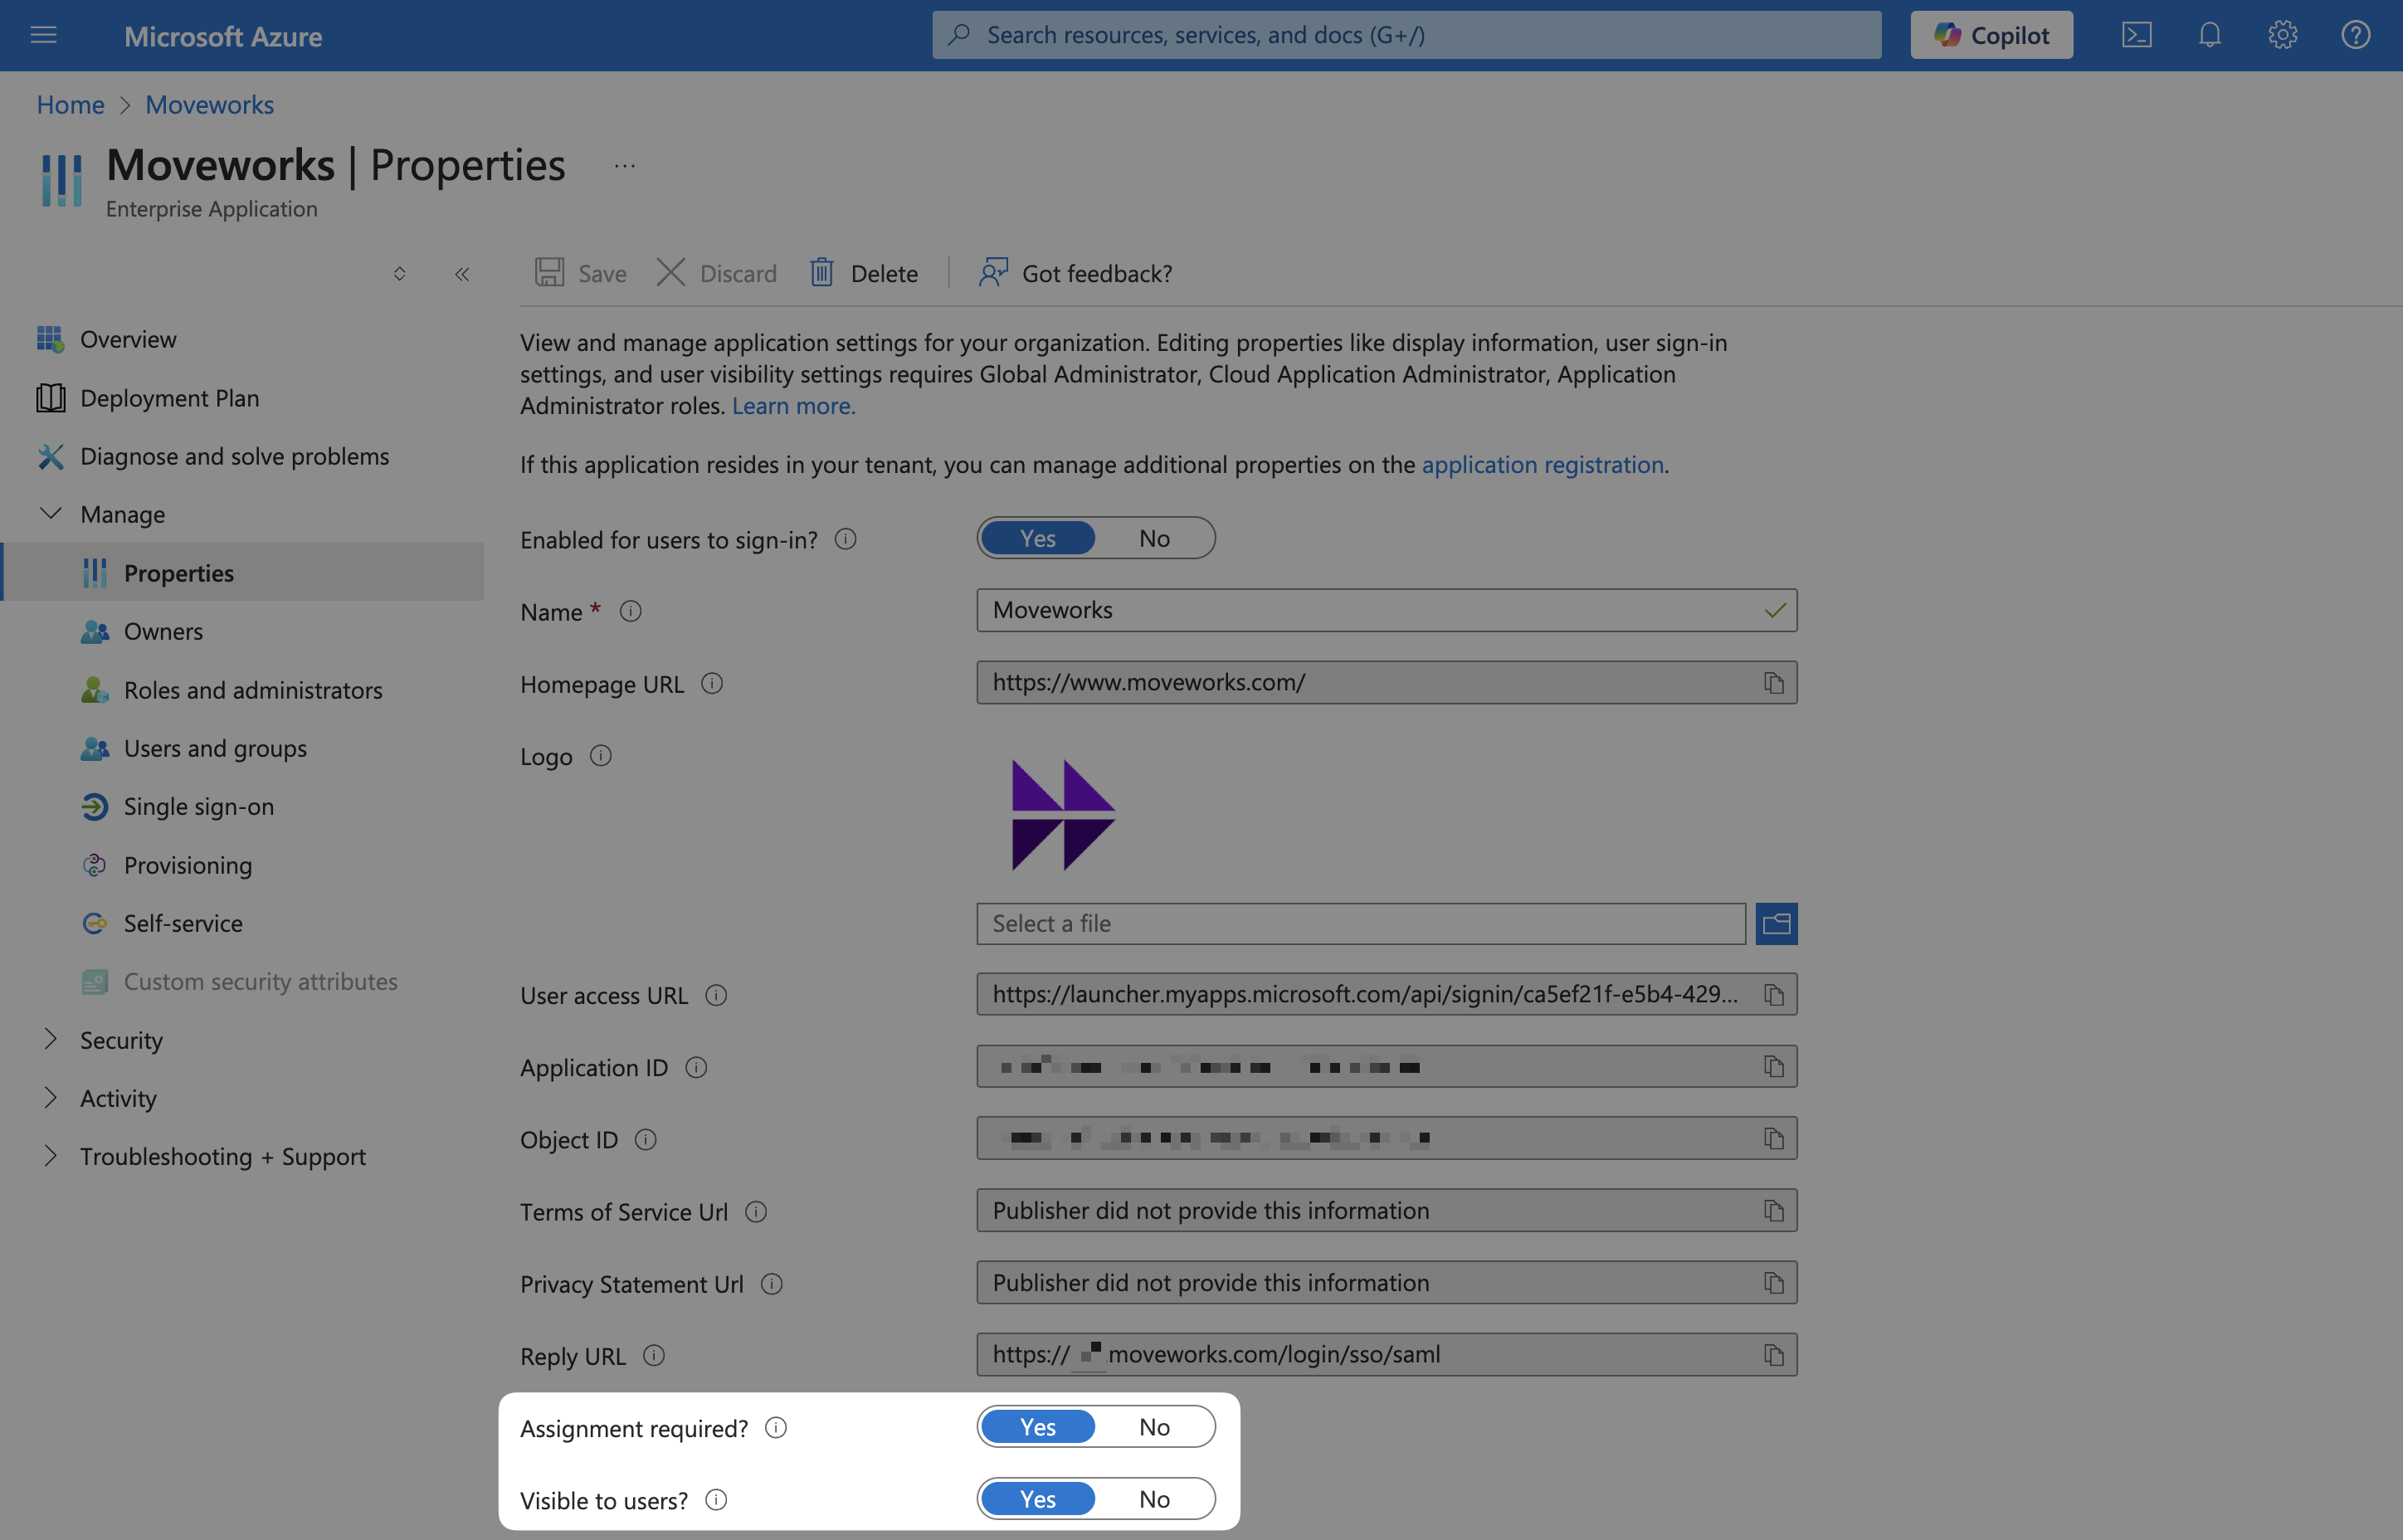
Go to Manage > Properties
-
Make sure that your app is visible to users.
Add SAML Configuration in MyMoveworks
-
On the Single Sign-on tab, download your X.509 Certification (
x509_certificate) by clicking on the Download link next to Certificate (Base64)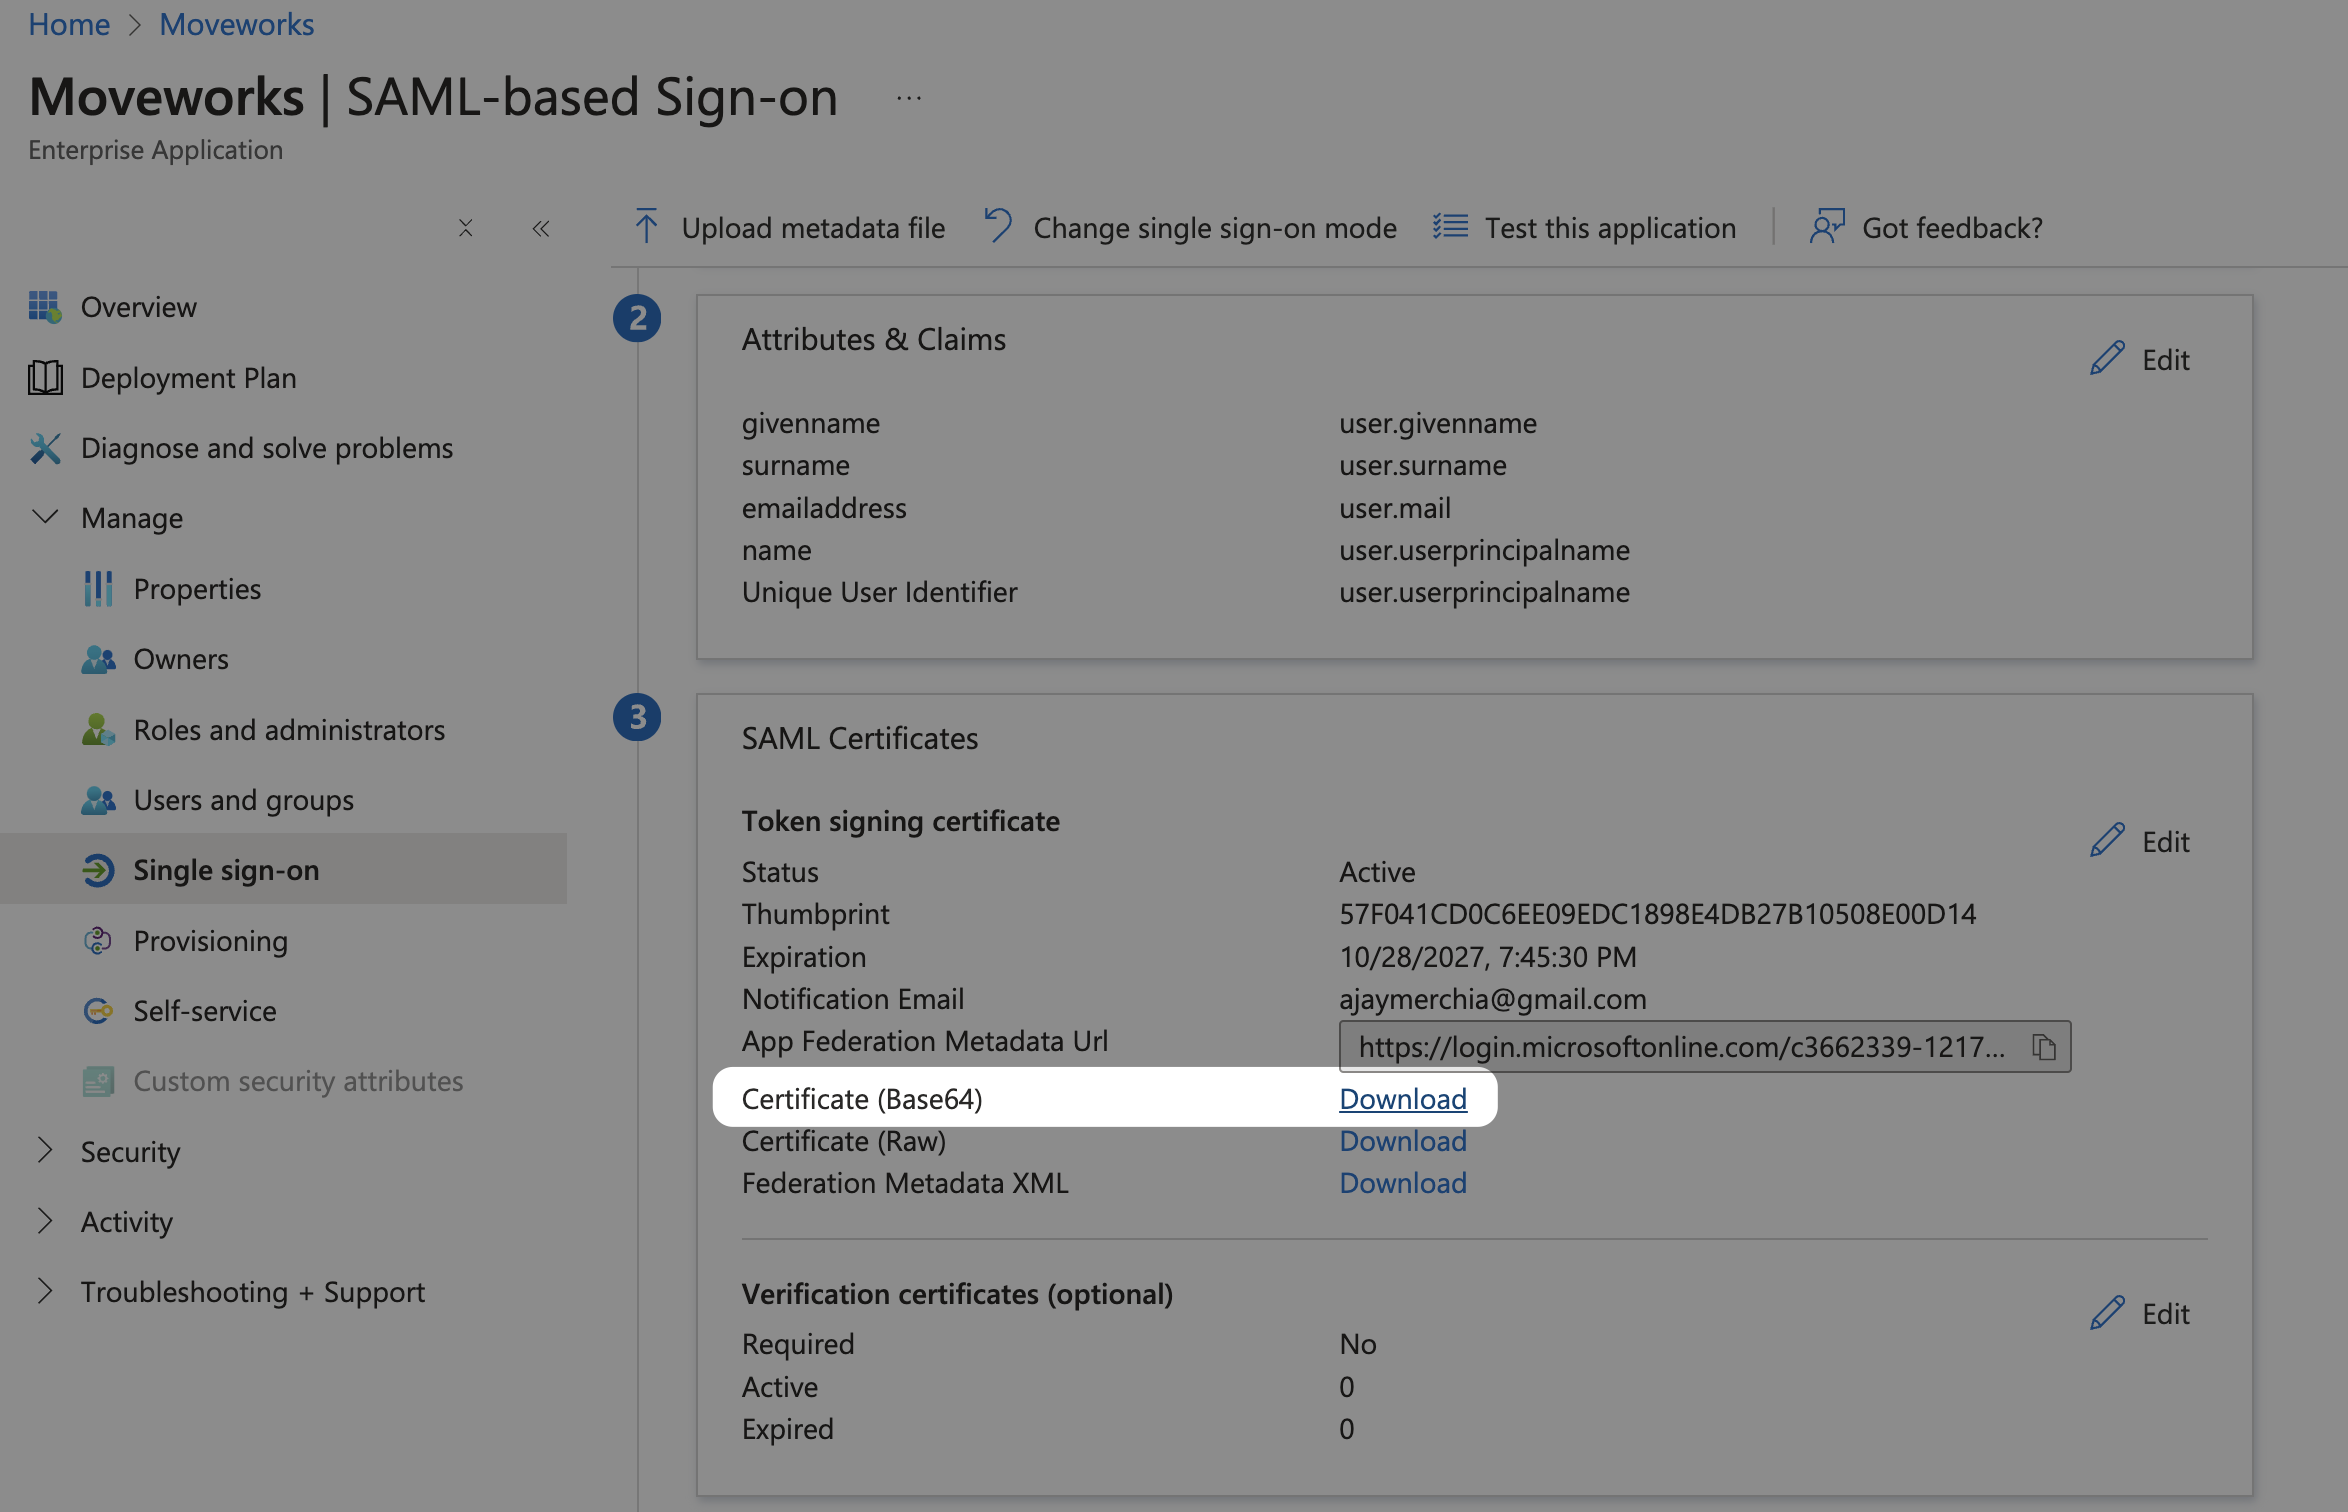
-
Open the downloaded file in a text editor. It should look something like this.
-----BEGIN CERTIFICATE----- **************************************************************************** **************************************************************************** **************************************************************************** **************************************************************************** **************************************************************************** **************************************************************************** **************************************************************************** ********************* -----END CERTIFICATE----- -
From Step 4 in the Single Sign-on tab, copy the remaining SAML variables
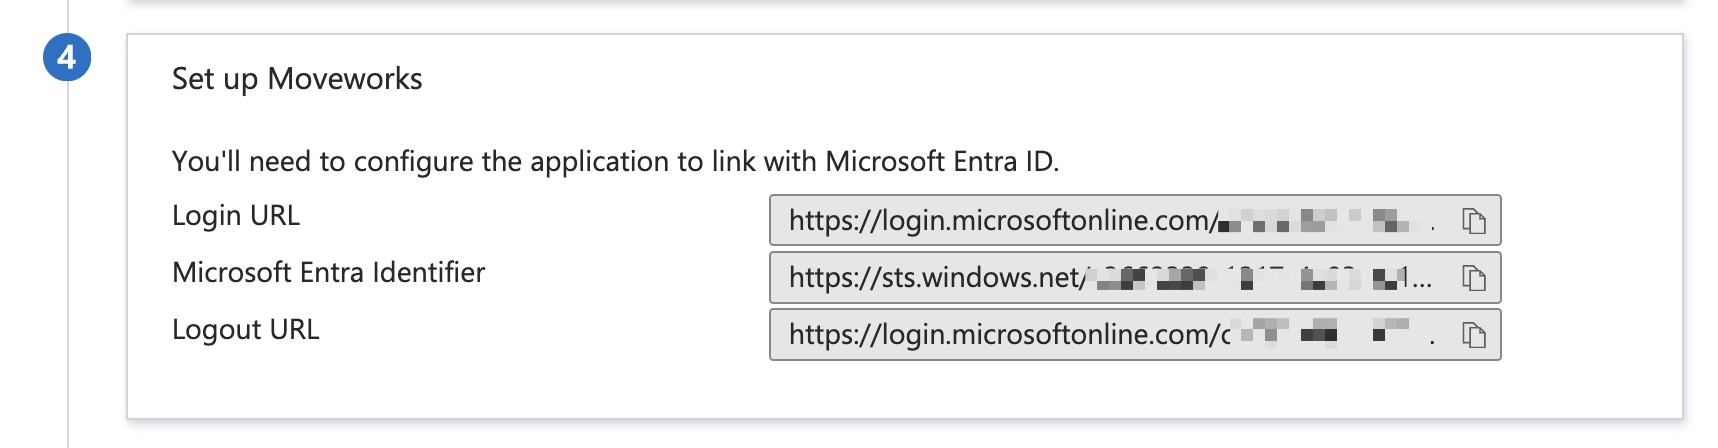
- Login URL: this is your
idp_url - Microsoft Entra Identifier: this is your
idp_issuer
- Login URL: this is your
-
Navigate to SSO Settings in MyMoveworks
-
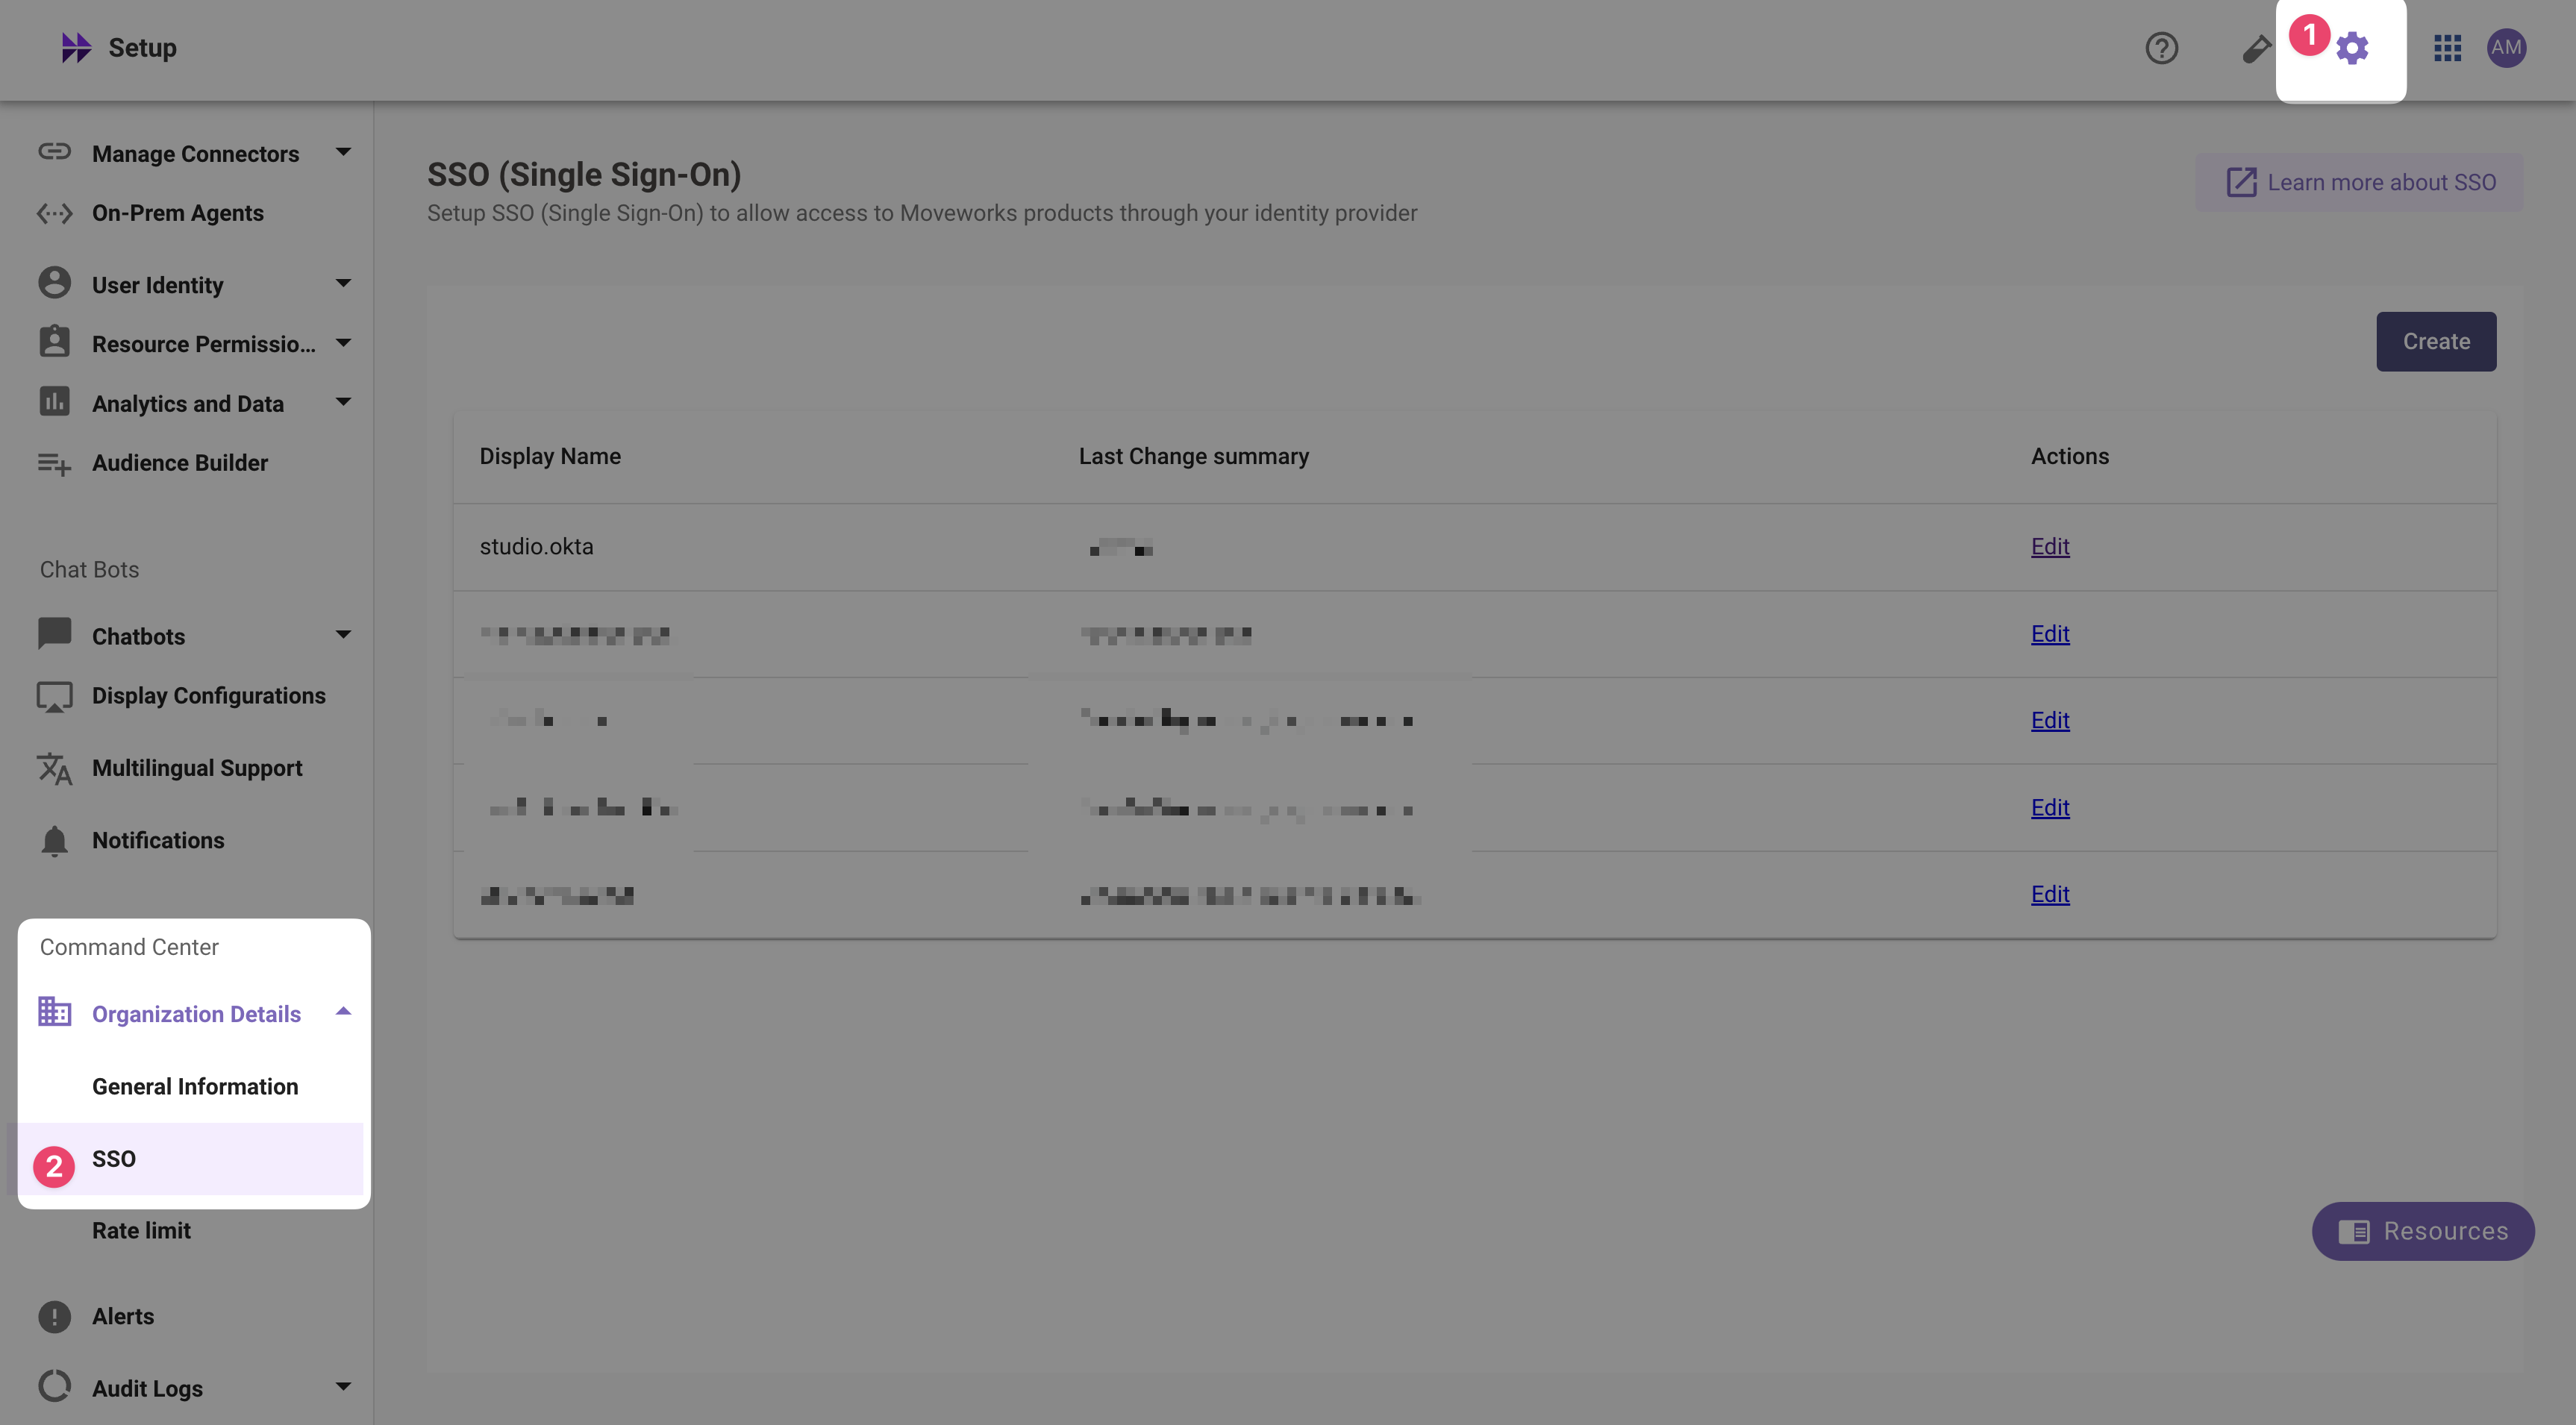 If you already see a
 studioconfig, edit it. Otherwise, choose Create. -
Add your configuration using the values you've noted above
- Moveworks Product:
studio - Select Connector:
ms_graph - Authentication Protocol:
SAML - IDP Sign On / SSO URL:
{{idp_url}}(From Step 3)- e.g.
https://login.microsoftonline.com/c3662339-1217-4e03-ac19-15f31311cca7/saml2
- e.g.
- IDP Issuer:
{{idp_issuer}}(From Step 2)- e.g.
https://sts.windows.net/c3662339-1217-4e03-ac19-15f31311cca7/
- e.g.
- IDP Public Certificate:
x509_certificate(From Step 1)
- Moveworks Product:
-
Click Submit.
-
Wait a few minutes, then attempt to log into your instance at
https://{{subdomain}}.{{data_center_domain}}
Updated 5 months ago