Creating a Microsoft App Registration for Moveworks
Moveworks Microsoft Graph Access - via App Registration Only Method
This guide will walk you through the process of setting up a Microsoft App Registration for Moveworks for purposes of accessing the Microsoft Graph API. You will need to capture the following information for configuring Moveworks
- Microsoft Graph App ID
- Microsoft Graph Secret
Follow the below mentioned steps to create an app and provide appropriate permissions
- Navigate to https://portal.azure.com and select Create an App registration
- Type a name for the App Registration

- Add the required application permissions, this is typically User.Read.All, but clarify with your Implementation team if other permissions are needed.
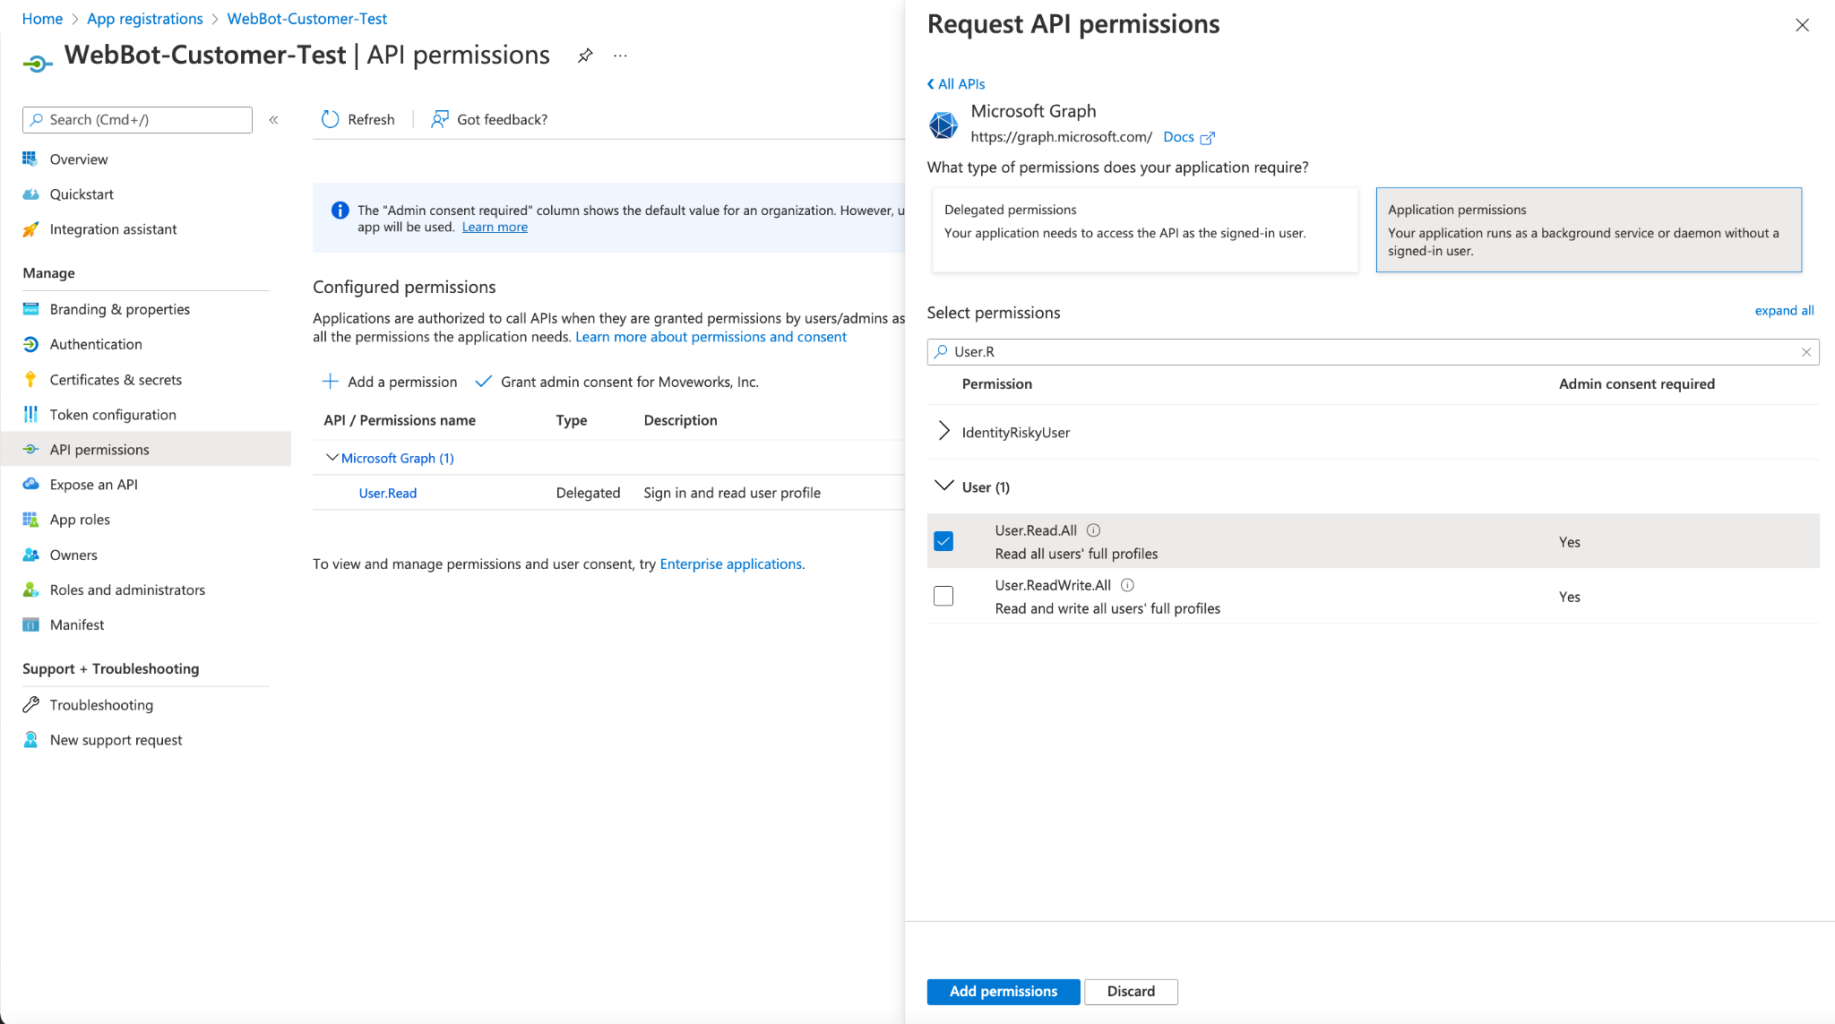
Note: It is required that the permissions are granted as Application Permissions
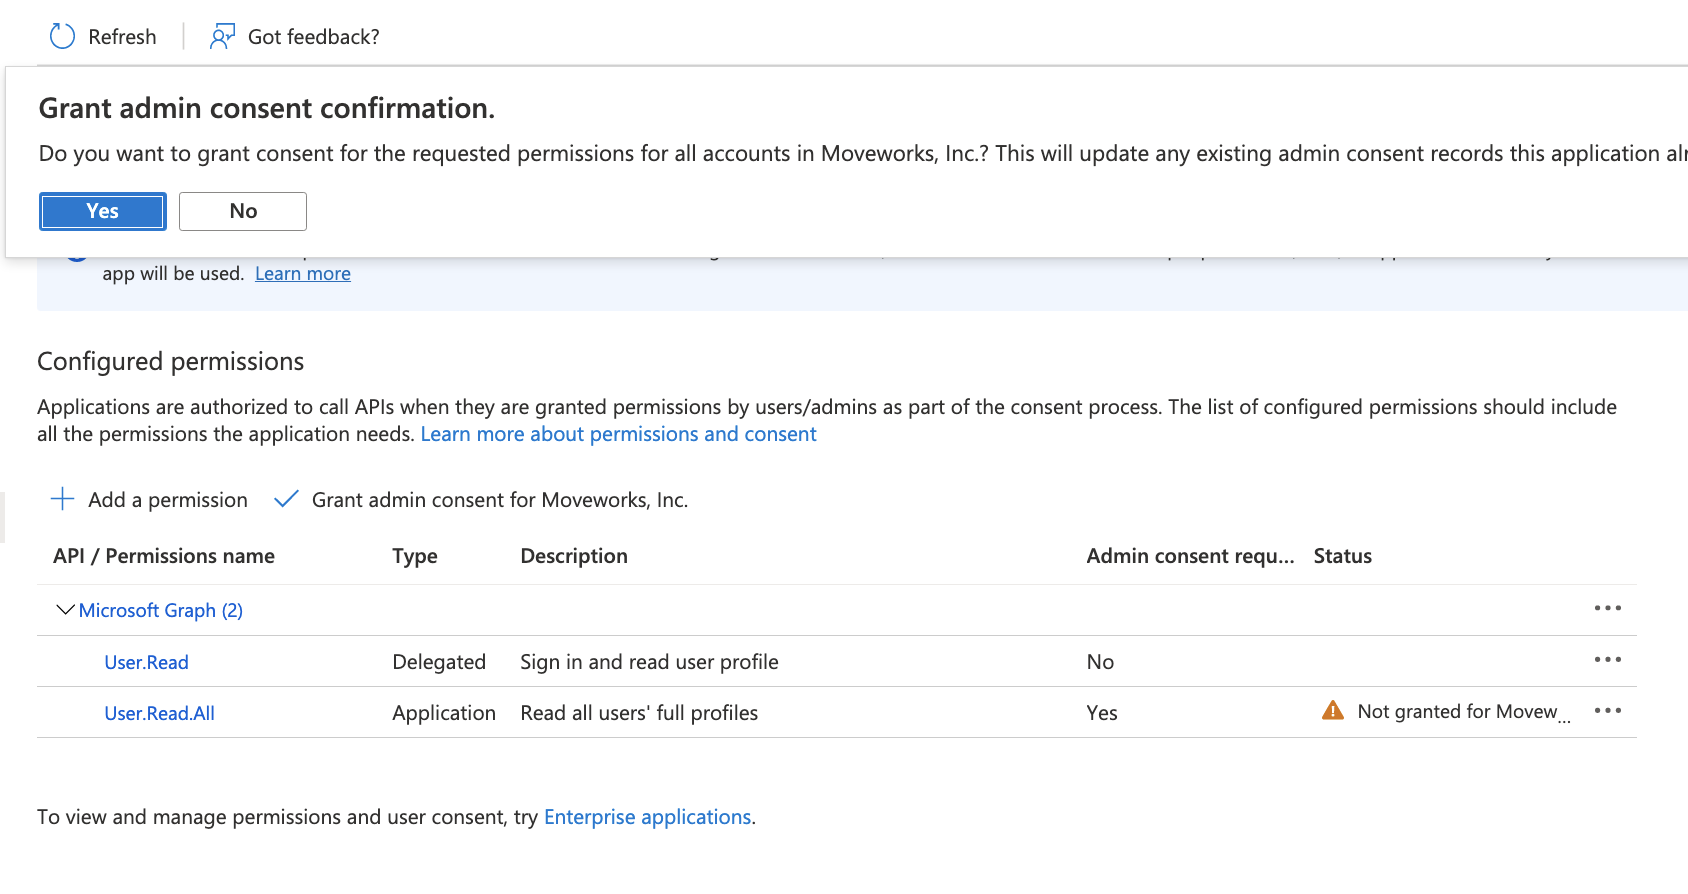
- Once you have added the permission, Select Grant Consent, and make sure you click Yes, and consent to the permission.
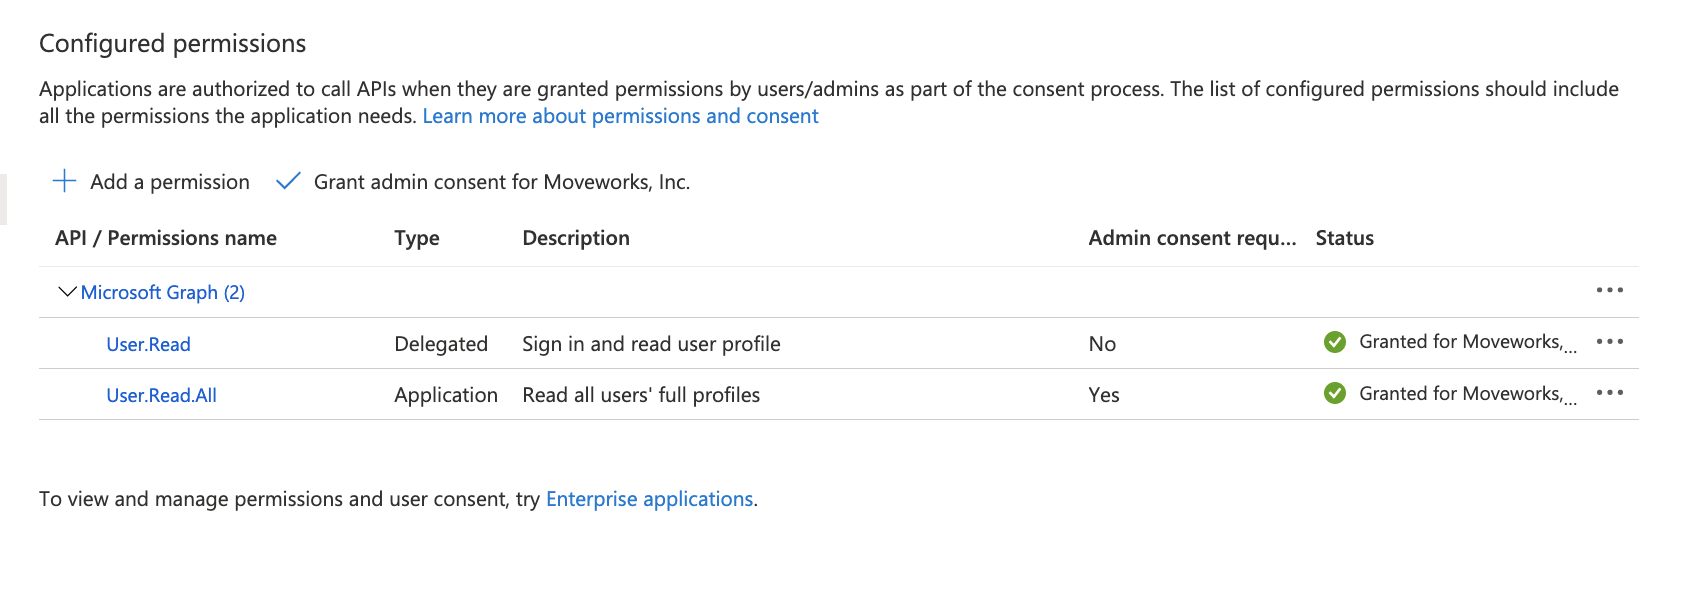
- After adding consent, you should see green check marks for the application permissions you selected.
- Create a new secret
- Once you have the App ID, and secret, complete the steps below to create the connector in Moveworks Setup.
Creating the Connector in Moveworks Setup
- Navigate to Connectors and Select Microsoft Graph:
- Go to Moveworks Setup (or the admin portal) > Core Platform > Manage Connectors > System Connectors.
- Click on Create New, search for and select the Microsoft Graph Connector.
- Click Next: Add Creds.
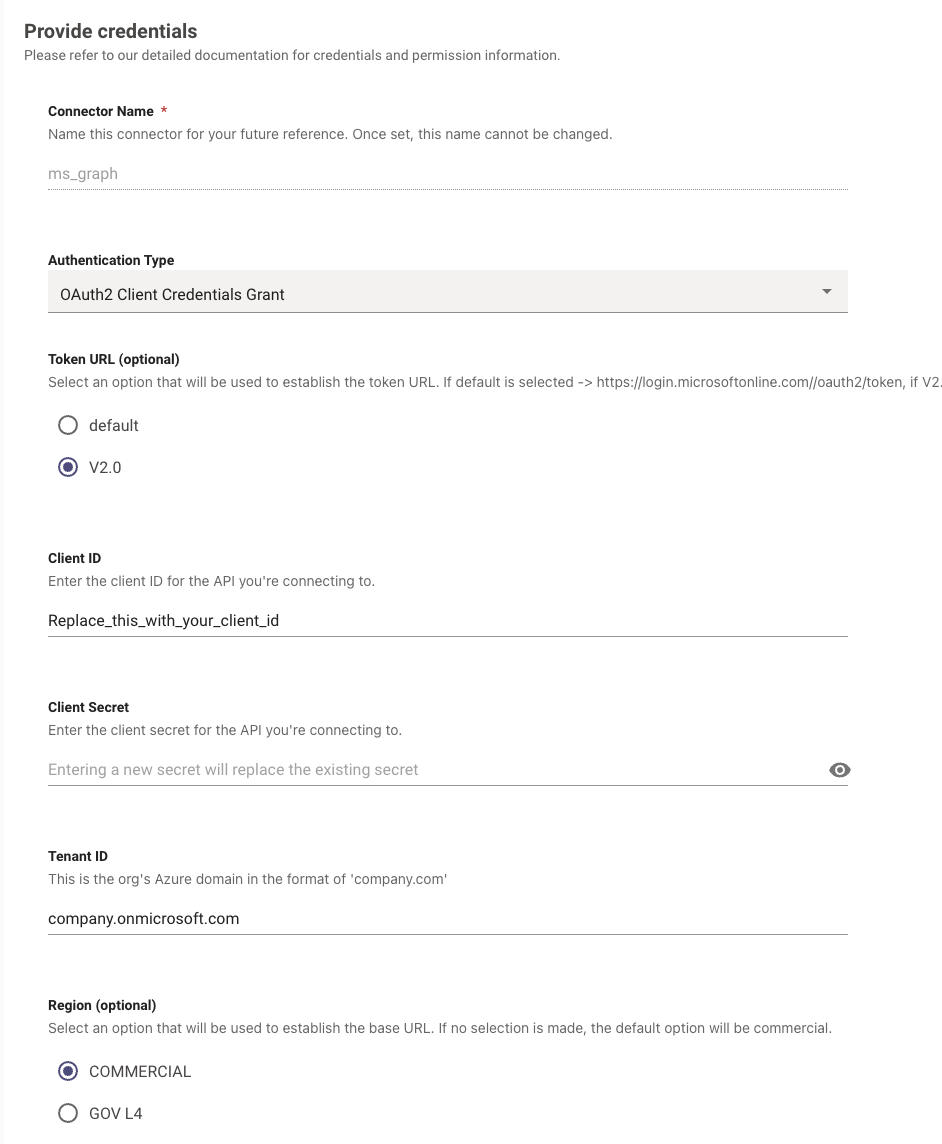
- Enter Connector Name and Base URL:
- Provide a descriptive Name for the connector (e.g., ms_graph_groups or ms_graph_files).
- Set the Base URL for the Microsoft Graph API, which is typically https://graph.microsoft.com/v1.0/.
- Configure OAuth 2.0 Client Credentials:
- Select OAuth2 as the Authentication Type.
- Choose Client Credentials as the OAuth2 Grant Type.
- Input the Client ID, Client Secret, and Tenant ID you previously obtained from your Azure AD App Registration. Client ID is your App ID that you created in the steps above.
- Save the Connector and Validate:
Updated 4 months ago