Salesforce Access Requirements
Why do we need access to your Service Cloud Instance ?
The client created in your Service Cloud instance will perform create, update operations on behalf of end users as well as notify end users on Case related updates.
The Moveworks Service interacts with your Salesforce platform so that the bot can:
- monitor tickets for autonomous resolution
- identify end users/employees
- create tickets for issues that require an agent's attention
- reach out to an employee when a Salesforce ticket needs the employee's attention (via ticket comments)
- load Salesforce Knowledge articles so the bot can serve them to employees
Access Requirements
The Moveworks Connected App and dedicated service account in Salesforce allows the Moveworks service to read and update tickets, read users, and KB articles.
Read only access is needed for the following objects in your Salesforce environment:
- Contact
- Knowledge__kav (if applicable)
Read/write access is needed for the following objects in your Salesforce environment:
- Case
- CaseComment
Authentication
This integration leverages a server-to-server integration using OAuth 2.0 JWT Bearer Flow. A private key/certificate pair will be created. The private key will be encrypted within the Moveworks backend, to sign the JWT claim generated by Moveworks. The certificate file will be uploaded to the Salesforce Connected App in order to file will be uploaded to Salesforce to validate the signed JWT assertions.
Setup Overview
After setup is complete, provide the following information to your Moveworks CS team:
- Consumer Key
- Consumer Secret
- Service Account Email
- Service Account Password
- Service Account First name and Last name
- Private Key (.key file)
👉🏻 Provide ALL of the above to your Moveworks Customer Success team via secure encrypted email.
Setting up JWT Bearer Flow (server-server)
Process Walkthrough
-
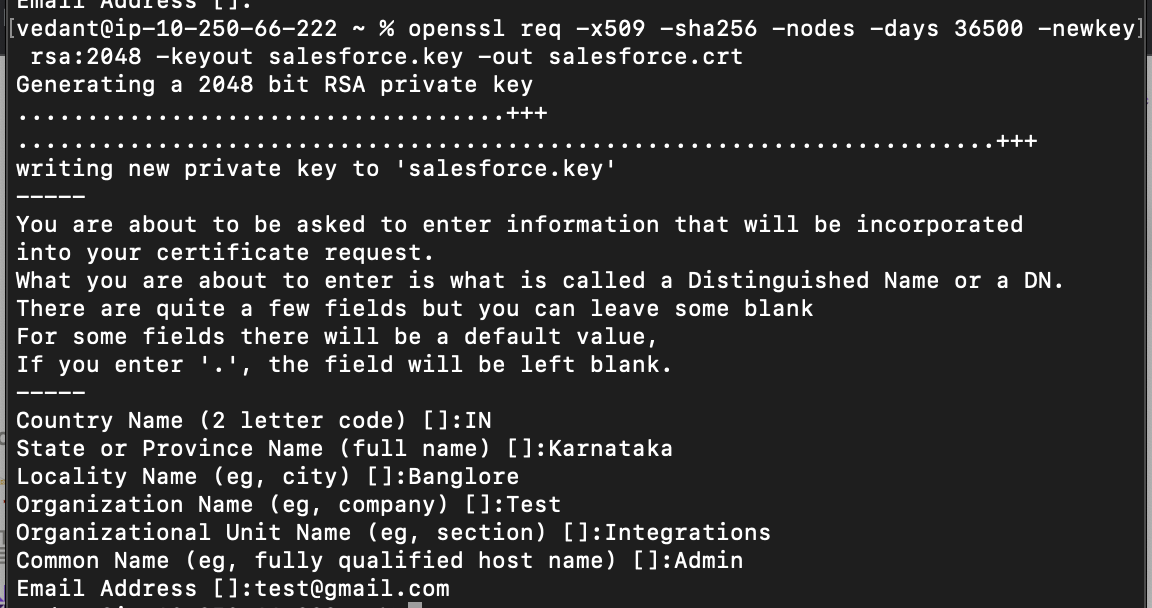
Create an RSA x509 private key/certification pair
openssl req -x509 -sha256 -nodes -days 36500 -newkey rsa:2048 -keyout salesforce.key -out salesforce.crt
The private key (.key) will be used to sign the JWT claim generated by Moveworks. The certificate (.crt) will be uploaded to Salesforce to validate the signed JWT assertions.

-
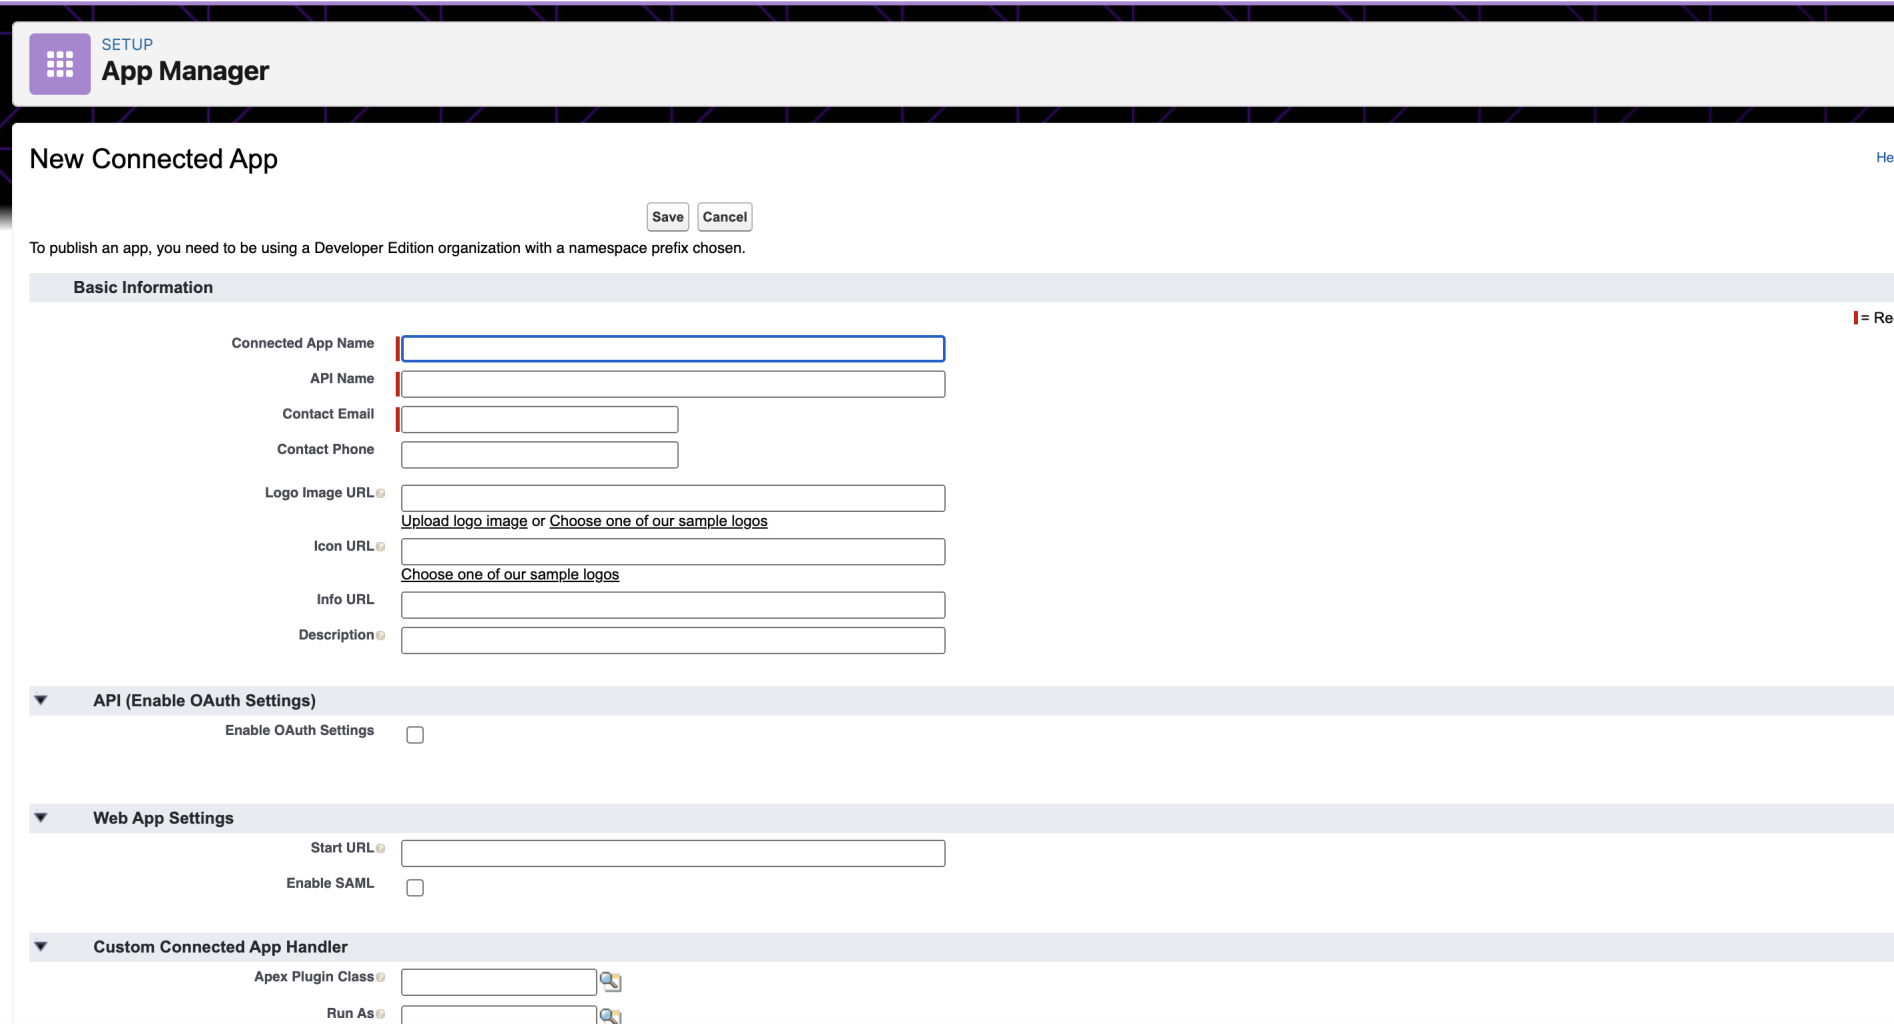
Create Connected App in Salesforce

- Under Setup > App Manager and click
New Connected App - Fill basic info: {Connected App Name:
Moveworks_Server, API Name:Moveworks_Server, Contact Email: [email protected]} - Select enable oAuth settings under API (Enable oAuth Settings) & add {Callback URL: https://login.salesforce.com/}
- Check Use digital signatures. Upload the
salesforce.crtthat was generated in step 1. - Add oAuth scopes to:
- api
- refresh_token, offline_access
- Click Save & Note down the
Consumer Keyand theConsumer Secret - After saving, click
Manage> Edit Policies- In the OAuth policies section, change Permitted Users to Admin approved users are pre-authorized
- In the Session policies section, change Timeout Value to 24 hours
- Click Save
- Under Setup > App Manager and click
-
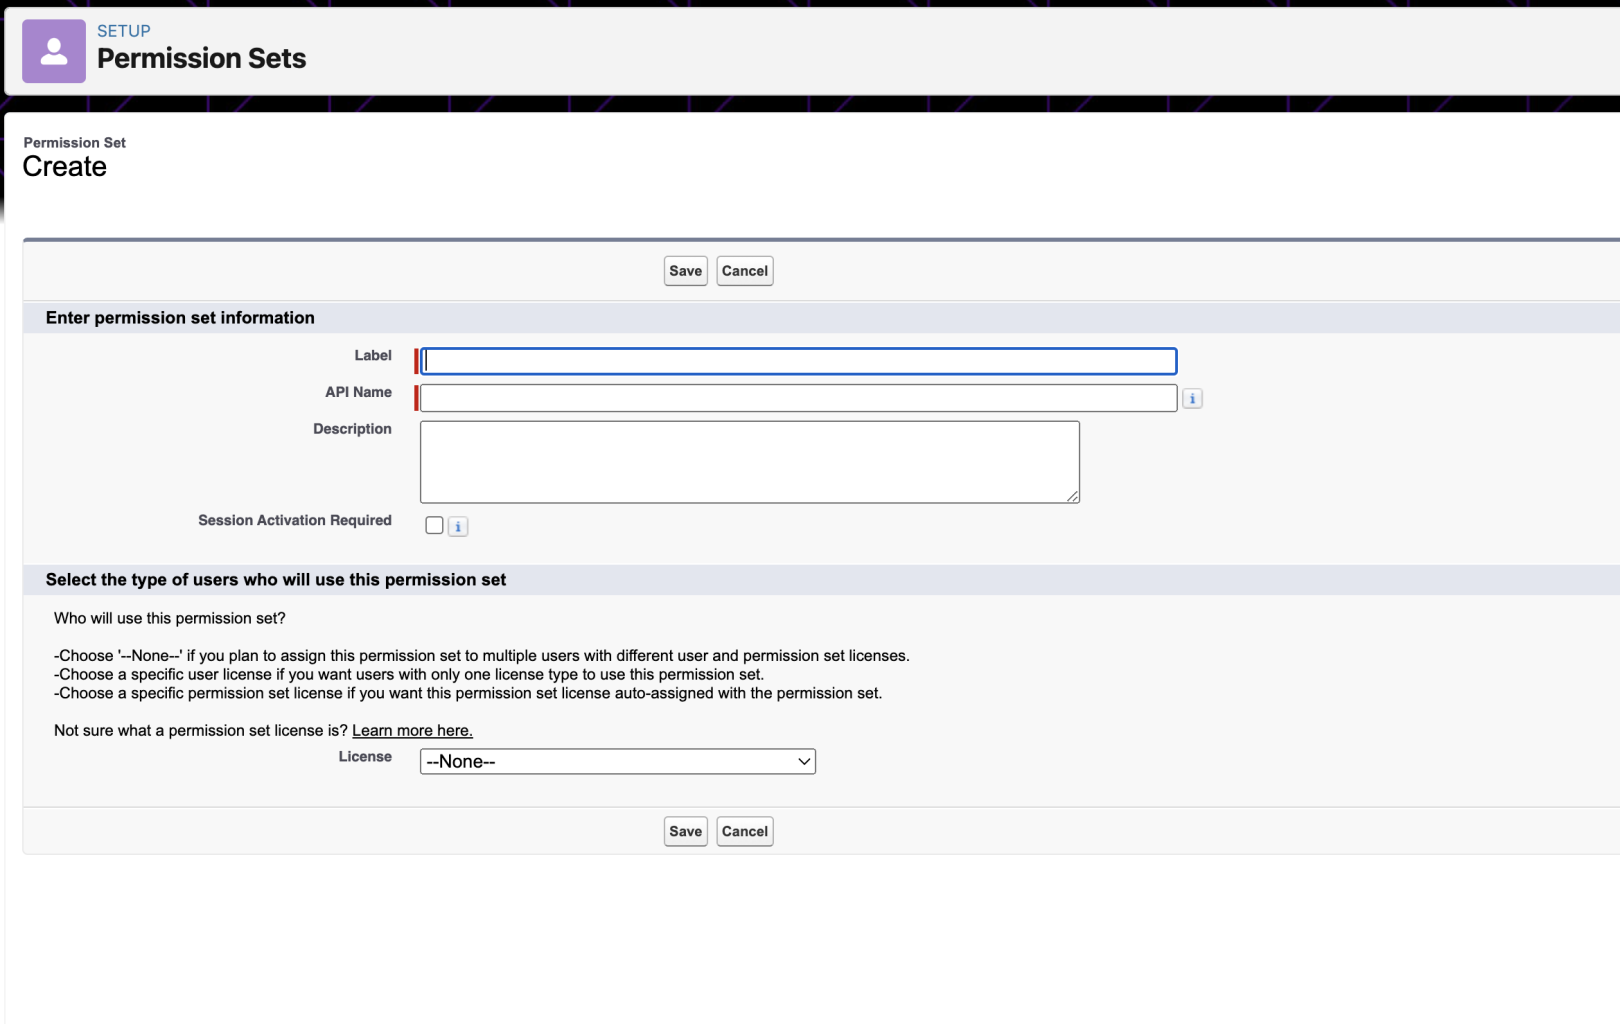
Create a Permission Set to interact with the Connected App

- Navigate to Users > Permission Sets and click on
New - Add
moveworks_connected_appas the Label & Api Names & click Save - Now click on the
moveworks_connected_appPermission Set and click Assigned Connected Apps - Click Edit and add
Moveworks_Serverto list of Enabled Connected Apps & click Save
- Navigate to Users > Permission Sets and click on
-
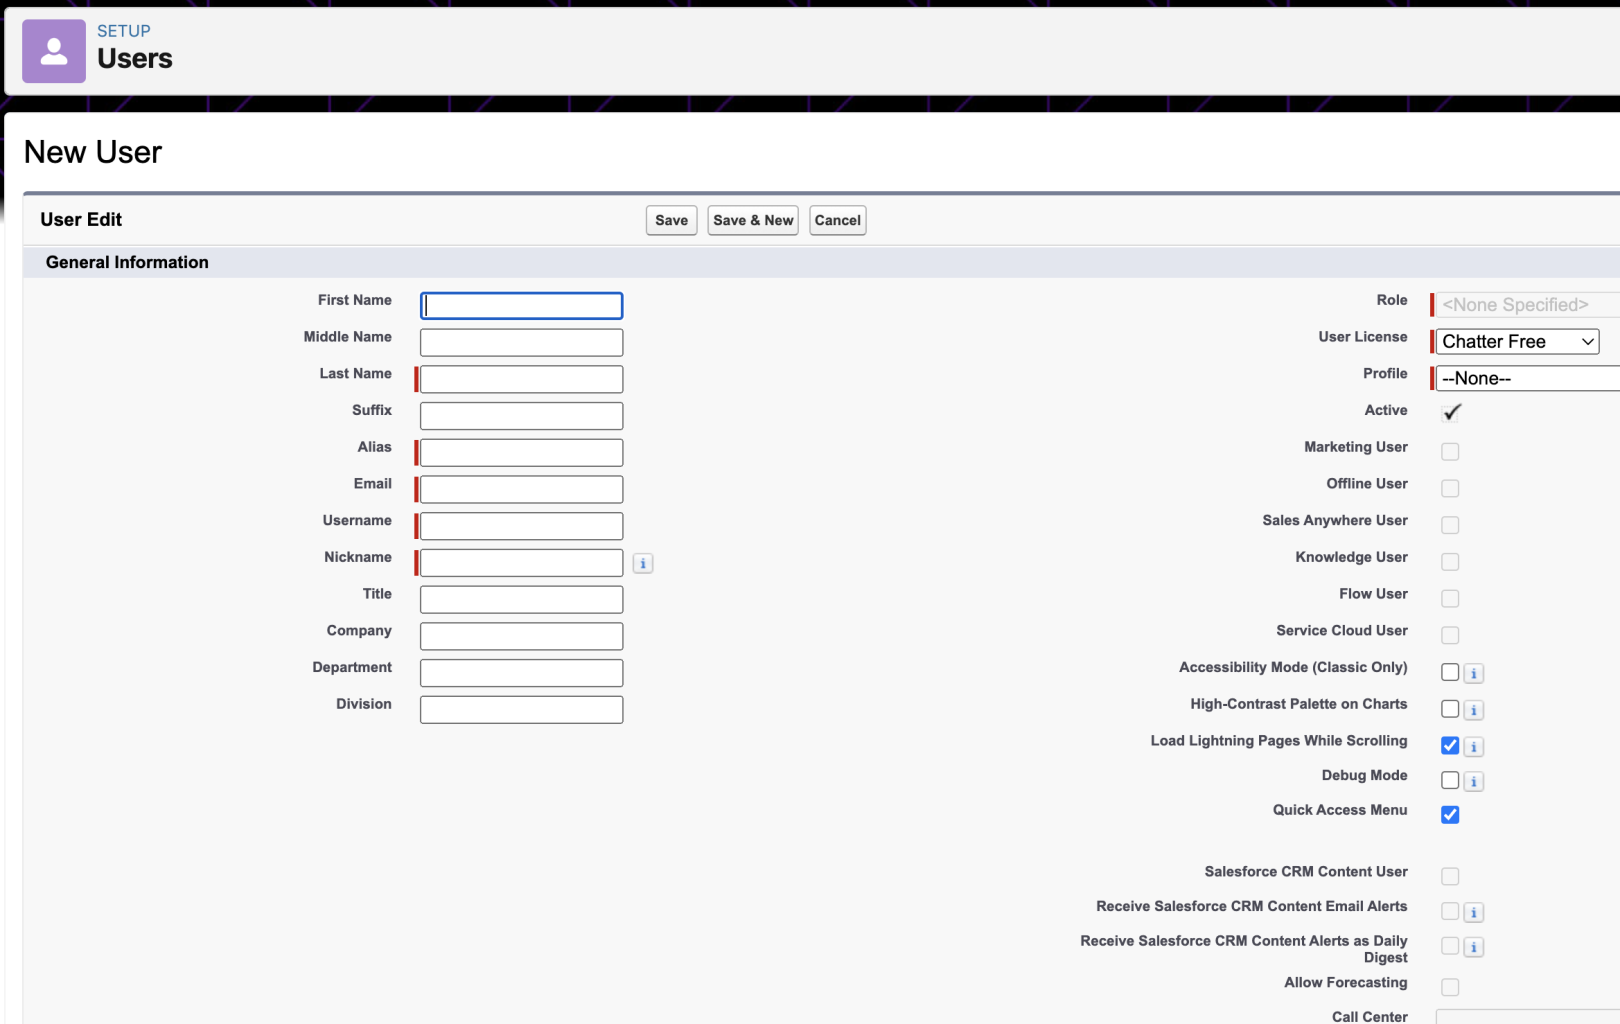
Create New Service Account (if it doesn’t exist)

- Navigate to Users > Users and click on
New User - Enter the following information & click Save:
- Last Name:
Moveworks - Alias:
moveworks - Email, Username & Nickname:
moveworks@{{customer-domain}}.com - Setup role as
Admin(or whatever the customer allows)
- Last Name:
- Navigate to Users > Users and click on
-
Assign our service user the connected app
- Navigate to Users > Users & click on our service user account that was just created.
- Click on Permission Set Assignment and then Edit Assignments
- Now add
moveworks_connected_appto list of Enabled Permission Sets & click Save
-
Edit policies to set admin approved users to preauthorize
- Navigate to the connected app and click on
Edit policies - Set permitted users to Admin approved users are pre-authorized
- Navigate to the connected app and click on
Updated 8 months ago