Quickstart #3: Basic Process Agent
Learning Objectives
This Quickstart guide will walk you through the steps of creating a Process Agent to help users navigate submitting purchase requests. In this guide, you'll get to see a few concepts in action as you learn how to:
- Leverage a Decision Policy to control branching logic in a Conversational Process.
- Use multiple types of Activities in a Conversational Process to handle different tasks.
- Design a Plugin that involves more Slots (with simple Validation Policies).
Prerequisites
- Access to the "Agent Studio" App.
- Completed Quickstart #1: Basic Task Agent.
What you'll build
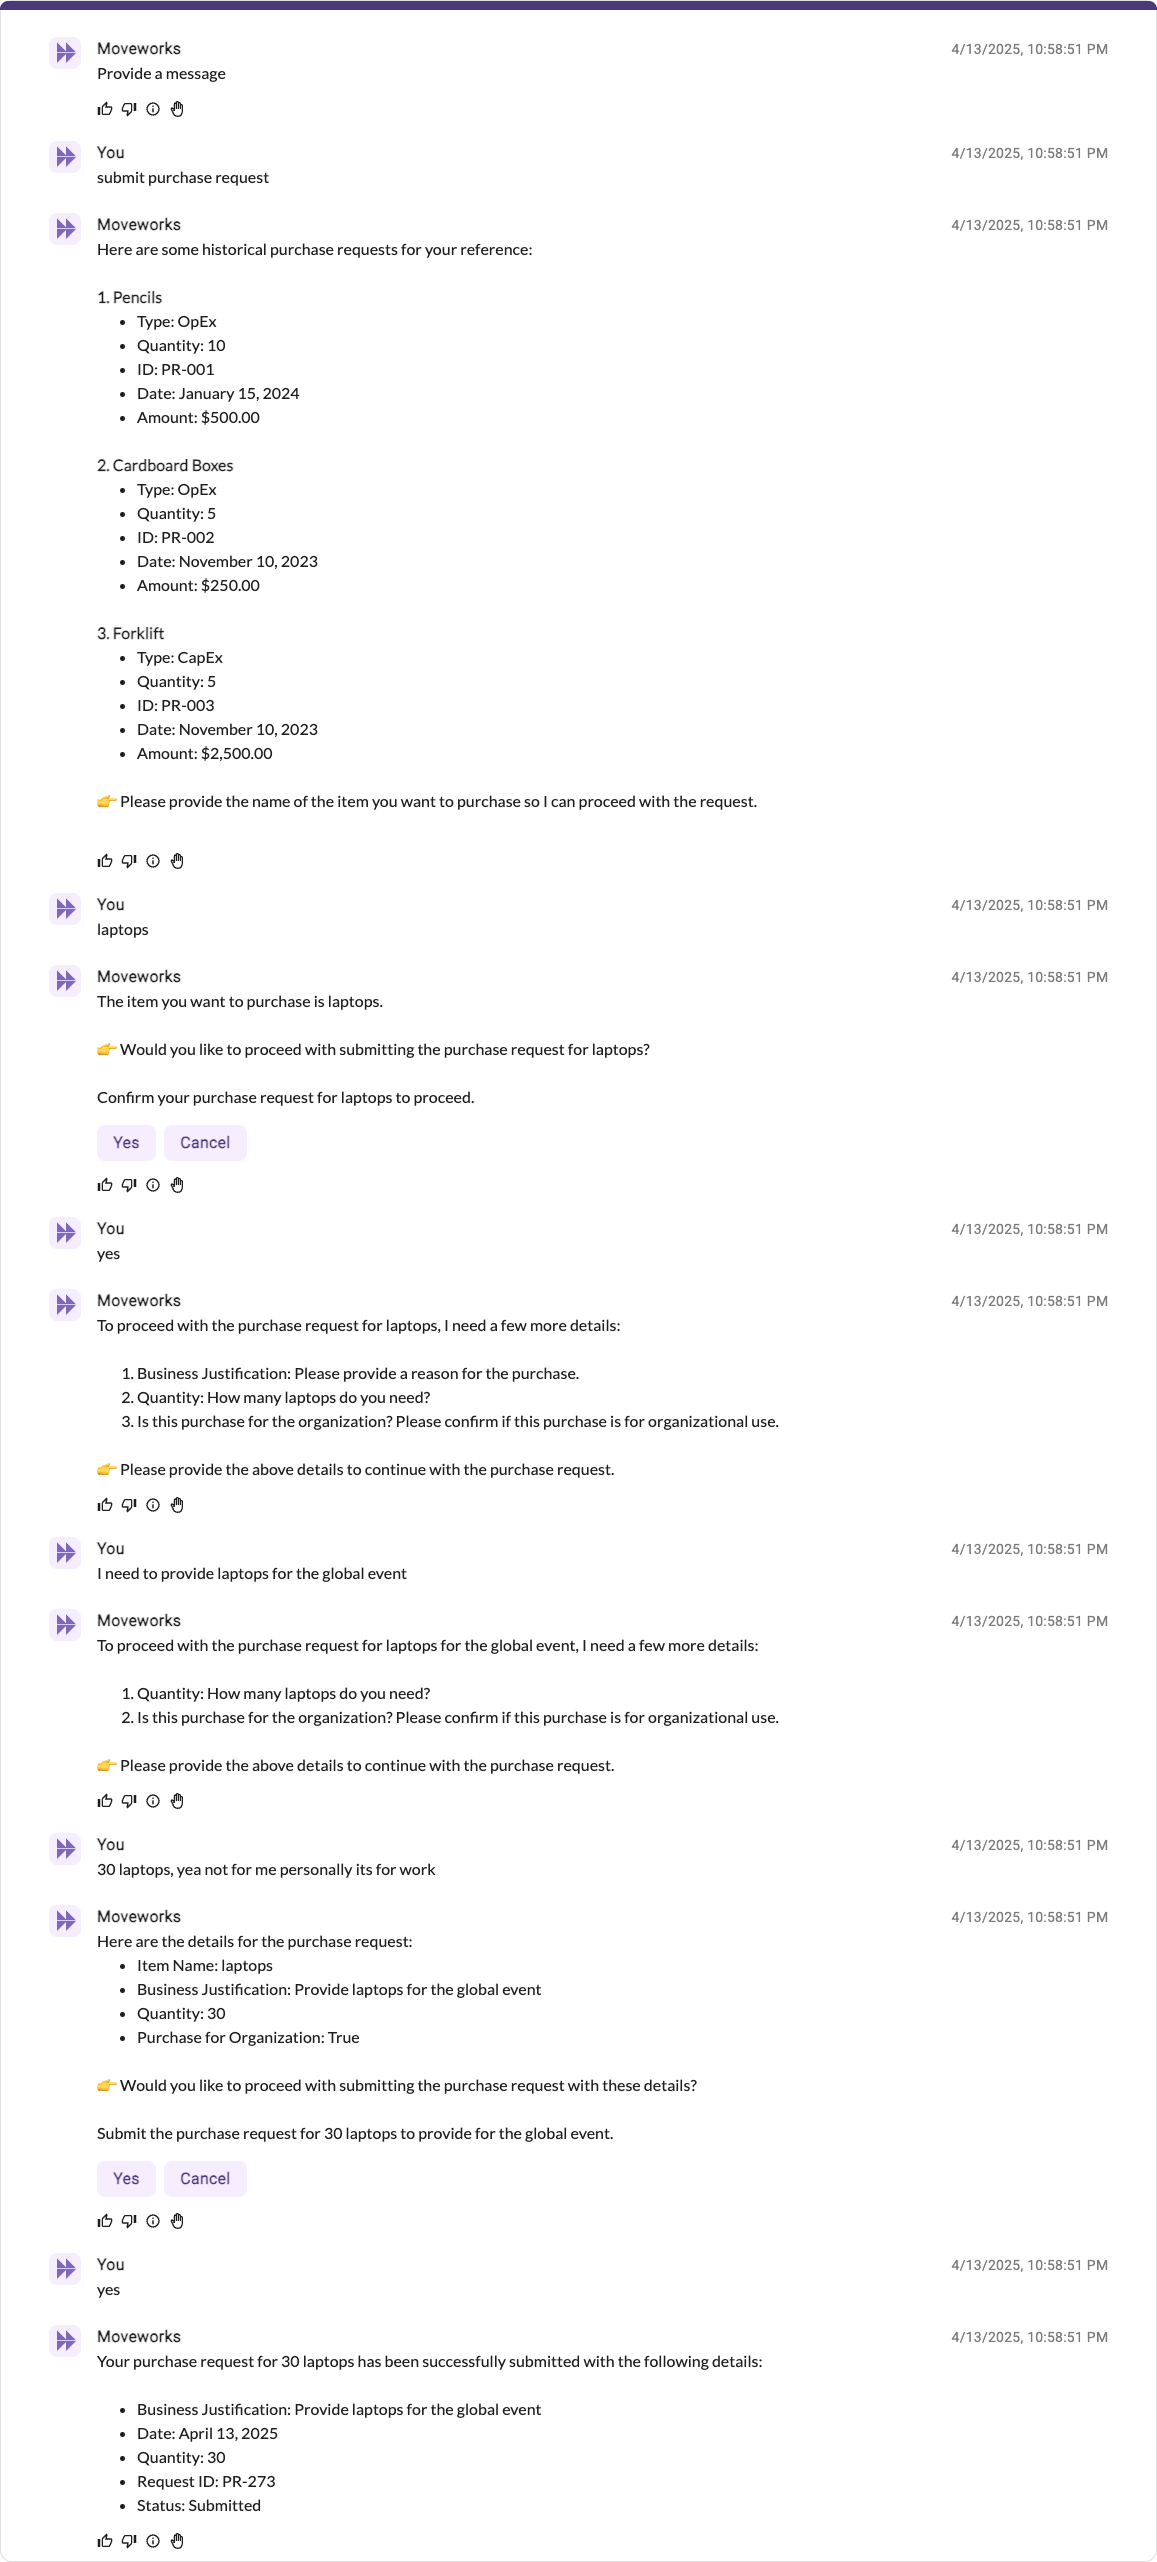
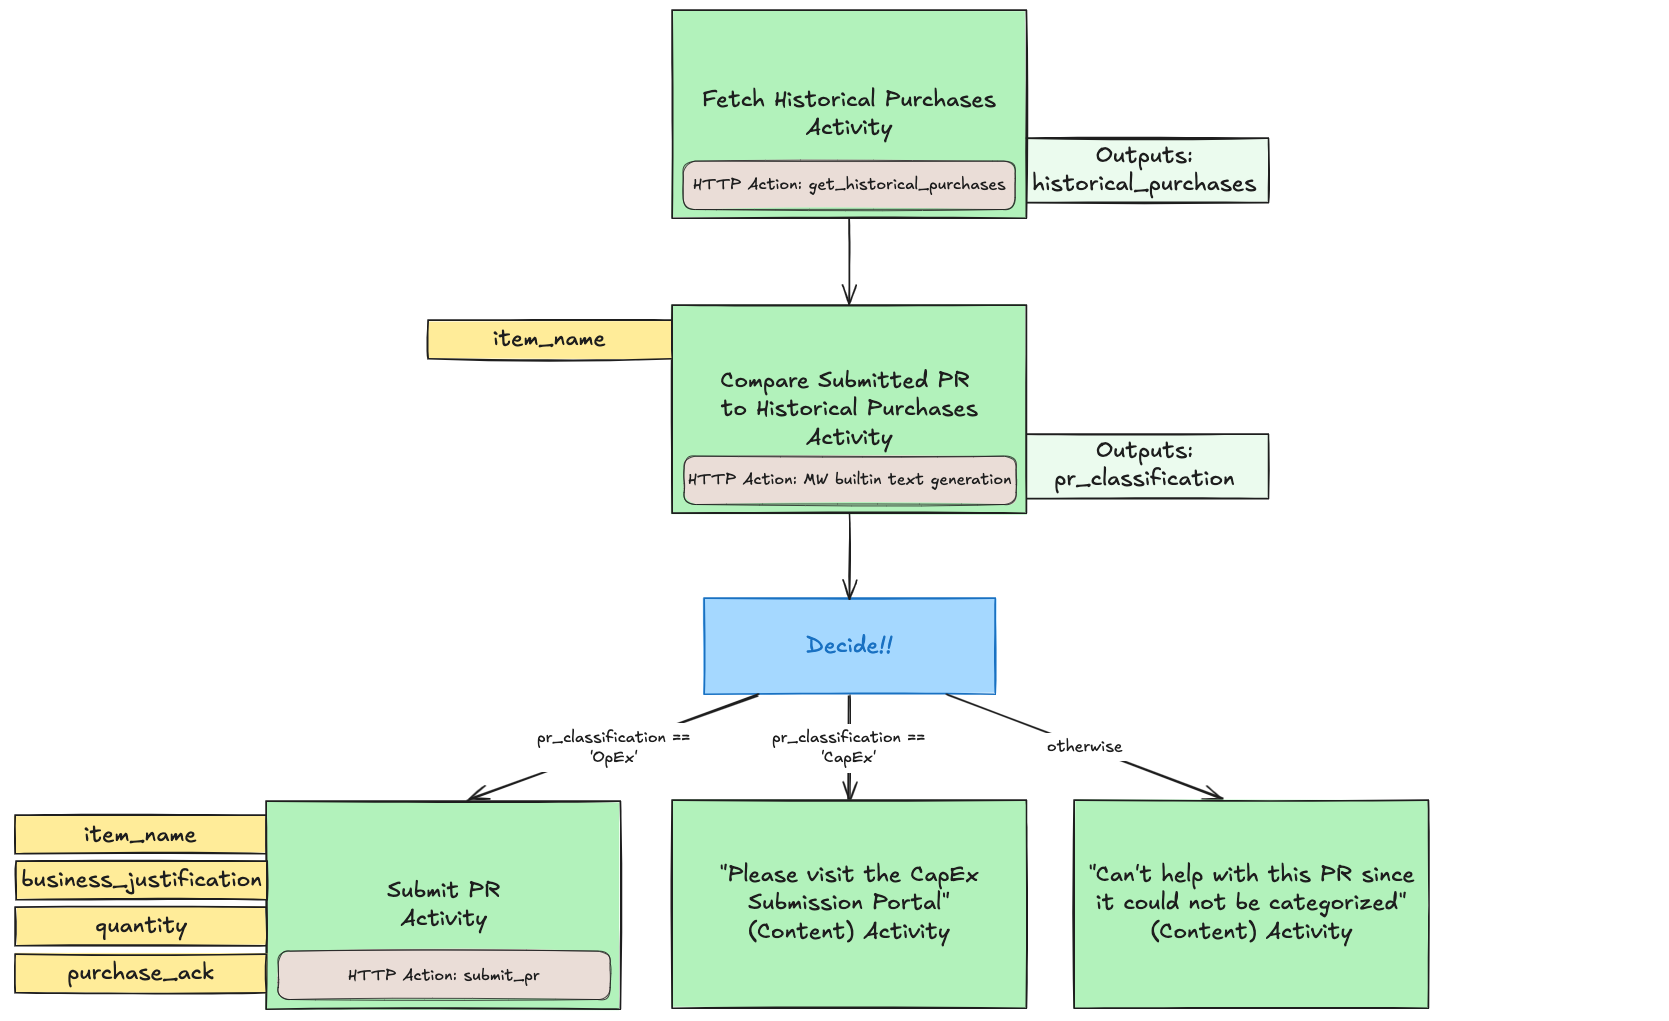
Today, we will be building a Purchase Request (PR) Submission Process Agent. This Agent will ask the end user details about the particular PR they want to submit, compare the details against historical PRs, and either submit it if it can be labeled as "OpEx" or reject it if it's considered "CapEx".
Here is an example of the end-user experience we hope to enable:
In order to build this, here's one way to decompose the process into a Conversational Process, consisting of a few Activities (both Action-based and Content-based), a Decision Policy, and a few Slots to power the data needed in this process:

In this guide, you'll work your way through these main phases:
- Set up 2 (HTTP)Actions: one to fetch historical PRs, and another to Submit a PR.
- Build the Conversational Process, complete with 4 Slots, 5 different Activities, 1 Decision Policy, as illustrated above.
- Add the Conversational Process to your AI Agent by launching a Plugin.
Let's get started!
Phase 0: Generate a unique Session ID & Set up your Connector
Import building notes if you are using the Moveworks Developer Labs environment
- If you are working in a Moveworks lab environment, name anything you save (Plugin, Action, Data Type, etc.) with
<fullname>_<descriptive_name>
- For example:
lucasrollo_Submit_PTO_Action- When launching your Plugin, make sure to only launch to yourself! You can do this by going to Your Plugin > Launch Configuration > Allow Selected Users > the email on your credential card
You may be able to skip this phase if you've completed another Agent Studio Quickstart guide.You can skip Phase 0 and move onto Phase 1A if:
- You have already created a
firstname_lastname_moveworks_purpleconnector, AND- You already have your unique "Session ID" on hand.
This section will walk you through how to set up your own connector to the Moveworks Purple API (which powers the Actions used in the Quickstart guides), so no need to repeat this step if you've done it before.
In this guide, you'll build a Plugin that will actually fetch from and take action on a store of feature requests that's set up just for you. In preparation for this, follow these steps
- Go to the Moveworks Purple API Tool.
- Click "Create New Session ID". You should see sample feature requests populate below.
- Copy your Session ID to your own notes. You'll to have this on hand in the following phase when we set up your Actions.
Now, you just need to set up a (reusable) connector that will allow you to seamlessly hit the necessary Actions that your Plugin will use.
-
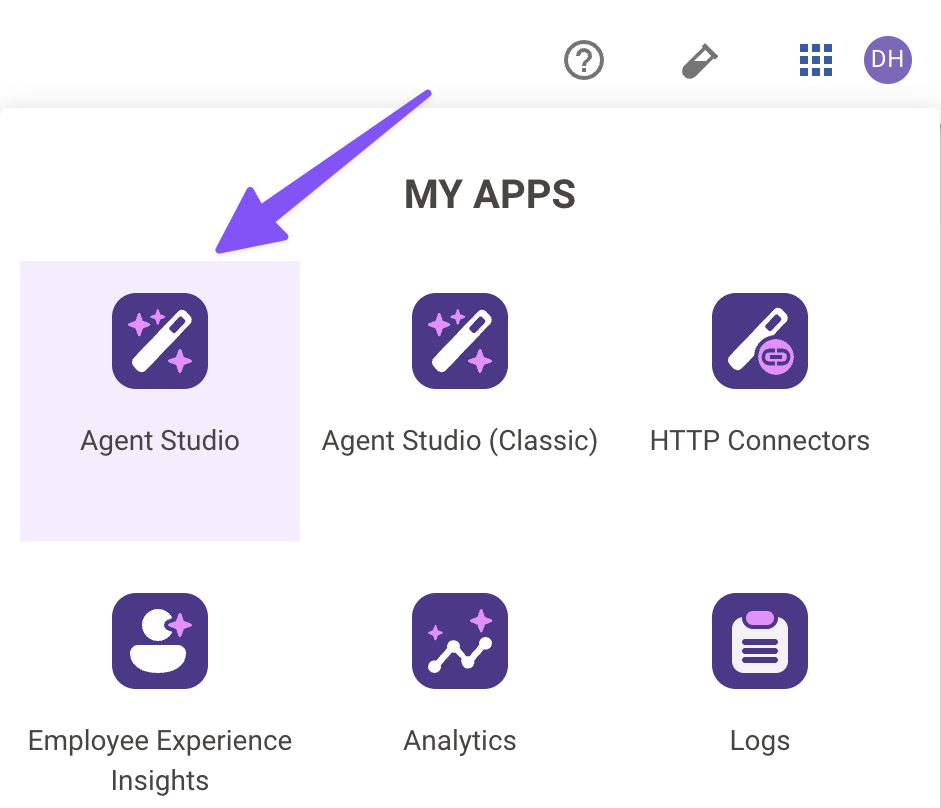
Navigate to the App Picker in the top right corner of Agent Studio.
-
Click on "HTTP Connectors", which will take you to another browser tab.
-
Click "Create" in the top right corner.
-
Fill out the following information for your Connector (be sure to replace "firstname" and "lastname" with your corresponding information).
Field Value to enter (replace "firstname" & "lastname" with your info) Connection Name firstname_lastname_moveworks_purpleDescription Moveworks Purple APIs ConnectorBase Url https://marketplace.moveworks.comAuth Config No Auth -
Click "Save" on the bottom right corner.
You're now fully ready to start building. On to Phase 1 to set up your Actions!Before you proceed, make sure you've copied your Session ID somewhere you can access soon.
Phase 1A: Set up your "Get Historical Purchases" Action
Import building notes if you are using the Moveworks Developer Labs environment
- If you are working in a Moveworks lab environment, name anything you save (Plugin, Action, Data Type, etc.) with
<fullname>_<descriptive_name>
- For example:
lucasrollo_Submit_PTO_Action- When launching your Plugin, make sure to only launch to yourself! You can do this by going to Your Plugin > Launch Configuration > Allow Selected Users > the email on your credential card
Let's first set up an HTTP Action that will retrieve historical PRs. This Action doesn't require any dynamic inputs, and will just query an external system for a list of purchase requests.
-
Navigate to the App Picker in the top right corner. Click on "Agent Studio".
-
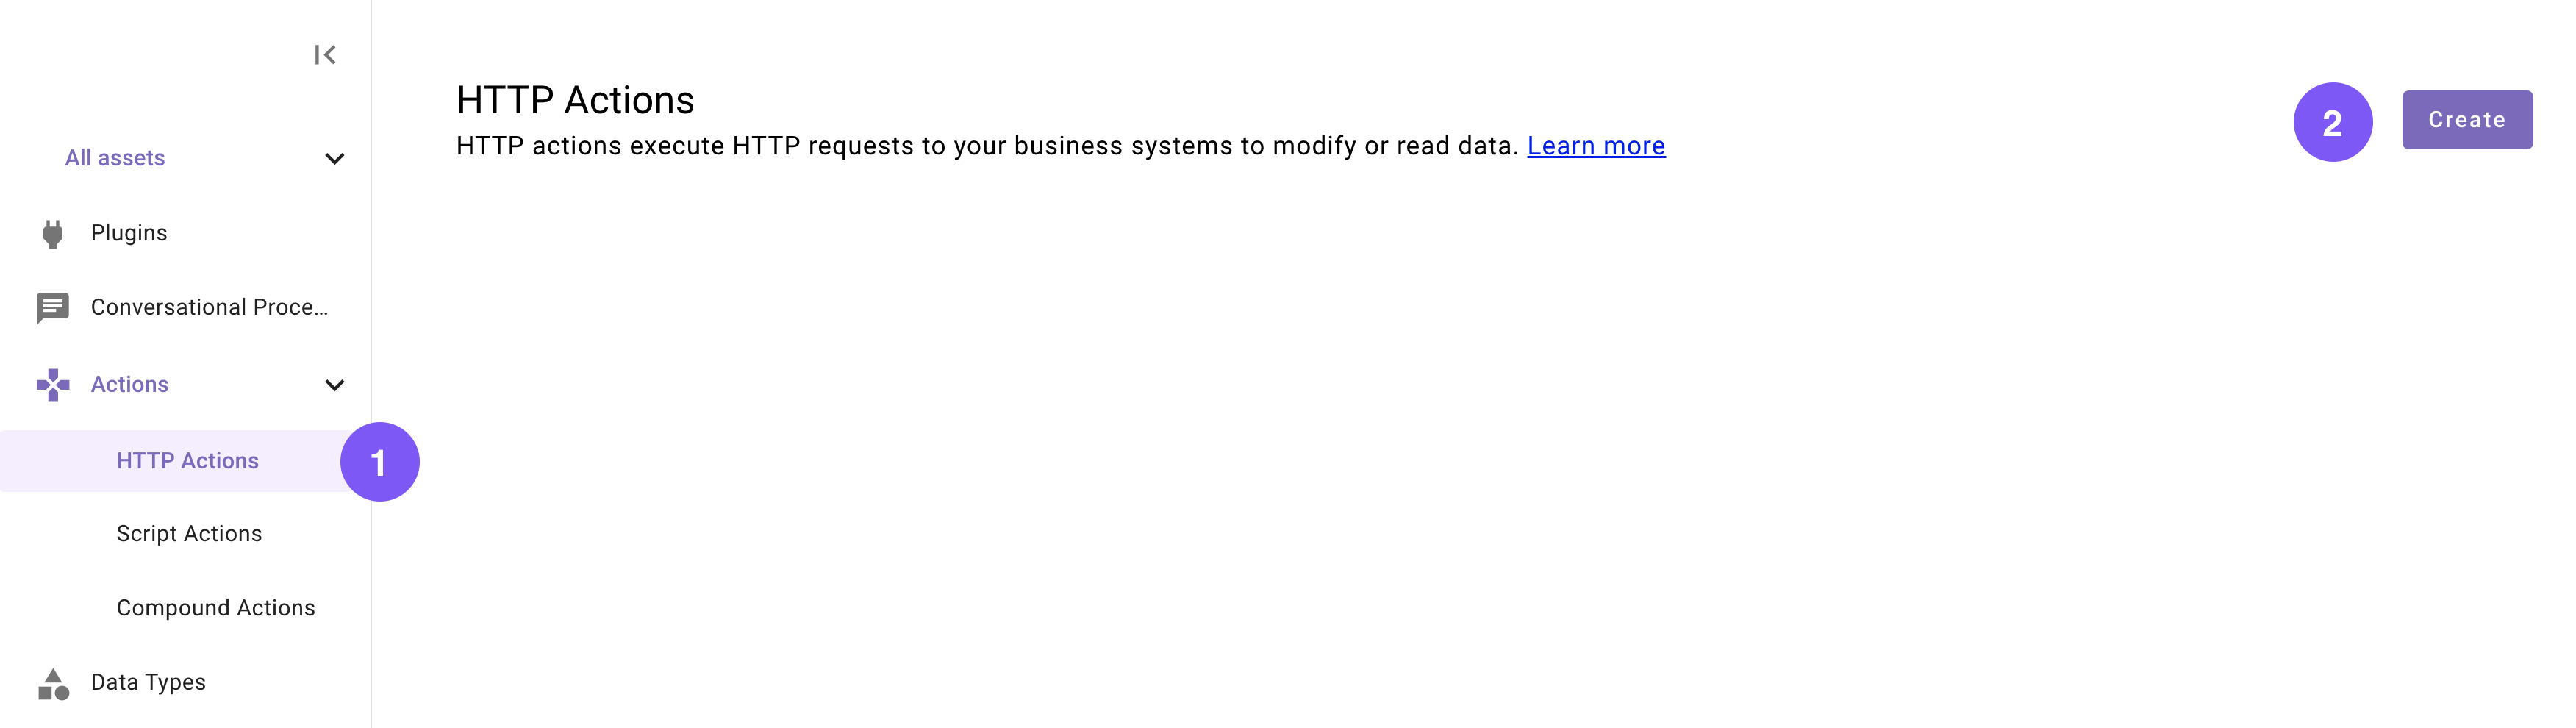
Navigate to a new HTTP Action.
-
Set the following title and description for your Action (be sure to replace "firstname" and "lastname" with your corresponding information).
Field Value to enter (replace "firstname" & "lastname" with your info) Title firstname_lastname_get_historical_purchasesDescription Fetches a list of historical purchase requests -
Enter the details of your API:
-
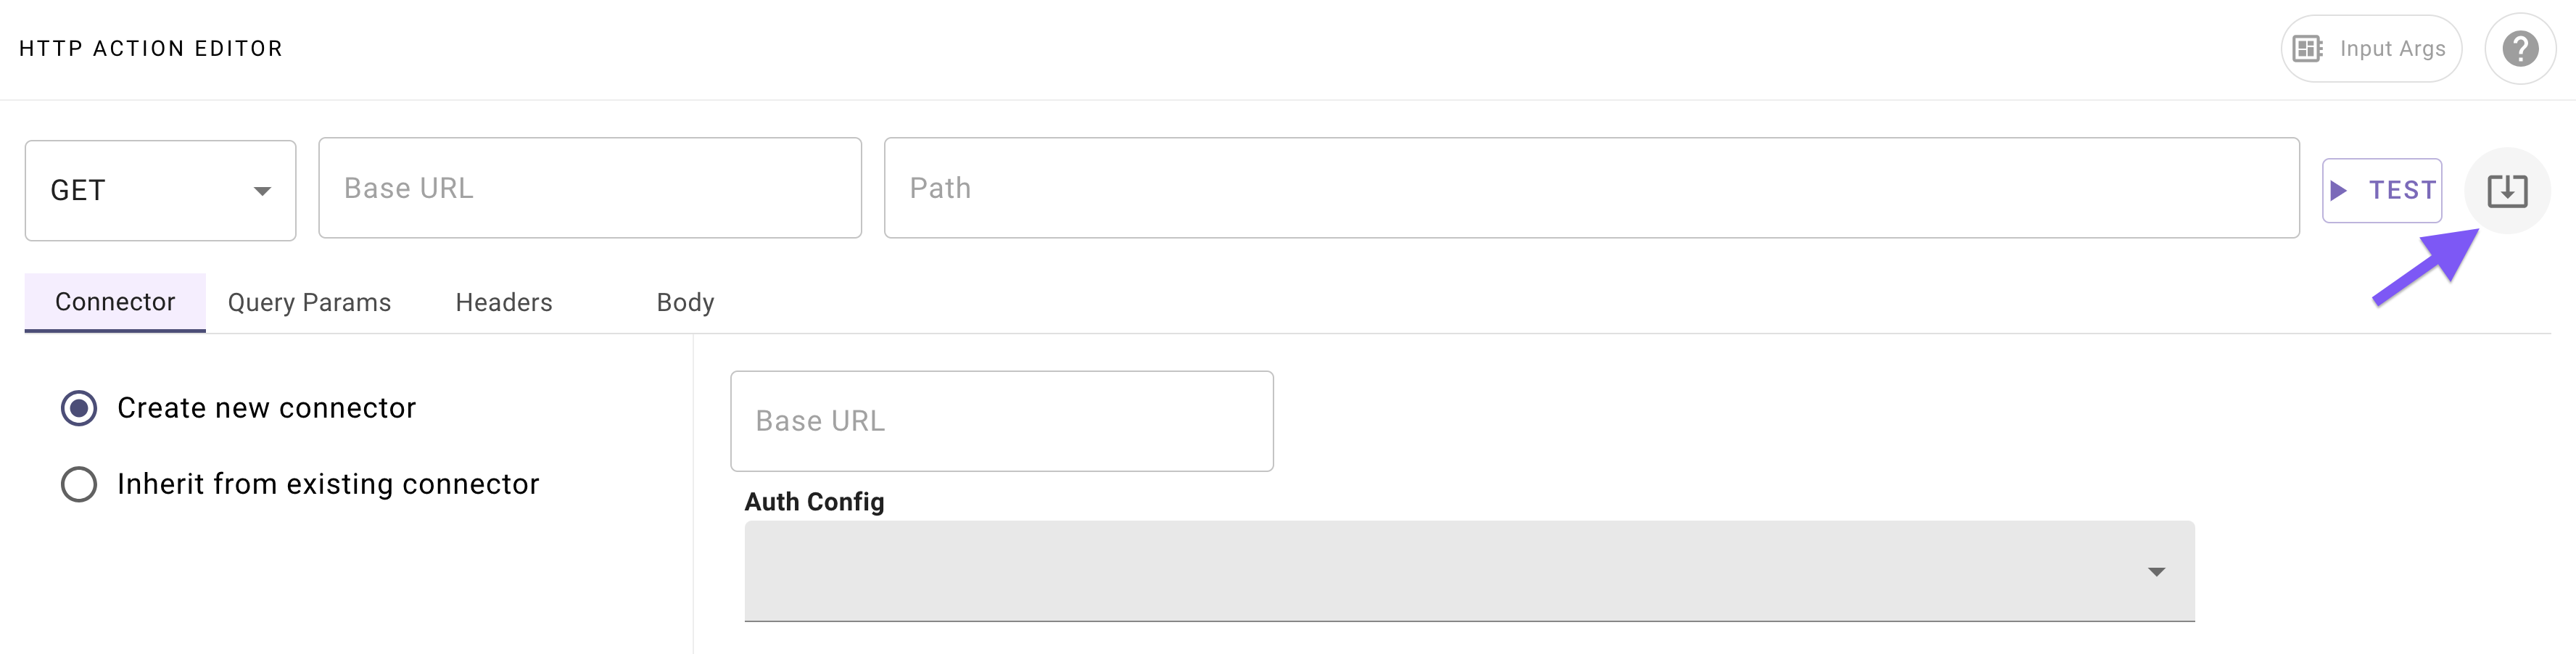
Click on the "Import" icon to the right of the "TEST" button.
-
Paste the following cURL command:
curl "https://marketplace.moveworks.com/api/purple-suite/erp/purchase-requests/history" -
Click "Import" (your Action should now be auto-populated with details).
-
-
Navigate to the "Connector" tab, and select your existing Moveworks Purple Connector (set up in Phase 0).
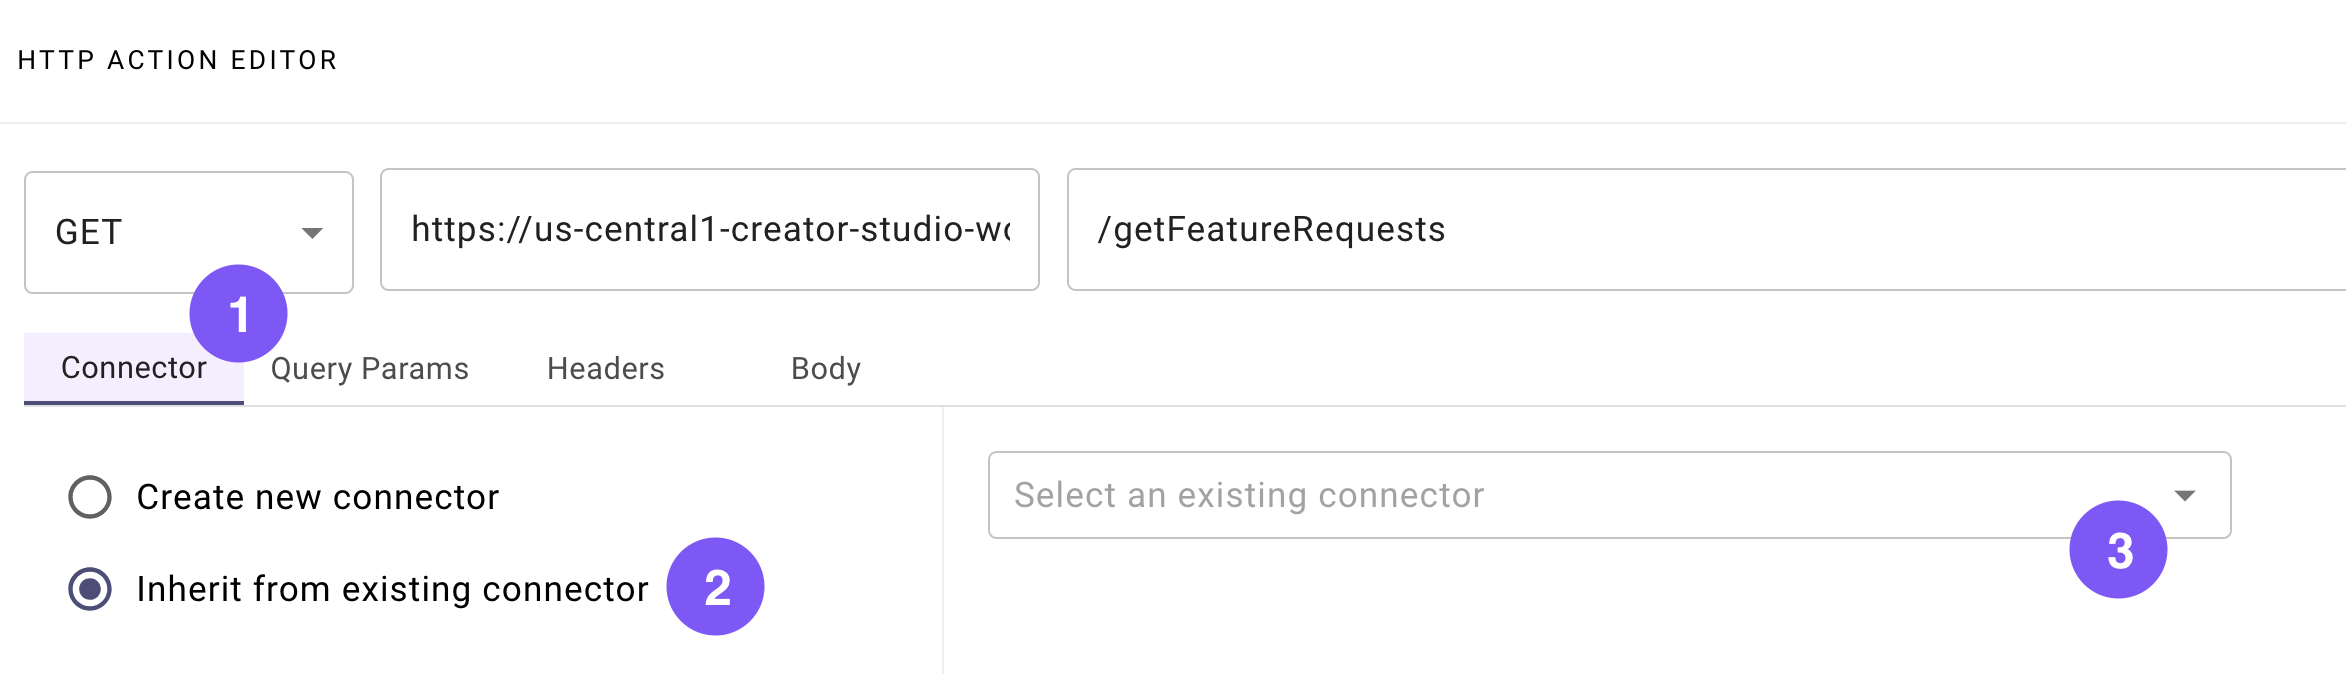
-
Test your Action:
-
Click on the "TEST" icon (to the right of the endpoint URL definition).
-
Inspect the Console to verify that you receive a successful response:
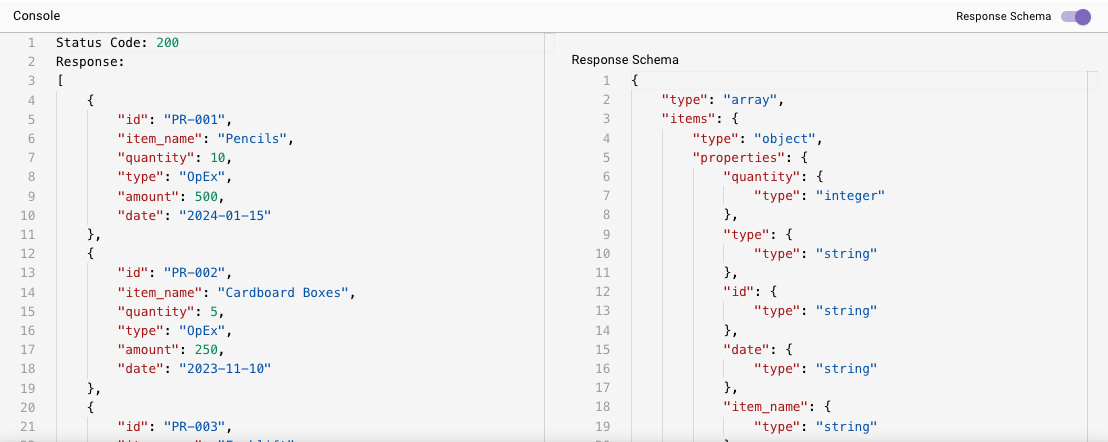
You should see: Status Code 200, a list of Purchase Request objects, and a response schema of the list.
-
-
Hit "Publish".
You've just set up 1 out of 2 custom Actions needed for this process!This Action will fetch the critical history of past purchase requests (that later you'll compare a user's new request against). Next up: setting up an action to actually submit new purchase requests.
Phase 1B: Set up your "Submit Purchase Request" Action
Import building notes if you are using the Moveworks Developer Labs environment
- If you are working in a Moveworks lab environment, name anything you save (Plugin, Action, Data Type, etc.) with
<fullname>_<descriptive_name>
- For example:
lucasrollo_Submit_PTO_Action- When launching your Plugin, make sure to only launch to yourself! You can do this by going to Your Plugin > Launch Configuration > Allow Selected Users > the email on your credential card
The next (and final) Action to set up will add a new purchase request object (and will actually update the purchase record database in your personal session!). This Action will require three dynamic inputs: item_name, quantity, and justification.
-
Navigate to a new HTTP Action.
-
Set the following title and description for your Action (be sure to replace "firstname" and "lastname" with your corresponding information).
Field Value to enter (replace "firstname" & "lastname" with your info) Title firstname_lastname_submit_purchase_requestDescription Submits a new purchase request to Procurement -
Enter the details of your API:
-
Click on the import button to the right of the "TEST" button.
-
Find the same Session ID that you created & copied from Phase 0 — you'll use it in the next step.
-
Paste (don't click "Import" yet) the following almost-ready cURL command:
curl -X POST "https://marketplace.moveworks.com/api/purple-suite/erp/purchase-requests" \ -H "Content-Type: application/json" \ -d '{ "sessionId": "YOUR_SESSION_ID", "purchase_request": { "item_name": "{{item_name}}", "quantity": "{{quantity}}", "business_justification": "{{justification}}", "amount": 1200.00 } }' -
Replace
YOUR_SESSION_ID(scroll all the way to the right to find it at the end of the URL) in the pasted command with your actual Session ID. -
Click "Import" (your Action should now be auto-populated with details).
-
-
Navigate to the "Connector" tab, and select your existing Moveworks Purple Connector (set up in Phase 0).
-
Define 3 formal input arguments to represent the "item name", and "quantity", and "business justification" inputs that this Action requires:
-
Click on the "Input Args" button near the top right corner.
-
Click "Create New" in the "Input Arguments" pop up.
-
Fill out the following details for your
item_nameargument:Field label Value to enter/select Argument Name item_nameData Type Select "string" Example Value penDescription The name of the item to be purchasedRequired Check the box -
Hit "Save".
-
Click "Create New" again in the "Input Arguments" pop up.
-
Fill out the following details for your
quantityargument:Field label Value to enter/select Argument Name quantityData Type Select "Number" Example Value 20Description The quantity of the item in the PRRequired Check the box -
Hit "Save".
-
Click "Create New" again in the "Input Arguments" pop up.
-
Fill out the following details for your
justificationargument:Field label Value to enter/select Argument Name justificationData Type Select "string" Example Value Needed to refill supply closetDescription The business justification for the item(s) in the PRRequired Check the box -
Hit "Save" and hit the "X" icon to close this "Input Arguments" pop up.
-
-
Test your Action:
-
Click on the "TEST" icon (to the right of the endpoint URL definition).
-
Inspect the Console to verify that you receive a successful response:
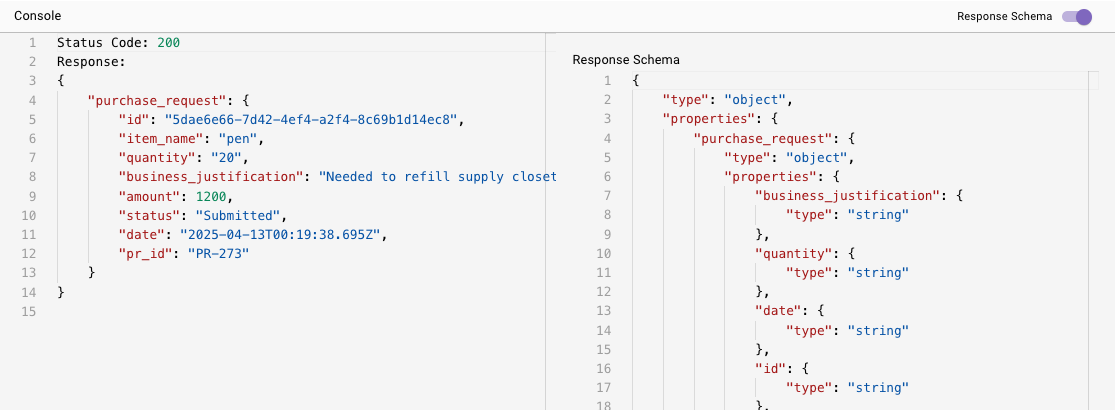
You should see: Status Code 200, a response containing the new PR details, and a schema for the object.
-
-
Hit "Publish".
Nice, your Actions are all set up and ready to go!Time to construct your Conversational Process.
Phase 2: Build your Conversational Process
Import building notes if you are using the Moveworks Developer Labs environment
- If you are working in a Moveworks lab environment, name anything you save (Plugin, Action, Data Type, etc.) with
<fullname>_<descriptive_name>
- For example:
lucasrollo_Submit_PTO_Action- When launching your Plugin, make sure to only launch to yourself! You can do this by going to Your Plugin > Launch Configuration > Allow Selected Users > the email on your credential card
Here's a reminder of the bird's eye view for this Submit Procurement Purchase Request Conversational Process:
Let's build it!
-
Navigate to a new Conversational Process (navigate to the library and click "Create").

-
Set the following title and description for your Conversational Process (be sure to replace "firstname" and "lastname" with your corresponding information).
Field Value to enter (replace "firstname" & "lastname" with your info) Title firstname_lastname_support_procurement_purchases_processDescription This will help users submit a Procurement purchase request (PR). -
Add the FOUR Slots that this process will need:
item_name,quantity,business_justification, andis_purchase_for_organization_acknowledgement. 📖 Learn more about Slots.-
Click on the "Slots" button near the top right corner of the editor.

-
Click "Create New" in the "Slots" pop up.
-
Fill out the following details for your first
item_nameSlot:Field label Value to enter/select Name item_nameData Type Select "string" Slot Description The name of the item that the user wants to purchase.Slot Validation Policy Leave blank Slot Validation Description Leave blank Slot Inference Policy Leave as is (Infer slot value if available) -
Hit "Save" (scroll to the bottom of the popup).
-
Click "Create New" again in the "Slots" pop up to build your second Slot.
-
Fill out the following details for your
business_justificationSlot:Field label Value to enter/select Name business_justificationData Type Select "string" Slot Description A justification from the user on why this purchase is necessary.Slot Validation Policy Leave blank Slot Validation Description Leave blank Slot Inference Policy Leave as is (Infer slot value if available) -
Hit "Save" (scroll to the bottom of the popup).
-
Click "Create New" again in the "Slots" pop up to build your third Slot.
-
Fill out the following details for your
quantitySlot:Field label Value to enter/select Name quantityData Type Select "number" Slot Description The number of units of the item that the user wants to purchase.Slot Validation Policy value > 0Slot Validation Description The quantity for the item in the purchase request must be greater than zeroSlot Inference Policy Leave as is (Infer slot value if available) -
Hit "Save" (scroll to the bottom of the popup).
-
Click "Create New" again in the "Slots" pop up to build your fourth and final Slot.
-
Fill out the following details for your
is_purchase_for_organization_acknowledgementSlot:Field label Value to enter/select Name is_purchase_for_organization_acknowledgementData Type Select "boolean" Slot Description An explicit acknowledgement from the user that this purchase is for the organization and not for personal use.Slot Validation Policy value == TRUESlot Validation Description The user must explicitly acknowledge "yes" to indicate that this purchase is intended for the organization and not for personal use.Slot Inference Policy Select "Always prompt the user" -
Hit "Save" (scroll to the bottom of the popup) and hit the "X" icon to close this "Slots" pop up.
-
-
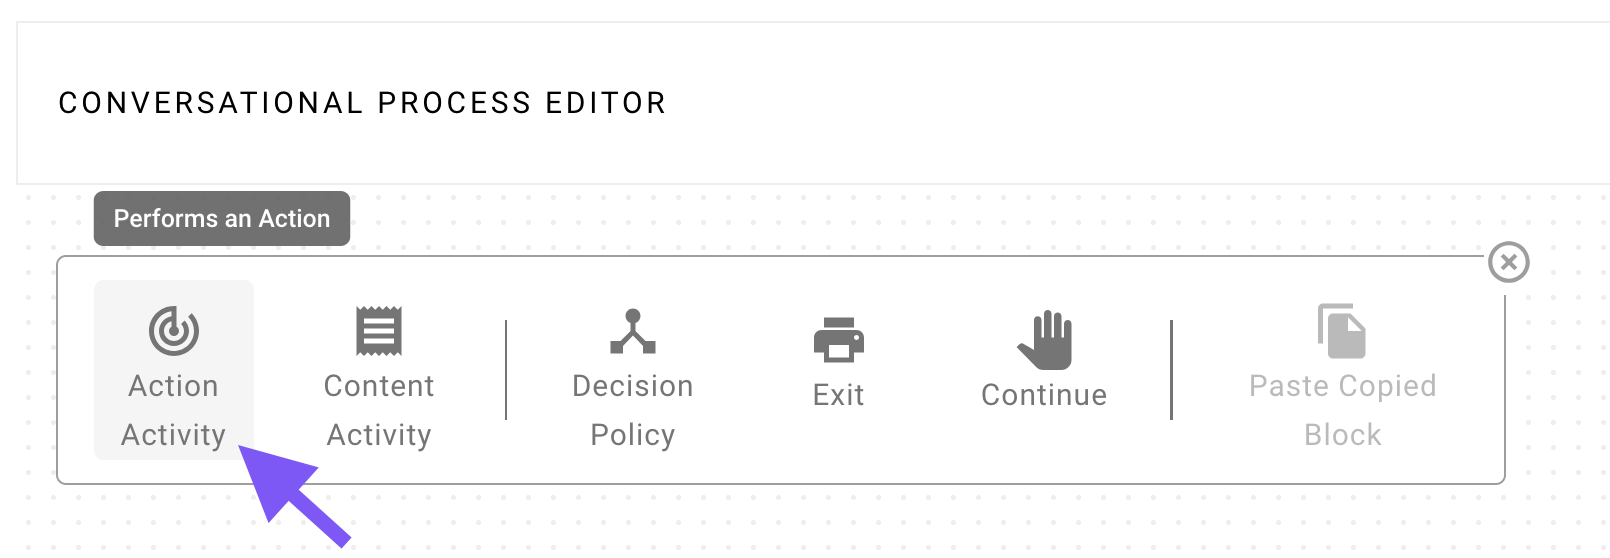
Build the first Action Activity that fetch a list of historical purchase requests that the process will later compare against. 📖 Learn more about Activities.
-
Click on the "+ Add a block to your process" button in the main section of the editor.
-
Click on "Action Activity".
-
Fill out the following details for your Action Activity, which simply hooks up the Action you created to this Action Activity:
Field label
Value to enter/select
Action
*Select the
firstname_lastname_get_historical_purchasesAction that you built in Phase 1A *Required Slots
Leave blank (no Slots are needed as input to this Activity)
Input mapping
Leave blank (no inputs to map to)
Output Mapping (".dot_walk_here" box)
Leave blank (output is fine as is)
Output Key
historical_purchasesConfirmation Policy
Leave unchecked
-
-
Build the second Action Activity, which will utilize a Built-in Action that can generate an output according to a natural language prompt. 📖 Learn more about the Built-in Generate Text Action.
-
Click on the "+" icon below the previous Activity in the main section of the Conversational Process Editor.
-
Click on "Action Activity".
-
Fill out the following details for your Action Activity, which mostly involves constructing a templated prompt to the Action, and mapping the predicted PR classification out of the model's response:
Field label
Value to enter/select
Action
Select the
mw.generate_text_actionBuilt-in ActionRequired Slots
Select 1 slot:
item_nameInput mapping (2 fields mapped)
system_prompt: $CONCAT(["'Take the '", data.item_name, "' and compare it against the '", data.historical_purchases.$STRINGIFY_JSON(), "' to determine its Opex or Capex classification. Only output Opex or Capex'"], "")user_input: "' '"Output Mapping (".dot_walk_here" box)
.openai_chat_completions_response.choices[0].message.contentOutput Key
pr_classificationConfirmation Policy
Check the "Require consent from the user" box
-
-
Build your first Decision Policy, which will execute after the already configured 2 Activity blocks. This policy will allow the Process to branch its execution depending on the
pr_classificationreturned by the generate text Action Activity. 📖 Learn more about Decision Policies.-
Click on the "+" square icon below the second generate text Activity in the main section of the Conversational Process Editor.
-
Click on "Decision Policy". (No need to input anything in the panel that appears on the right).

-
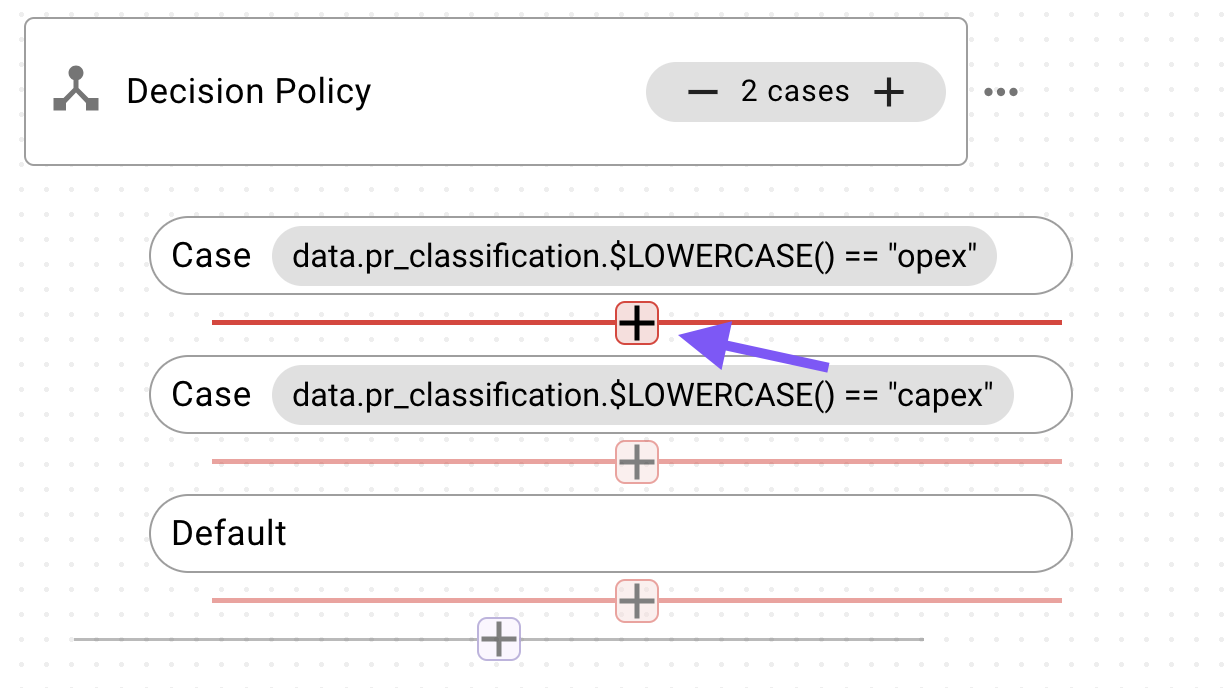
Increment the number of Cases by clicking on the "+" button to the right of the words "1 case".

-
Click on the first Case entry under the Decision Policy and enter the below DSL rule in the panel that appears on the right:
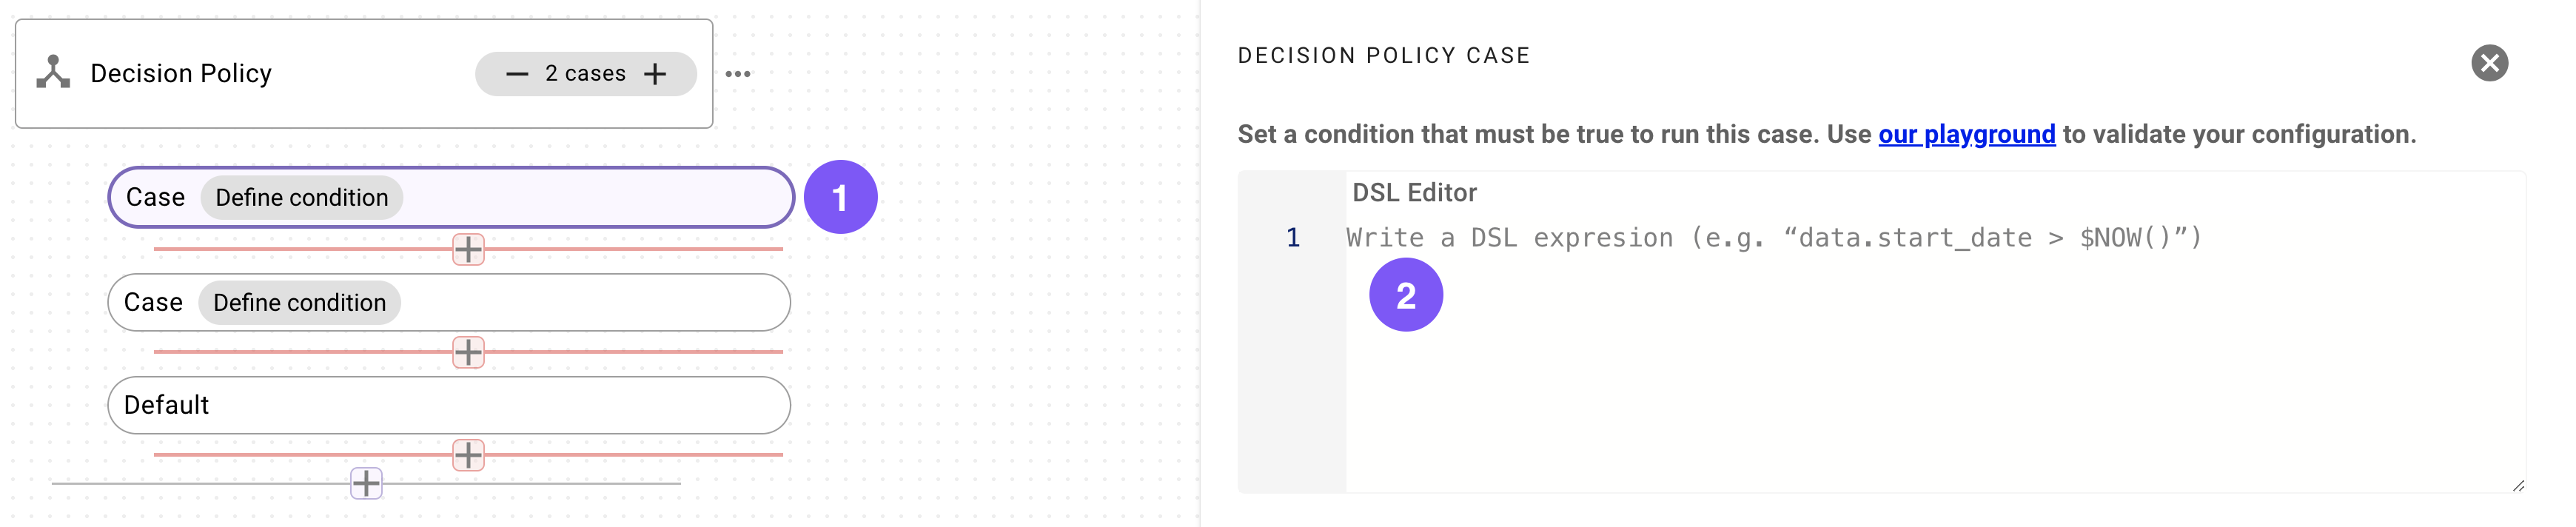
data.pr_classification.$LOWERCASE() == "opex" -
Click on the second Case entry under the Decision Policy and enter the below DSL rule in the panel that appears on the right:

data.pr_classification.$LOWERCASE() == "capex"
-
-
Create the Action Activity that will execute under the first Decision Policy Case (
pr_classificationisopex).-
Click on the "+" icon below the first Case entry under the Decision Policy.
-
Select "Action Activity".
-
Fill out the following details for your Action Activity, which will connect your slots to the input(s) of the HTTP Action (and mapping the result of the Action back to the Conversational Process).
Field label
Value to enter/select
Action
*Select the
firstname_lastname_submit_purchase_requestAction that you built in Phase 1B *Required Slots
Select all 4 Slots:
item_name,quantity,business_justification, andis_purchase_for_organization_acknowledgementInput mapping (3 fields mapped)
item_name: data.item_namejustification: data.business_justificationquantity: data.quantityOutput Mapping (".dot_walk_here" box)
Leave blank (output is fine as is)
Output Key
submitted_pr_resultConfirmation Policy
Check the "Require consent from the user" box
- Note that even though
is_purchase_for_organization_acknowledgementis not technically needed to invoke the submit pr action, marking it as a required Slot for this Activity ensures that the AI Agent will ensure it fills the Slot before executing this Activity.
- Note that even though
-
-
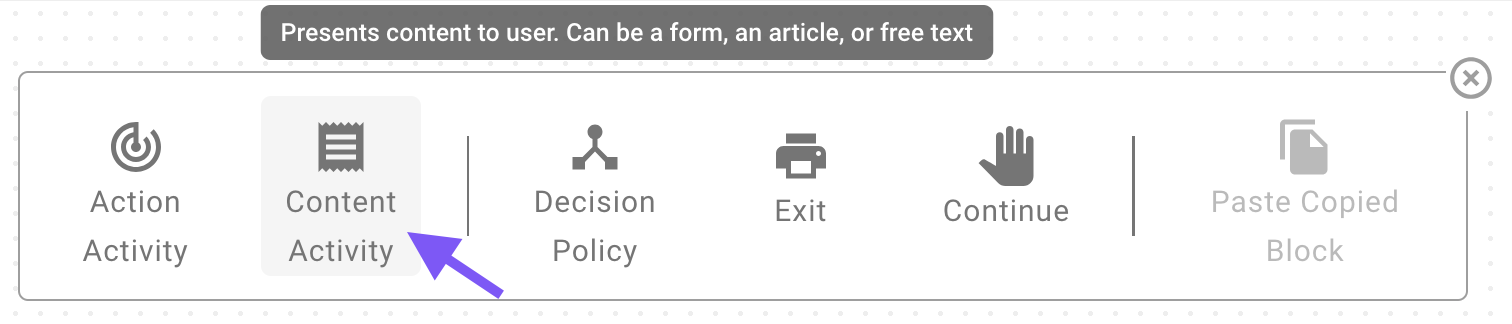
Create the Content Activity that will execute under the second Decision Policy Case (
pr_classificationiscapex).-
Click on the "+" icon below the second Case entry under the Decision Policy.
-
Select "Content Activity" this time.
-
Keep the "Content Type" set to "Text".
-
Paste the following text content (which will share text instructions with the user on how to submit purchase requests that fall under CapEx).
This request falls under CapEx. Please visit <a href="https://www.google.com">CapEx Submission Portal</a> to submit your request.
-
-
Create the Content Activity that will execute under the
defaultbranch (whenpr_classificationsomehow is neitheropexnorcapex).- Click on the "+" icon below the second Case entry under the Decision Policy.
- Select "Content Activity" again.
- Keep the "Content Type" set to "Text".
- Paste the following text content (which will share text instructions with the user on how to submit purchase requests that fall under CapEx).
Unfortunately, this purchase request could not get categorized, so it was not submitted. Please feel free to try submitting another request.
-
Click "Validate". If everything went well so far, the Console (bottom of the editor) will say "Validation successful".
-
💡Pro-tip: You can also use the following hotkeys to validate without pressing the button:
On a MacOS machine On a Windows machine Cmd + Shift + V Ctrl + Shift + V
-
-
Click "Publish", review details, and Click "Publish" once again.
Congratulations! You've just built the main part of this Plugin: the Conversational Process.Way to stick through all the steps! We're ready for the last phase: now you'll launch a Plugin — this packages the Conversational Process into a tool that your AI Agent can use directly.
Phase 3: Launch a Plugin
Import building notes if you are using the Moveworks Developer Labs environment
- If you are working in a Moveworks lab environment, name anything you save (Plugin, Action, Data Type, etc.) with
<fullname>_<descriptive_name>
- For example:
lucasrollo_Submit_PTO_Action- When launching your Plugin, make sure to only launch to yourself! You can do this by going to Your Plugin > Launch Configuration > Allow Selected Users > the email on your credential card
It's finally time to add your Conversational Process to a Plugin, where you can control the Triggering scenarios of your Plugin and specify which end users are allowed to use your Plugin.
-
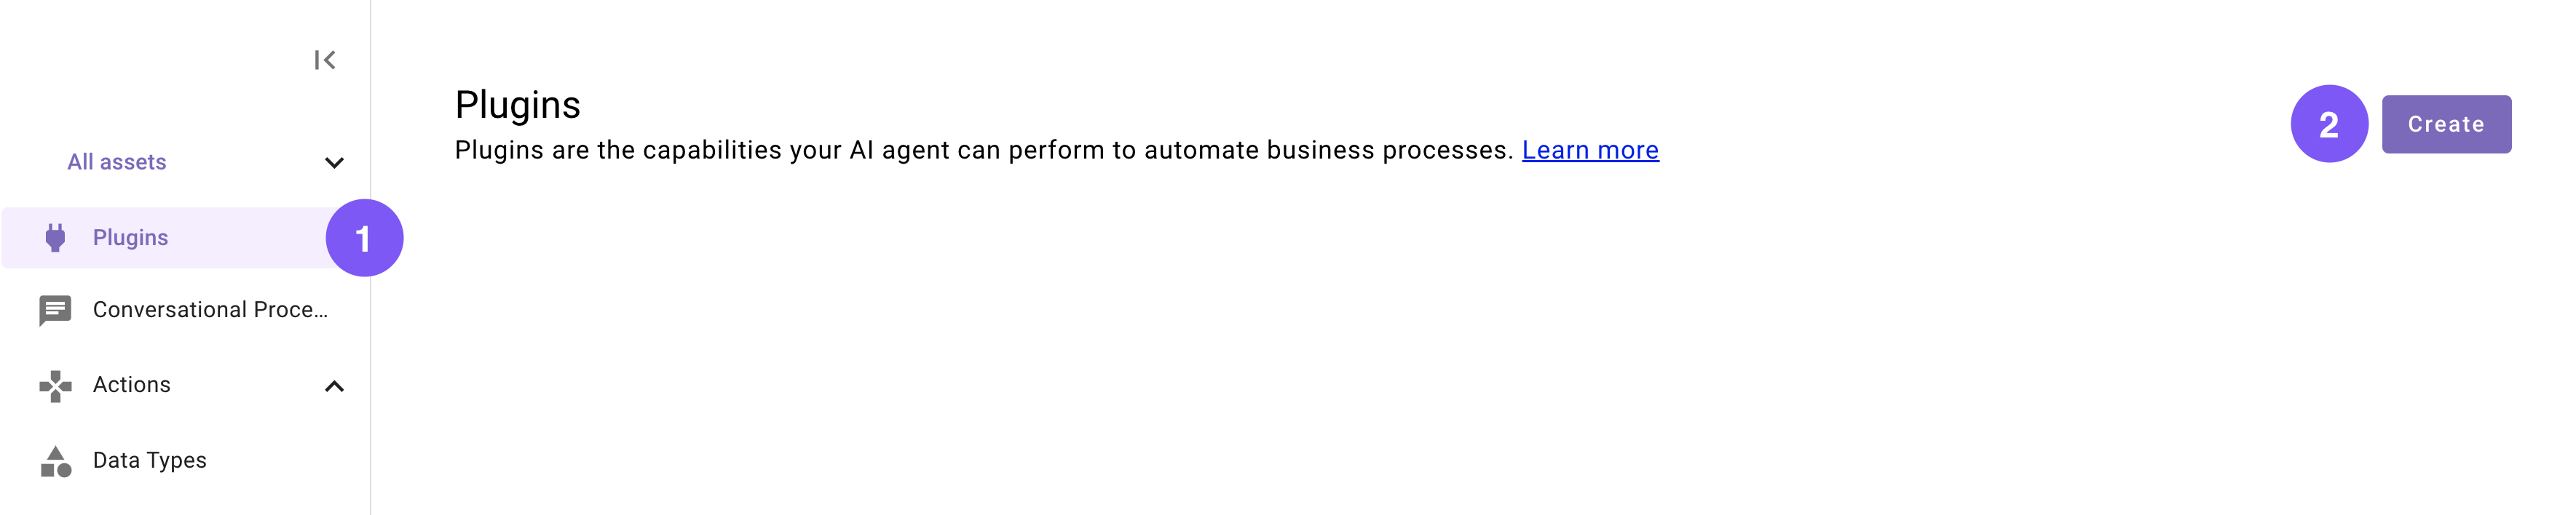
Navigate to a new Plugin (navigate to the library and click "Create").
-
Set the following title and description for your Plugin (be sure to replace "firstname" and "lastname" with your corresponding information).
Field Value to enter (replace "firstname" & "lastname" with your info) Title firstname_lastname_support_procurement_purchasesDescription This will help users submit a Procurement purchase request (PR). This first compares the name of the PR that the user wants to submit against a list of historical PRs to determine whether the request is classified as "OpEx" or "CapEx". Depending on the classification, it will either submit the PR directly for the user or give the user more information on how to proceed. -
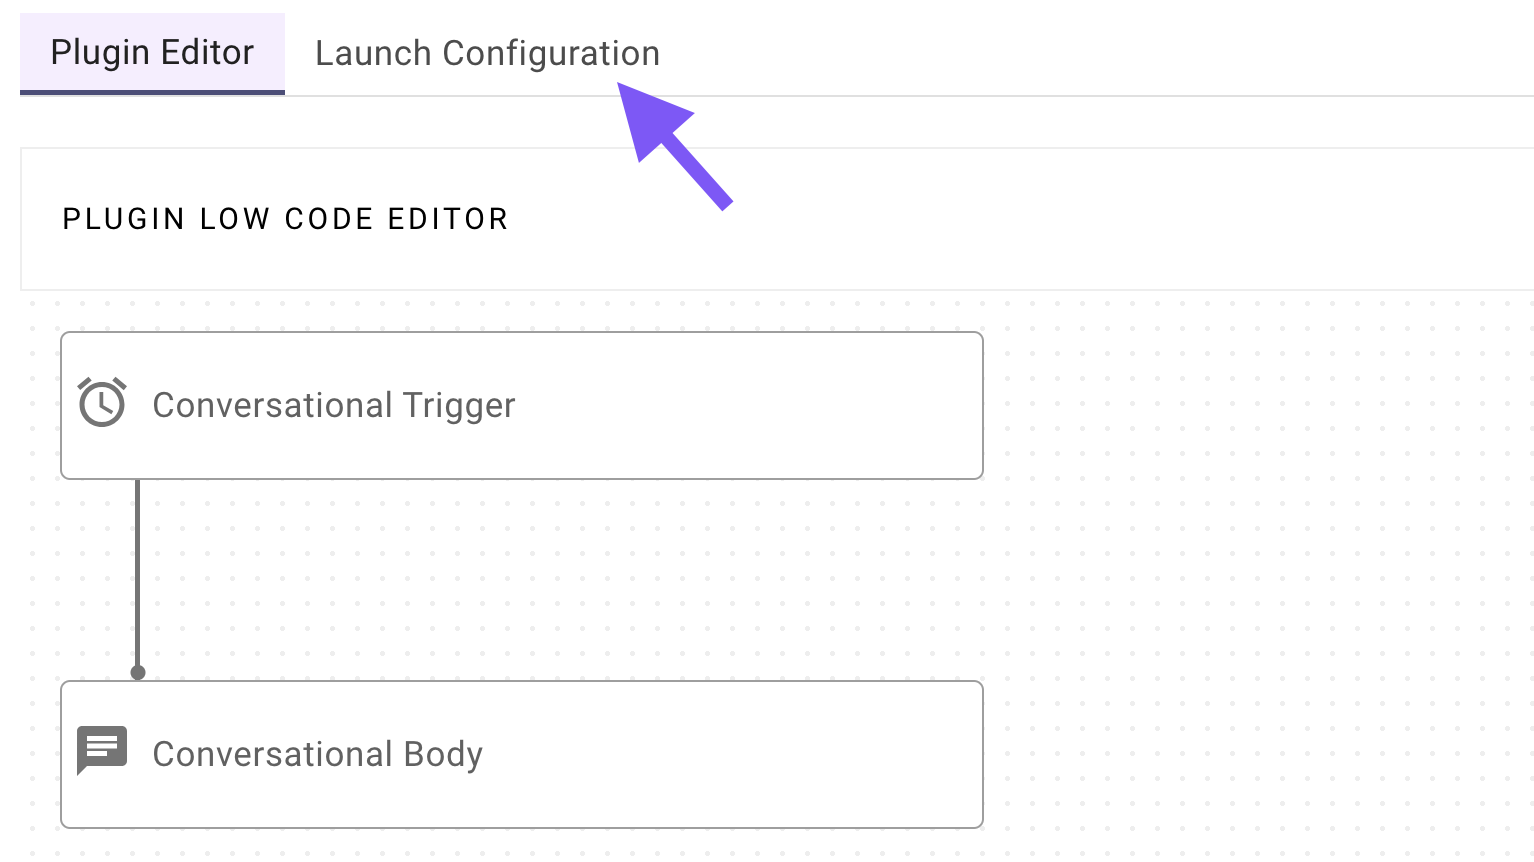
Define a Conversational Trigger. 📖 Learn more about Natural Language Triggers.
-
Click on "No triggers configured".
-
In the panel that appears on the right, either:
-
Approve (click "Trigger") 5 of the auto-generated suggested positive examples, or
-
Add the following recommended utterances:
Utterances to add submit purchase requesthow can i submit a PR to procurement?I need to order 100 pens for the officeI need to submit a PR for a laptopCan I submit a purchase order?
-
-
-
Choose your Conversational Process (the one you built in Phase 2).
- Click on "No body configured".
- In the panel that appears on the right, search for and select the Conversational Process that you built in Phase 2 (should be named
firstname_lastname_support_procurement_purchases_process)
-
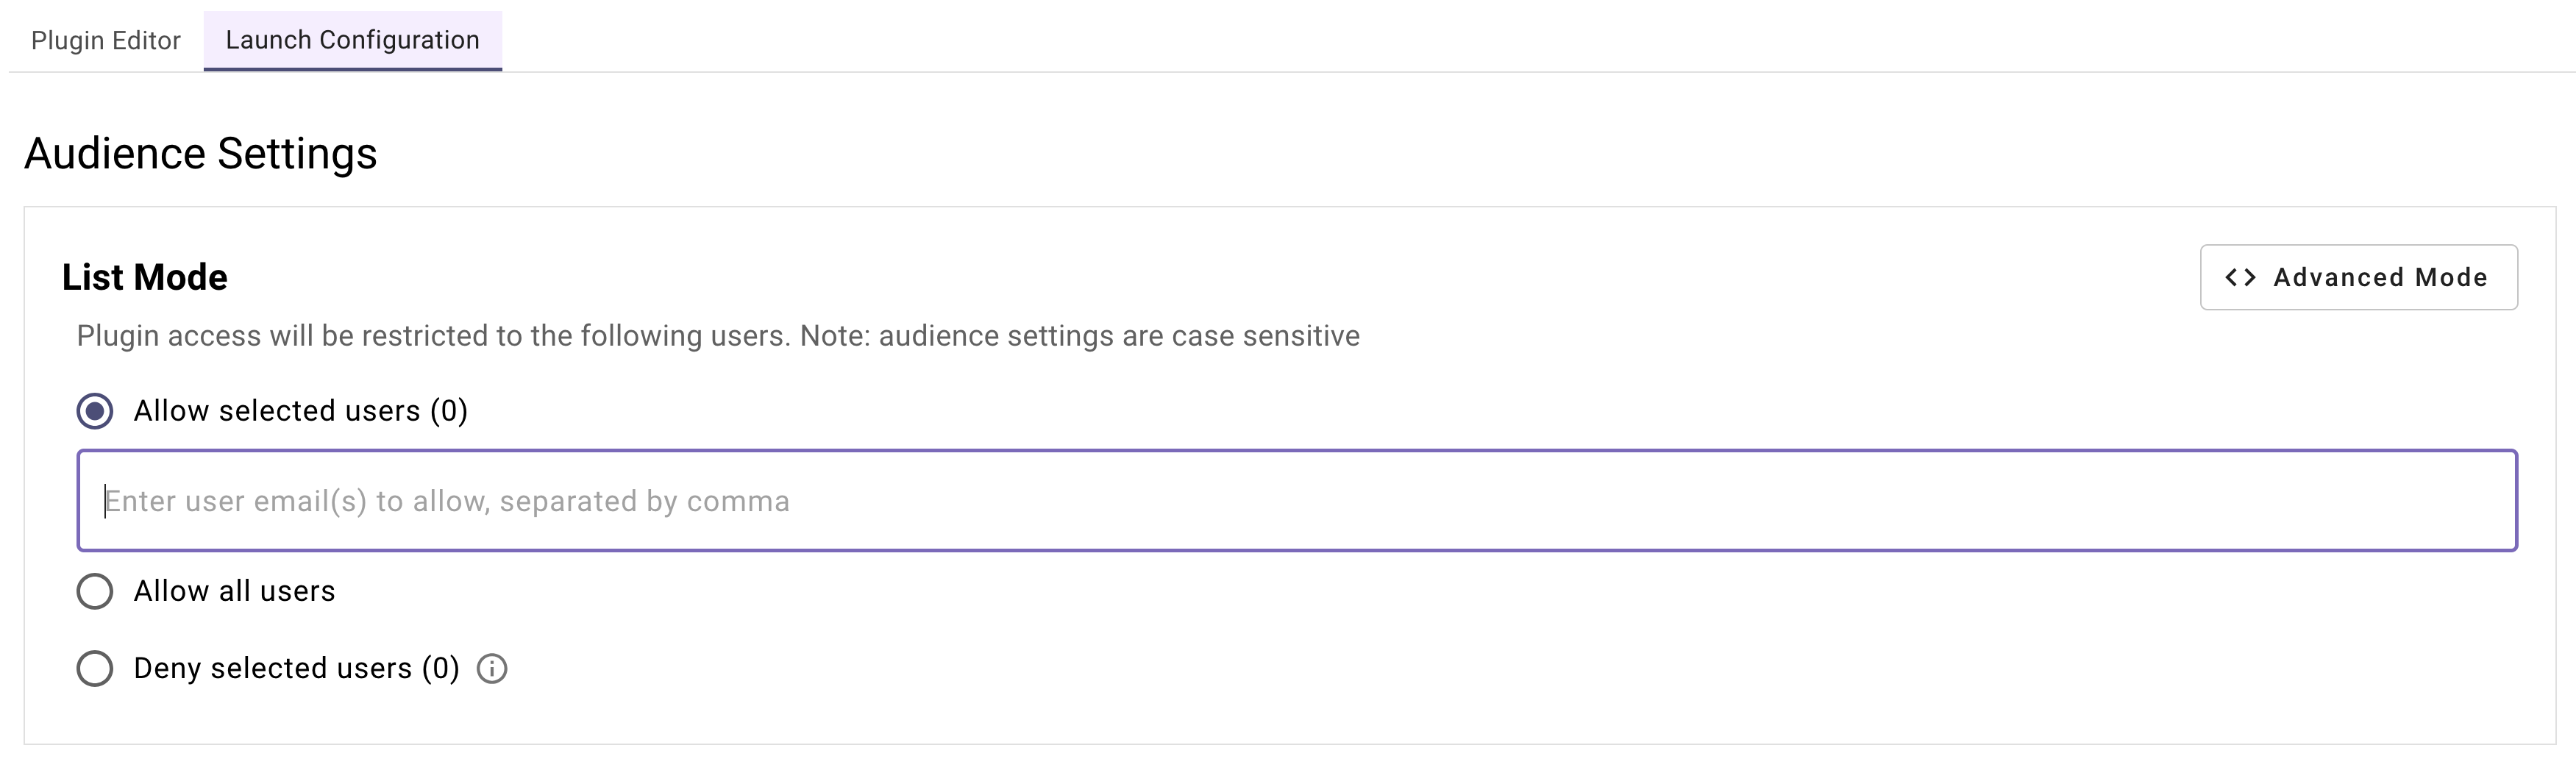
Define your Launch Configuration.
-
Navigate to the "Launch Configuration" tab.
-
In the Input field under "Allow selected users", enter your email (or multiple emails using commas to separate the email addresses).
-
-
Click "Publish" to launch your Plugin.
Woohoo! You've finished building your Plugin — time to try it out!Use one of your triggering examples (e.g. "submit purchase request") to access the Plugin in conversation. Try refreshing your submitted purchase requests tab in your Moveworks Purple API session to see the updates take effect in real time!
Reflecting on this Plugin
The Plugin you just built contains a plethora of Agent Studio concepts, from different Activity types to Decision Policies. There's a lot it had to take care of as a Process Agent:
- Retrieve historical purchases from an external source.
- Perform classification on the fly to figure out how to categorize the user's intended purchase.
- Make an informed decision on the best way to support the request, depending on the predicted classification.
- Collect critical information that's needed for submitting a purchase request.
- Executes for the right users at the right moments via Triggering and Launch configurations you've set up.
Congratulations on building this powerful Process Agent — it's now ready to help support users with their procurement purchase needs!
Updated 1 day ago