Zendesk Setup for Enterprise Search
This page is for the Zendesk (Next Gen) connector and it can only be configured within the new enterprise search configuration experience explained below.
Please visit this documentation to learn more about Next Gen and Classic connectors.
System Overview
Zendesk is an omnichannel customer service platform. Core products include Support (ticketing), Guide/Knowledge (help center knowledge base), Gather (community forums), and messaging/voice in Agent Workspace. Together, these let customers self-serve, chat with bots/agents, and open tickets when needed.
Many organizations run multiple brands in one Zendesk account. Each brand can have its own help center; when you add brands, you associate a help center (or other channels) per brand.
For Enterprise Search, Moveworks ingests published Help Center articles (Guide) across the brand(s) that the service account has access to, and mirrors viewing permissions from Zendesk:
- Articles: viewing is controlled at the article level via user segments.
Note: Community posts and Tickets aren’t indexed for Enterprise Search currently; this connector focuses on knowledge articles.
Access Requirements
Moveworks requires an API token generated via a Service Account to connect with your Zendesk instance. First, you’ll need to create a Service Account by going to the admin portal of your Zendesk instance. Moveworks uses Basic Authentication to authorize with the API and requires the Username (email address of your Service Account) and API token (generated for your Service Account). Make sure the Service Account has read access to all Help Center articles you want to ingest into Moveworks and has access to all users and relevant permissions via the custom Admin role.
Pre-requisites
Before you get started, make sure you have everything you need:
- Admin permissions: Access to Admin Center > People and Admin Center > Apps and Integrations.
- Environment details: The base URL of your Zendesk instance—for example:
https://<your-site>.zendesk.comif you’re using the standard Zendesk setup. - List of categories to ingest: Put together a list of all the Zendesk Help Center categories you want Moveworks to index.
Create a dedicated integration role + service account
Create a custom role and assign a service account to it.
- Custom Role (Admin Center → People → Team → Roles):
- People: “View all users” (Moveworks resolves user-segment rules that reference users, orgs, and groups).
- Ticket access: “All” (read is sufficient for this connector).
- Knowledge privileges: grant Knowledge admin so the account can read all articles/topics and manage topic access; Knowledge admins can view the full help center.
- Service Account: create a Full Agent user and assign the role above. (Custom roles are available on Enterprise.)
Why this role: Moveworks reads Articles (incl. incremental changes), User Segments, and Users/Orgs to mirror access—no write permissions required.
Generating API token
-
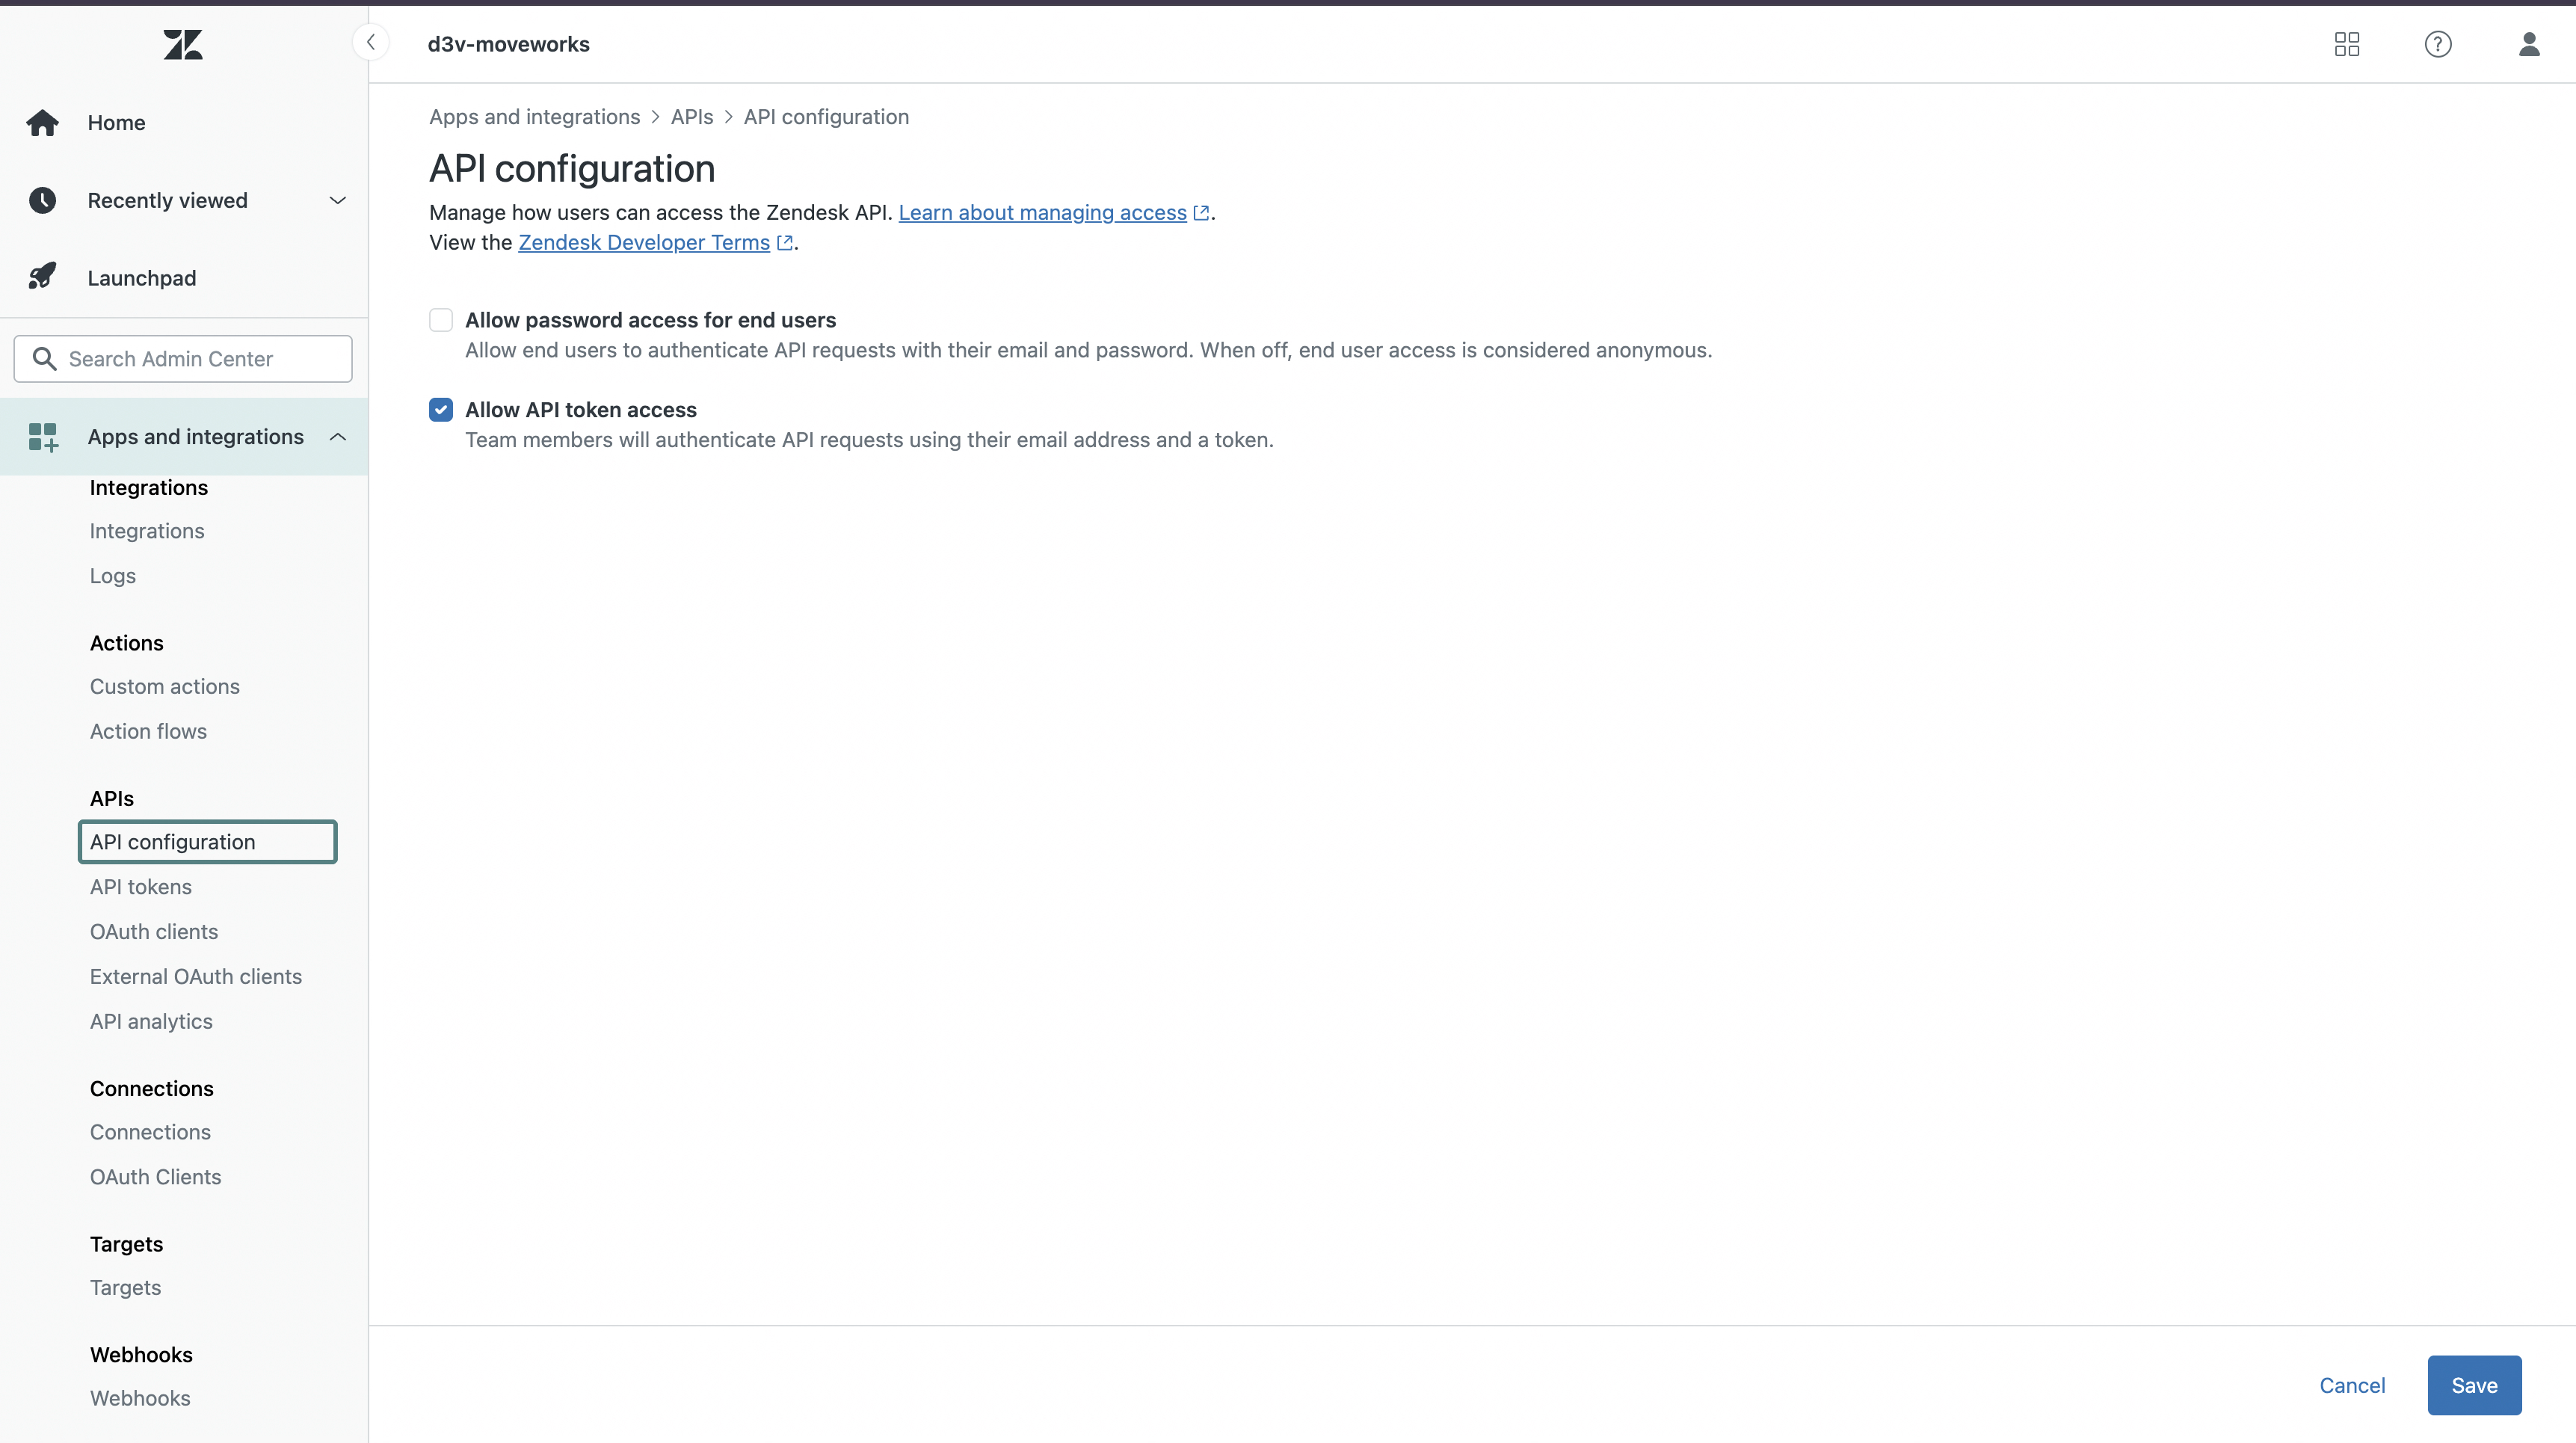
Confirm API token access is enabled (Admin Center → Apps & integrations → APIs → API configuration). If not, please enable the Allow API token access checkbox.
-
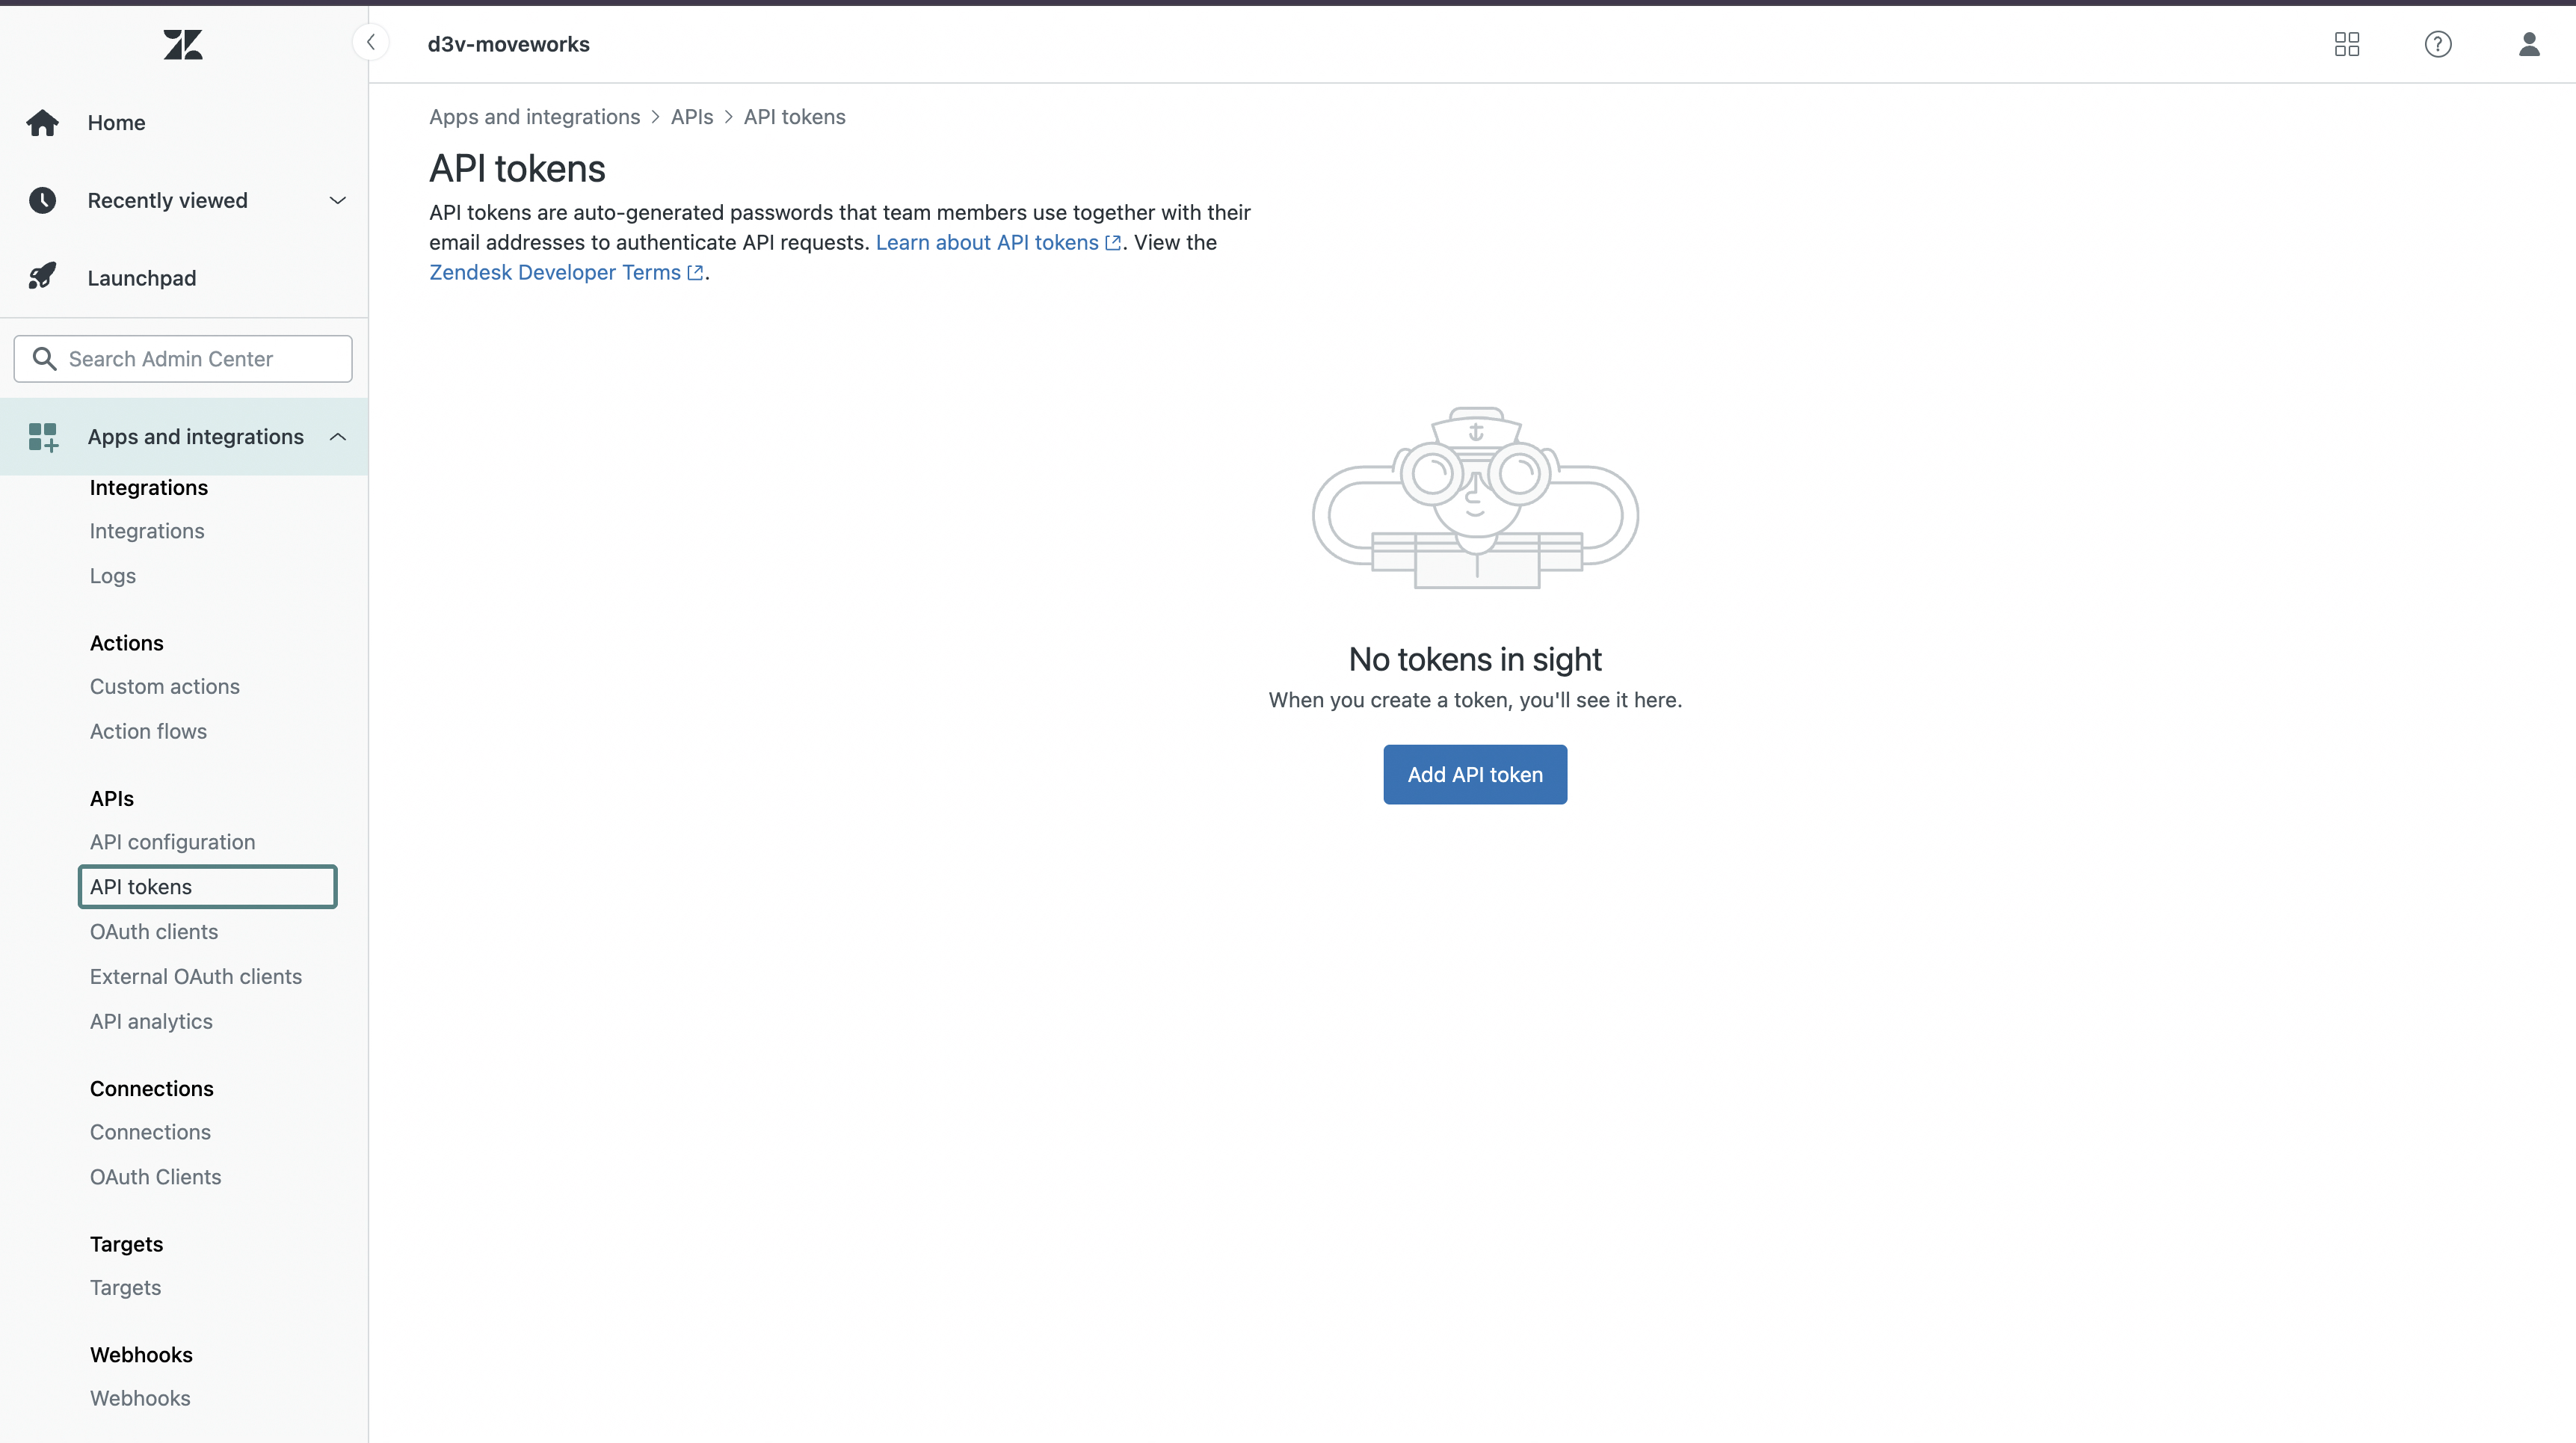
Navigate to Admin Center → Apps & integrations → APIs → API tokens and click Add API token to generate a new one.
-
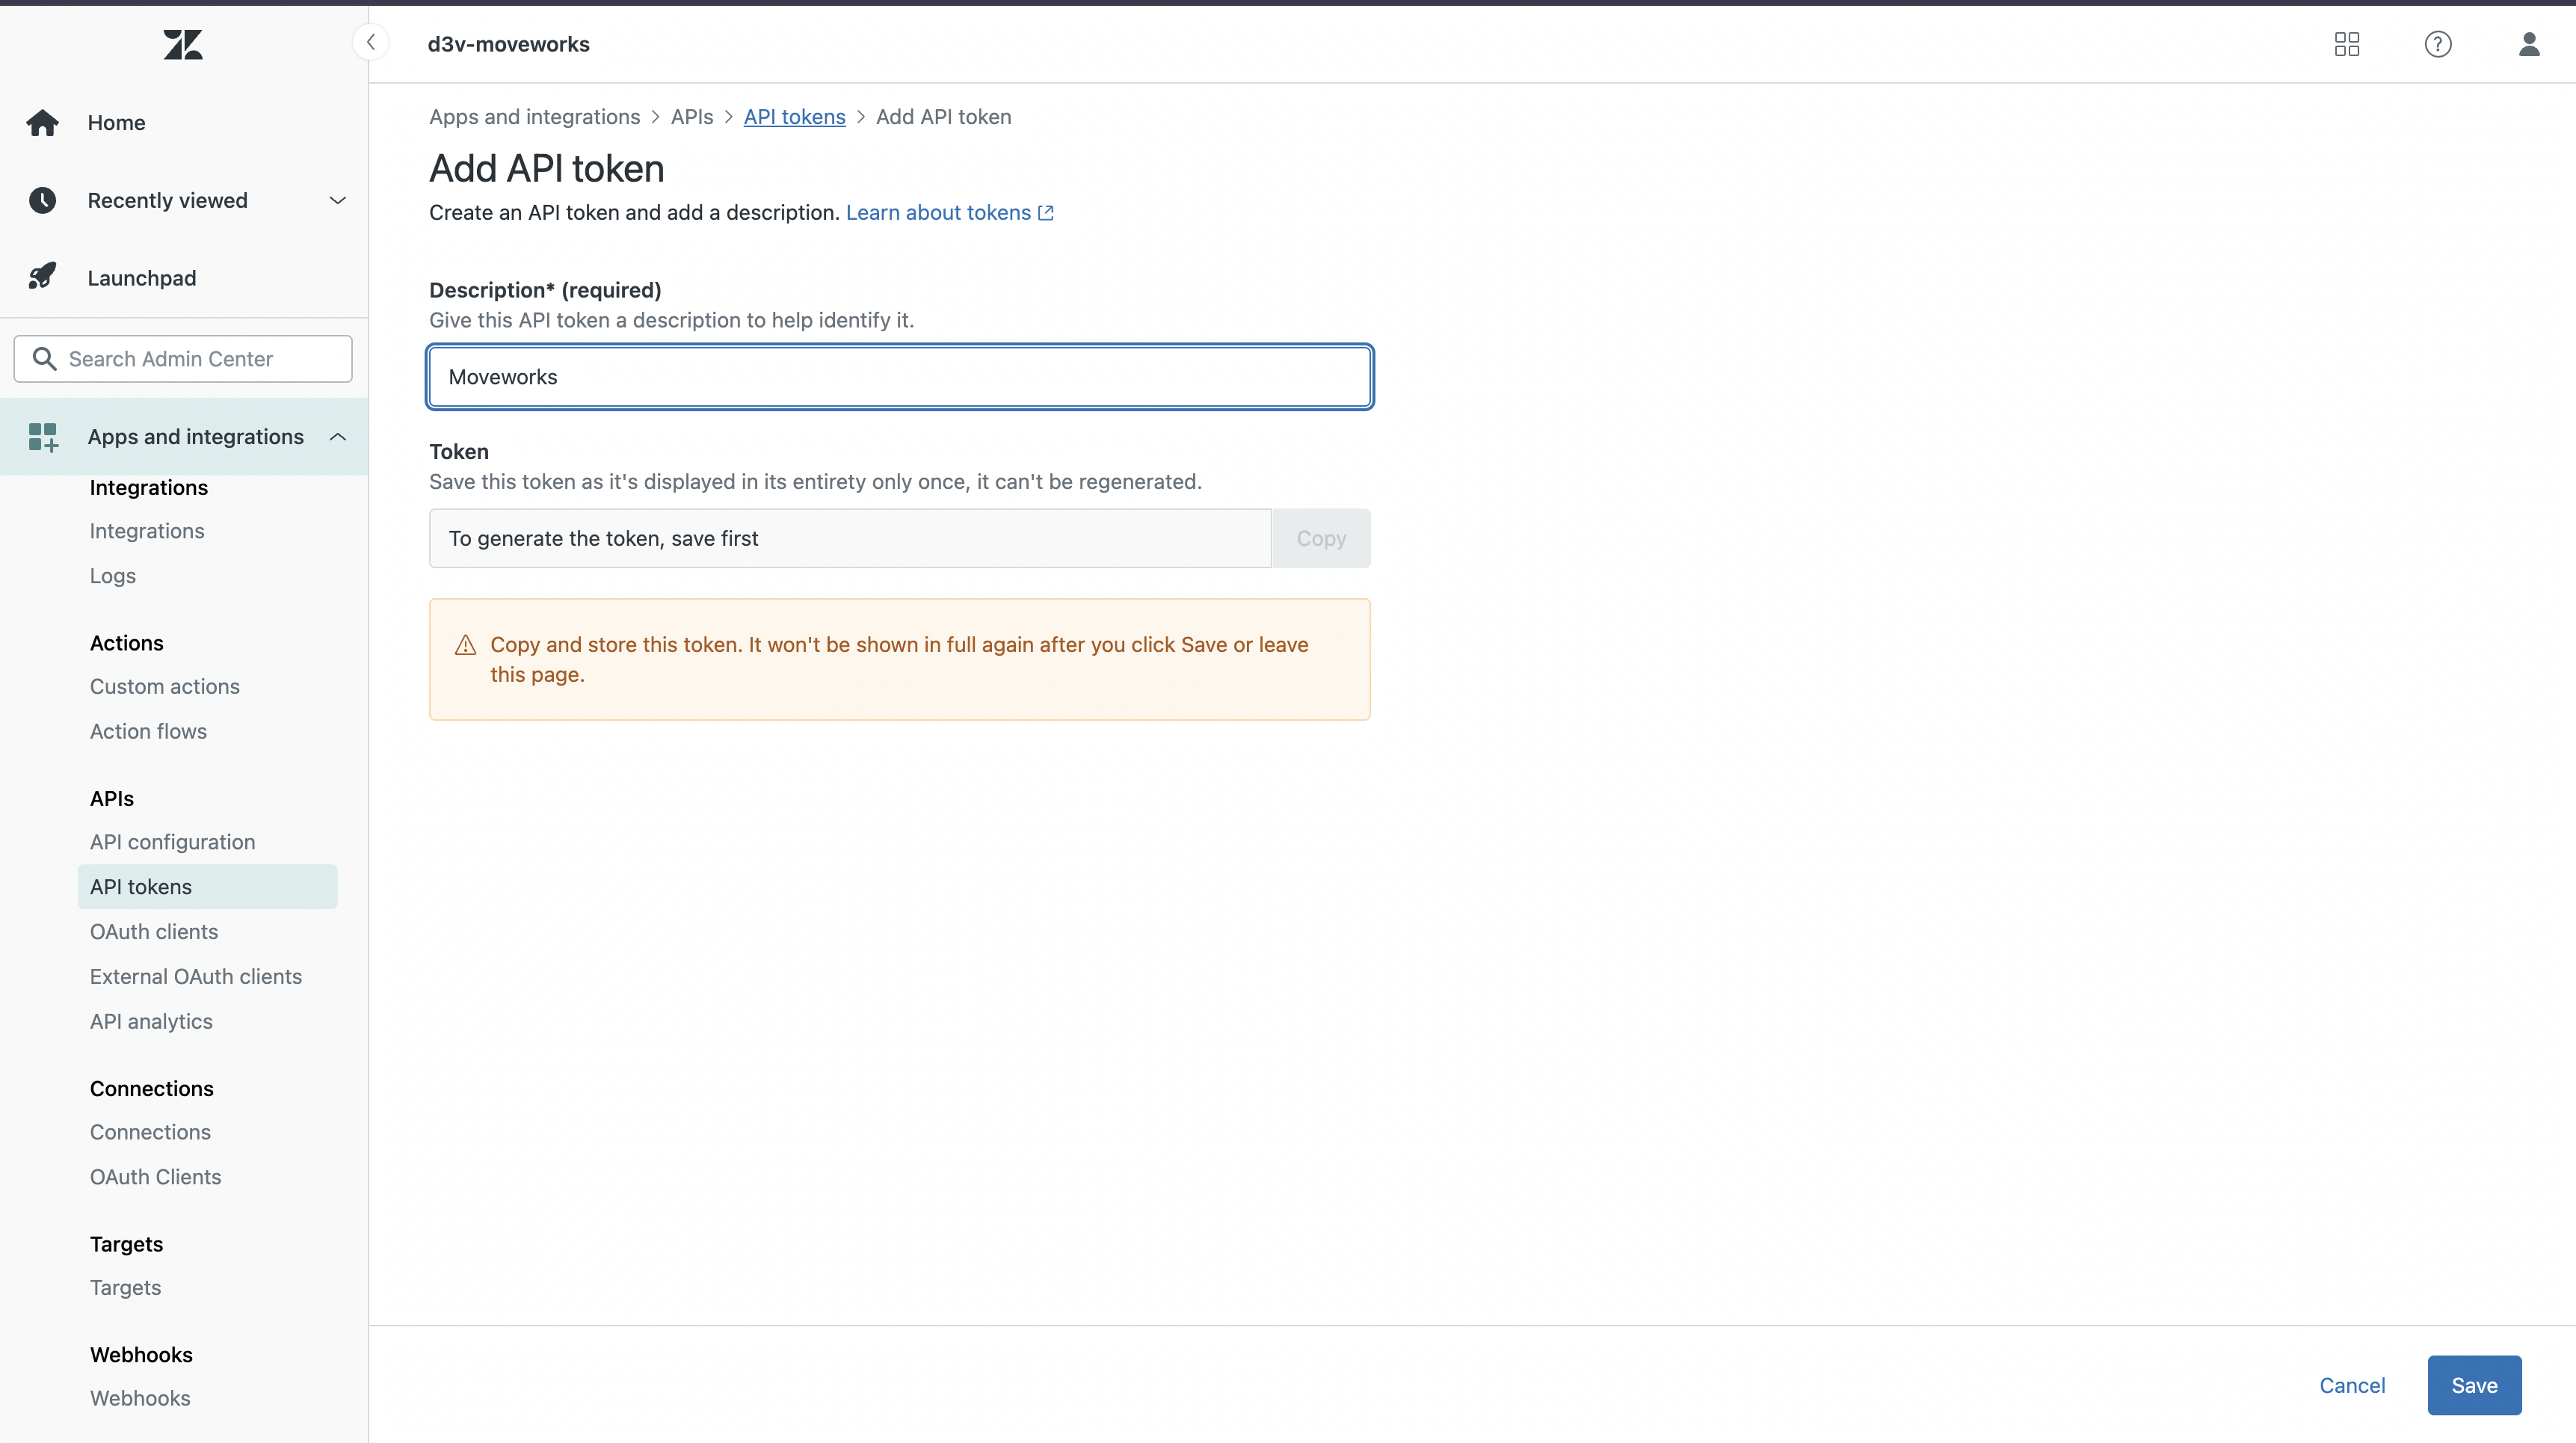
On the pane that appears, set the Description as Moveworks and click on Save to generate the Token.
-
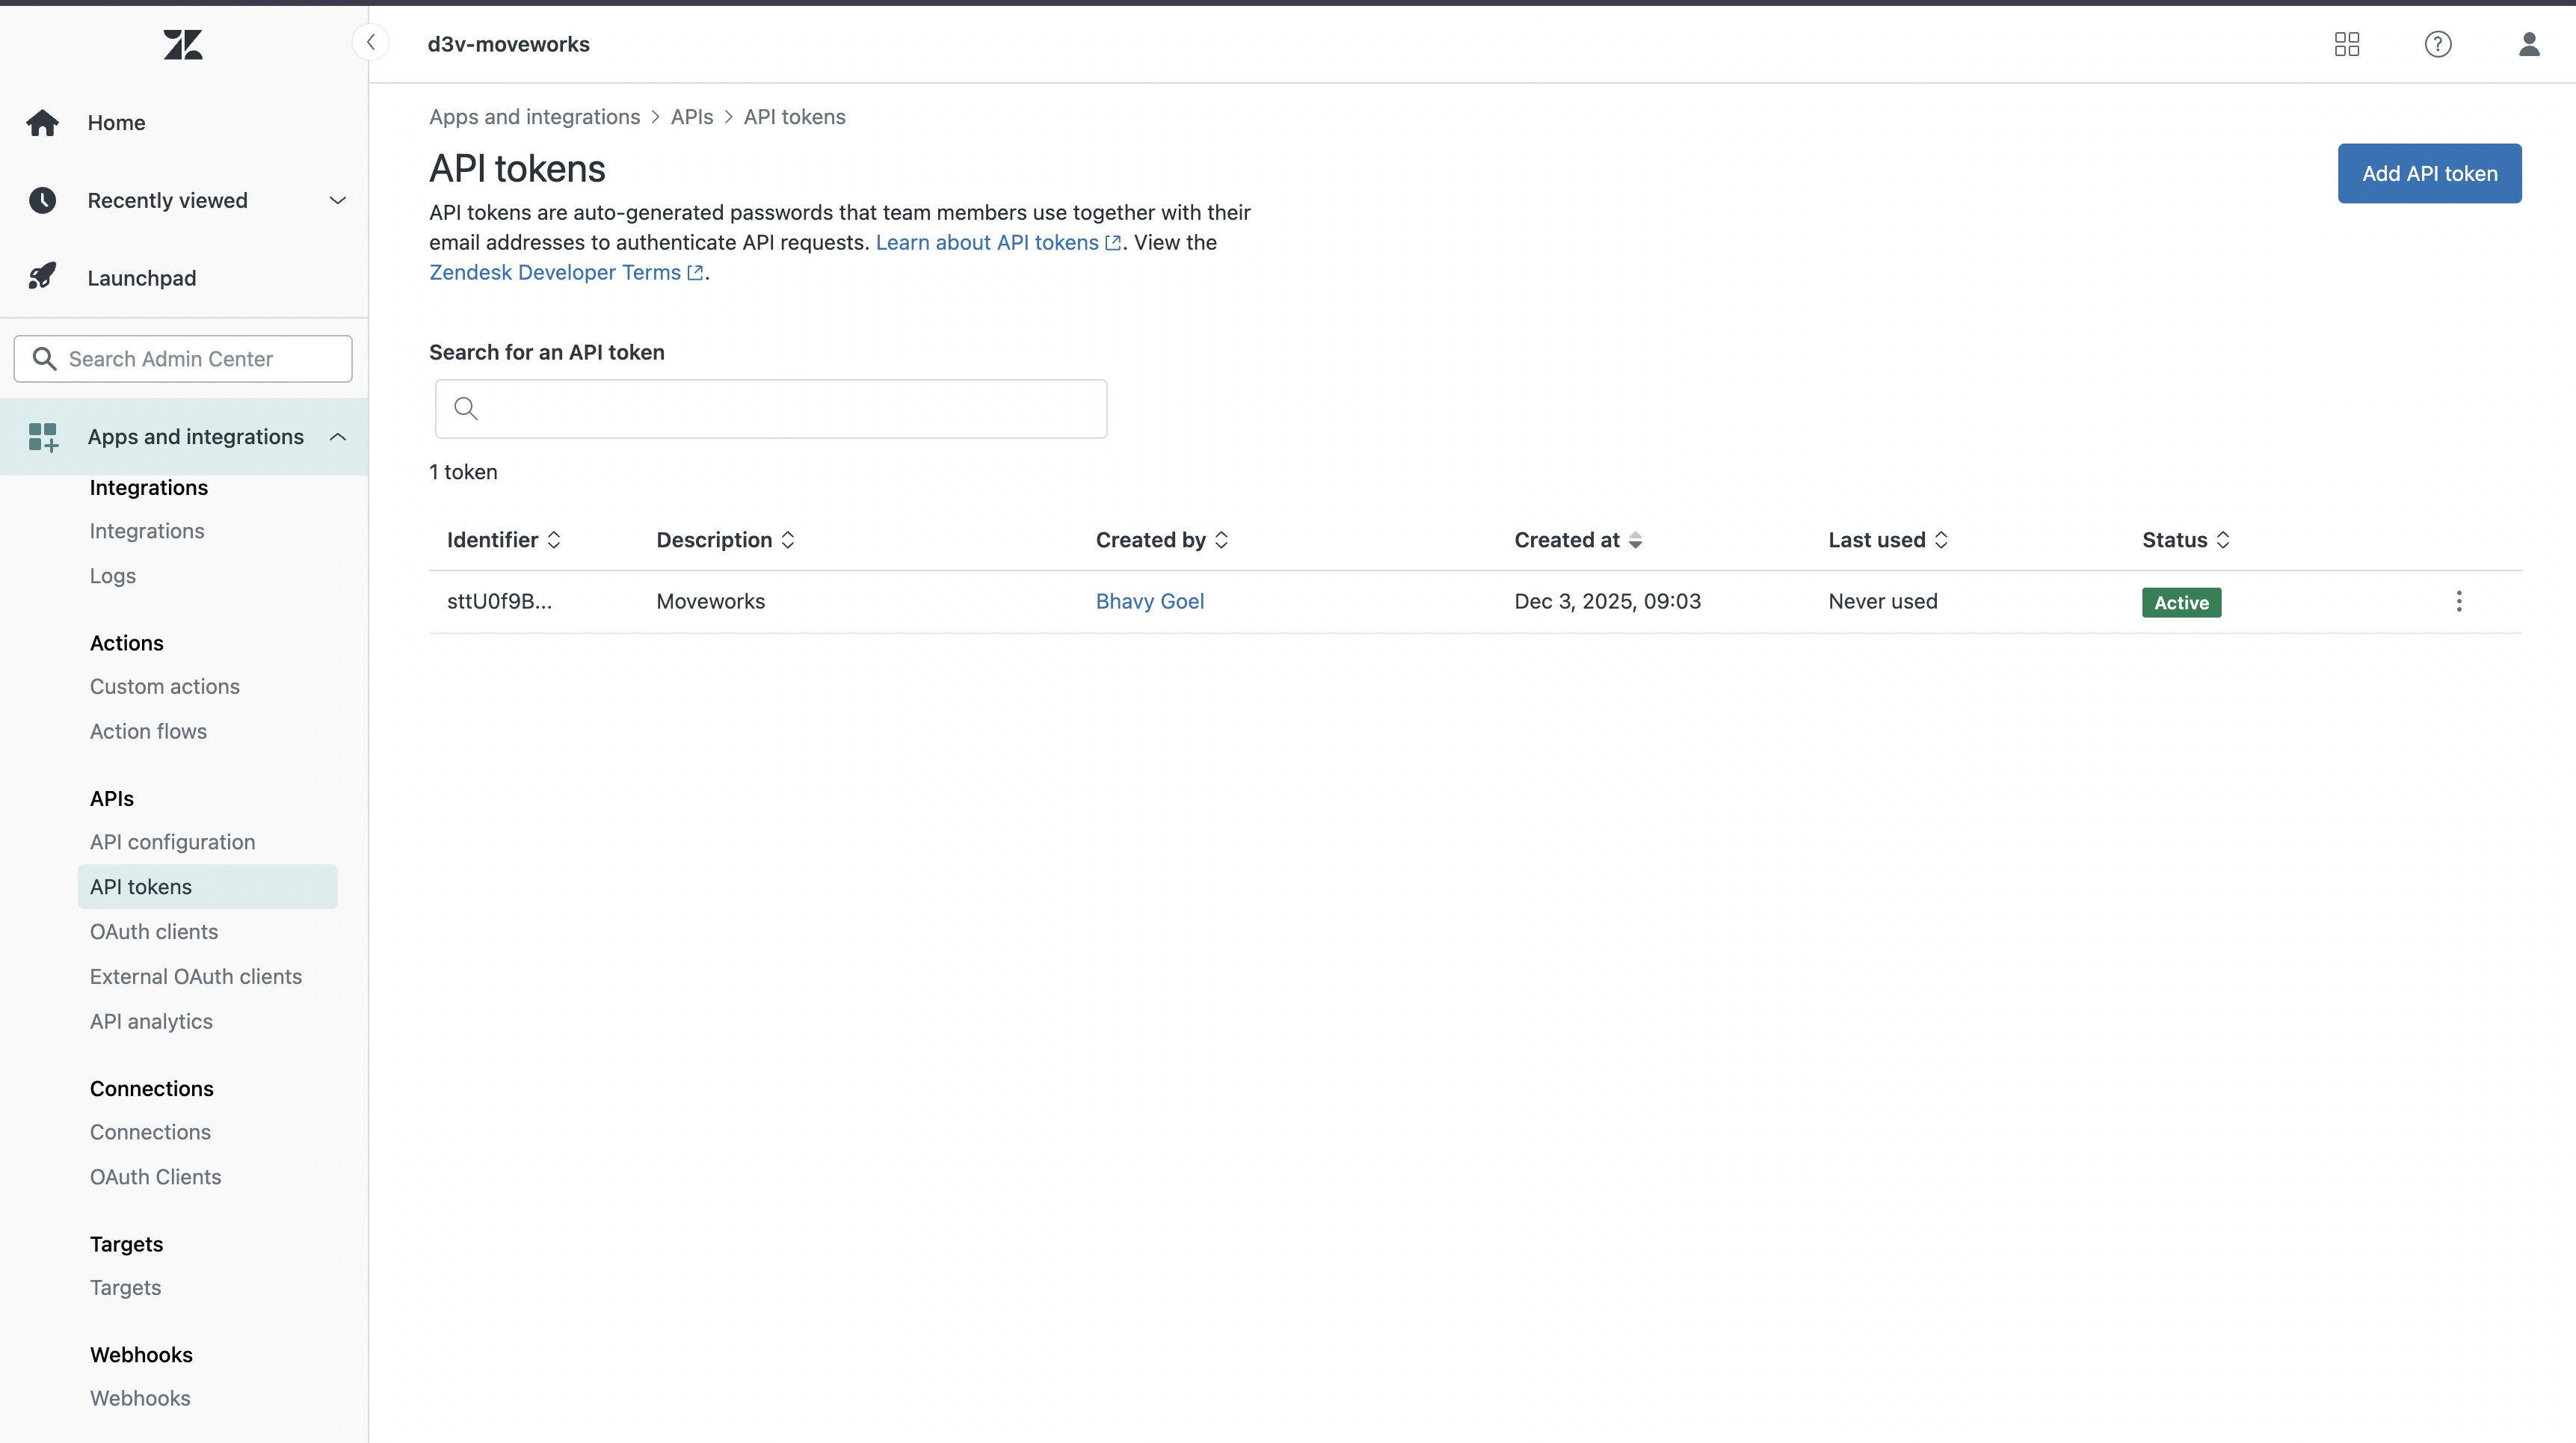
Once the Token is generated, copy and store it in a secure location to access it again later. Click on Save again to save it and it will take you back to the API token home page. You will notice that this API token is now Active.
Setup in Moveworks
Connector Creation
- Log in to your org's MyMoveworks portal
- Navigate to Moveworks Setup > Connectors > Built-in Connectors
- Click Create New
- Search and Select Zendesk (Next Gen)
- Click on Next: Add Creds
- Input the following details
- Connector Name : Name this connector for your future reference. Once set, this name cannot be changed.
- Base URL: Enter the SubDomain of your Zendesk instance.
-
Common Base URL: For Zendesk, the URL follows this pattern:
https://your-instance-domain.zendesk.comCopy your instance domain from this URL and paste it into the text field provided.

-
Custom Base URL: If you are on GovCloud or have a custom URL, your Zendesk URL will vary based on your specific configuration. In this case, you’ll need to provide the full URL domain. Open Zendesk in your browser and copy the complete URL from the address bar.
-
- Username: Select the email ID of the service account you had created above
- Password: Enter the API Token you have generated above.
- Click Save. This connector will now be used to configure content ingestion from Zendesk. Refer to the steps mentioned below.
Configuring Zendesk for Enterprise Search
Initialising setup
- Log in to your org's MyMoveworks portal
- Navigate to Moveworks Setup > Answers > Ingestion > Enterprise Search
- Click on Create New or Get Started
- Select Zendesk from the dropdown list and click on Get Started
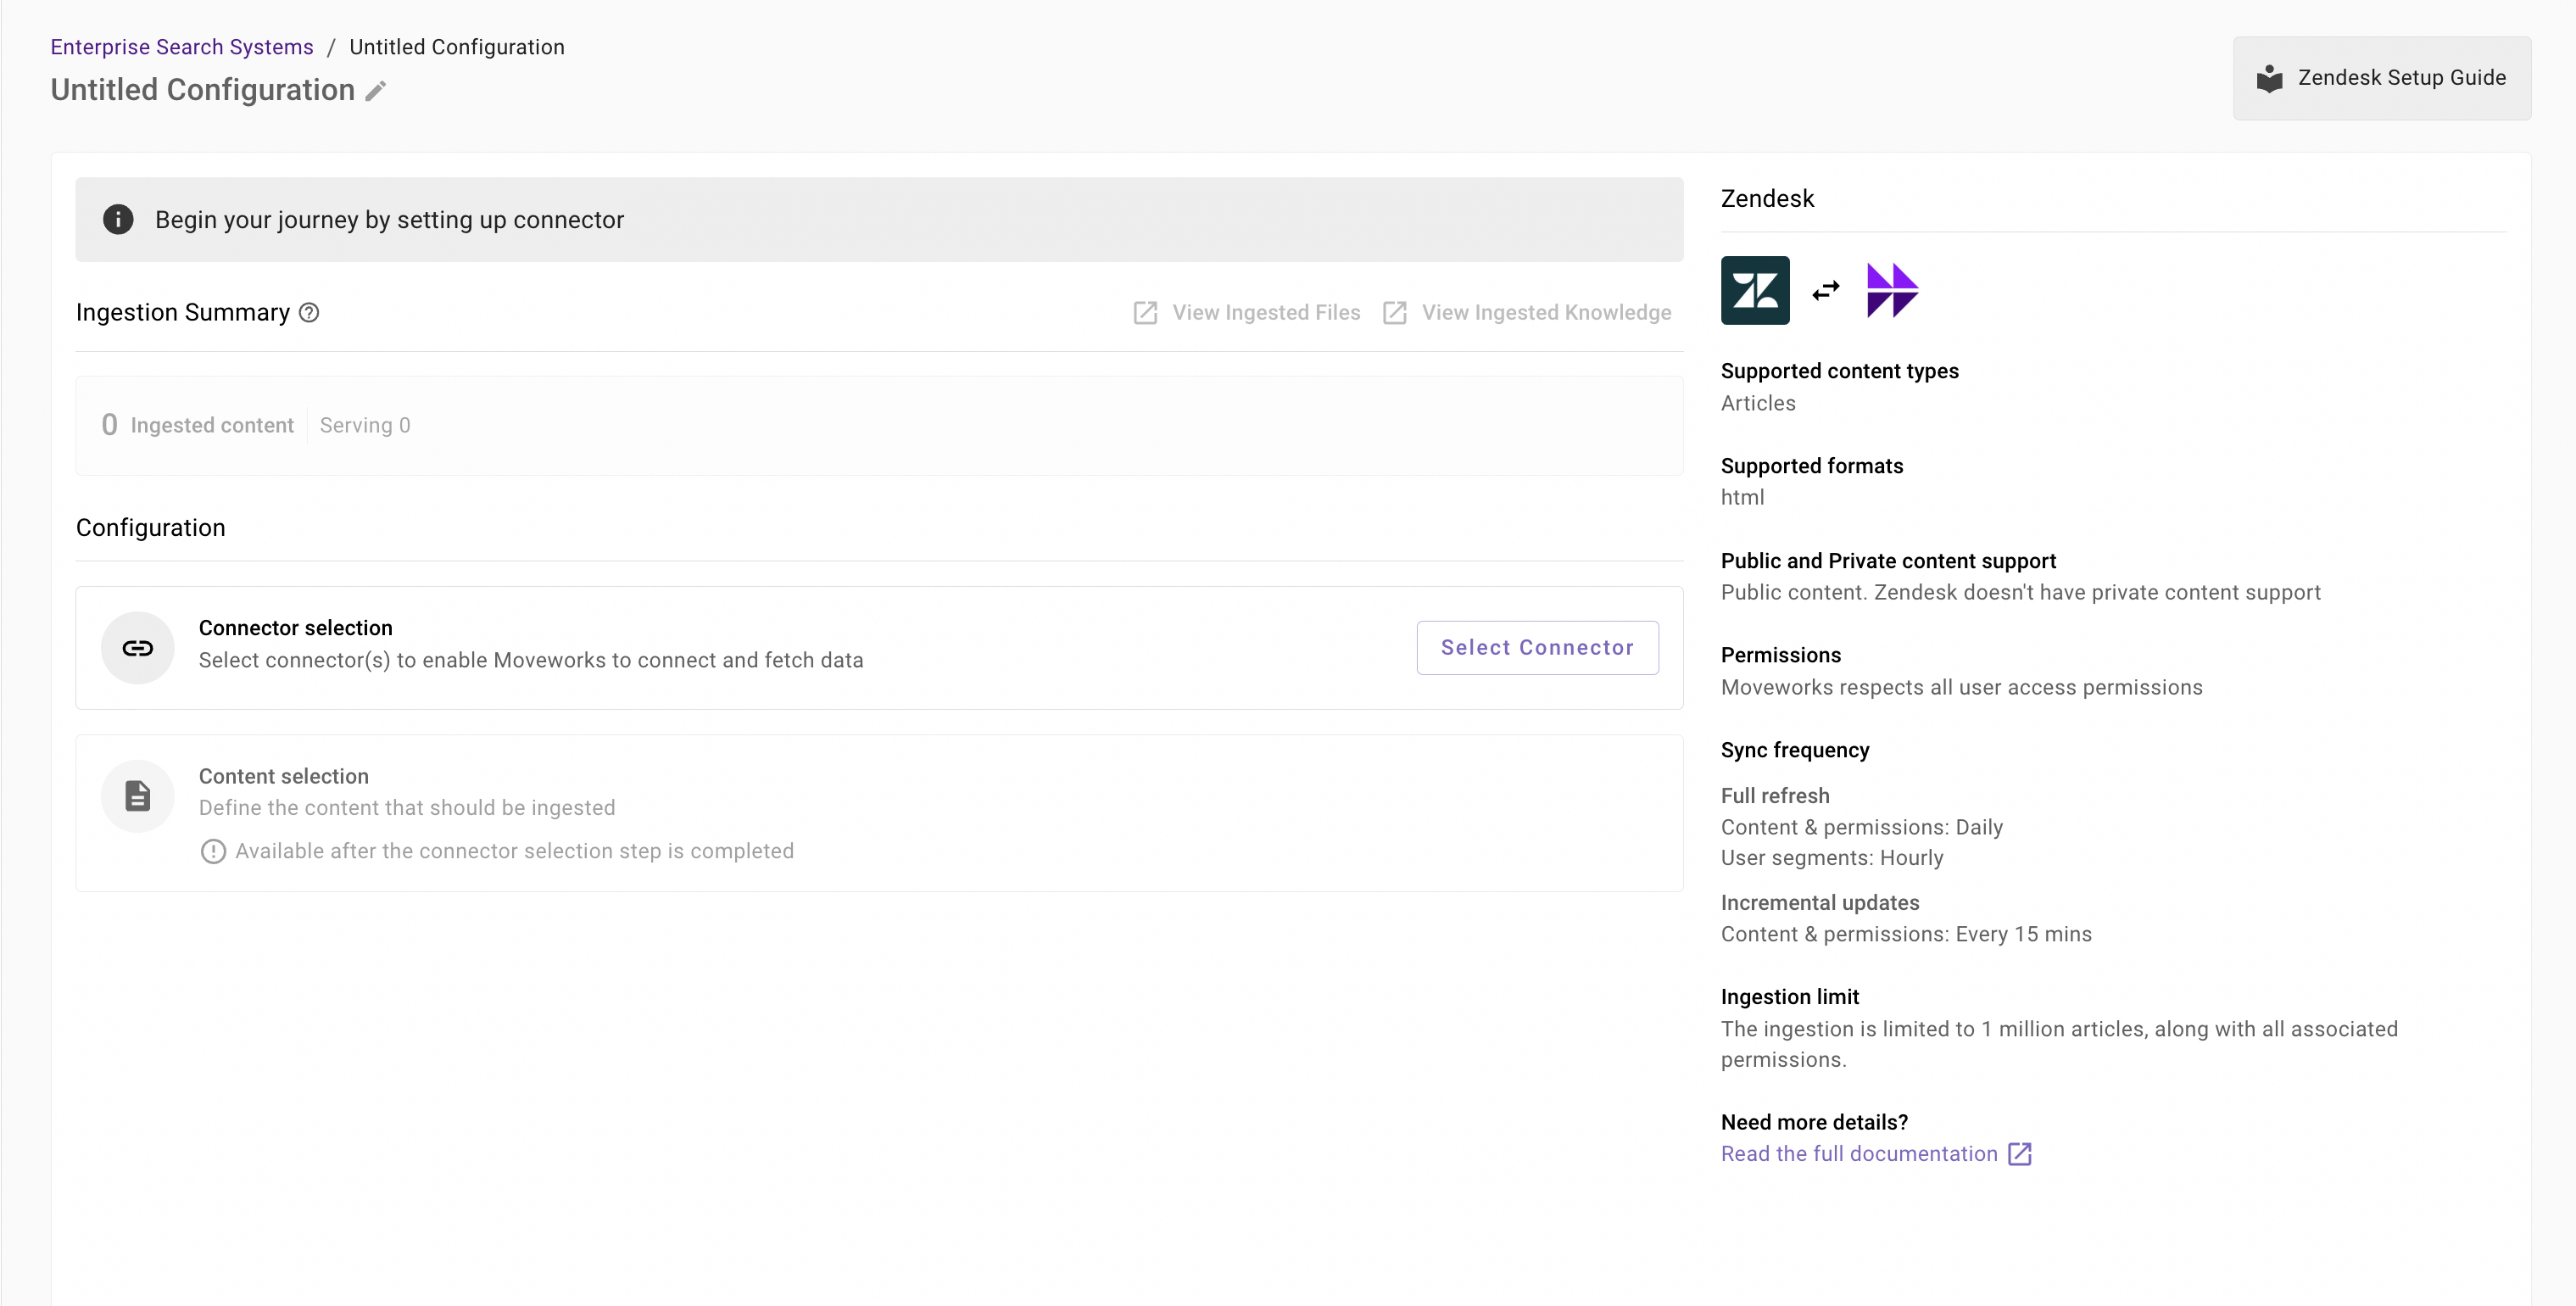
- You will be redirected to the Zendesk ingestion overview page. In the overview page, you will find few info blocks and few configuration blocks.
- System Overview: This presents an overview of Zendesk support from Moveworks
- Ingestion Summary: This provides information on the count of records that has been ingested and serving. The values will appear after the first successful ingestion run.
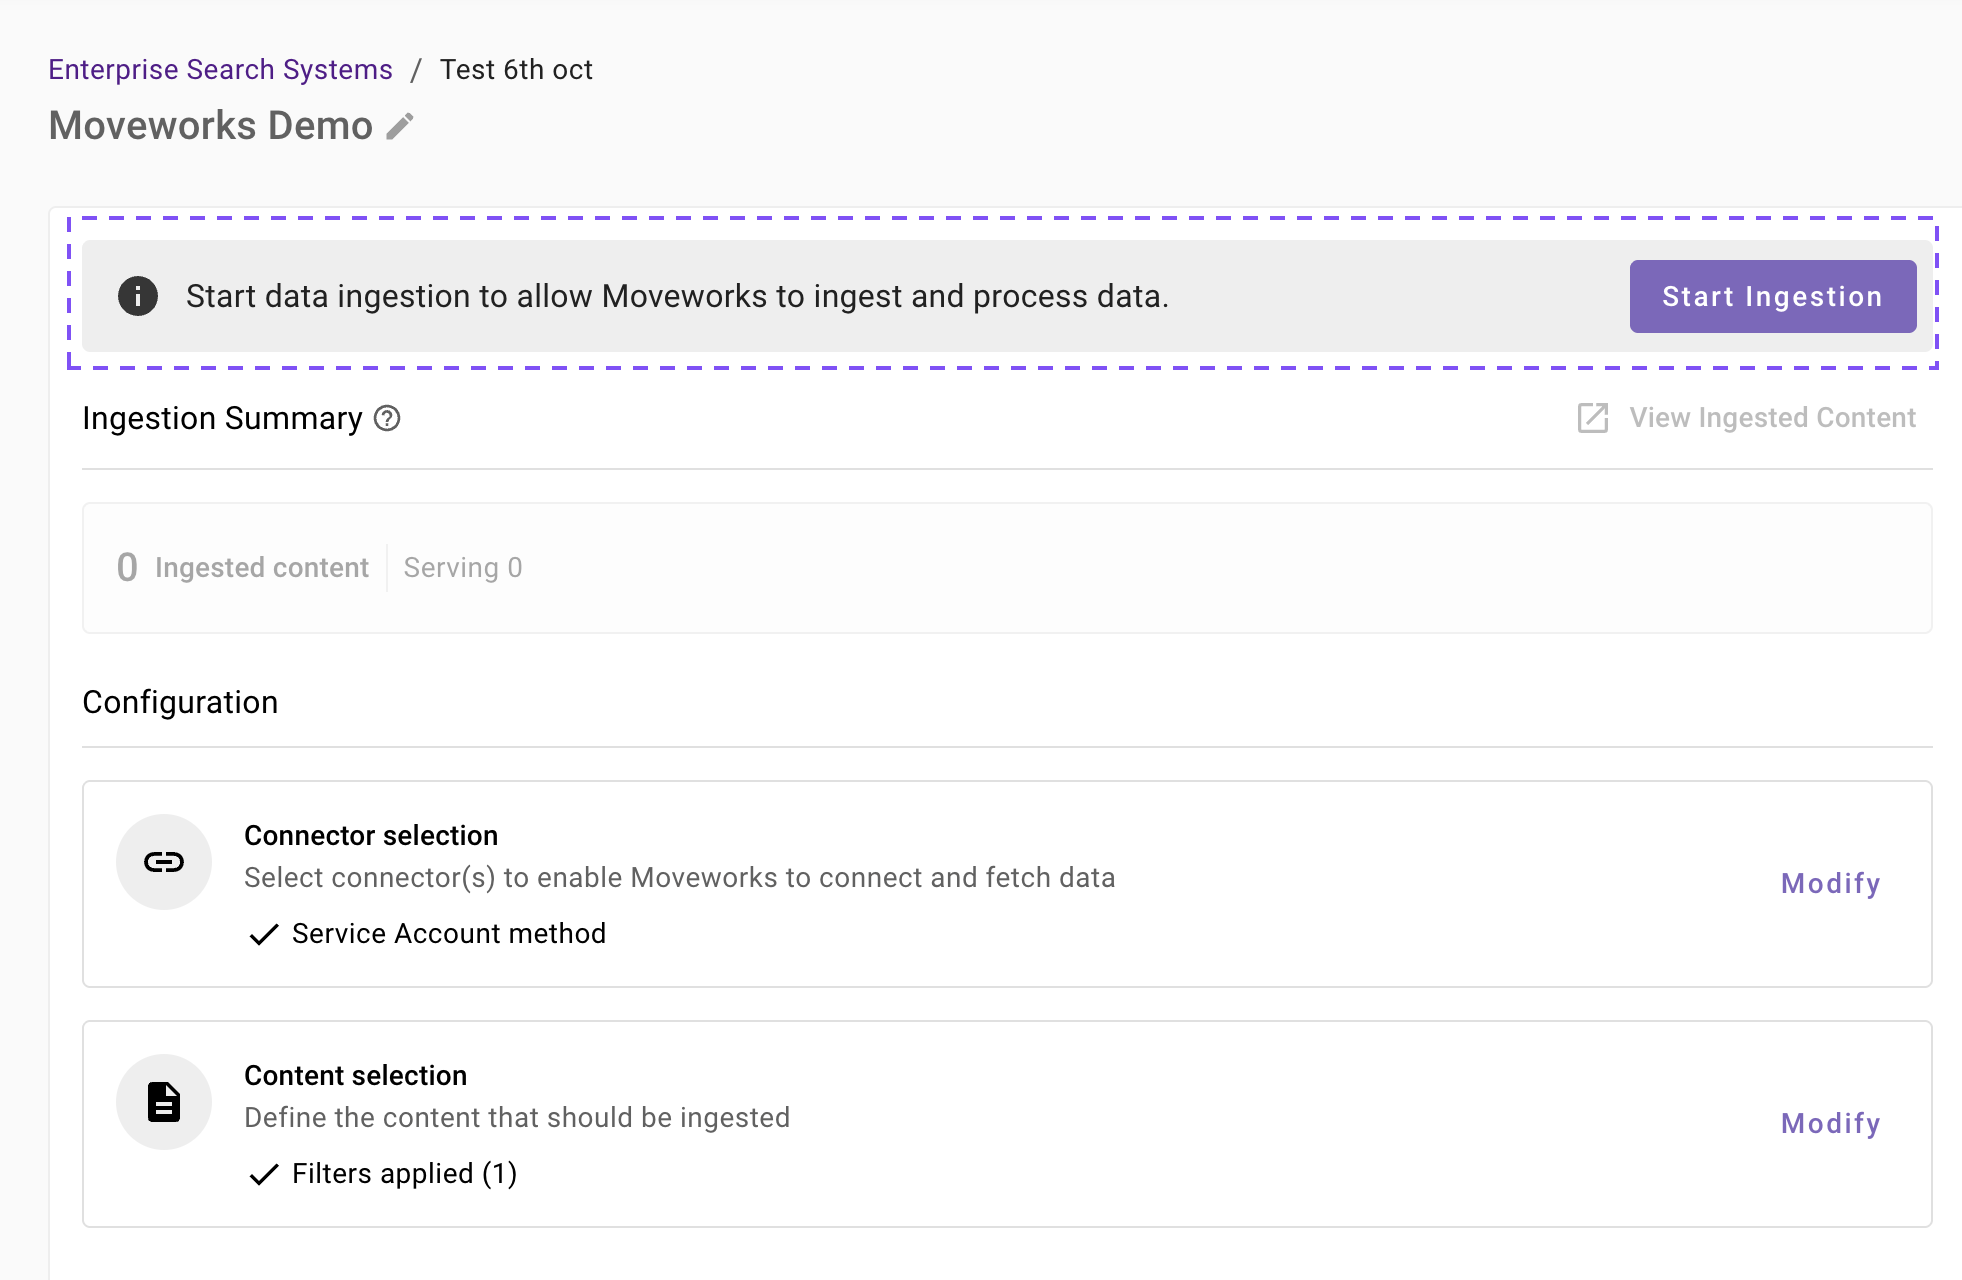
- Connector Selection: In this configuration block, you are required to select the required connector to enable Moveworks to connect and fetch data
- Content Selection: In this configuration block, you are required to define the content that should be ingested within Moveworks
Connector selection and validation
-
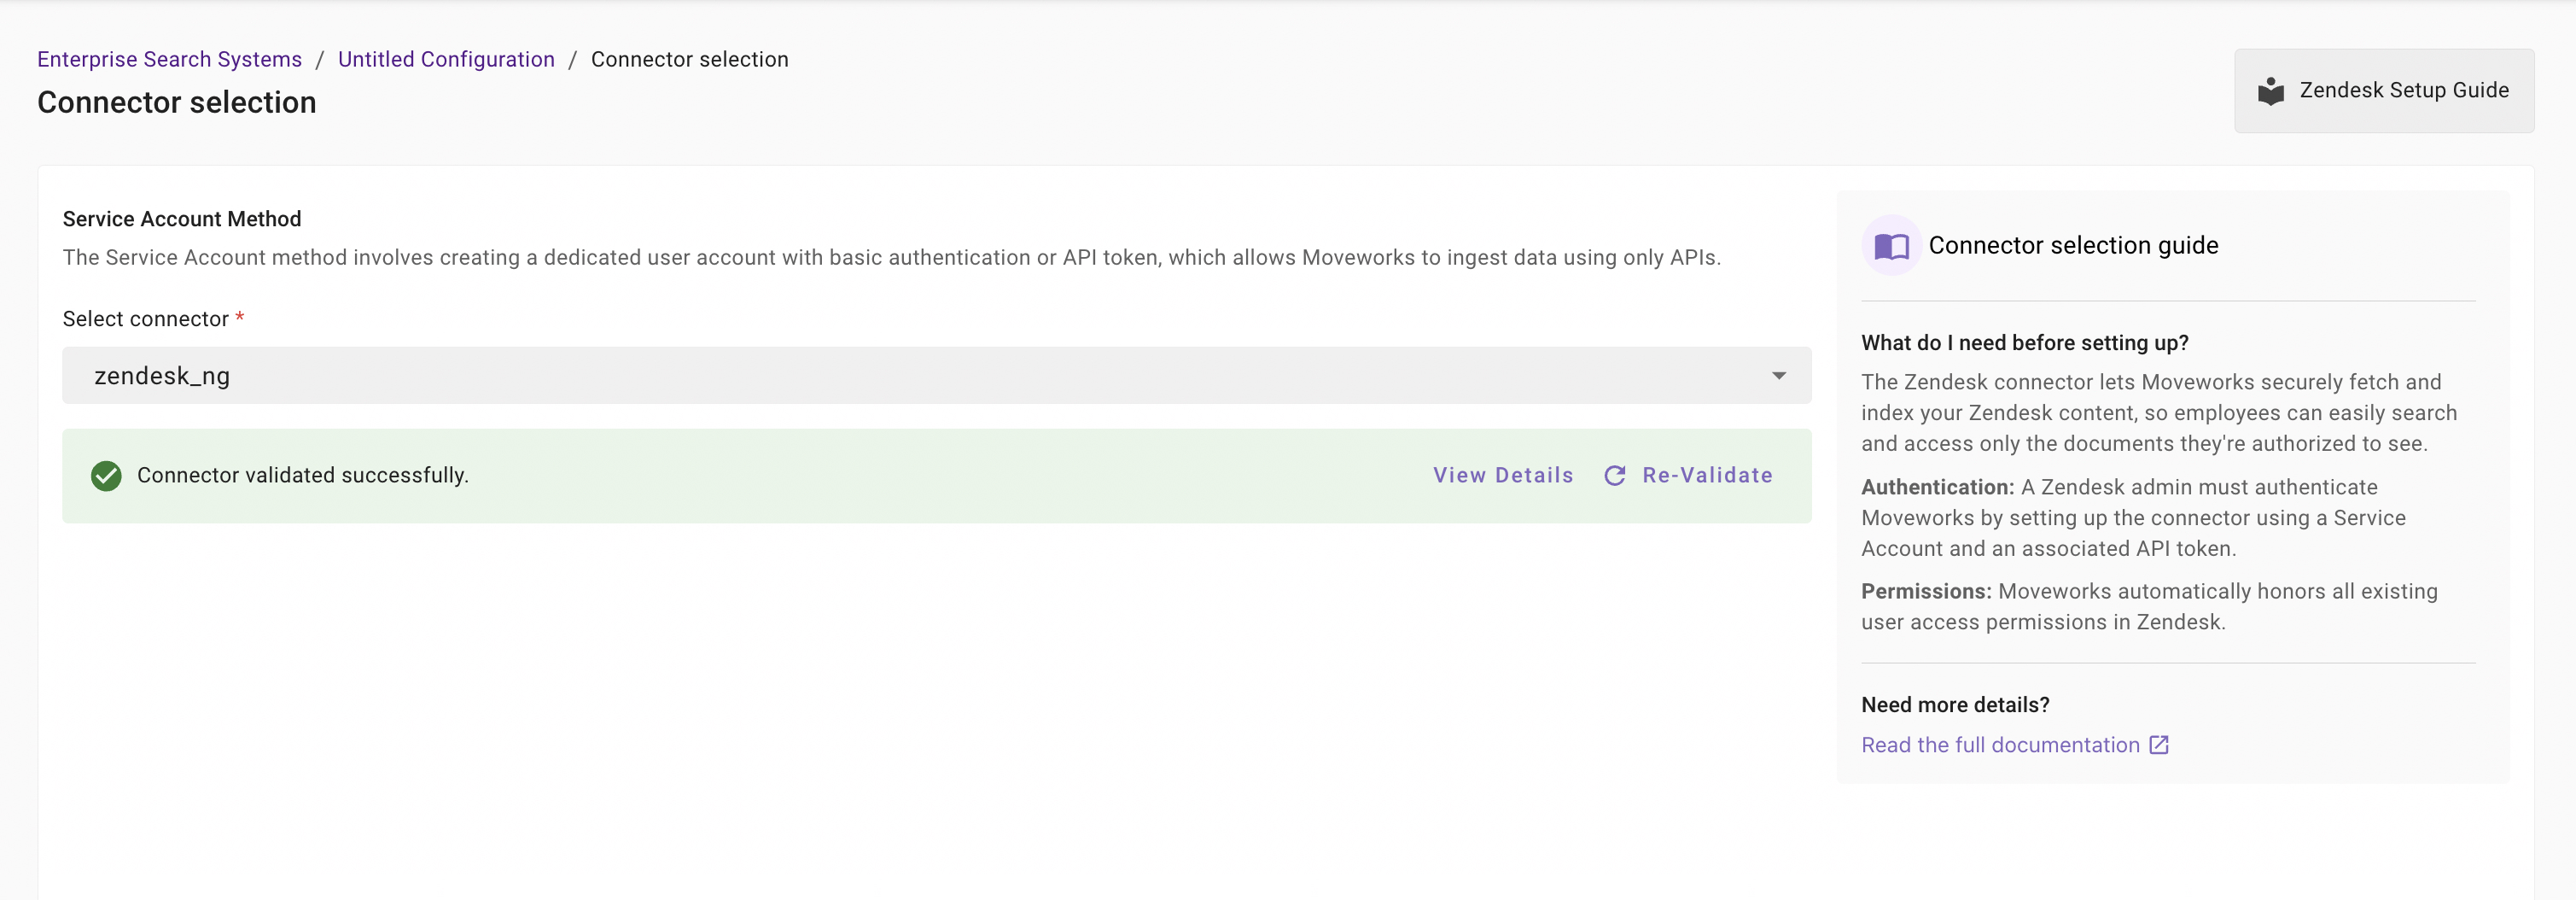
Once you click on Select Connector, a connector setup screen will appear as follows
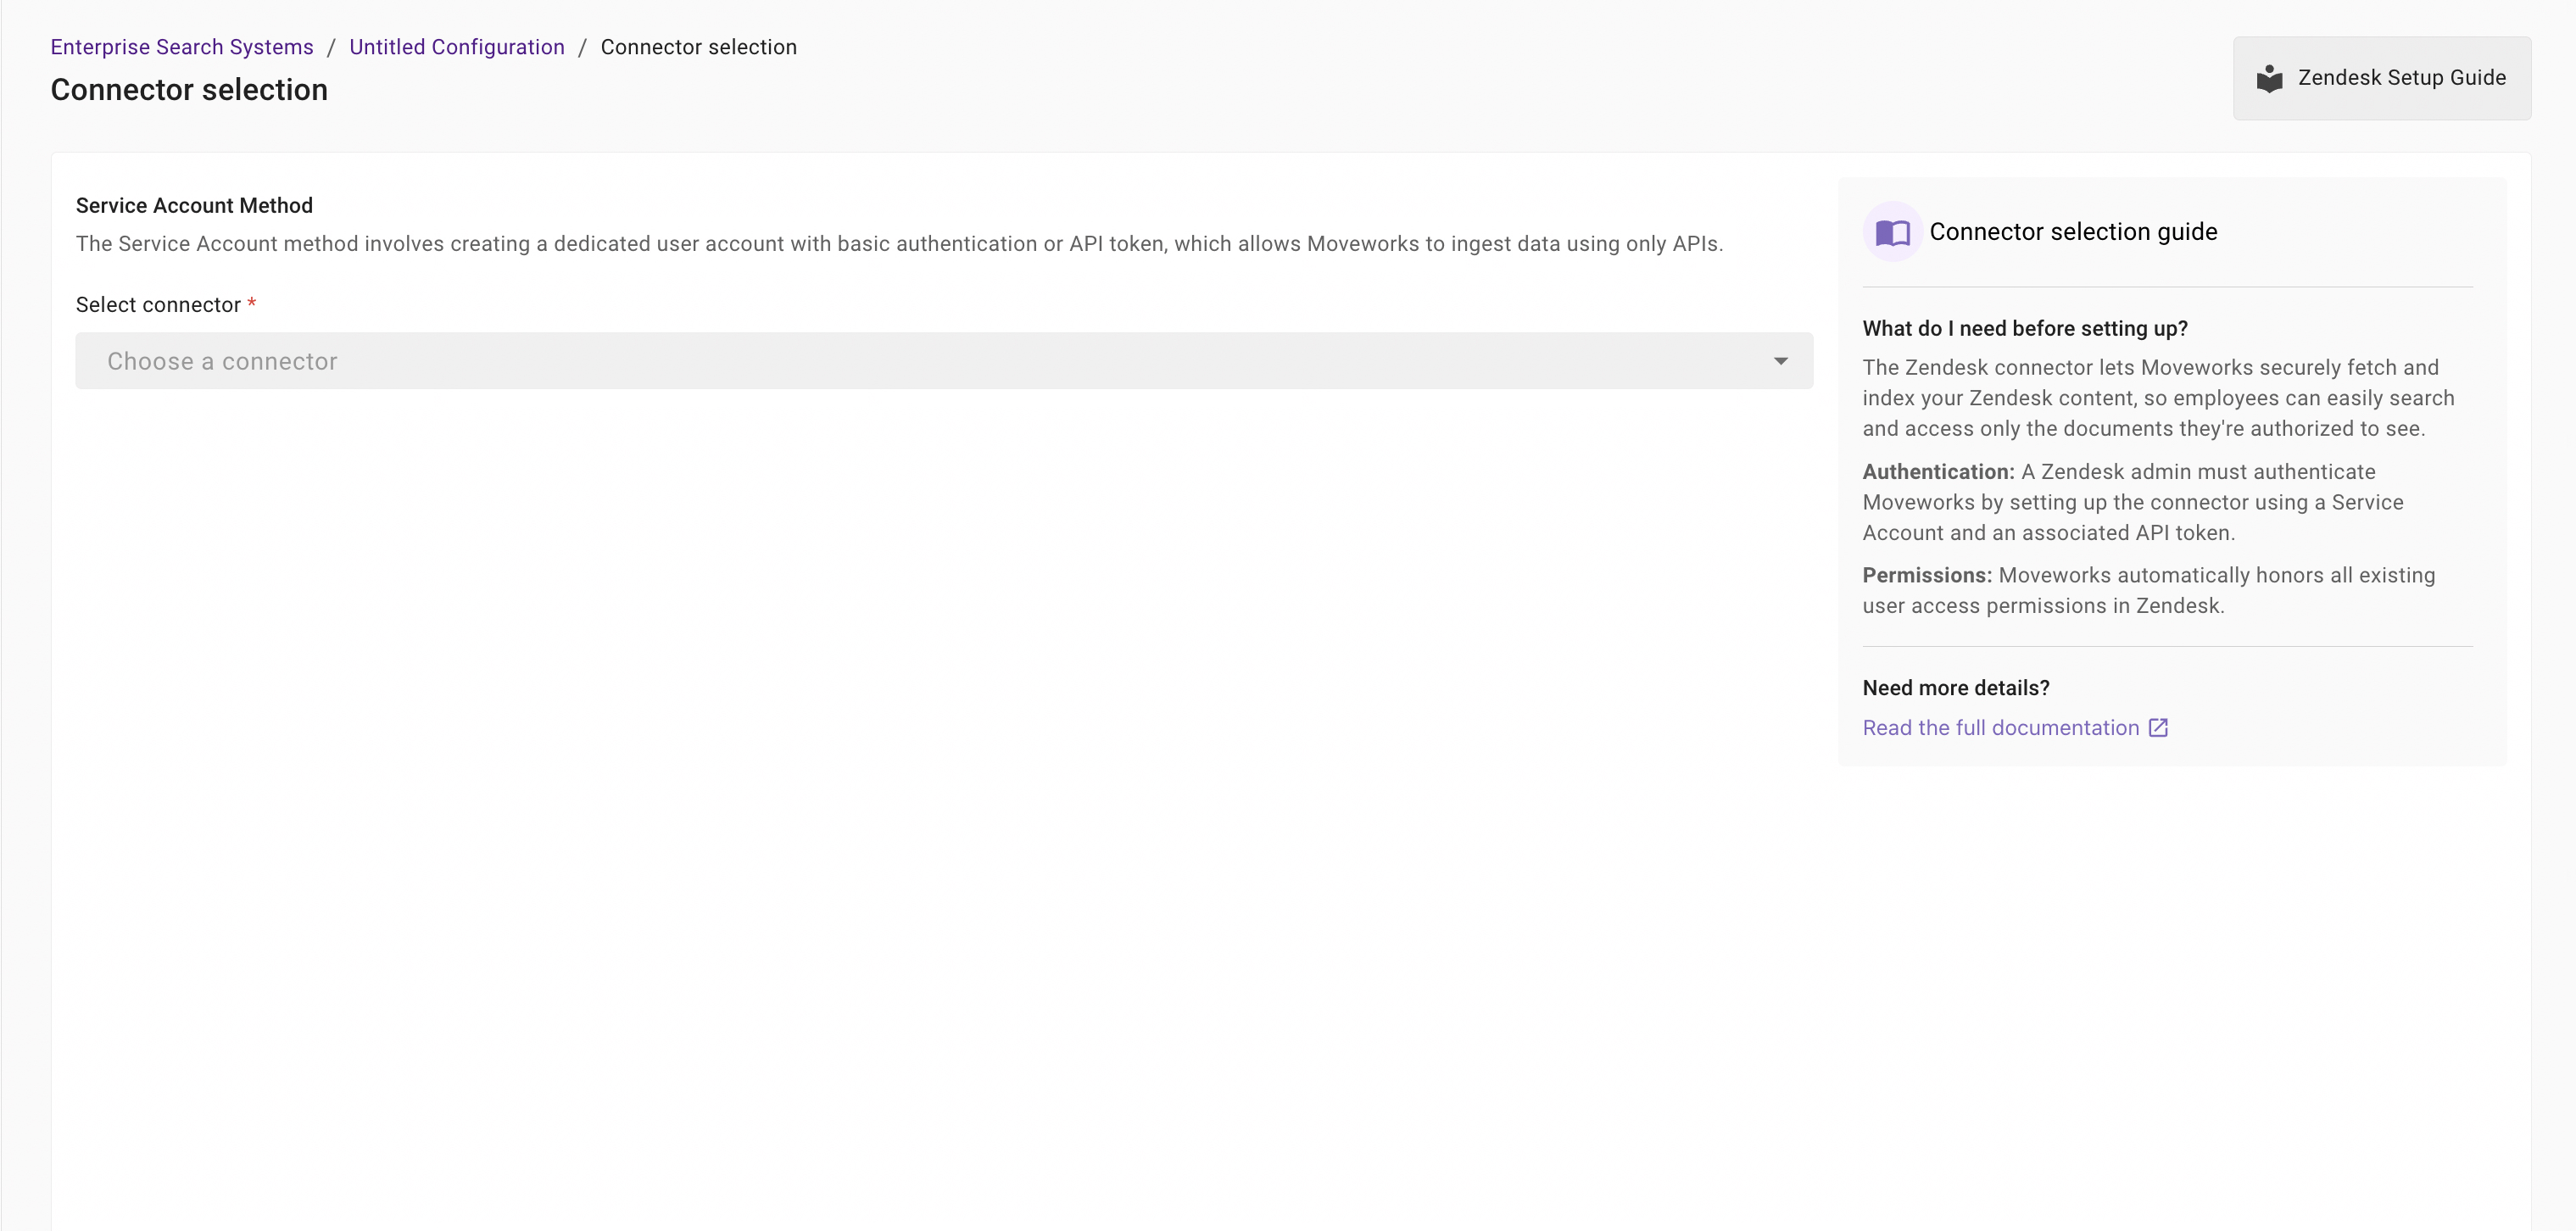
-
Select the connector (from the dropdown) that you have created in the Connector Creation step.
Please note: Only the Zendesk (Next Gen) connectors will appear in this list.
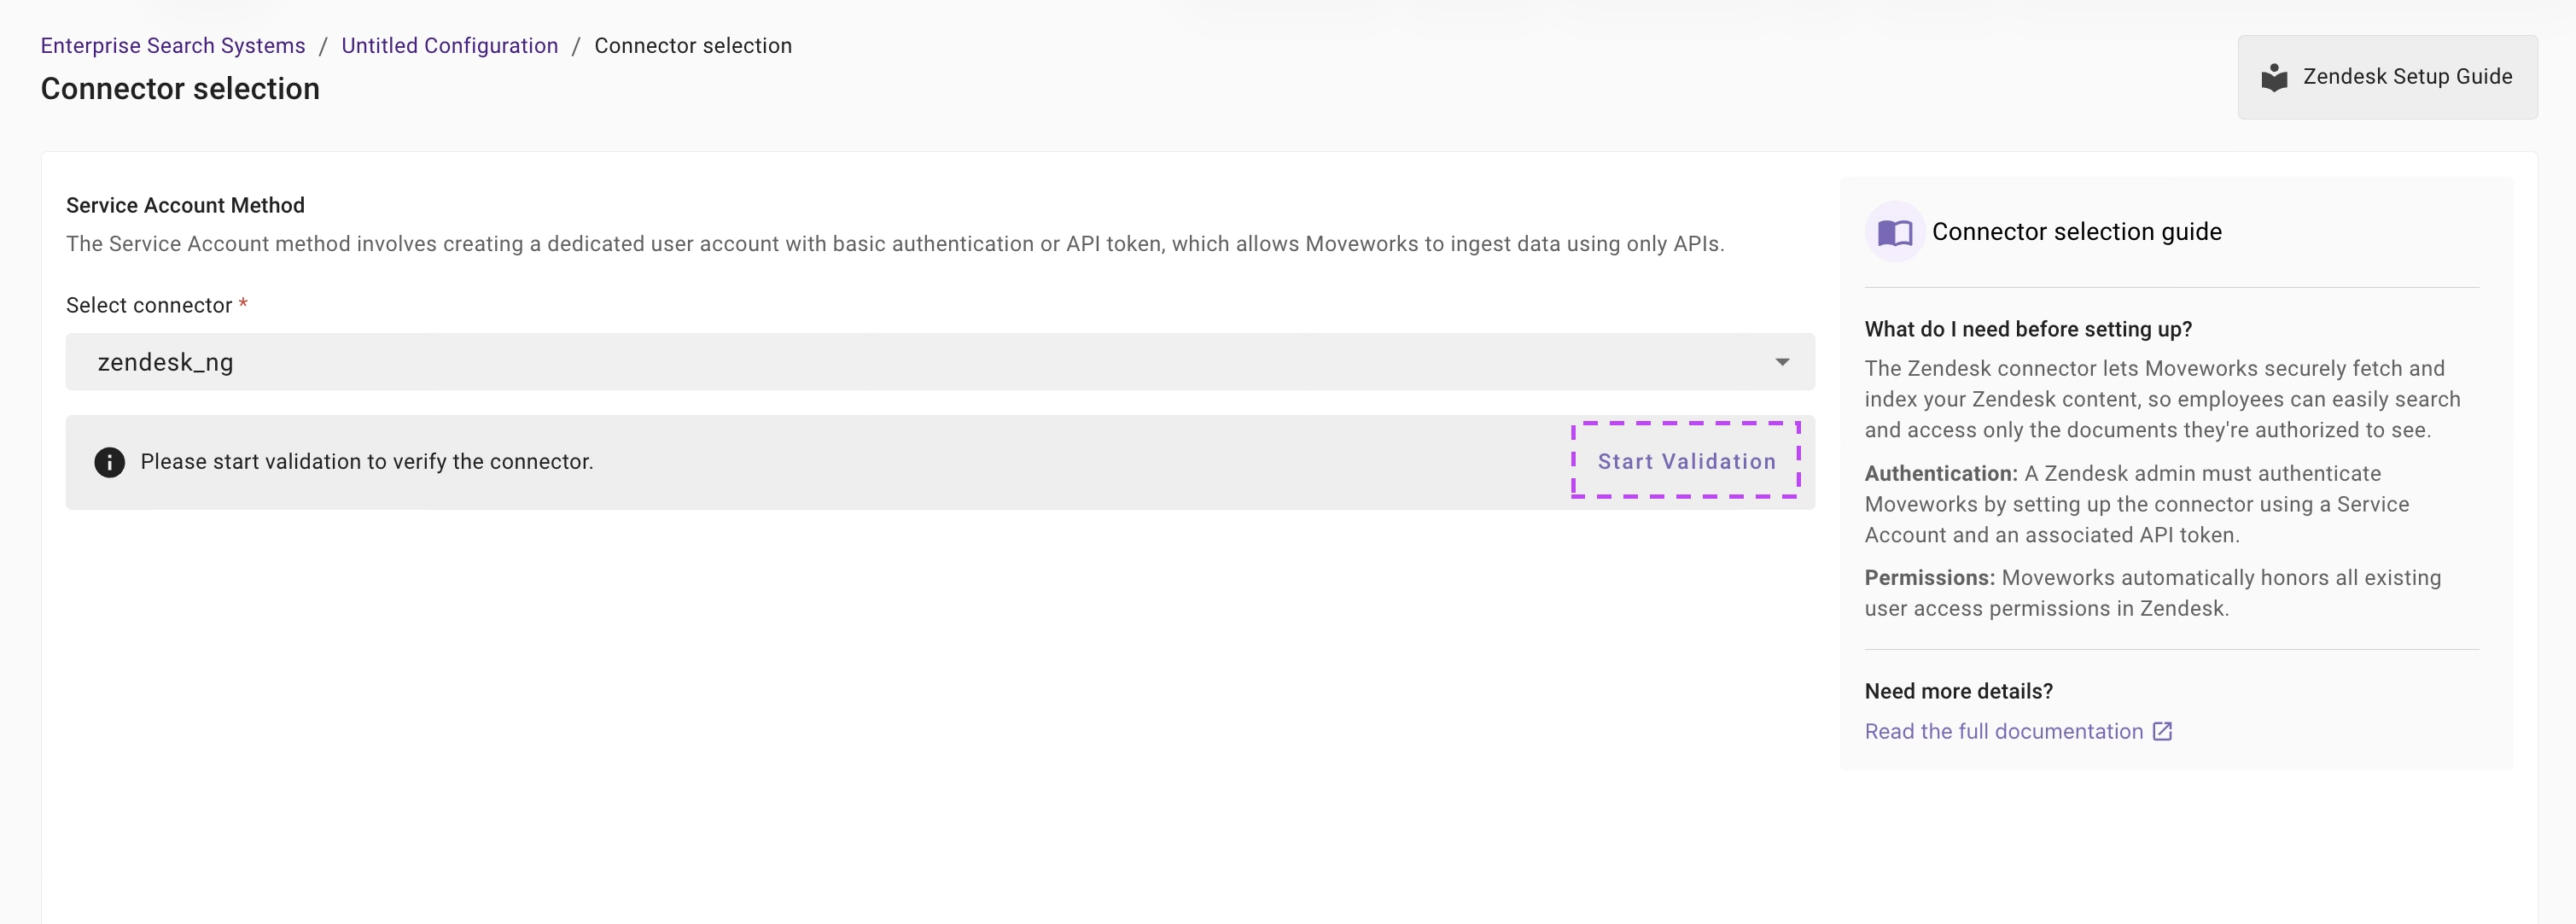
-
Once the connector is selected, you need to click on Start Validation to validate the connector credentials and required scope.
Connector Validation
This is a mandatory step in order to save the configuration and move to the next step.
Moveworks validates the selected connector to check:
- Auth: Moveworks validates if the connector has right credentials to authenticate
- Content: Moveworks validates if connector has right scopes to fetch content
- Permissions: Moveworks validates if connector has right scopes to fetch user permissions
- Users: Moveworks validates if connector has right scopes to fetch user data
- User Segments: Moveworks validates if connector has right scopes to fetch user segments data
-
If the connector is validated successfully, you will see a green info banner as follows.
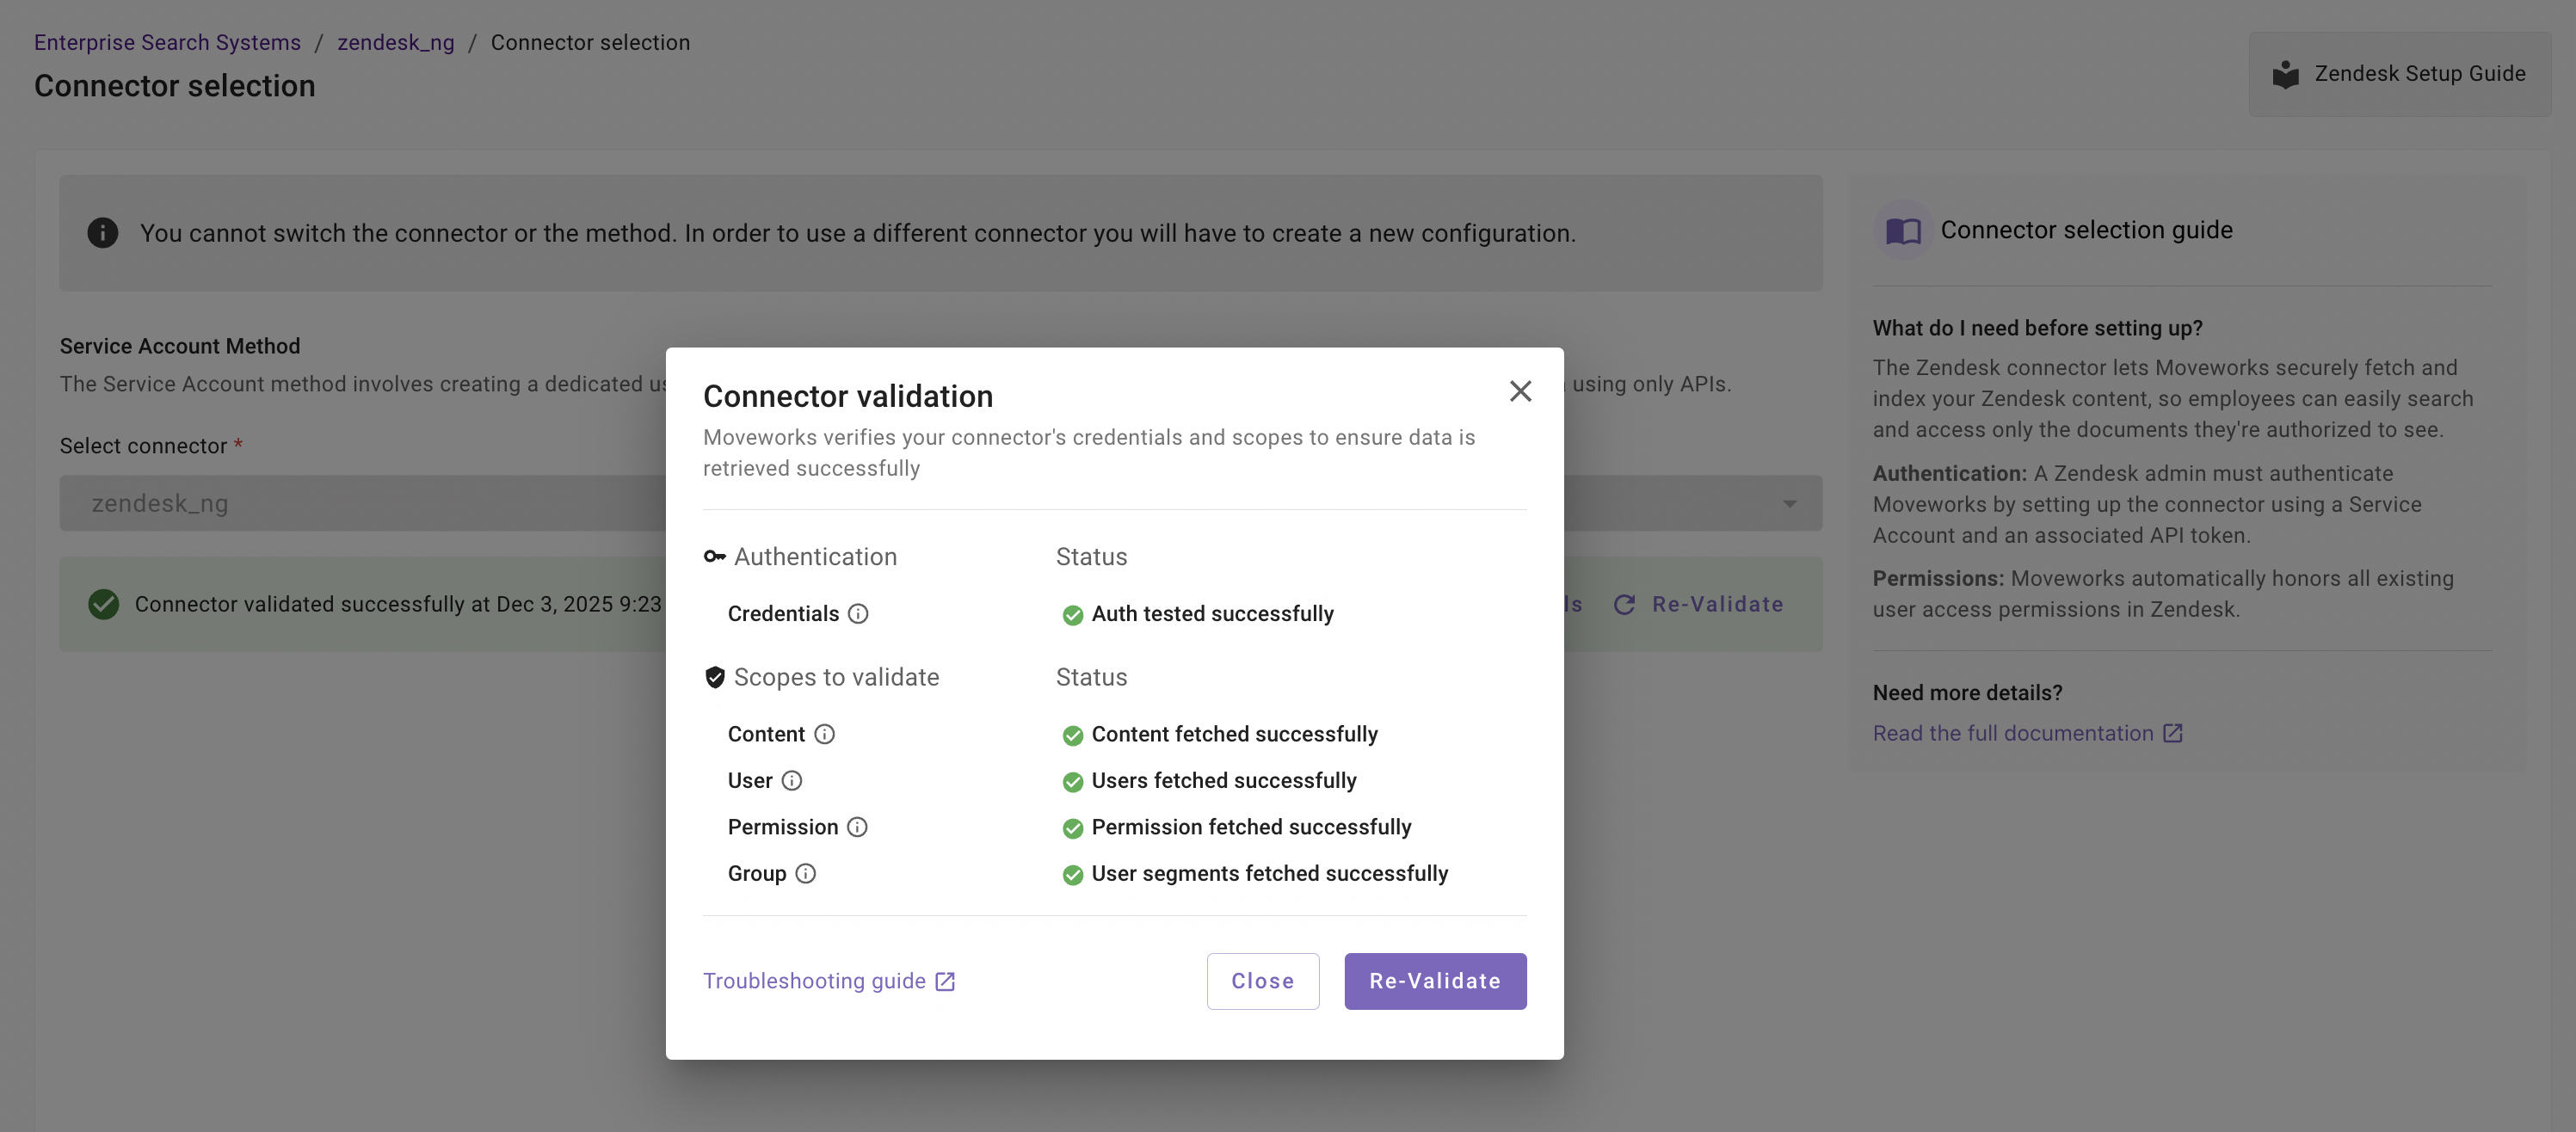
- If there are any credentials or scope issues, you will receive an error message as follows. Click on View Details to identify the issue. Refer to this step-by-troubleshoot guide (link to be added) to rectify any validation errors.
-
Once the connector is validated successfully, you will be able to Save the configuration.
-
Input the unique configuration name and Save.
At this stage, only the configuration entry is created. Ingestion doesn't start immediately after this step. You need to configure the Content Selection step to complete the journey. Refer to the next section for details.
-
Once the configuration is saved, you can view the unique configuration name at the top of the screen. You can also click the pencil 🖊️ icon to edit the configuration name.

-
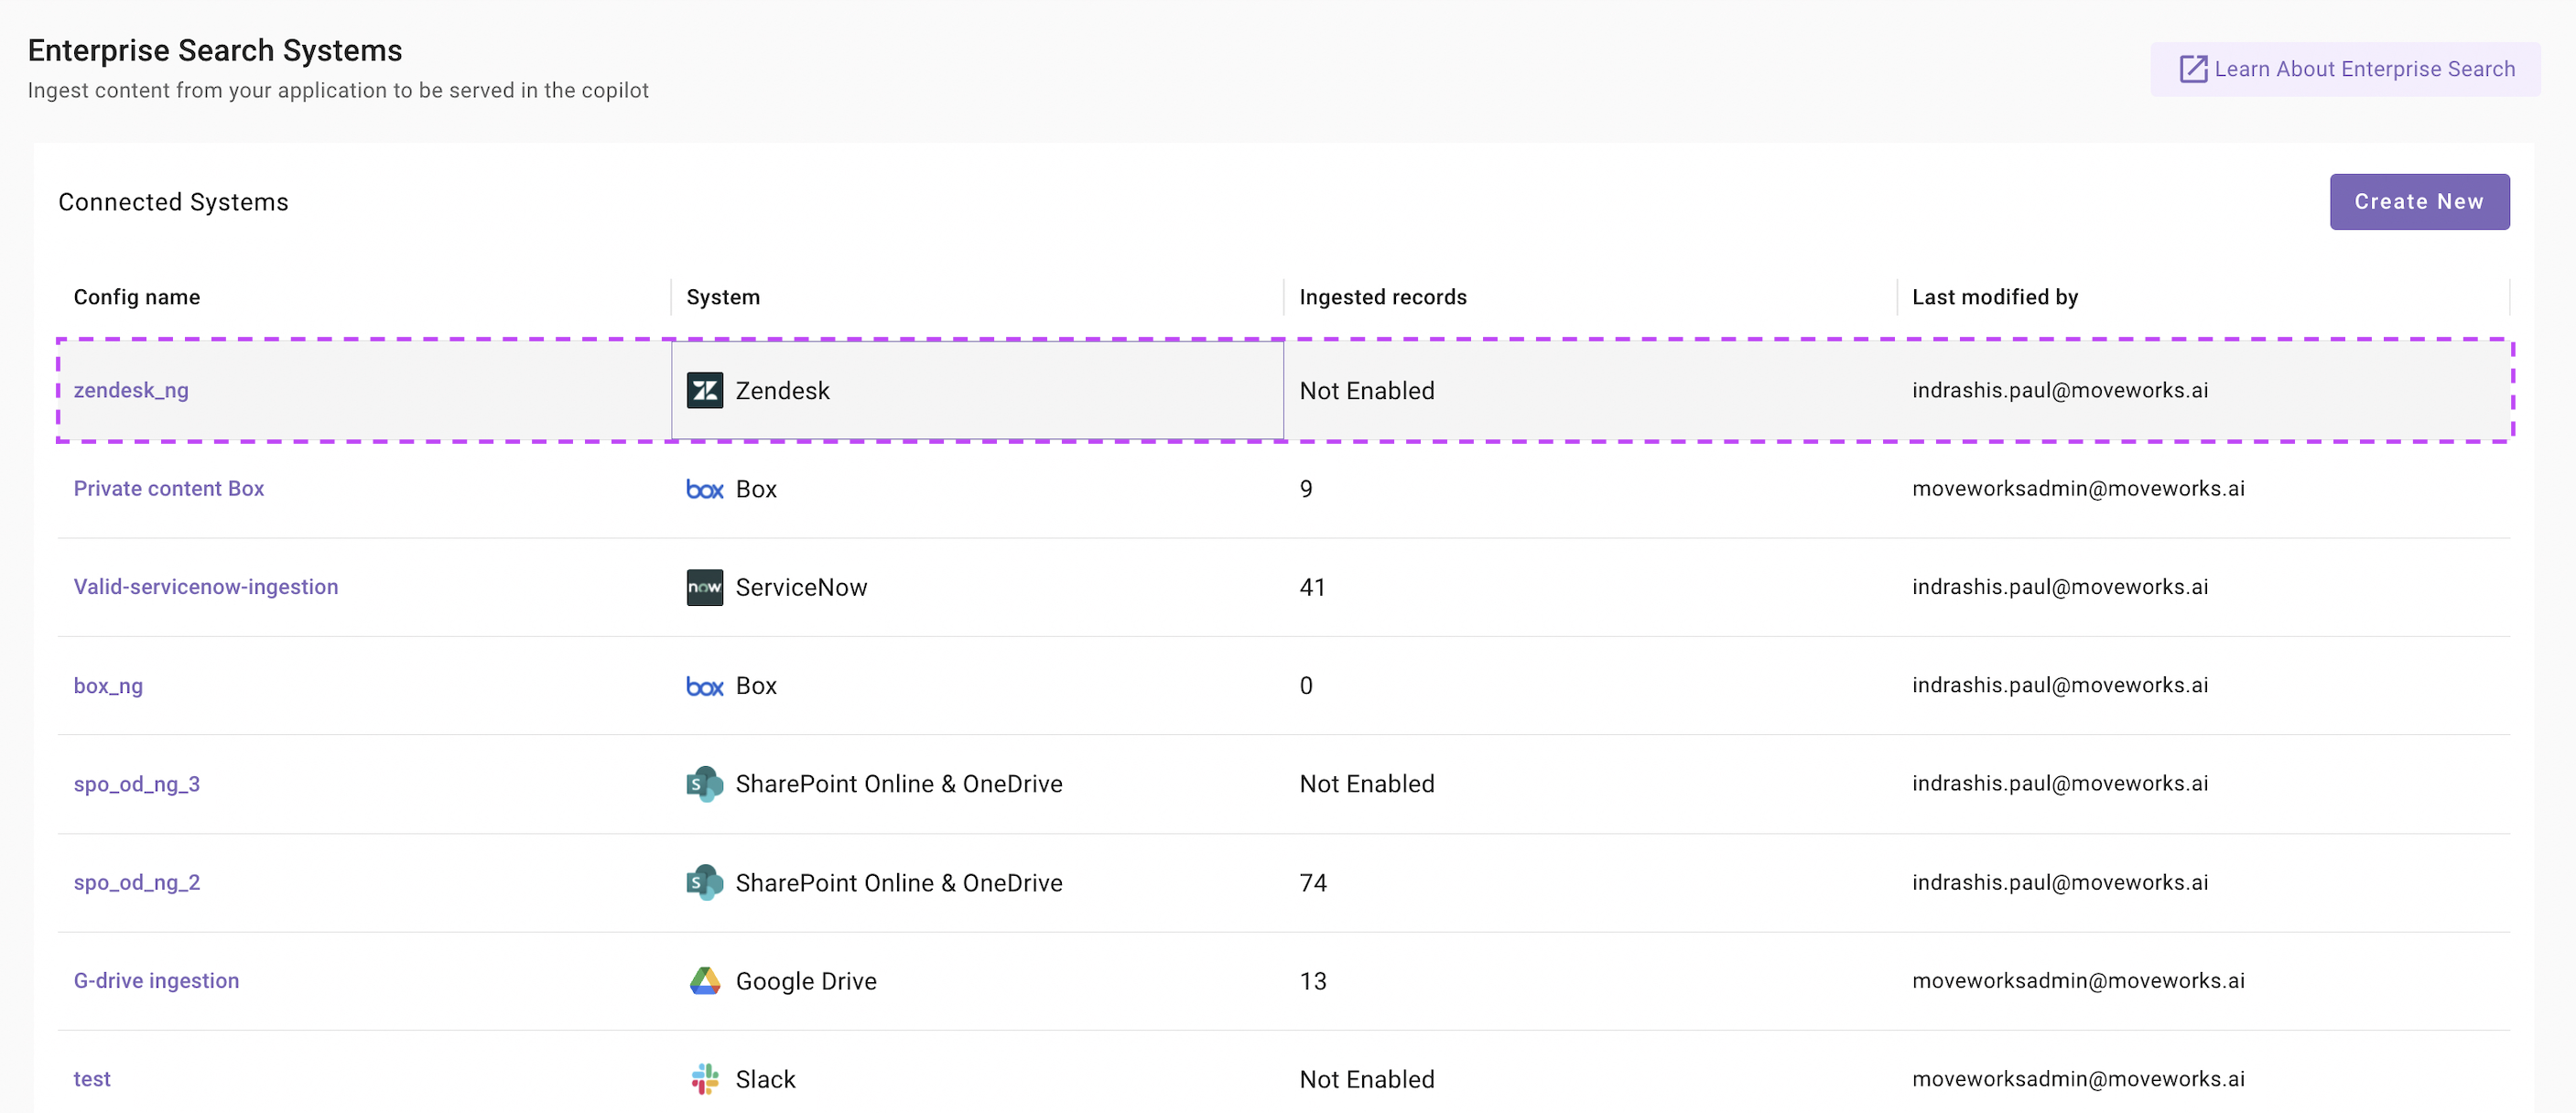
Additionally, you will start seeing an entry of your configuration in the Enterprise Search home page. You can click on your configuration to go to edit/ complete the configuration.
Content Selection
Once the connector selection step is complete and the configuration is saved, you will now be required to define the scope of content that will be ingested in Moveworks.
-
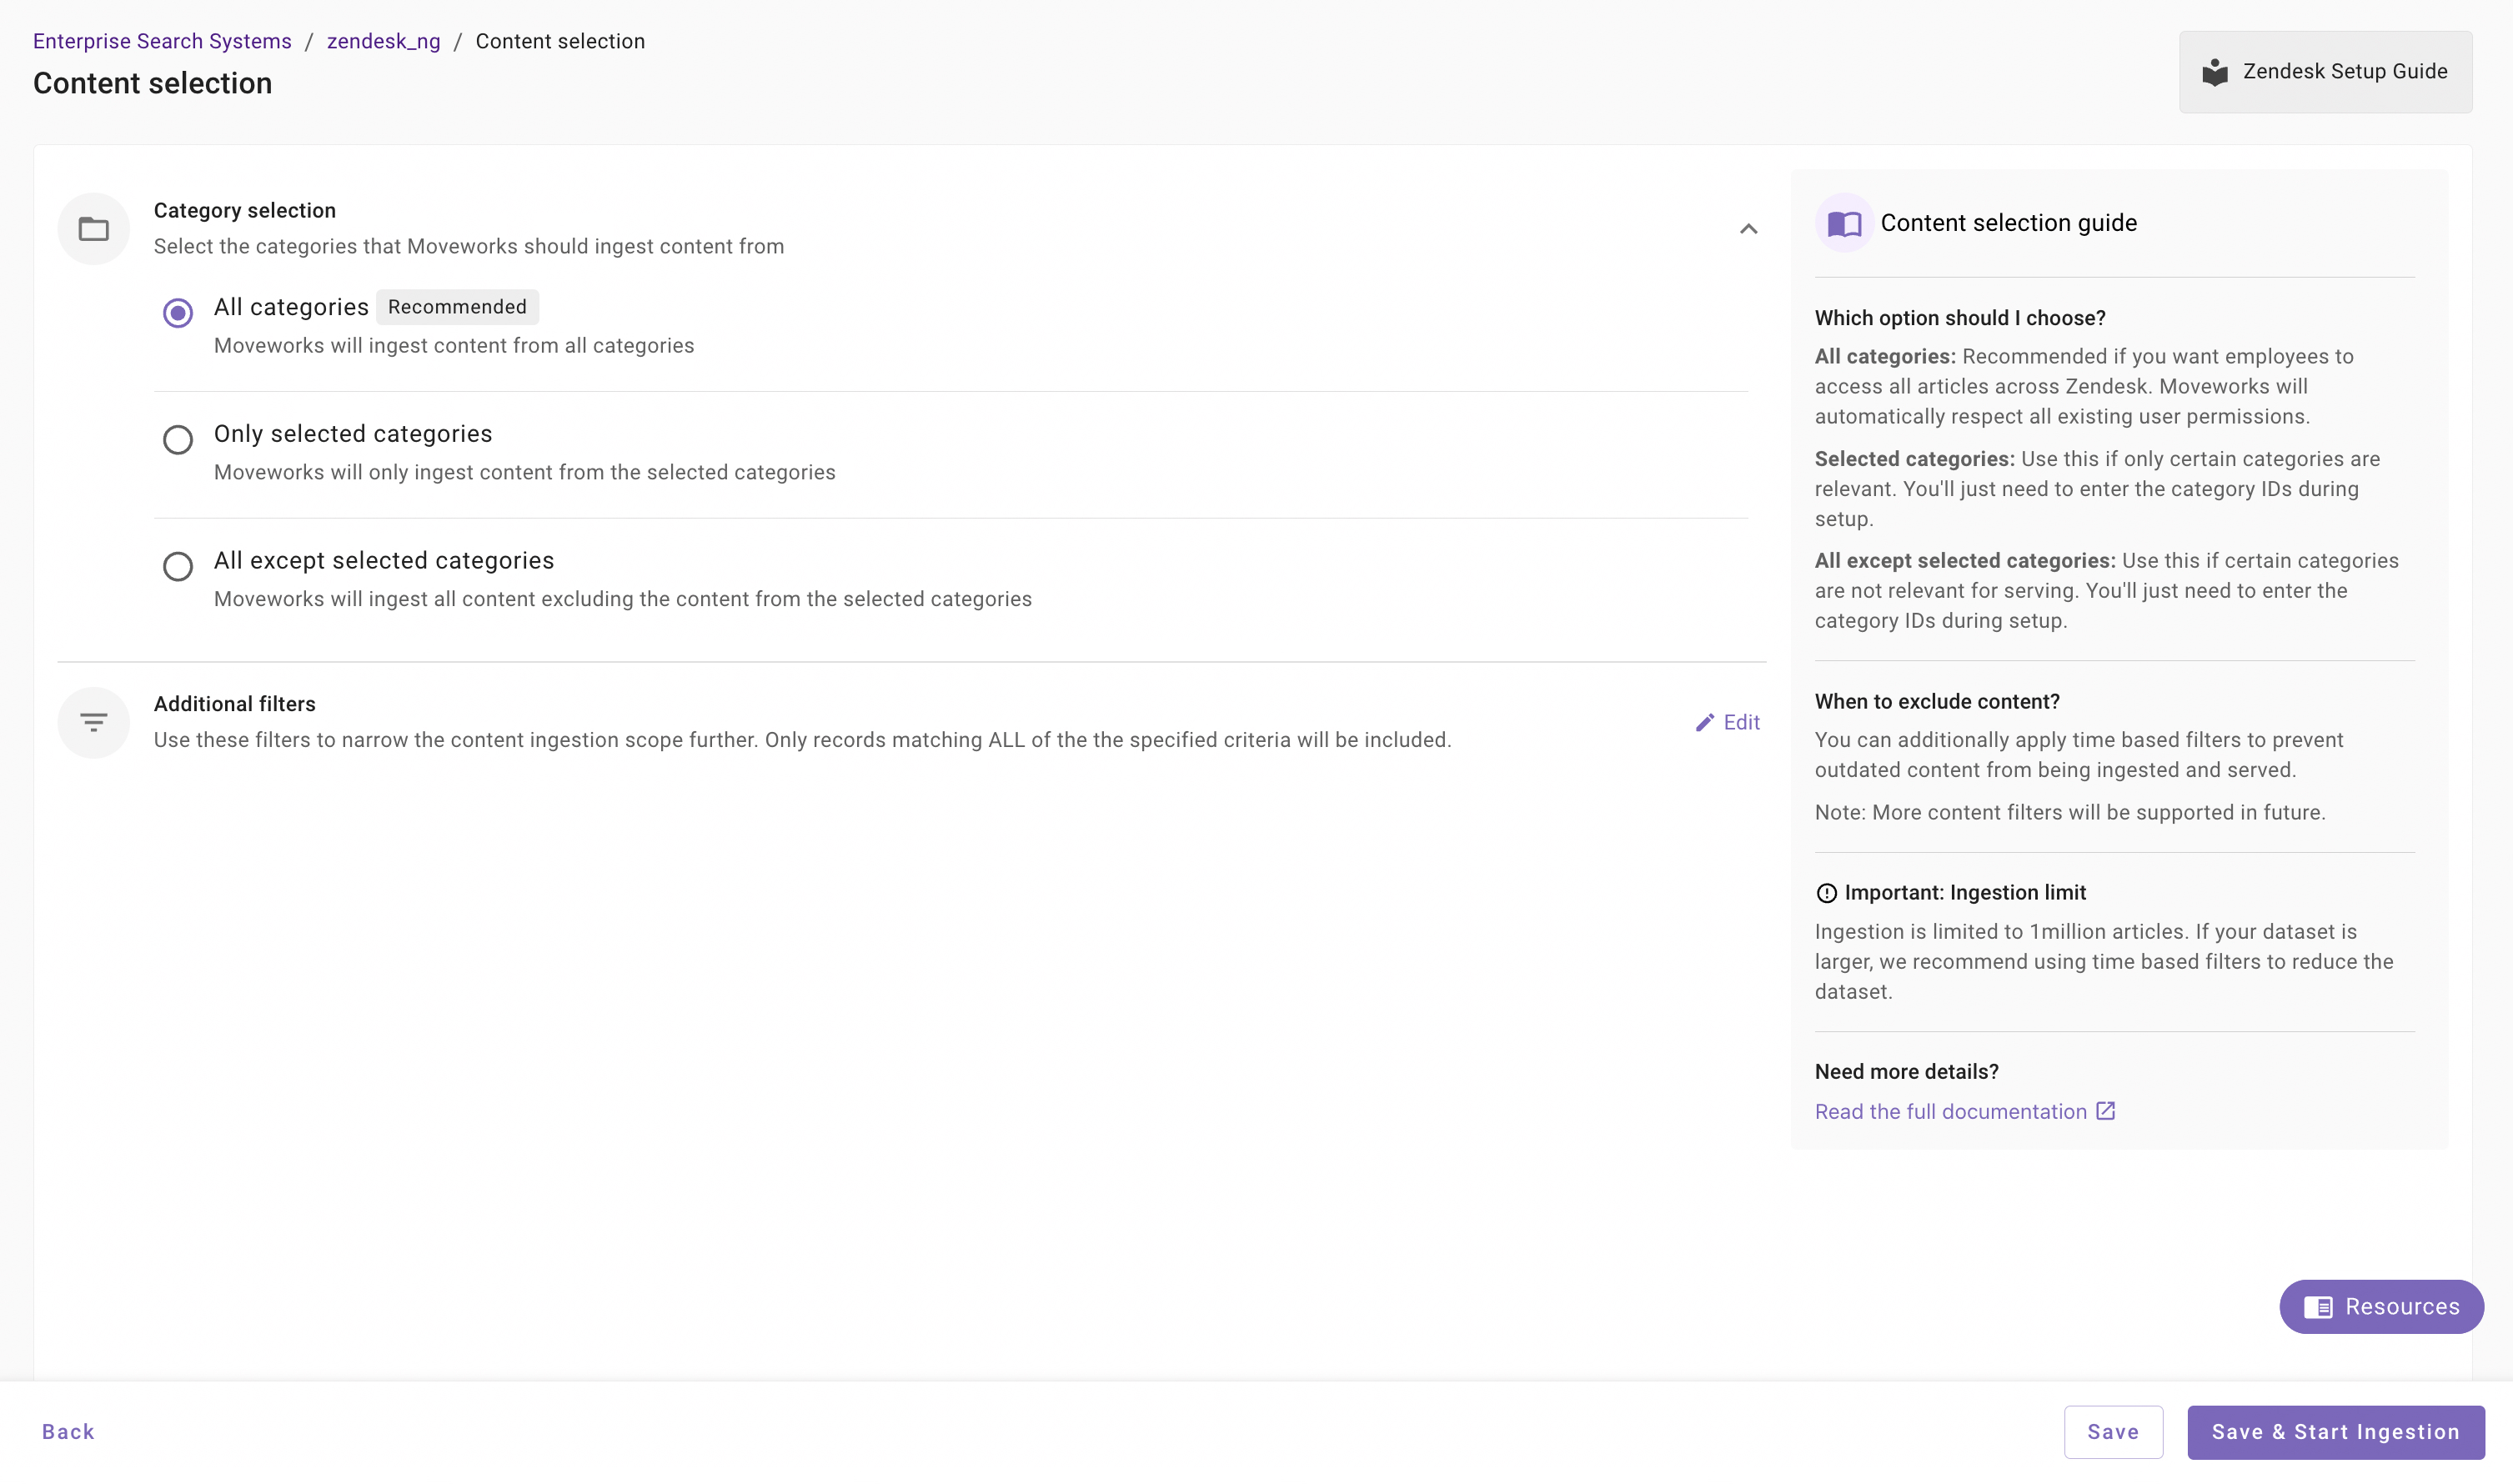
Once you click on Select Content, a content selection screen will appear as follows.
-
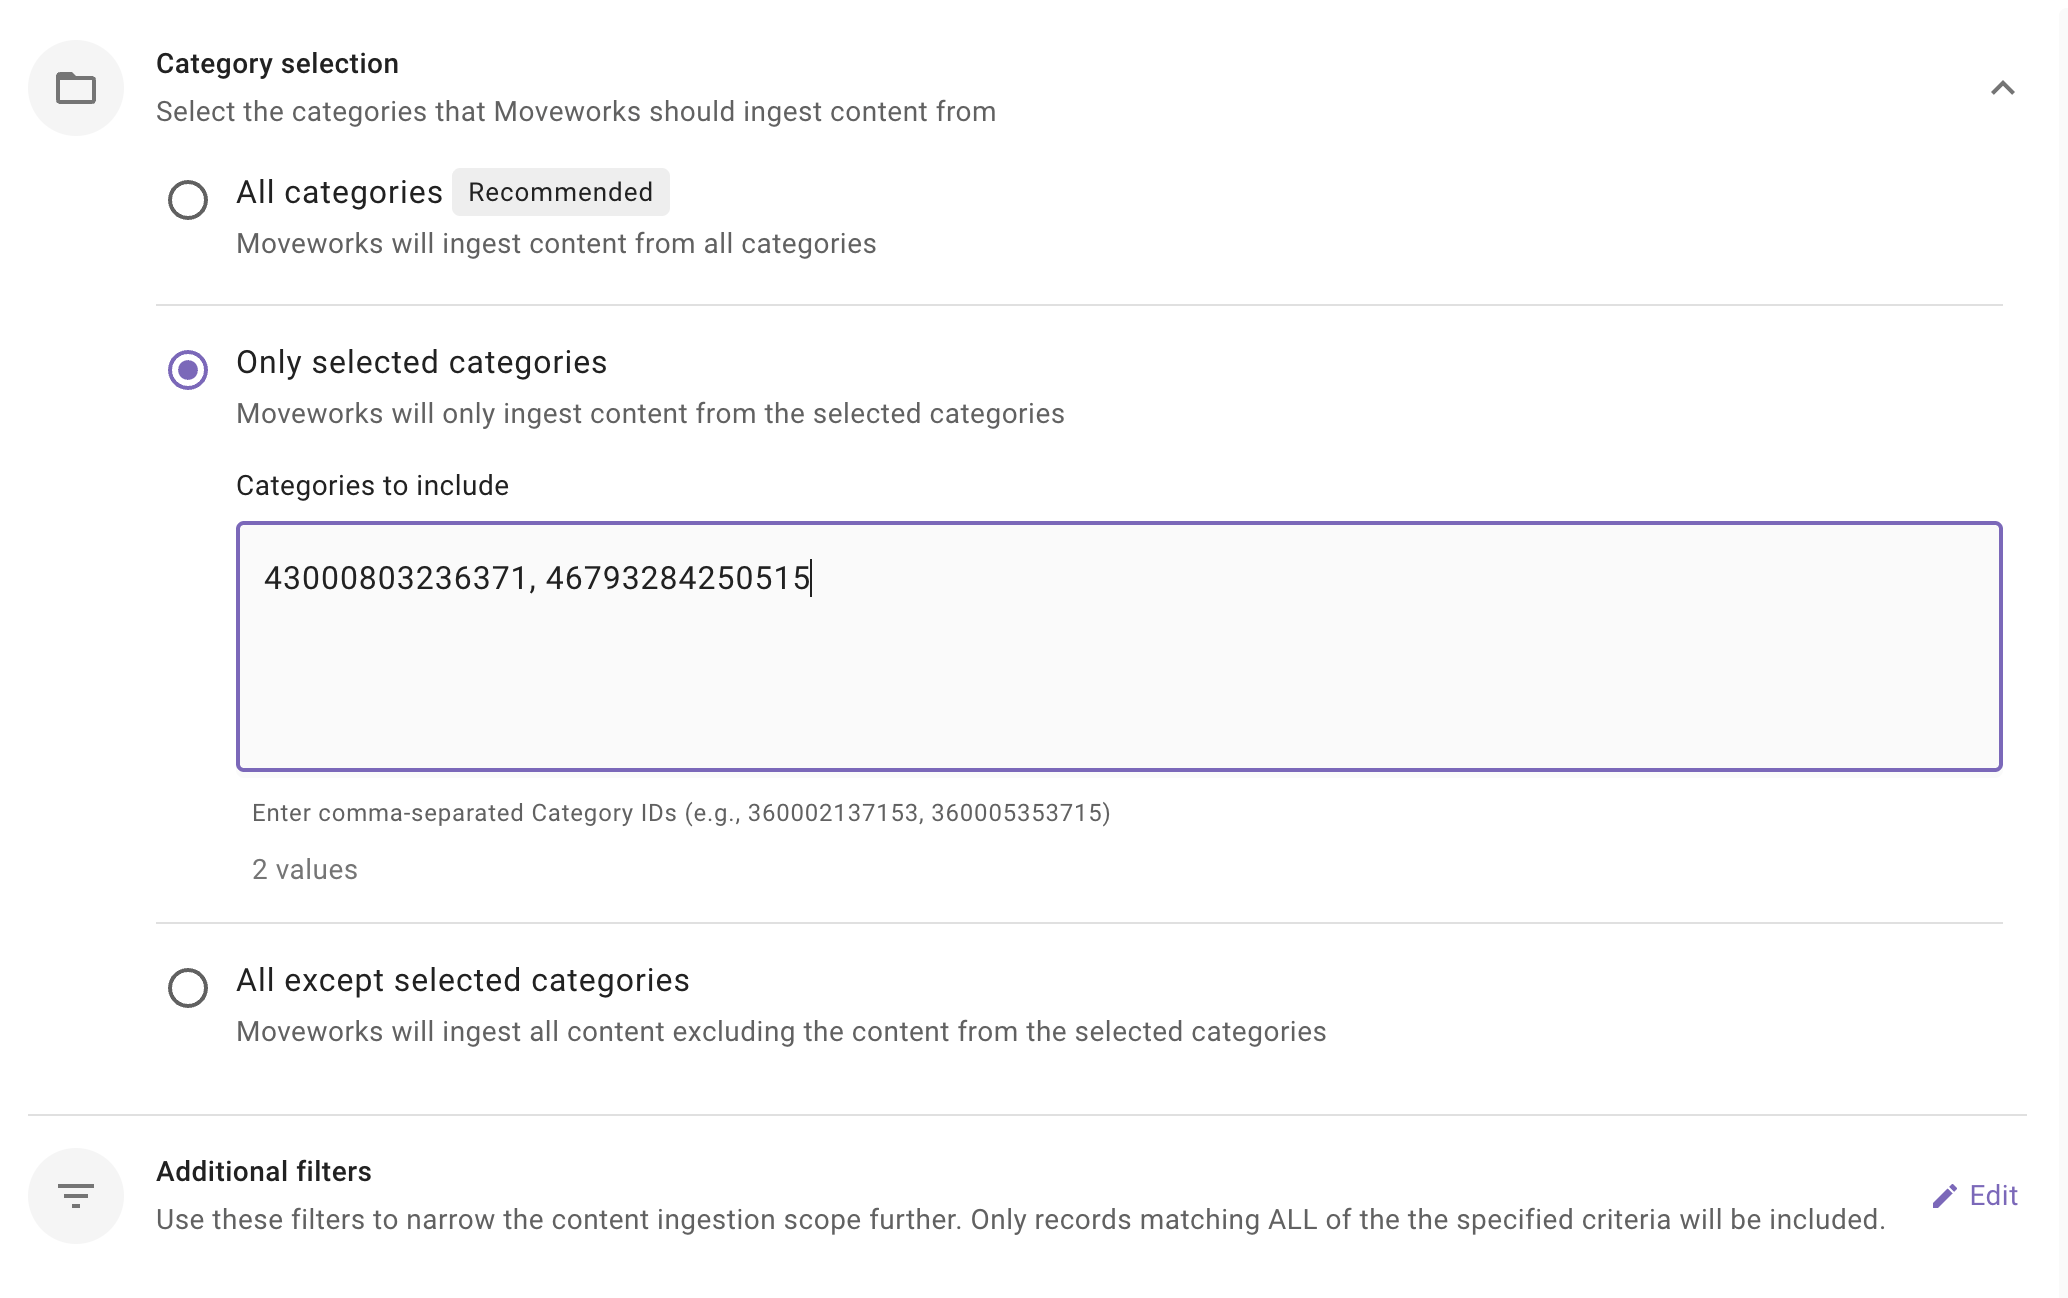
In this screen, you are required to either keep ingesting All Categories or define the Category IDs from which Moveworks will ingest content and apply filters (optionally) to filter down the content further.
-
Category Selection: This is a mandatory configuration. This configuration defines which categories Moveworks will crawl and ingest content from. As an admin, you get three options
-
All categories (Recommended): Moveworks will ingest content all applicable categories
When to choose this option?
Choose this option if you want content to be served from categories present in your Zendesk instance.
Important Note: The Service Account must have access to the specified categories in order for Moveworks to crawl all categories successfully.
How to configure? Select this option. You are not required to specify the Category IDs in this scenario.
-
Only selected categories: Moveworks will only ingest content from specific categories.
When to choose this option? Choose this option if you want content to be served only from a subset of categories that are present in your Zendesk instance. For example - Let's assume, you have 15 categories in your Zendesk instance, but you want content to be served only from 5 categories, then you choose this method.
Important Note: The Service Account must have access to the specified categories in order for Moveworks to crawl all categories successfully.
How to configure? Enter comma separated Category ID(s).
-
All except selected categories: Moveworks will ingest content from all except specified categories.
When to choose this option?
Choose this option if you want content to be served from all except few categories. For example - Let's assume, you have 100 categories in your Zendesk instance, but you want content to be served from 90 categories, then you choose this method and specify the 10 categories from which Moveworks should not ingest.
Important Note: The Service Account must have access to the specified categories in order for Moveworks to crawl all categories successfully.
How to configure? Select this option and enter comma separated Category ID(s).
-
-
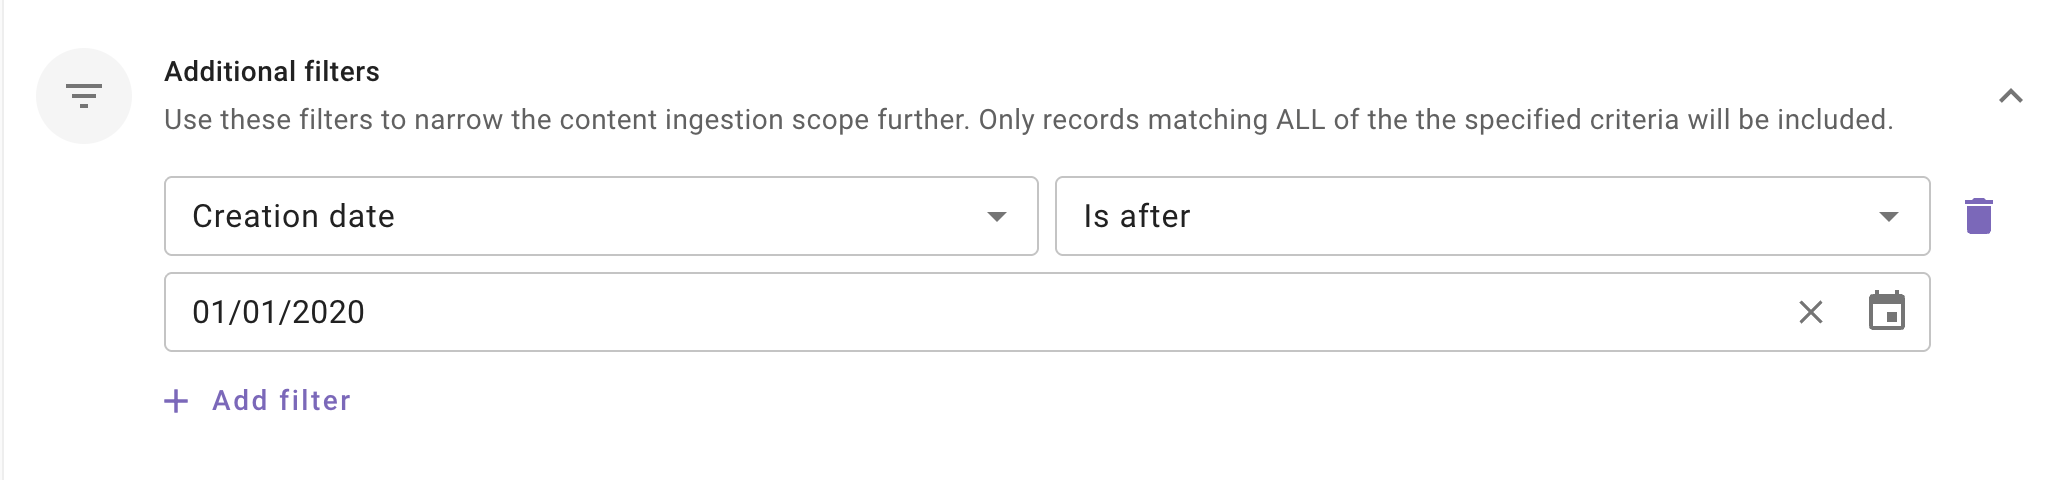
Additional Filters: Use these filters to narrow the content ingestion scope further. Only records matching ALL of the the specified criteria will be included.
This is an optional configuration. Moveworks recommend using these filters only if your dataset is very large (i.e. >1 million records) so that only relevant content is ingested and served to your employees.
Currently following filters are supported:
- Modified date: Use this filter to include only those content records whose Modified date is after a specified date.
- Created date: Use this filter to include only those content records whose Created date is after a specified date.
Note: We support absolute dates only. Relative ranges (e.g., “last 7 days,” “older than 1 year”) are not supported.
Save and Start Ingestion
Once Space selection is configured, you have two options:
-
Save: Clicking this will just save the configuration and not initiate the first ingestion crawl. Use this option, if you would want to complete your configuration in multiple sessions/ sittings.
-
Once you click on Save, you will be redirected to the Zendesk overview screen
-
You will notice a banner that prompts you to Start Ingestion
-
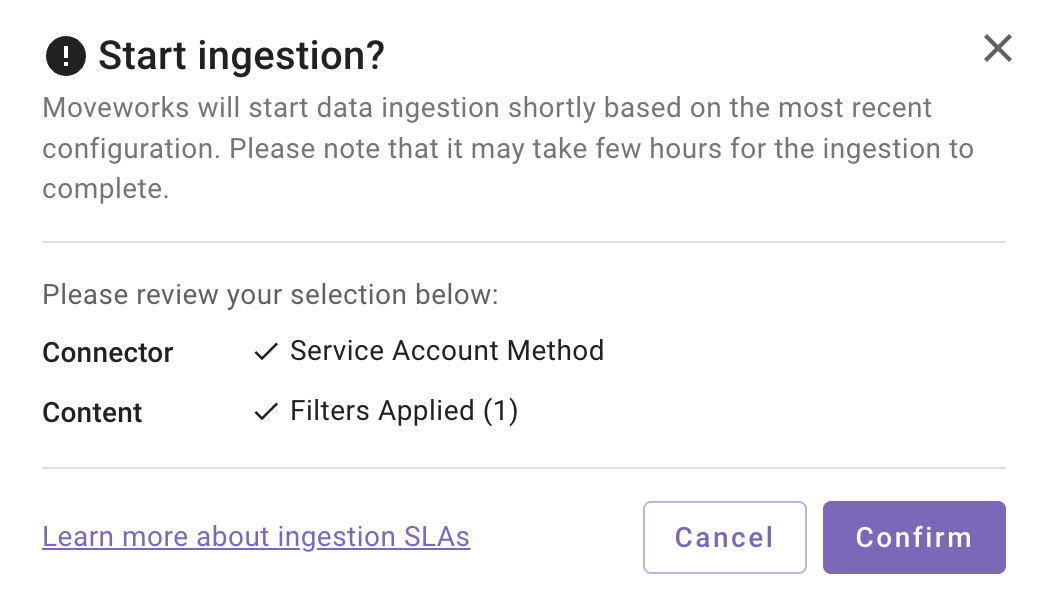
Once you are satisfied with your configuration, you can click on Start Ingestion
-
A confirmation popup will come that provides a summary of the configuration
-
Click on Confirm
-
After you click on Confirm, ingestion will start shortly.
-
For the first crawl to complete, this generally takes anywhere from few hours to 48 hours depending upon the size of the data.
-
-
Save and Start Ingestion: Click this option if you have completed and validated your content selection configuration and you are ready to initiate the first ingestion crawl.
-
A confirmation popup will come that provides a summary of the configuration

-
Click on Confirm
-
After you click on Confirm, ingestion will start shortly.
Important Note for Admins:
- It generally takes anywhere from few hours to 48 hours for the first crawl to complete depending upon the size of the data.
- You can review the status of ingestion via Data Ingestion Viewer and view ingested record in the Ingested File and Ingested Knowledge screens.
-
Troubleshooting Connector Validation Failures
Updated 25 days ago