System Connectors
How to Create a System Connector?
Prerequisites
- Ensure you have the appropriate permission to use Moveworks Setup. You must have have either an Admin or user roles assigned to you in order to create and view connectors.
- Ensure that you have provided correct access to the service account you are using for creating a connector. You can view this guide in order to find all the access requirement guides for the systems that Moveworks supports.
- Go to the guide for the system you’re trying to set up a connector for and follow the steps in the guide to make sure you’ve provided the necessary access to Moveworks before beginning to setup the connector.
Configuration
Here is an example of creating a ServiceNow connector under System Connectors.
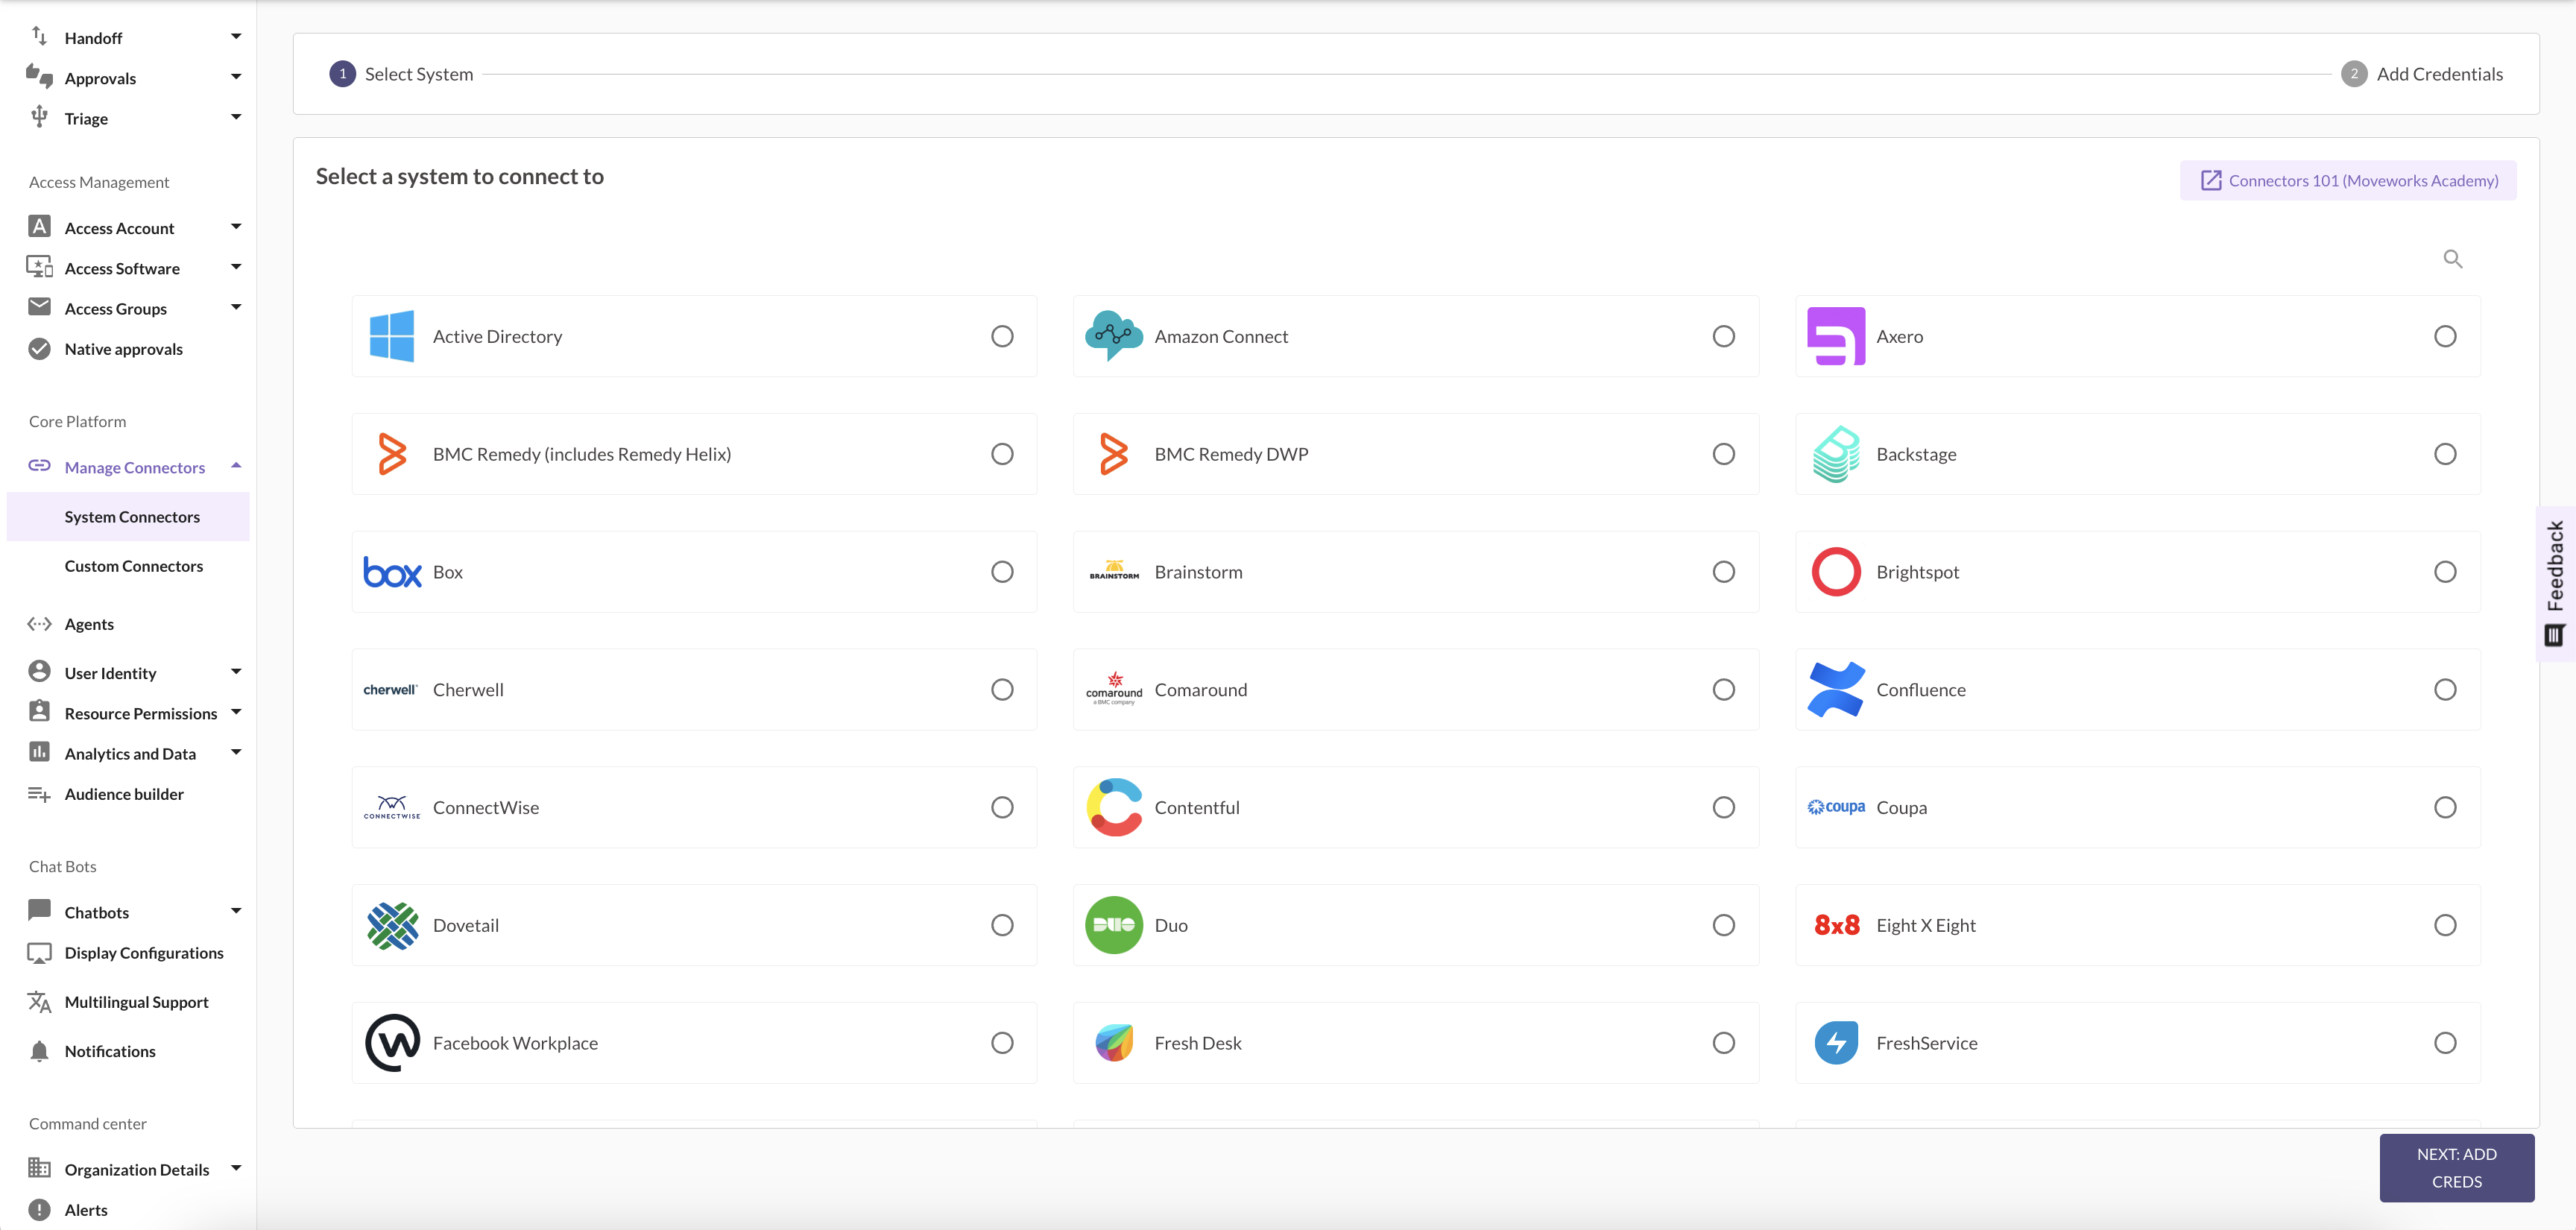
- Go to the Connectors module in Moveworks Setup, by clicking on Manage Connectors under Core Platform, and then click on System Connectors.
- Click on Create New in the top right corner.
- You will then see a list of all the systems supported by Moveworks. Select the system you are trying to create a connector for. In this example it would be ServiceNow. If you can’t find the system you’re looking for, use the search bar on top right to search for the system. Then click on Add Creds.
- Provide a Name to the connector, please keep in mind this name is also going to be considered as the unique Integration ID for this system. It will be defined in configurations like Identity ingestion and Permissioning.
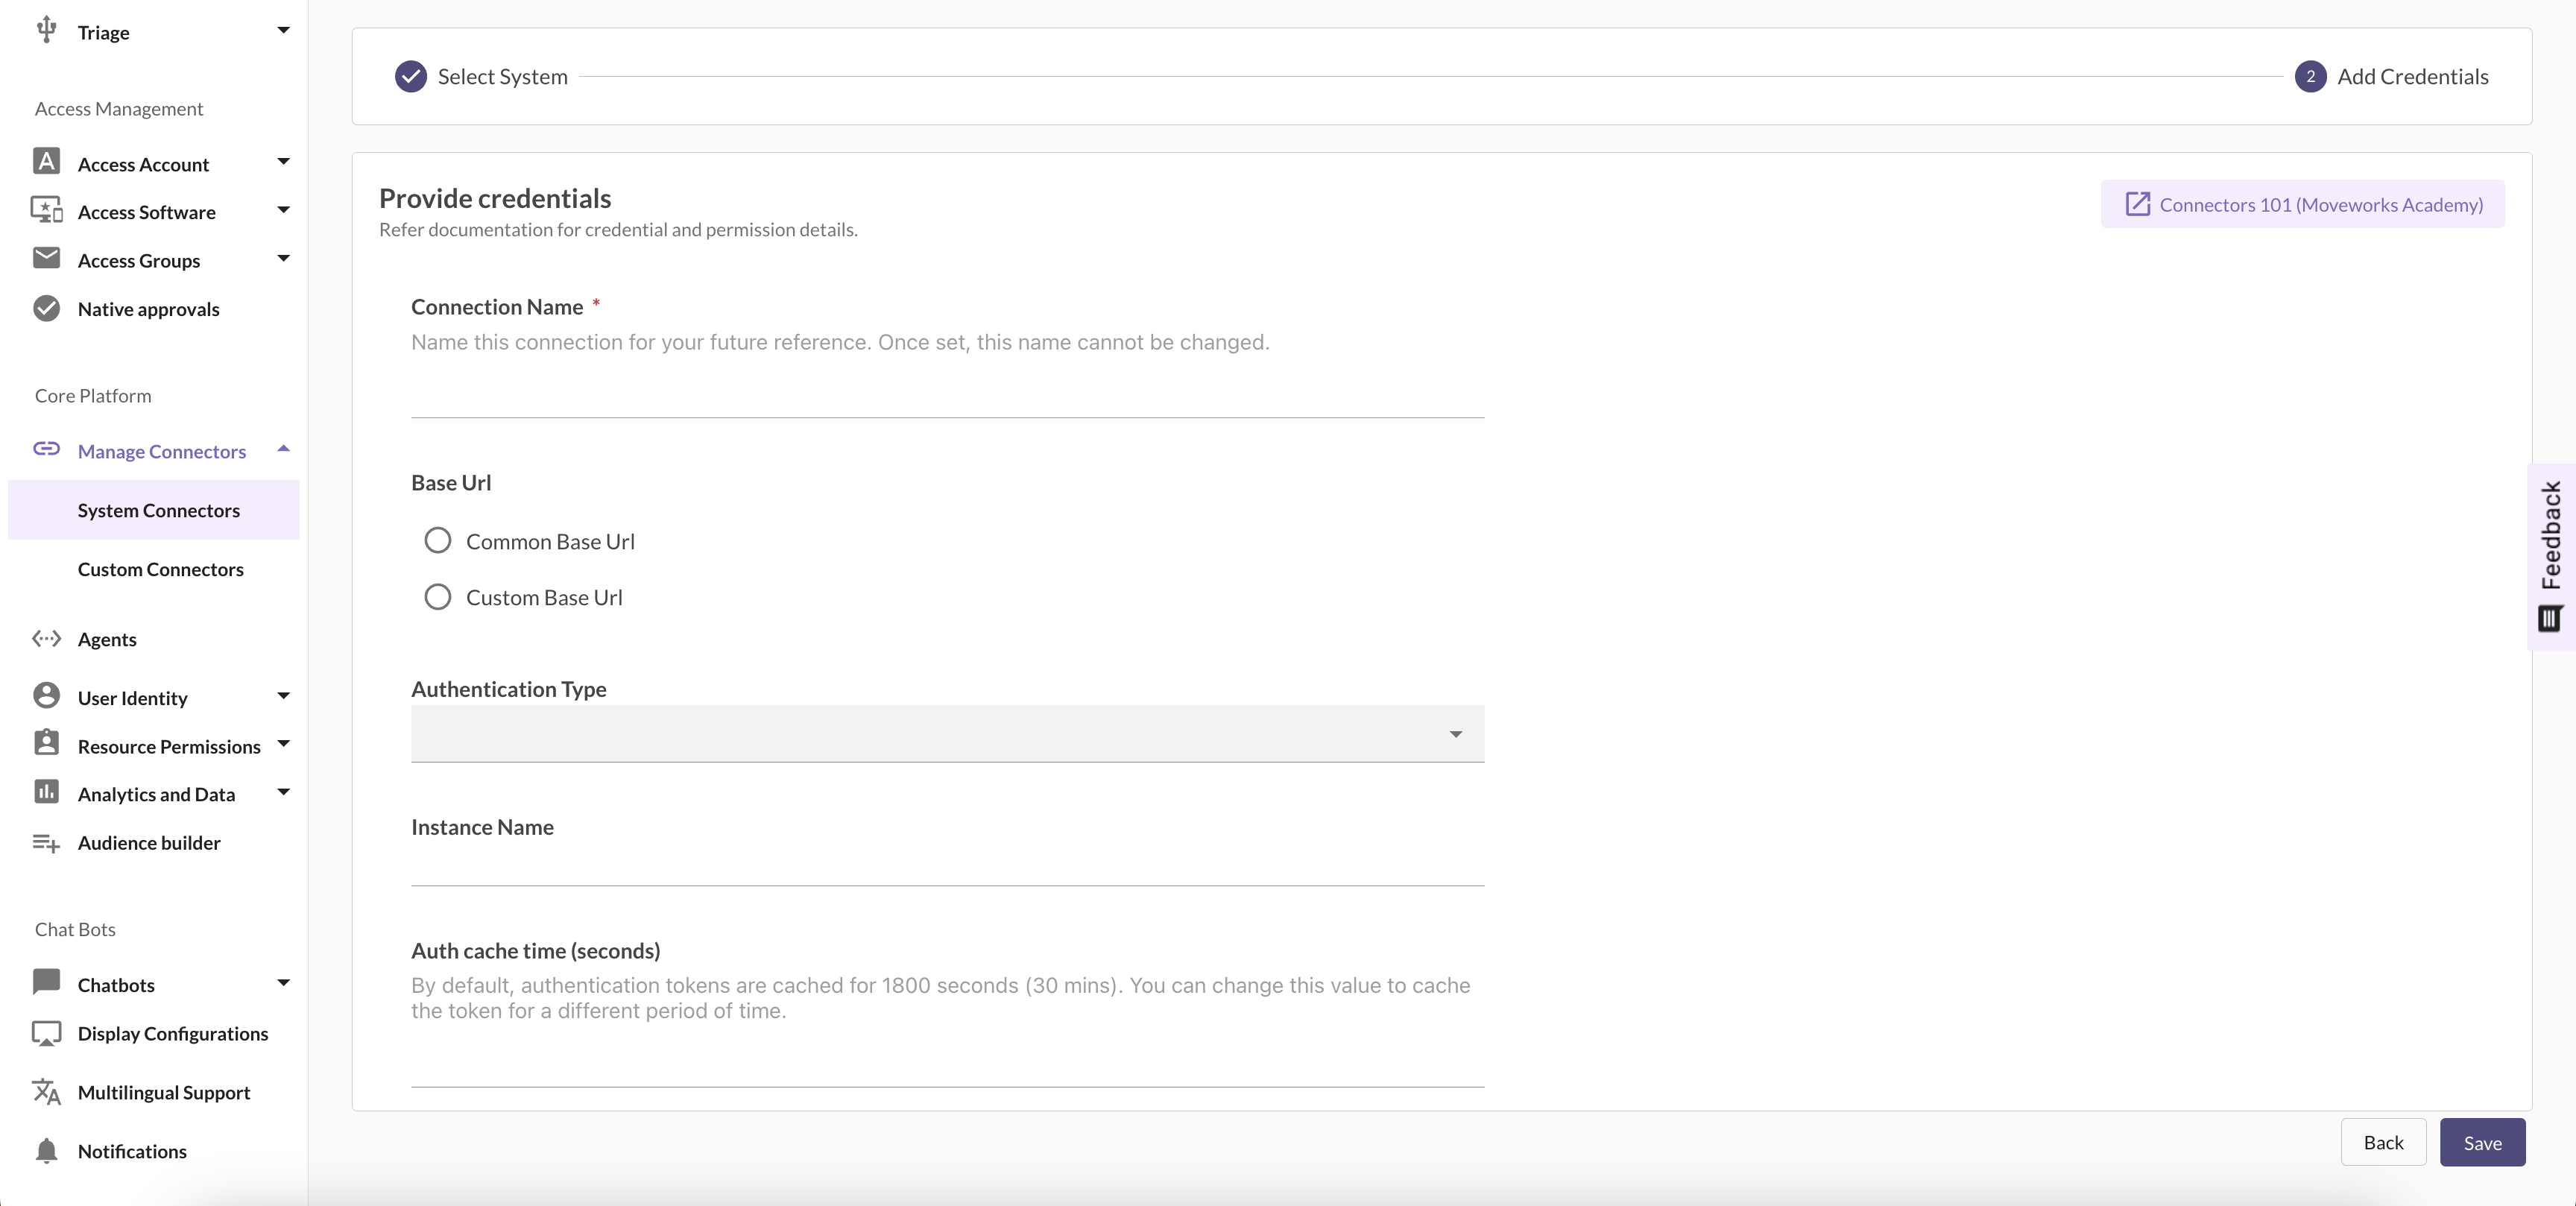
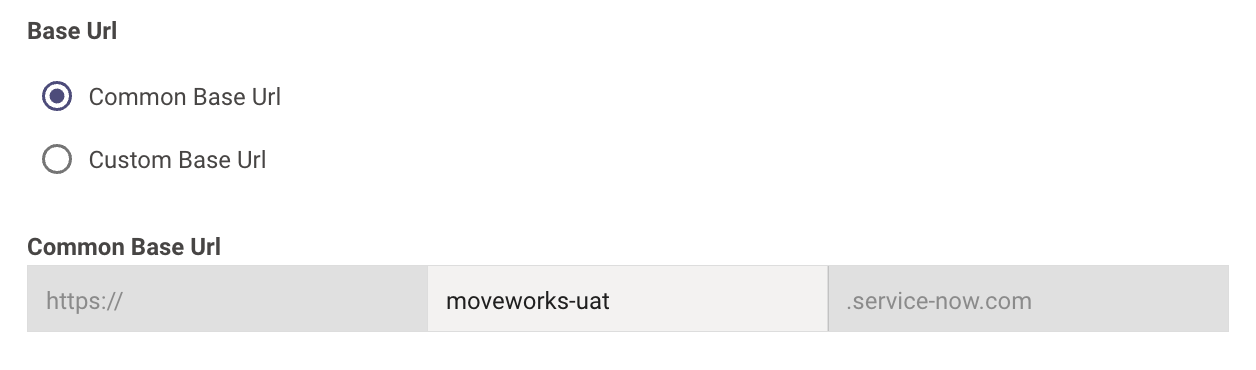
- Depending on the instance, provide the base URL. Choosing Common Base URL renders the section for the URL where only your instance name would need to be provided and the domain would be pre-filled.
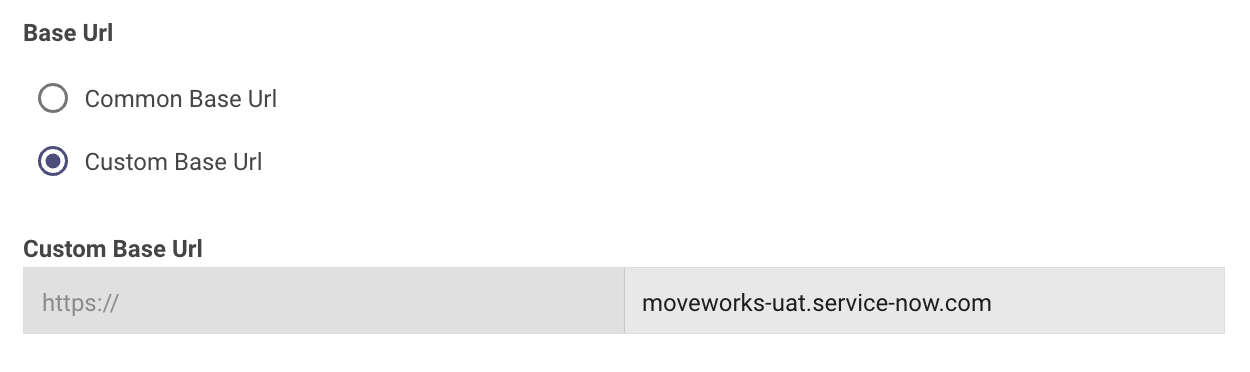
- Choosing Custom Base URL renders the section for the URL where you need to define the complete URL including the domain as this method is chosen when the domain name is not the default.
-
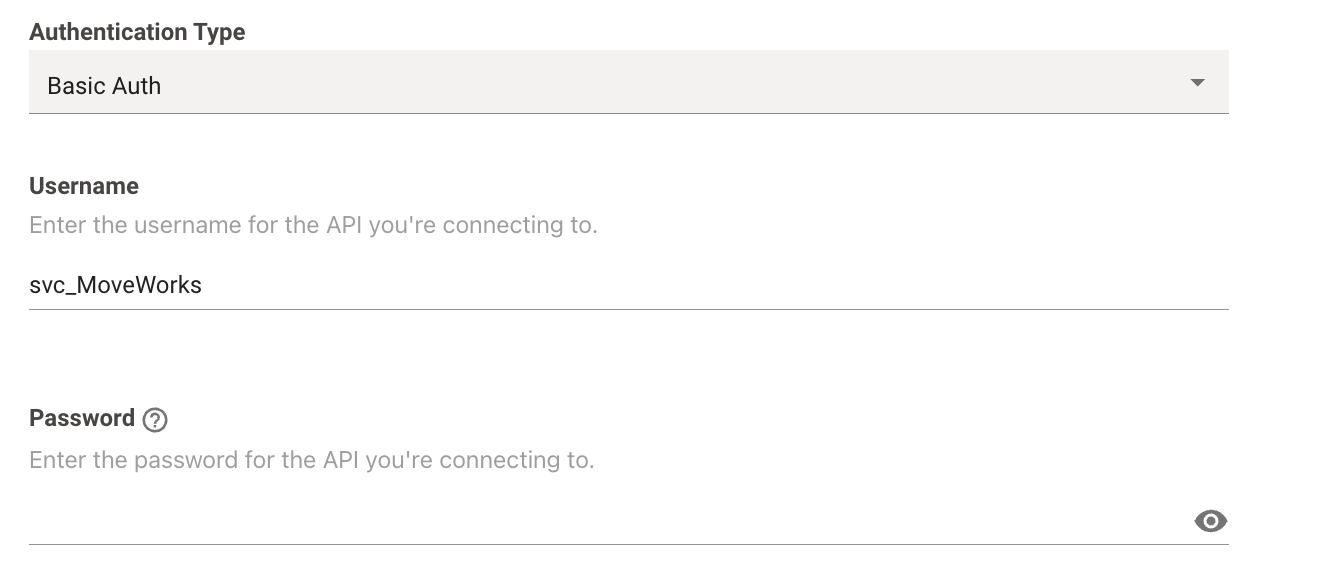
Next, select an authentication type. Please note that this depends on the configurations that you have made on the ServiceNow instance. We provide Auth methods in this drop down which specific to the integration.
-
In this case we are using Basic Auth which requires Username and Password. Note: Once the password has been saved, it will no longer show up in the UI as it is encrypted.
To learn more about creating service accounts, generating credentials and using them to create connectors, view the guides here.
-
If there is an Auth method you would like Moveworks to Support. Please reach out to the Support Team.
- Once you have provided the credentials for your authentication type, go ahead and click Save.
Please make sure you provide the correct credentials and inputs. Once a connector is created, it cannot be deleted. Although you can have multiple connectors per system and can also edit existing connectors.
Validation
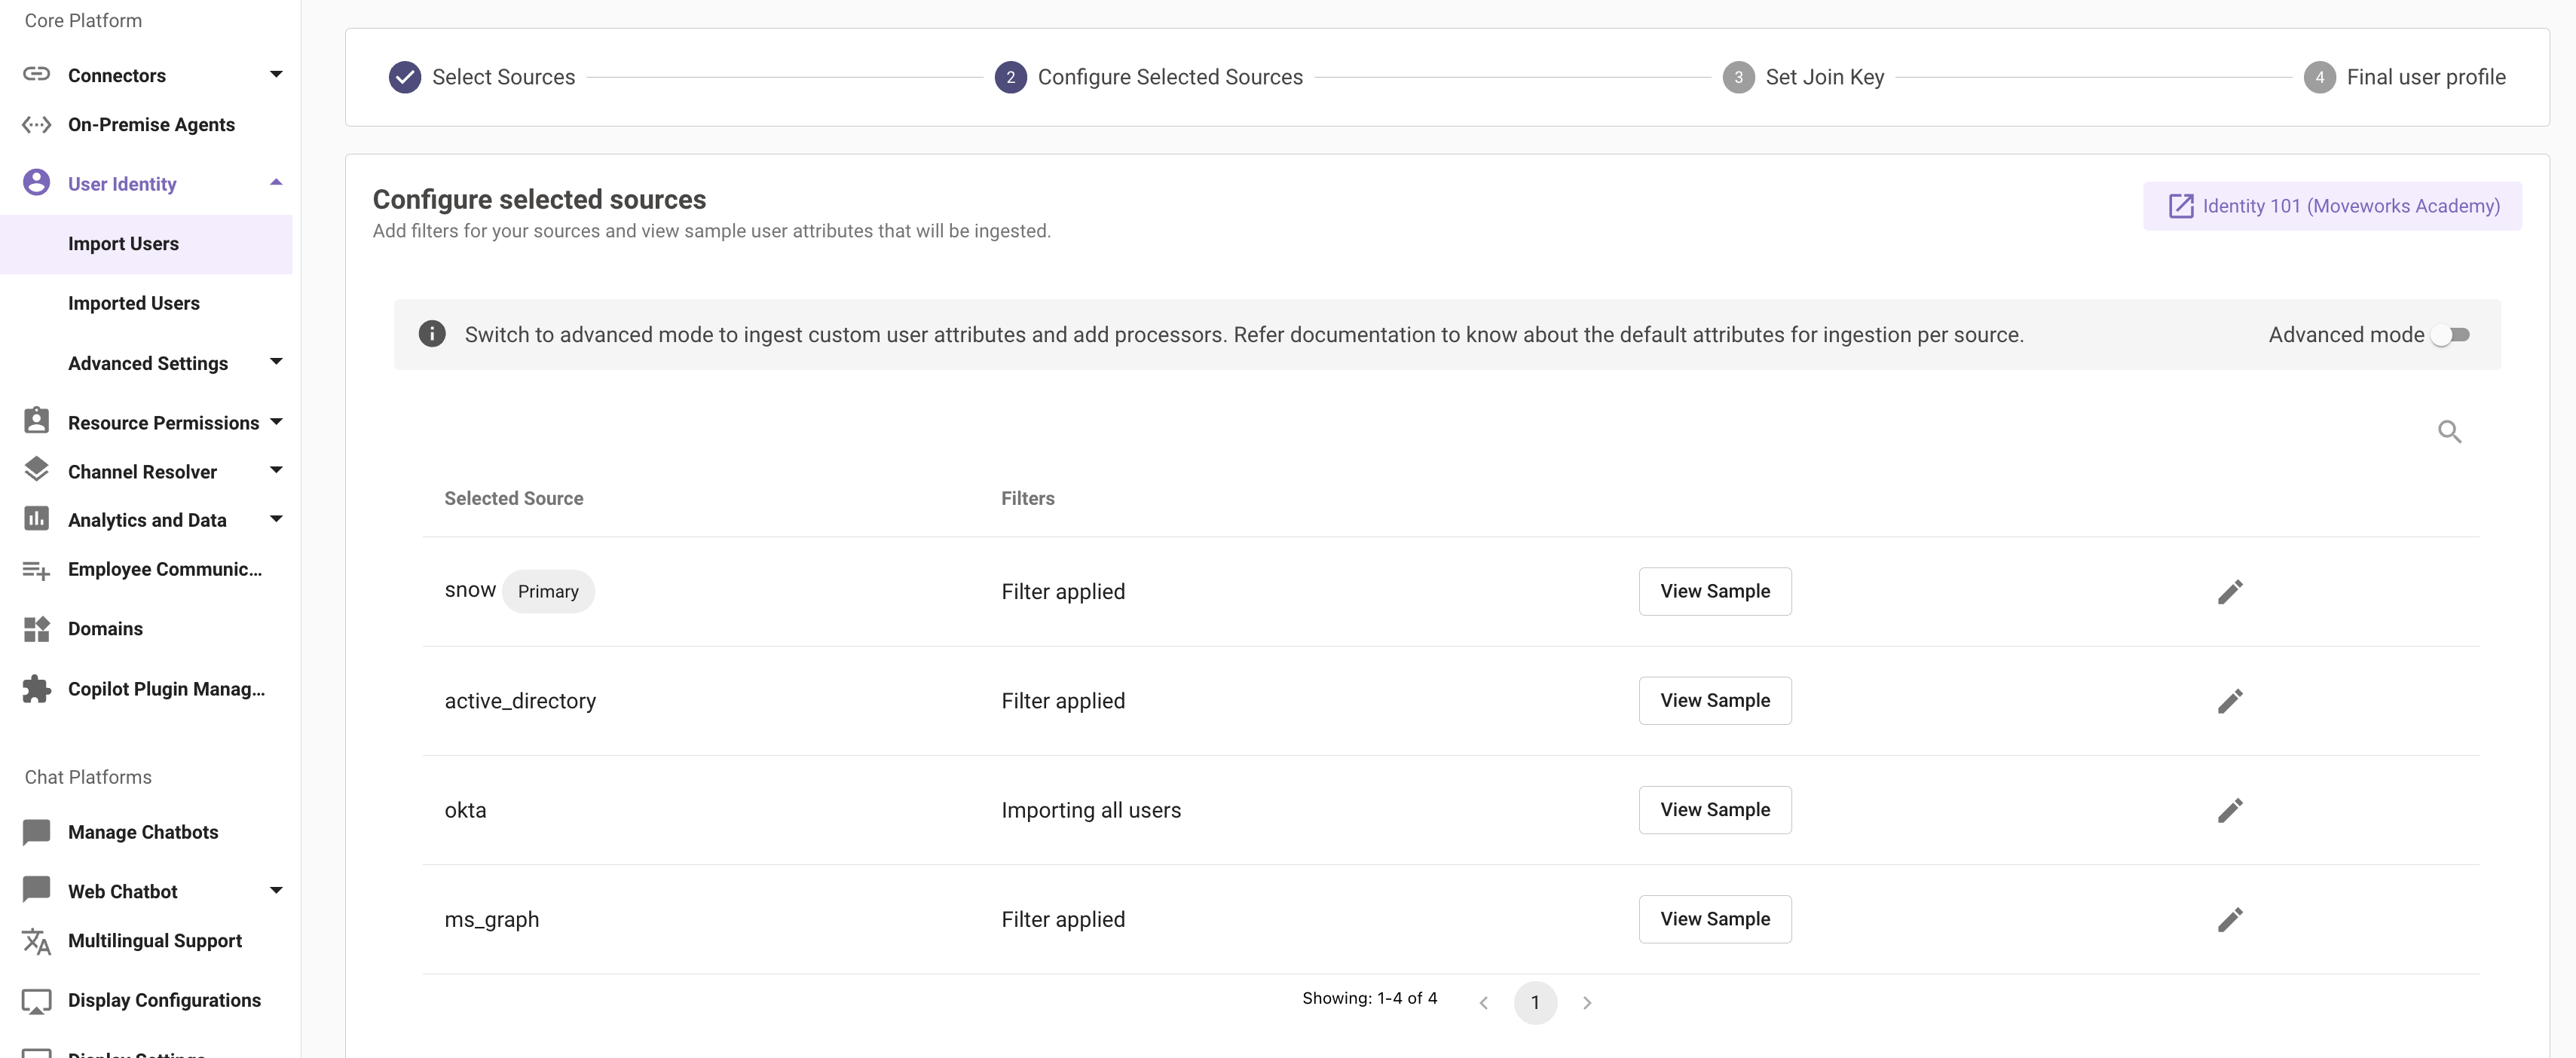
In order to validate if the connector which has been setup is working as expected, We need to navigate to the User Identity > Import Users where we need to select the connector for the source we have set up.
You will see a table with all the identity sources that you have previously selected. Here you will come across a "View Sample" button for each source. This is a quick way to check if the connector being used for the source system is configured correctly.
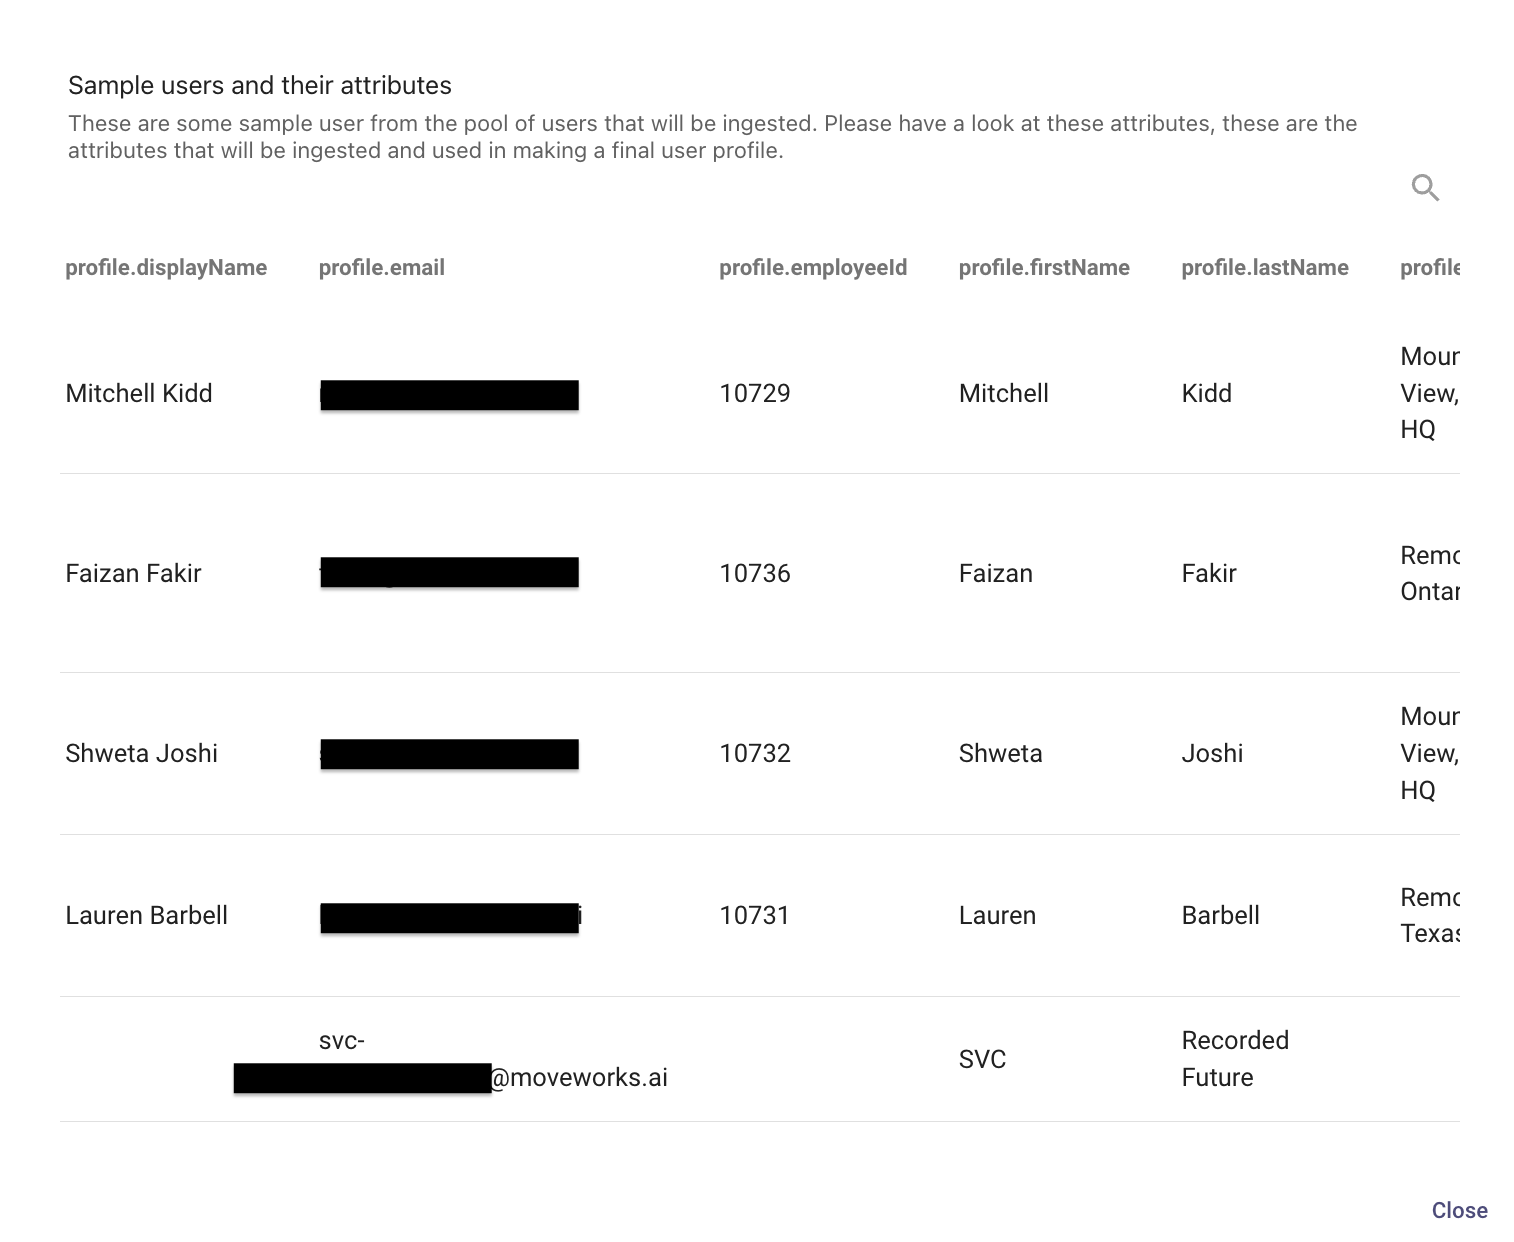
Clicking on "View Sample" makes a live API call to the source system and fetches the identity data using the default attributes if the connector has been setup correctly.
Native Connector Validation is coming soon !The current validation method serves as a workaround until we support native connector validation.
How to leverage System Connectors for Agent Studio
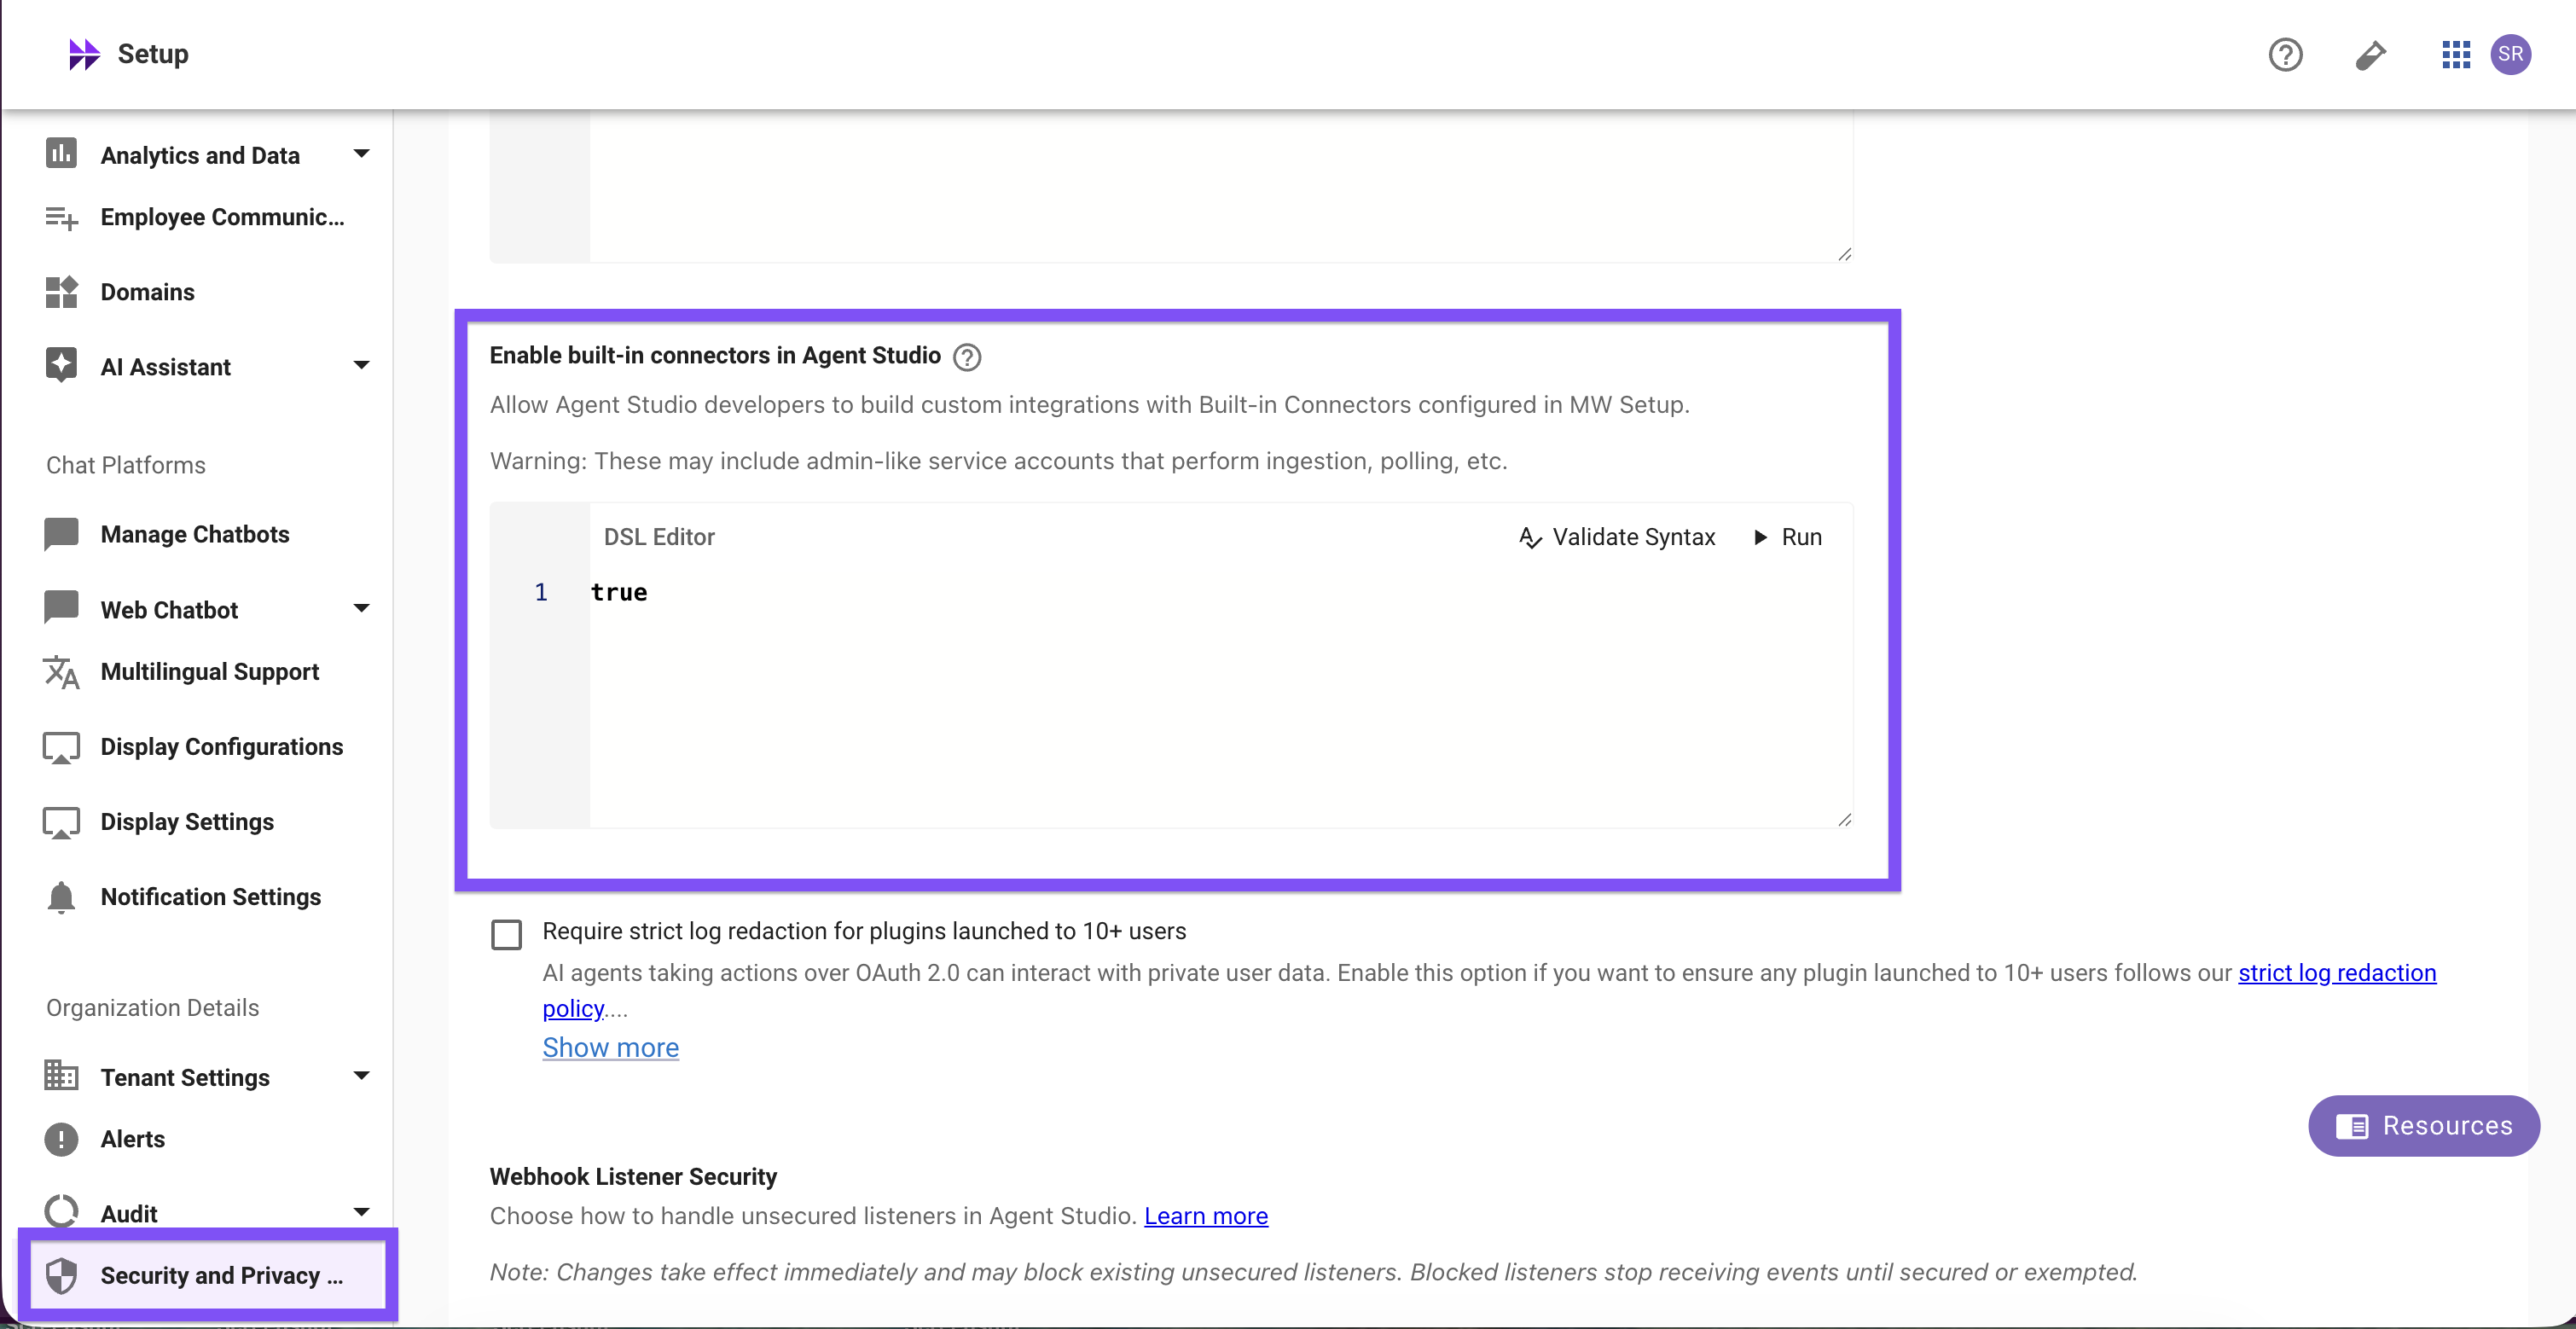
To enable the functionality to use System Connectors in Agent Studio a Moveworks Setup admin must
- Log in to Moveworks setup
- Select Security and Privacy Settings under Organization Details on the lefthand menu.
- Find the DSL rule setting box for Enable built-in connectors in Agent Studio
- Set it to True
Once this functionality is enabled, please refer to the following steps to use a system connector inside of Agent Studio.
-
Go to
HTTP Actionswithin Agent Studio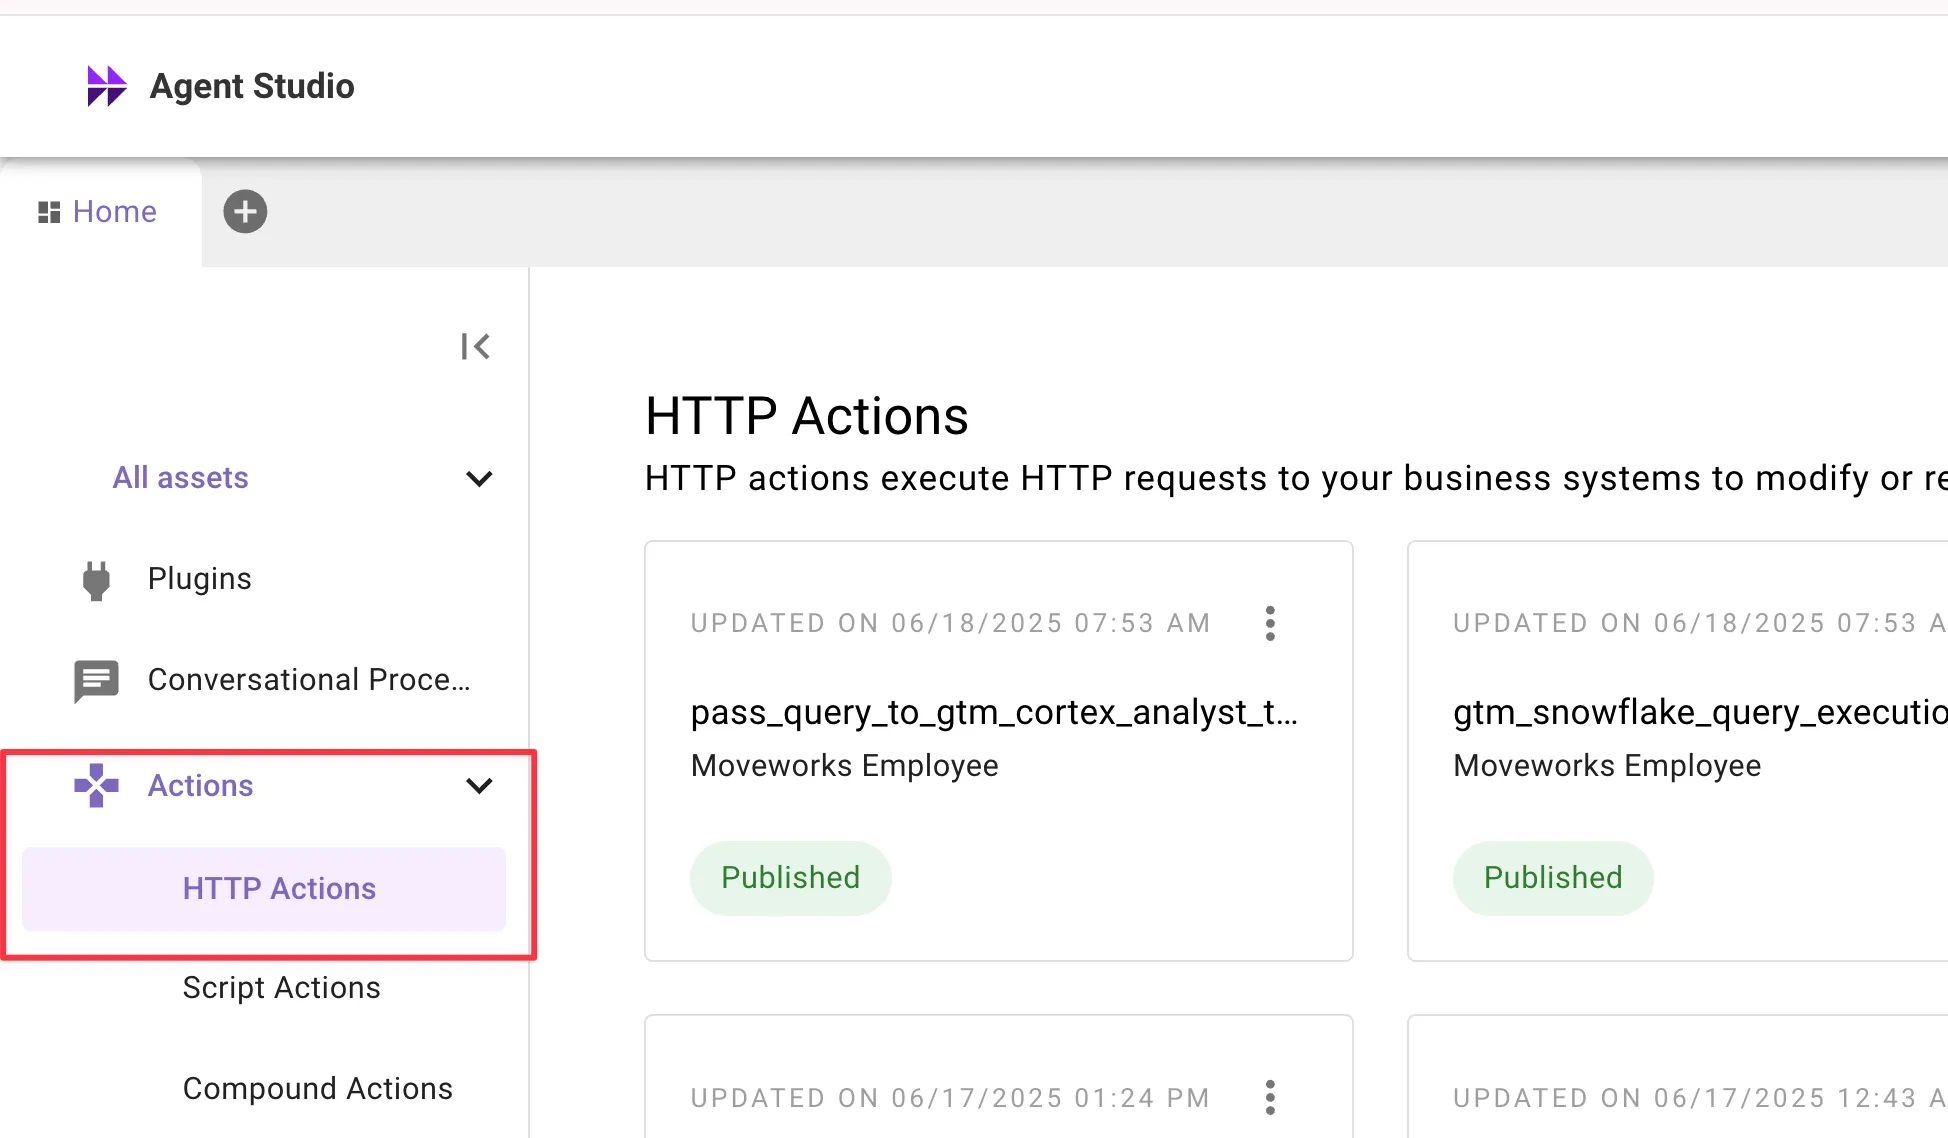
-
Under the
ConnectorTab, selectInherit from existing connector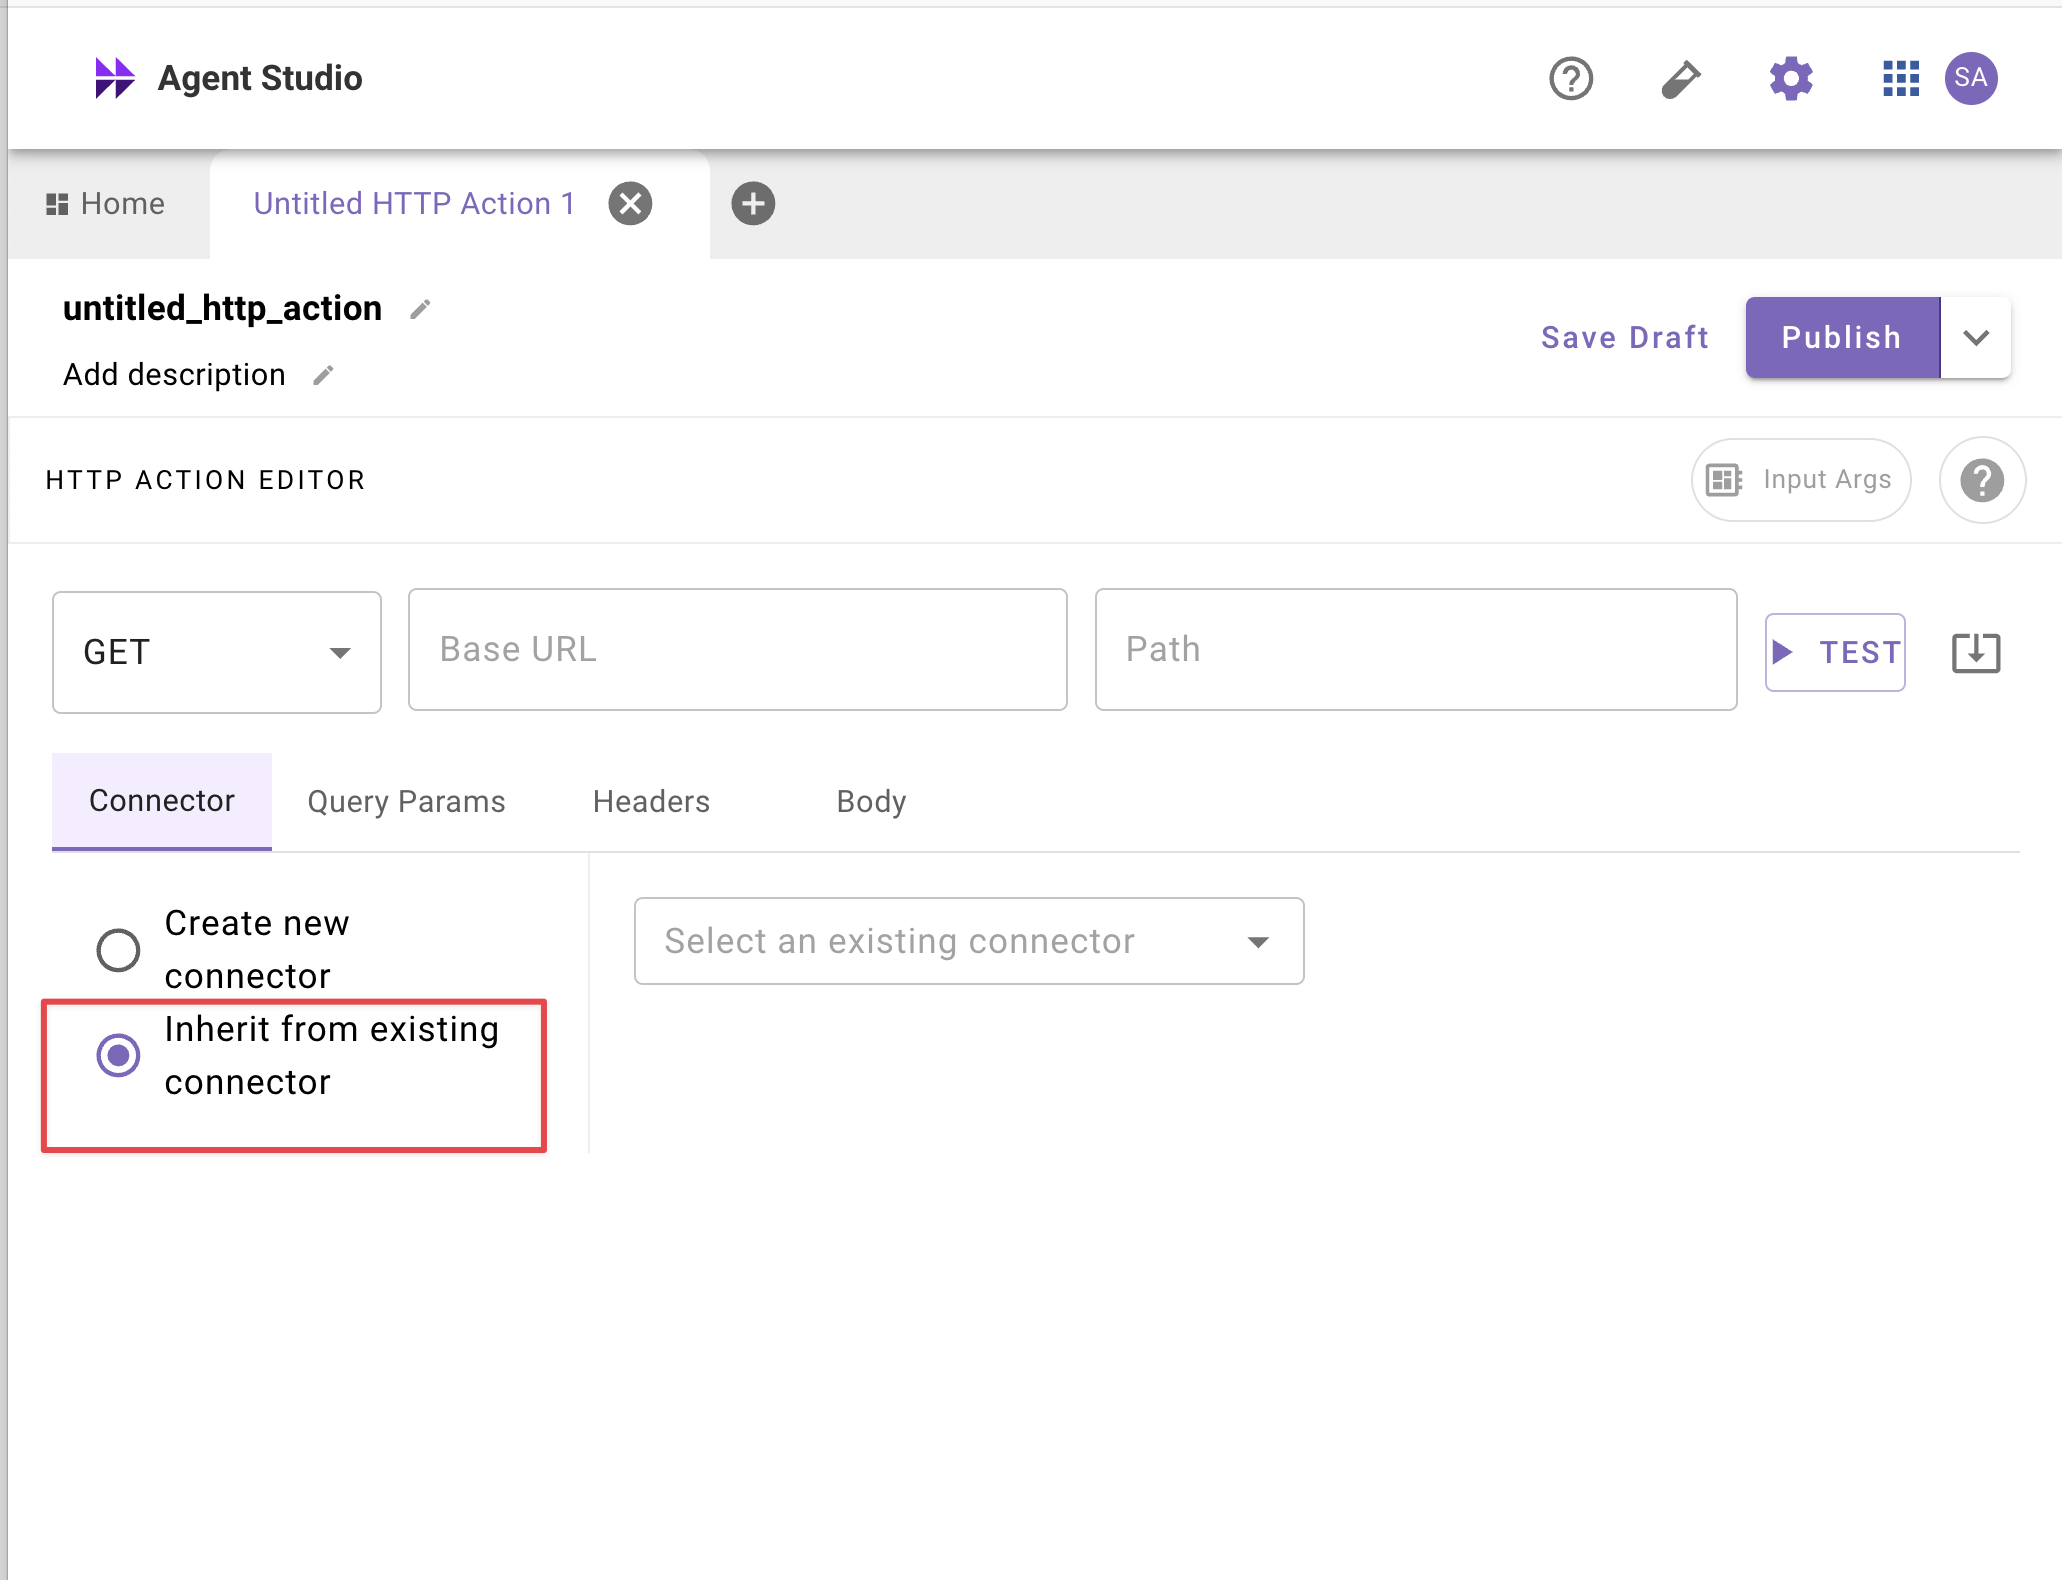
-
Search for a built-in connector in the Select an existing connector dropdown. The names in the dropdown should match those of the built-in connectors name.
-
Select the connector and use it as you would any other connector. You will be able to test, create plugins, etc. just as you would an HTTP Connector.
There are the following limitations to be kept in mind with this functionality:
- Developers may access connectors they should not have access to. If this feature is enabled, then all developers will be able to use Built-In Connectors inside of Agent Studio. They will not be able to edit these connectors unless they have access to Moveworks Setup. This may result in developers seeing and using connectors that they would not have access to. Please only turn on this featrue if this limitation is not a concern for you.
- Developers cannot create built-in connectors inside of Agent Studio. Configuring or editing built-in connectors must be done inside of Moveworks Setup. For developers with the Setup RBAC, they will have to go to MW Setup to make changes. For developers who do not have the role, they will not be able to create or edit these connectors, but rather only use previously configured ones.
- System Limitations. The following systems are not supported:
- Amazon Connect, Cisco Webex Teams, Duo, Facebook Workplace, Google Hangouts Chat, Google Spreadsheet, Microsoft Exchange Online, Microsoft Teams, NetIQ eDirectory, PingID, RingCentral Glip, Twilio, Vayusphere
Updated about 2 months ago