Quickstart #7: Scheduled Trigger Ambient Agent
Learning Objectives
In this Quickstart, you’ll build an Ambient Agent that is triggered on a schedule and notifies you with a weekly risk analysis of purchase requisitions. Along the way you’ll learn how to:
- look up a target user(s) with built in
mw.get_user_by_email - Use built in
mw.generate_text_actionand the Notify expression. - Configure a Scheduled Trigger to run a Compound Action on a defined cadence
Prerequisites
- Access to the "Agent Studio" app.
What You'll Build
The plugin you’ll build solves a common, practical problem: proactively surfacing valuable insights to the right person on a reliable cadence.
Before starting to build, we always recommend that you first map out the desired end user experience and the overall building blocks of an Ambient Agent.
Here is an example of the end-user experience we hope to enable:
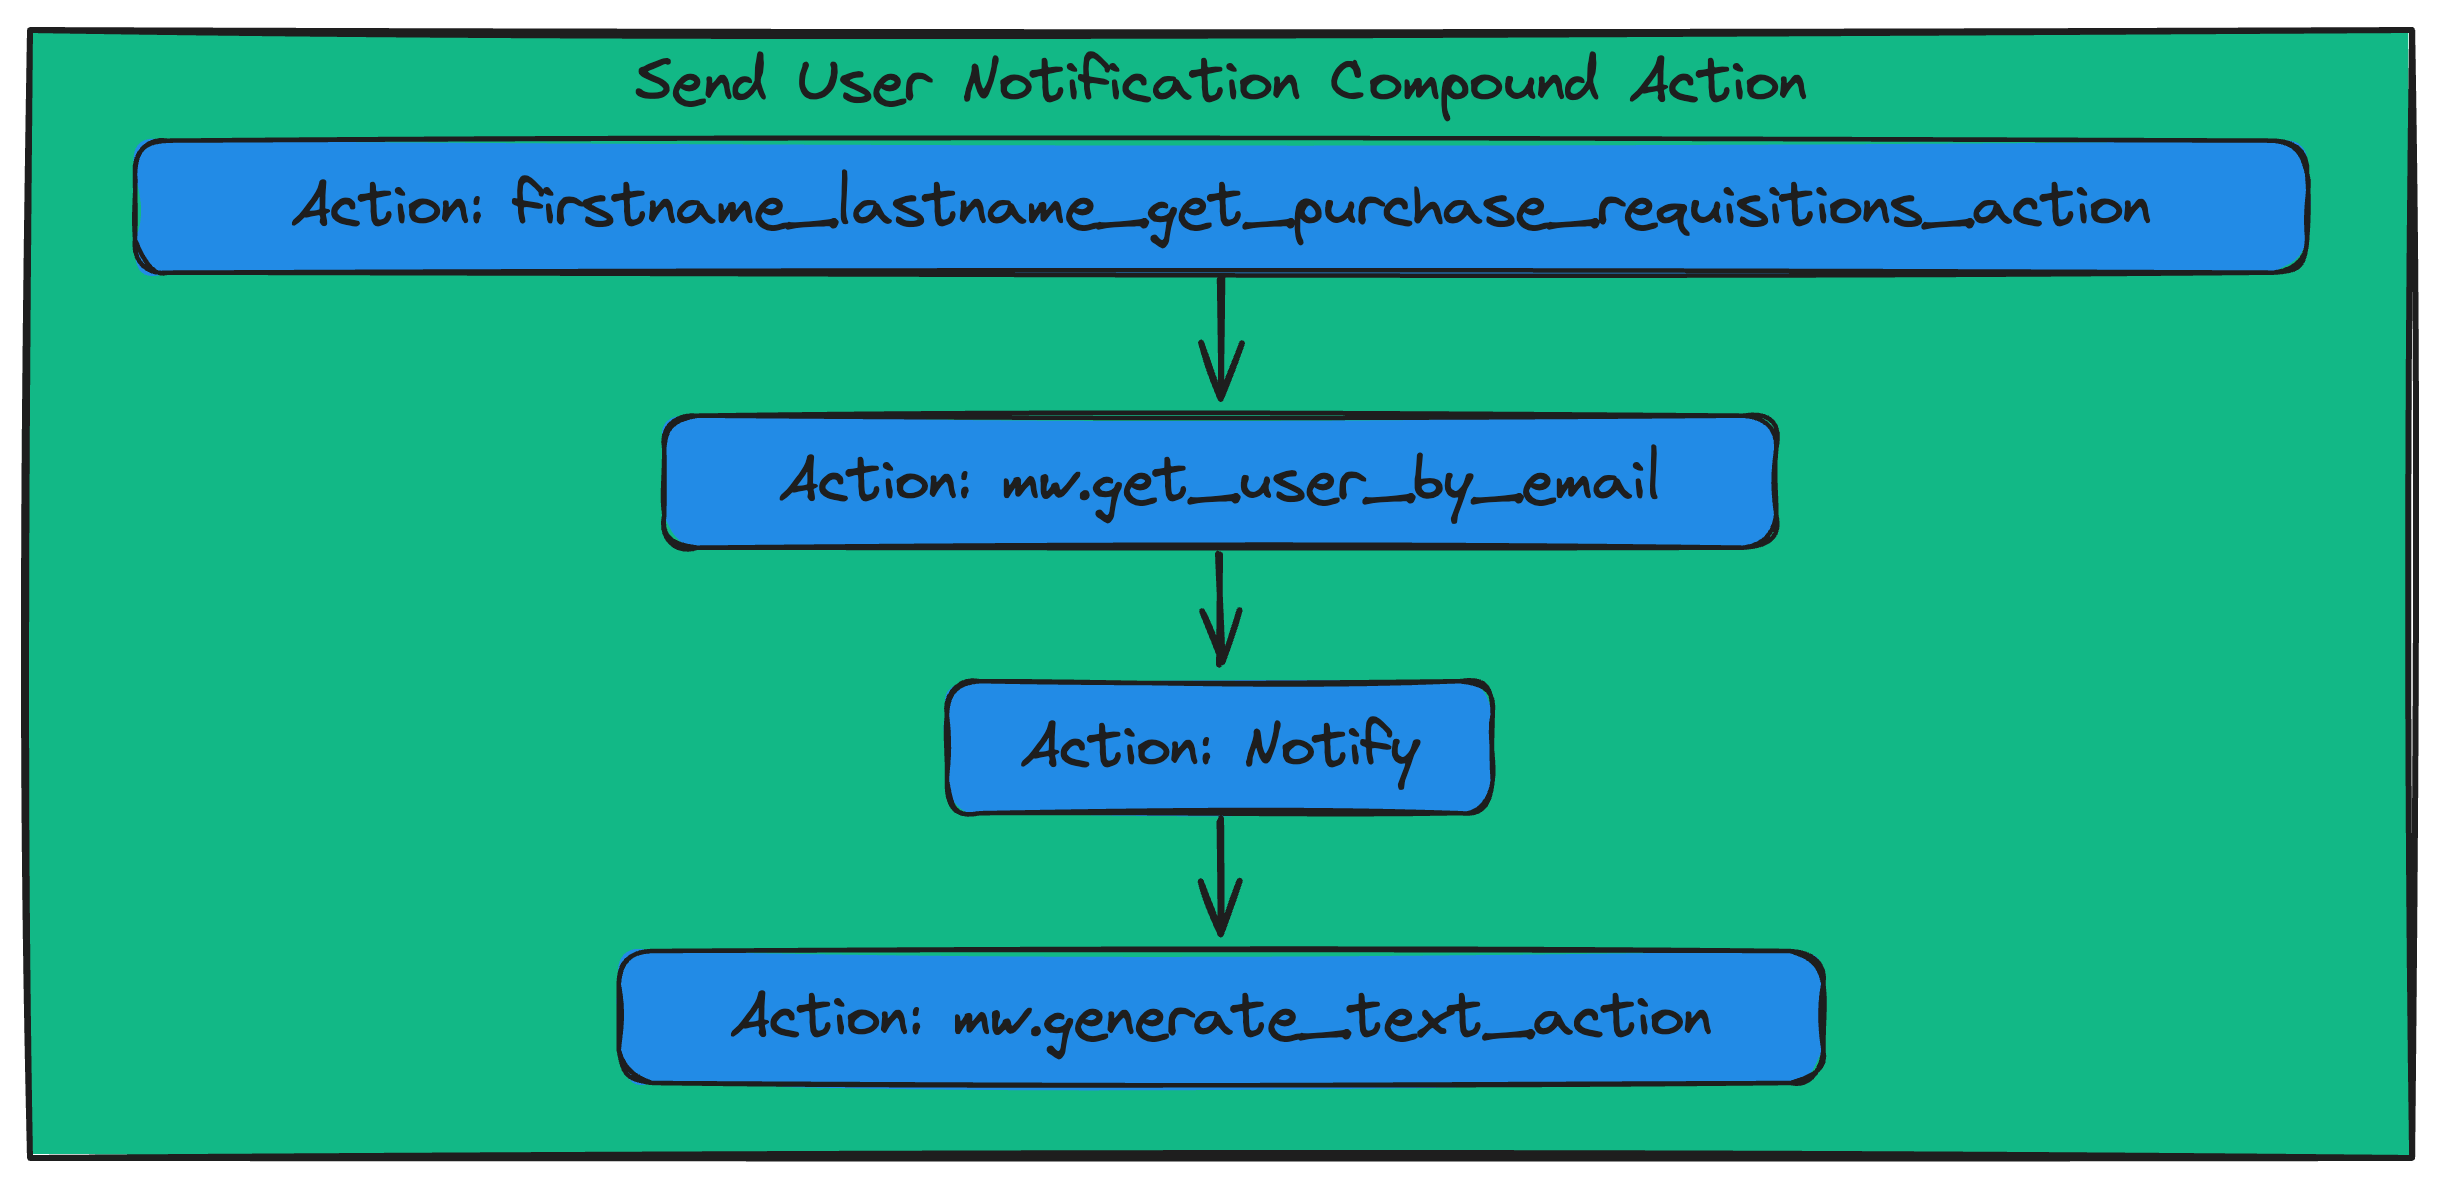
To get to this experience, the Ambient Agent will consist of one Compound Action
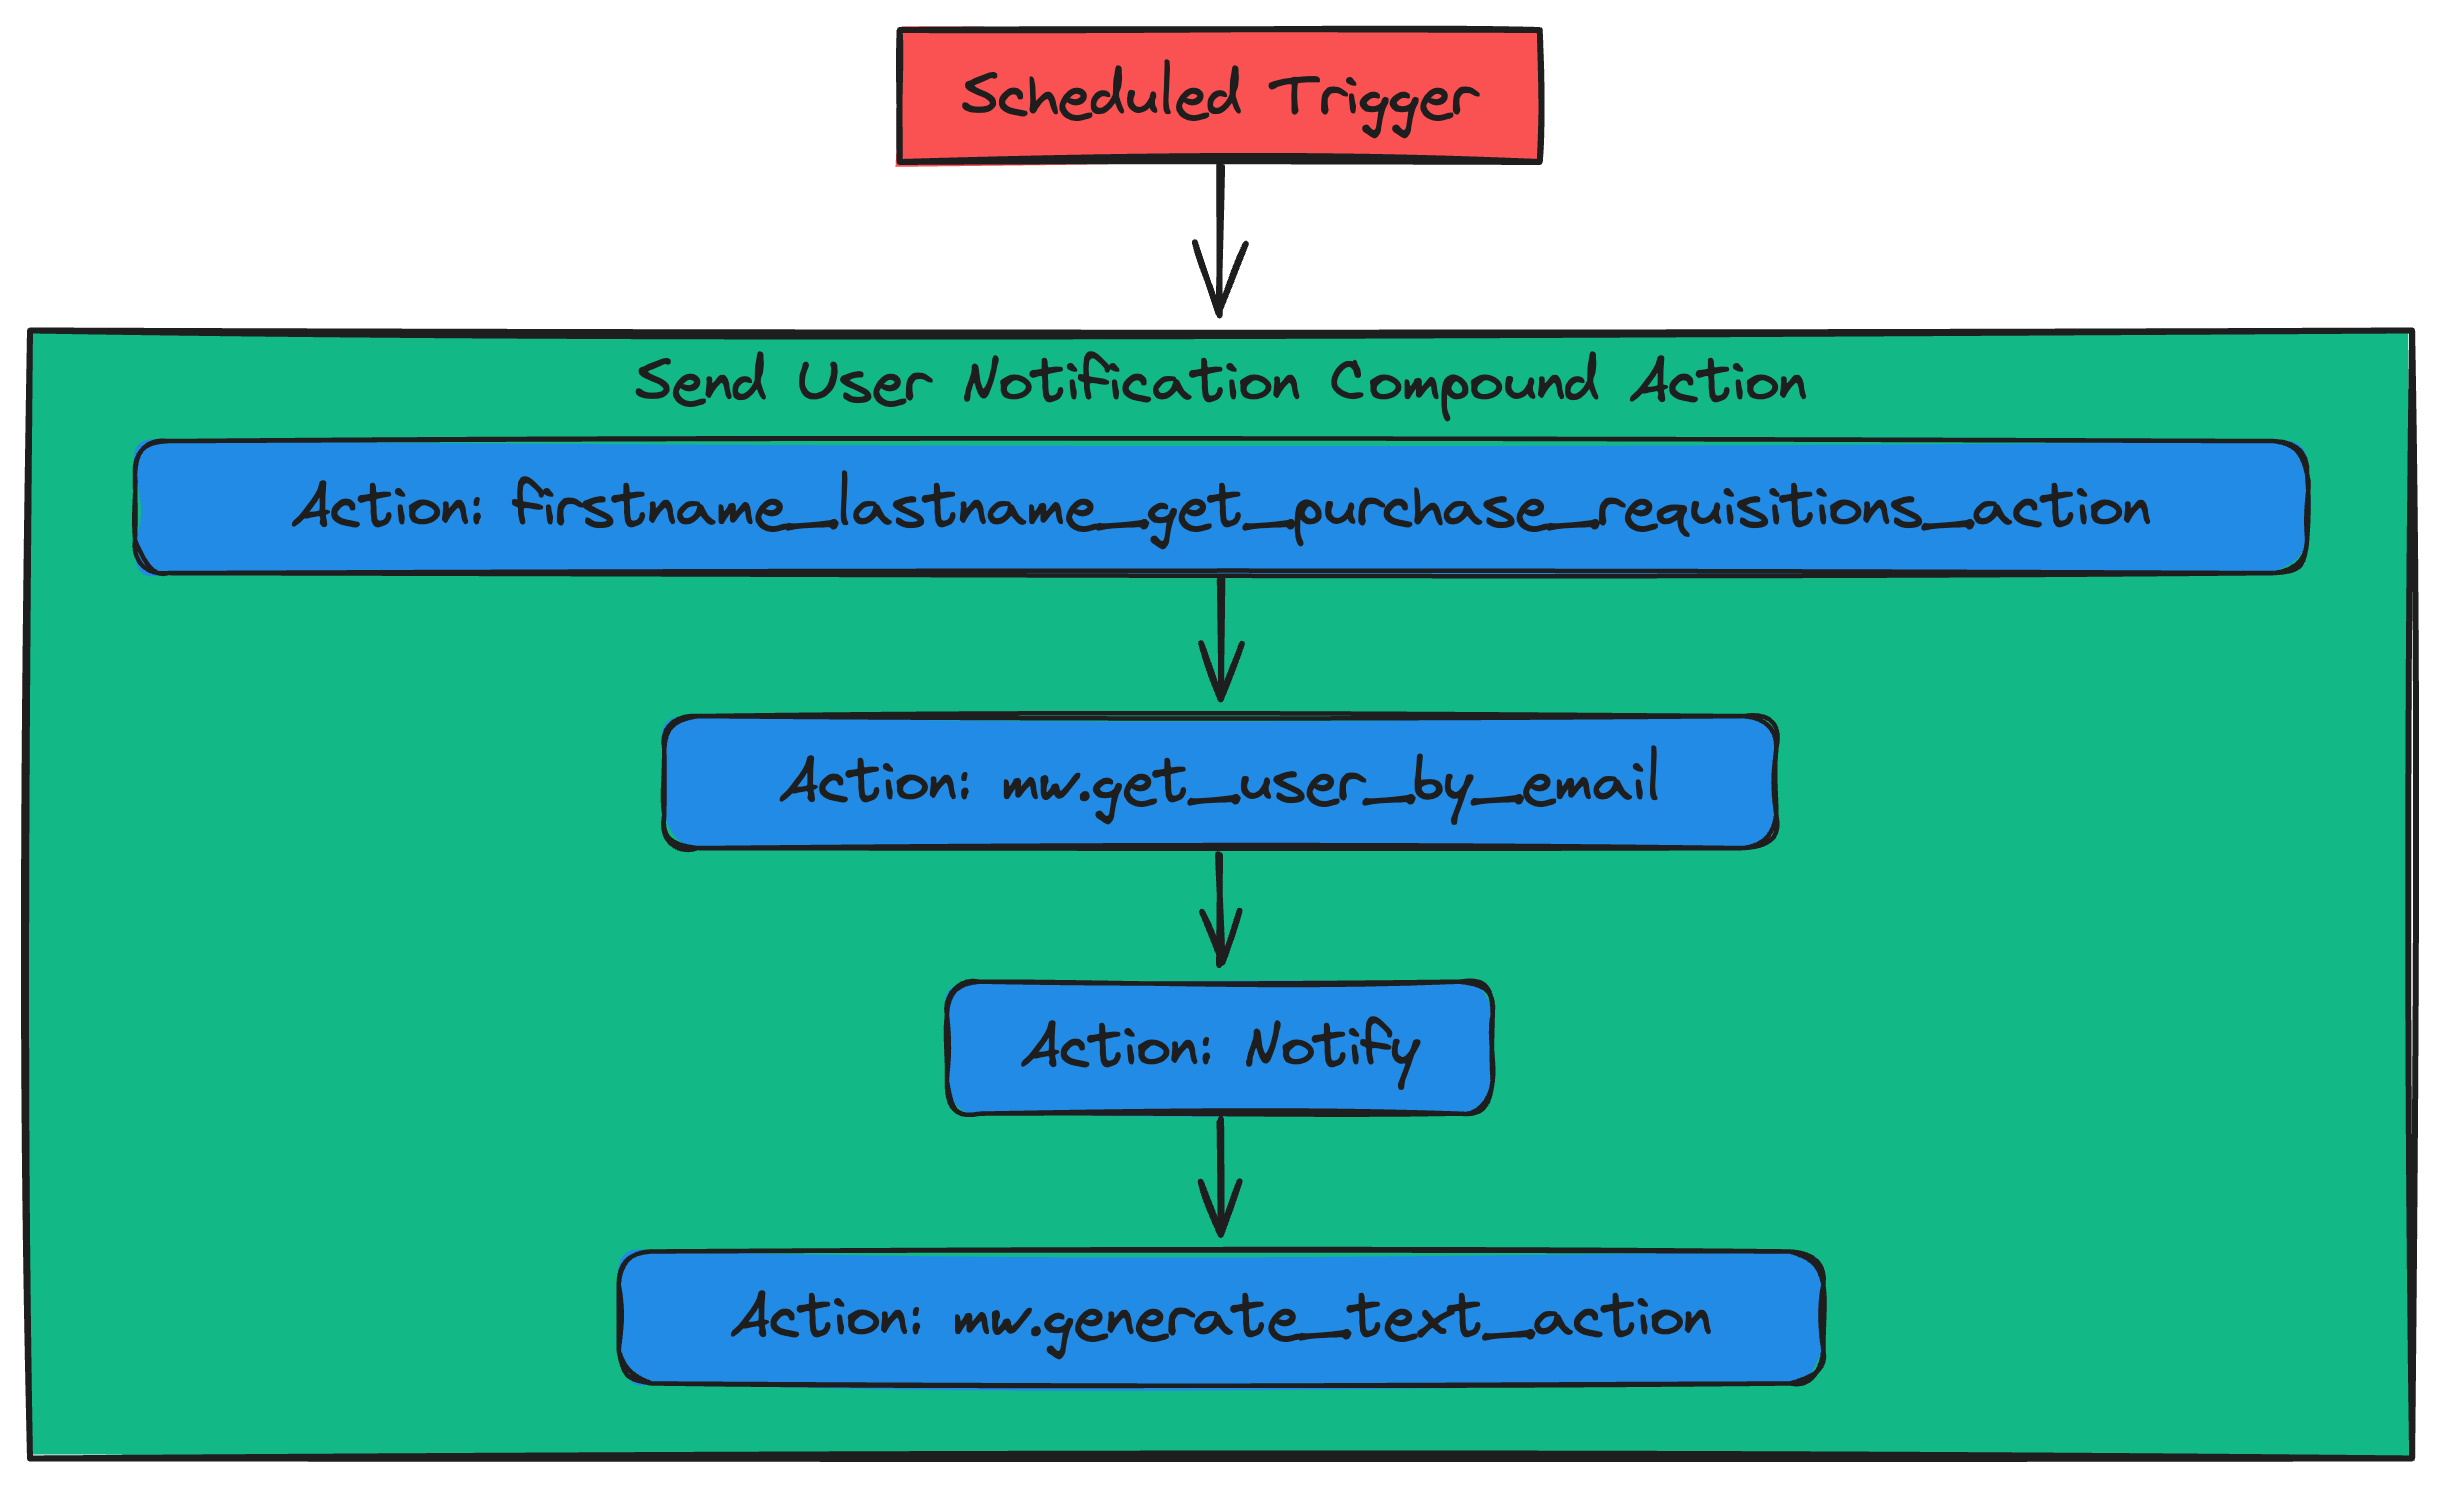
You'll build an end-to-end working Ambient Agent Plugin via these phases:
- Set up an action.
- Build the Compound Action, containing three actions and a notify expression.
- Add the Compound Action to your AI Agent by launching a Plugin.
Let's get started!
Phase 0: Set Up Your Connector
You may be able to skip this phase if you've completed another Agent Studio Quickstart guide. You can skip this phase if:
You have already created a firstname_lastname_moveworks_purple connector. This section will walk you through how to set up your own connector to the Moveworks Purple API (which powers the Actions used in the Quickstart guides), so no need to repeat this step if you've done it before.
In this guide, the purchase requisition data that your Action will access lives behind the Moveworks Purple API Connector. To access this data via your Action, you need to set up a (reusable) connector:
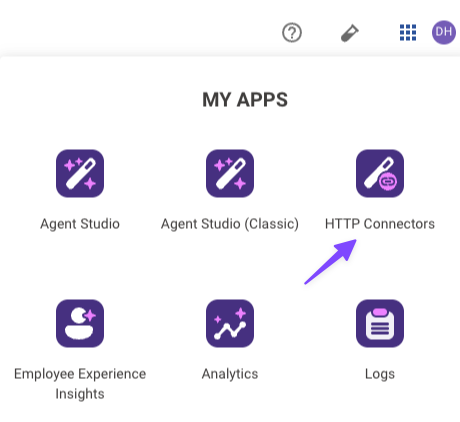
- Navigate to the App Picker in the top right corner of Agent Studio.
- Click on "HTTP Connectors", which will take you to another browser tab.
- Click "Create" in the top right corner.
- Fill out the following information for your Connector (be sure to replace "firstname" and "lastname" with your corresponding information).
| Field | Value to enter (replace "firstname" & "lastname" with your info) |
|---|---|
| Connection Name | firstname_lastname_moveworks_purple |
| Description | Moveworks Purple APIs Connector |
| Base Url | https://marketplace.moveworks.com |
| Auth Config | No Auth |
- Click "Save" on the bottom right corner.
You're now fully ready to start building. On to Phase 1!
Phase 1: Create the HTTP Action to fetch purchase requisitions
-
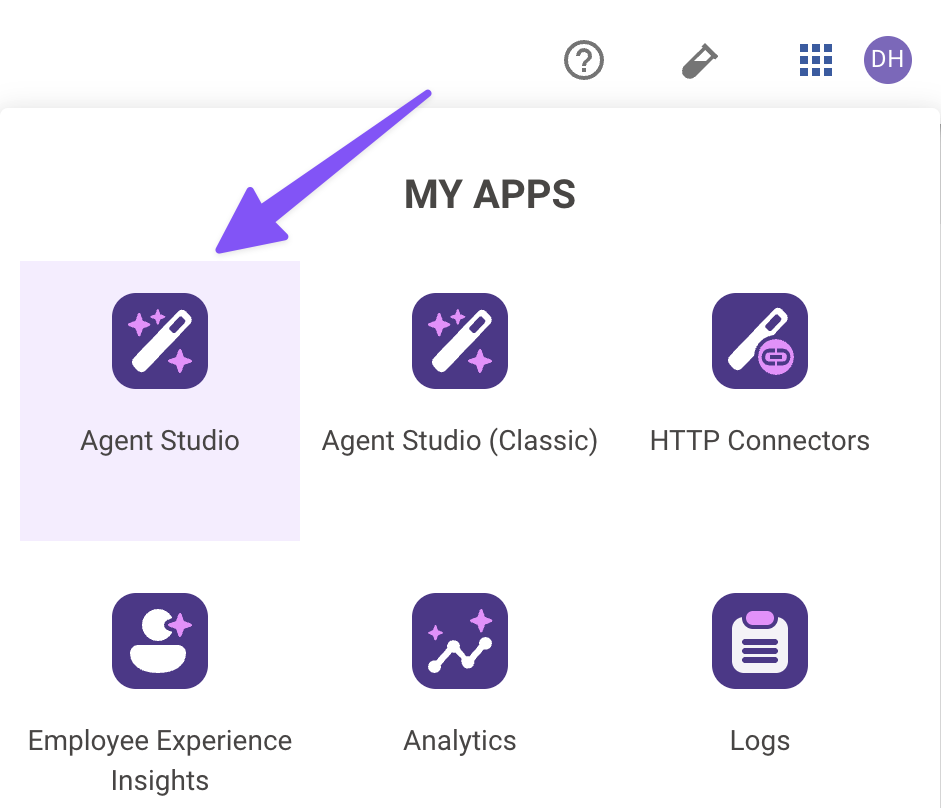
Navigate to the App Picker in the top right corner. Click on "Agent Studio".
-
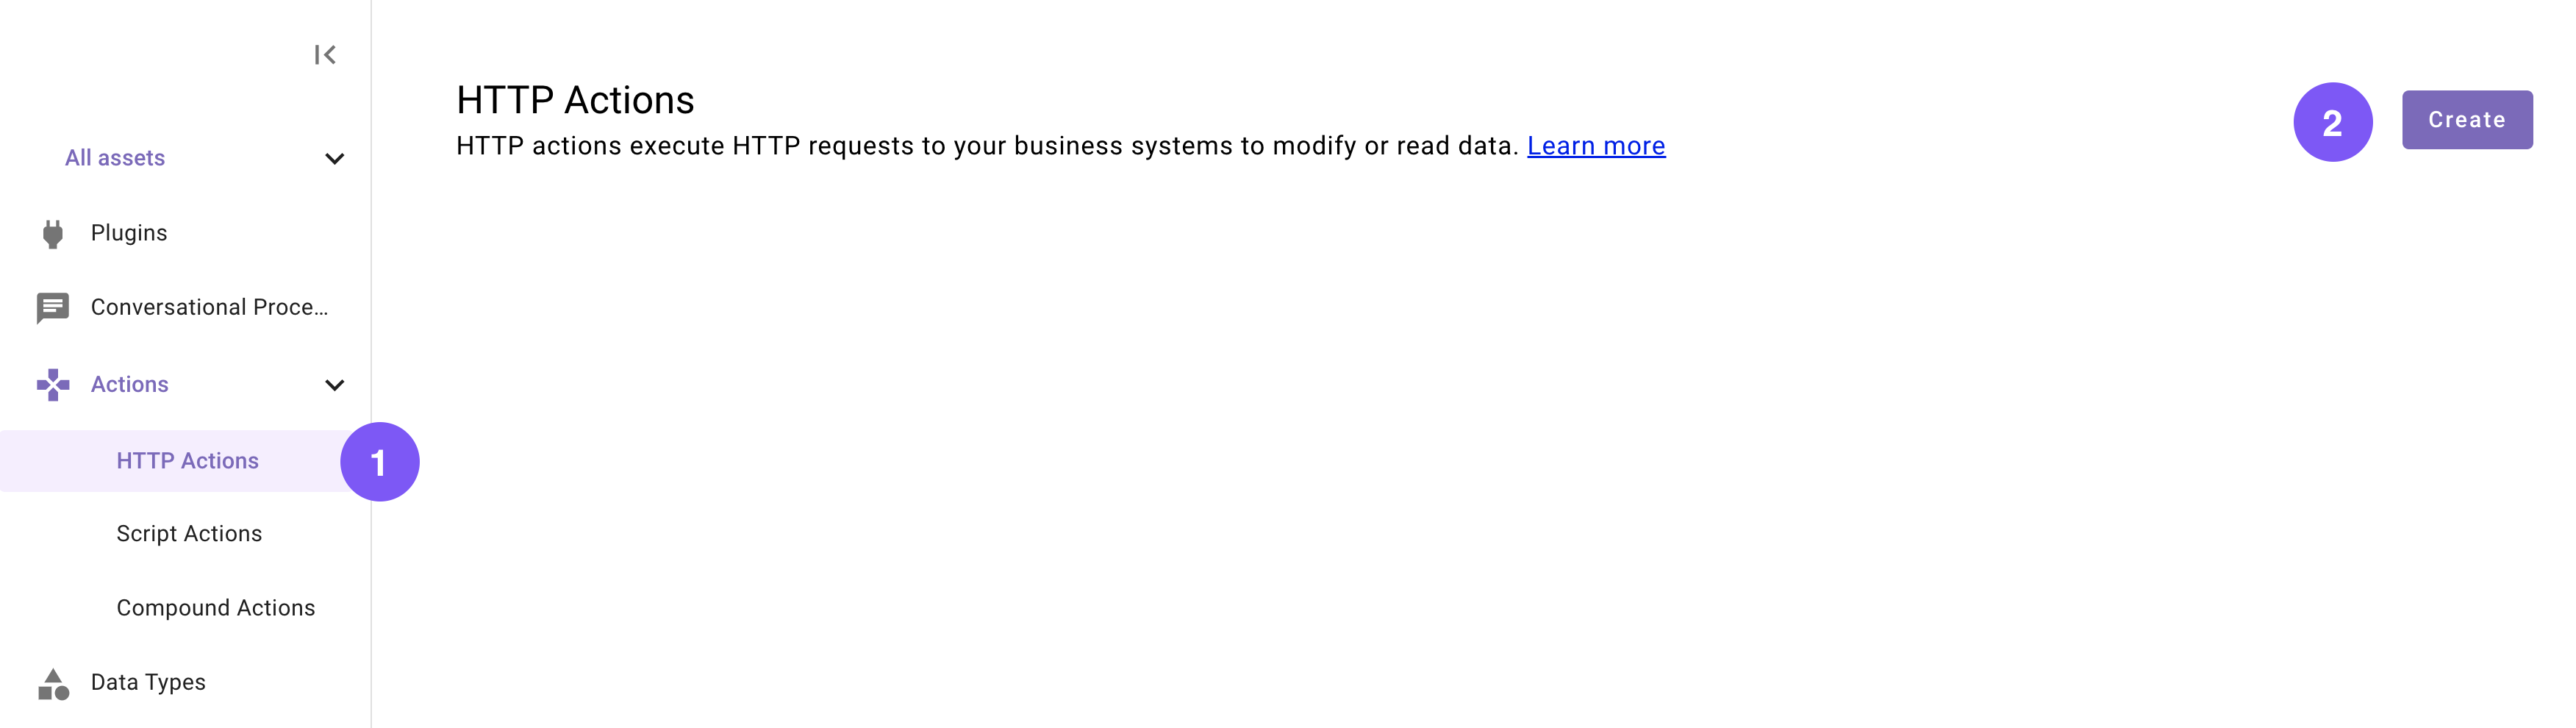
Navigate to a new HTTP Action.
-
Click "Create".
- Set the following Title and Description for your Action (be sure to replace "firstname" and "lastname" with your corresponding information).

| Field | Value to enter (replace "first" & "last" with your info) |
|---|---|
| Title | firstname_lastname_get_purchase_requisitions_action |
| Description | Retrieves all purchase requistions |
-
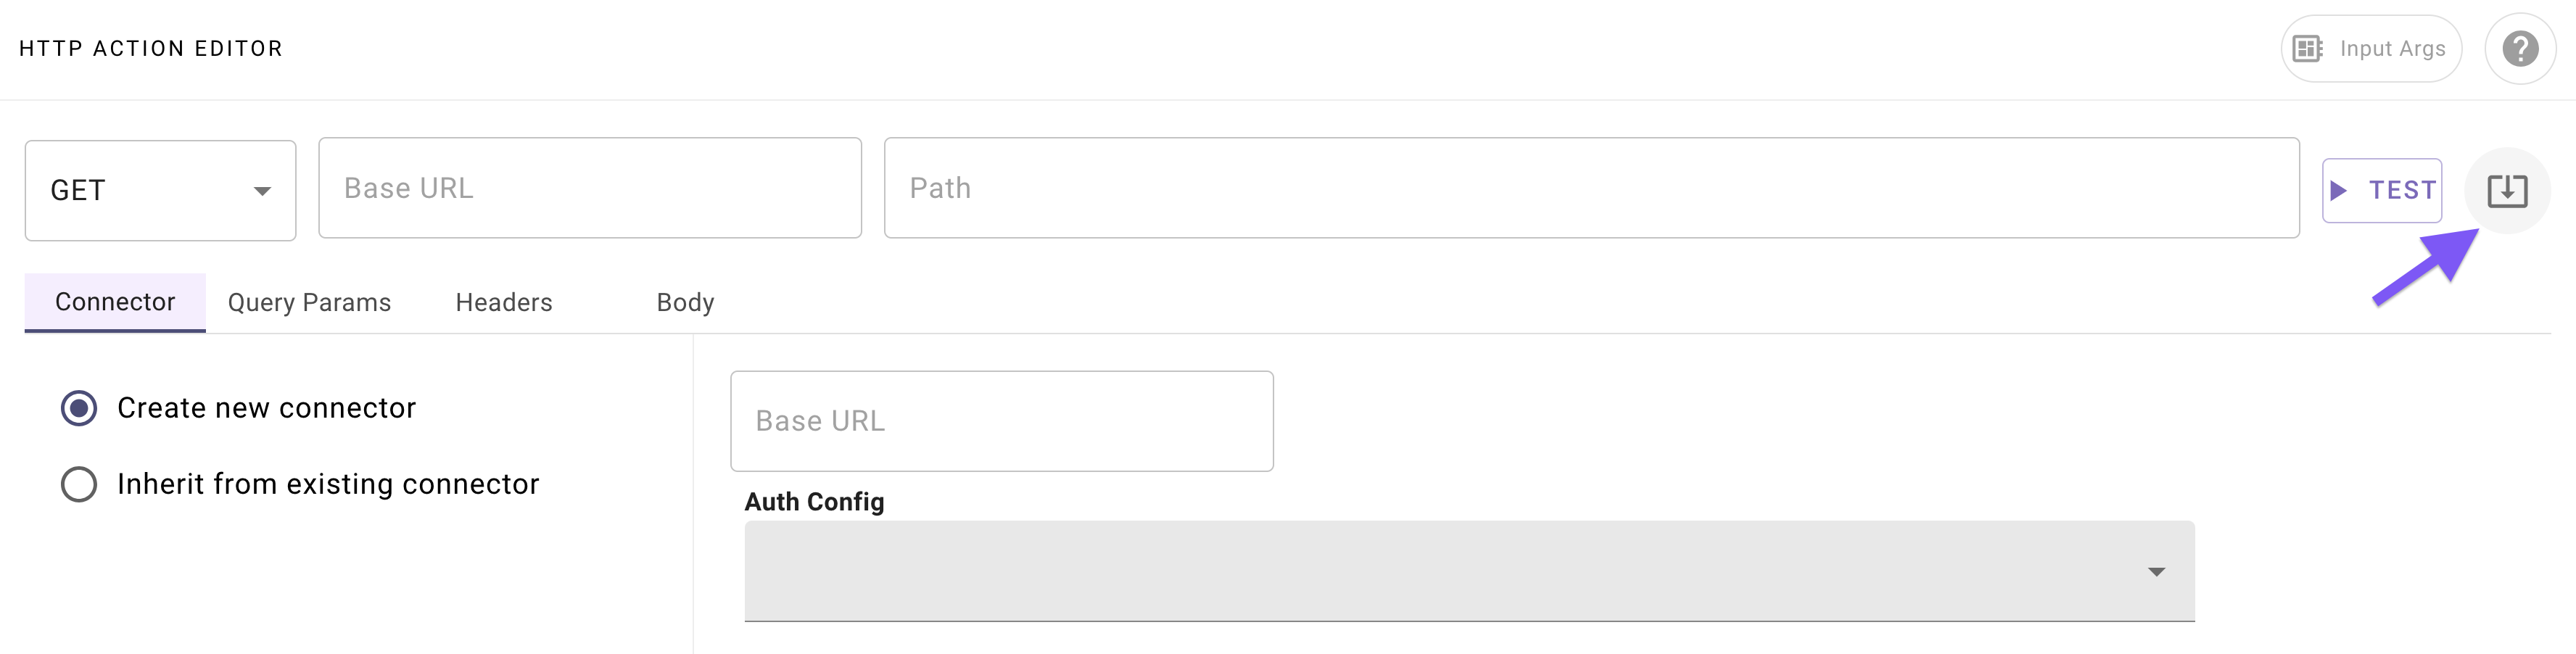
Enter the details of your API:
- Click on the "Import" icon to the right of the "TEST" button.
- Paste the following cURL command (this represents an endpoint which has one dynamic user email query parameter):
curl -X GET "https://marketplace.moveworks.com/api/purple-suite/erp/purchase-requests/history"iii. Click "Import" (your Action should now be auto-populated with details).
- Add your Connector.
- Navigate to the Connector tab.
- Select the "Inherit from existing connector" radio button.
- Select the Connector you created in Phase 0 from the dropdown (e.g.
firstname_lastname_moveworks_purple).

-
Test your Action:
- Click on the "TEST" icon (to the right of the endpoint URL definition).
- Inspect the Console to verify that you receive a successful response:
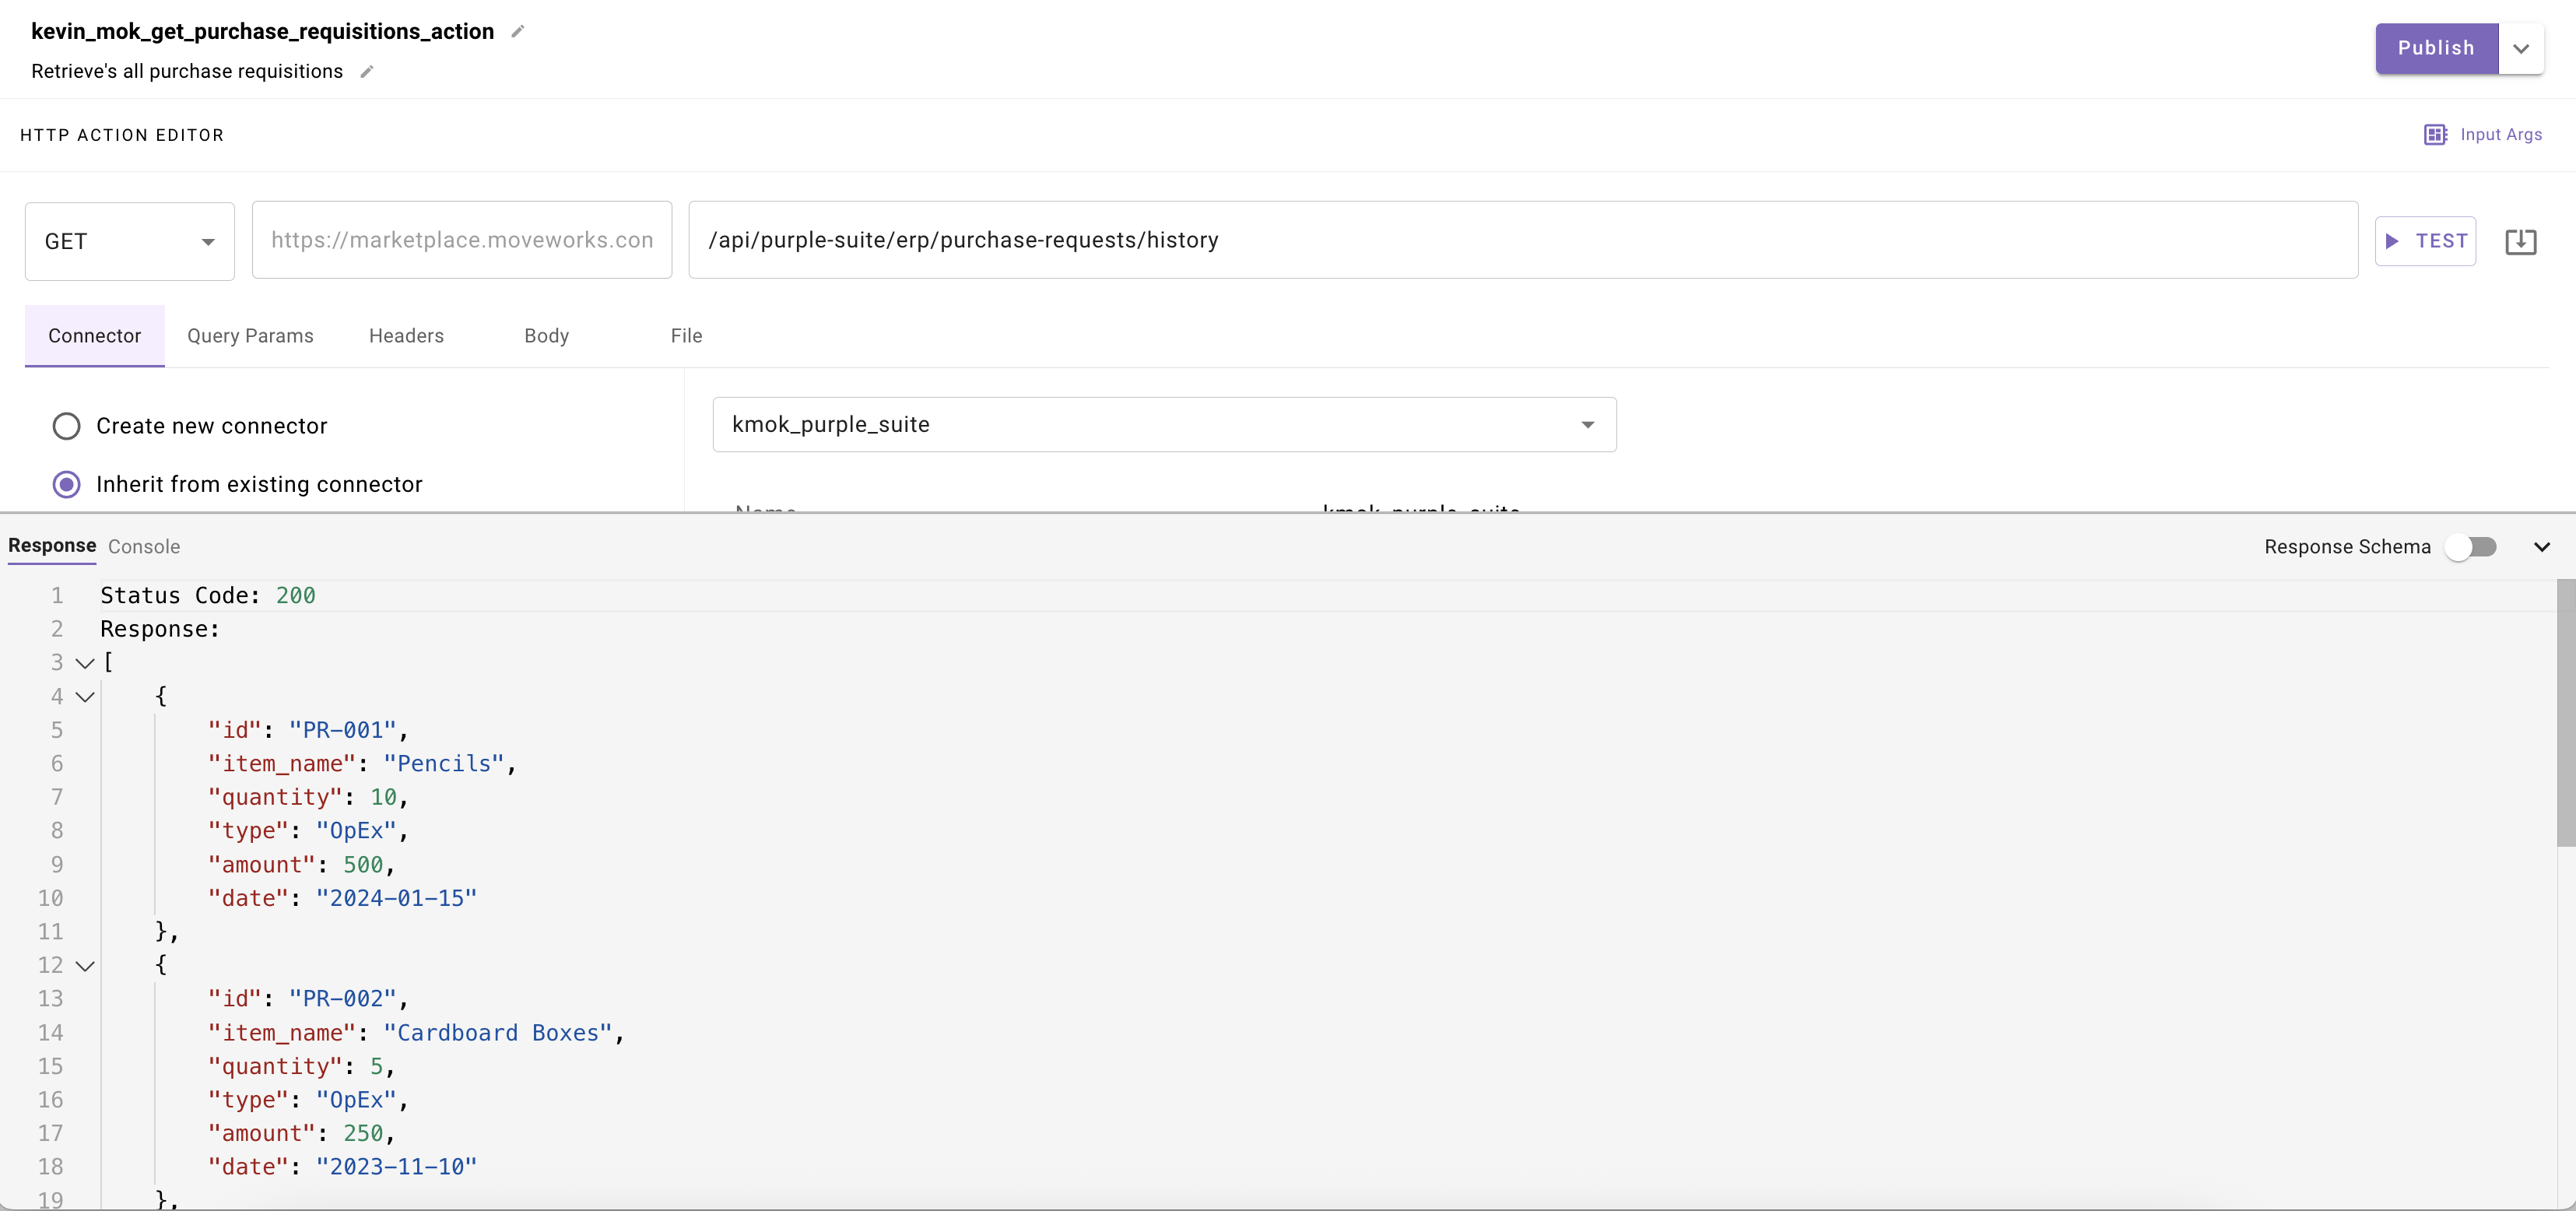
You should see: Status Code 200, a PTO result object, and a response schema of the returned object.
-
Click "Publish"
Phase 2: Create Your Compound Action
You will now create a compound action to handle all the logic of the agent when triggered by the plugin's schedule.
In this phase you will build a compound action with the action you configured to retrieve all purchase requistions, a built in action to lookup the target user's Moveworks profile, and a Notify key to message provide the user the option to retrieve the insights if they select yes it will call a built in action to generate the risk analysis against the purchase requisition data
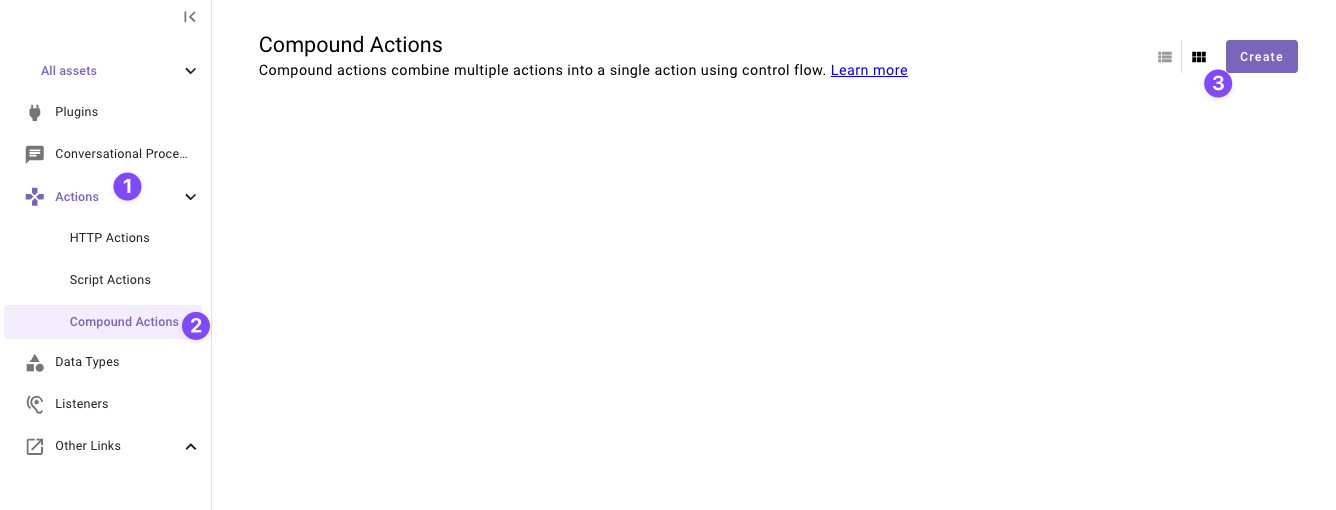
-
Navigate to a new “Compound Action” in the left nav and then click “Create”.
-
Set the following title and description for your Compound Action (be sure to replace "first" and "last" with your corresponding information).
Field Value Title quickstart_first_last_purchase_requisition_insights_caDescription Sends a message to a user to get insights on purchase requisitions -
Copy the following expression into the Compound Action Editor and
- Replace
<your email here>with your actual email on line 9 - Replace
<your pr action name here>on line 3 with whatever you named the actionfirstname_lastname_get_purchase_requisitions_actionfrom step 1.
steps: - action: action_name: <your pr action name here> output_key: purchase_requistions - action: action_name: mw.get_user_by_email output_key: user_object input_args: user_email: '"<your email here>"' - notify: output_key: notify recipient_id: data.user_object.user.id message: '"Select yes if you would like to receive an analysis on purchase requisitions for the day"' actions: - key: yes_option label: '"Yes"' system_action: action_name: mw.generate_text_action input_args: model: '"gpt-4.1"' system_prompt: '"Analyze the purchase requistions for the day and risk based on item, dollar amount, and quantity. Callout any specific items that seem over priced or innacurate"' user_input: data.purchase_requistions.$STRINGIFY_JSON()Understanding the Compound Action
This Compound Action executes four actions in sequence, with the output of one step feeding into the next:
- firstname_lastname_get_purchase_requisitions_action
- Purpose: To identify the notification recipient.
- Process: Custom made action you configured in step 1 to call the purple api and retrieve all purchase requisitions.
mw.get_user_by_email(Built-in Action)- Purpose: To identify the notification recipient.
- Process: It takes a user's email address (you defined statically) as its input and retrieves that user's unique Moveworks profile ID.
mw.generate_text_action(Built-in Action)- Purpose: To create a polished message for the user and analyze for insights and callout risk.
- Process: This action uses an LLM to interpret the raw data in the webhook payload and generate a structured, readable message.
notify(Compound Action Expression)- Purpose: To send the final notification.
- Process: This action takes two inputs from the previous steps:
- Recipient ID: It uses the user ID that was retrieved by the
mw.get_user_by_emailaction. - Message: It uses the formatted text that was generated by the
mw.generate_text_actionaction.
- Recipient ID: It uses the user ID that was retrieved by the
- Replace
-
Click "Publish"
All done with Actions!You're ready to move on — time to create your Plugin and put everything you've built together.
Phase 3: Configure and Launch Your Plugin
This section guides you through adding your Scheduled Trigger and Compound Action to a Plugin. A key step will be configuring the data flow, where you'll specify exactly which fields from the webhook you want to forward to your action.
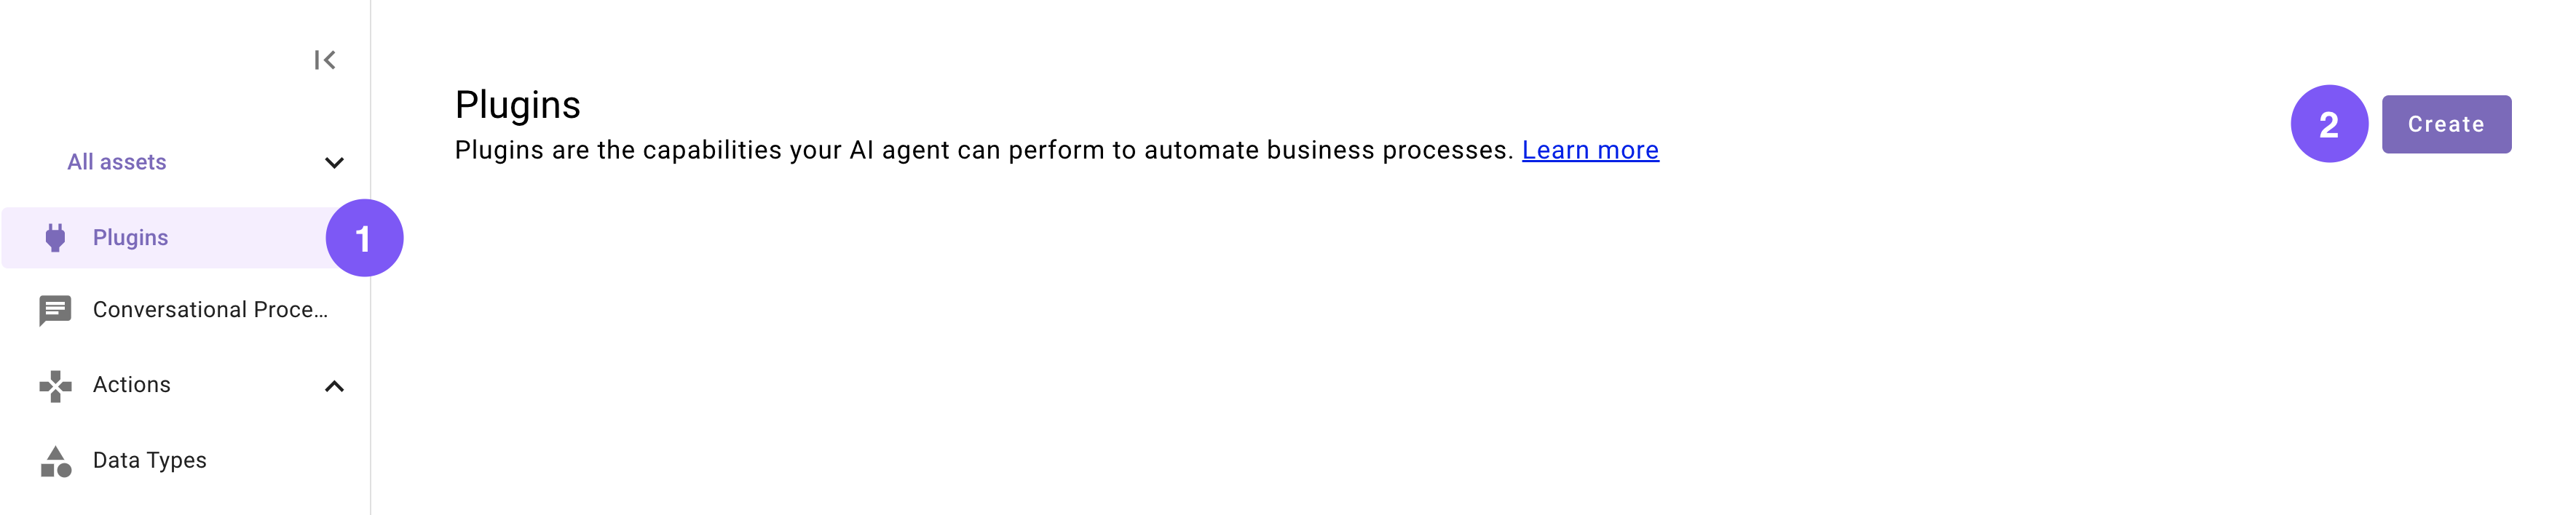
-
Navigate to a new Plugin (navigate to the library and click "Create").
-
Set the following title and description for your Plugin (be sure to replace "first" and "last" with your corresponding information).
Field Value to enter Title quickstart_first_last_purchase_requisition_insights_notificationDescription Sends a message to a user to opt in to recieving purchase requisition insights. -
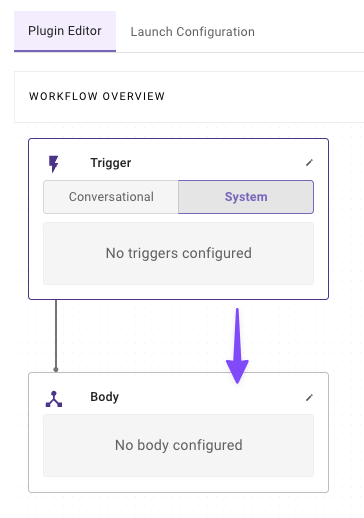
In the “Workflow Overview” section click “System” in the Trigger box.

-
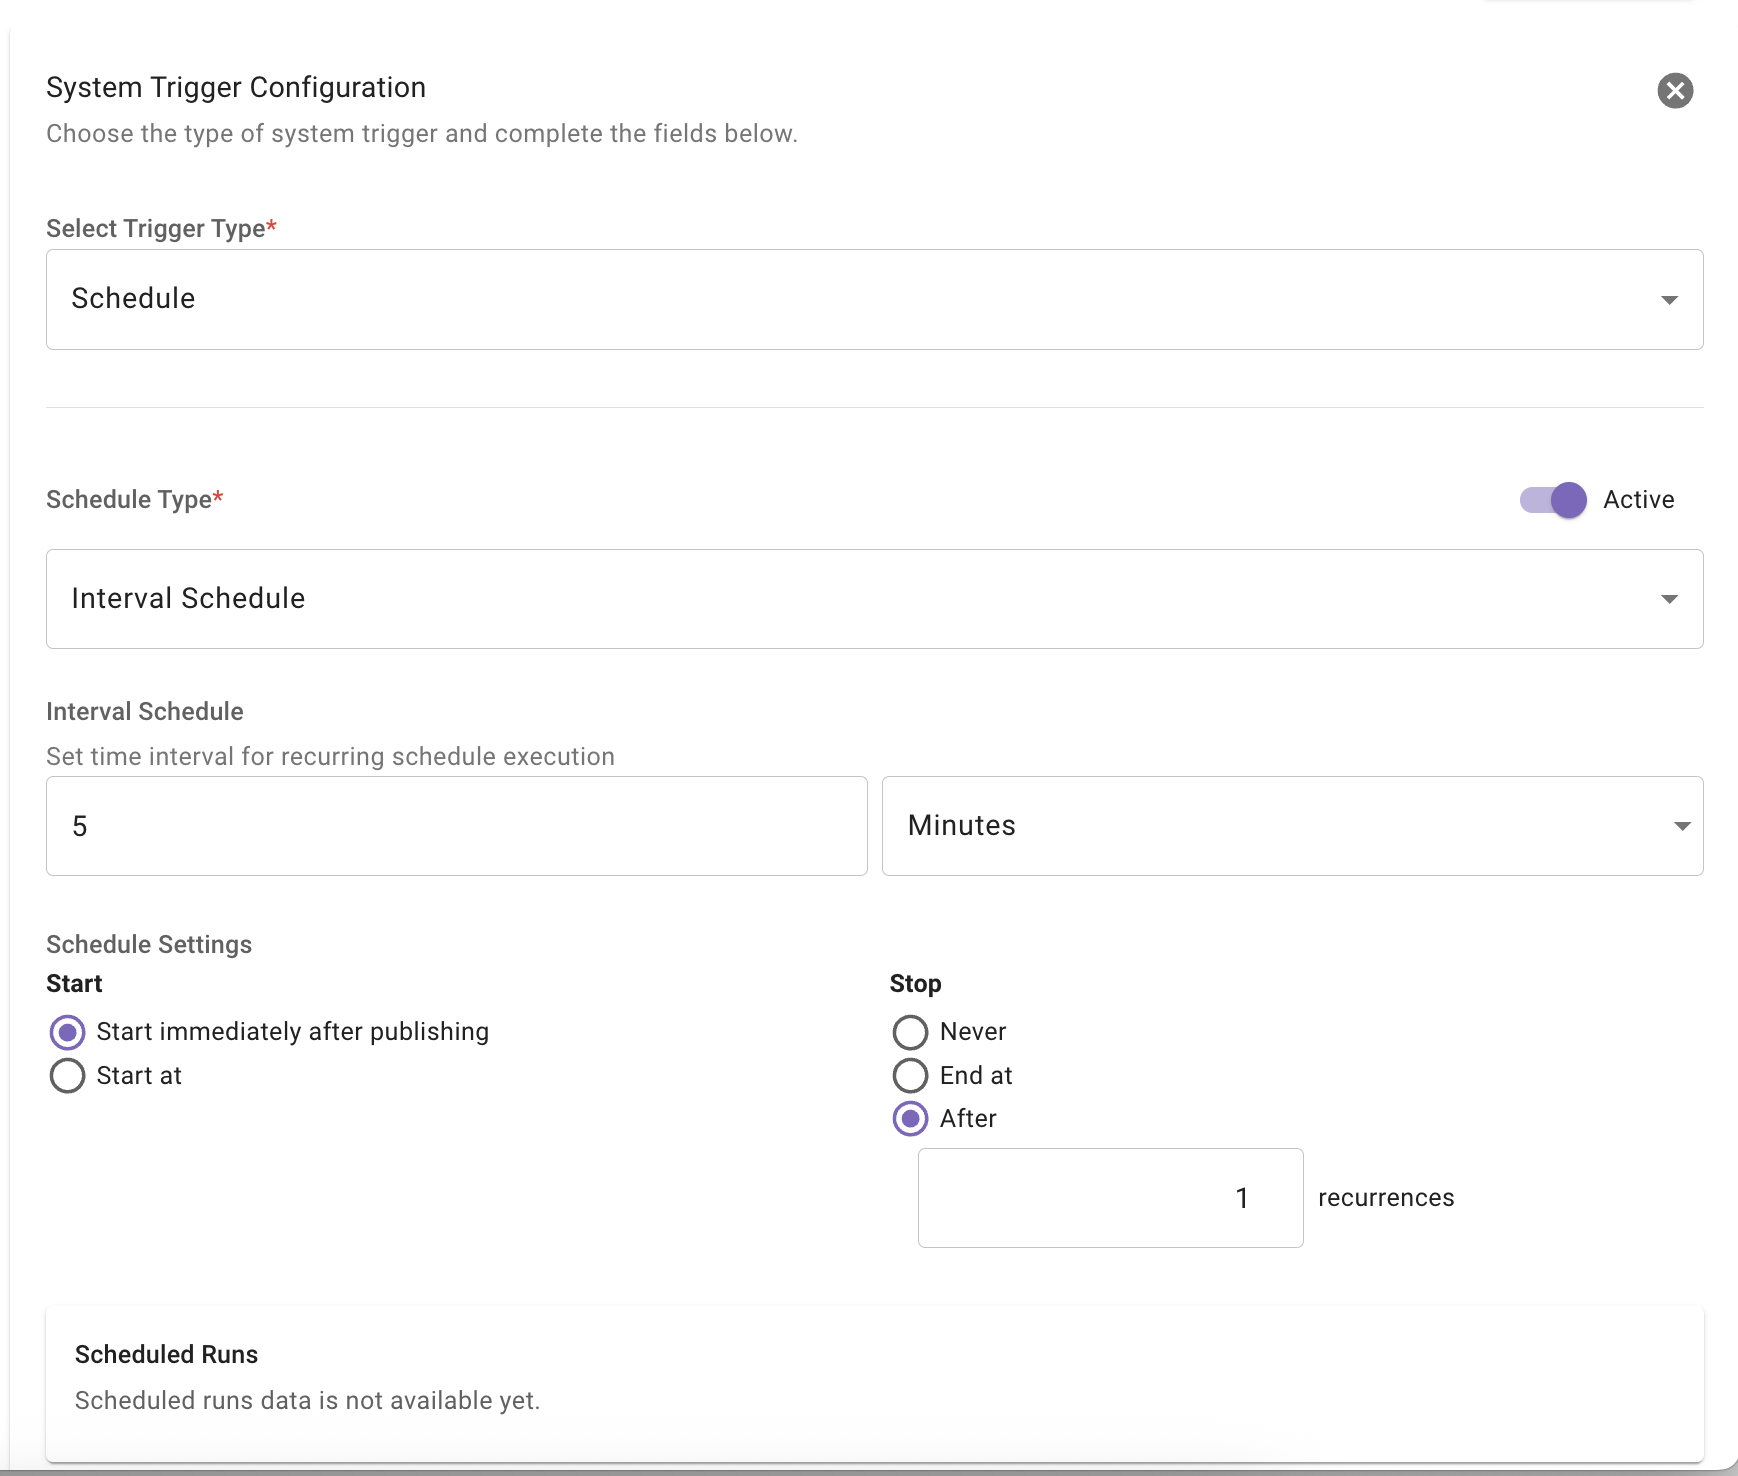
Configure your system trigger in the slide-out pop up with:
Field Label Value to enter/select Select Trigger Type ScheduleSchedule Type IntervalInterval Schedule 5 Minutes(or whatever you want for testing) Minimum 1 minute*Schedule Settings Start: Start Immediately after publishedStop: After 1 occurence(s) (recommended to stop so it doesn't keep notifying you)
ii. Click on the "Body" in the "Workflow Overview
-
Configure your system body to connect your compound action to the plugin
Field label Value to enter/select Select Type System bodySelect an Action quickstart_first_last_purchase_requisition_insights_ca(Select yours)
-
-
Click "Publish" to launch your Plugin.
And just like that — you've finished building your Plugin, and now it's ready to use!Congrats! Your plugin is complete. You should get notified from your AI assistant with a message including a button to receive insights.
Reflecting on this Plugin
The plugin you just created uses several key Agent Studio concepts, from Schedule Triggers to LLM actions to Compound Actions. You've successfully built a plugin that:
- Runs on a cadence on it's own
- Grabs all the purchase requisitions.
- Processes that data to find insights onto purchase requisitions happening daily.
Awesome work sticking with it!
Updated 3 days ago