Moveworks Agent Azure Key Vault Setup Guide
This guide is only required for those who want to access secrets from a pre-existing secrets manager. Otherwise please follow the Moveworks Agent Installation Guide.
This document will outline the instructions to setup the following three resources in Microsoft Azure to run the Moveworks Agent VM, as well as an Azure Key Vault resource to securely access the secrets:
- A Resource Group for the Agent VM
- A VM Instance
- A Key Vault
Prerequisites
- Access to Azure Admin Portal
- Appropriate IAM permissions in Azure to create a new Azure Key Vault Resource.
- Azure CLI installed on the server (or equivalent method to test Azure Key Vault access)
- Instructions to install Azure CLI on Linux can be found here: https://docs.microsoft.com/en-us/cli/azure/install-azure-cli-linux?pivots=dnf
Instructions
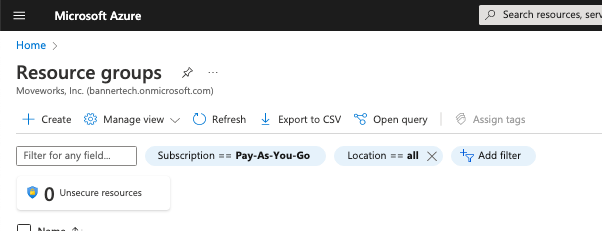
- Navigate to Resource Groups section in Azure, select Create on the top left to create the Resource Group in Azure.
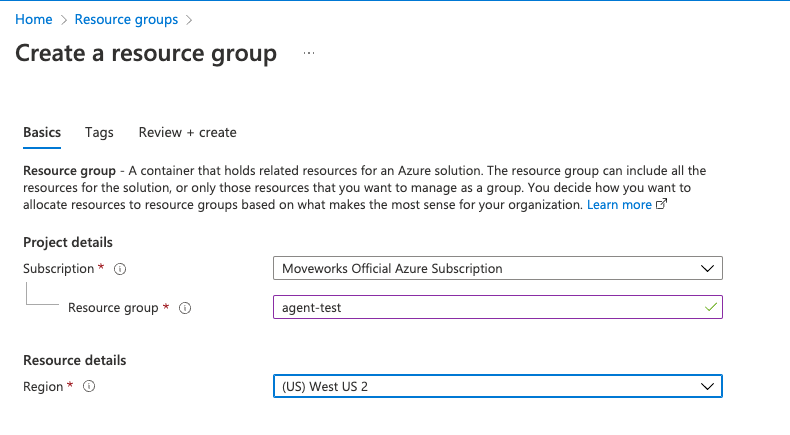
- Enter in the relevant information to create the Resource Group in Azure.
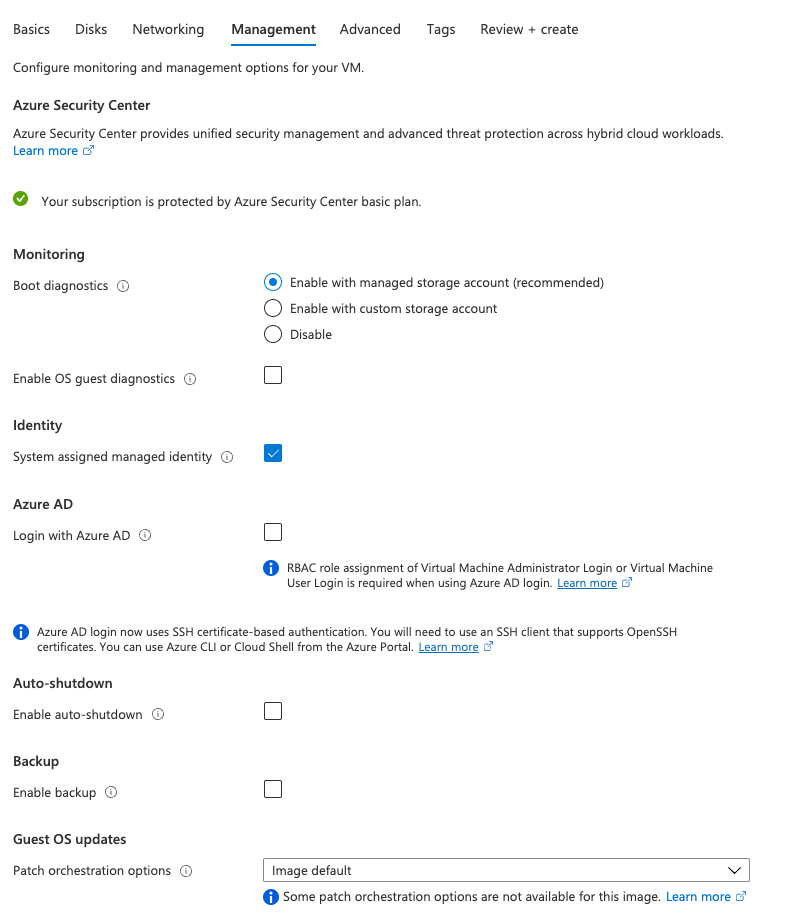
- Create a VM and add it to the resource group.
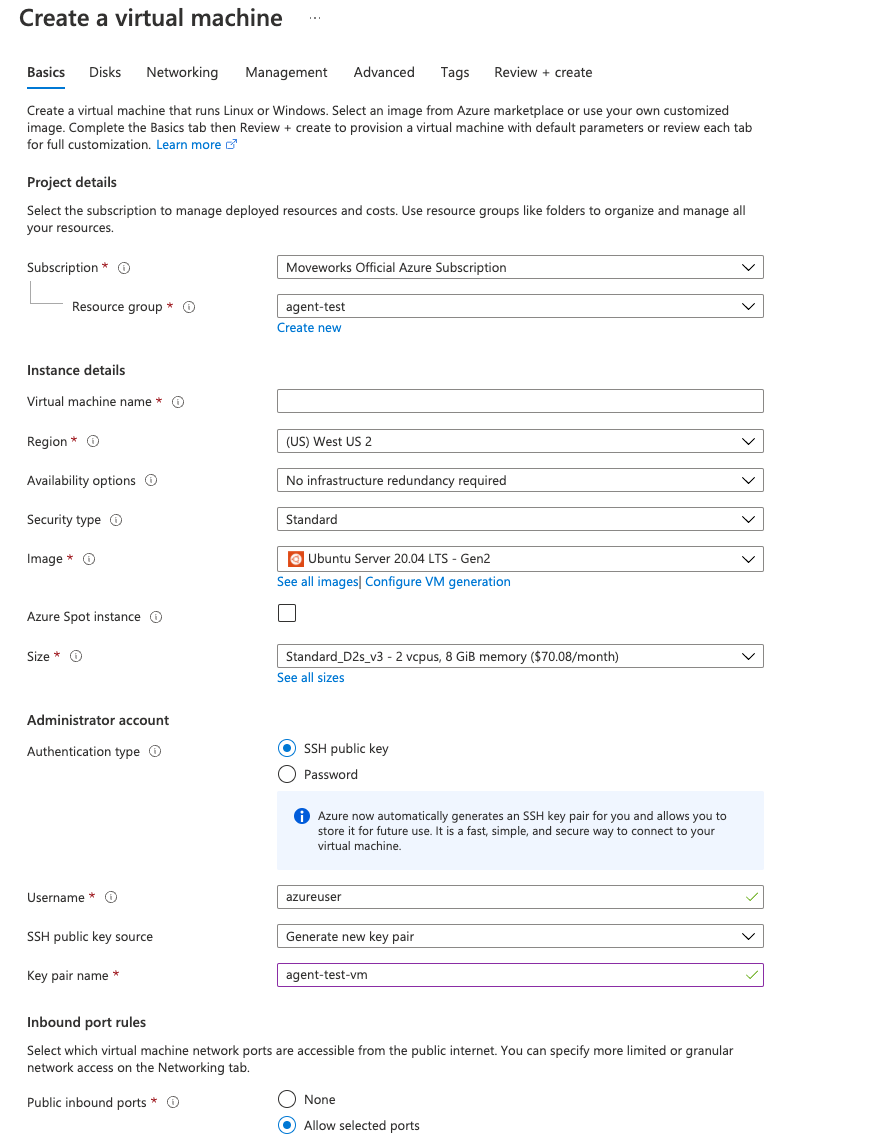
Note: Under management section → Identity, make sure to useSystem assigned managed identity— If you decided to generate a new key pair for ssh, be sure to save the*.pemfile.
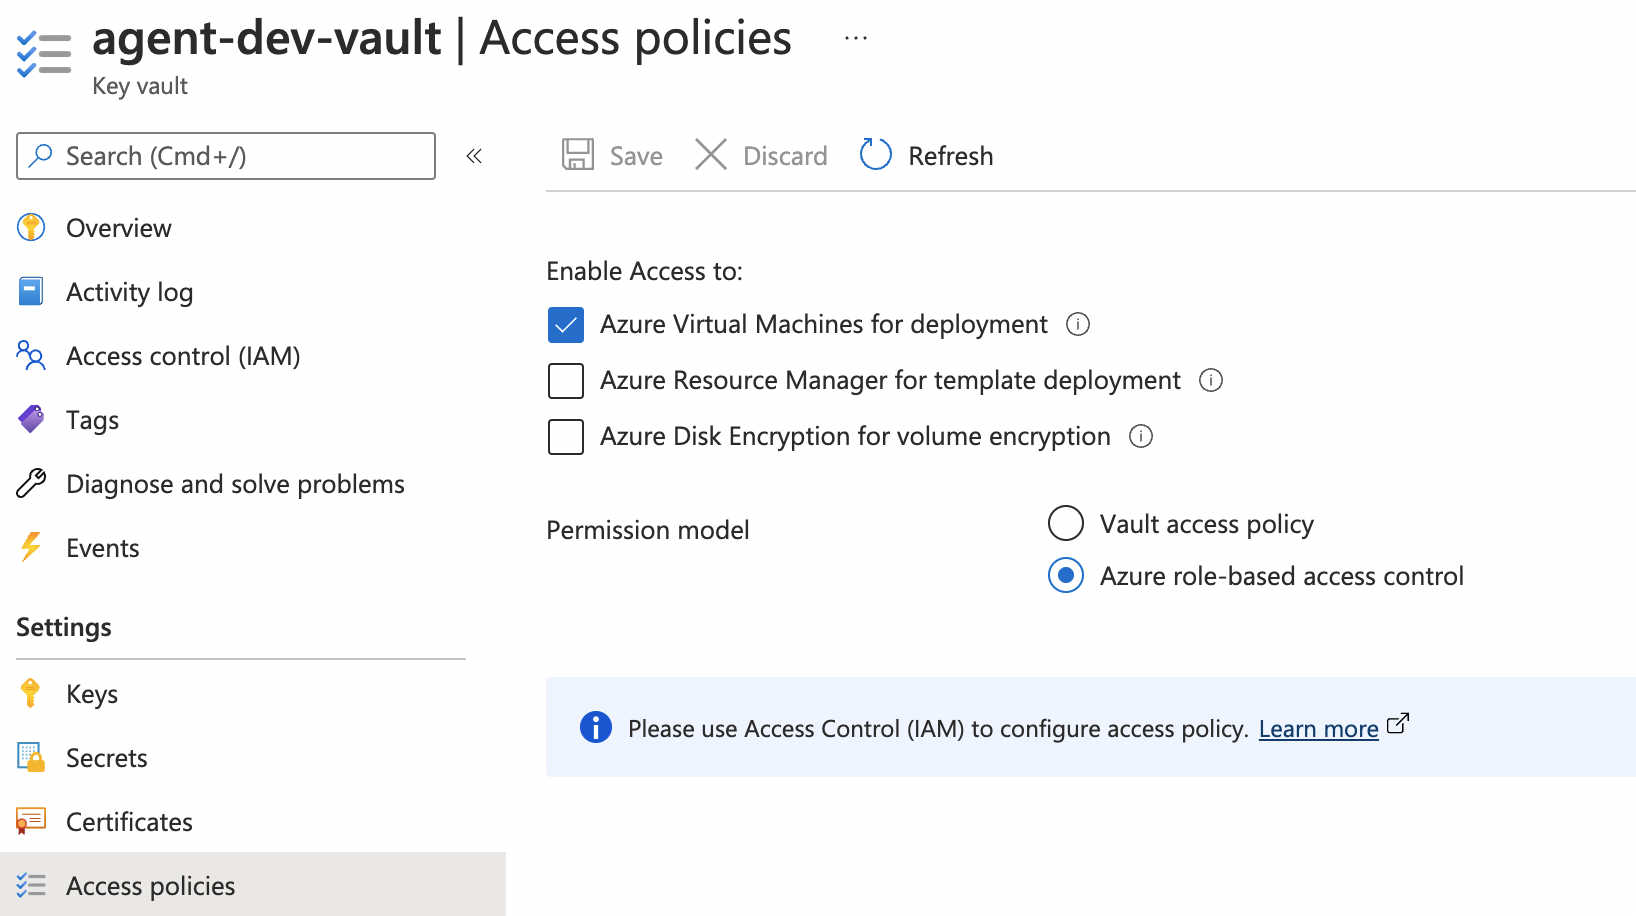
- Create a new key vault for agent and add it to the agent resource group.

- Enable Azure role-based access control.
- Test SSH-ing into the VM, ensure you have read-only access to the private key.
chmod 400 azureuser.pem - SSH into VM — E.g:
ssh -i <private key path> [email protected]. - Install the Azure CLI, [Install azure cli on Linux] by running the following command:
curl -sL https://aka.ms/InstallAzureCLIDeb | sudo bash - Login to Azure with Managed Identity [sign in with a managed identity] by running the following command:
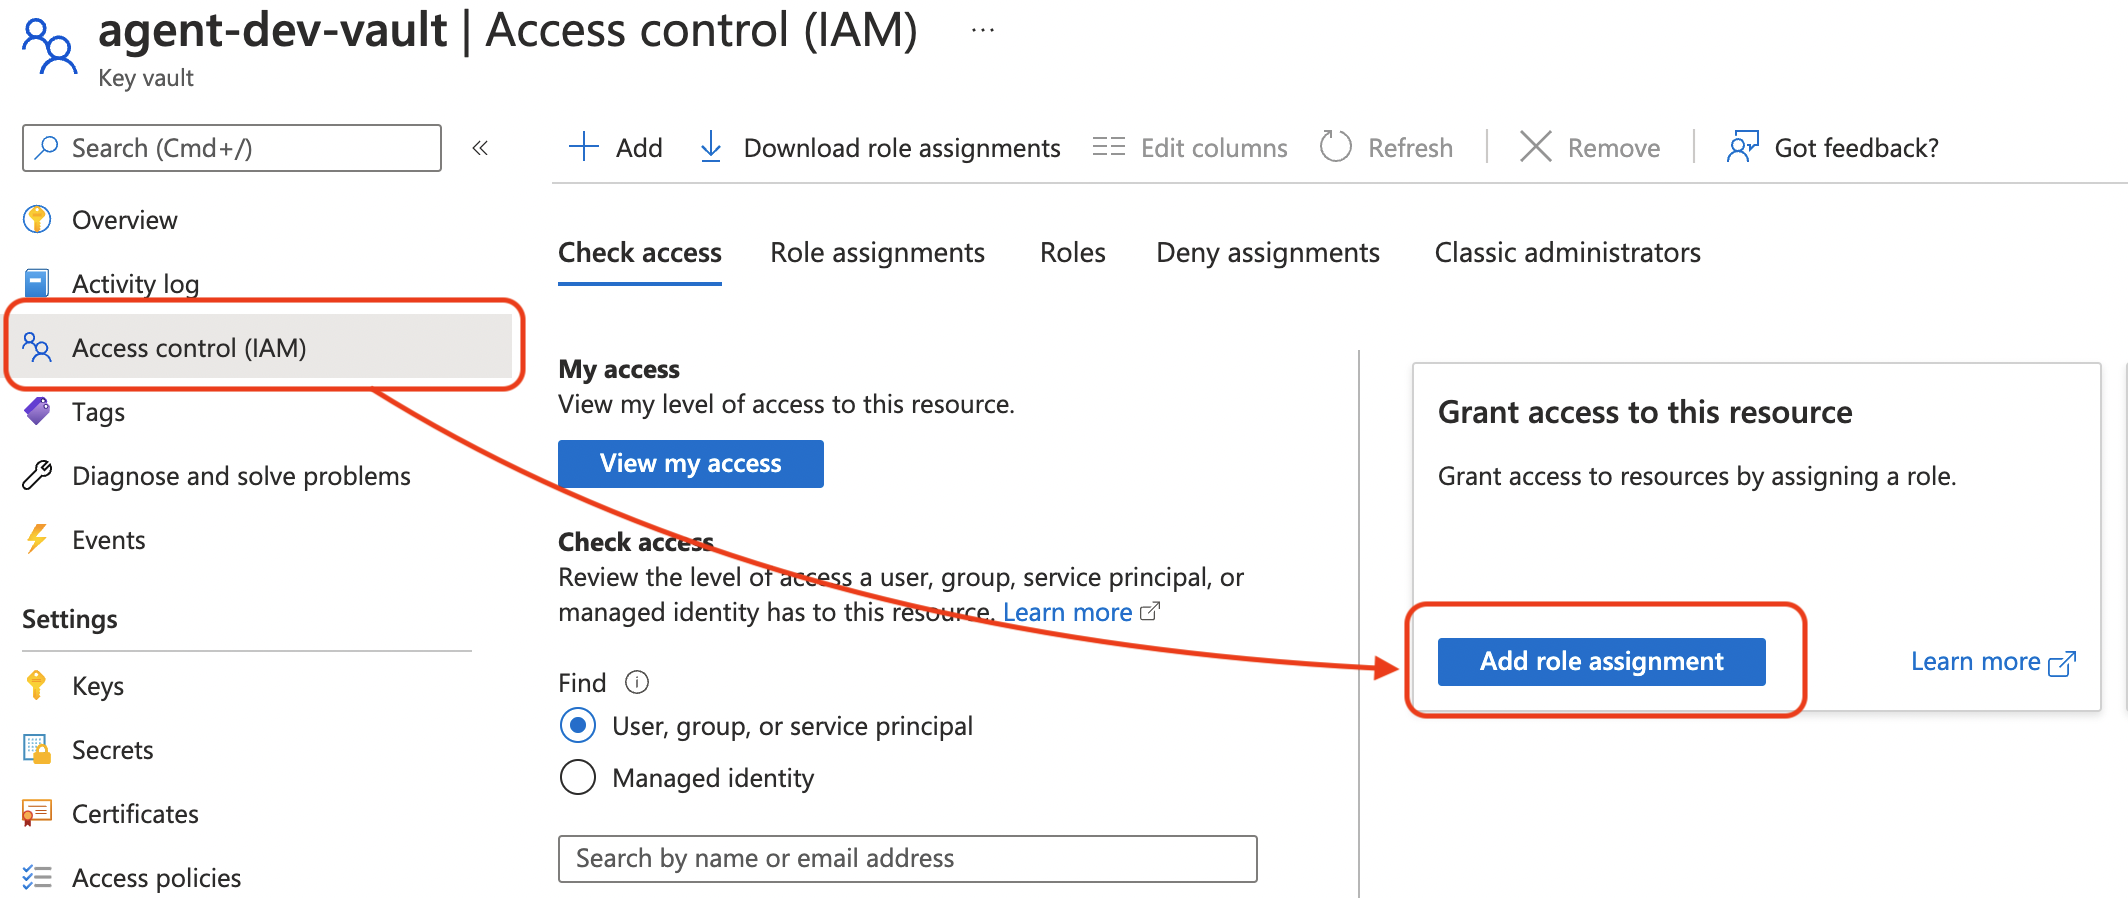
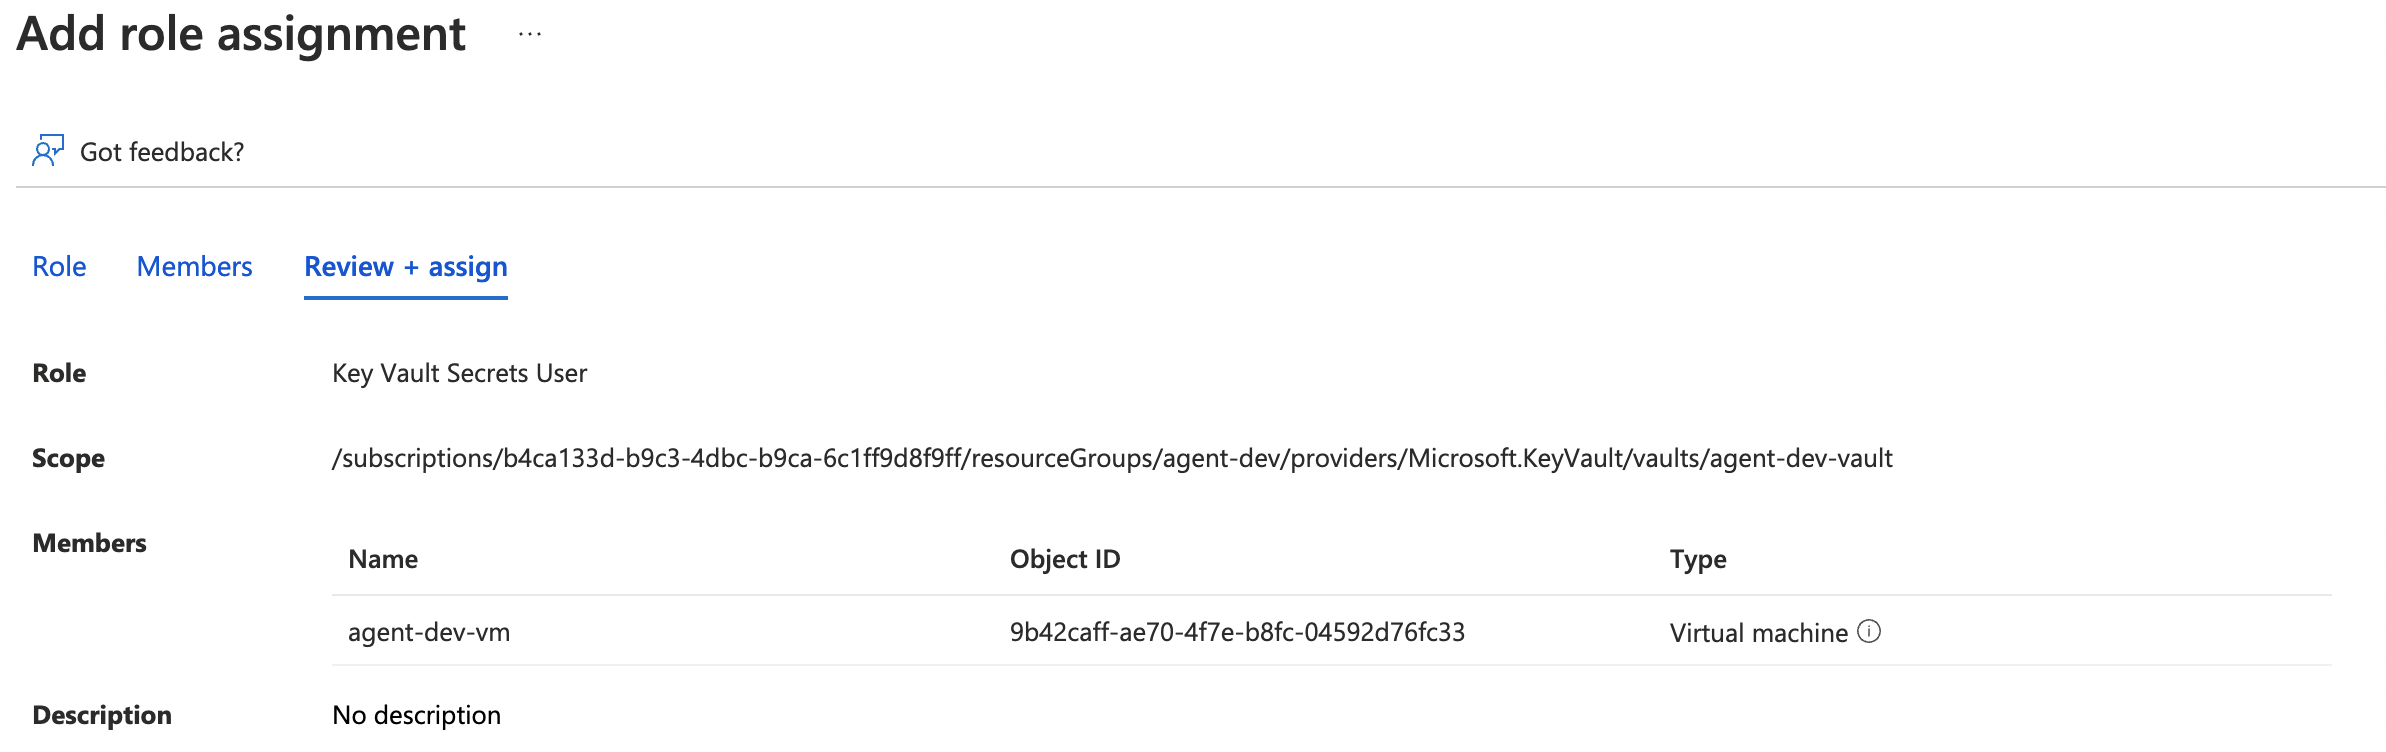
az login --identity - Grant permissions for the VM to read secrets from the key vault
- Navigate to key vault and select Access Control → Add Role Assignment.
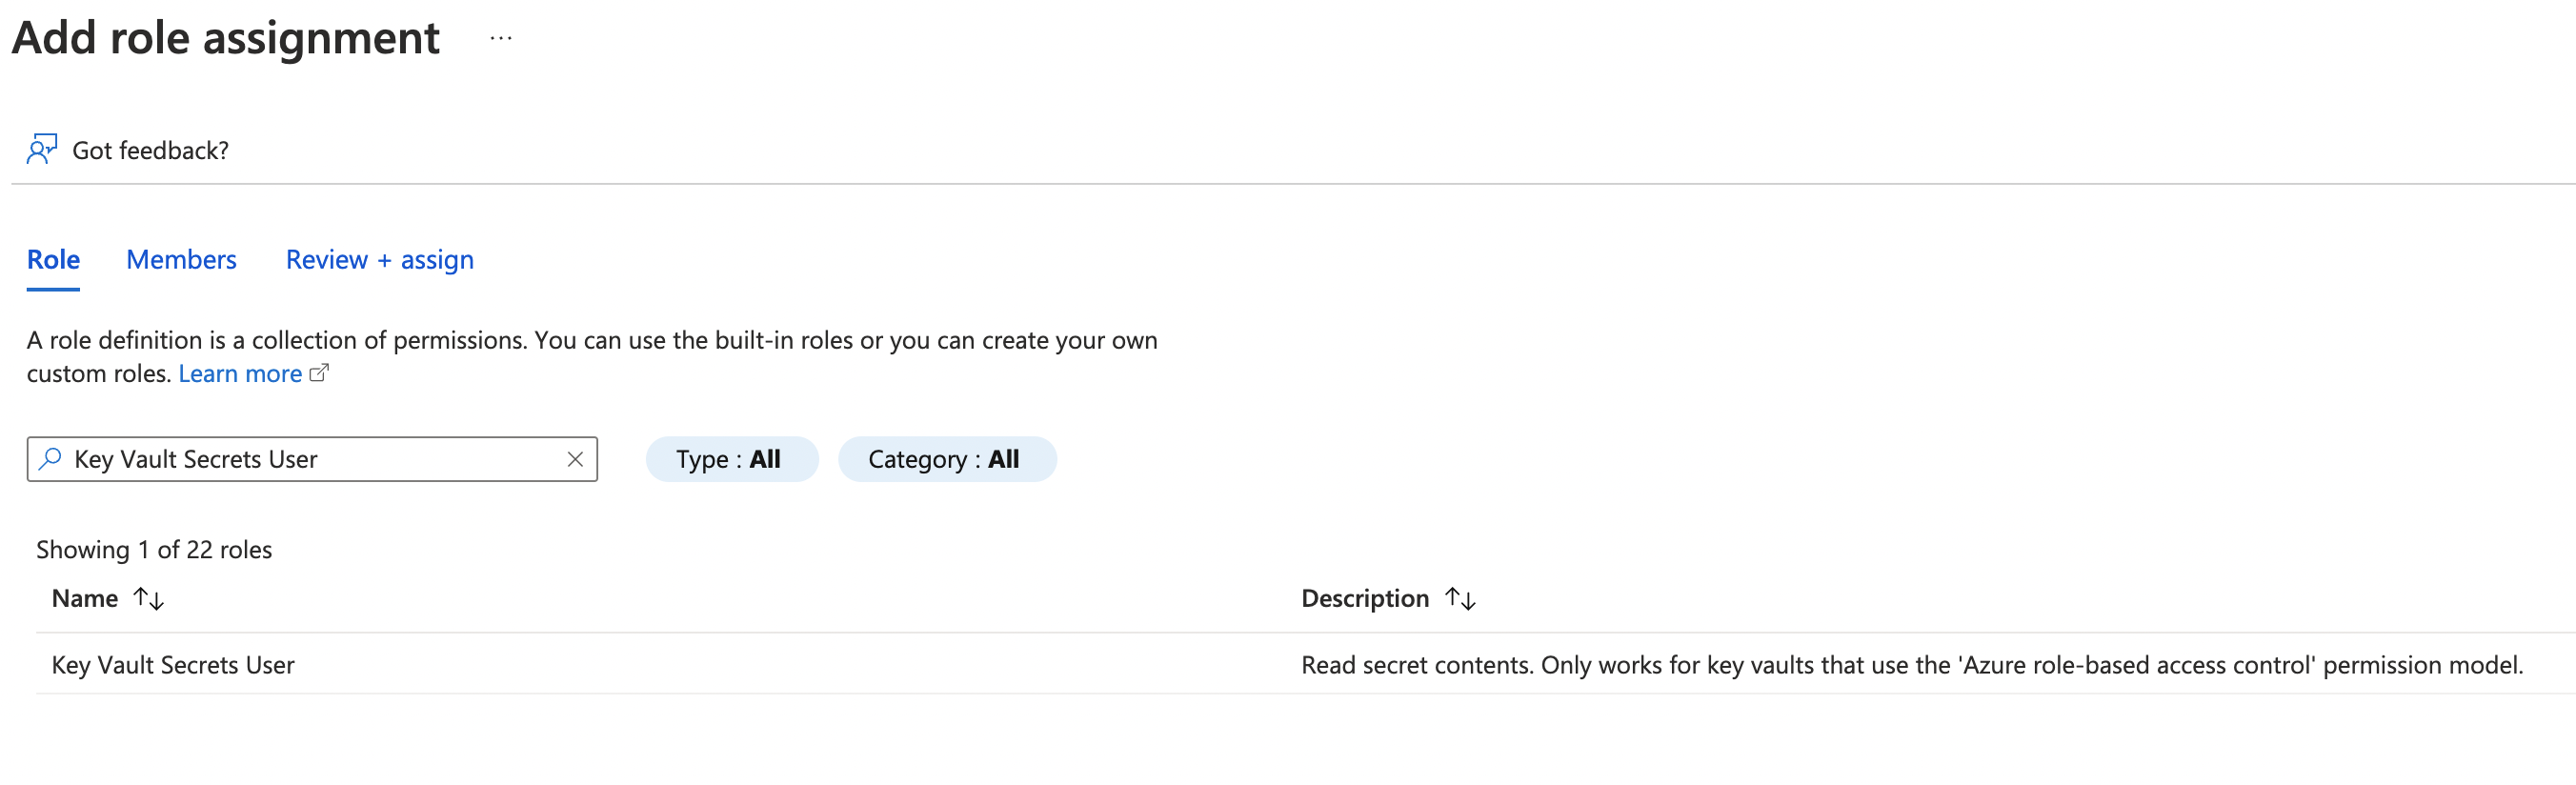
- Select at least Key Vault Secrets User. This is the least amount of permissions to read the secrets. More permissions will be required if you want to write/update secrets from the VM.
- Select the VM’s managed identity.
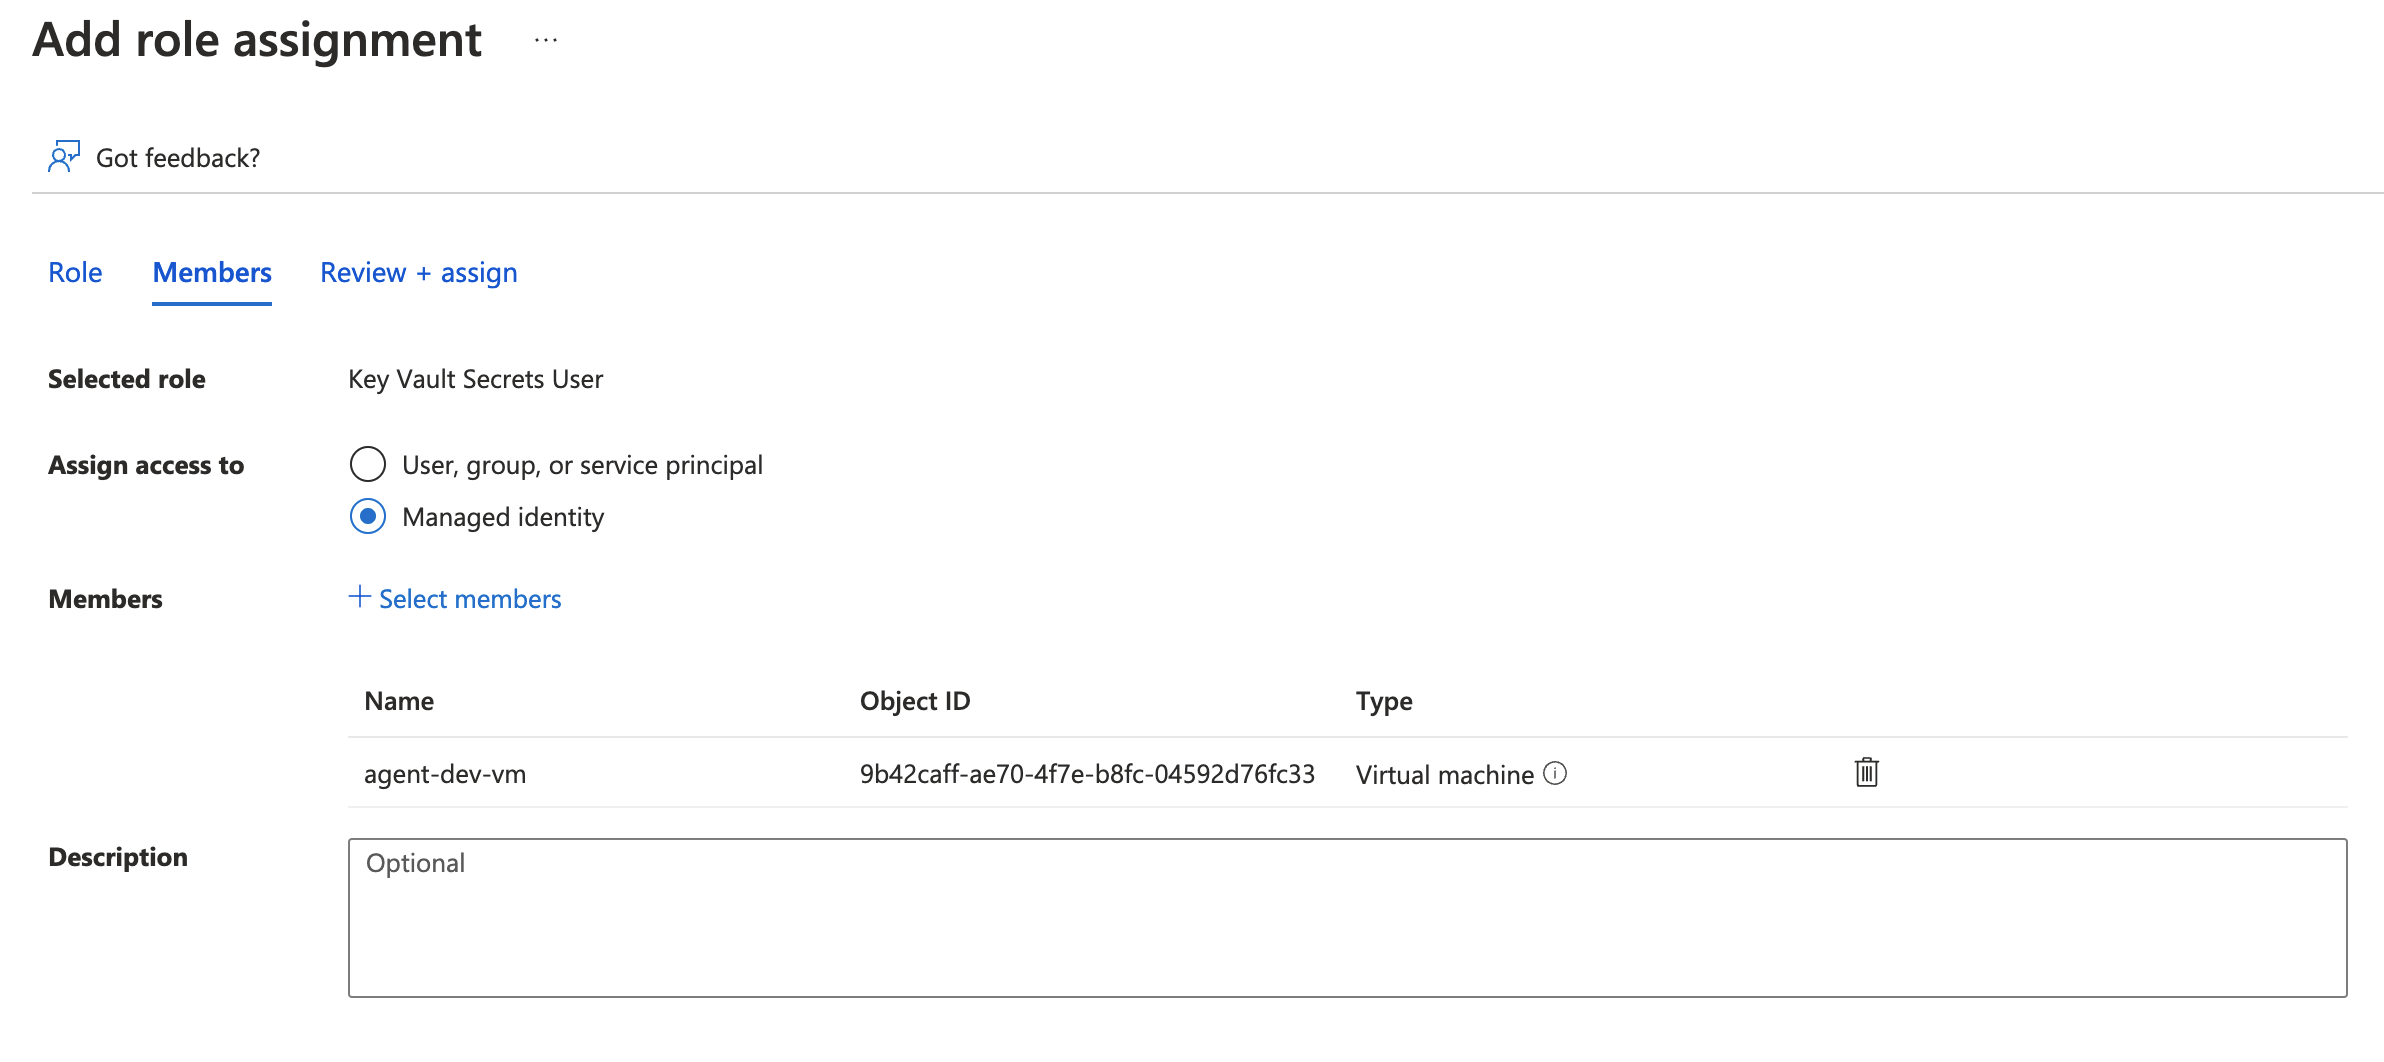
- Assign the role to the VM’s managed identity.
- Navigate to key vault and select Access Control → Add Role Assignment.
- Once your Vault is created, you will need to add Secrets to the Key vault under Settings section on the left side navigation bar.
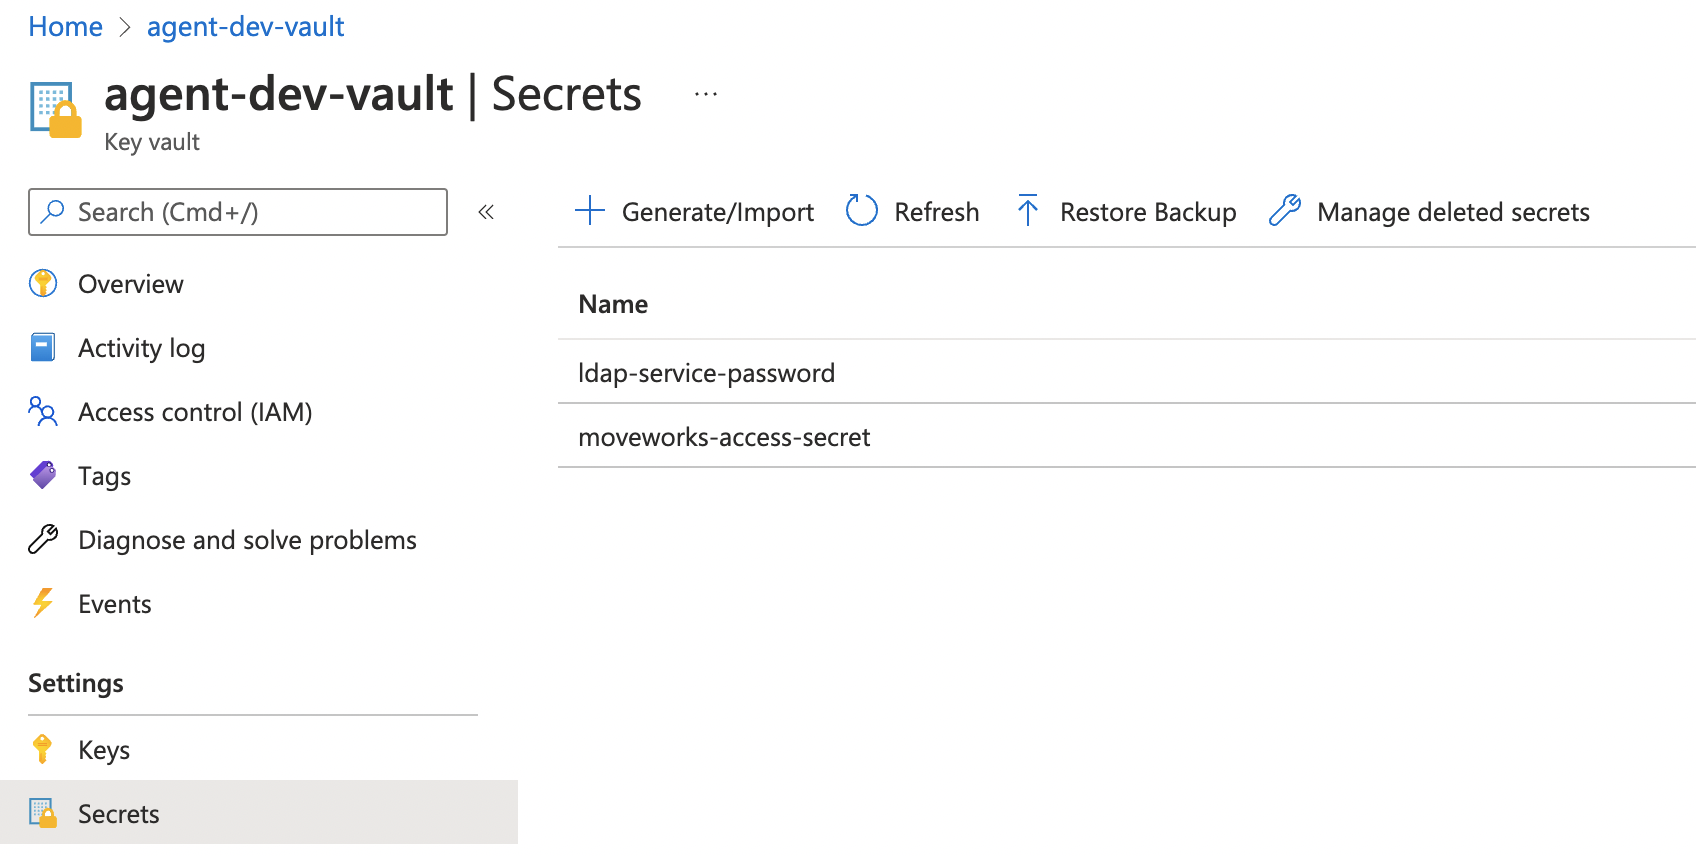

- Once you have added your secret, the next step is to check for key vault access from the VM, by leveraging the managed identity. Follow the Azure CLI test commands below to verify the key vault access works as expected from the VM:
e.g: list secrets
Note: You can also check for access to specific secretsaz keyvault secret list --id=https://agent-dev-vaulxt.vault.azure.net/az keyvault secret show --name ldap-service-password --vault-name agent-dev-vault
Resources
- Managed Identities Overview: https://docs.microsoft.com/en-us/azure/active-directory/managed-identities-azure-resources/overview
- Azure CLI reference: https://docs.microsoft.com/en-us/azure/key-vault/secrets/quick-create-cli
Updated 8 months ago