Getting started: Build your integration with Data API (Hands-on)
Overview
Data APIs are a set of ODATA APIs exposed by Moveworks to enable the export of raw analytics data. The Data API allows you to replicate the Moveworks analytics dashboard or build custom metrics and dashboards in your reporting tool. You can use any SQL-based datastore such as Snowflake, SQL Server, and others to store the data retrieved via the API.
This document guides you through the process of setting up the integration with the Data API and helps you build dashboards in Power BI. This exercise provides an example that you can modify or implement according to your specific needs.
Prerequisites
To complete this exercise, you need to set up four essential components:
- Python installation on your machine
- Access to a code editor installed on your system in case you need to edit the shared Python script
- A Snowflake instance with read/write access
- Access to Power BI to build dashboards and visualizations (Power BI Desktop is required as it allows direct connection to Snowflake)
Note: The tools used in this exercise are demonstrative. Feel free to use any tools that suit your tech stack. The script shared in this document and template only works with Power BI and Snowflake—you will need to modify parts of the script accordingly for other platforms.
Let's start with the Python installation, then move on to creating a Snowflake account. Once these two steps are complete, we'll create a GitHub account that will allow us to copy the starter code to our system and run it to ingest data into the Snowflake account.
Python Installation
-
Download Python for either Windows or macOS from the official website. Run the installer downloaded from this site.
-
Verify that Python is installed on your system by checking the Python version. In our case, we have installed version 3.13.2. You can check the Python version by running the
python3 --versioncommand in your Terminal (mac/linux). If you are using windows please use the following commandpython --versionin windows power shell.
Snowflake Setup
Snowflake provides a free trial instance that can be used for this exercise. You will need a business email to obtain a free instance. Visit the Snowflake signup website to register for a new free Snowflake instance.
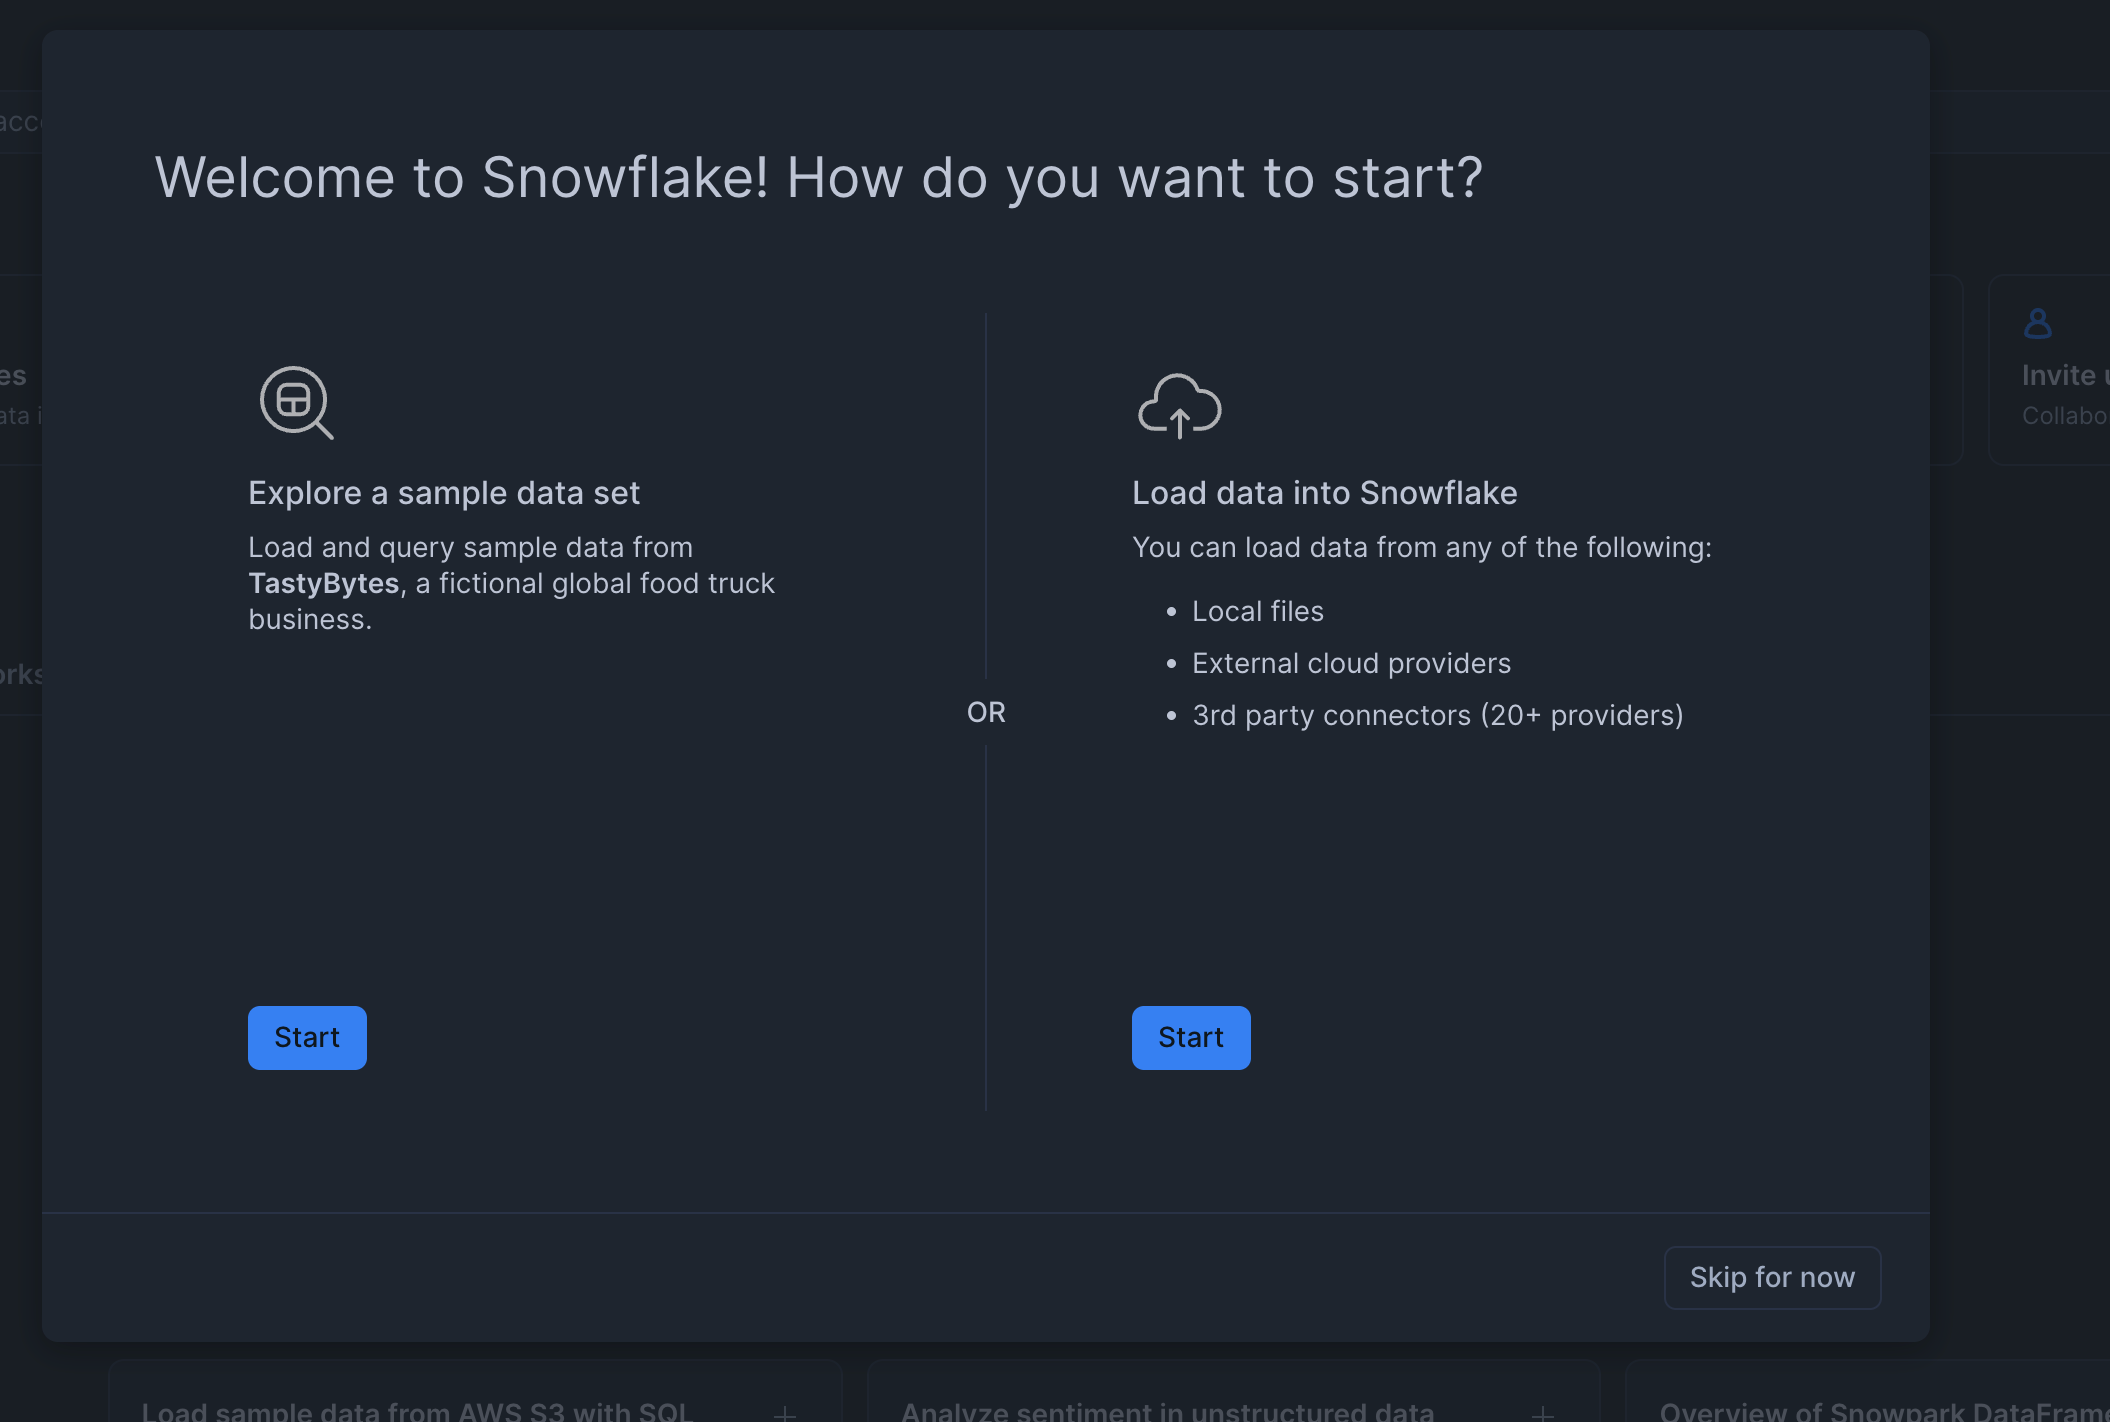
Once your Snowflake instance is ready, you will see the following UI—click the "Skip for now" button.
After you have the instance ready, let's also set up a database and schema. A database and schema provide a storage location where our tables will be created.
Database and Schema Creation
-
Click on the Data tab in the left navigation and click + Database to create a new database. Name the database
DATA_API.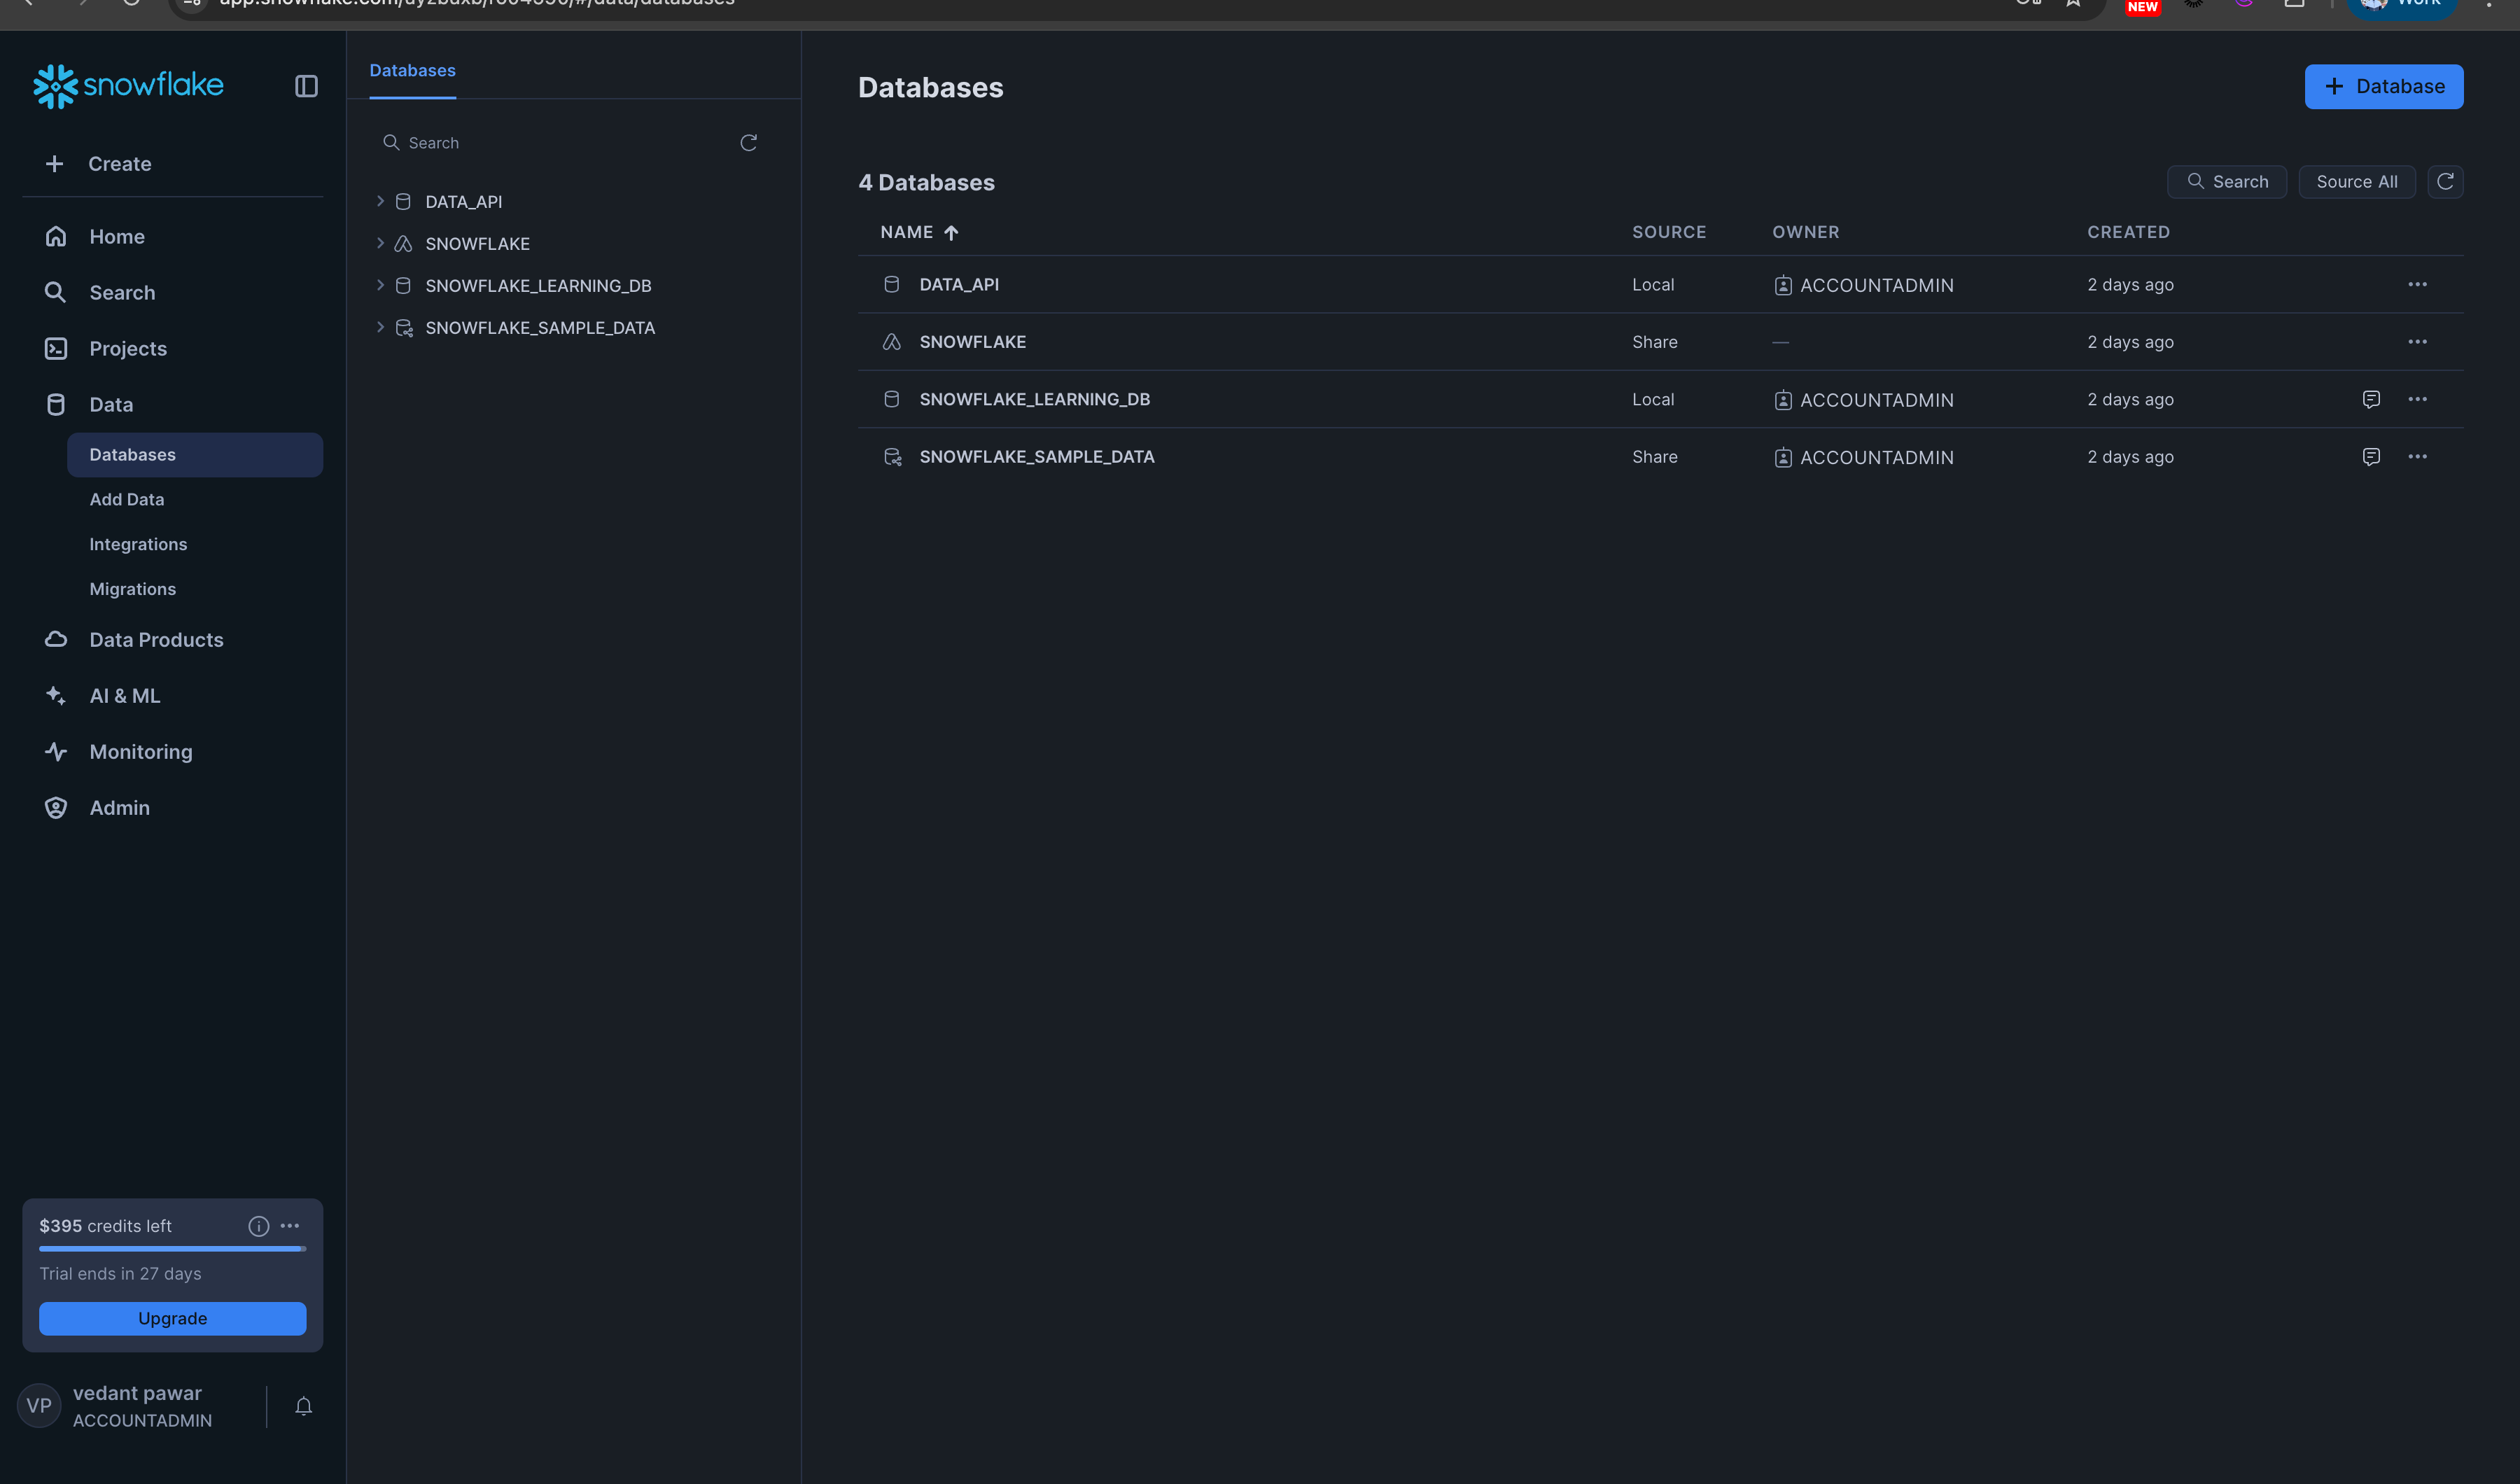
-
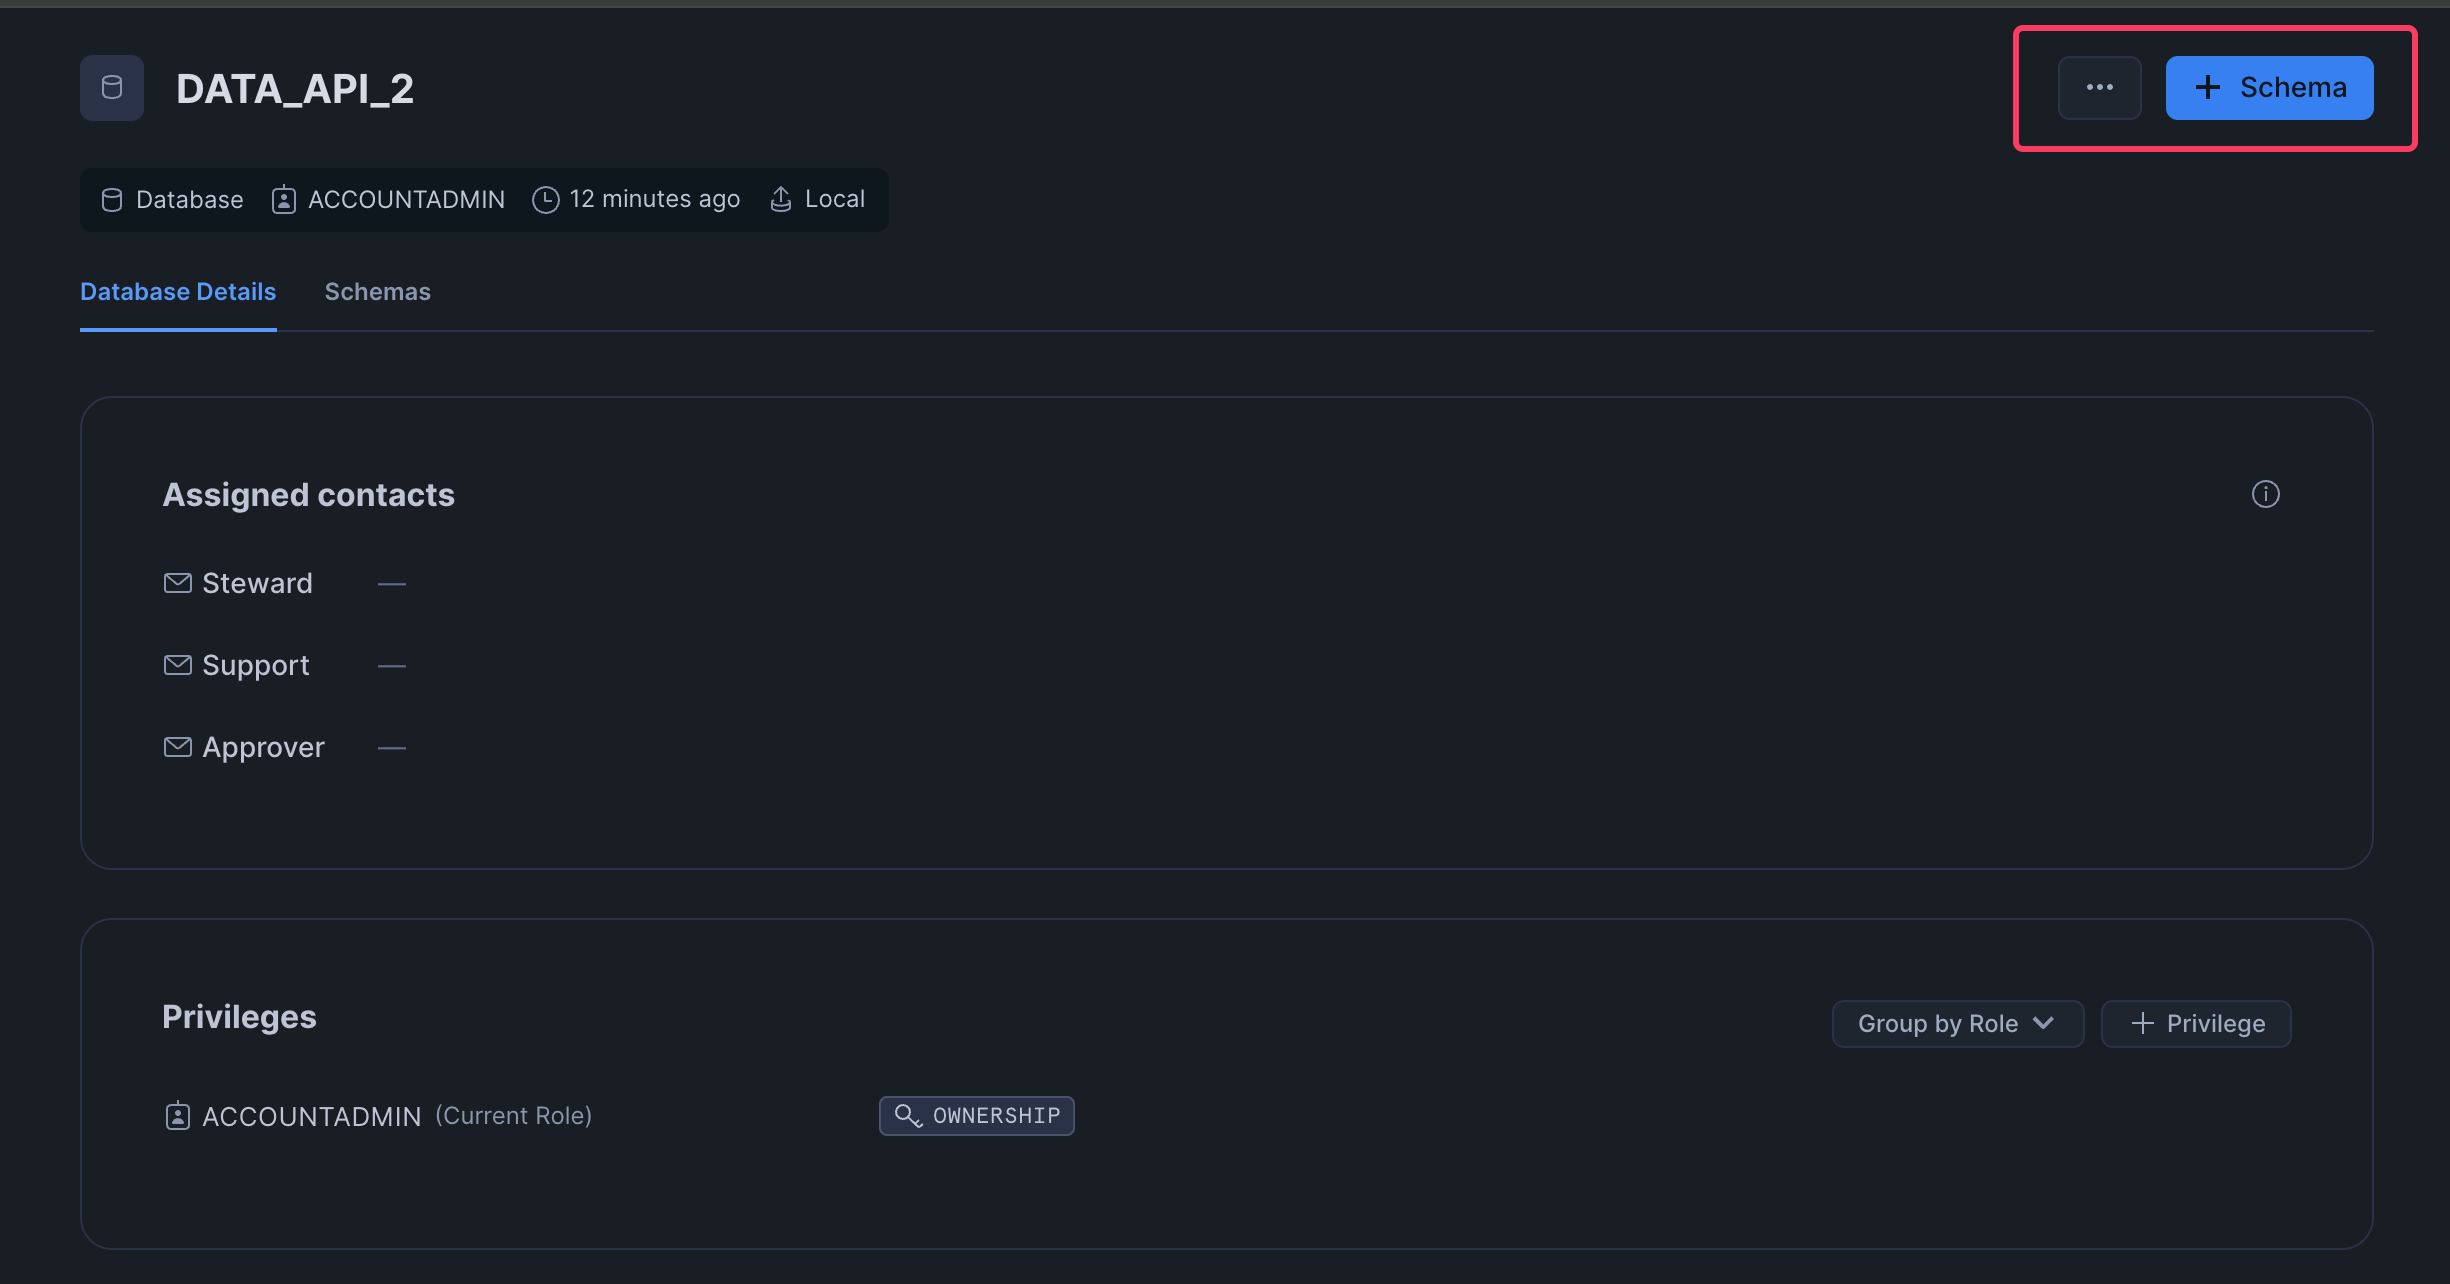
Once you have created the new database, click on the database name to create a new schema.
- Click the + Schema button and name the schema
PROD -

-
- Click the + Schema button and name the schema
-
After creating the database and schema, let's gather the necessary details required to connect to Snowflake. Note these details in a notepad so they can be used later to connect the Data API with your Snowflake instance.
Required Snowflake Details
Capture the following details from Snowflake:
- Snowflake username - Your username used when creating the account
- Snowflake password - Password for your Snowflake account
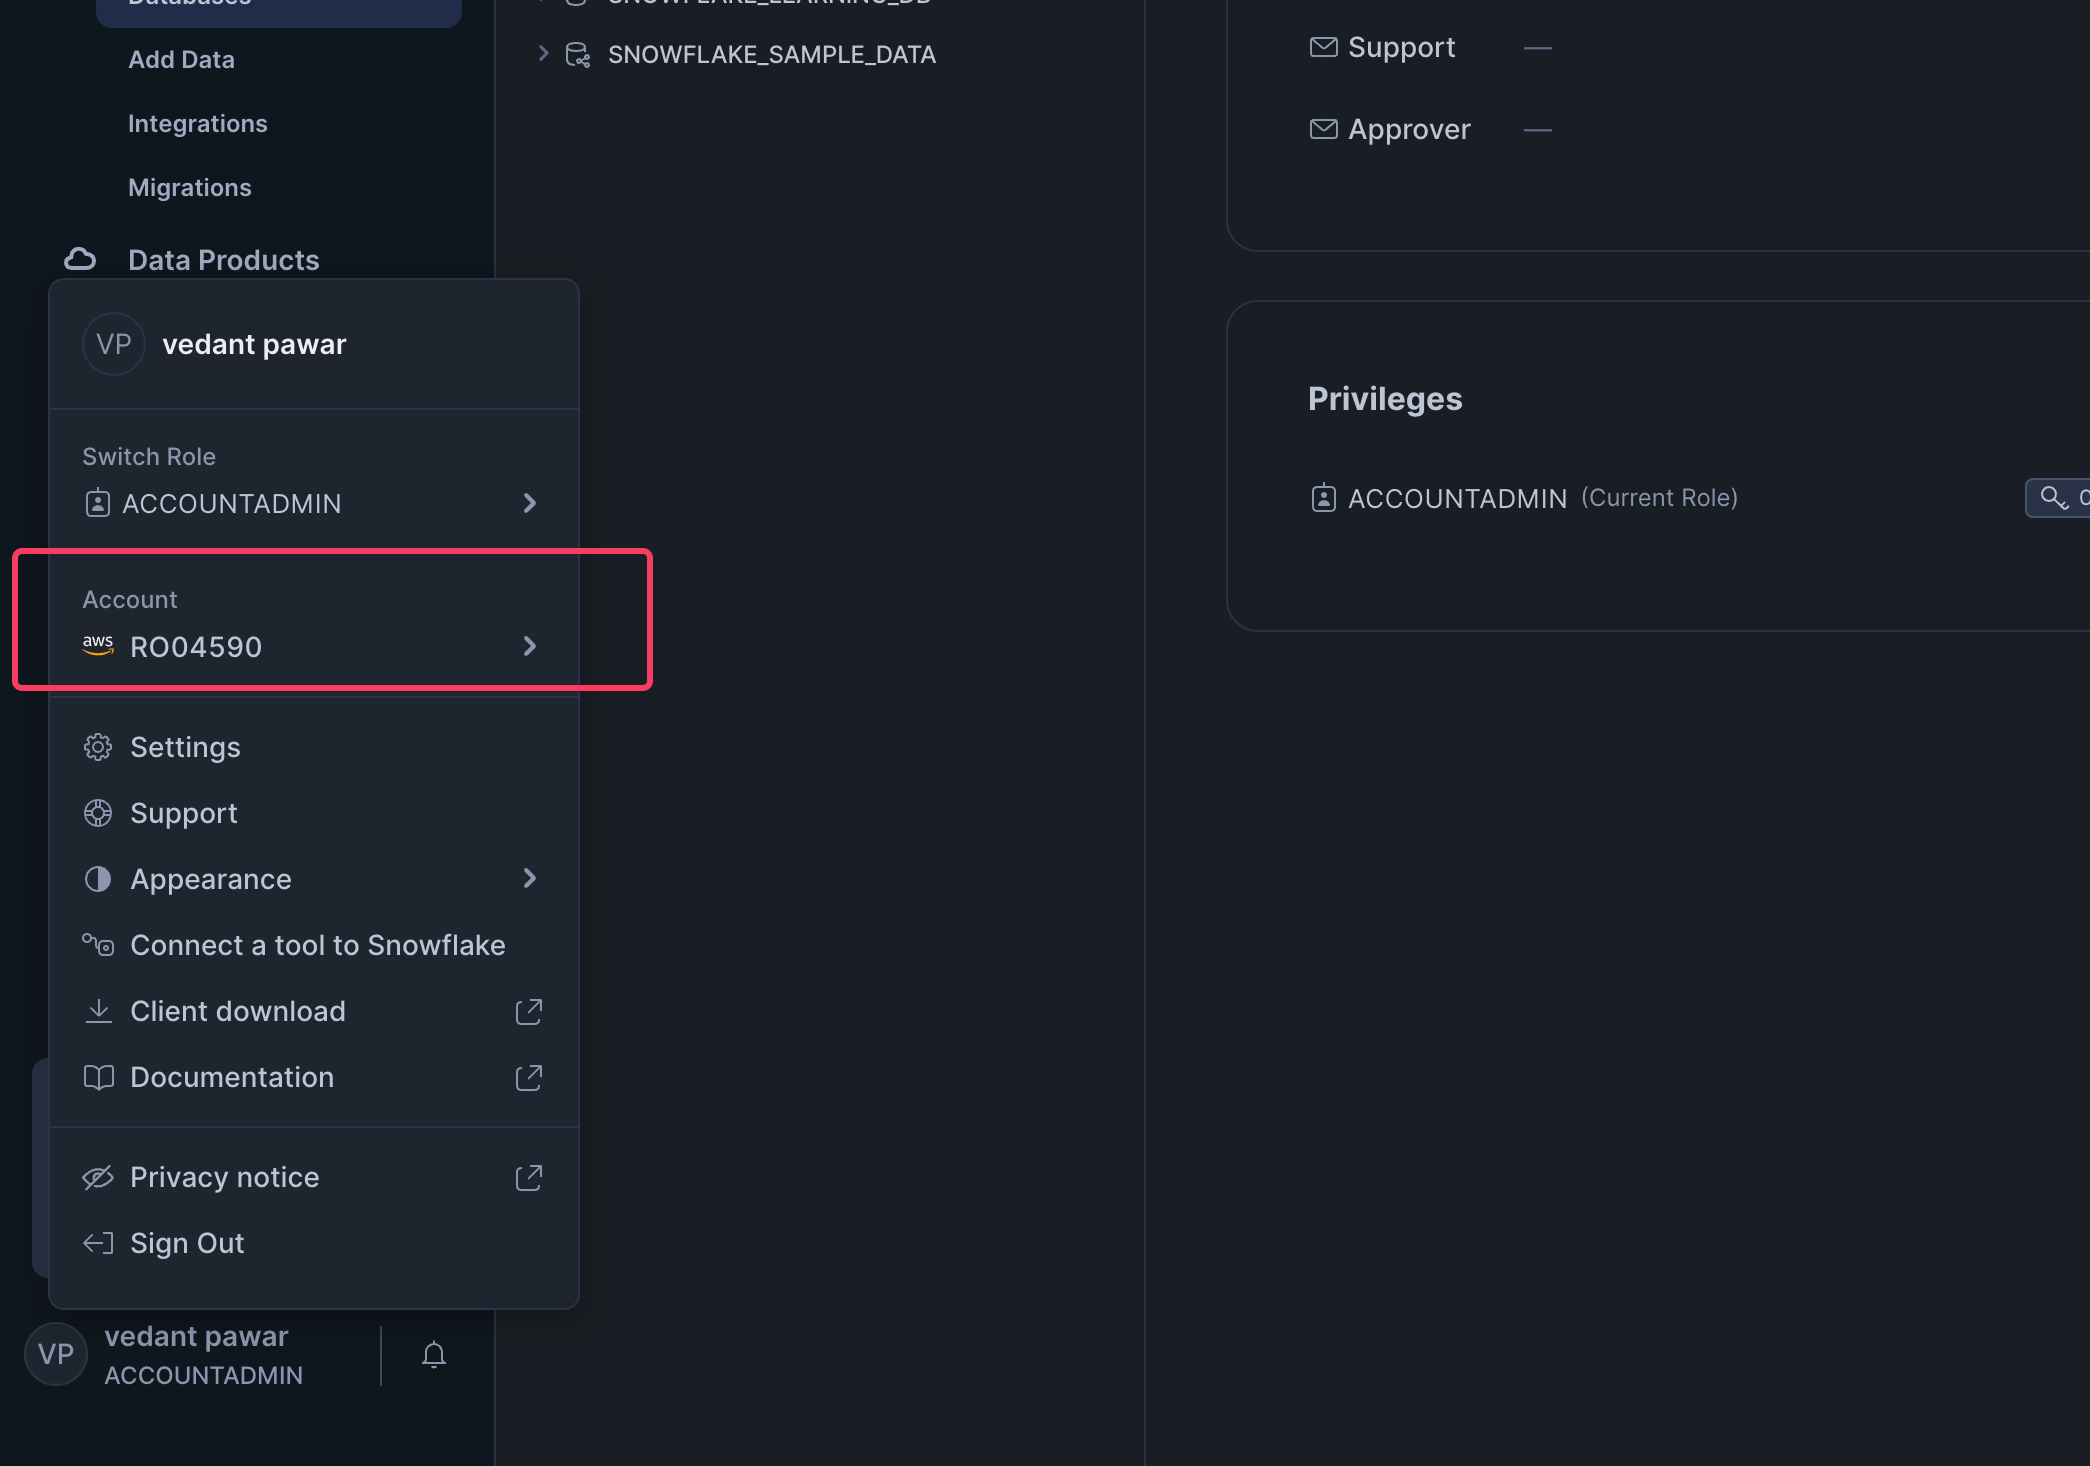
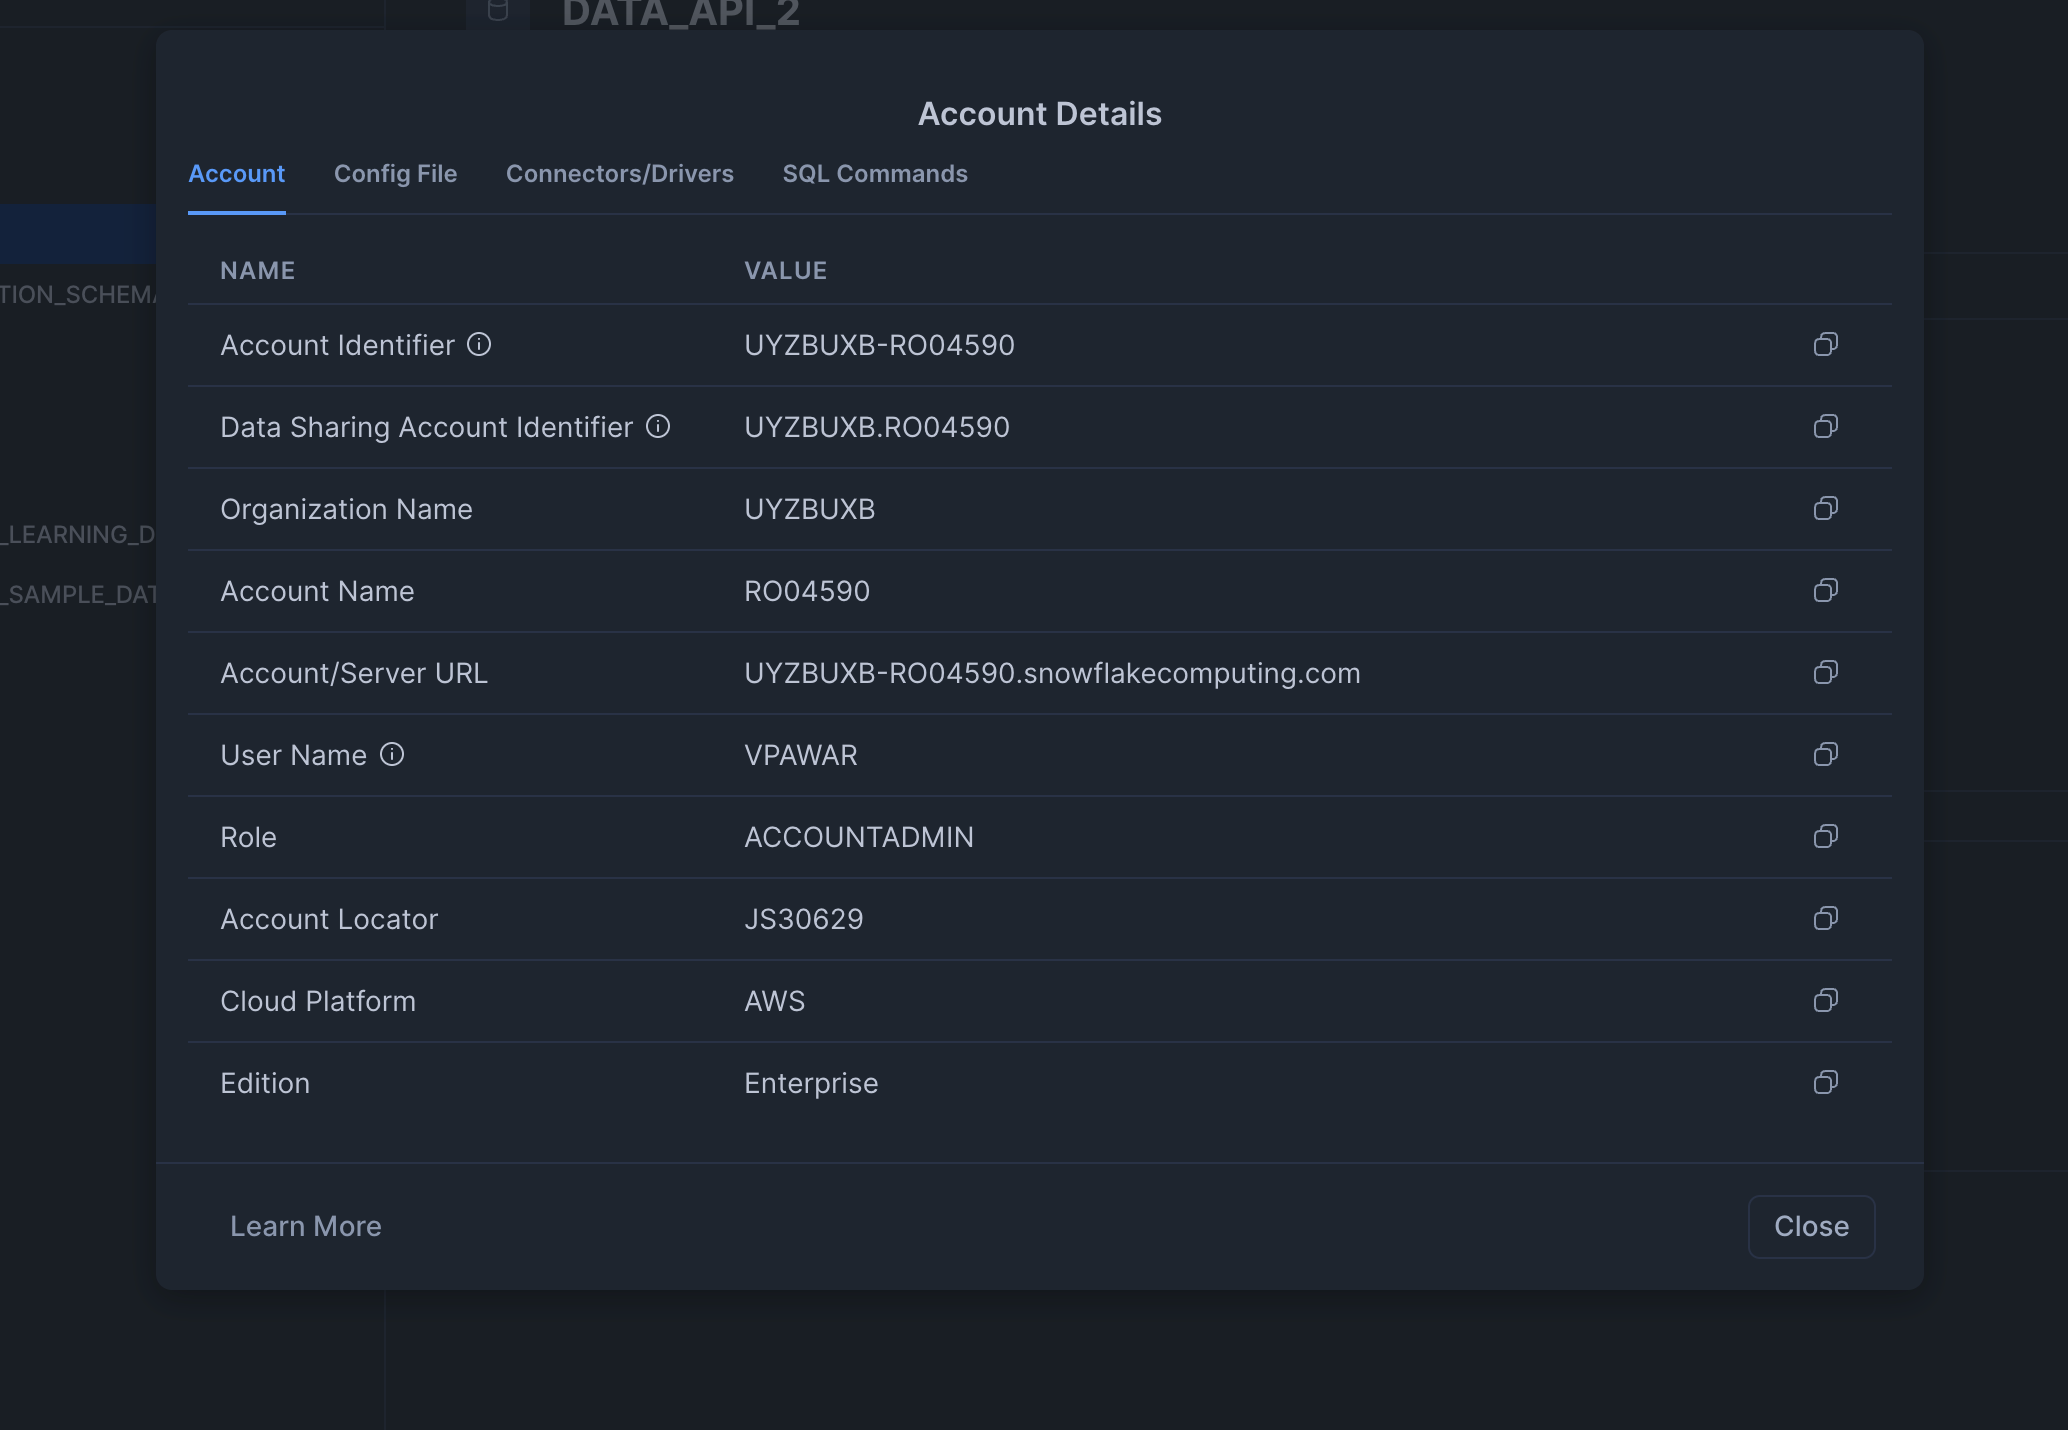
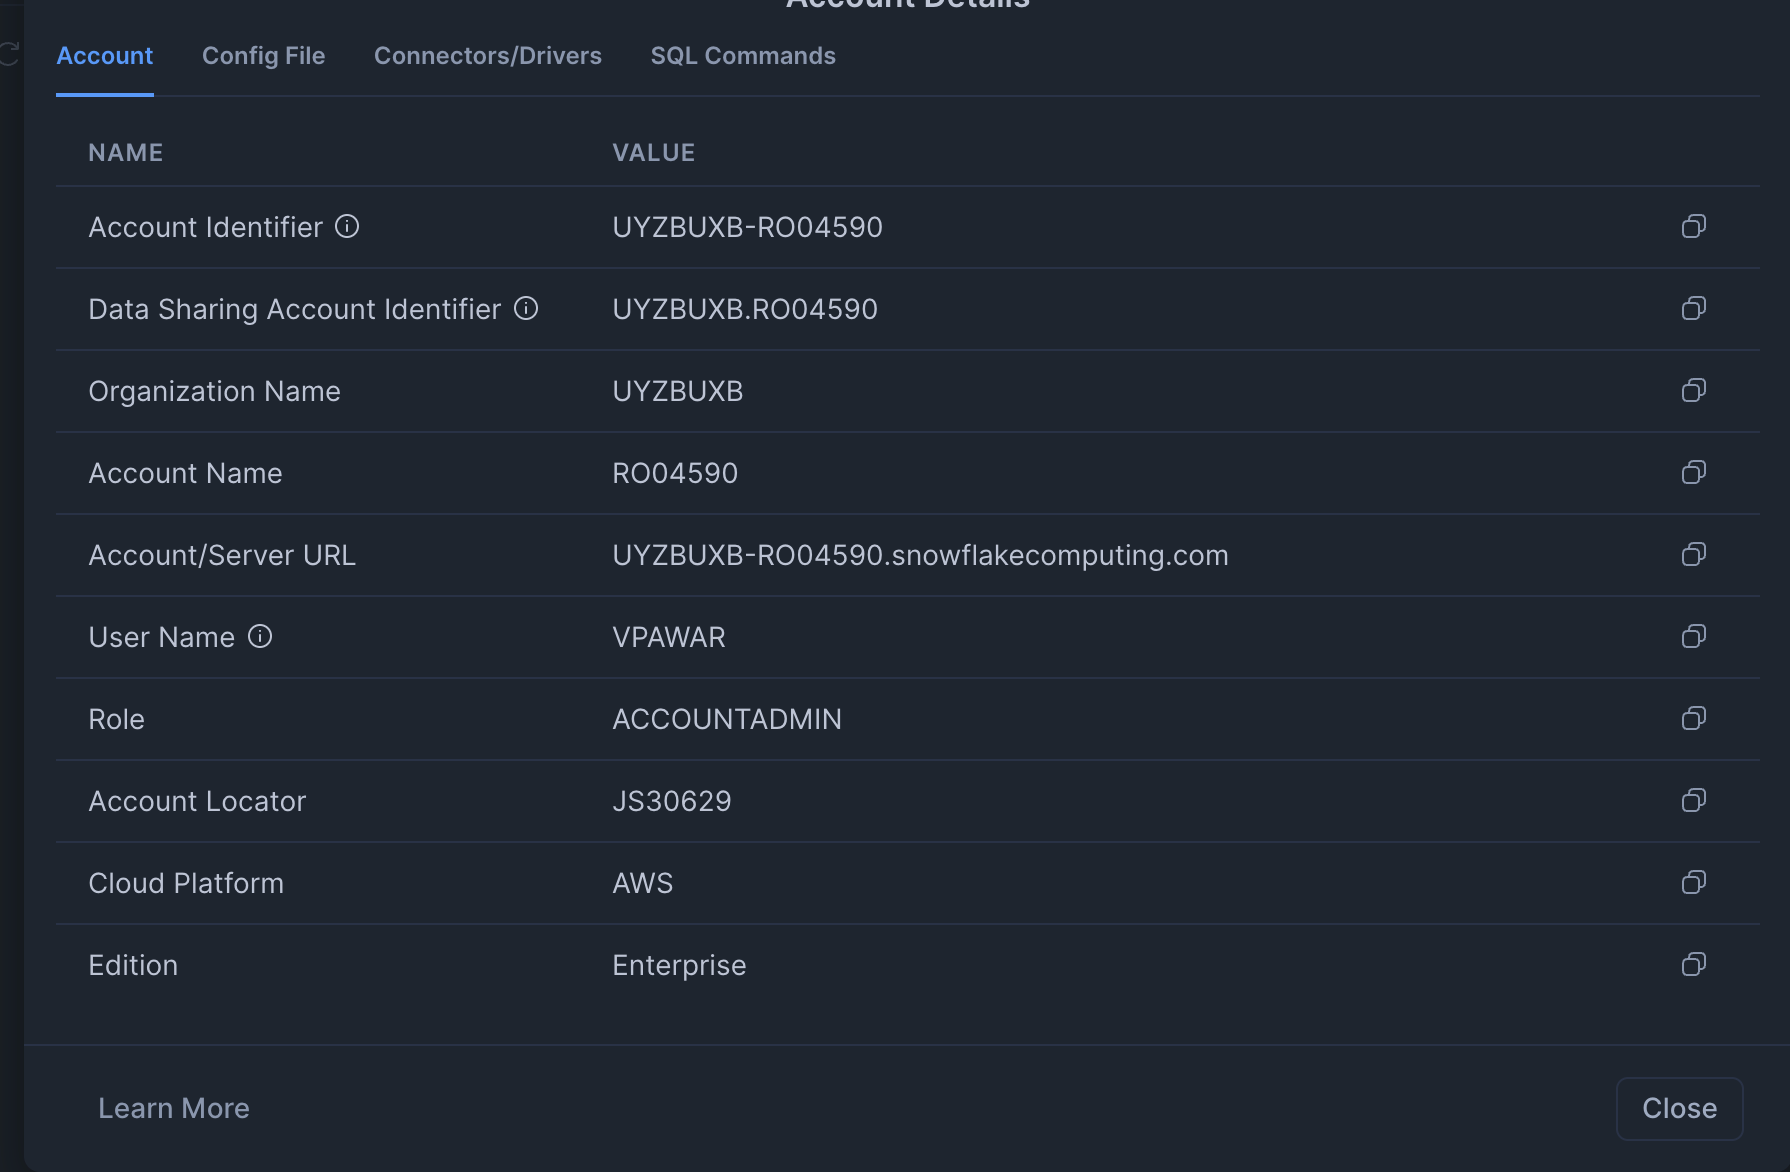
- Snowflake account - To retrieve the account details, click on your account name and select "View account details." Copy the account identifier and note it down
-
- Snowflake warehouse -
COMPUTE_WH(standard with all Snowflake accounts) - Snowflake database -
DATA_API - Snowflake schema -
PROD - Snowflake role -
ACCOUNTADMIN(standard for admin accounts in Snowflake)
GitHub Repository
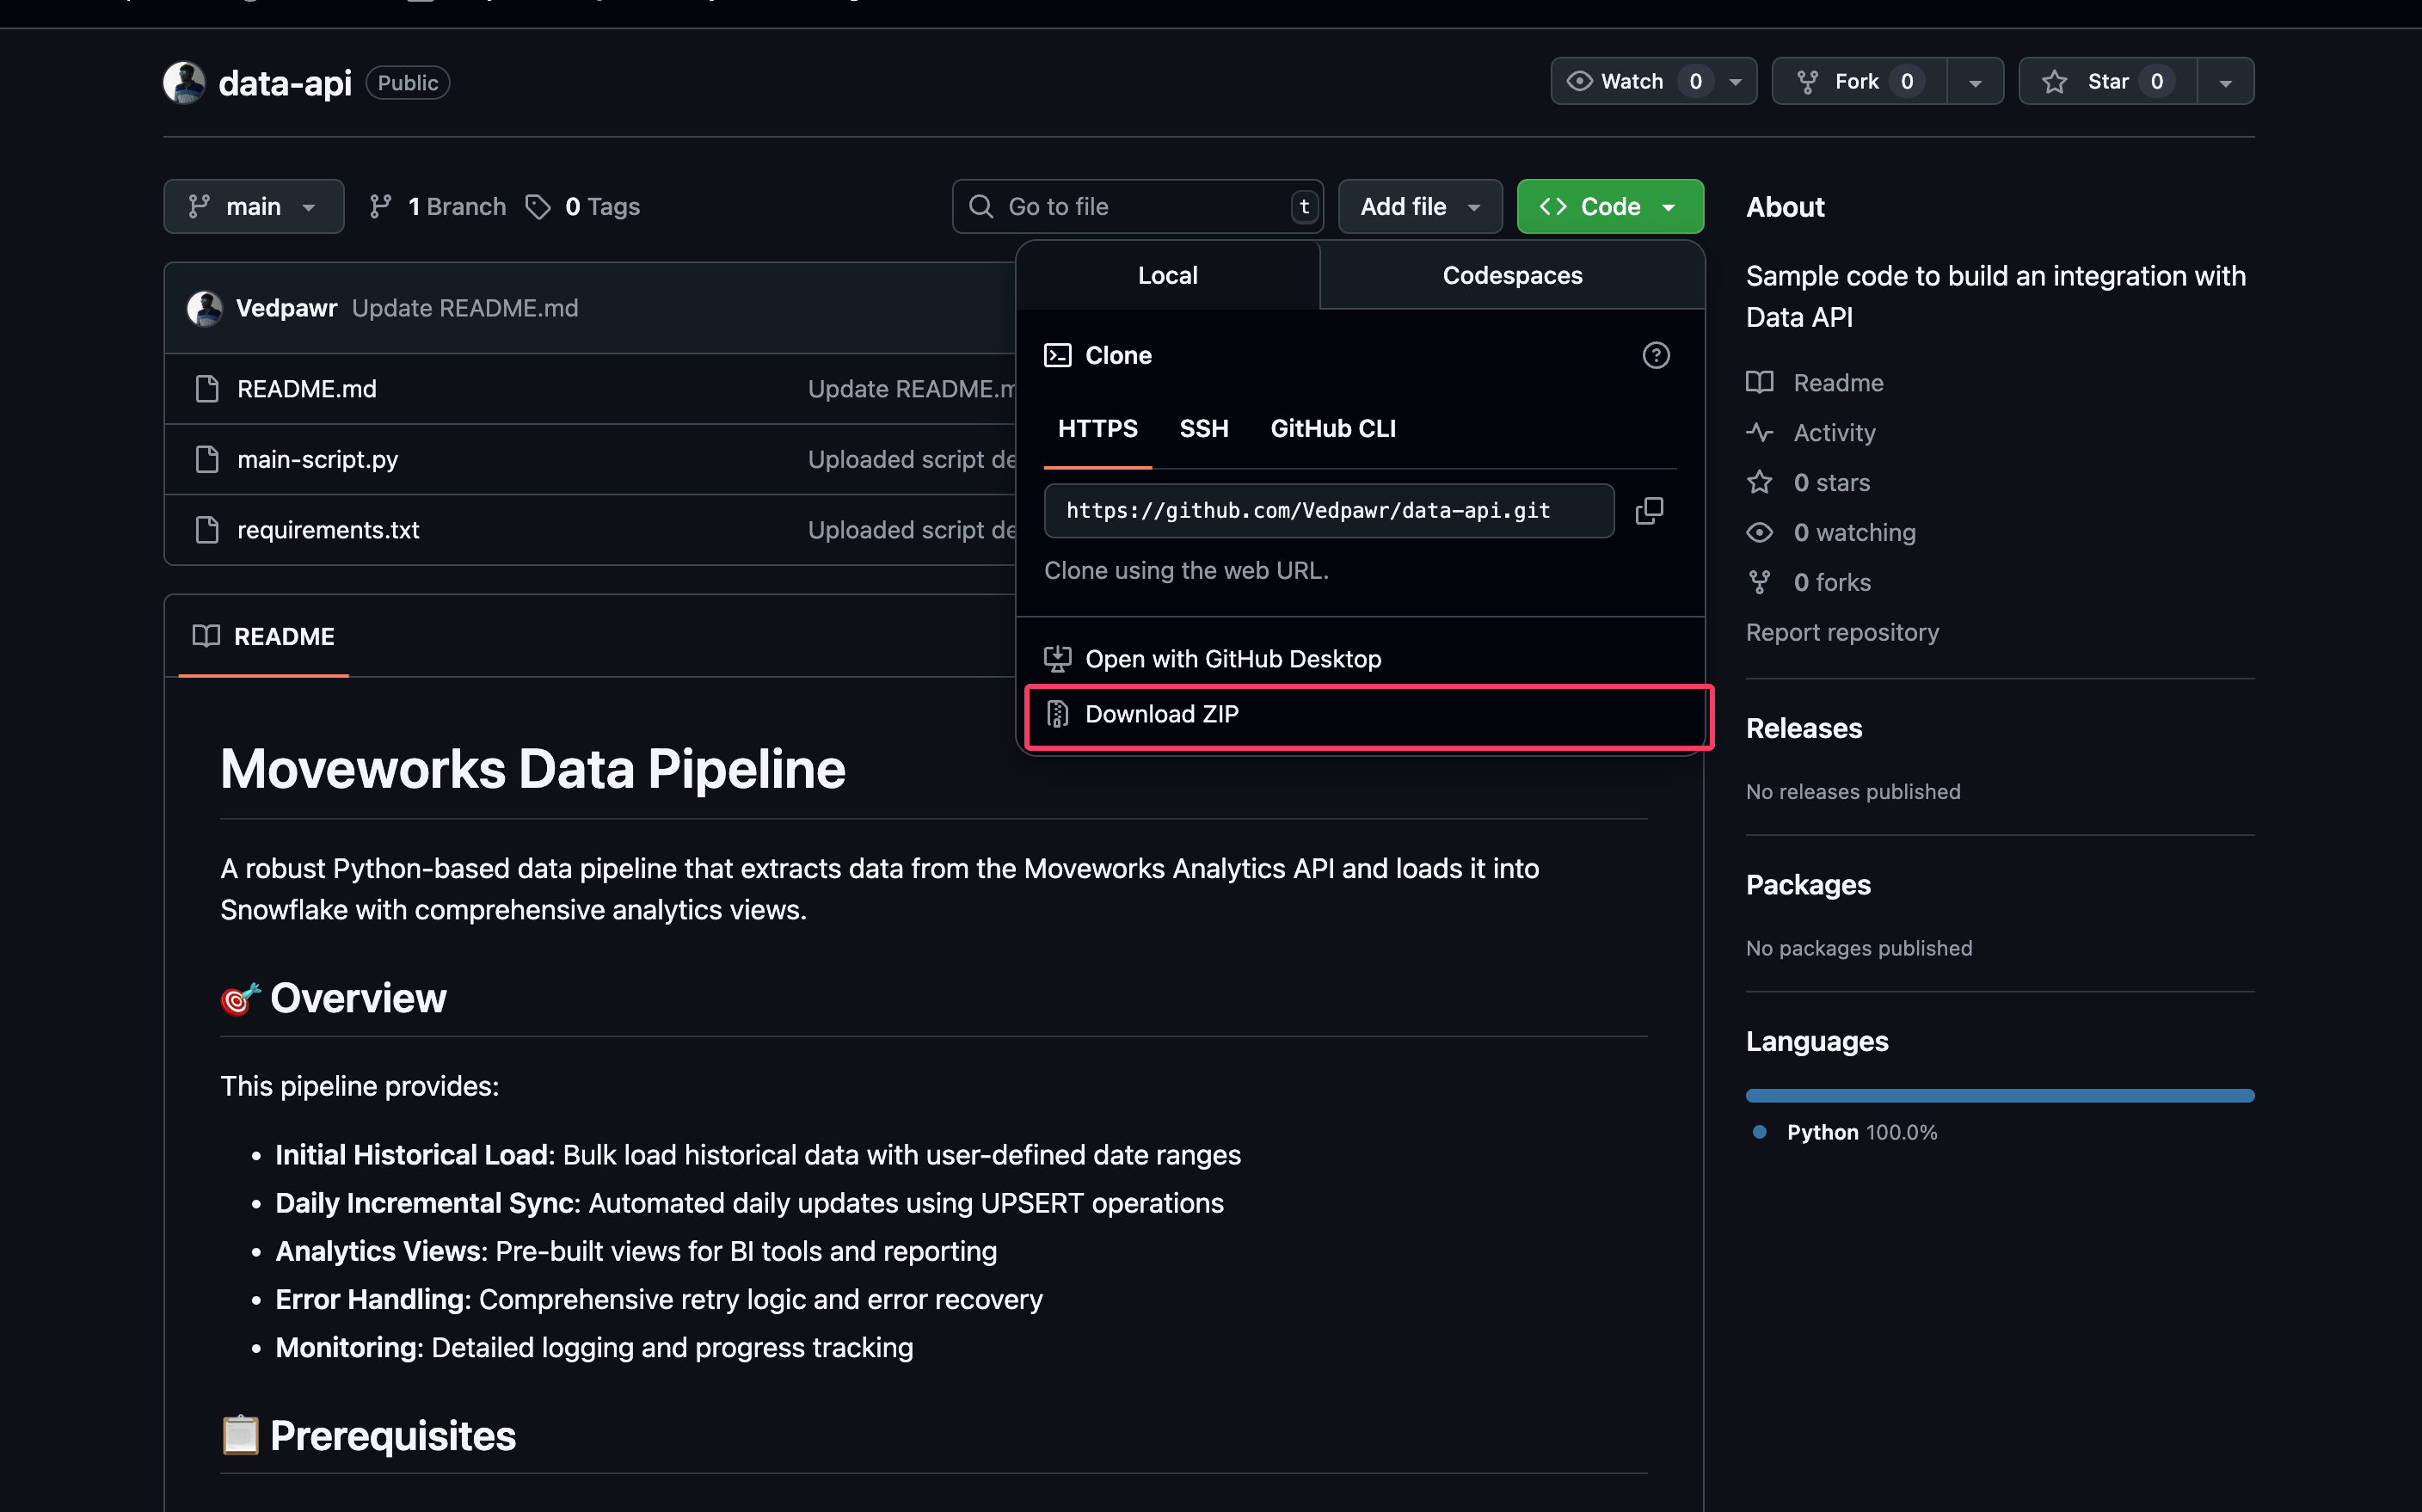
The sample script has been uploaded to this GitHub repository: https://github.com/moveworks/data-api
You can visit this repository and download all the files as a ZIP to store them on your local machine.
We are now done with the prerequisites and ready to get started with running the data pipeline and building metrics and custom dashboards.
Step 1: Set Up the Integration Pipeline
Once you have dowloaded the zip - Navigate to the zip file and extract the folder from it , use your terminal or command line tool and navigate to the folder where the script was copied. You need the file path for that folder and you can use the following command to navigate to that file path
Terminal (Mac/Linux)
cd ~/Documents/data-apiPower shell (Windows)
cd C:\Users\YourName\Documents\data-apiReview the readme file to install the necessary dependencies.
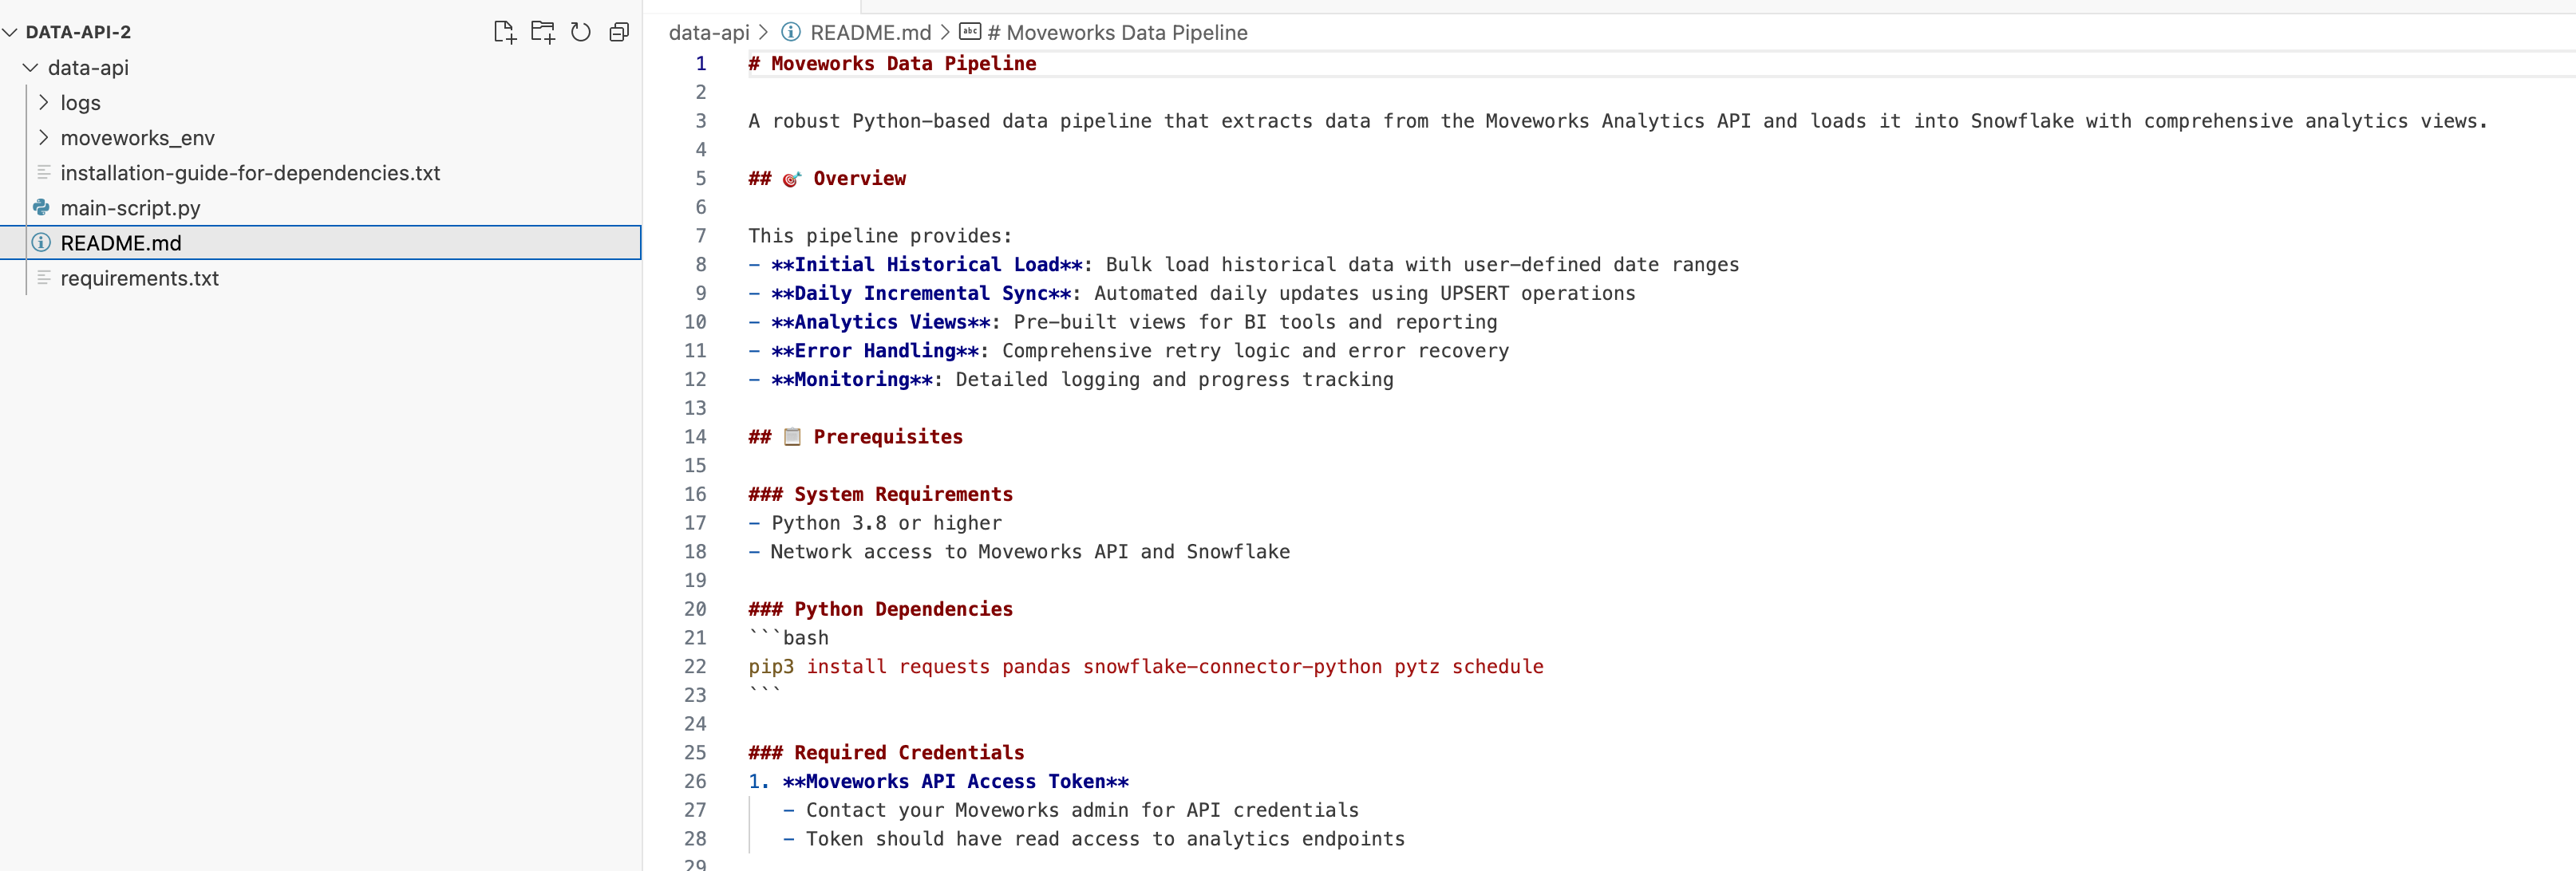
The script provides four features:
- Setting up the connection between your API key and your Snowflake instance
- Enabling data ingestion for a selected time range
- Enabling data ingestion on a daily basis (Note: You must keep the Python script running to ingest data daily)
- Pre-built views that can be reused in the shared Power BI template provided in this document
Environment Setup
Before understanding how to run the data ingestion pipeline, let's learn how to install the dependencies and perform the initial setup. Start by setting up the Python virtual environment to install dependencies.
Run this command in your terminal and ensure the environment is running properly by checking the environment name:
python3 -m venv moveworks_env
source moveworks_env/bin/activate
Run the following command to install the necessary dependencies:
Terminal (Mac/Linux)
pip3 install -r requirements.txtPower Shell (Windows)
pip install -r requirements.txtInitial Configuration
Running the data ingestion pipeline requires a specific set of inputs. You only need to do this once when you are running the ingestion pipeline for the first time.
Run the following command to initiate the setup and provide the inputs required by the script:
Terminal (Mac/Linux)
python3 main-script.py setupPower Shell (Windows)
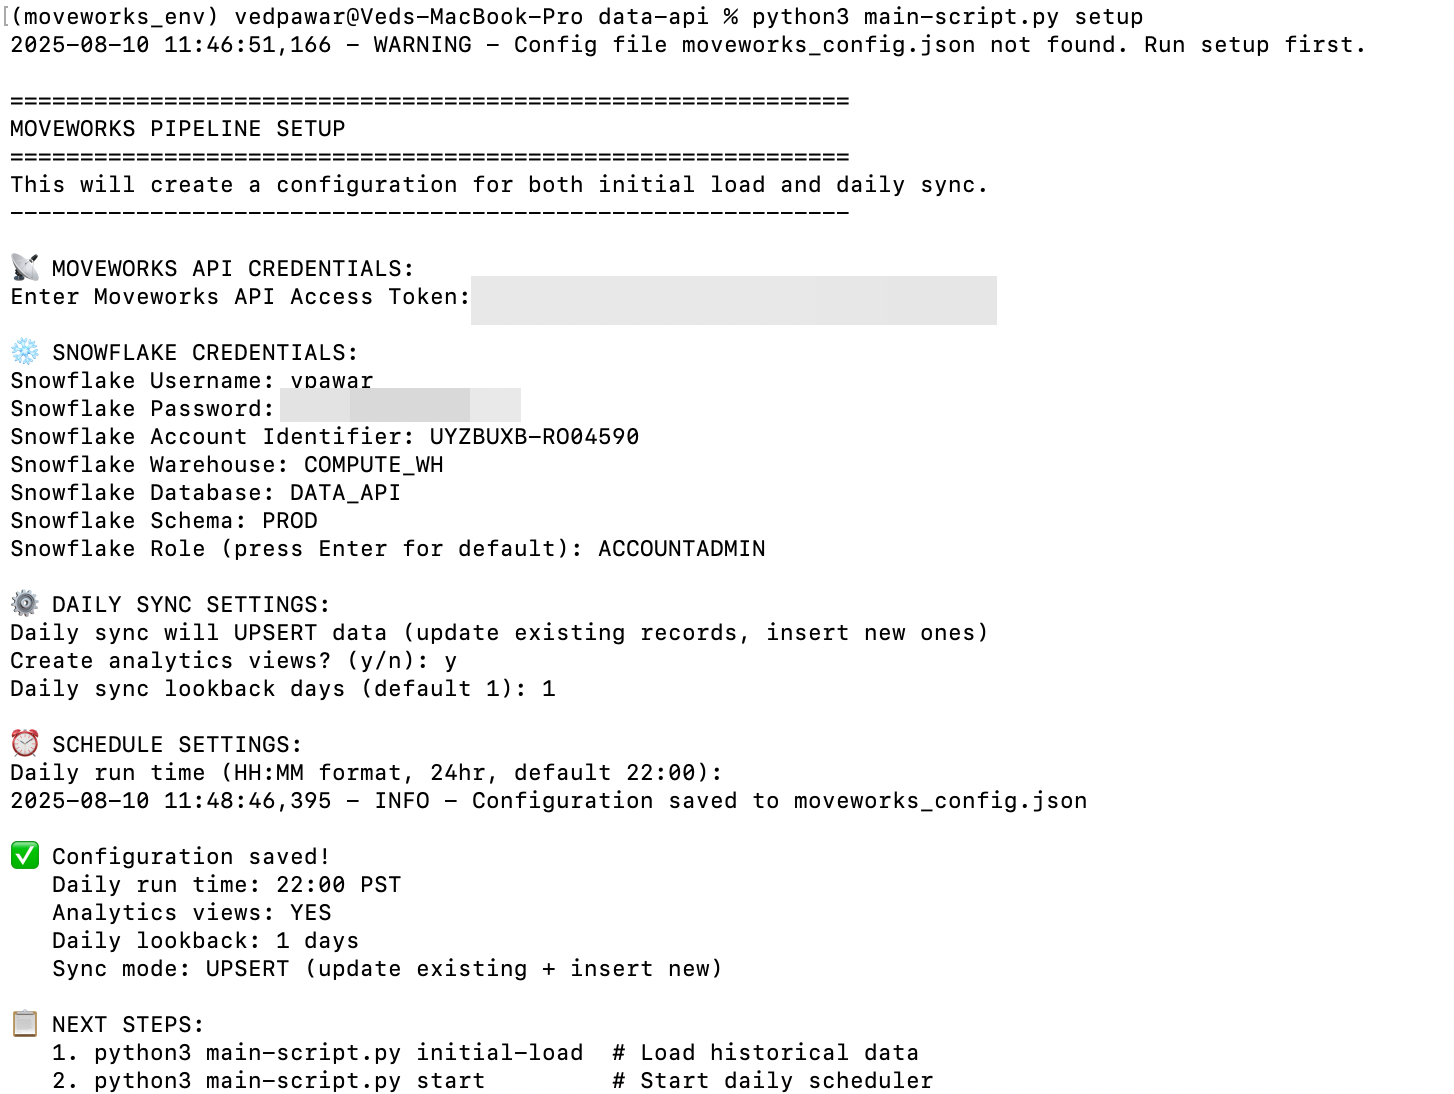
python main-script.py setupSetup Steps
- Enter the API key shared by Moveworks for the API Access token input
- Enter the Snowflake details captured while setting up the Snowflake instance (refer to the prerequisites section)
- Type "Yes" or "y" to create analytics views—select yes to get started with the pre-built views through the script
- Set the daily sync look-back to 1, as the Data API provides data on a daily basis
- Configure the daily schedule settings—keep this as default; the script already handles daily ingestion and when it is triggered. By default, daily ingestion is triggered at 22:00 PST every day
Step 2: Run the Integration Pipeline
The script allows you to run the integration pipeline for a fixed interval (ad hoc runs) and also enables daily ingestion runs. Let's begin by running the pipeline for a fixed interval and testing whether the tables and views are created in our Snowflake instance.
Recommendation: It is advised to perform a one-time ingestion of all your data in your environment when you get access to the Data API, then start pulling data on a daily basis. Run the initial load once and start the daily ingestion from the subsequent day.
Please note the
BASE_APIfield in the share script contains the URL for US PROD ENV. If you are in a different ENV update the URL accordingly.Check the URL applicable to your region here.
Initial Load
To run the initial load, execute the following command:
Terminal (Mac/Linux)
python3 main-script.py initial-loadPower Shell (Windows)
python main-scripty.py initial-loadThe script will ask for a start date and end date when run. Try loading one day's worth of data first to ensure the pipeline is running correctly.
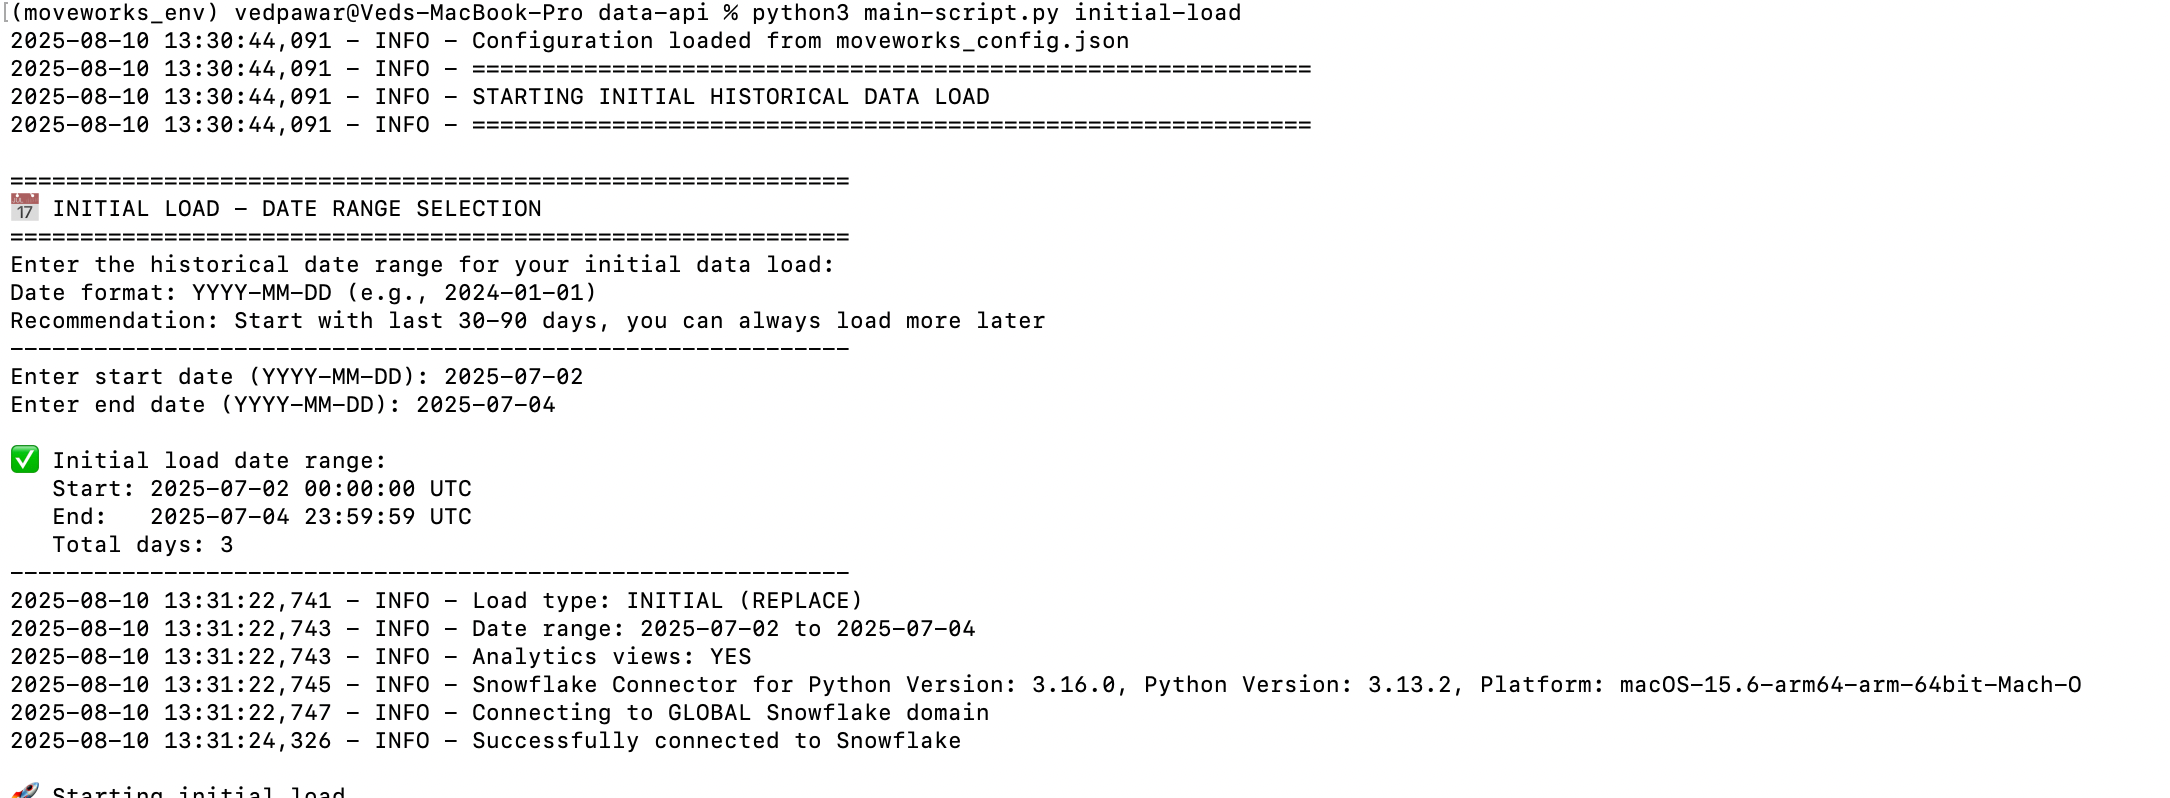
Once this is completed, the script will output clear logs of each API call made and the total records ingested per table. It will also show a summary of the initial load in your command line tool.
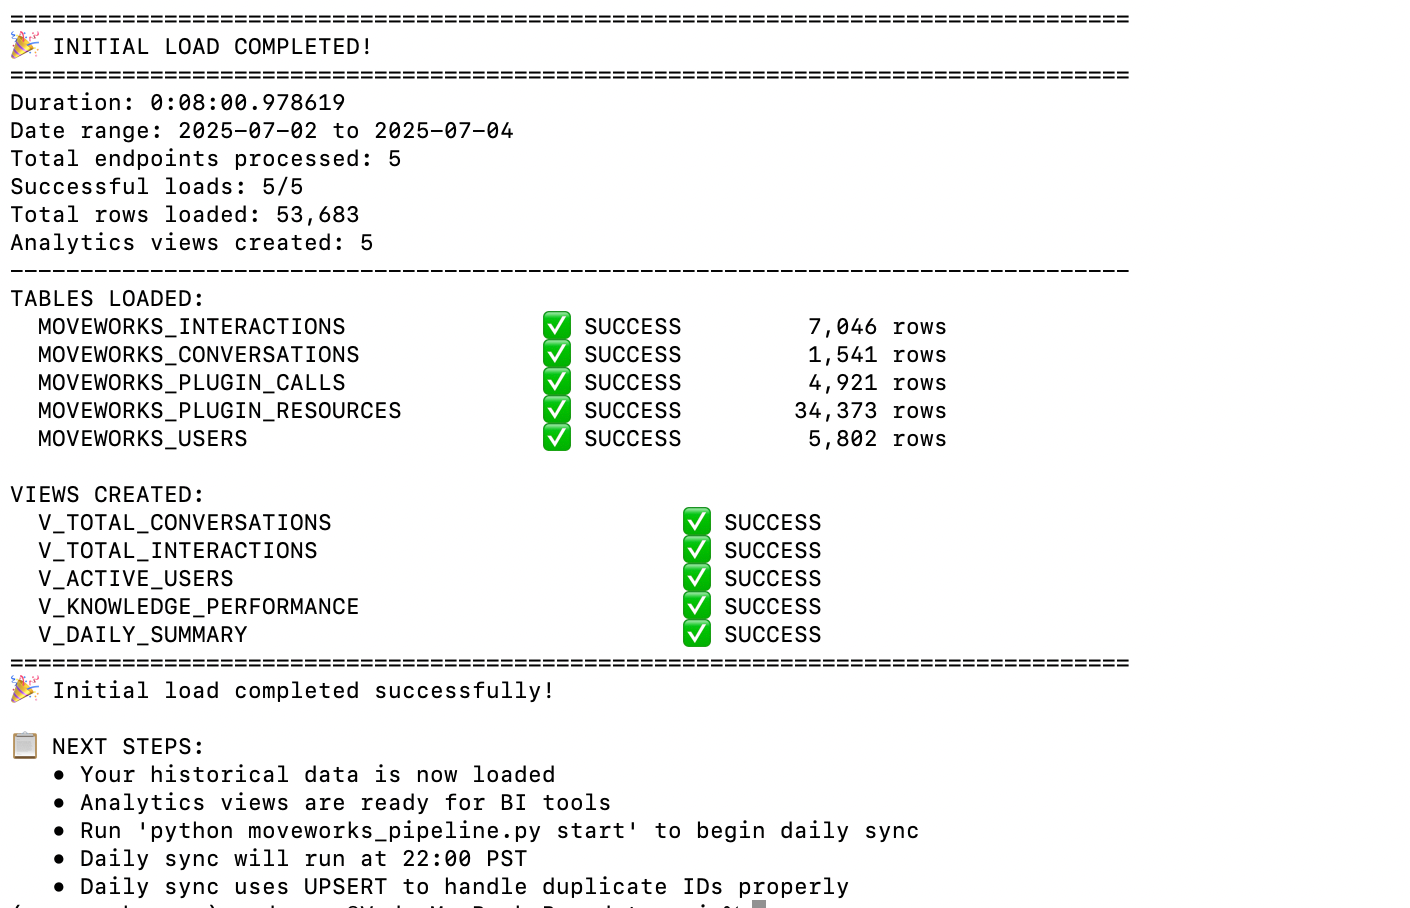
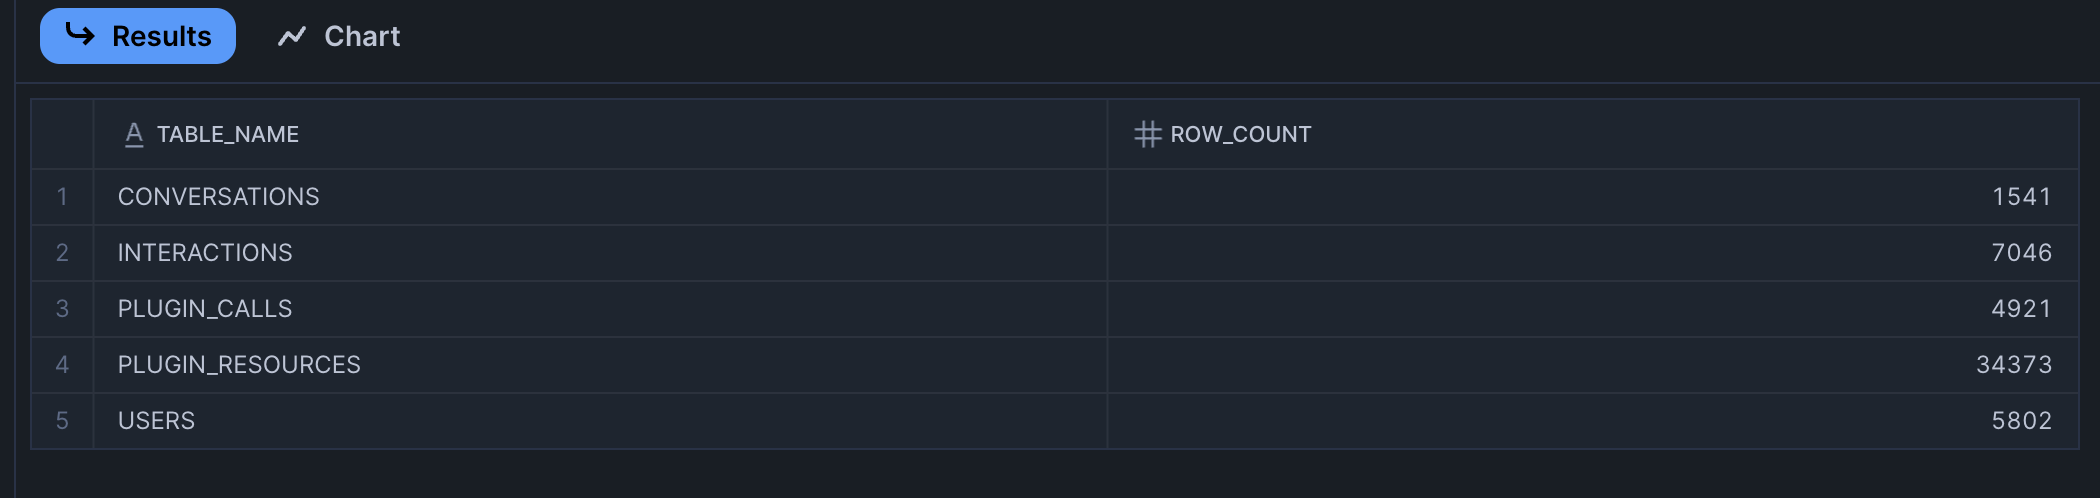
Verification
Go to your Snowflake instance and try these queries to ensure data has been entered into the tables. This should give you a count of all rows for the tables created in Snowflake:
SELECT 'CONVERSATIONS' as table_name, COUNT(*) as row_count FROM MOVEWORKS_CONVERSATIONS
UNION ALL
SELECT 'INTERACTIONS', COUNT(*) FROM MOVEWORKS_INTERACTIONS
UNION ALL
SELECT 'PLUGIN_CALLS', COUNT(*) FROM MOVEWORKS_PLUGIN_CALLS
UNION ALL
SELECT 'PLUGIN_RESOURCES', COUNT(*) FROM MOVEWORKS_PLUGIN_RESOURCES
UNION ALL
SELECT 'USERS', COUNT(*) FROM MOVEWORKS_USER
Output :
Daily Ingestion Pipeline
To enable the daily ingestion pipeline, enter the following Python command:
Terminal (Mac/Linux)
python3 main-script.py startPower Shell (Windows)
python main-script.py startImportant: If you stop the scheduler, daily data will not be ingested into your Snowflake instance.

Step 3: Connecting Power BI to Snowflake
To connect Power BI to your Snowflake instance, you will need the Power BI Desktop application. Please note that the Power BI Desktop application is not supported on Mac, so you will need a Windows machine or a Windows VM to run the shared Power BI template.
Connection Steps
-
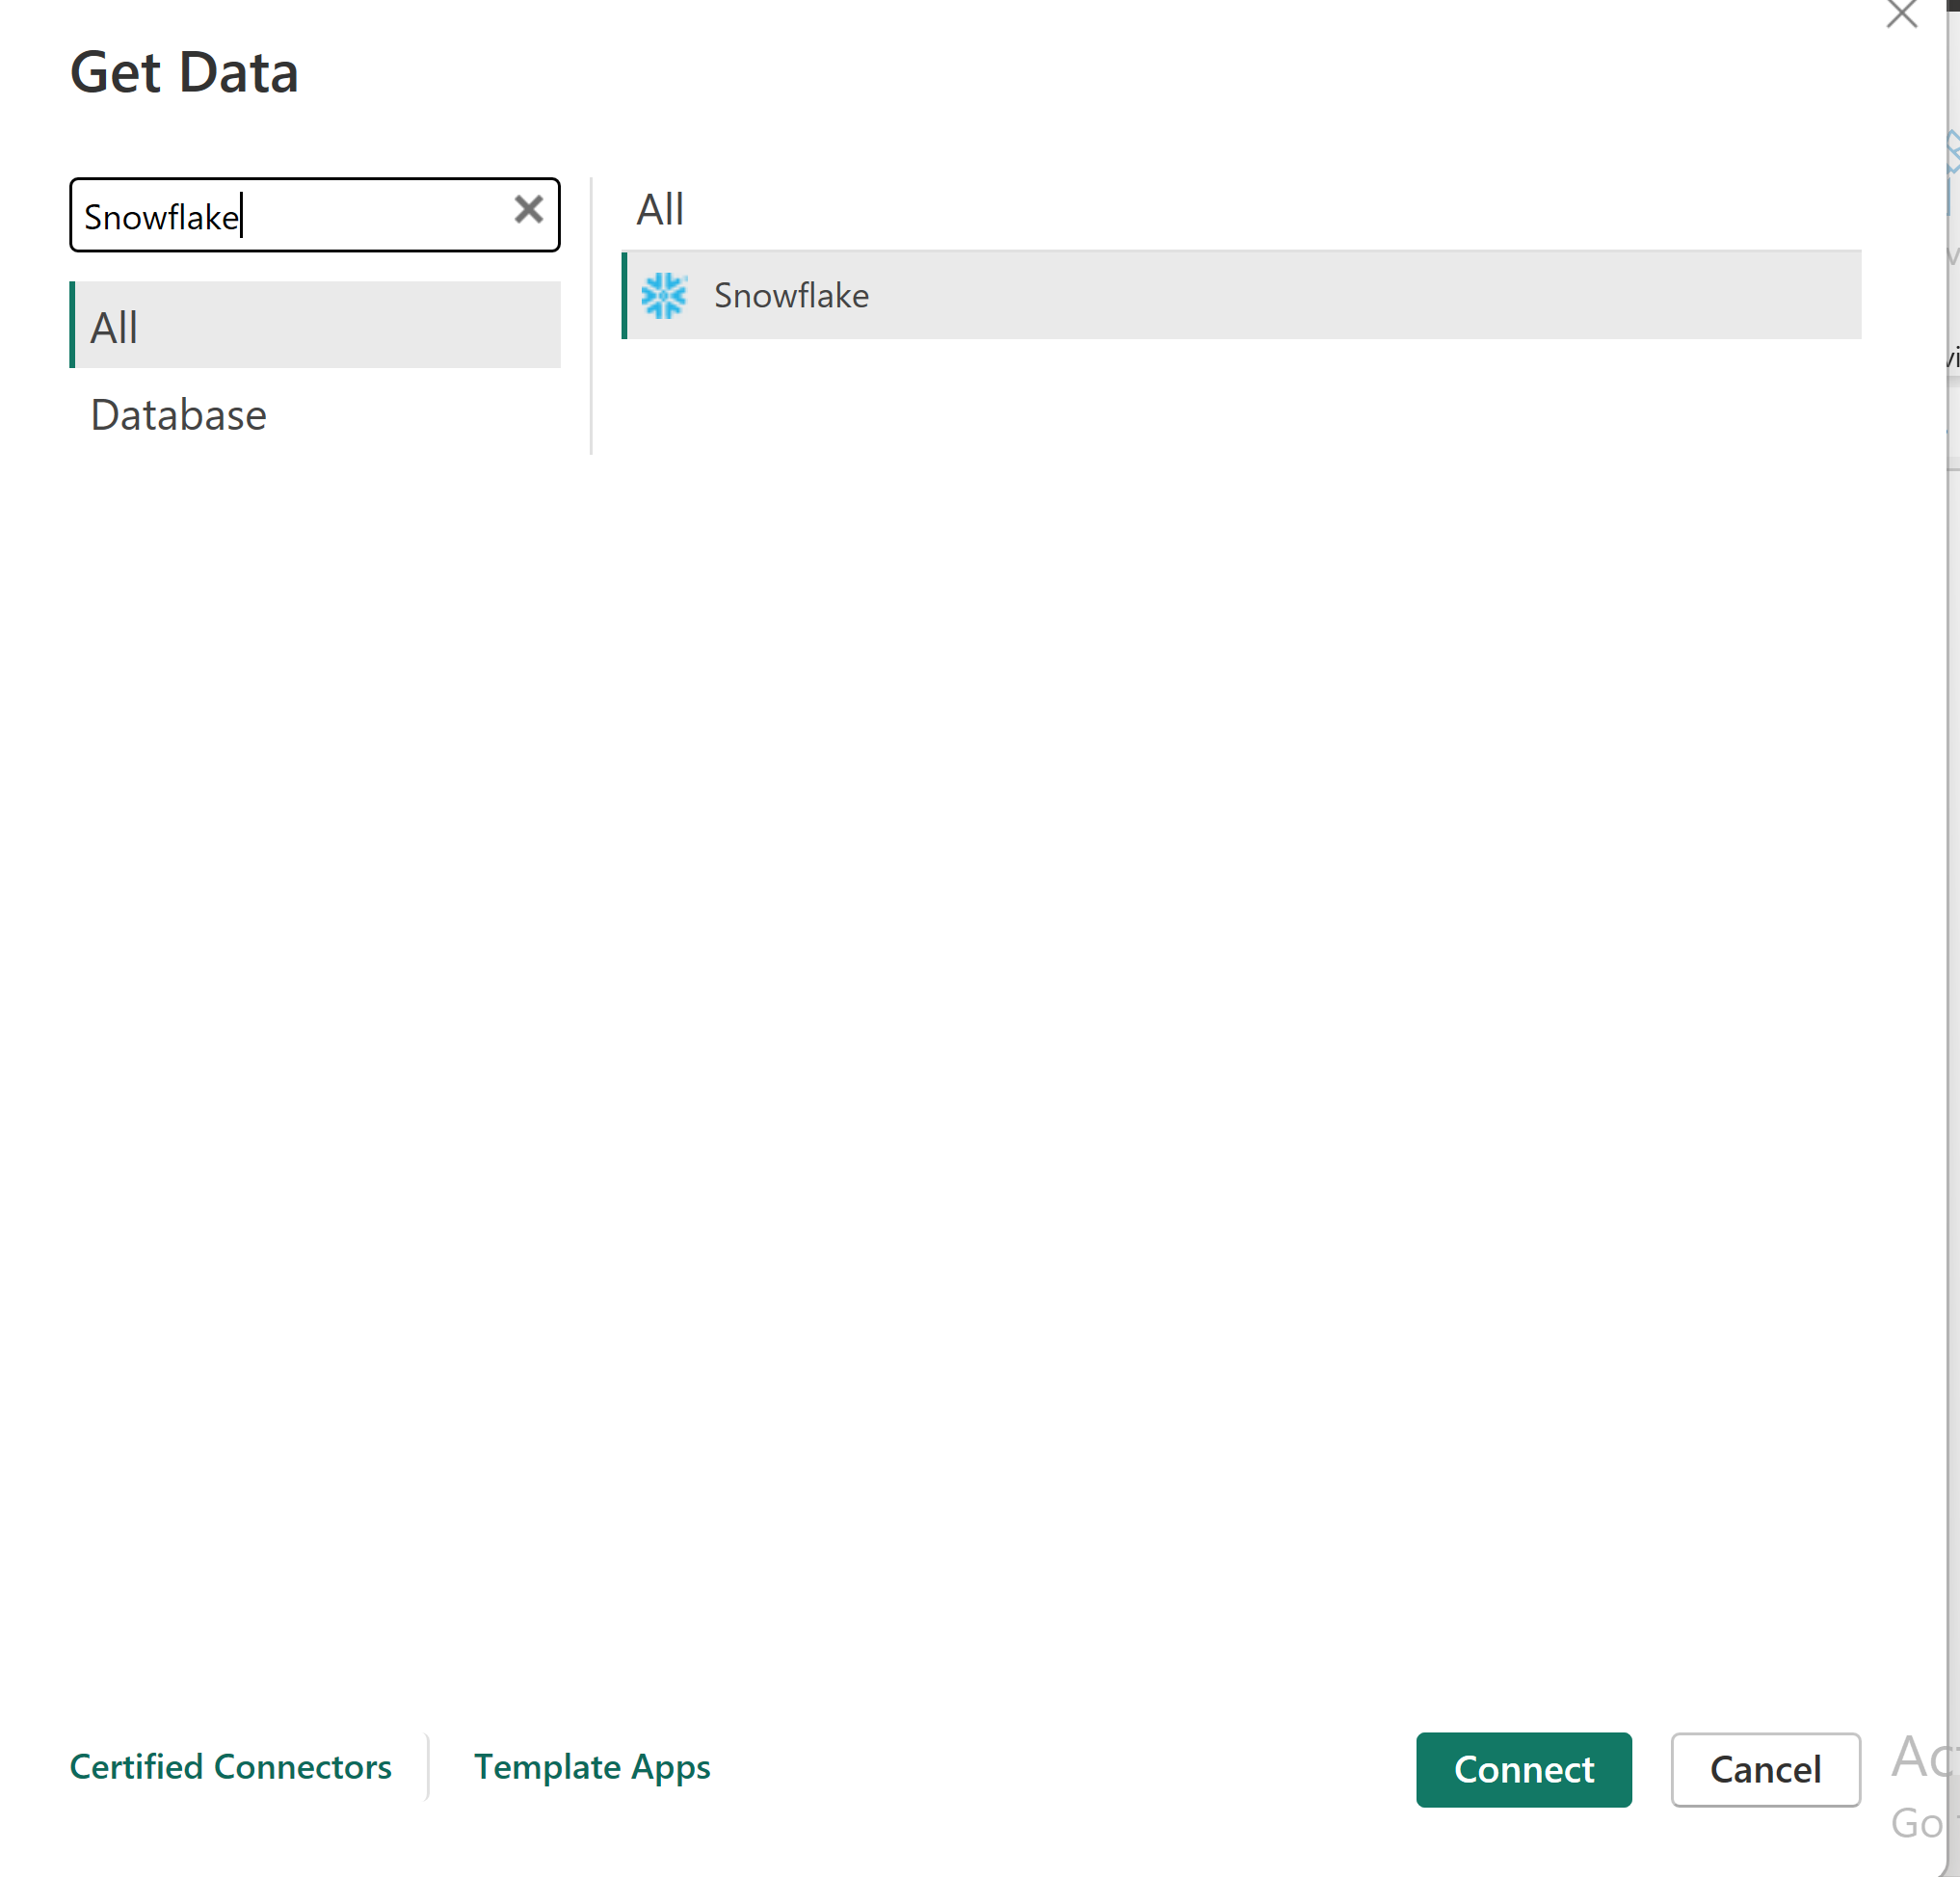
Start a new blank report in Power BI and click "Get data from another source"
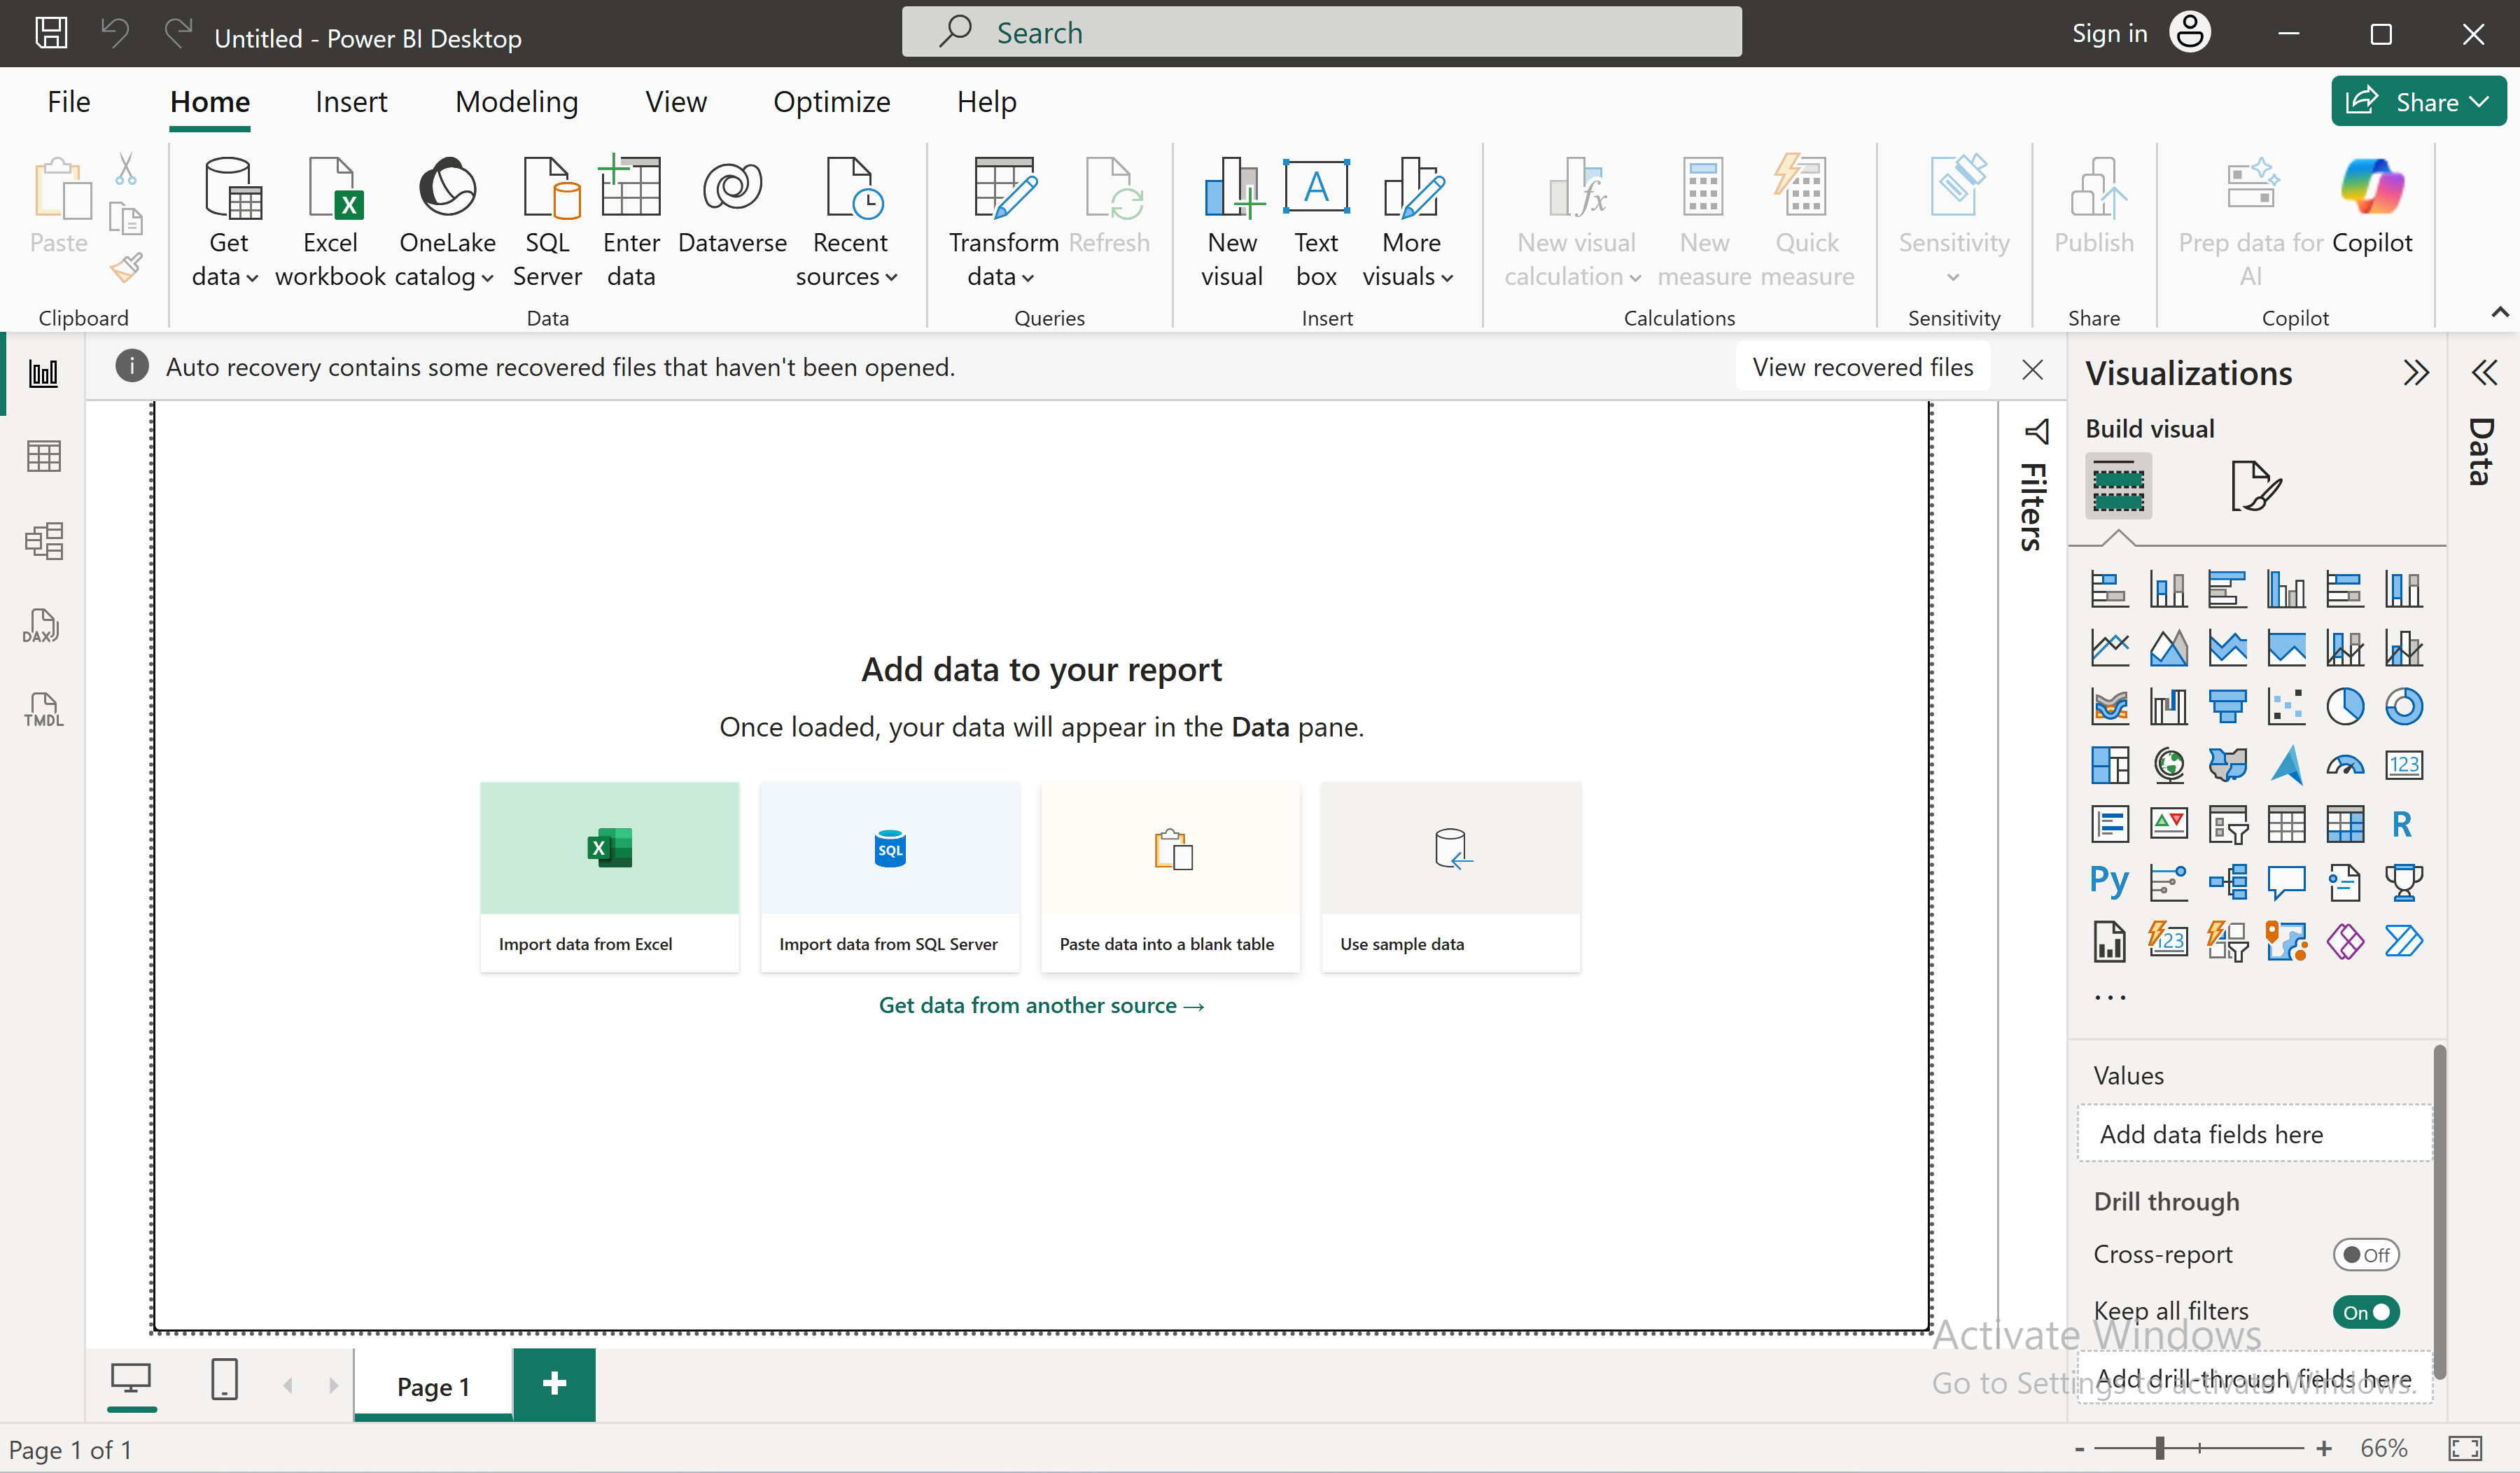
-
Select Snowflake from the available options
-
Enter the server name and warehouse name:
- Server name: Can be retrieved from the account details. Select the account/server URL
-
- Warehouse name:
COMPUTE_WH -
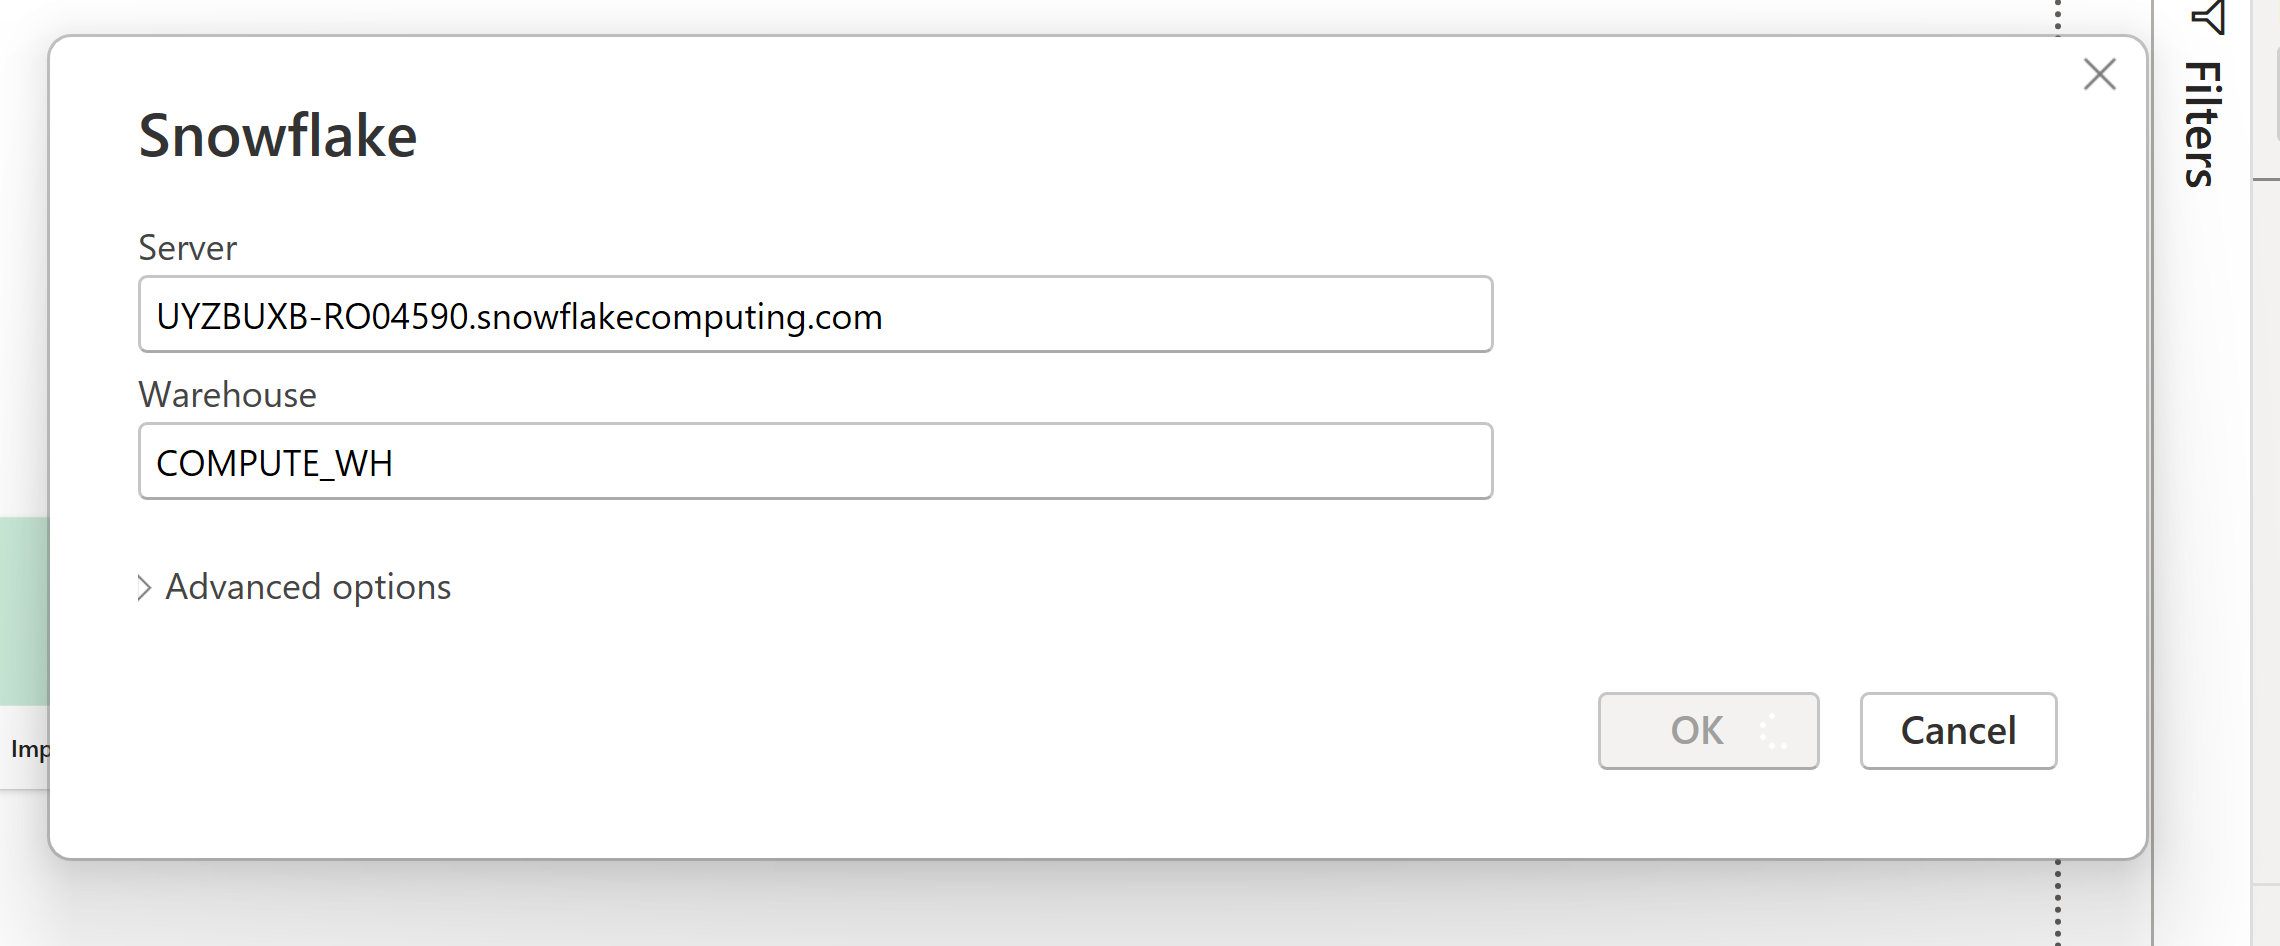
- Server name: Can be retrieved from the account details. Select the account/server URL
-
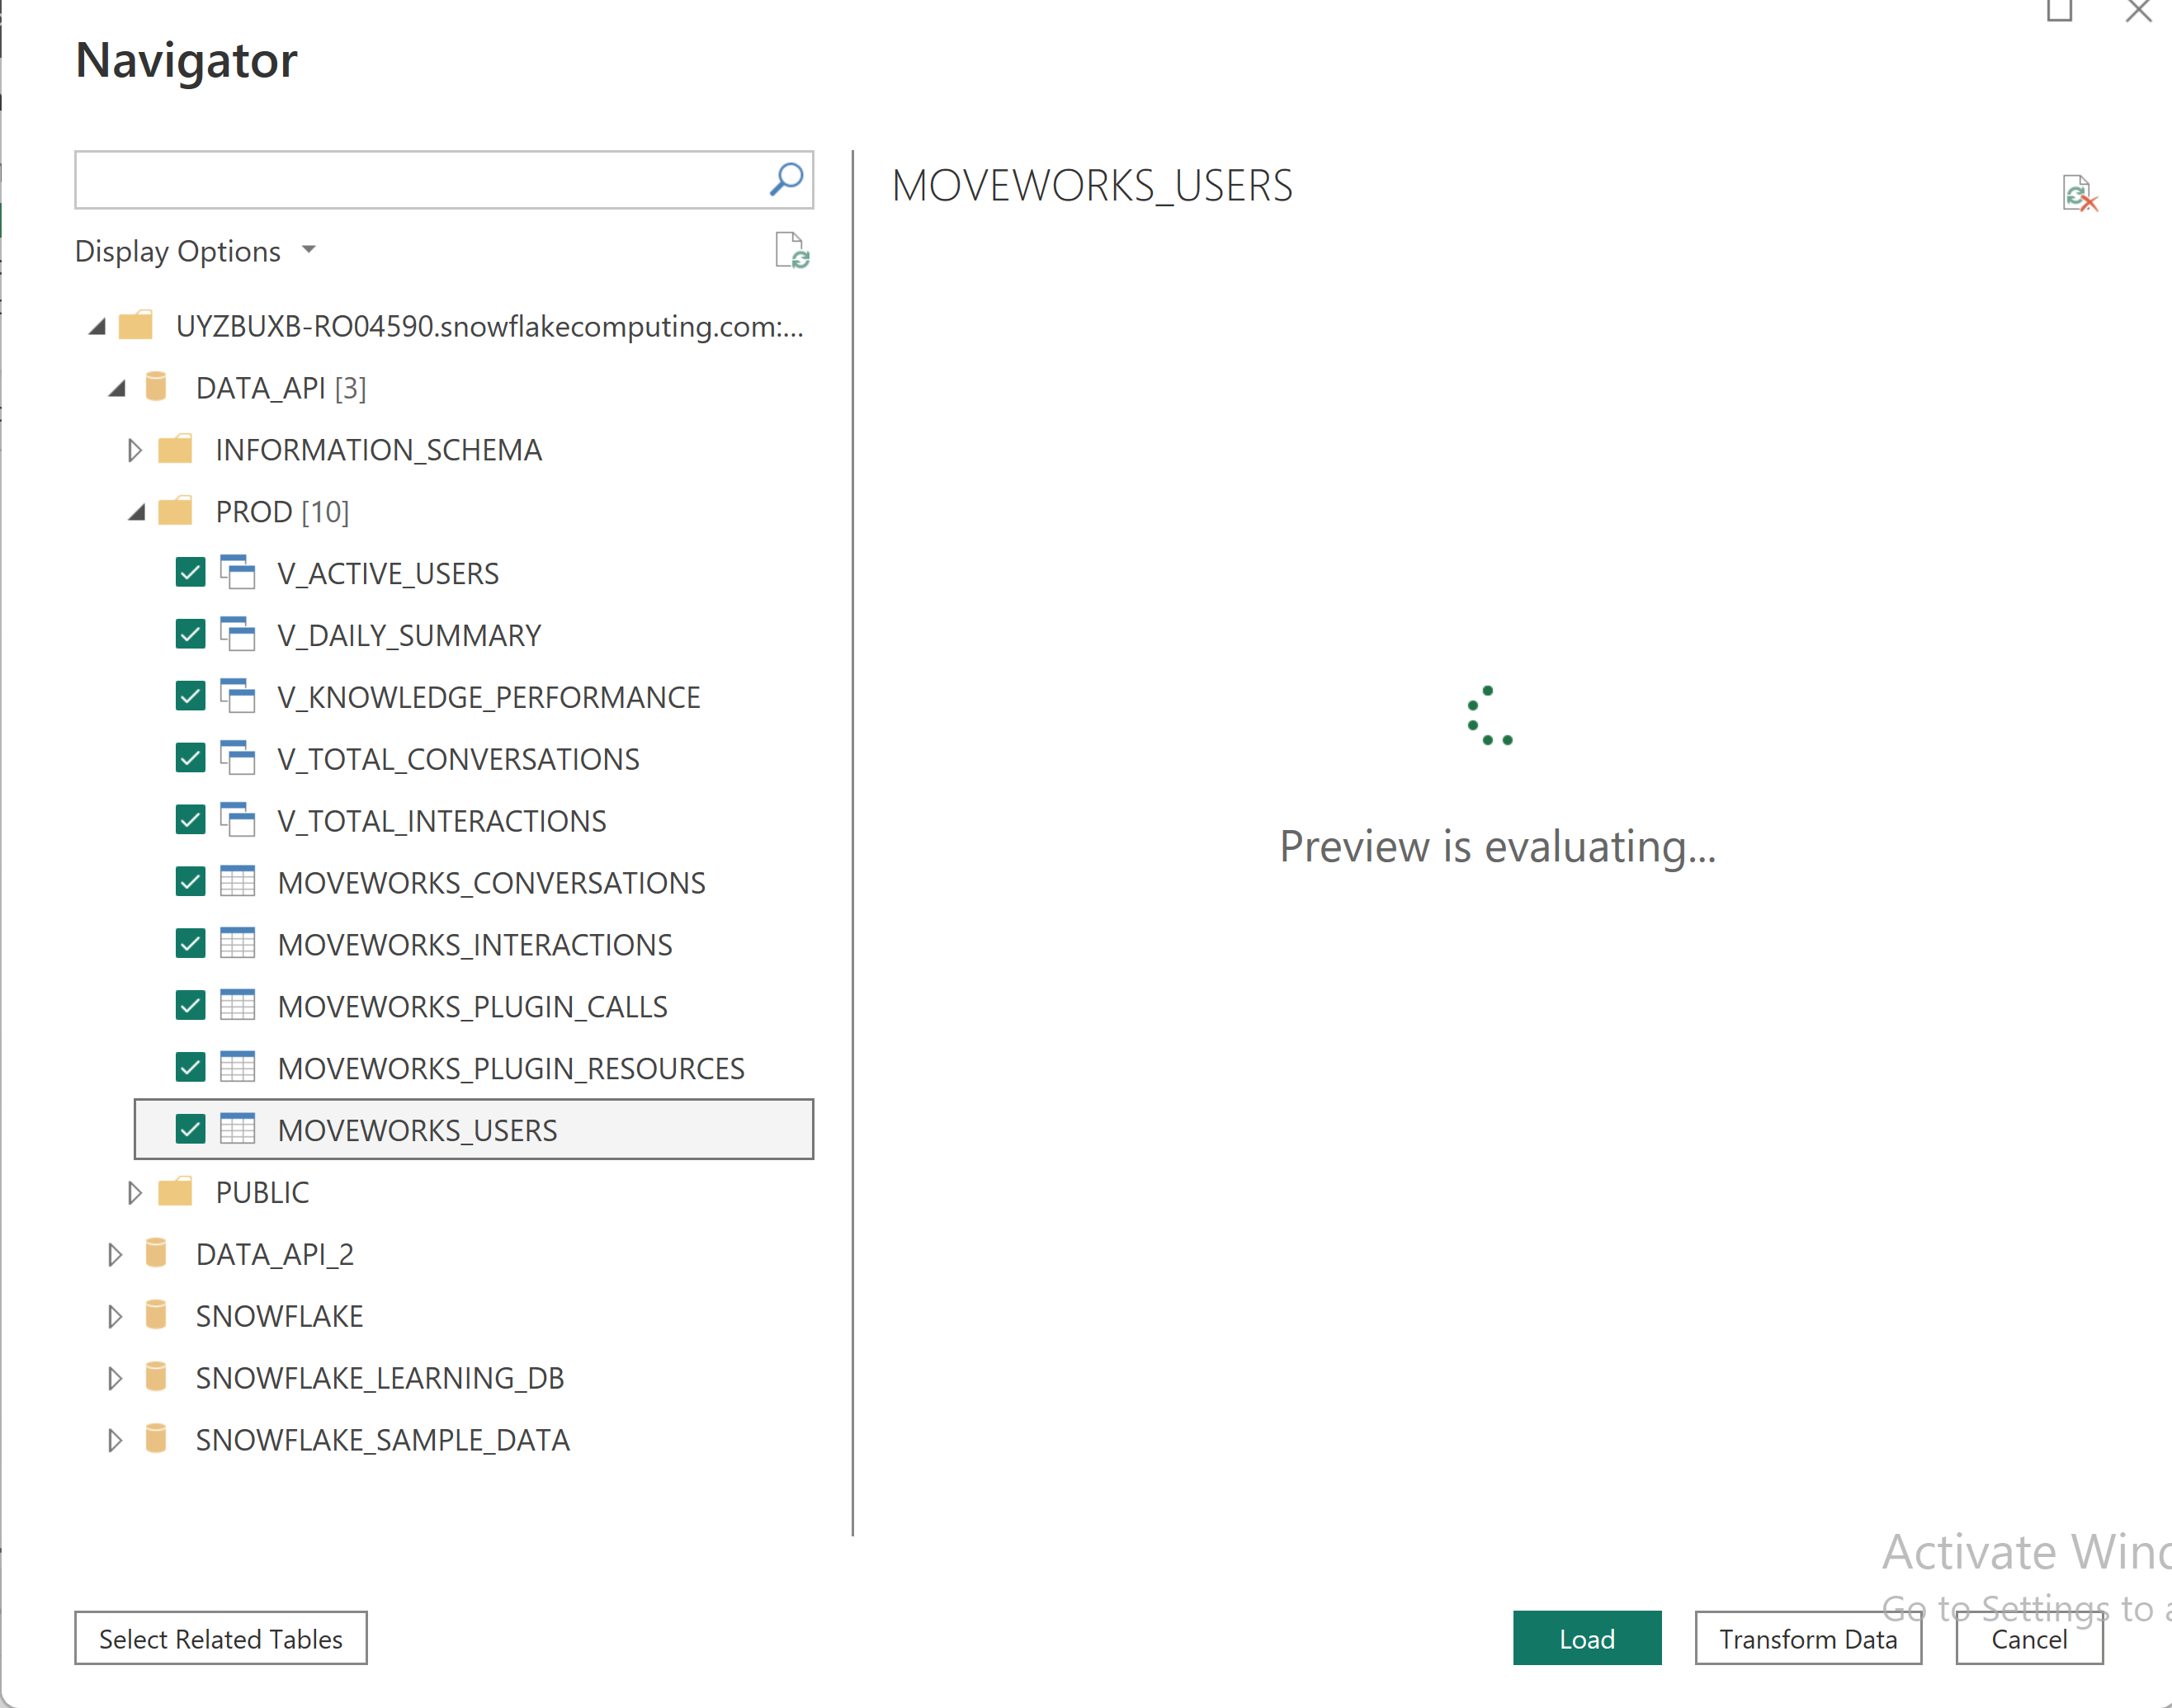
Enter your username and password and allow it to connect to your Snowflake instance. Once connected, it will load all the databases and schemas created in your instance. Select the tables and schemas we have already created for the Data API. Select all views and raw tables to be loaded in Power BI and click "Load"
-
Select your data import option—DirectQuery is preferred so you don't have to continuously reimport data from Snowflake to Power BI. Once selected, Power BI will start connecting to your Snowflake instance and begin importing your data
Sample Dashboard
We have also created a sample Power BI file that imports data from Snowflake and sets up visuals in your environment. You can download this file and open it in your Power BI tool to get started with this dashboard. This file is uploaded in the same github repository. If you face any errors in opening the .pbit template - Please update your PowerBI to the latest version. The template was made using : 2.145.1105.0 64-bit (July 2025) version
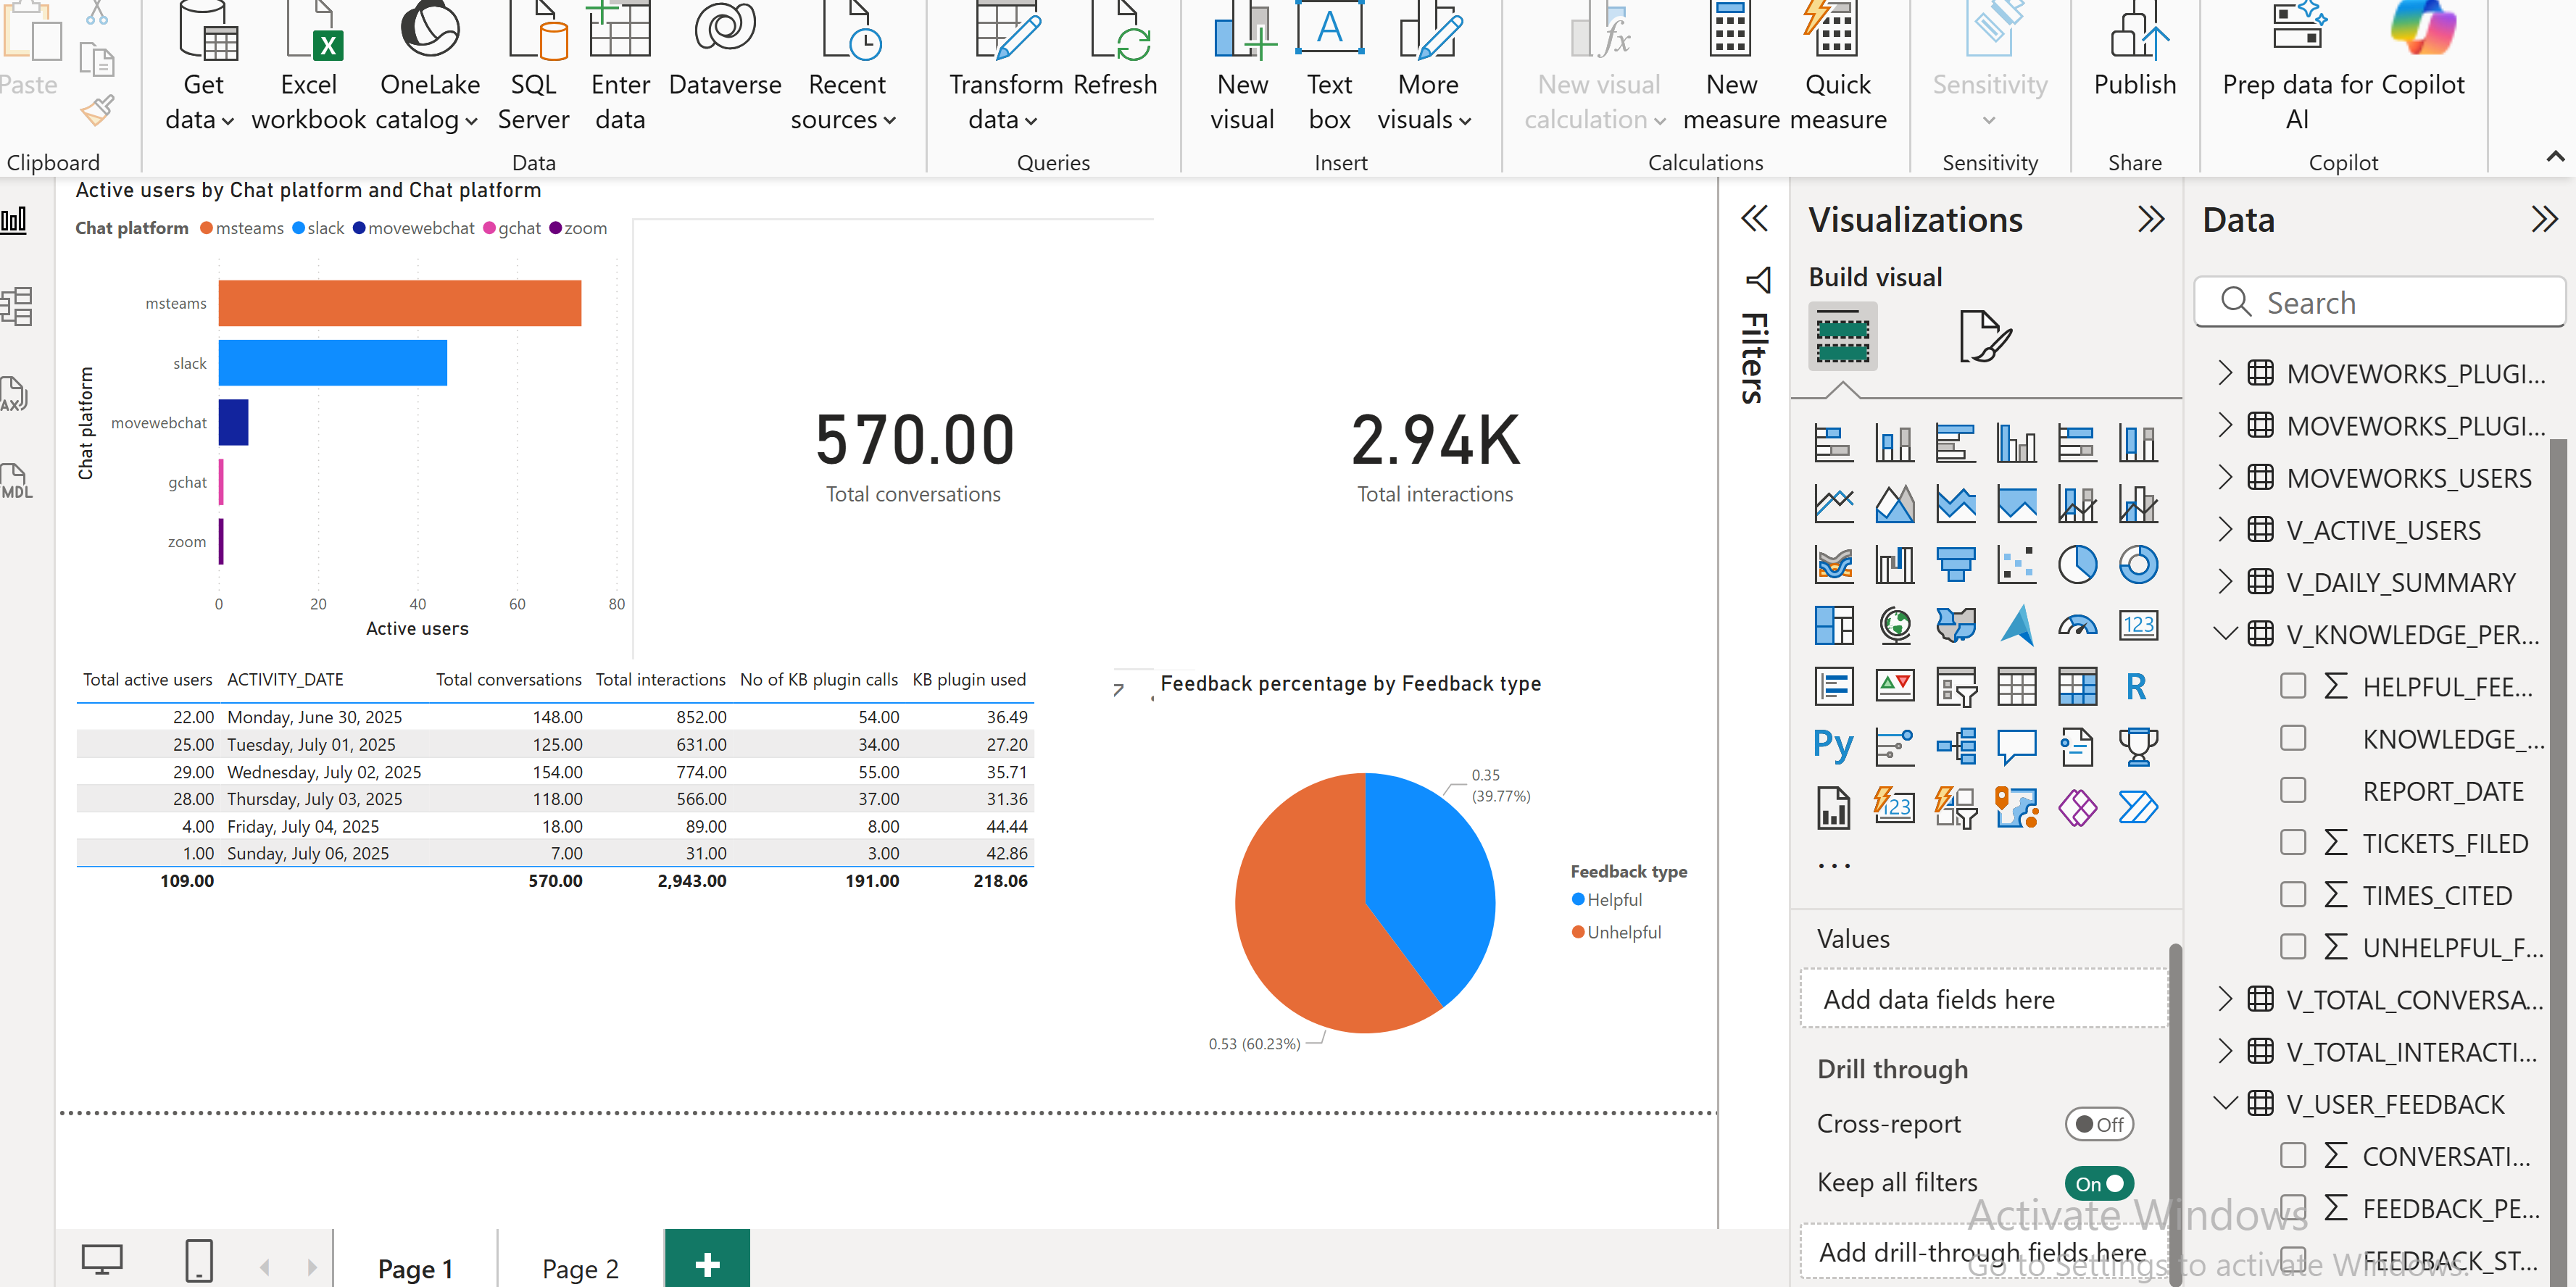
You can now expand this dashboard according to your needs and create any custom metrics in your environment.
Happy building !!
FAQ
In-case you encounter any issues while running the pipeline or setting up powerBI template. Please share the log file generated by the script and details of the issue at [email protected]
Updated 6 months ago