How To Guides for People and Places Lookups
How to Exclude Records from People Lookups
You can tag records as SITE_USER or SERVICE_ACCOUNT in the mapping step under the User Identity config to have them be excluded from People Lookups. This is done in the identity vars mapping.
How To customize the Label for Lookups Discovery Button
-
Navigate to Lookups > Lookup Configs
-
Find Label for "Lookups" Discovery Button

-
Input the preferred label for the button
-
Submit the changes
-
Once you submit the changes, the label text will be updated
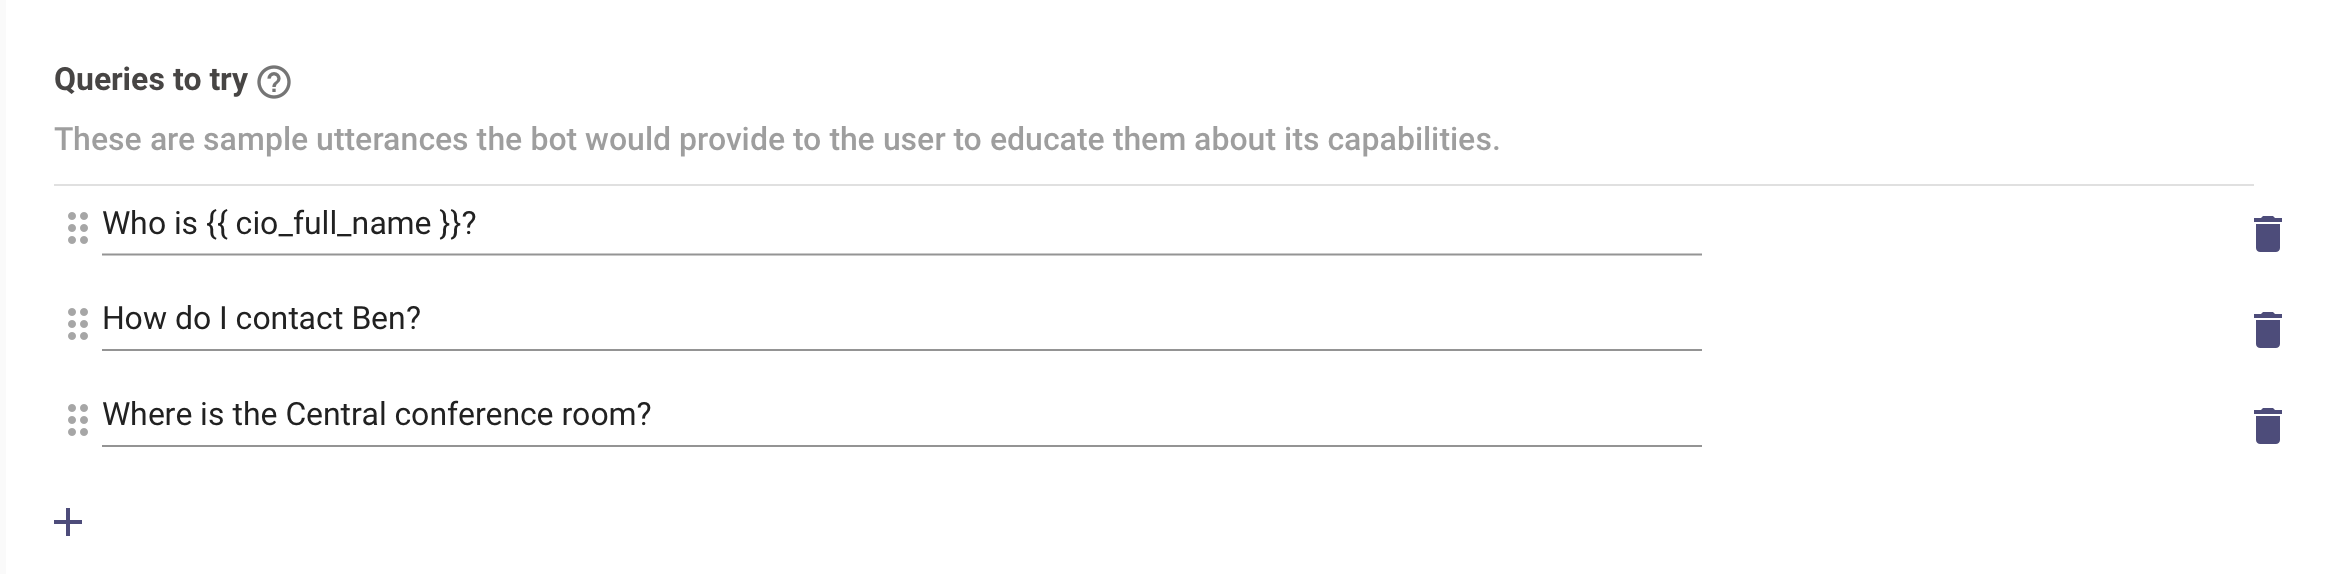
How To customize Lookup Sample Queries
-
Navigate to Lookups > Lookup Configs
-
Scroll to find Sample Queries to Try in the Lookups Discovery Card
-
Add, edit, or delete the sample queries
-
Submit the changes
-
Once you submit the changes, the Lookups Discovery Card will display the updated queries
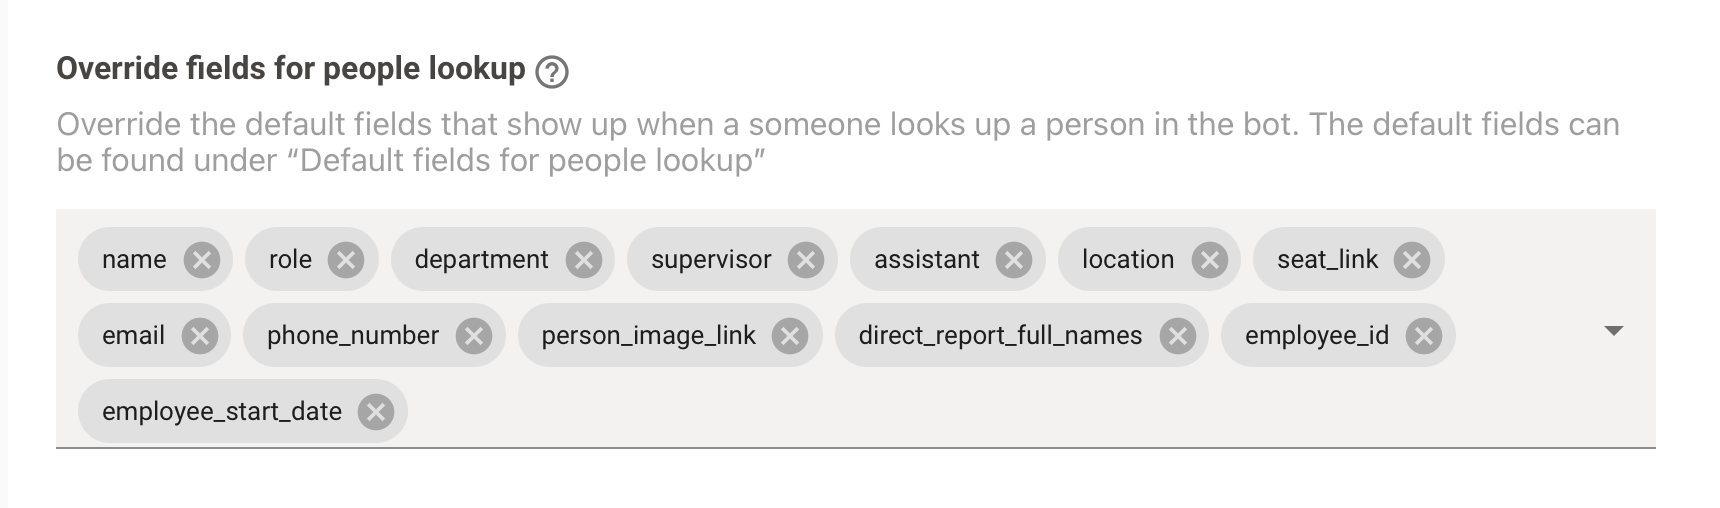
How To customize Fields for People Lookup Results
-
Navigate to Lookups > Lookup Configs
-
Scroll to find Override default fields in People Lookup Card Results Configs
-
Add or delete the fields that you want to show in the people lookup results card
-
Submit the changes
-
Once you submit the changes, the selected fields will be shown in people lookup results card
NoteThis config will replace all the fields defined in the 'Default Fields' for People Lookups.
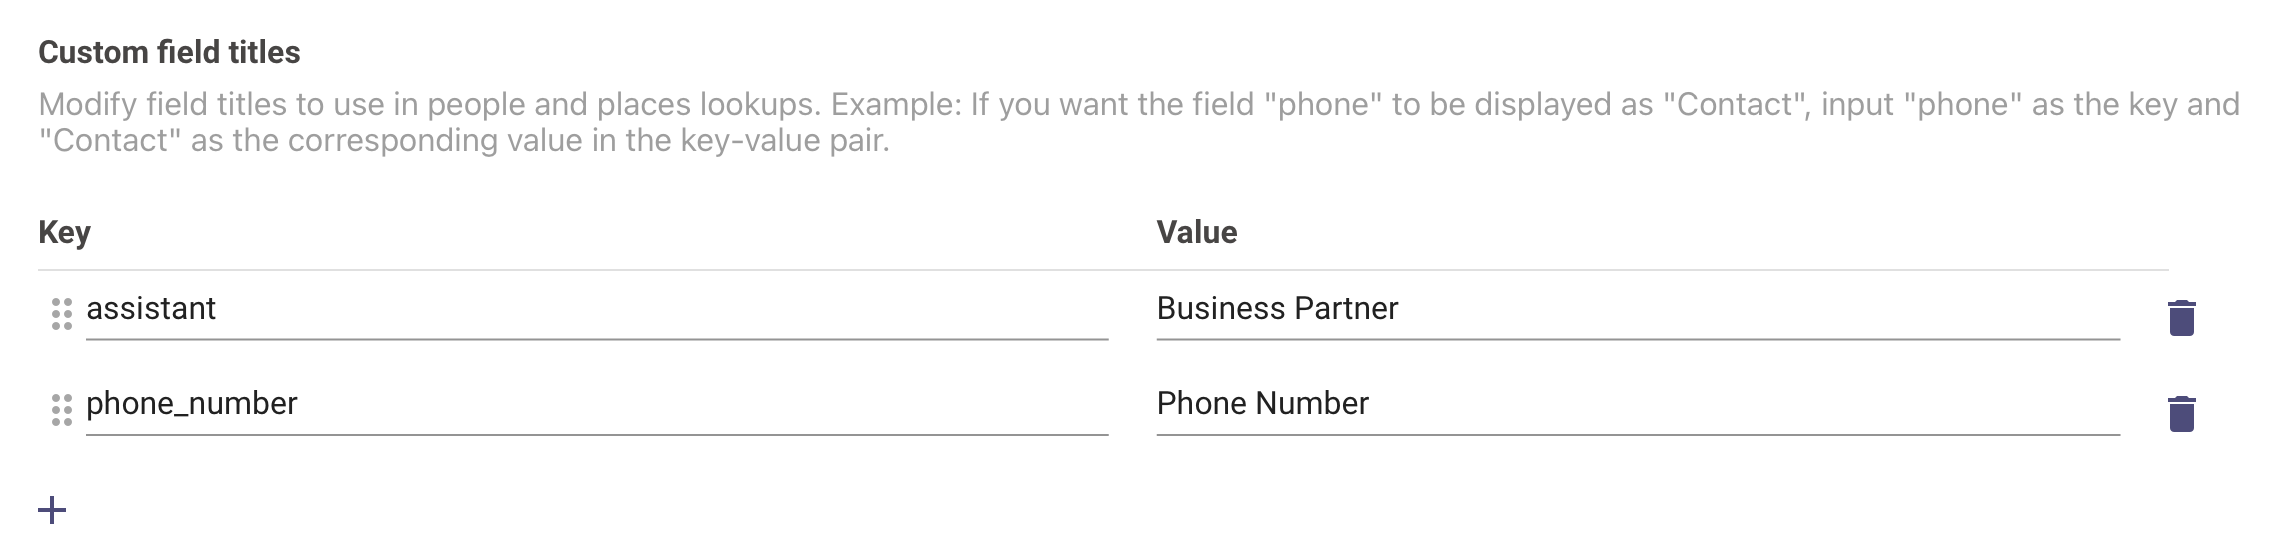
How To customize Field for Lookup fields
-
Navigate to Lookups > Lookup Configs
-
Scroll to find Customize default field titles for people and places in the Additional Settings for Lookup Result Field Configs
-
Add (or delete) the default field titles as keys and desired field titles as values. For example, if you want
first_nameto be displayed asFirst Name, thenfirst_namewill be the key andFirst Namewill be the value -
Submit the changes
-
Once you submit the changes, the customized fields titles will be shown instead of default field titles in people and places lookup results card
-
I want to customize fields shown in case of similar or ambiguous results
-
Navigate to Lookups > Lookup Configs
-
Scroll to find Distinguishing fields in case of ambiguous results in the Additional Settings for Lookup Result Field Configs

-
From the dropdown, select the fields that should be shown to help distinguish between lookup results that are similar or ambiguous
-
Submit the changes
-
Once you submit the changes, the selected fields will shown to distinguish results in case of ambiguity
-
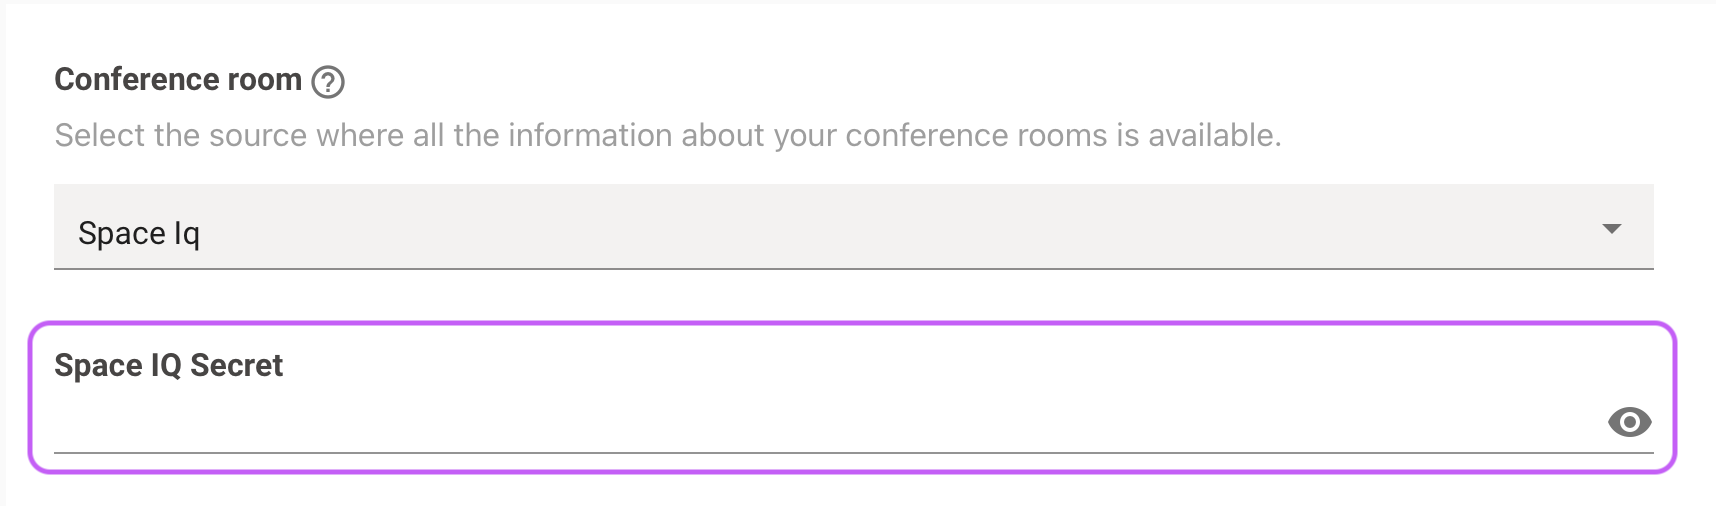
How To Setup or Update the Conference Room Integration
-
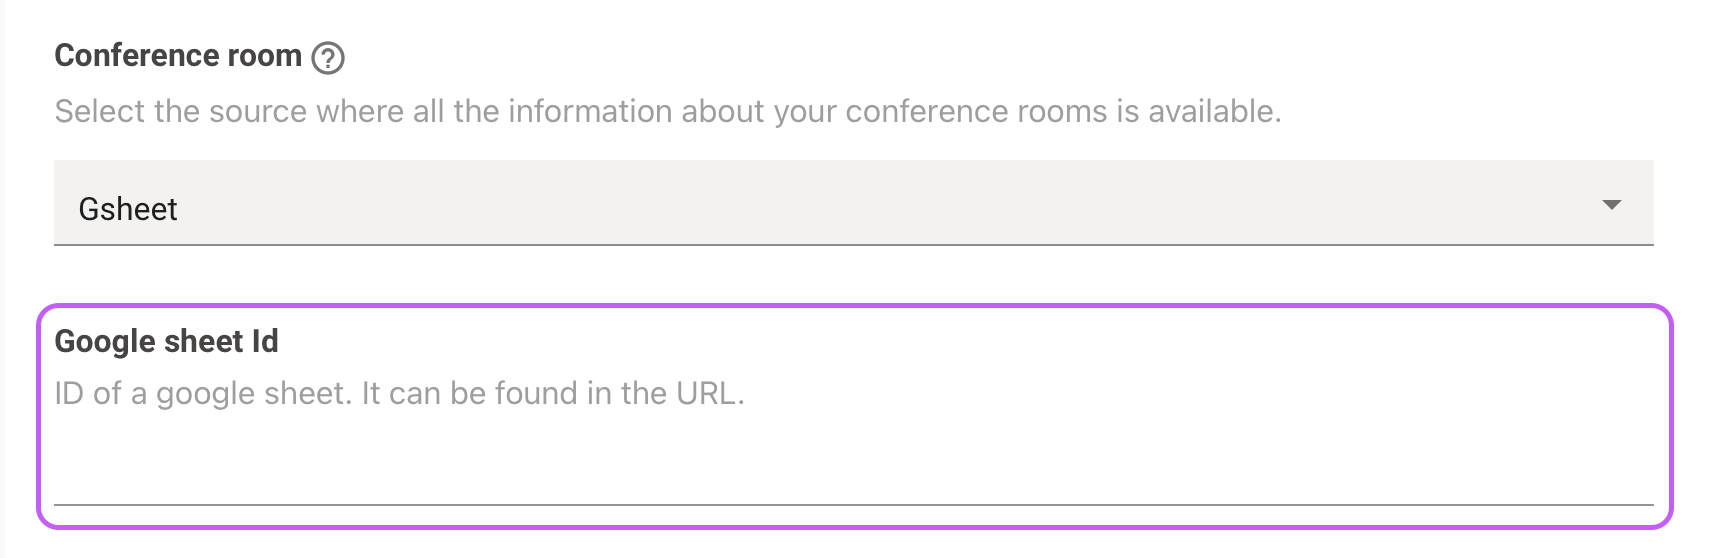
Navigate to Lookups > Conference Rooms Configs
-
Select the data source from the dropdown menu to determine where the details will be retrieved from

-
For OfficeSpace, you don’t need to provide any key or ID
-
For SpaceIQ, you will need to provide your API key
-
For Google Sheets, you will need to provide the sheet ID
-
-
Submit the changes
-
Once you submit the changes, the new/updated conference room details will be ingested
NoteThere are certain advanced or deprecated configs that we do not recommend modifying. If you need to update those settings, please contact our customer success team for assistance.
How To Add Custom Attributes to the User Roster
Prerequisite
- There should be an already configured user ingestion before continuing with this guide.
- The external identity system API field names should be validated.
Configuration
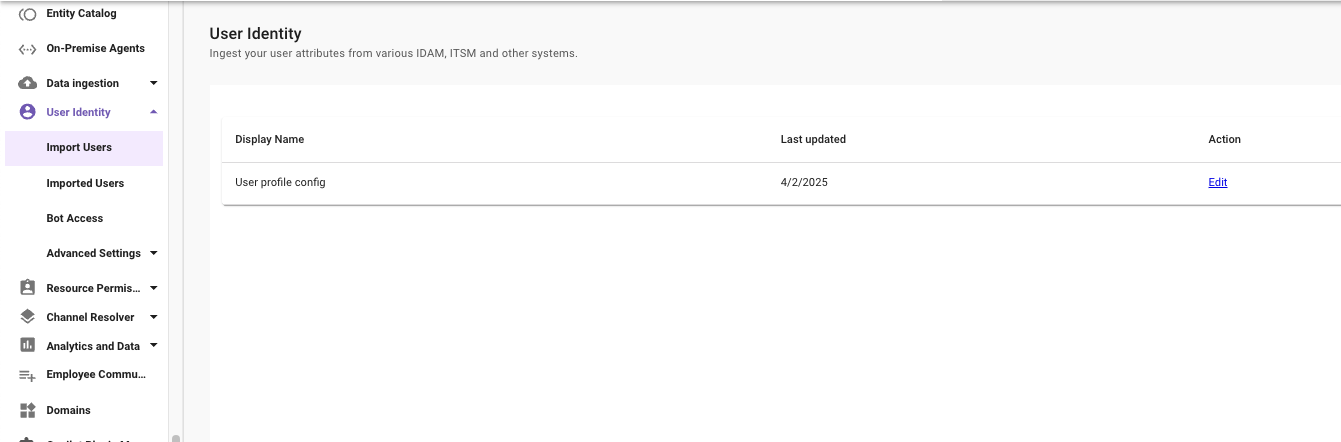
First, navigate to User Identity -> Import Users.
- Click Edit on the existing user ingestion settings.
- Click Next.
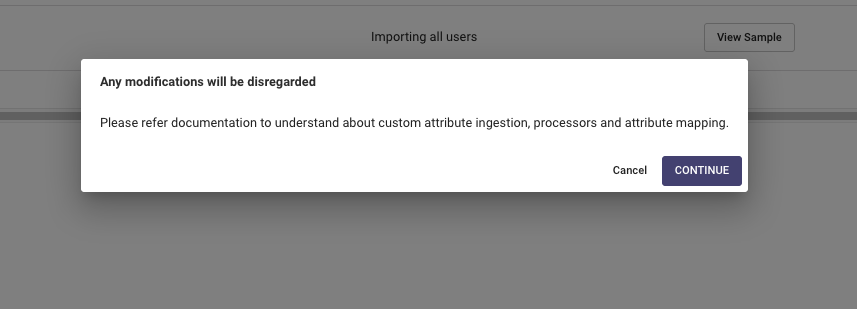
- Click the Advanced mode toggle to switch to Advanced Mode
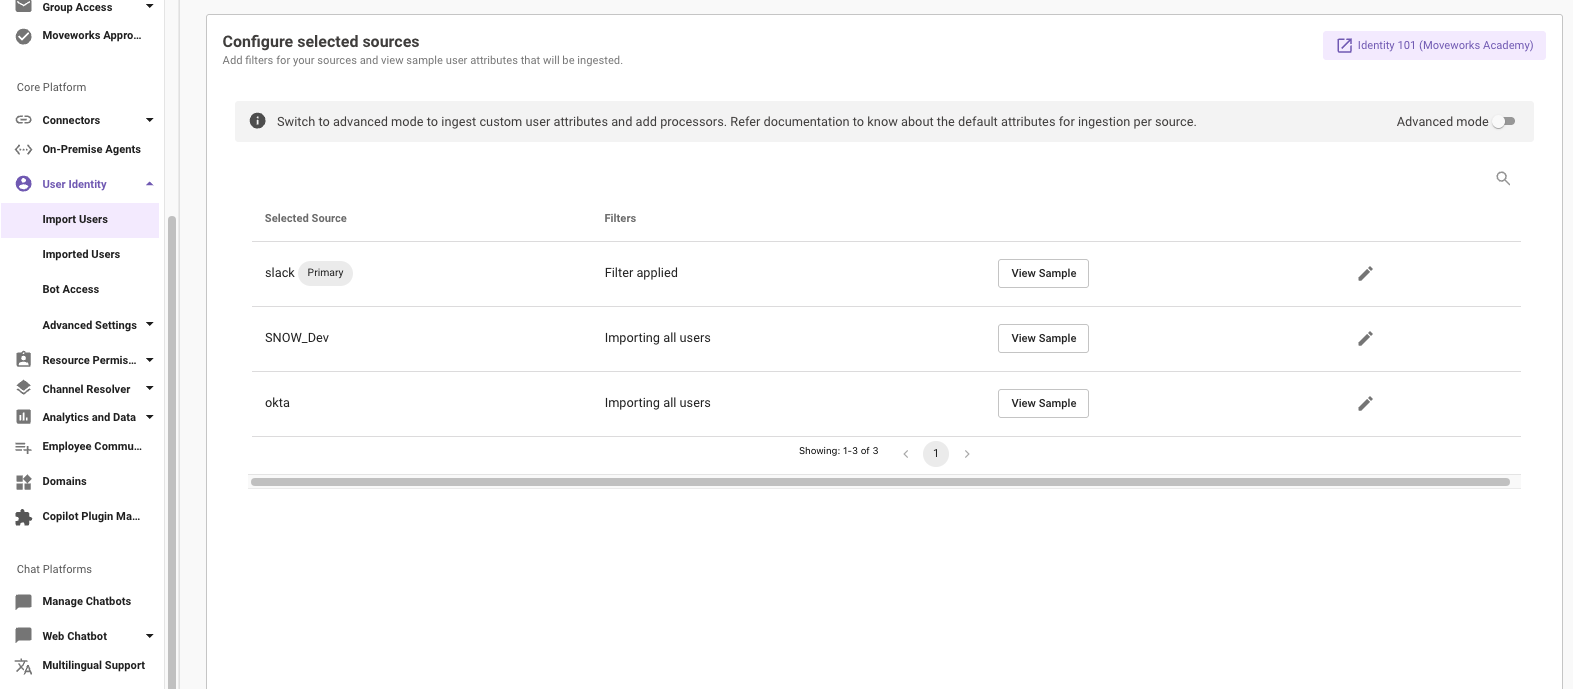
- Click Continue
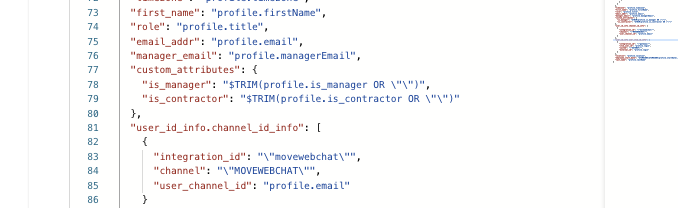
- Navigate to the identity system settings that the custom attribute is to be sourced from and click into the Source-Specific User Attribute Mapping.
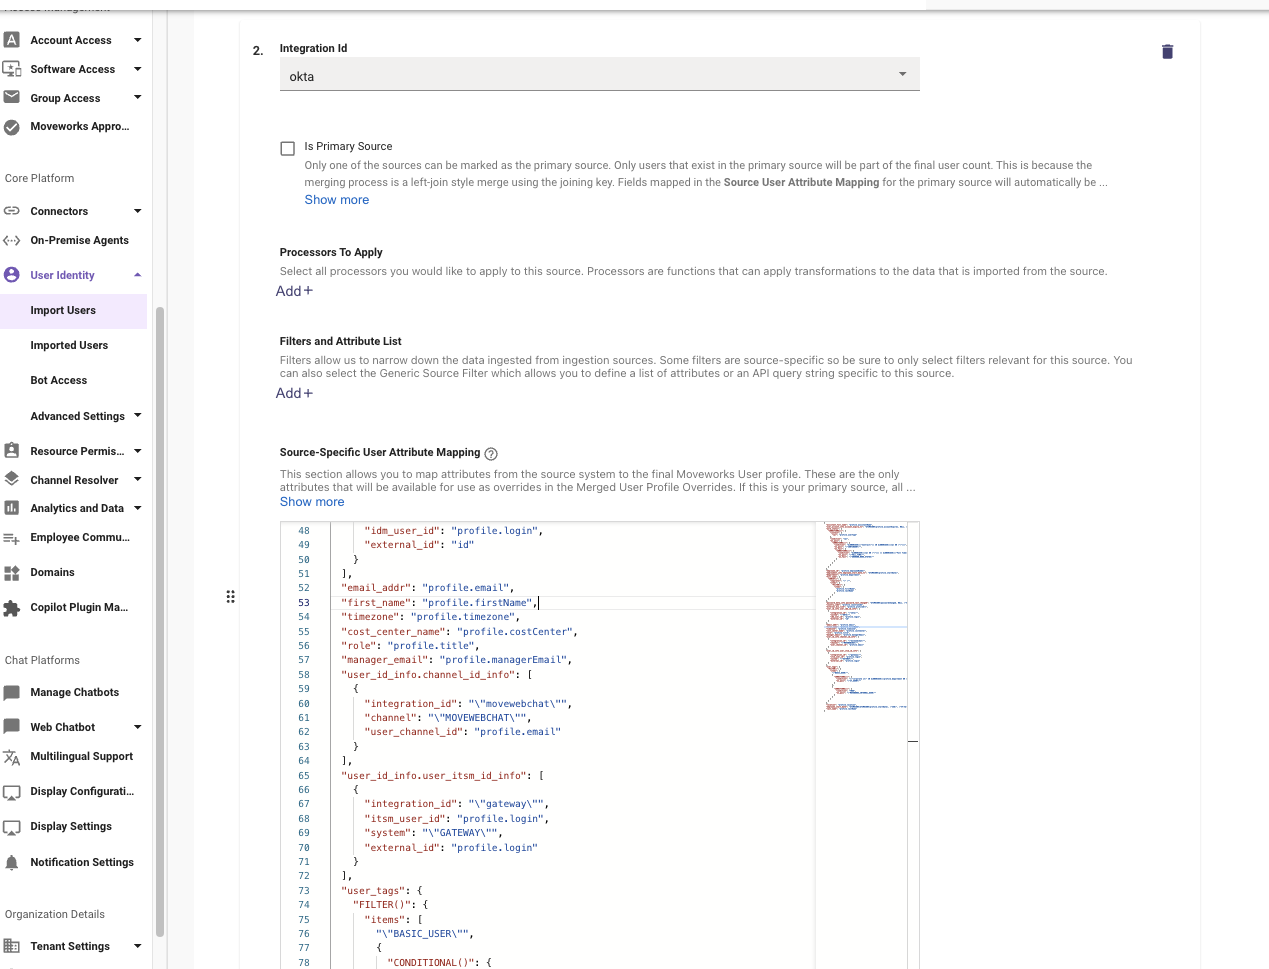
- Add in a custom_attributes JSON object and the attribute that should be saved to the user roster.
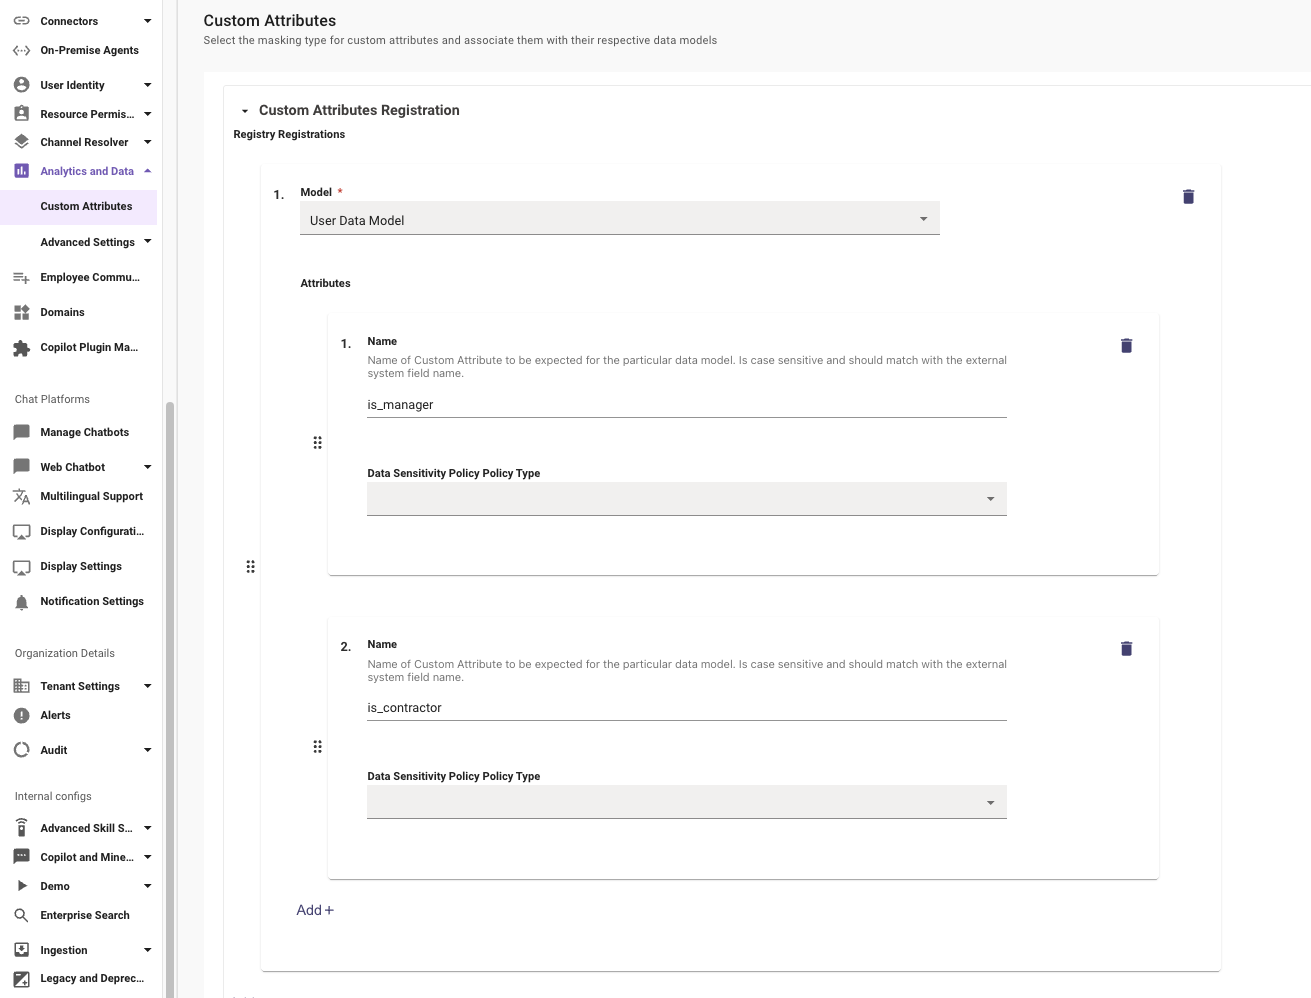
- In this example, there are two okta fields that will be ingested as custom attributes. is_manager and is_contractor. In okta, all user fields are stored within the profile object. This is different per other system APIs.
- Click Submit in the lower right.
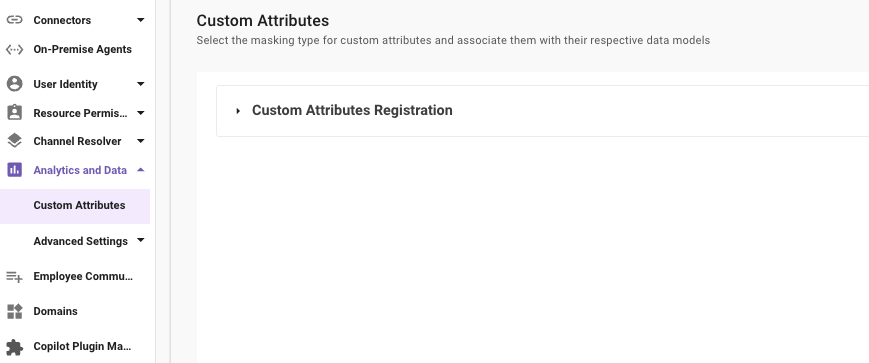
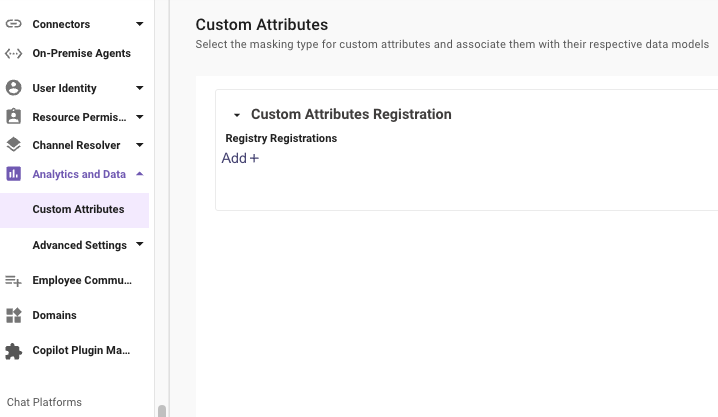
Next, navigate to Analytics and Data -> Custom Attributes.
- Click on the Custom Attributes Registration toggle.
- Click Add +
- The Model dropdown will be User Data Model.

- Click Add + to add a blank Attributes object
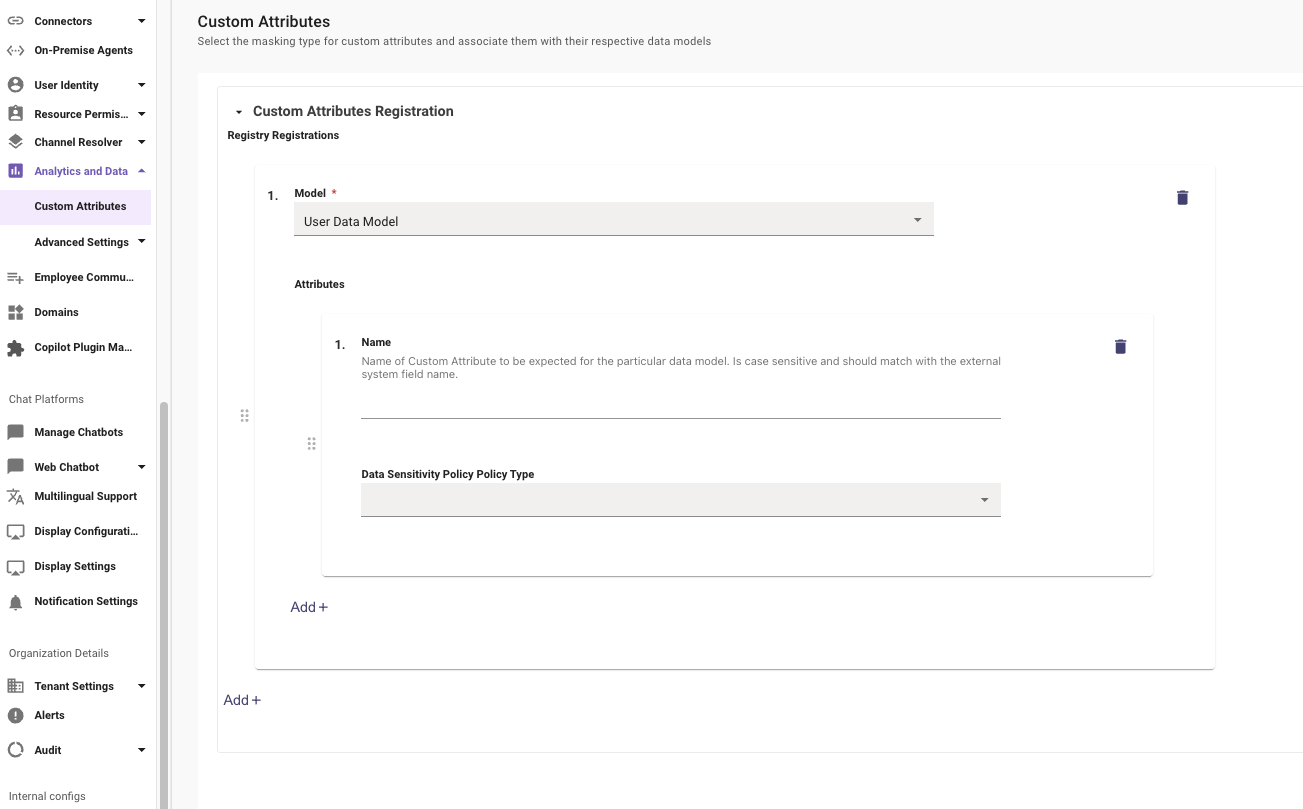
- The Name will be the custom attribute name that was listed within the Import Users mapper.
- The Data Sensitivity Policy Policy Type dropdown will be set to Customer Data.
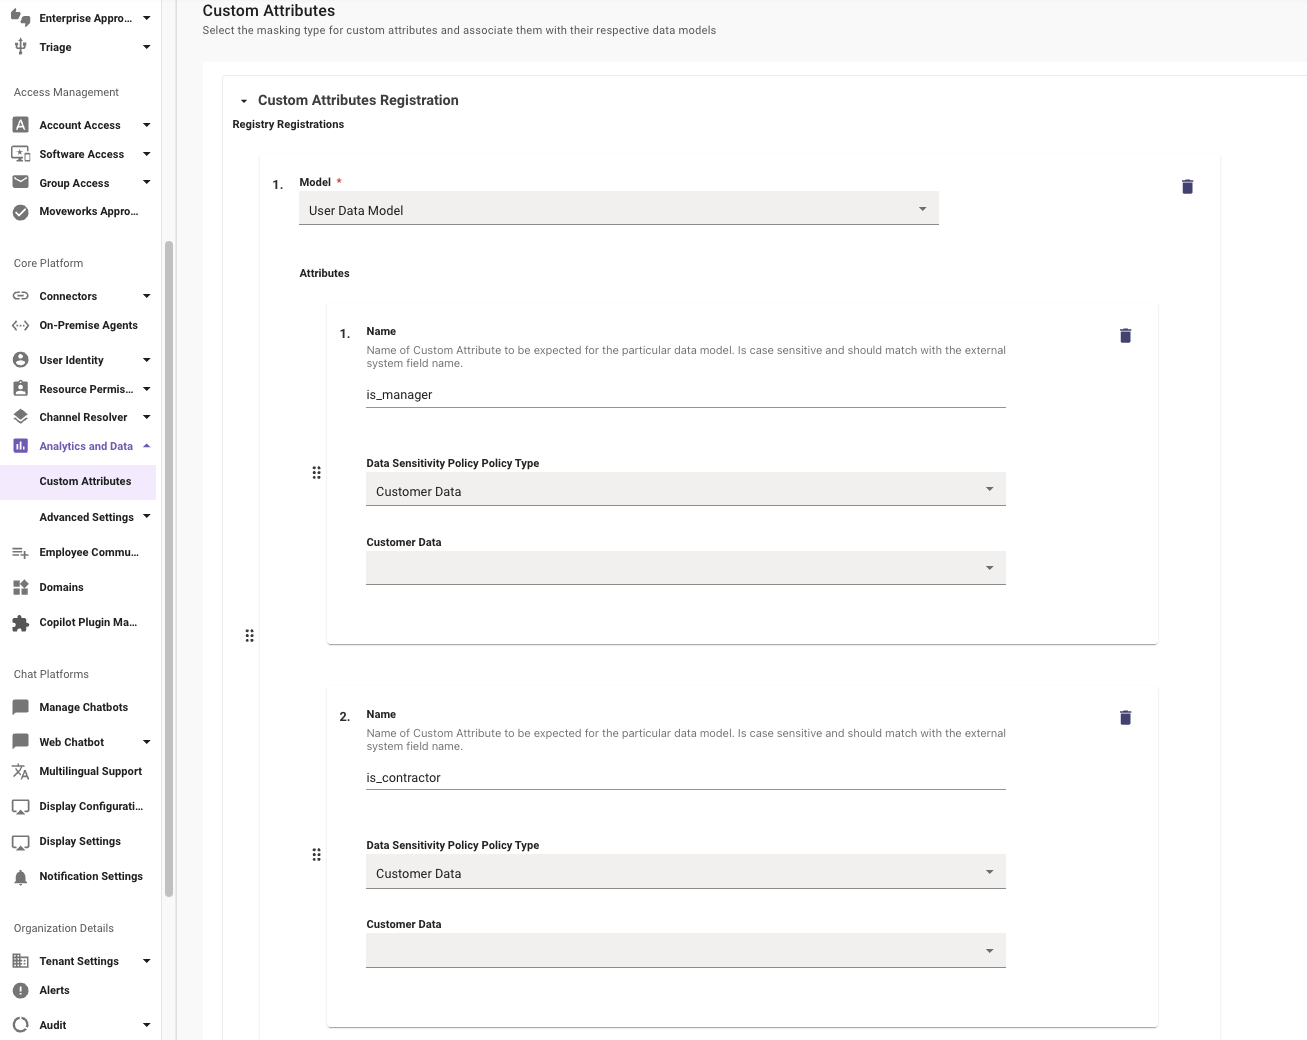
- The Customer Data dropdown will be set to CUSTOMER_DATA_USER_DATA.
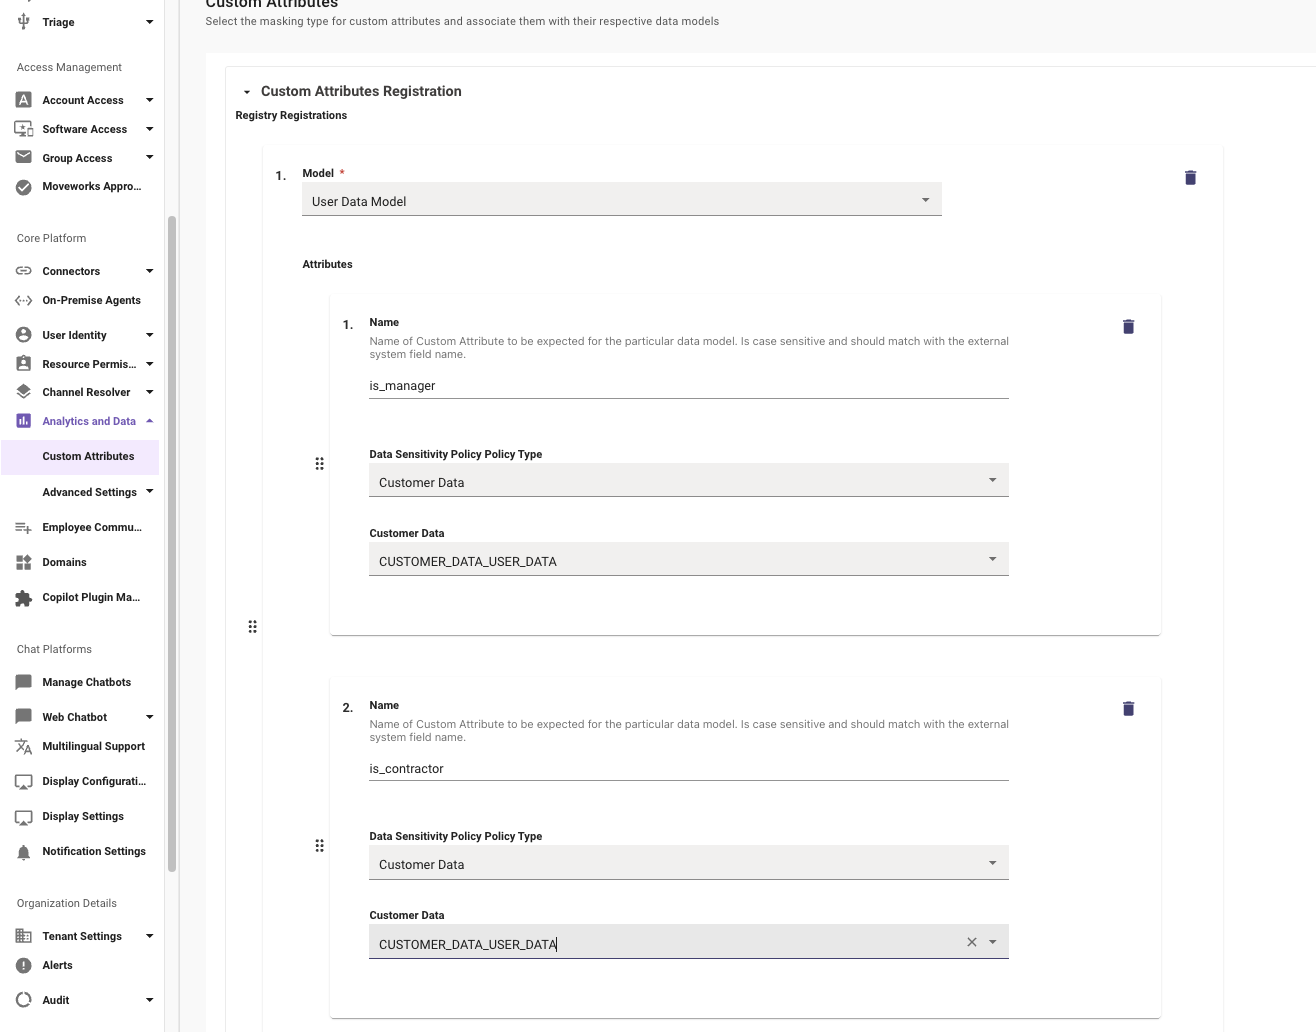
- Click Submit in the lower right.
Validation
This new custom attribute can be found within the User Identity -> Imported User roster lookup after the next user ingestion. It can take 24 - 48 hours for a custom attributes to propagate to the user roster.
Updated 15 days ago