Embedded AI Assistant SSO Configuration - Okta SAML SSO
Installing Embedded AI Assistant with a Code Snippet and Okta SAML SSO
This method of installation allows you to embed Embedded AI Assistant on any webpage governed by Okta Single Sign-On (SSO), as long as the page supports HTML/JavaScript editing. It simply requires setting up an Okta application and then pasting a code snippet onto your target pages.
Installation Participants
On the day of installation, we need these individuals from your team on the call:
- Okta super admin
- Must be able to add a new application and make tenant-level configuration changes.
- Target host admin(s)
- Must be able to paste an HTML/JavaScript code snippet onto the target page or site.
Installation Overview
Moveworks can walk you through the Okta application installation on a call in about 15 minutes.
Setting up the Okta application is a one-time activity and from then on you are free to paste the code snippet onto any other site governed by your Okta SSO at your convenience.
Moveworks will provide the following:
- Unique Customer Identifier String
- Unique Customer Code Snippet
Step 1: Review Security Overview document and Verify Okta tenant is configured to support iFrames
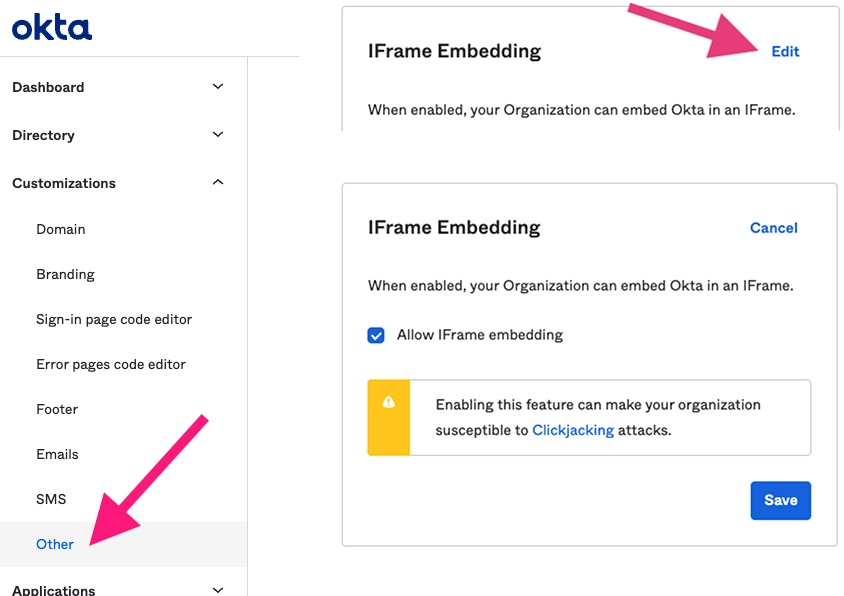
Embedded AI Assistant is an iframe-based application since the entire chat is hosted on Moveworks’ domain. Okta allows these kinds of applications to be installed by enabling a tenant-wide configuration (see screenshot below).
Enabling this feature is necessary for Embedded AI Assistant to function, however, it does allow other Okta applications to utilize iFrames as well. By enabling this feature within the Okta tenant, customer’s security posture may be weakened since this may enable attackers to perform a clickjacking attack against end users. Customers may sign up for Okta’s beta program feature for trusted origins which only allows explicitly specified domains to be displayed in iFrames, such as Moveworks. We highly recommend customers review this with their security team (or an equivalent) before enabling this feature.
For further information about this feature please see:
- Okta iFrame solution: https://support.okta.com/help/s/article/Okta-in-IFrame-is-not-working?language=en_US
- Trusted Origins for iFrame embedding (beta feature): https://help.okta.com/en-us/Content/Topics/API/trusted-origins-iframe.htm
Step 2: Okta App Setup Instructions
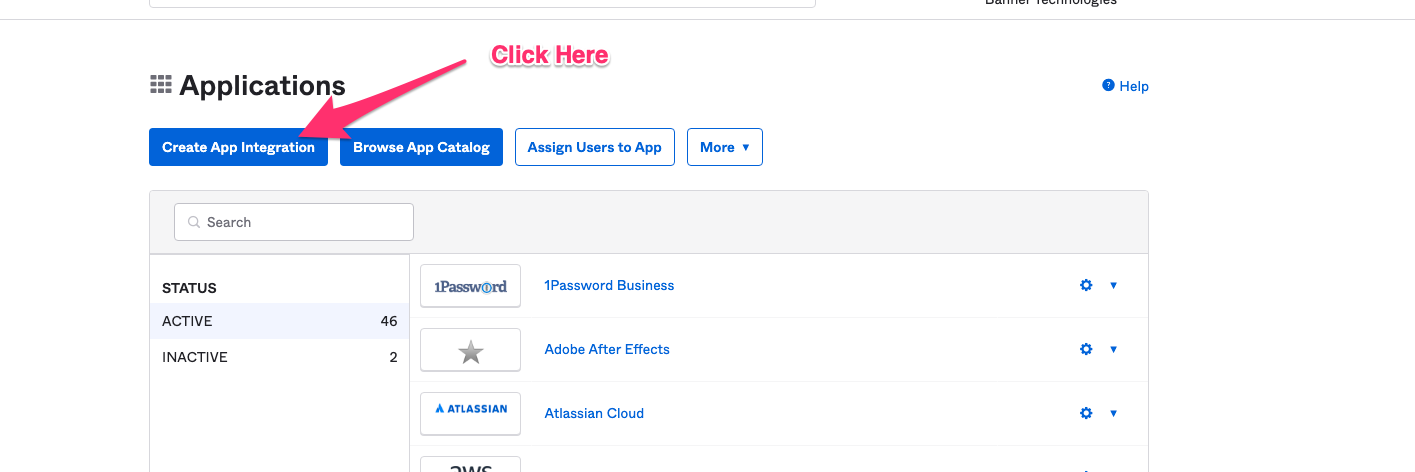
Go to the screen that lets you create Applications.
Click on Create App Integration.
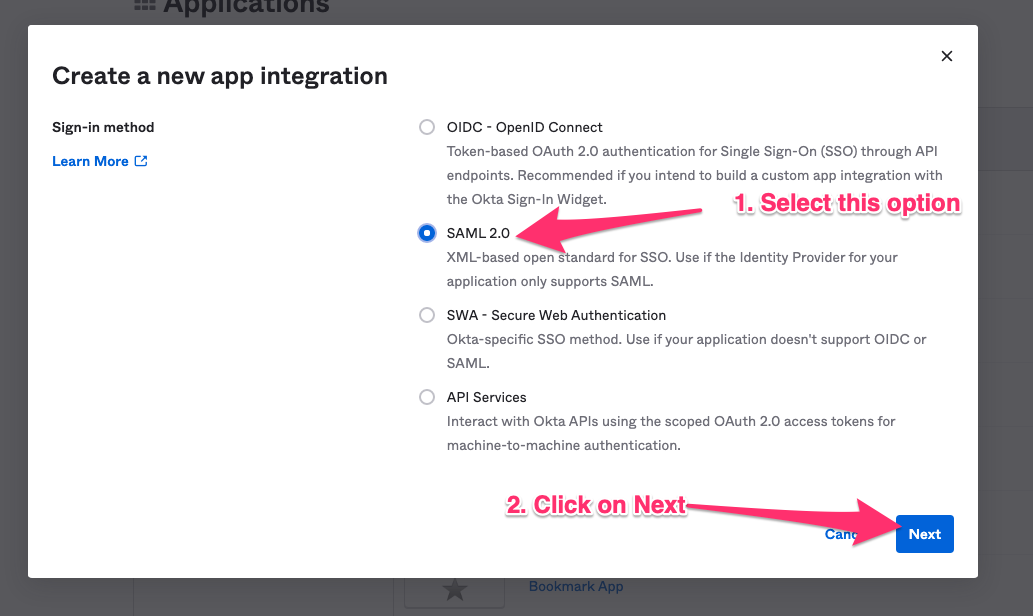
Select SAML 2.0 in the next screen.
Specify a name for the application. Moveworks recommends using your bot’s name.
Check the box to not display the AI Assistant as an application among your users’ Okta chiclets.
Click next to configure the application.

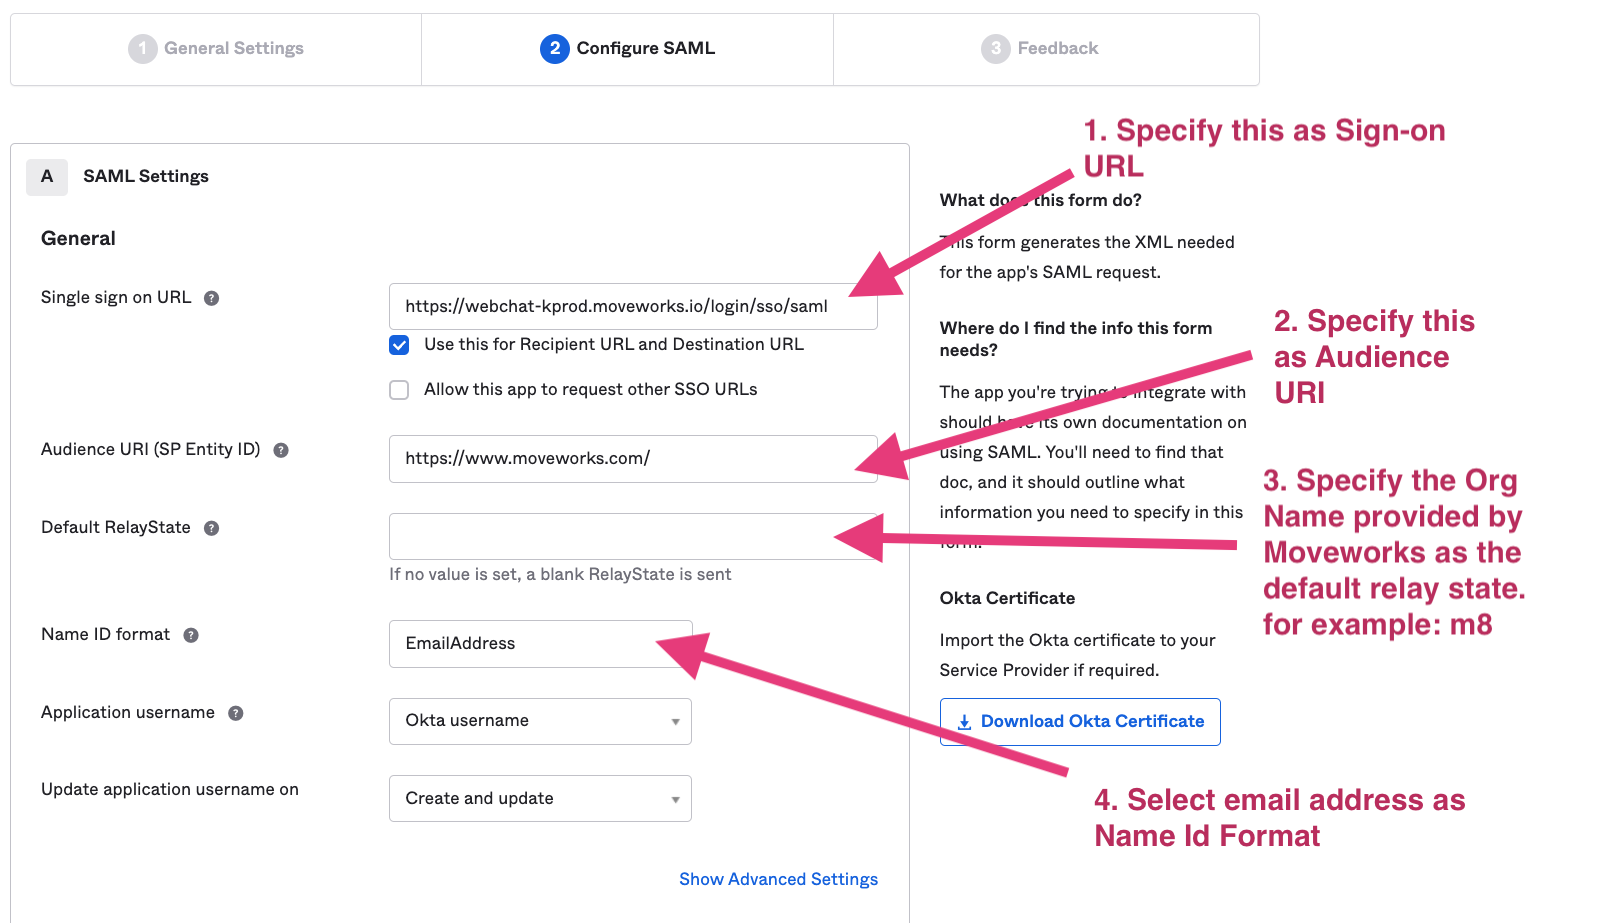
Based on your AI Assistant environment, set the Single sign on URL as one of the following:
Commercial Environment: https://webchat-kprod.moveworks.io/login/sso/saml GovCloud Environment: https://webchat.moveworksgov.com/login/sso/saml EU Environment: https://webchat.prod.am-euc1.moveworks.io/login/sso/saml Canada Environment: https://webchat.prod.am-cac1.moveworks.io/login/sso/saml
Specify https://www.moveworks.com/ as the Audience URI.
In Default Relay State: Add the unique customer identifier string provided by Moveworks.
Select email address as the Name ID format.
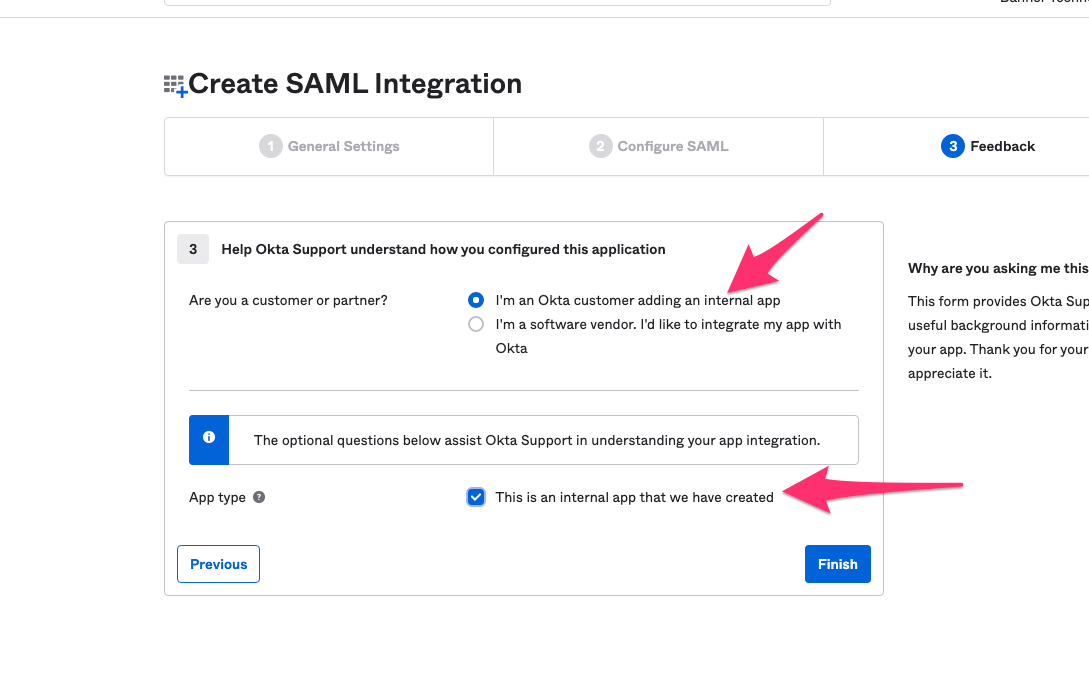
On the Feedback panel, select the following options.
Step 3: Record configuration info about your app
- Go the Sign On tab and click on View Setup Instructions.
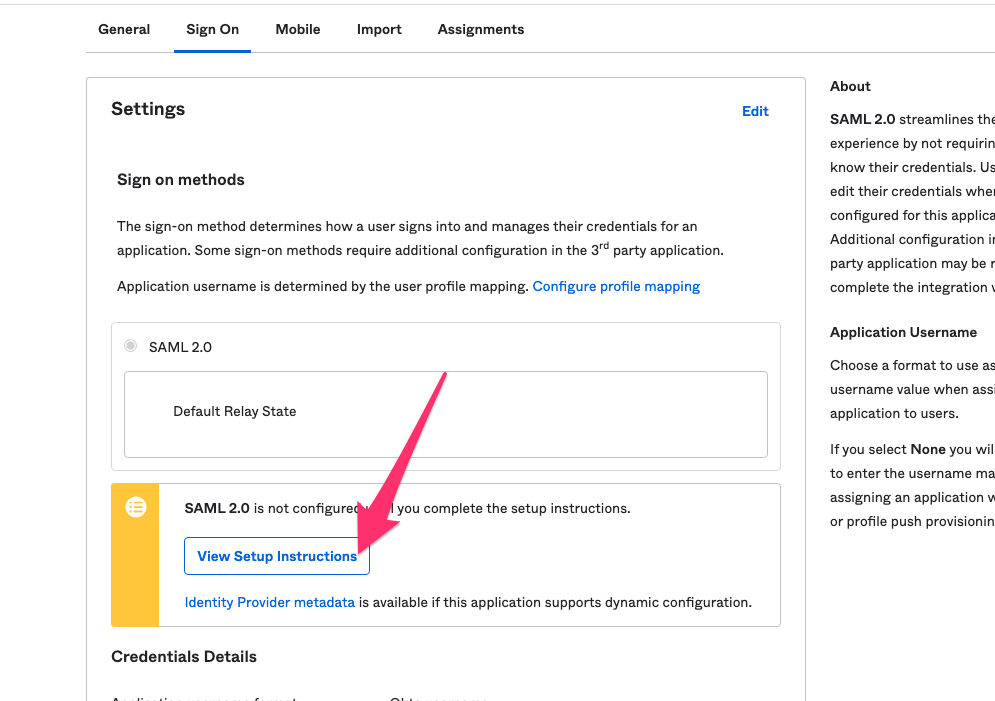
-
Note down the following:
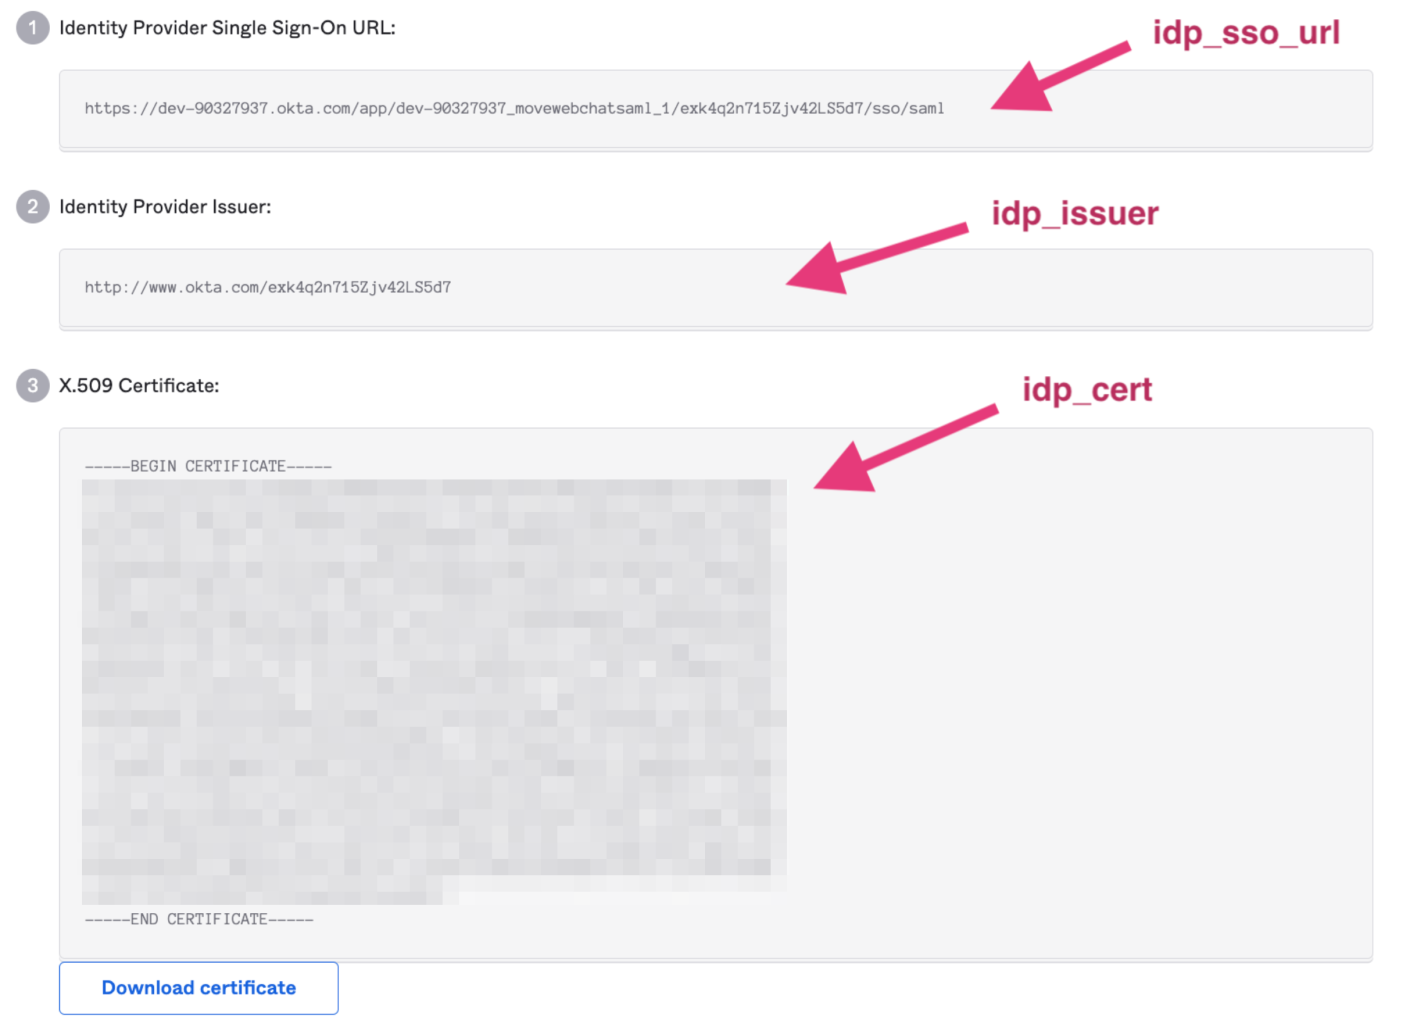
- Identity Provider Single Sign-On URL
- Identity Provider Issuer
- X.509 Certificate
-
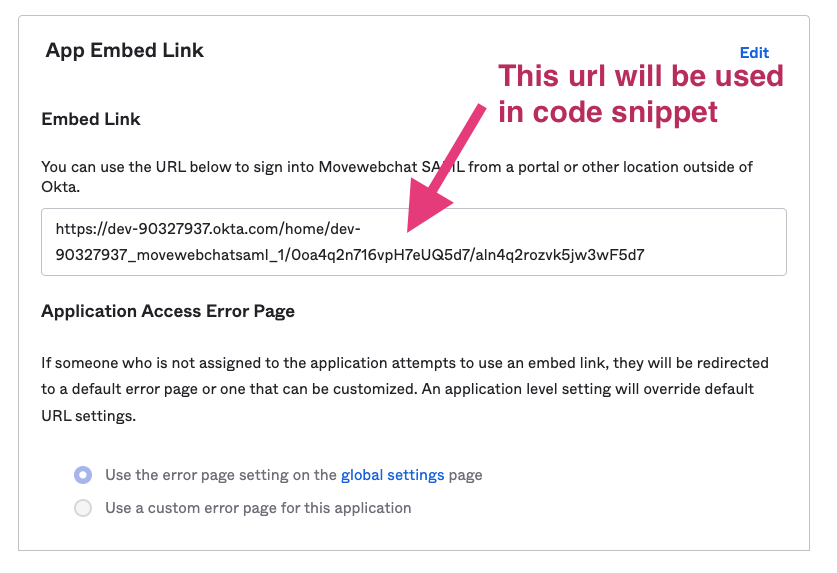
Embed Link:
Step 4: Complete your Configuration in Moveworks Setup
After setup is complete, login to Moveworks Setup to add the SSO application details.
- Within Moveworks Setup, navigate to Single Sign-on (SSO)
- Click create to create a new SSO configuration
- Input the following details:
- Moveworks Product: Movewebchat
- Select Connector: Okta
- Authentication Protocol: SAML
- IDP Sign On/ SSO URL
- IDP Issuer/Identifier ID
- IDP Public Certificate
Create Moveworks Setup Authentication Configuration
- Within Moveworks Setup, Navigate to Web Chatbot > Authentication and click create to create a new authentication record
- Set Auth Config to Generic SSO
- Set SSO Config to the SSO configuration record you created in the previous section of this guide.
- Set Auth Key to defaultfor single SSO authentication setups. For setups where you have multiple SSO systems users use to authenticate, follow the Multi SSO Configuration Guide
Configure the Embedded AI Assistant
You will need to follow the Embedded AI Assistant Configuration Guide to complete the remaining setup steps if you have not done so already.
Updated about 1 month ago