AI Assistant in Microsoft 365 (MS Teams + MS Graph) Access Requirements
This method is only applicable for customers hosted in the US commercial data centers. For all other regions, use the Non-App Store guide.
Prerequisite
As part of this set up process, you will need a Microsoft 365 Admin to consent to the following mandatory permissions:
- User.Read.All (Application Permission) is mandatory for purposes of identifying who a user is when they are messaging the AI Assistant in Microsoft Teams.
- TeamsAppInstallation.ReadWriteSelfForUser.All (Application Permission) - Is mandatory for the Moveworks AI Assistant to proactively message users in Microsoft Teams.
As part of the set up process, you can also allow the following optional permission:
- Group.ReadWrite.All (Application Permission) - is optional, and only required if your organization will be leveraging the AI Assistant for Group Management.
- DeviceManagementApps.Read.All (Application Permission) - is optional, and only required if you would like the Moveworks AI Assistant to serve deep links to items on your Intune Company Portal.
- Files.Read.All (Application Permission) - is optional, and only required if your organization will be leveraging the AI Assistant for Sharepoint File search feature.
- Groups.Read.All (Application Permission) - is optional, and only required if your organization will be leveraging the AI Assistant for mirroring Sharepoint permissions for File search feature.
- Sites.Read.All (Application Permission) - is optional, and only required if your organization will be leveraging the AI Assistant for Sharepoint Knowledge Ingestion capabilities.
Ensure Proper Networking Allowlist Rules
If you are leveraging a Firewall, CASB, or VDI, and have another layer of network firewall rules. Ensure the following Moveworks owned domain is in an allowlist so that Moveworks can render content in Microsoft Teams Task Modules.
https://app.moveworks.ai`
Teams App Store AI Assistant Installation
- Under Manage Apps, search for Moveworks (Note: The Moveworks AI Assistant will say No under Custom app)
NOTE: If you cannot find the app in the Microsoft Teams App Store, try navigating to the AppSource Store: https://appsource.microsoft.com/en-us/product/office/WA200002149?tab=Overview

- Once you have added the AI Assistant to your tenant, you will need to authorize the API scopes for the app. To do this, navigate to the following URL, replace
CUSTOMERTENANT_IDwith the ID of the tenant you are installing the AI Assistant to: - Select Grant admin consent
- Once you have granted admin consent, You can store the Tenant ID which will be used in the Chat Bot config to validate the connection from Moveworks to your Microsoft Tenant works as expected.
- You can follow this guide on How To Deploy a Teams AI Assistant. In order to utilise these Credentials and Deploy the Assistant on your Teams Tenant.
Note: If you cannot find the AI Assistant under Enterprise Application, try: https://login.microsoftonline.com/<CUSTOMER_TENANT_ID>/adminconsent?client_id=b8ec4e1a-e05a-49d0-ba3a-05119b8b62c0&state=12345&redirect_uri=https://www.moveworks.com/msteamsd
(Optional) Apply a Custom App Policy
Moveworks is able to ensure that the bot’s functionalities are only accessible by approved users during development. The AI Assistant will be visible in the MS Teams app store but users will not be able to communicate with it.
In some cases our customers would like to have more granular control over this access. You can do this in the Microsoft Teams Administration Console.
-
Navigate to https://admin.teams.microsoft.com/.
-
Go to the dashboard on the left → Select Teams apps> Setup policies -> Add New Policy.
-
Create a custom app policy to allow the AI Assistant you just created.
- NOTE: If a user is assigned a custom policy, that policy applies to the user. If a user isn't assigned a custom policy, the global policy applies to the user. This means if the org is using custom app setup policies already, then you will need to add the AI Assistant to all the app setup policies.
- Please ensure that your Implementation team is aware of any custom policies.
Customizing your Bot
After you’ve installed your AI Assistant into Microsoft Teams. You can customize your AI Assistant as your organization sees fit. When you are ready to start, visit the Customizing your Teams Appstore Bot Page to learn more
Configuring in Moveworks Setup
-
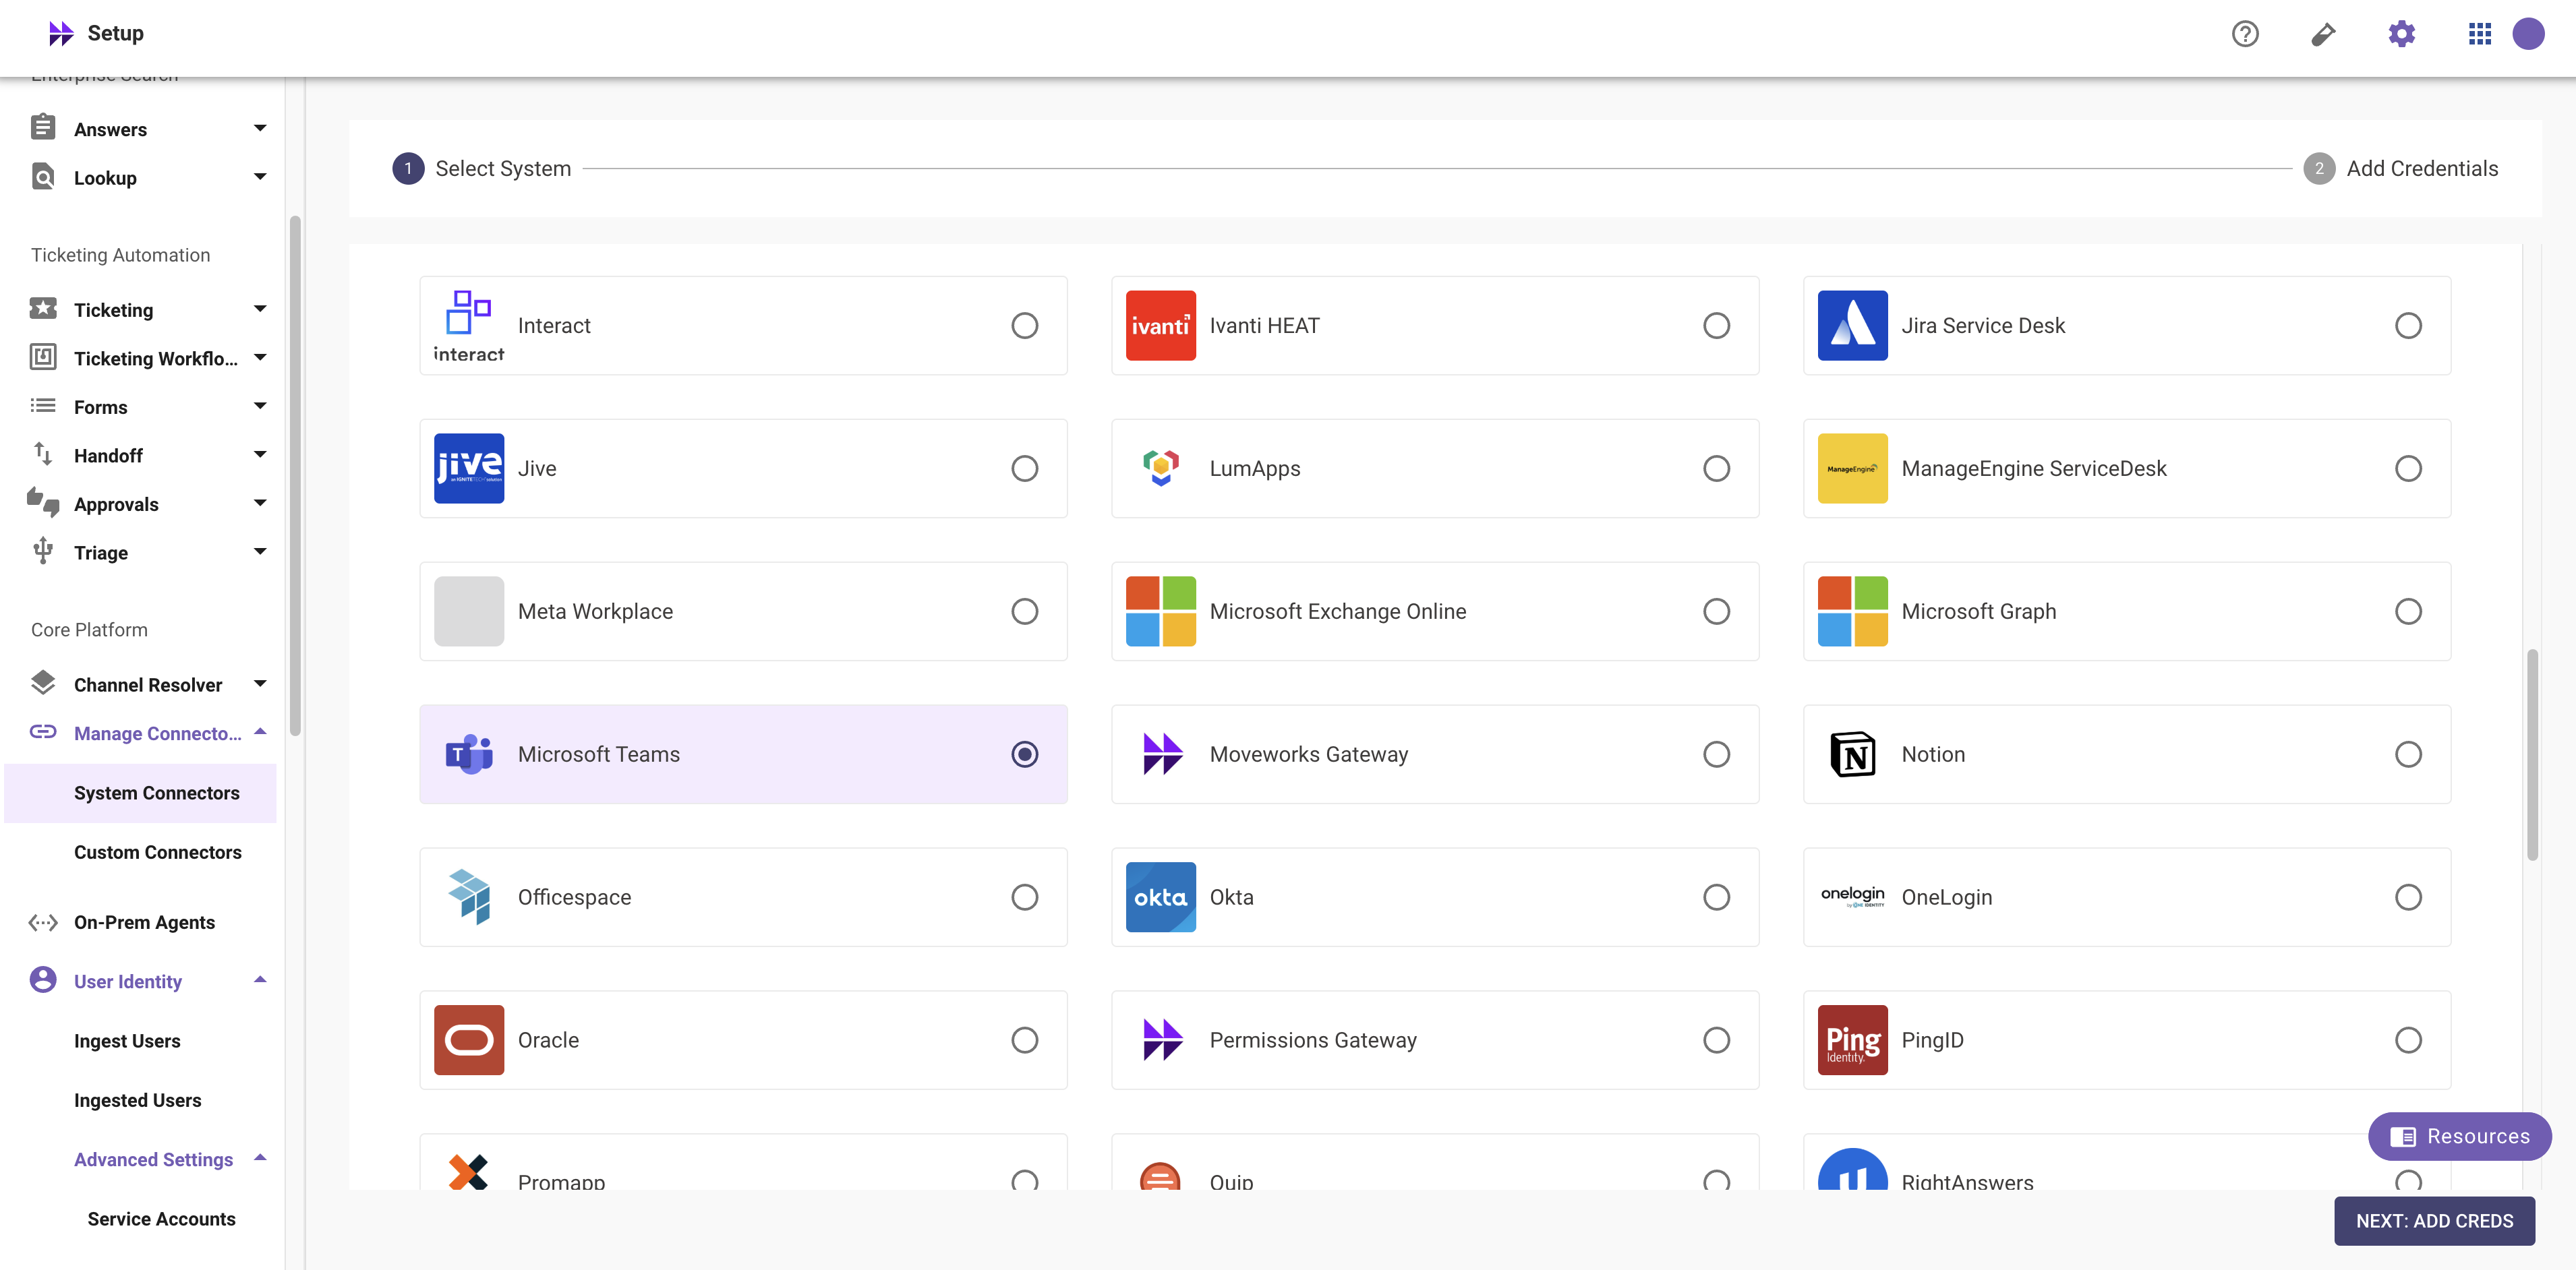
Navigate to Moveworks Setup Portal. Go to Core Platform > Manage Connectors > Built-in Connectors and select Microsoft Teams.
-
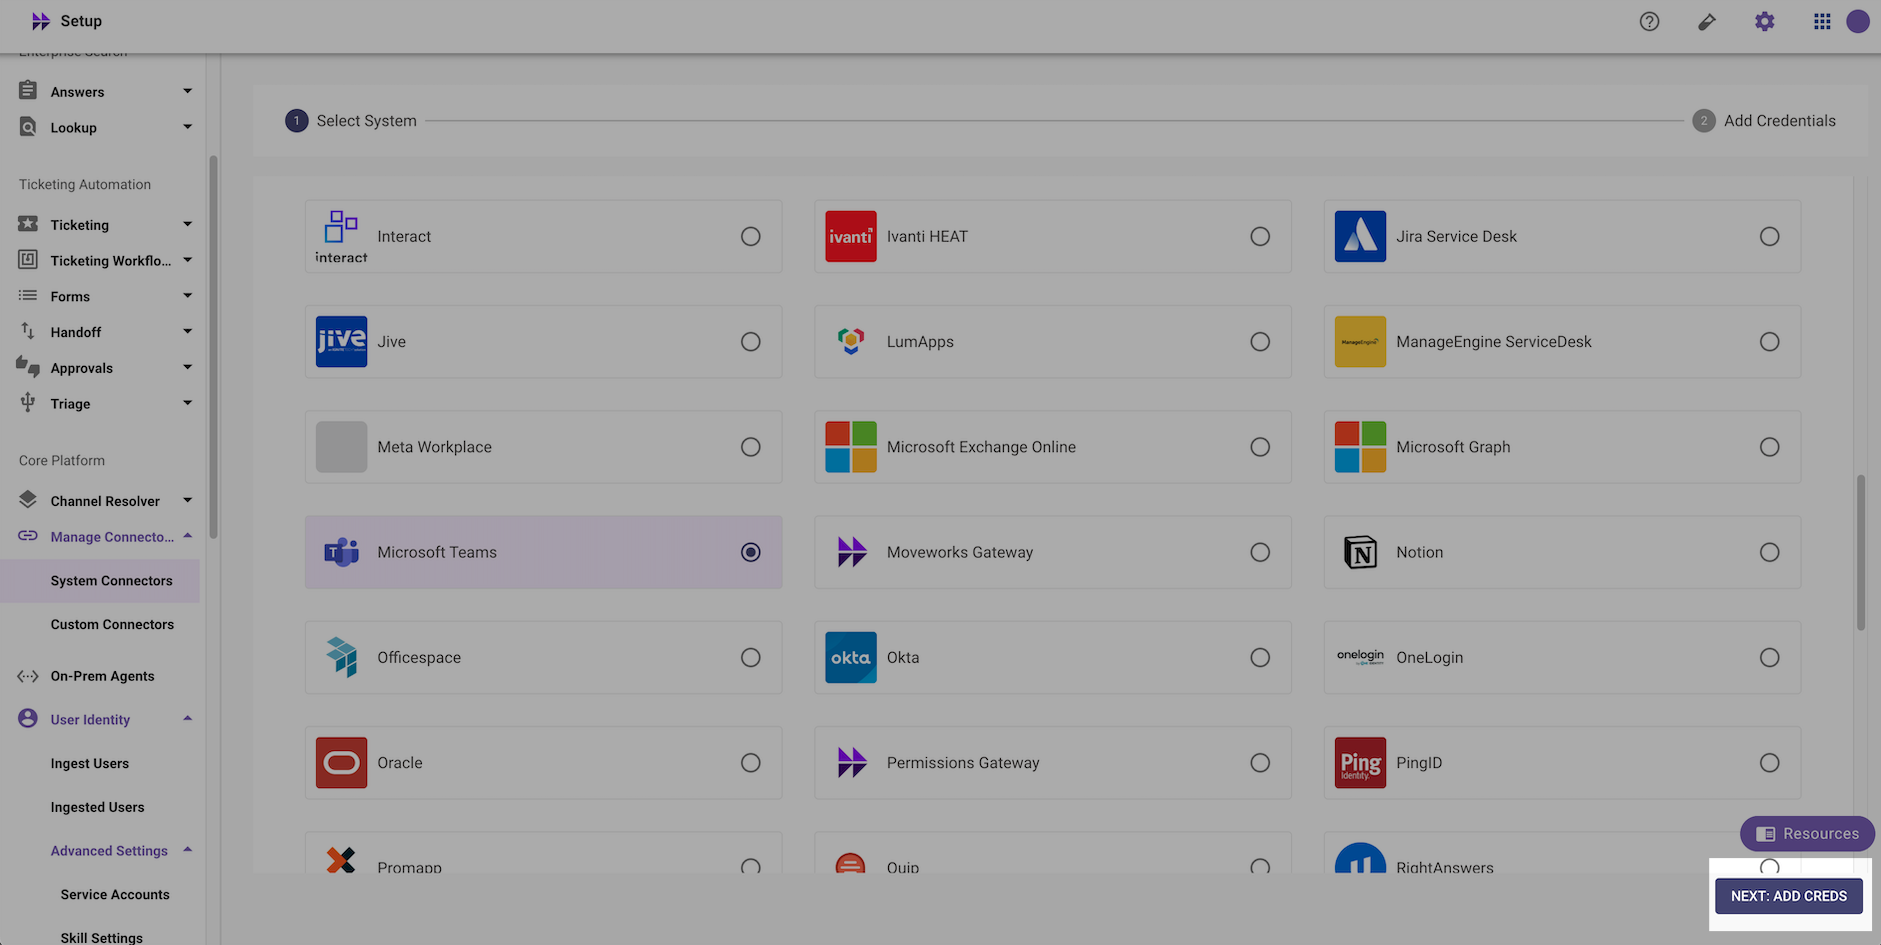
Click on NEXT: ADD CREDS
-
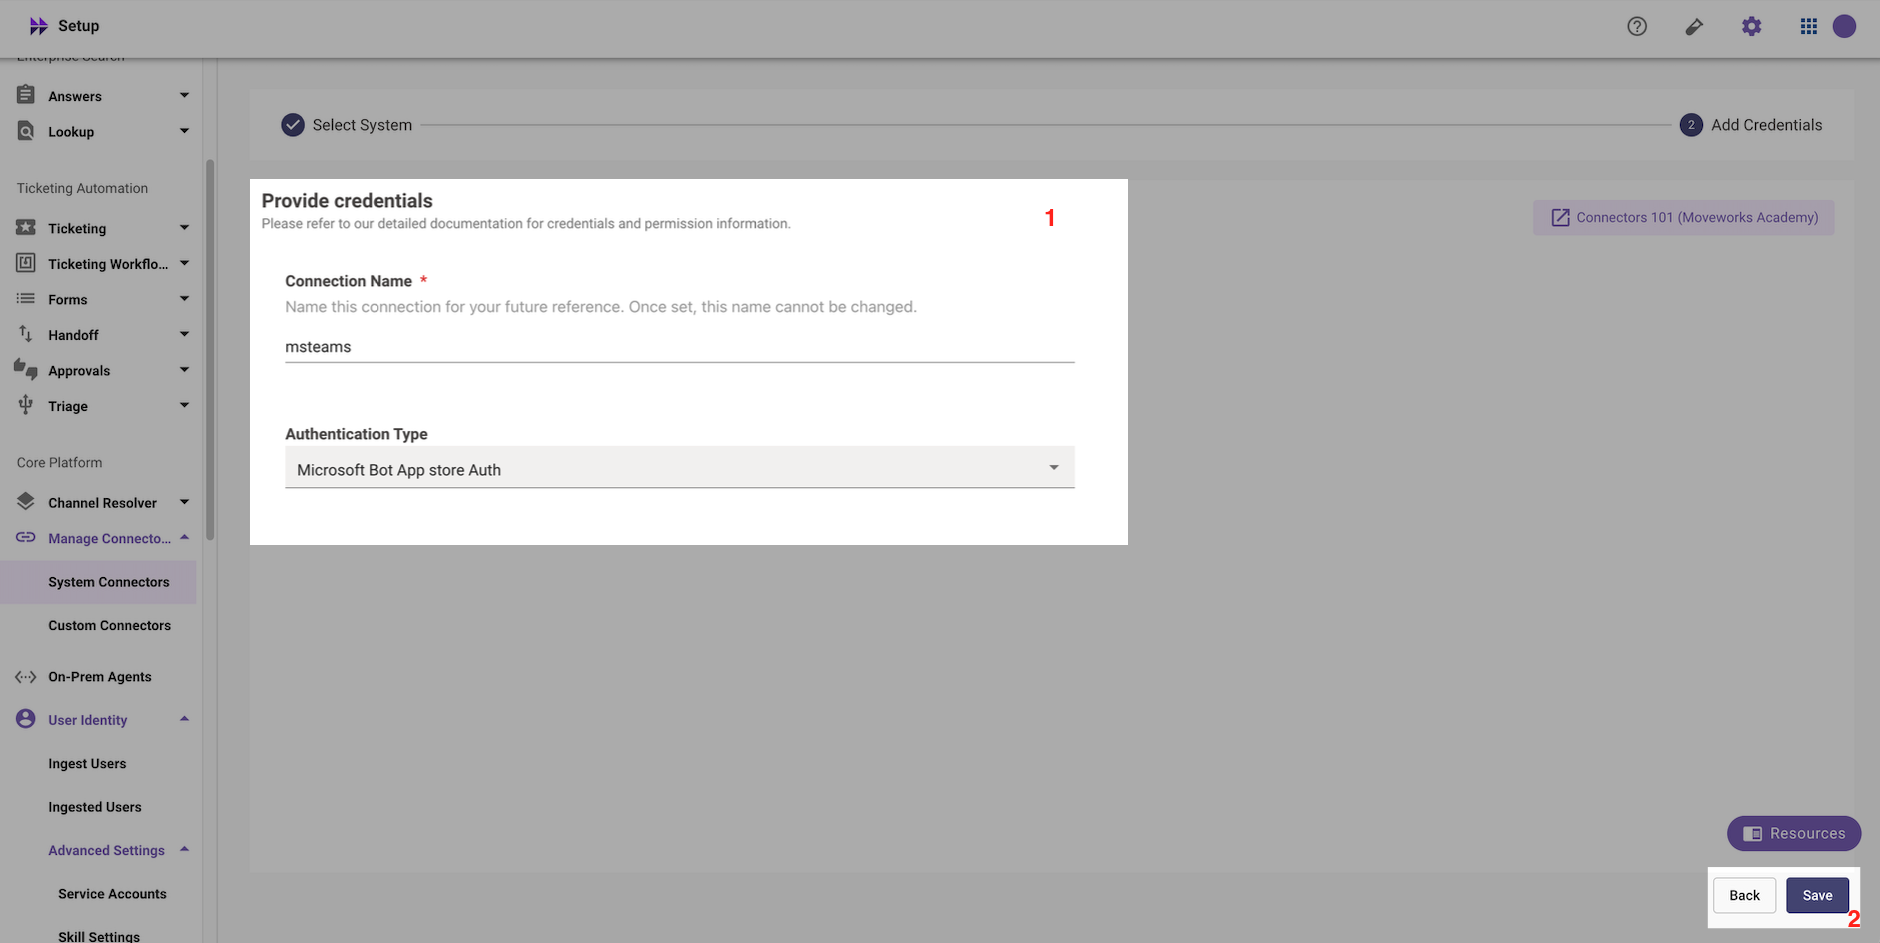
Add a Connection Name and select Authentication Type as Microsoft Bot App Store Auth. Click Save.
-
Navigate to Chat Platforms > Manage Chatbots and configure your Chatbot with the following settings. Be sure to replace:
- Bot Name
- Bot Friendly Name
- Microsoft Teams Tenant ID
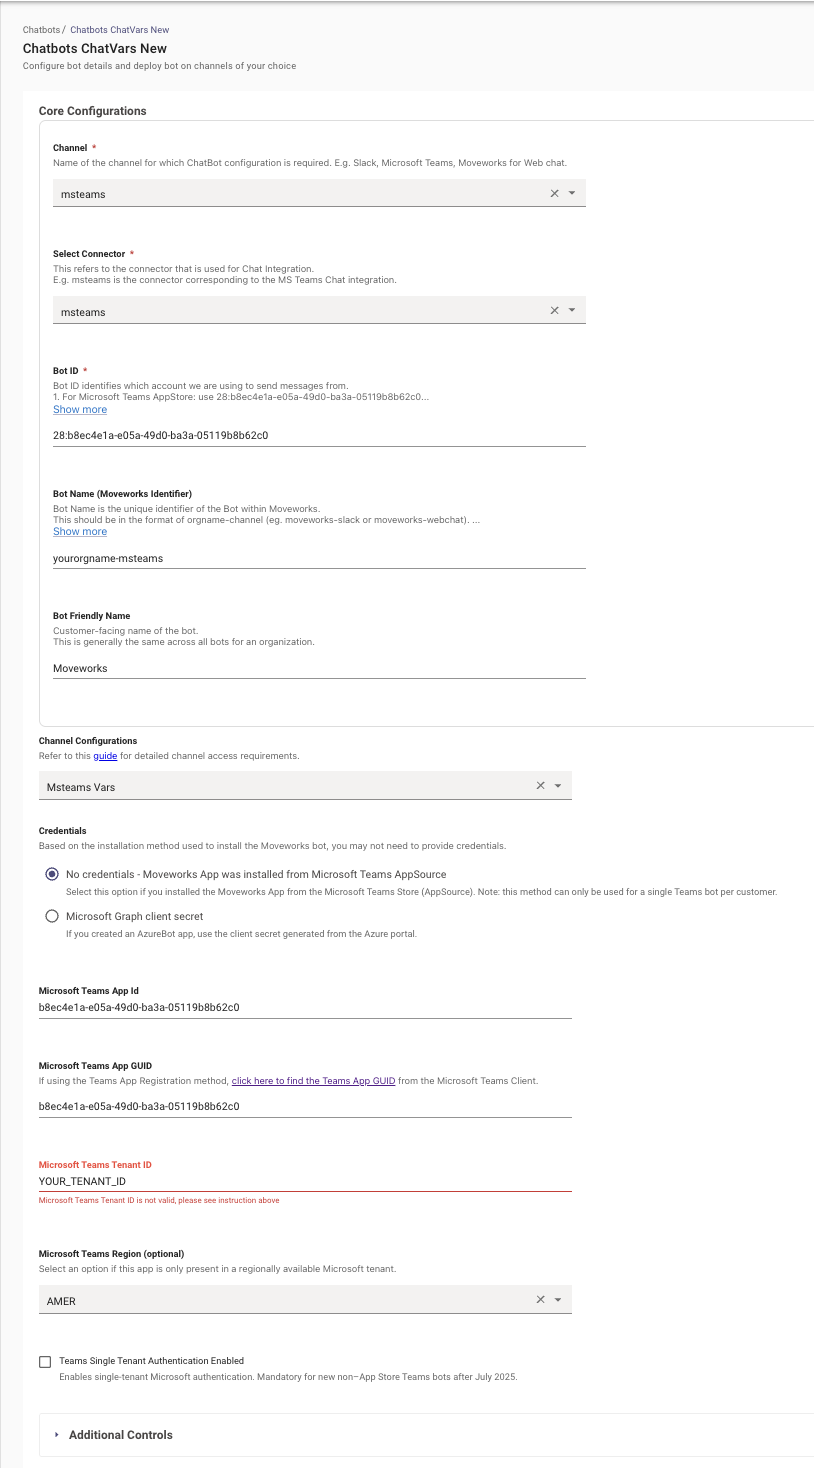
NOTE: All other configurations should match the screenshot above exactly
Pre-launch Steps
The steps below should be completed when the AI Assistant is ready for go-live.
Pin the App to the Microsoft Teams Sidebar
Pin for all employees
-
Visit admin.teams.microsoft.com.
-
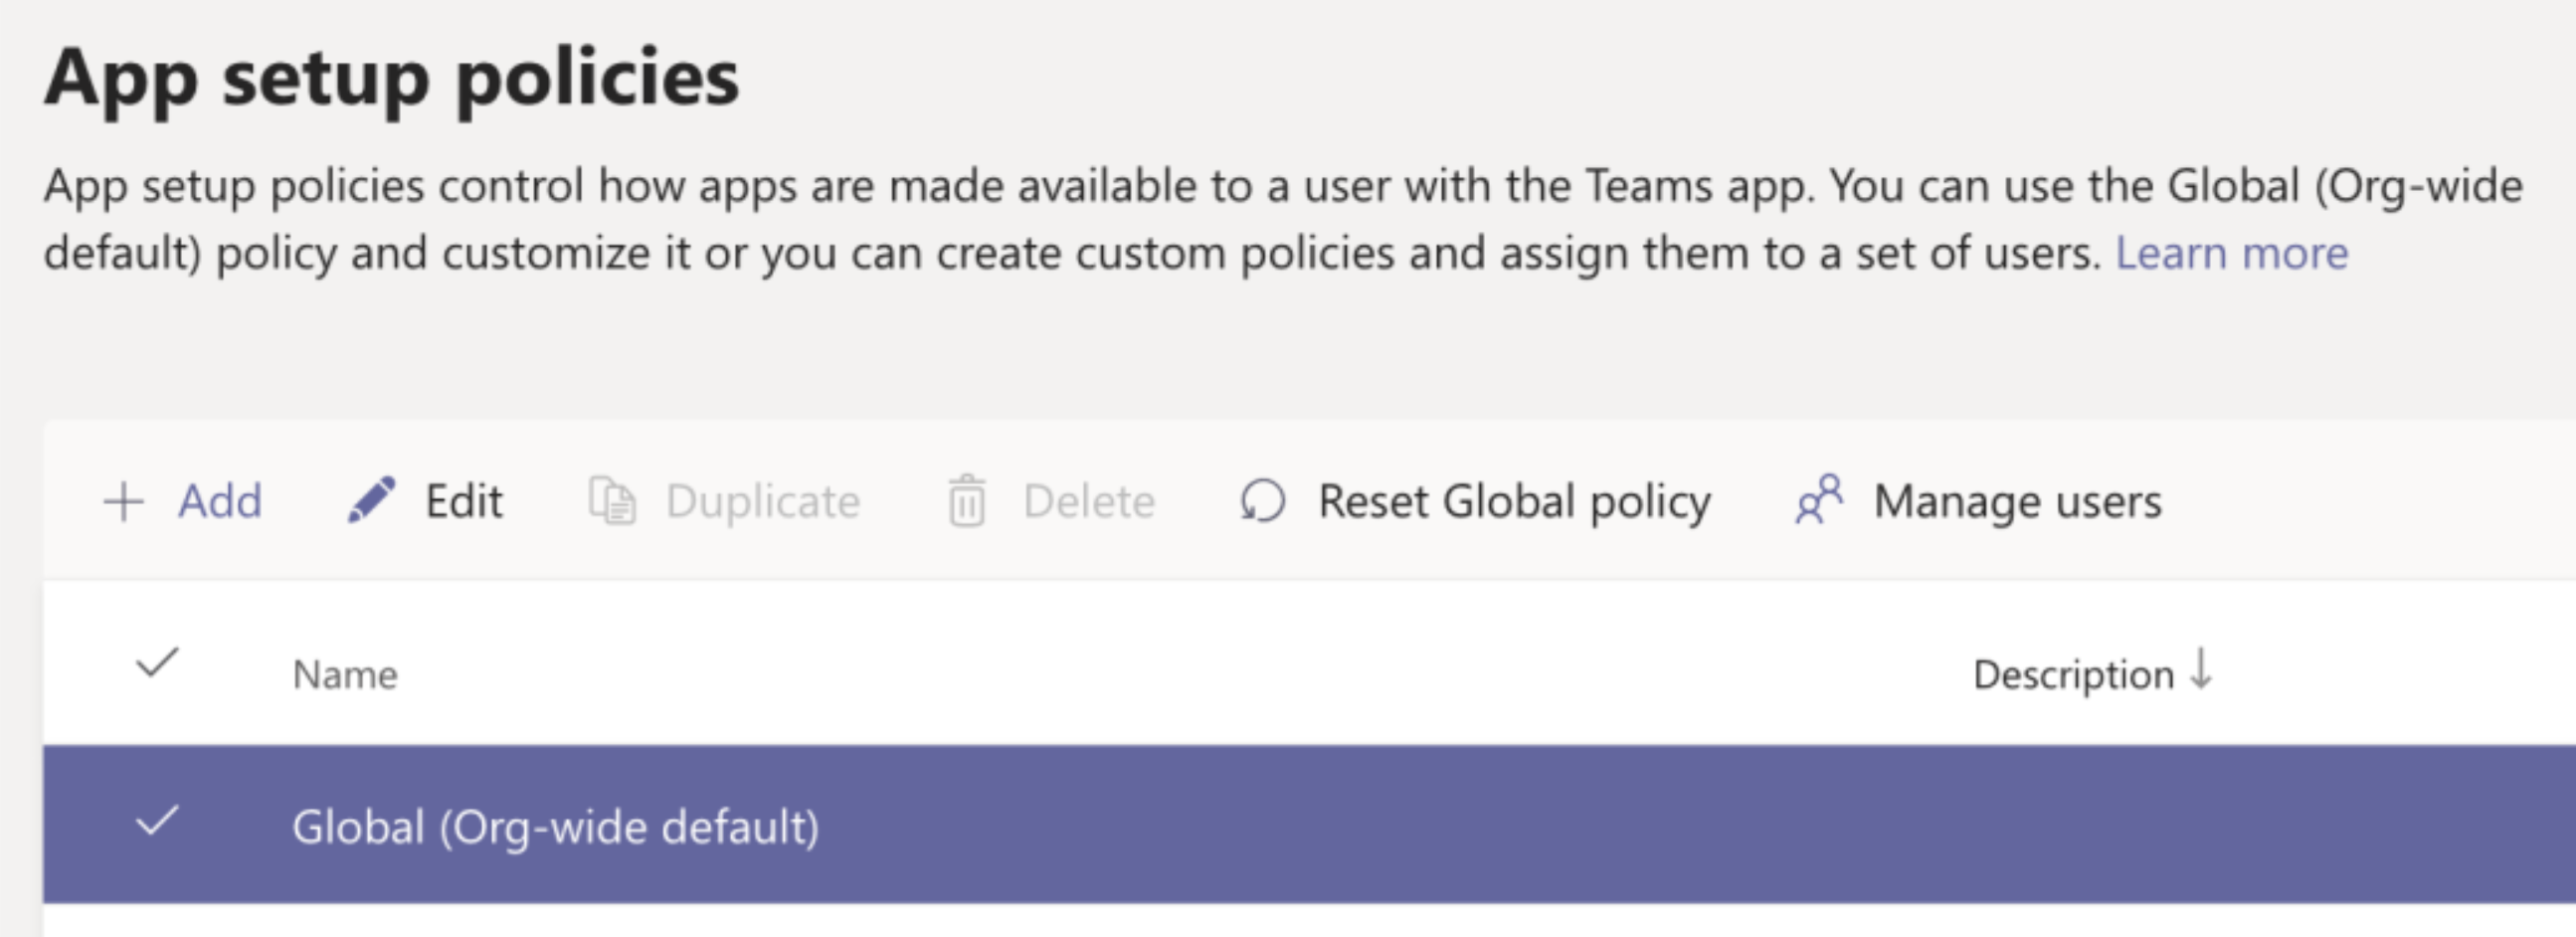
From the options on the left, select Teams apps ⇨ Setup policies.
-
Click on the Global (Org-wide default) policy and then click Edit.
-
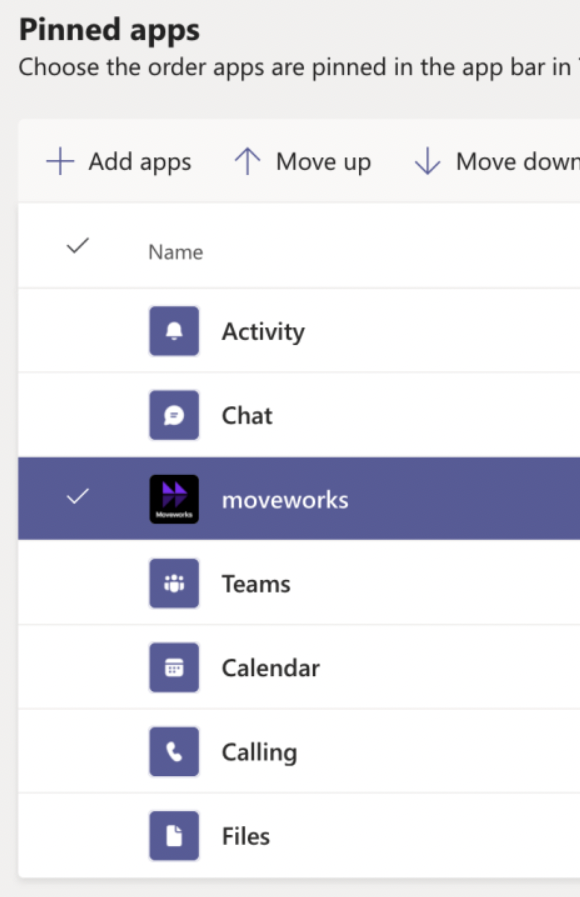
Toggle the order of the apps so that the installed AI Assistant application is below the Chat option.
Pin Teams app for a specific group of users
- Visit admin.teams.microsoft.com.
- From the options on the left, select Teams apps ⇨ Setup policies.
- Click on the + Add button to create a new Teams app setup policy (more info here: https://docs.microsoft.com/en-us/MicrosoftTeams/teams-app-setup-policies)
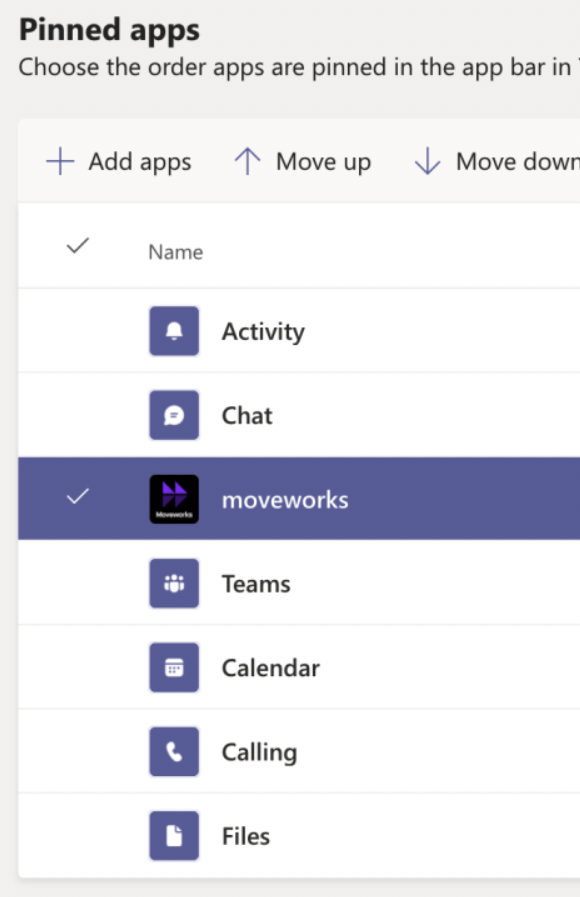
- Toggle the order of the apps so that the installed AI Assistant application is below the Chat option.
- Now you can select which users you want this specific policy to apply to. There are two options here - manual method and a Powershell method.
- Option A: Manually enter users to add to the policy
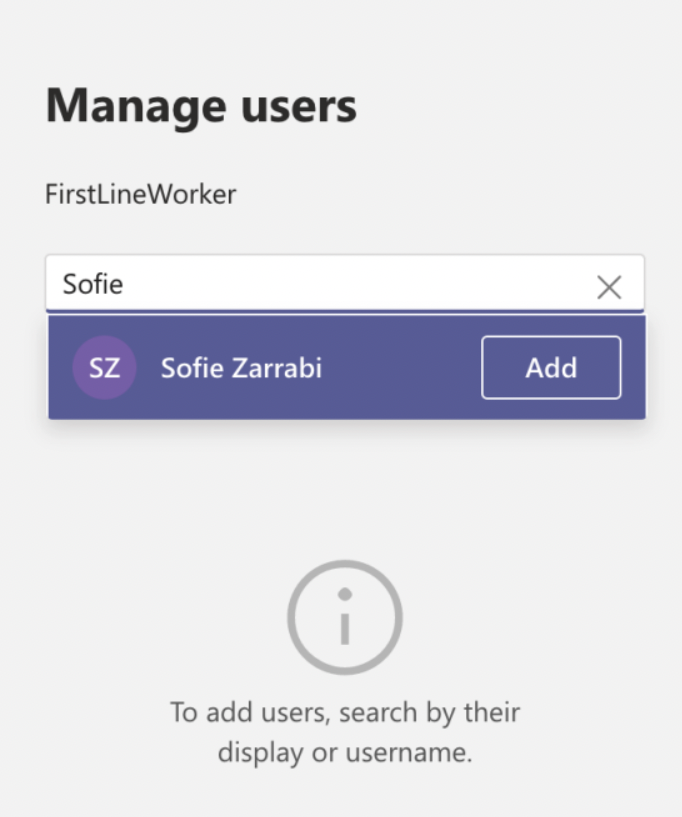
- Go back to the Setup policies page, select the newly created App setup policy and click Manage Users.
- Enter the names of users you want the policy to apply to. Click Apply..
- Option A: Manually enter users to add to the policy
-
Option B: Create policy for a specific group of users in Azure using Powershell
-
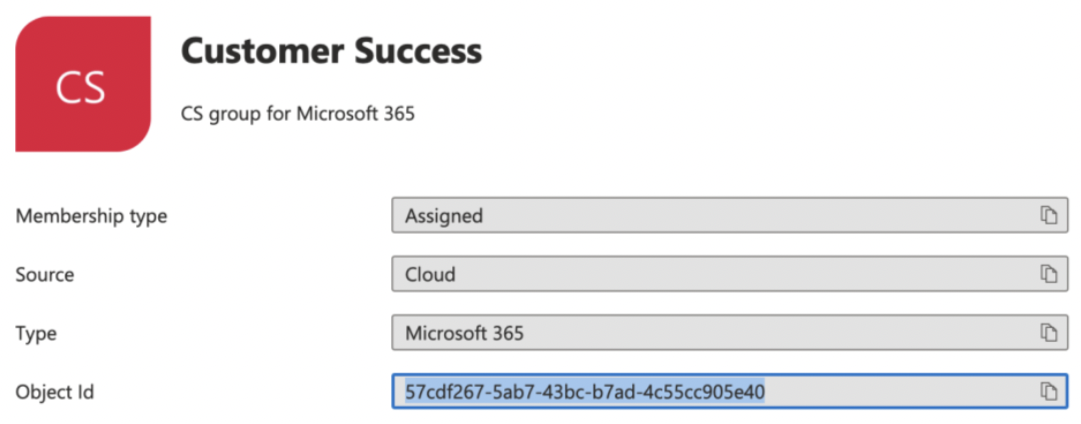
Locate your group in Azure that you want to apply the policy to. Copy the object id for the group.
-
Open Powershell and enter the following commands. Once complete this can take up to 72 hours to take effect, depending on the size of the group. See here for more information.
New-CsGroupPolicyAssignment -PolicyType TeamsAppSetupPolicy -GroupId <group_id> -PolicyName "Moveworks AI Assistant Users" -Rank 1

Get-CsGroupPolicyAssignment -GroupId <group_id>
Replace the group_id with the correct value above. The group_id is the Azure object id and “Moveworks AI Assistant Users” is the name of the policy you used in the previous step.Example based on above:
New-CsGroupPolicyAssignment -PolicyType TeamsAppSetupPolicy -GroupId 57cdf267-5ab7-43bc-b7ad-4c55cc905e40 -PolicyName "FirstLineWorker" -Rank 1

Get-CsGroupPolicyAssignment -GroupId 57cdf267-5ab7-43bc-b7ad-4c55cc905e40
-
Appendix
(Optional) Revoking Specific Permissions from the Moveworks ServicePrincipal
There may be cases where you want to remove some of the default permissions from the AI Assistant for your tenant for security purposes. Please note that the following permissions are mandatory for the Teams AI Assistant to work:
- User.Read.All (Application Permission) is mandatory for purposes of identifying who a user is when they are messaging the AI Assistant in Microsoft Teams.
- TeamsAppInstallation.ReadWriteSelfForUser.All (Application Permission) - Is mandatory for the Moveworks AI Assistant to proactively message users in Microsoft Teams.
If you are not going to leverage a specific permission, you can remove the permission from the application using the Azure Portal or Azure Powershell. The instructions below walk through the steps:
Revoking Specific Permissions using the Azure Portal
-
Go to Enterprise applications. Search "moveworks-teamsappstore-prod". Select the moveworks-teamsappstore-prod app.

-
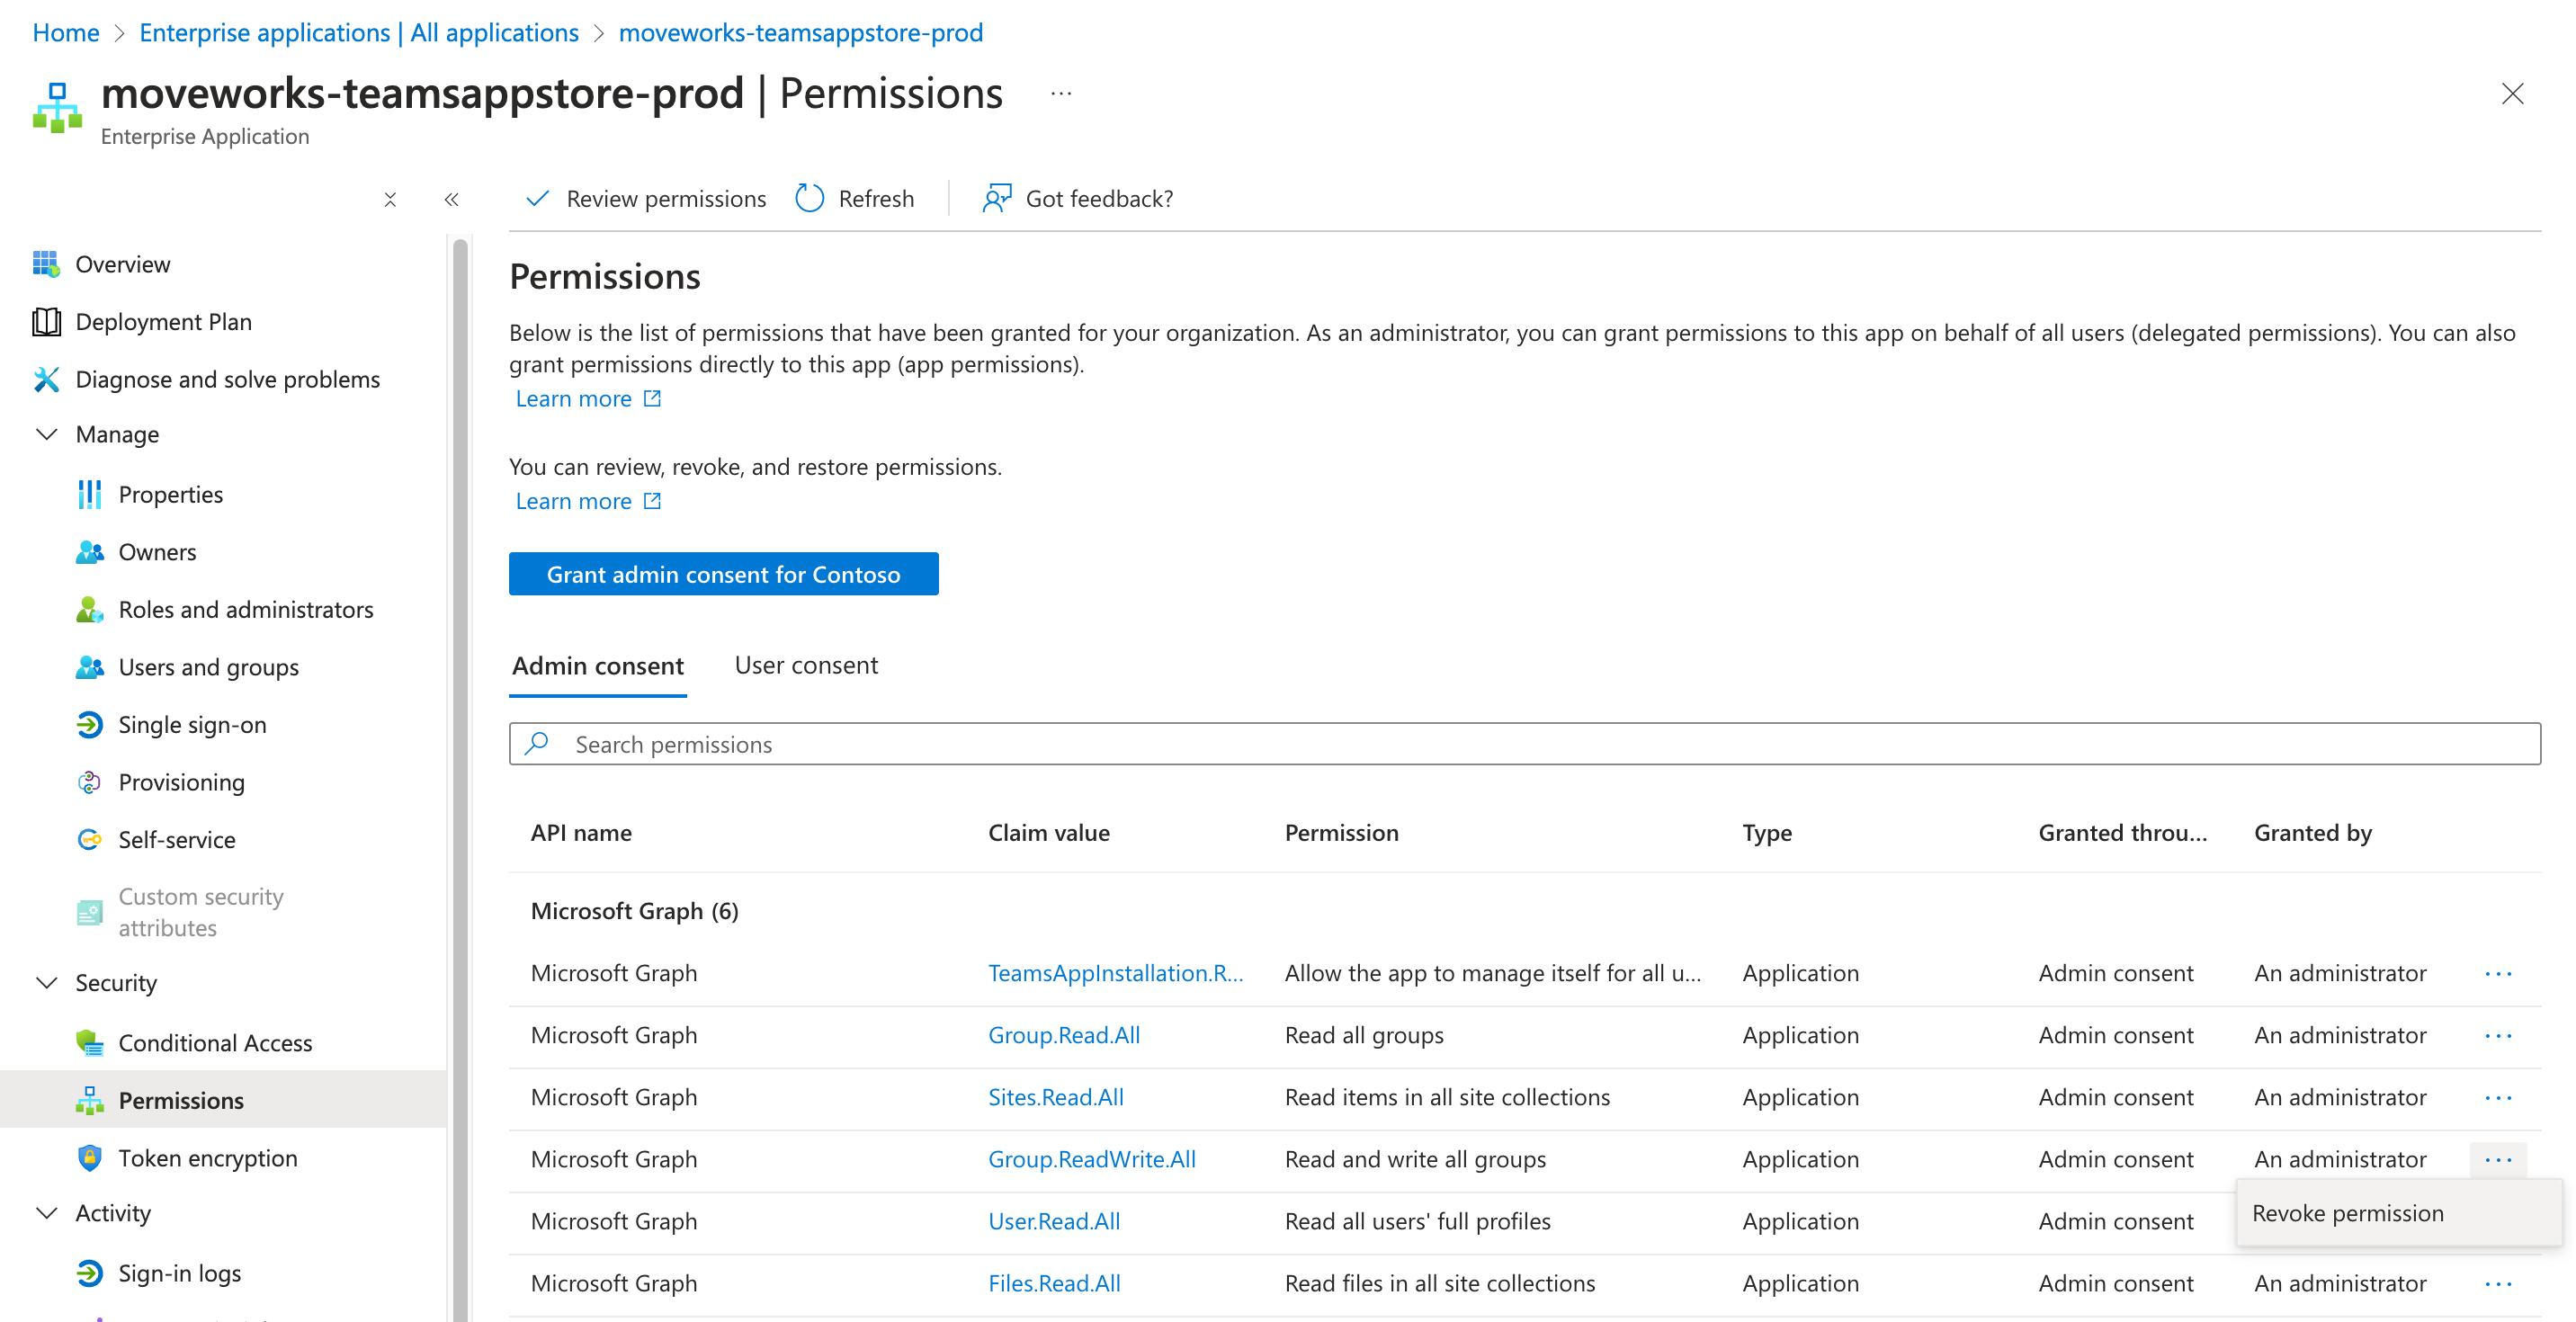
Go to Security > Permissions for the moveworks-teamsappstore-prod app.
-
Click the three dots to the right of the permission that you would like to revoke and select Remove permission
-
Click Yes, revoke on the confirmation prompt.

Revoking Specific Permissions using Azure Powershell
- Launch Azure AD:
Connect-AzureAD - Get the ServicePrincipal Object for Moveworks e.g:
$sp = Get-AzureADServicePrincipal -filter "displayName eq 'moveworks-teamsappstore-prod'"

- Find the assigned permissions to the ServicePrincipal e.g:
Get-AzureADServiceAppRoleAssignedTo -ObjectId $sp.ObjectId -All $true | Where-Object { $_.PrincipalType -eq "ServicePrincipal" } | ConvertTo-JSON - Find the ID of the permission that you want to remove using the table below. You can find all MS Graph Permission IDs here.
| Permission Name | ID |
|---|---|
| Group.ReadWrite.All | 62a82d76-70ea-41e2-9197-370581804d09 |
| Sites.Read.All | 332a536c-c7ef-4017-ab91-336970924f0d |
| Files.Read.All | df85f4d6-205c-4ac5-a5ea-6bf408dba283 |
- Grab the
objectIdcorresponding to theidbased on the table above. You can assign that value to a variable$permissionObjectId. - Remove the permission e.g:
Remove-AzureADServiceAppRoleAssignment -ObjectId $sp.ObjectId -AppRoleAssignmentId $permissionObjectId(you can repeat this step for any other permissions you would like to remove) - Validate the permissions have been removed by fetching the ServicePrincipal Object permissions again. e.g:
Get-AzureADServiceAppRoleAssignedTo -ObjectId $sp.ObjectId -All $true | Where-Object { $_.PrincipalType -eq "ServicePrincipal" } | ConvertTo-JSON
FAQ:
Q: Can I install more than one Moveworks App on the tenant?
A: No, currently there can only be one installation of Moveworks in each Microsoft Tenant.
Q: Can I use this method of installation if my Moveworks tenant is not hosted in the US?
A: No, currently the Moveworks App Store Teams AI Assistant will only work if your Moveworks AI Assistant is hosted within Moveworks Commercial Region.
Q: Can a user unpin the AI Assistant in Teams?
A: Moveworks AI Assistant can be unpinned from the sidebar in Microsoft Teams by the user.
Q: What's the behavior in Teams?
A: Moveworks AI Assistant will remain removed from the current Teams session, however once the user logs out of teams and logs back on the app setup policy kicks in and re-adds Moveworks Bot.
Q: Can a user move the left sidebar icon around?
A: User can move the Moveworks AI Assistant around in the left side bar, however the App Setup Policy will overwrite this once the user logs off and logs back onto teams.
Q: How can I troubleshoot why a specific user still doesn't see the AI Assistant in Teams?
A: You can use the Get-CSUserPolicyAssignment command to see which App Permission Policies and App Setup Policies are currently assigned to a user. Note that it can take up to 72 hours for policy assignments to apply to all members of your tenant.
Updated 14 days ago