Ticketing Configuration (New Ticketing Journey)
Coming Soon !!!
The product is going through GTM activities and will be enabled for your organization soon
Overview
The new Ticketing Configuration Wizard introduces a guided, wizard-based experience for configuring ticketing skills in Moveworks. This guide is intended for customer administrators who want to understand the end-to-end journey of the new ticketing wizard and learn how to configure and manage ticketing effectively.
It provides an overview of the experience along with step-by-step instructions for setting up ticketing using the new configuration workflow.
Ticketing configuration at a glance
To set up ticketing, there are five key steps:
- Configure the required ticketing prerequisites in your ticketing system.
- Set up identity configuration in Moveworks.
- Review the default configuration and configure any custom ticketing destinations (tables or issue types from which tickets are created and read), and define payloads for CRUD actions.
- Set up ticketing workflows and routing.
- Configure platform-level ticketing settings.
This guide walks through each of these steps in detail. The new ticketing configuration wizard covers all of them in a single, guided journey and automatically populates system-specific defaults to help you get started quickly.
Prerequisites & readiness checklist
Technical prerequisites
The new ticketing journey supports the following ticketing systems:
- ServiceNow
- JIRA
- Freshservice
- Zendesk
Creating ticketing configurations for systems outside of this list is not supported in the new journey. If you are using a different ticketing system, please use the legacy ticketing configuration experience.
Moveworks prerequisites
The new ticketing configuration wizard is accessible to both Moveworks Setup Admins and Moveworks Setup Users from the left navigation in Moveworks Setup.
Readiness checklist
Before starting ticketing configuration, ensure the following prerequisites are completed:
- Review and complete the access requirements for your ticketing system. These are required to set up the connector.
- Refer to the access requirement guides for your specific ticketing system.
- Moveworks identifies the end user interacting with the AI Assistant through user identity ingestion. This is required so the AI Assistant can file tickets on behalf of users.
- Configure user identity ingestion for your ticketing system in Moveworks Setup.
- Moveworks manages AI Assistant access through a Service Account configuration. Ensure the service account is configured before setting up ticketing.
- Moveworks uses a Service Portal Configuration to store the end-user service portal URL for your ticketing system. Ensure this is configured in advance.
- Test your connector using the API Playground to verify that Moveworks can fetch data from your ticketing system. You can test ticket creation and update scenarios as well.
Refer to the system-specific guides listed at the end of this document for detailed prerequisite instructions.
Where to begin: Accessing the Ticketing Configuration Wizard
The Ticketing Configuration Wizard is located in the left navigation bar of Moveworks Setup and can be accessed by any user with access to the Moveworks Setup tool.
Once you have completed the prerequisites, navigate to this view to begin ticketing setup.
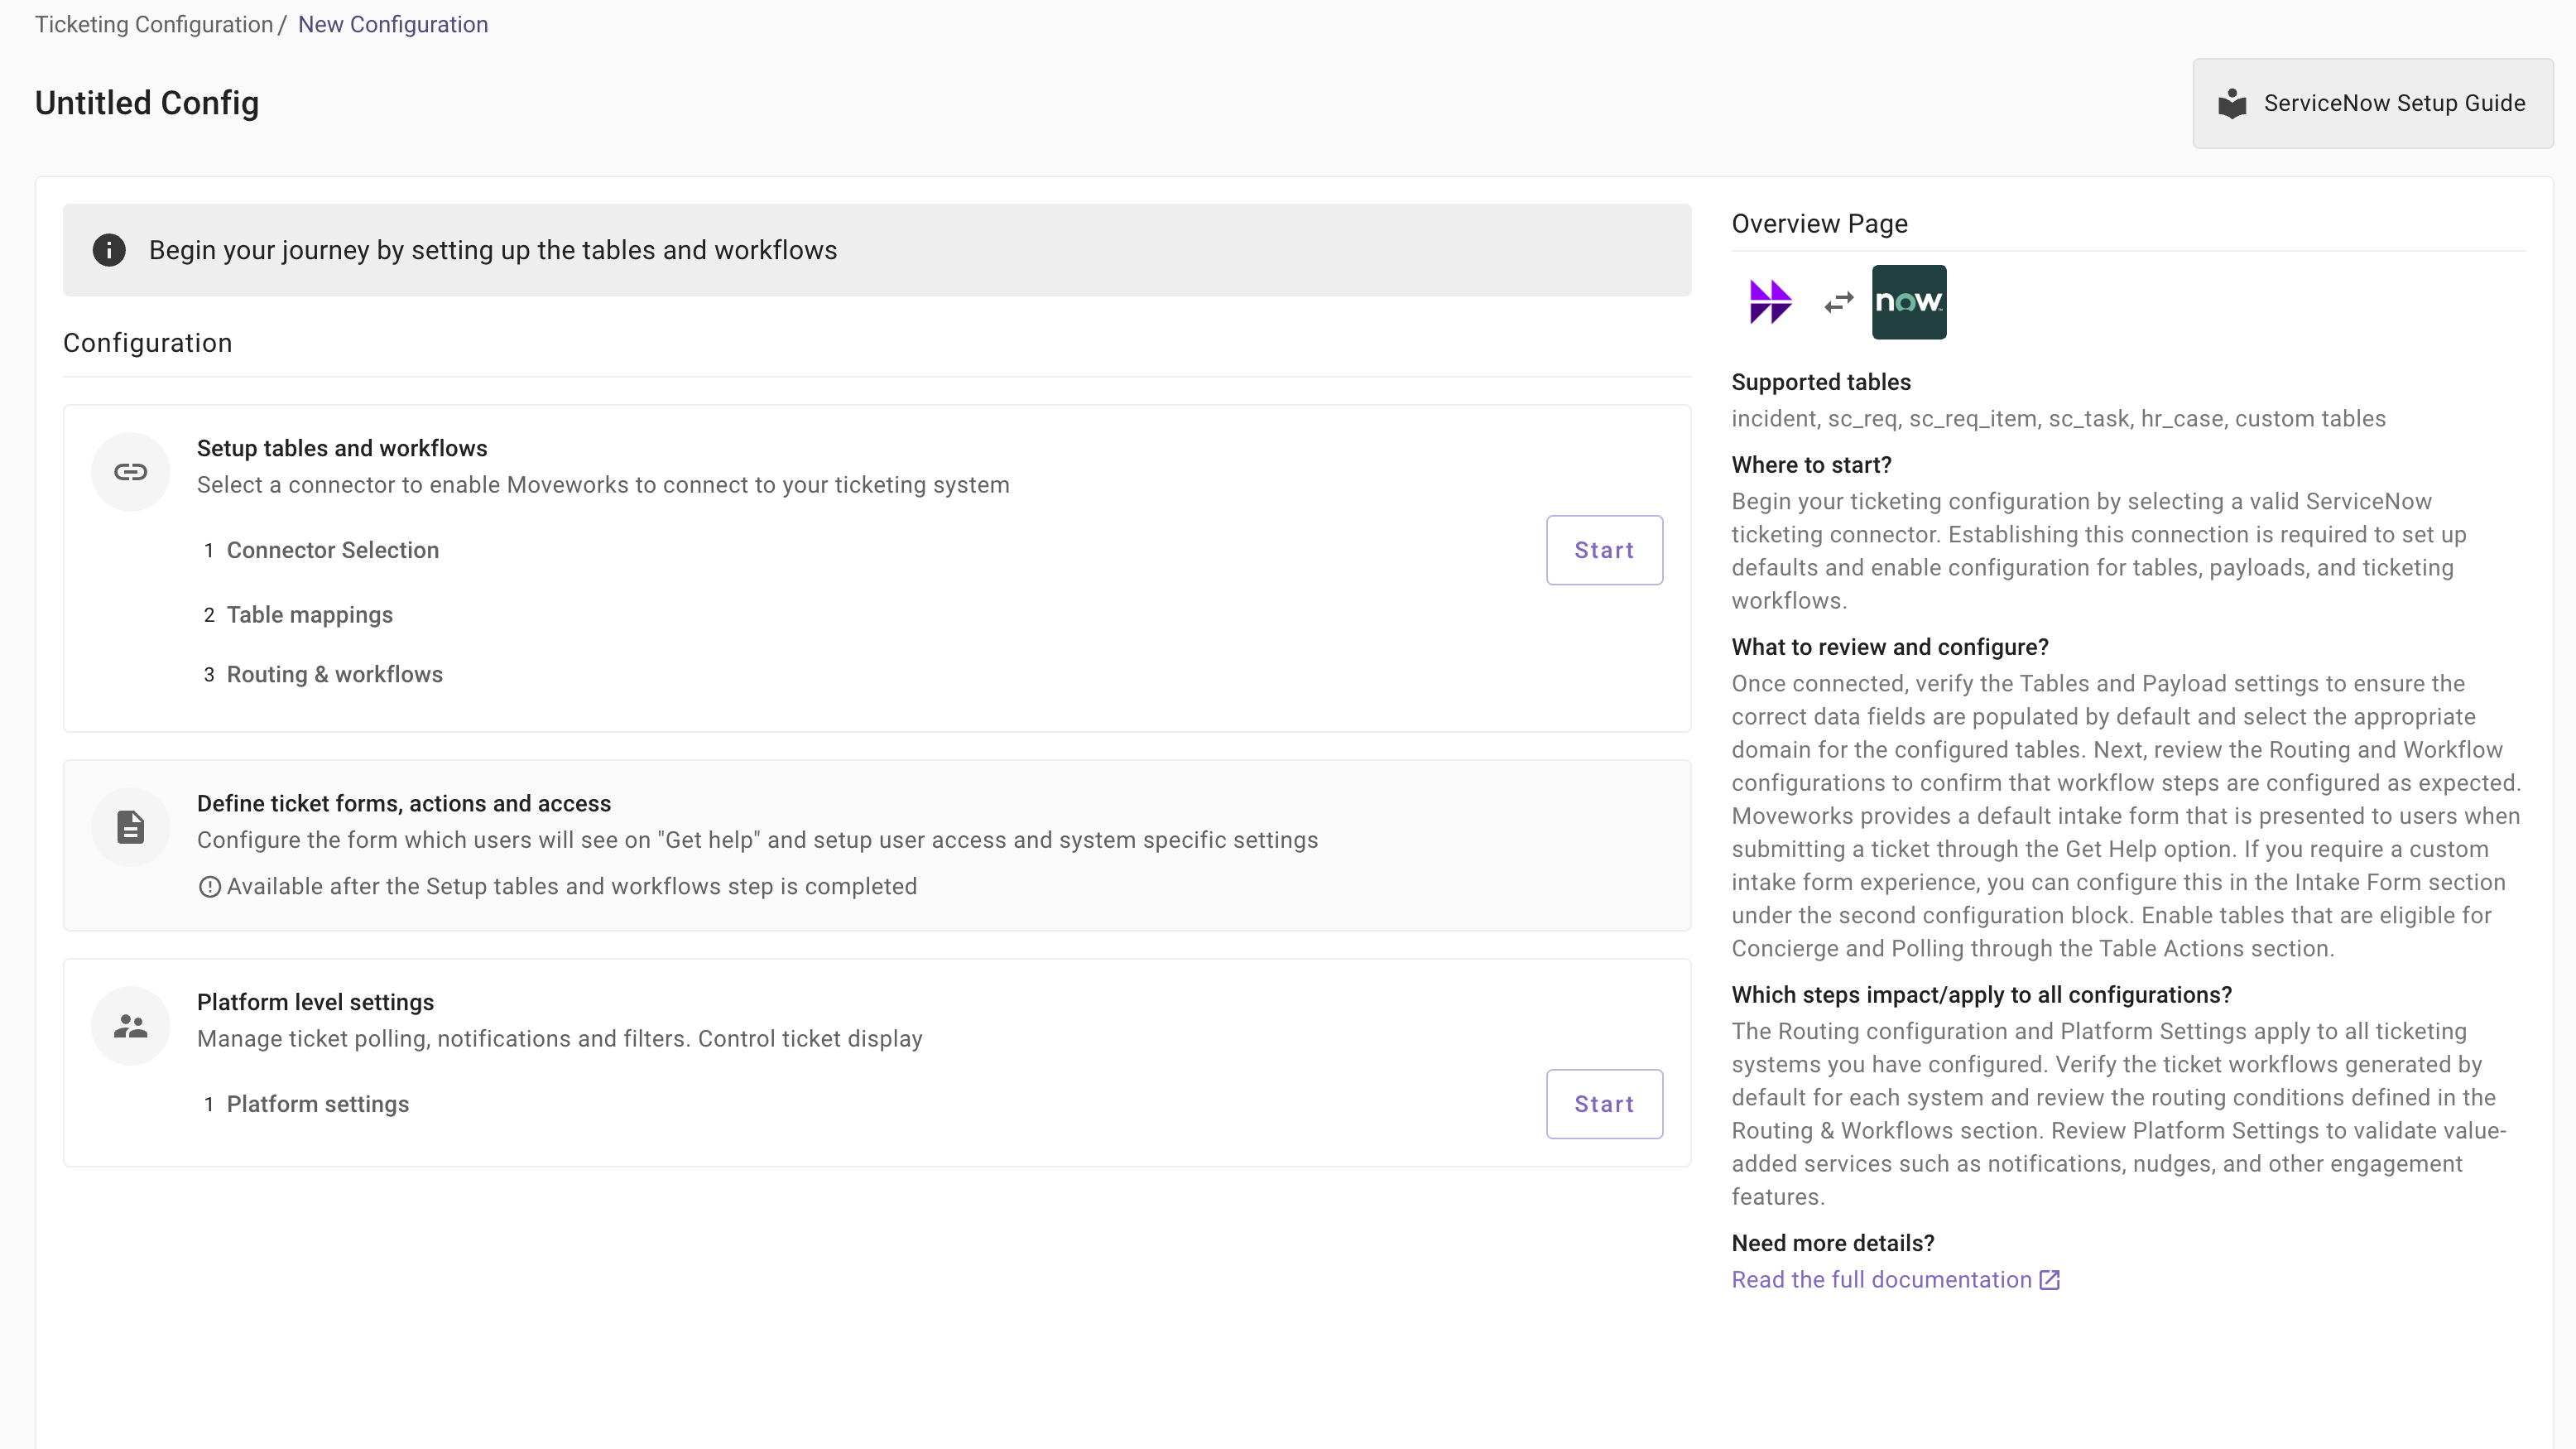
Step 0: Setting up the connector and enabling defaults
The new ticketing wizard generates system-specific defaults that allow you to get started immediately with ticketing actions in the AI Assistant.
Begin by selecting and configuring the connector for your ticketing system. Completing this step unlocks default creation and enables the remaining steps in the configuration flow.
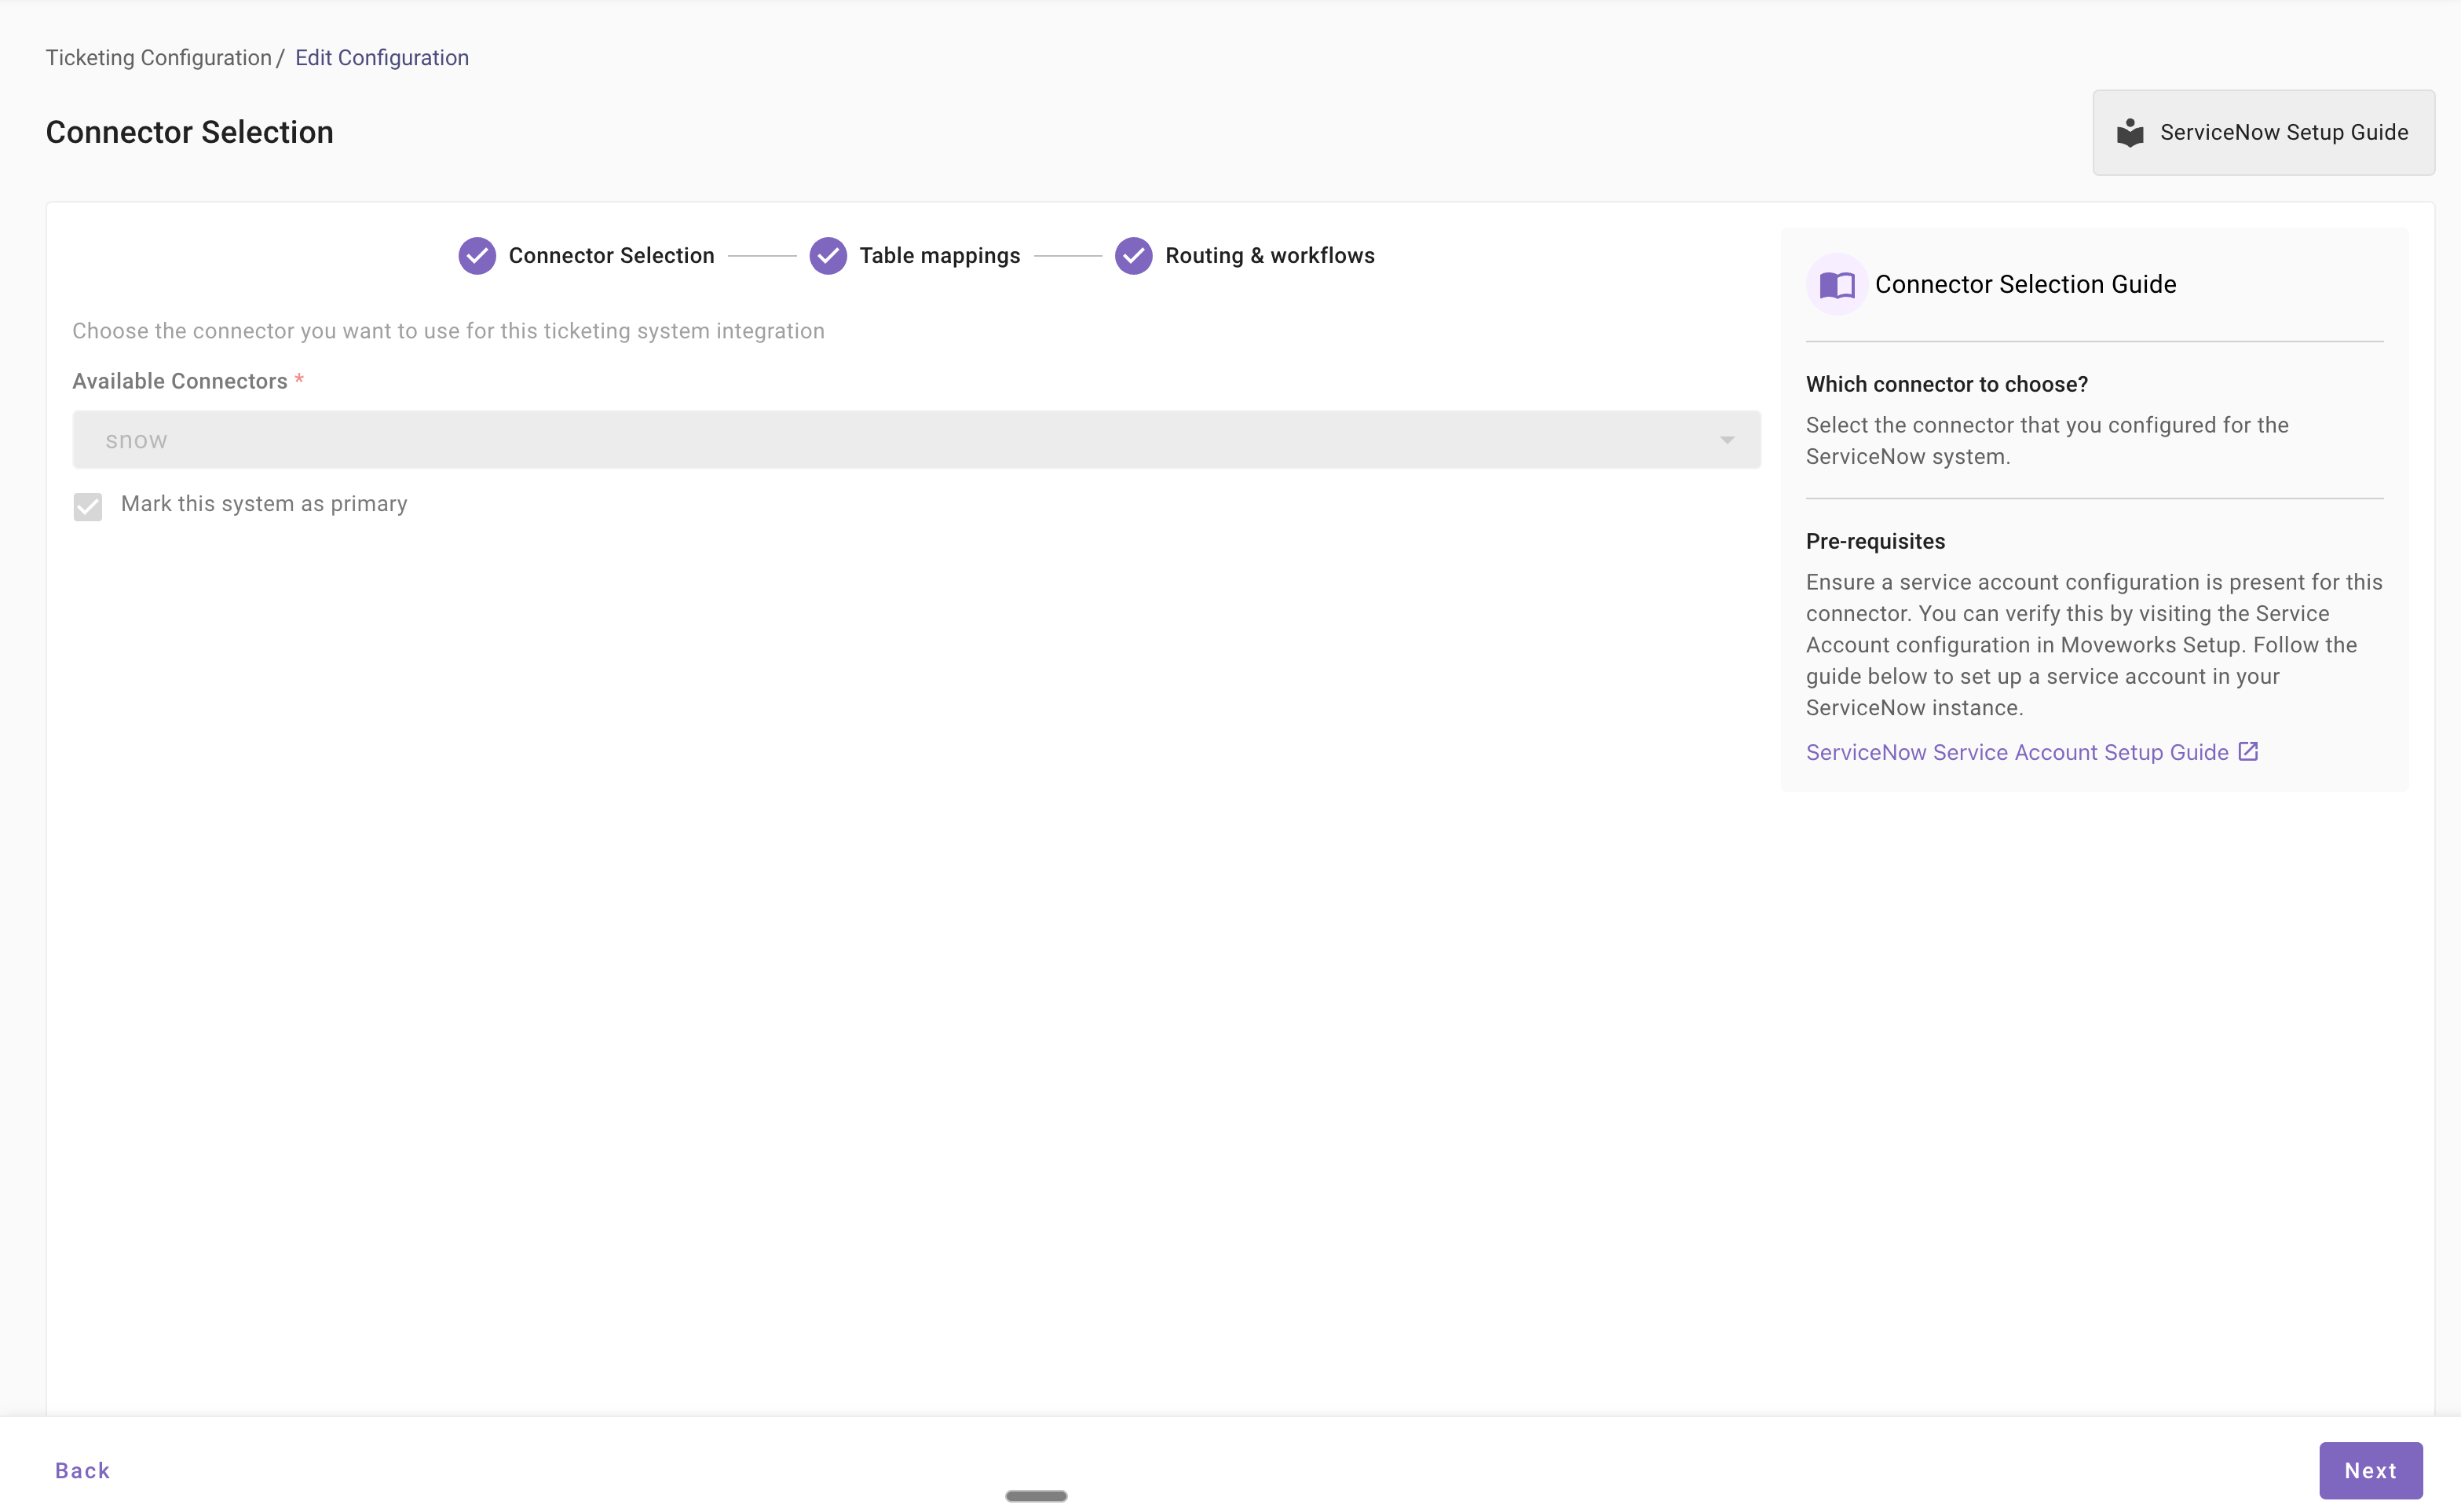
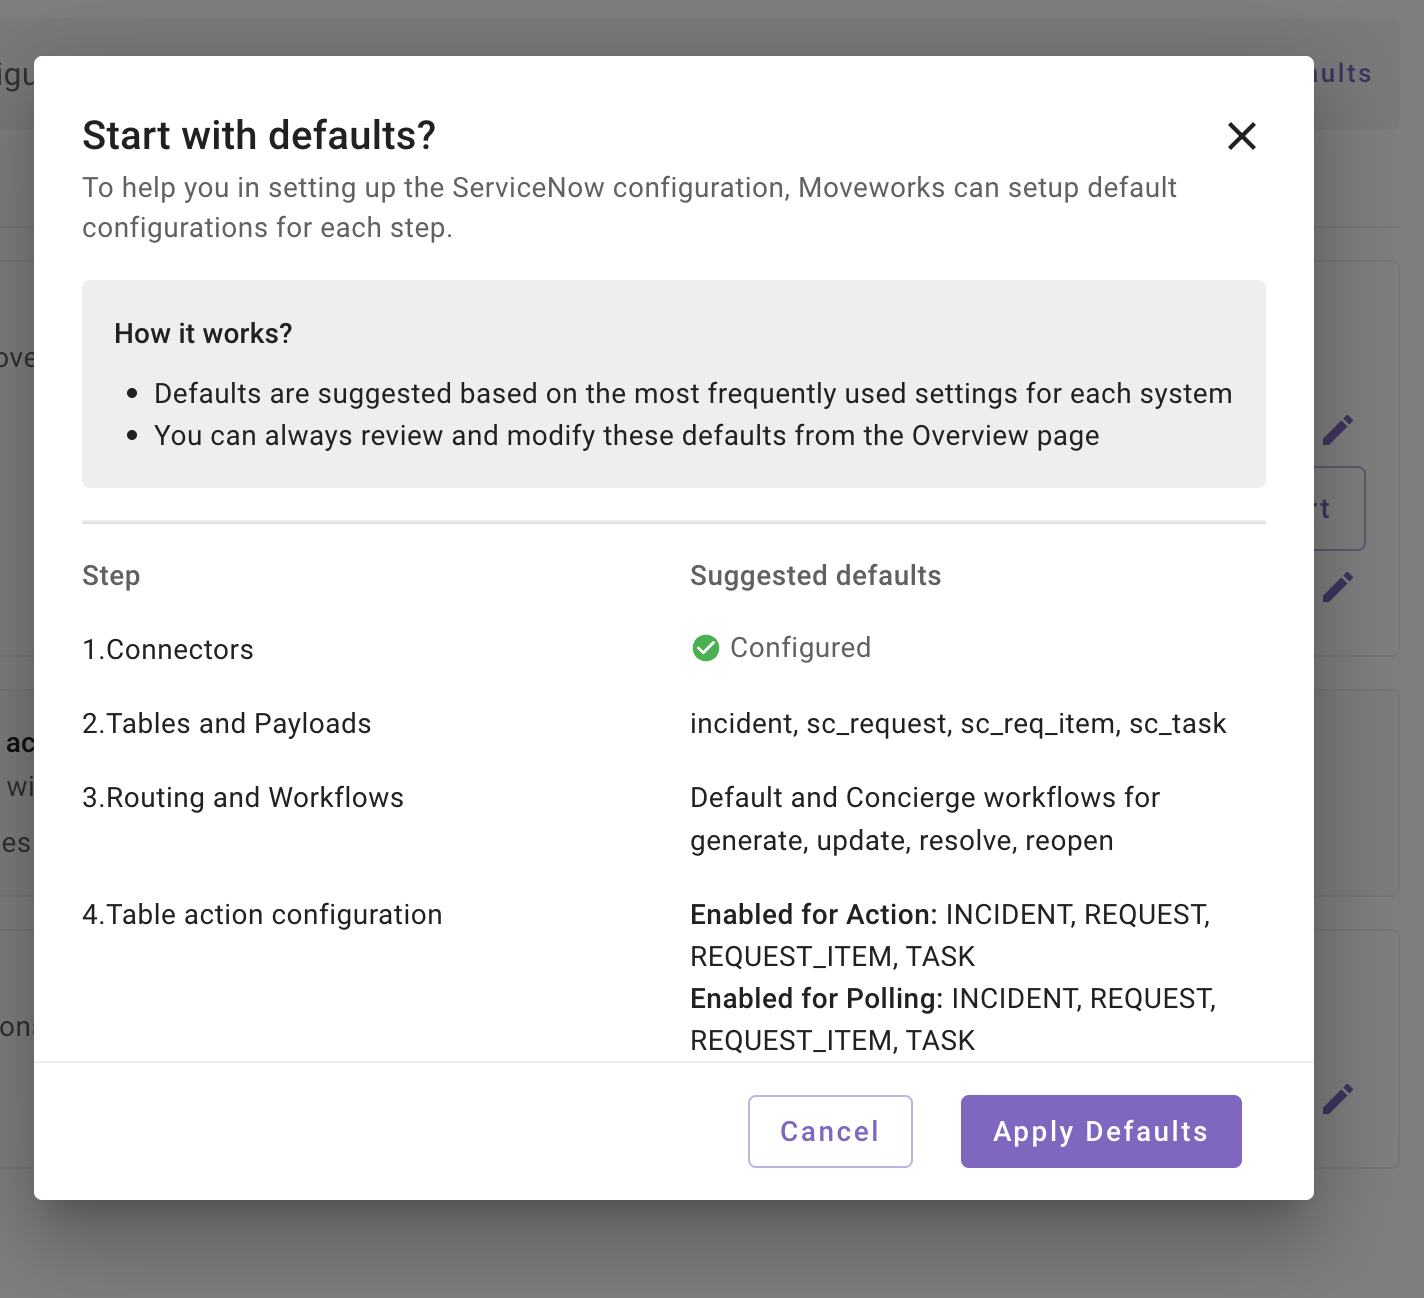
Once you save the connector and provide a title for the configuration, you will be redirected to the configuration home page. If this is your first ticketing system setup please check click on the “Mark this system as primary” checkbox. At the top of the page, you will see a “Setup defaults” section. Click this option to apply defaults.
Applying defaults automatically populates recommended ticket destinations and workflows for your selected ticketing system.
Step 1: Reviewing defaults and setting up ticket destinations
Ticket destinations represent the end-system entities from which Moveworks reads, creates, and updates tickets.
- For ServiceNow, Freshservice, and Zendesk, destinations correspond to tables.
- For JIRA, destinations correspond to a project and issue type (or request type) combination.
Review the defaults created by the ticketing wizard under:
- Table mappings (ServiceNow, Freshservice, Zendesk), or
- Issue and request type mappings (JIRA).

Each destination includes the following components:
- Destination details: Table name (ServiceNow/Freshservice/Zendesk) or issue type ID (JIRA).
- Query ticket payload: Maps external ticket attributes to the Moveworks ticket object, enabling Moveworks to read and understand tickets.
- Create ticket payload: Defines the fields sent to the external system when creating a ticket.
- Update ticket payload: Defines the fields sent when updating a ticket.
- Resolve ticket payload:
- Resolution: Fields sent to the external system when resolving a ticket.
- Update if empty: Fields updated only if they are empty in the external system.
- Reopen ticket payload: Fields sent when reopening a ticket.
Refer to the system-specific guides for detailed instructions on configuring ticket destinations.
Step 2: Reviewing ticket workflows and routing
Workflows define the ticketing actions executed by Moveworks in the external ticketing system. The new ticketing journey automatically creates default workflows based on your selected system.
You can review these workflows in the Routing & Workflows section.
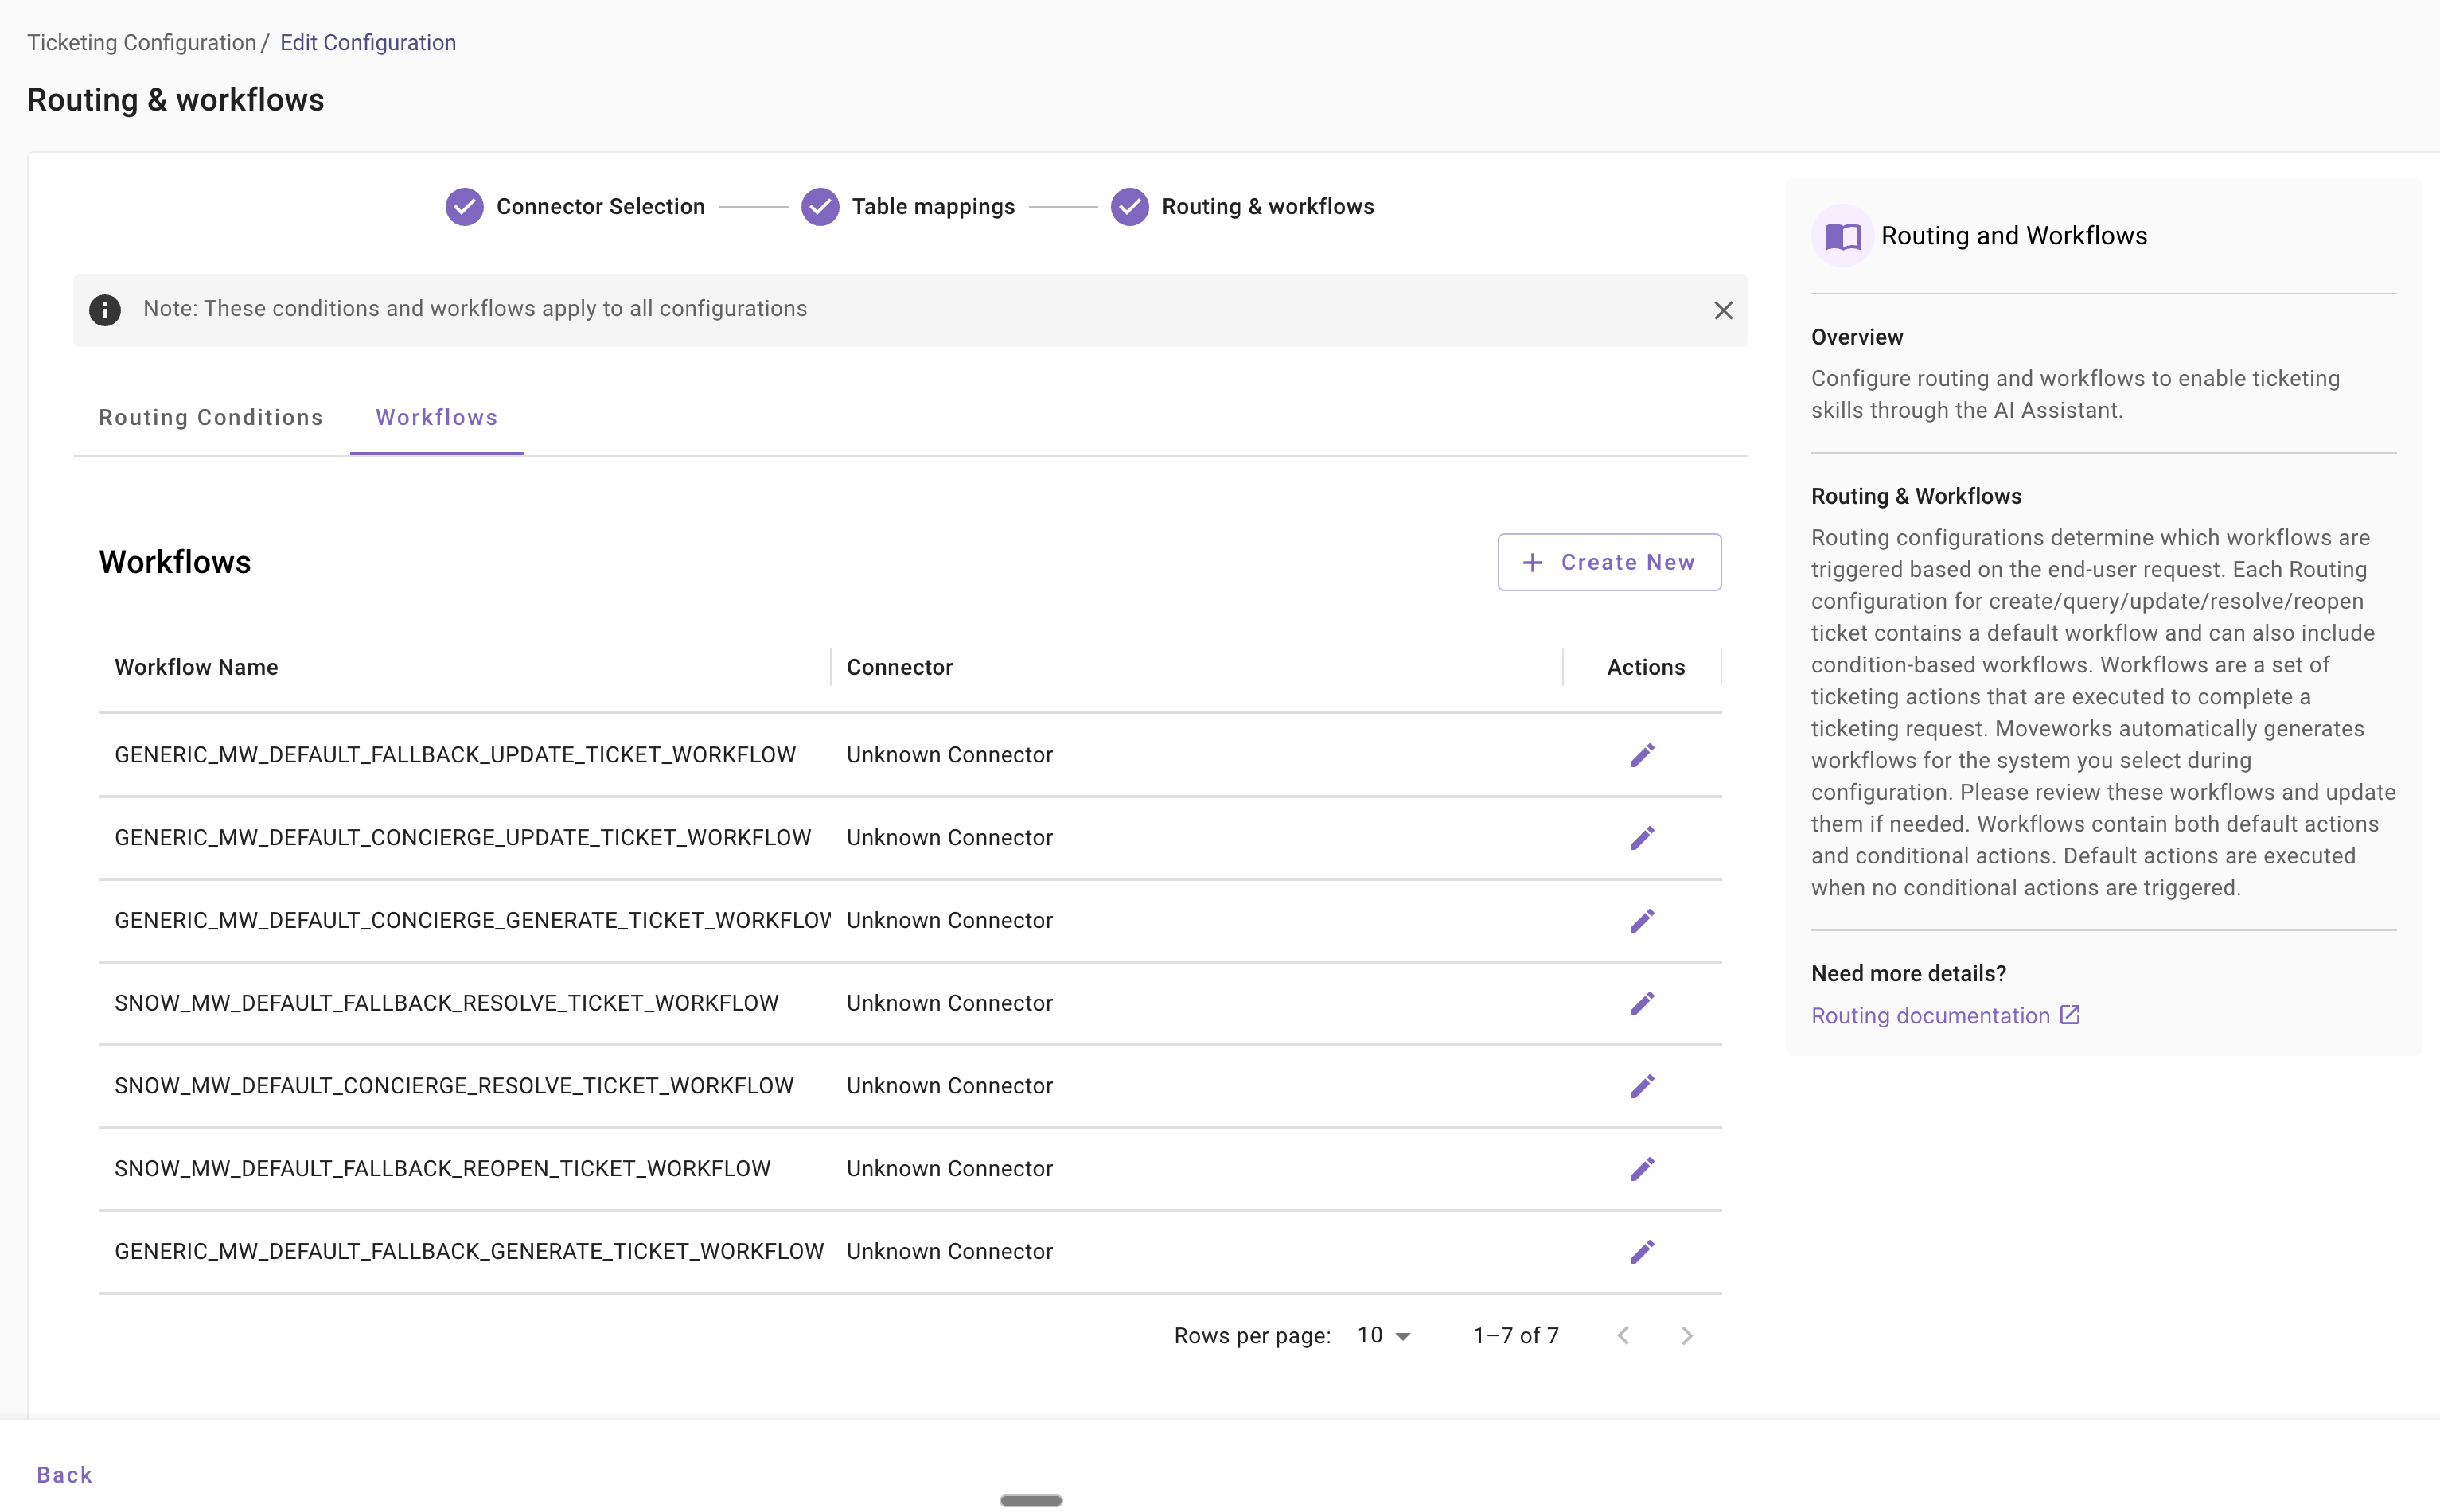
Review each workflow and refer to the system-specific documentation to understand how to customize them for individual use cases.
Routing conditions determine when workflows are triggered based on end-user requests. If this is your first ticketing system configuration, the wizard automatically sets the newly created workflows as the default.
You can add additional routing conditions and workflows to customize ticketing behavior. Routing conditions are configured in the same section.

Refer to the system-specific guides for details on writing DSL conditions, using in-bot triage predictions, and configuring ticketing actions.
Step 3: Setting up intake forms, actions, and access control
Intake forms
Intake forms provide a structured way to collect required ticket information from end users. Moveworks includes a default intake form that captures Short Description and Description when filing a ticket.
If you need additional fields, you can create a custom intake form in the Create Intake Form section. Note that the default form is managed by Moveworks and is not visible in this configuration.
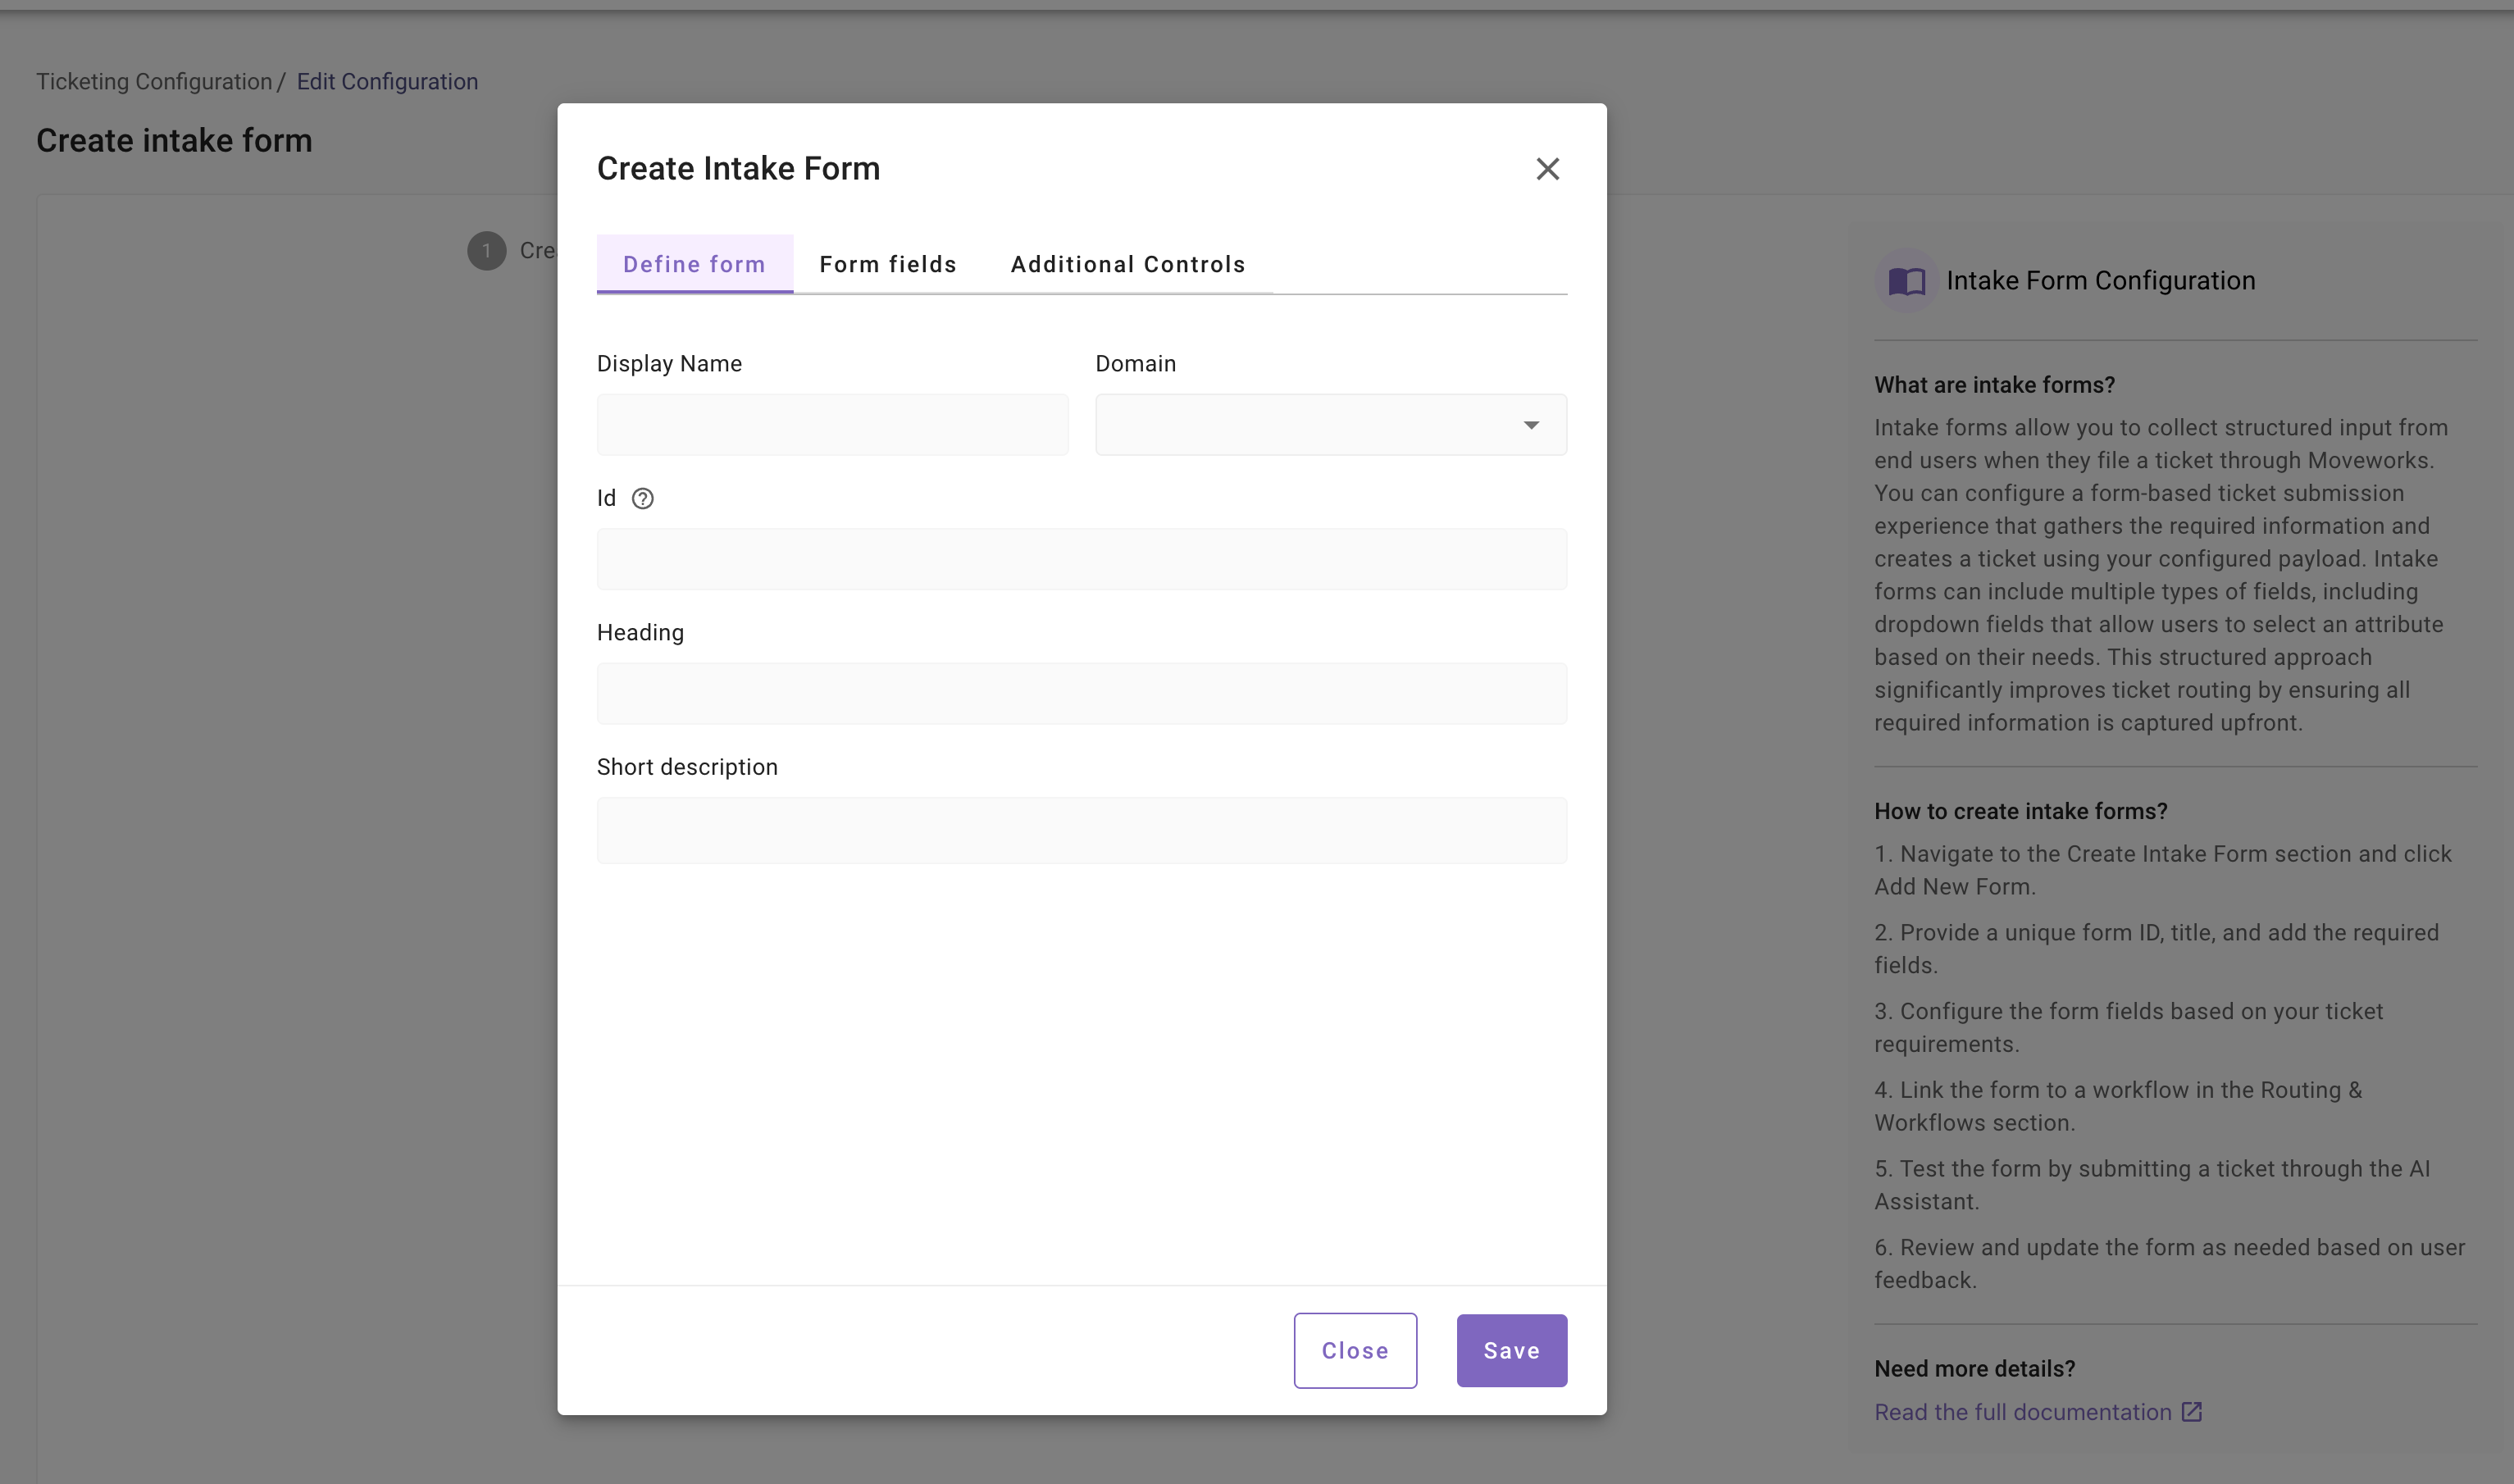
Refer to the system-specific guides for examples of configuring custom intake forms.
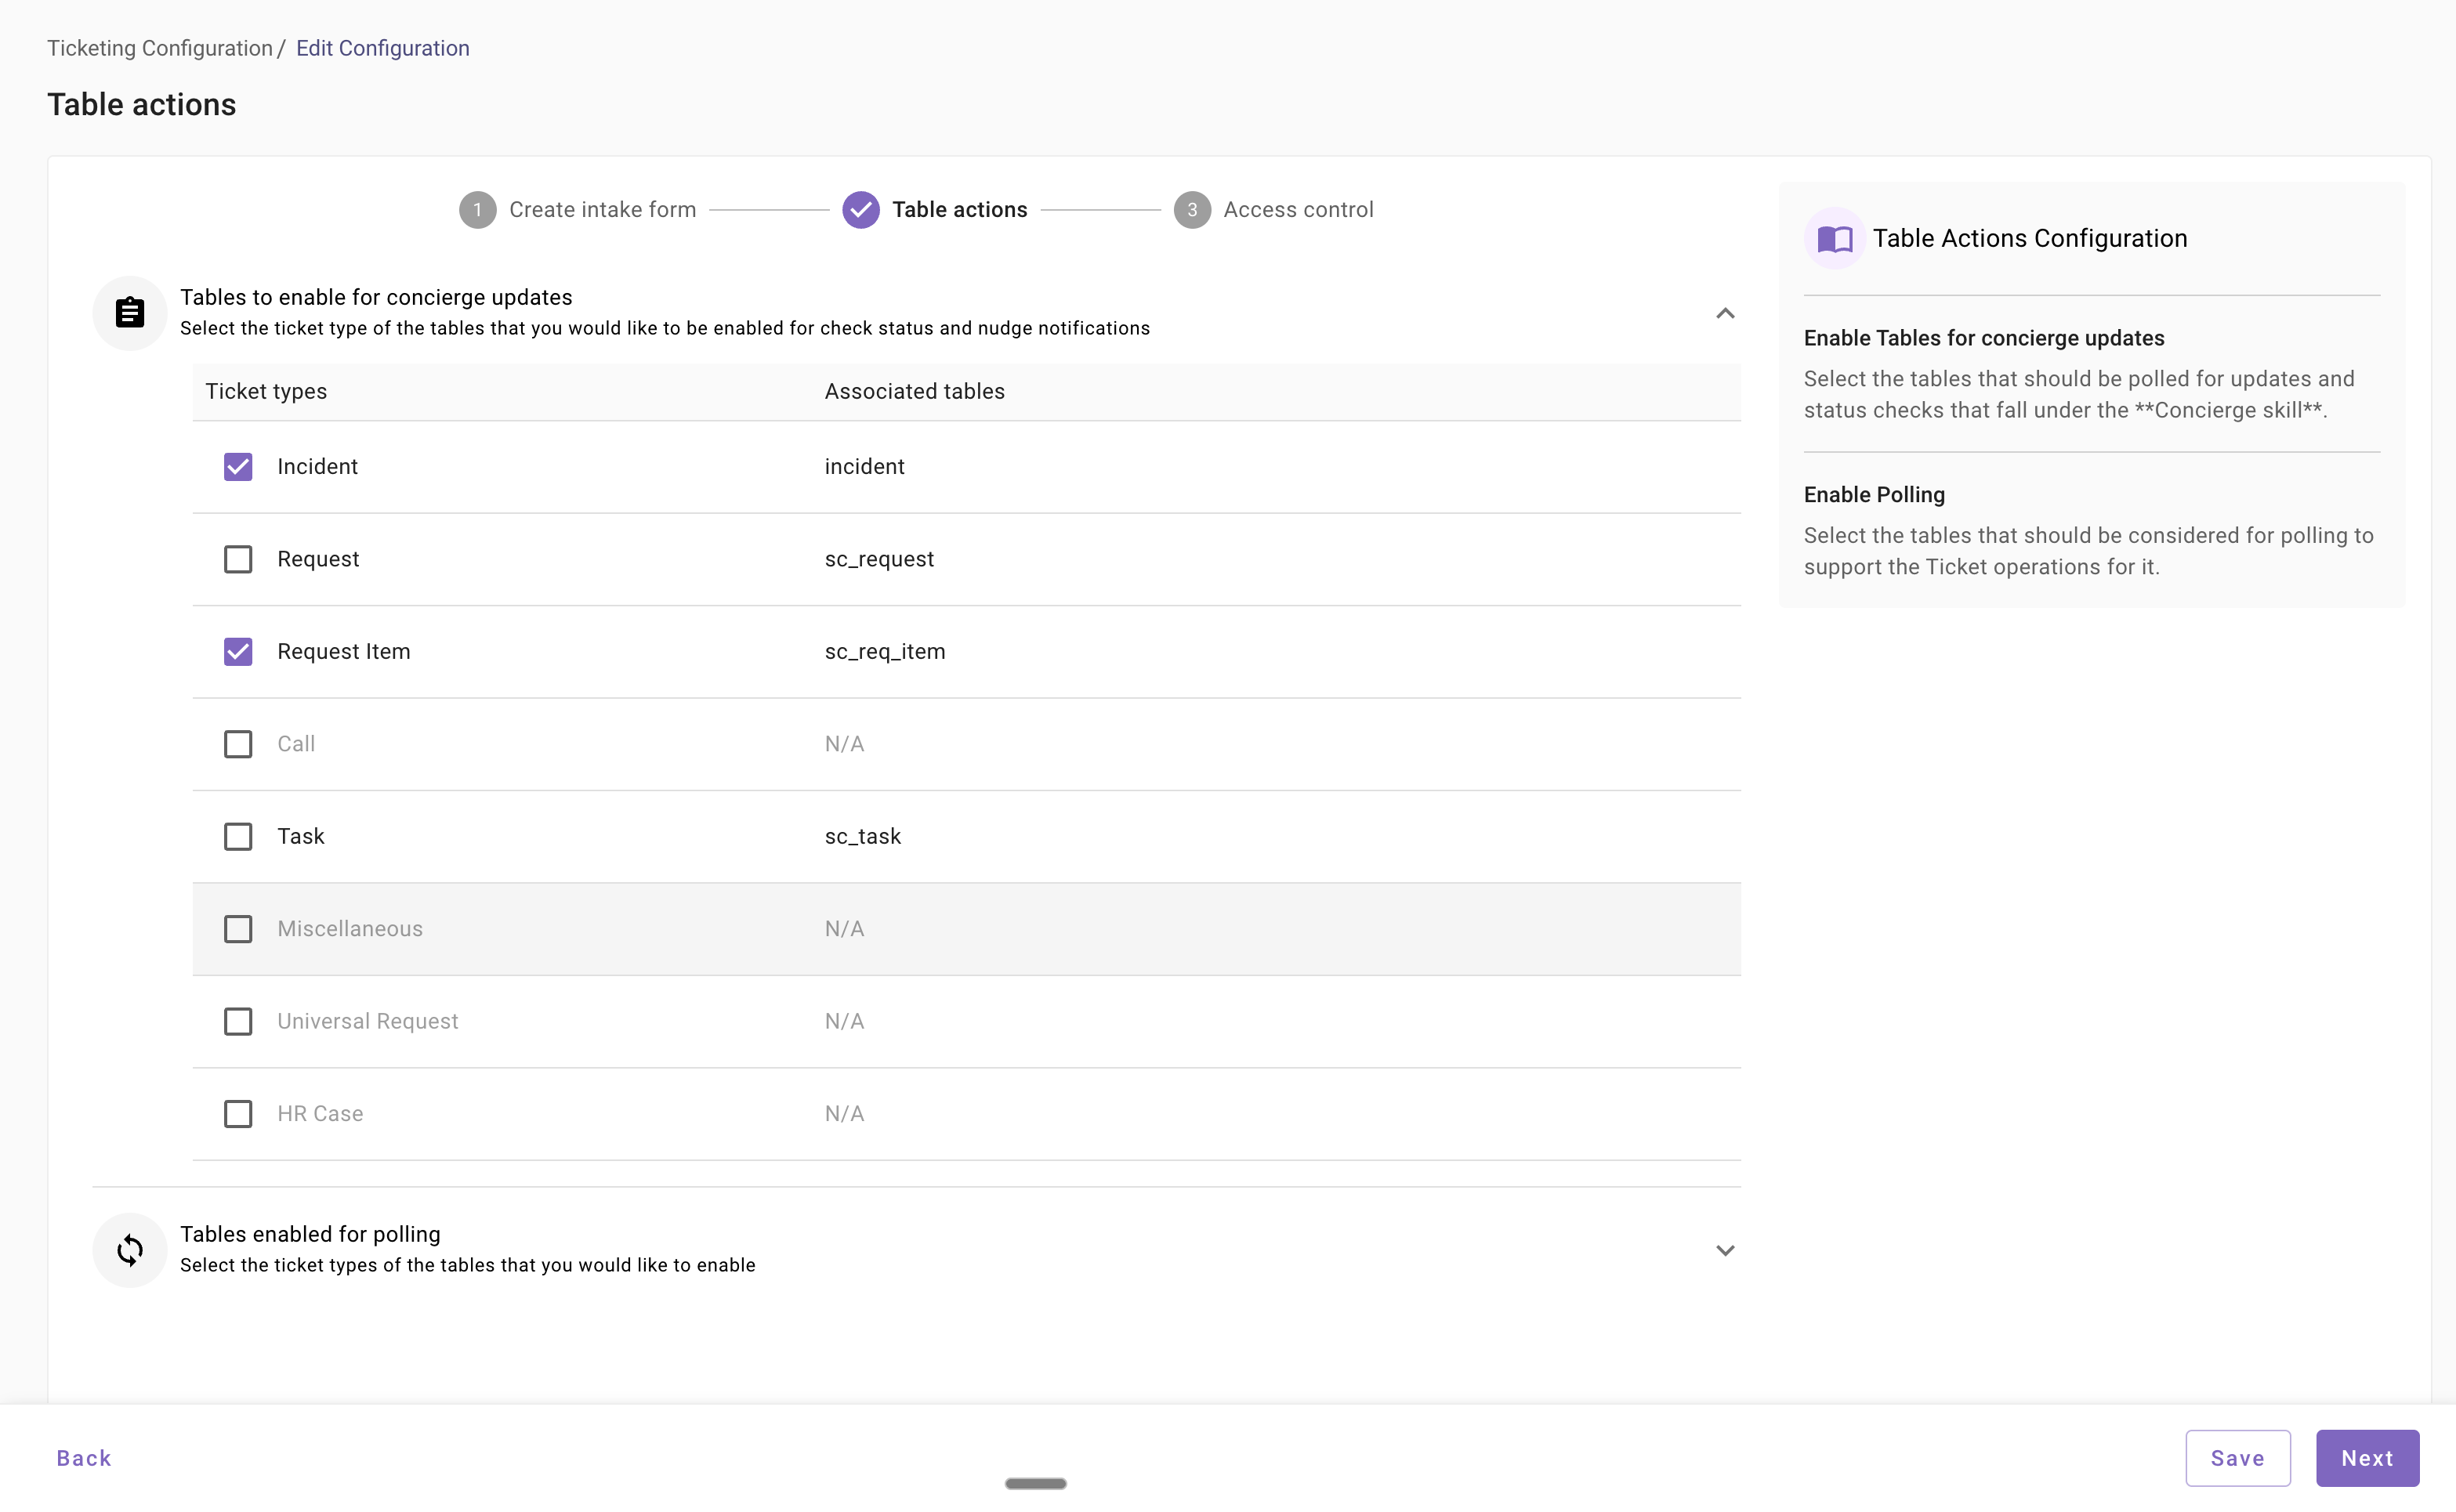
Ticket actions
Moveworks automatically polls your ticketing system to provide Concierge updates such as notifications and nudges, and to enable ticket-related actions.
You must specify which tables, issue types, or request types are eligible for these actions. Configure this in the Table Actions or Issue and Request Type Actions section by selecting the corresponding ticket destinations.
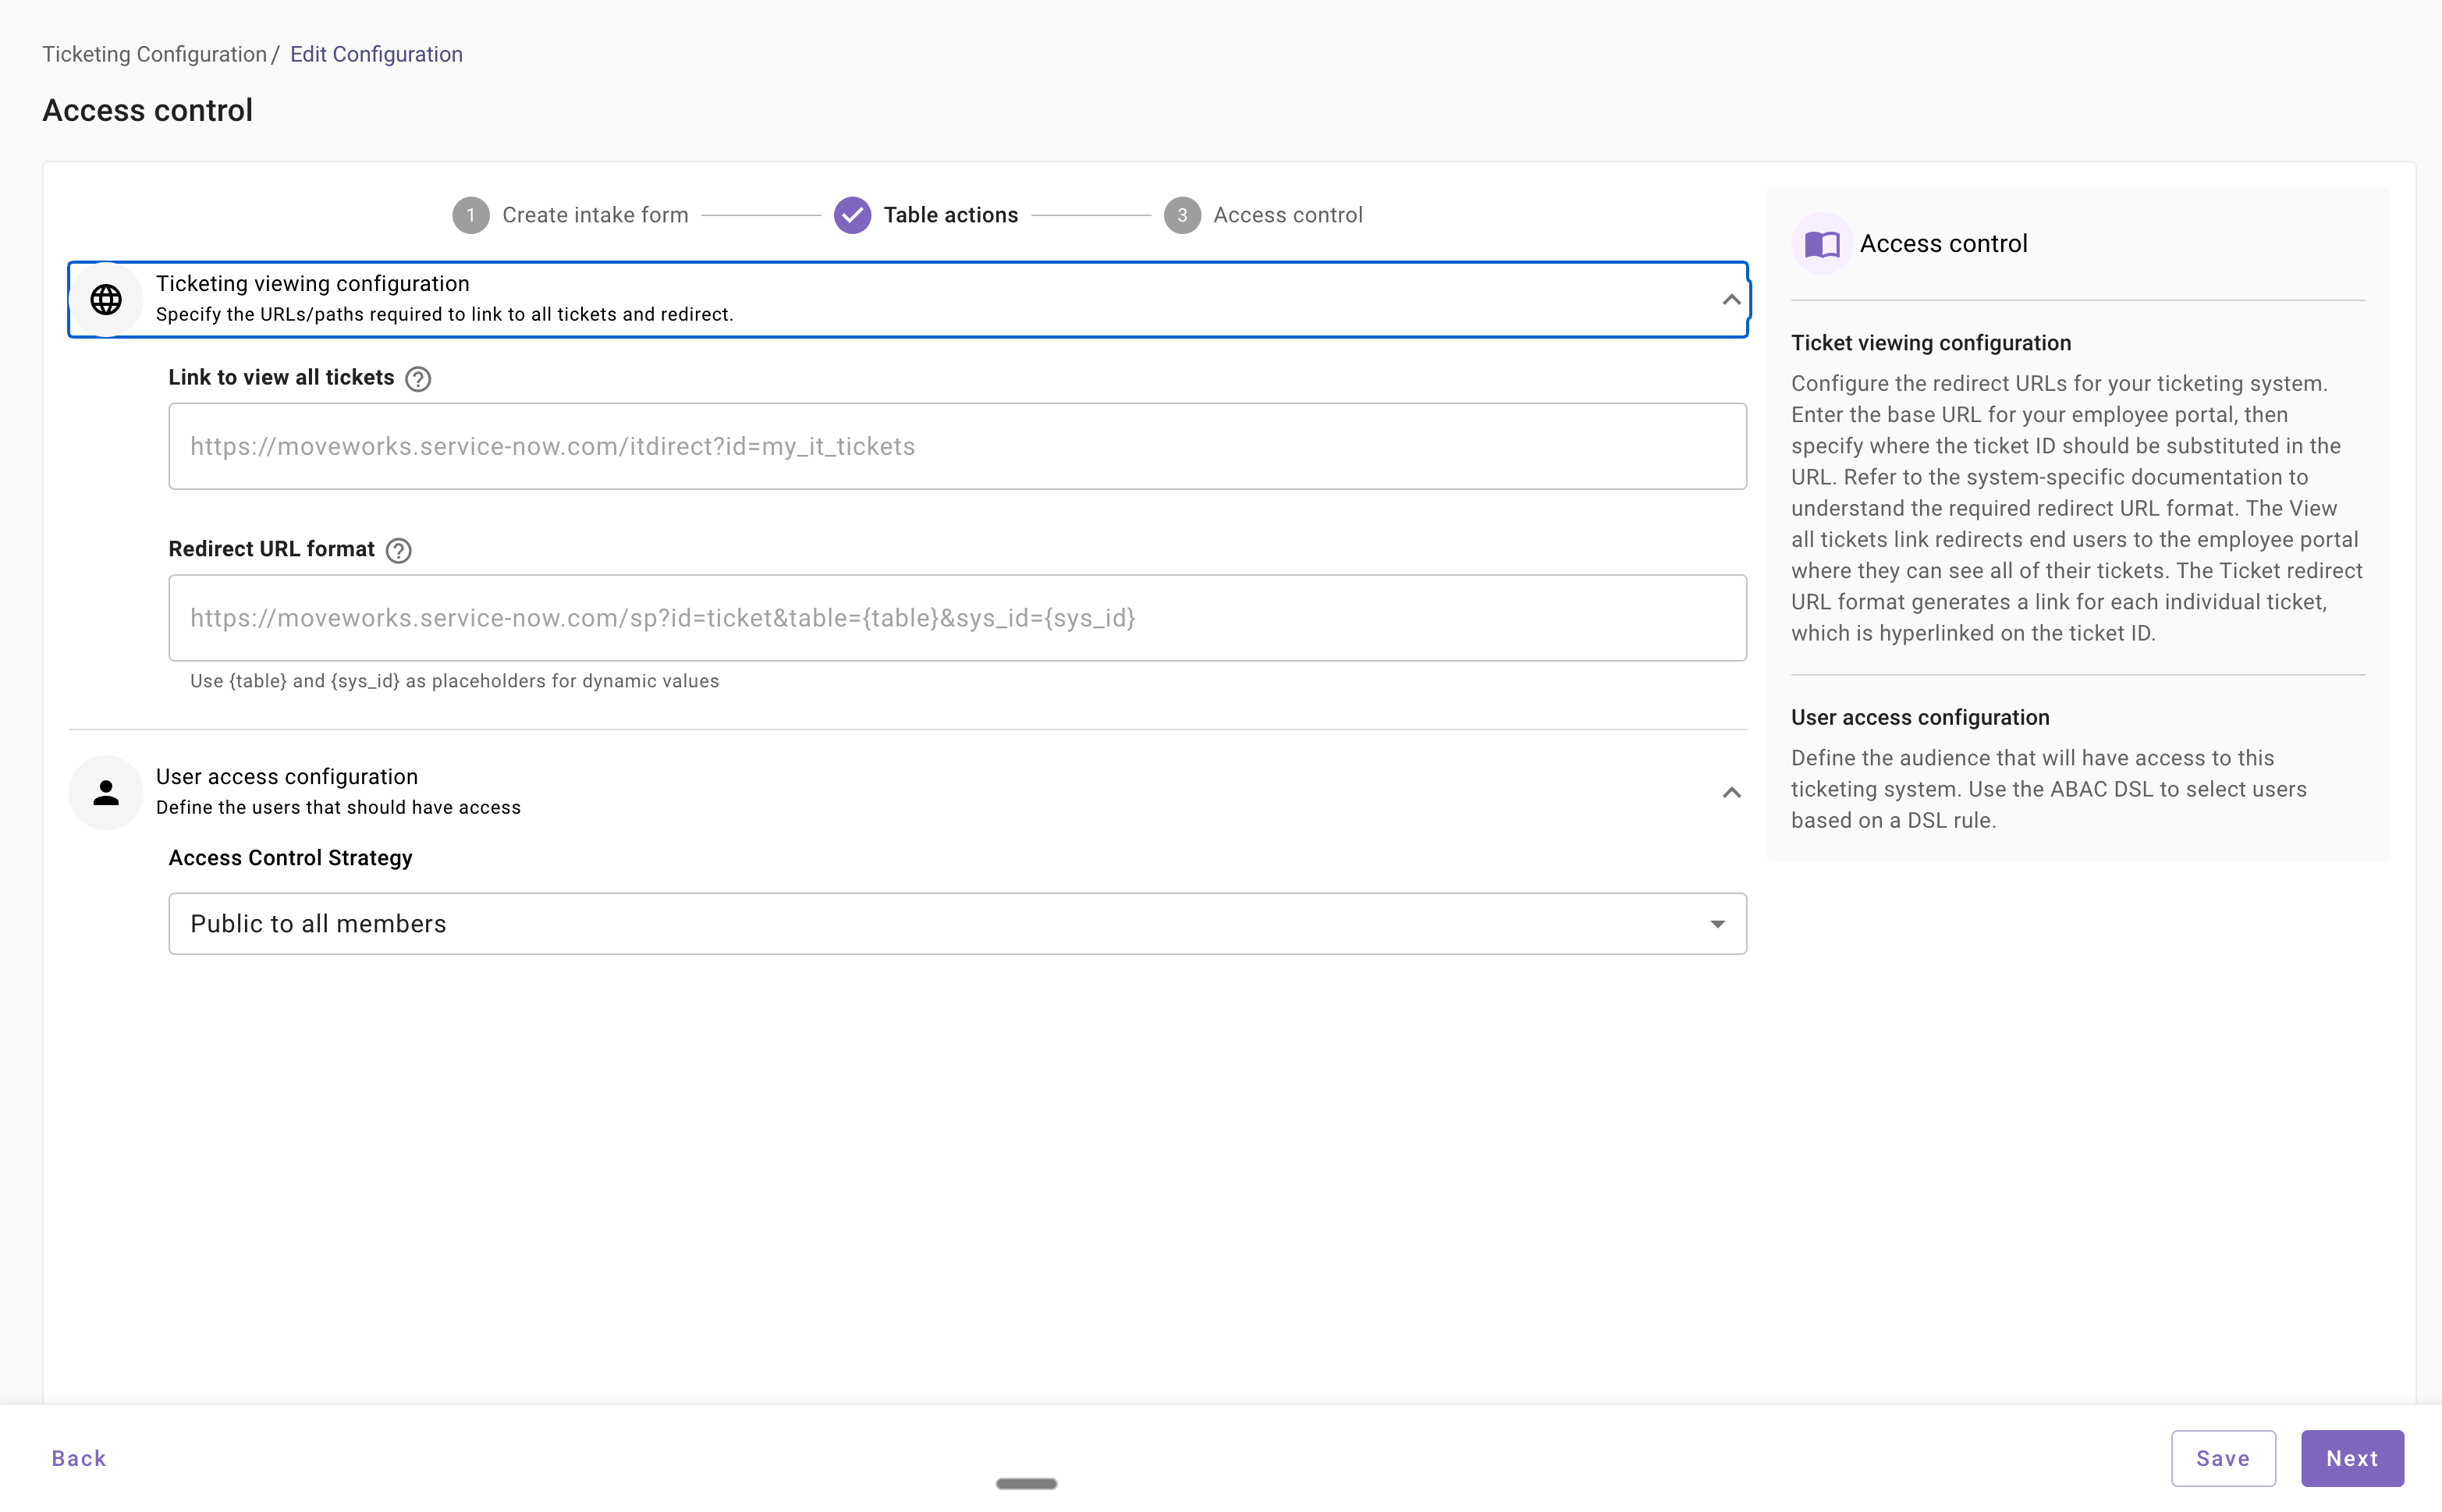
Access control
You must define which users can access the ticketing integration. Two access control options are available:
- Public: Accessible to all members.
- ABAC (Attribute-Based Access Control): Define a custom DSL rule to control access based on user attributes.
Step 4: Setting up platform-level configurations
Platform-level settings control the overall behavior of the ticketing skill in Moveworks. These settings apply globally across all configured ticketing systems.
Moveworks provides default values, which you can modify if needed. Key configurations include:
- Ticket polling configuration
- Notification settings
- Nudge settings
- Display settings
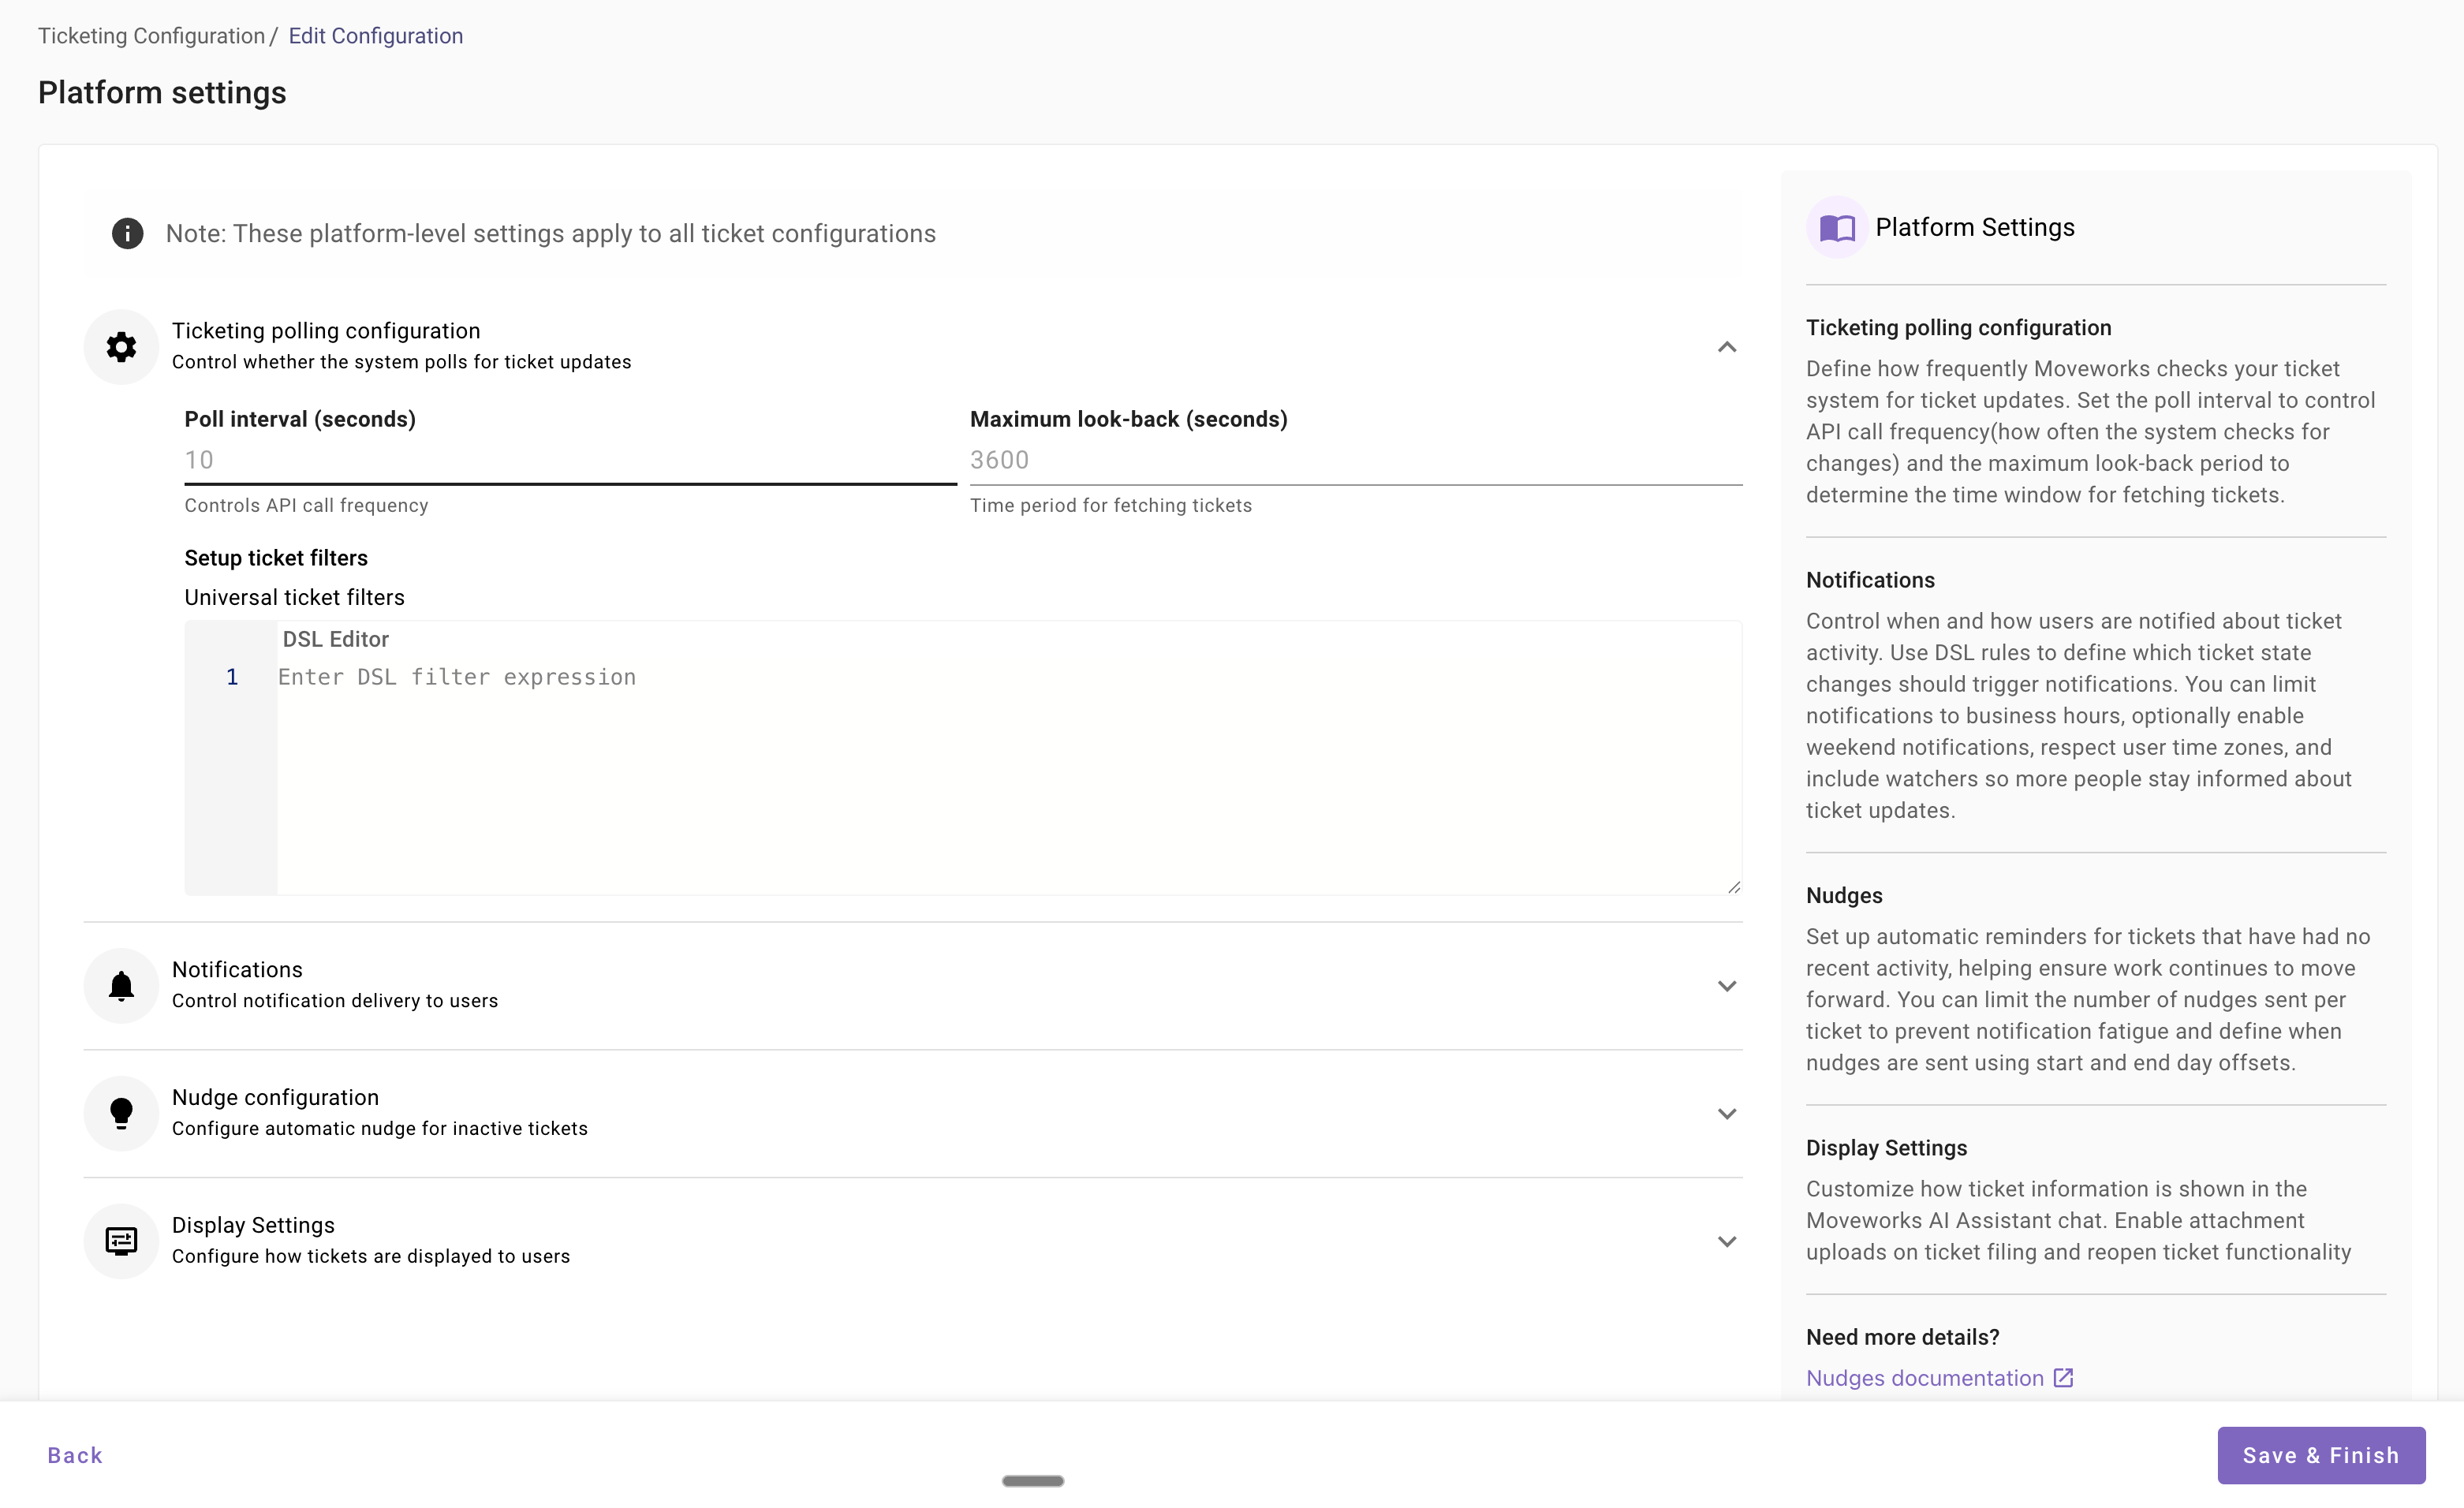
Refer to the Ticketing Platform-Level Settings guide for details on each configuration.
Validation, testing, and go-live
After completing configuration and ensuring user identity ingestion is complete, validate your setup using the following steps:
- Visit the Ingested Users page and verify that the external system ID from the ticketing system is populated for end users.
- Test ticketing flows in the Moveworks AI Assistant using prompts such as:
- “File an IT ticket”
- “Show all my tickets”
System-specific guides
- ServiceNow: https://help.moveworks.com/docs/new-ticketing-journeyconfigure-ticketing-for-servicenow
- JIRA: https://help.moveworks.com/docs/new-configure-ticekting-for-jira-service-management
- Freshservice: https://help.moveworks.com/docs/new-configure-ticketing-for-freshservice
- Zendesk: https://help.moveworks.com/docs/new-configure-ticketing-for-zendesk
- Platform-level settings: https://help.moveworks.com/docs/new-ticketing-platform-level-settings
Updated 16 days ago