Okta SSO Configuration Guide for Non-US Commercial Regions (OIDC)
This guide is deprecatedPlease see our updated Okta Installation Guide (🔗)
Before you begin
-
Ensure you have Admin Access to your Okta instance.
-
You have collected the CUSTOMER_ID under Organization Details > General Information.
-
This is the unique identifier for your organization . This is stored as Org Name
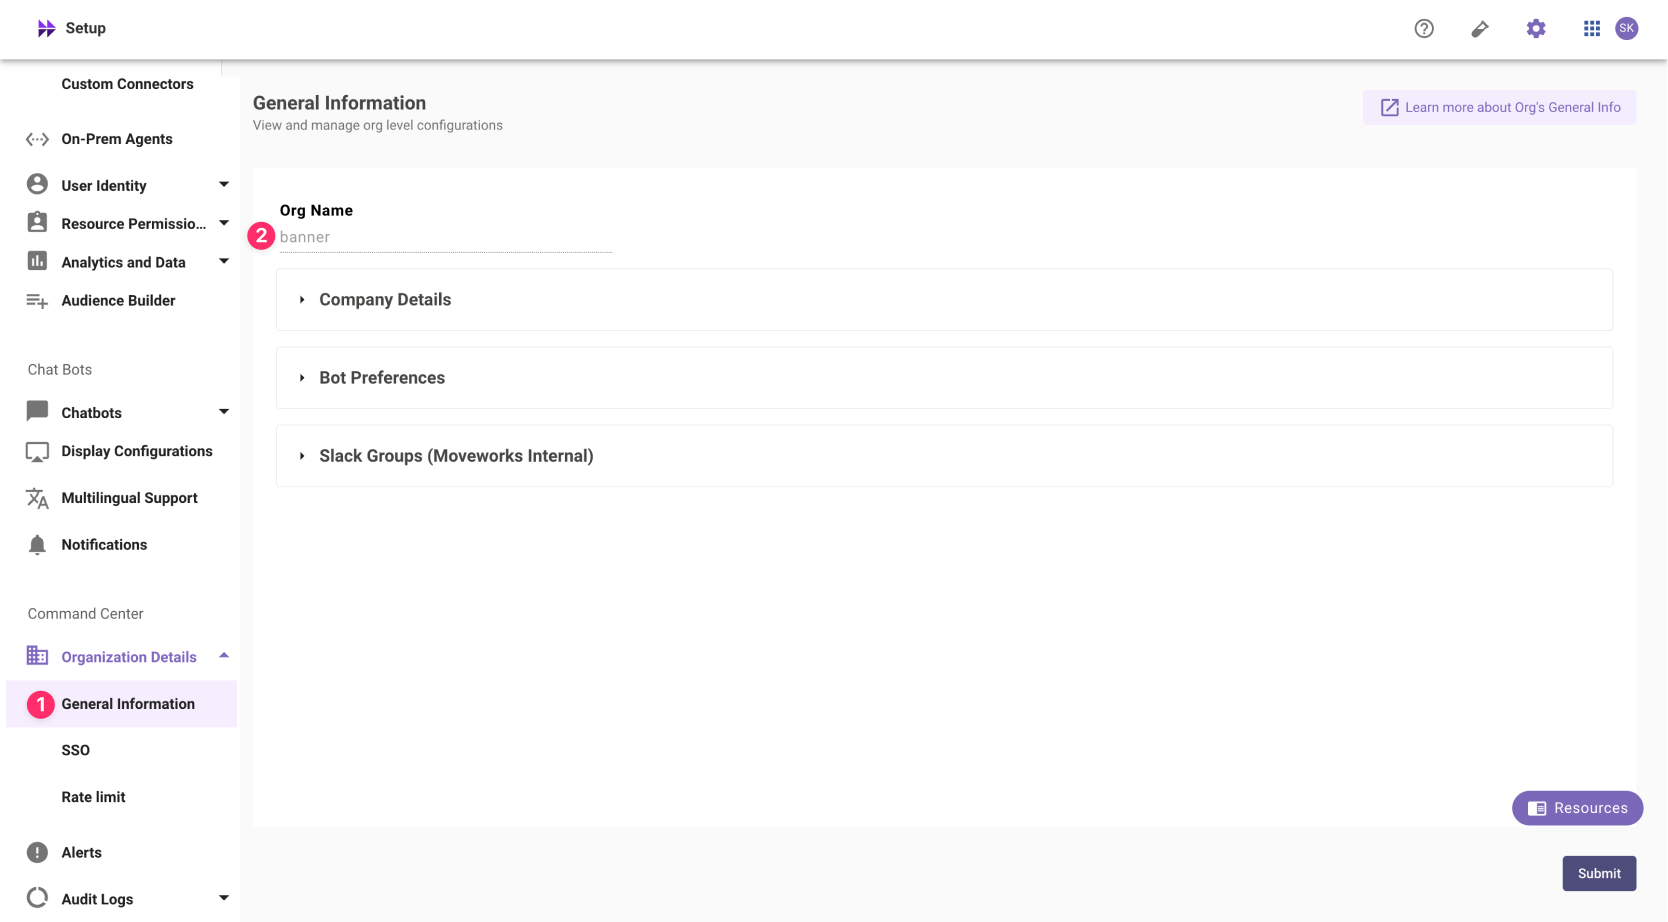 The Org name cannot be changed. Once set, the same value should be used in all cases.
In exceptional cases where you would like Moveworks to support your organisation with a different subdomain value. Please reach out to Moveworks Support.
-
Okta App Setup Instructions
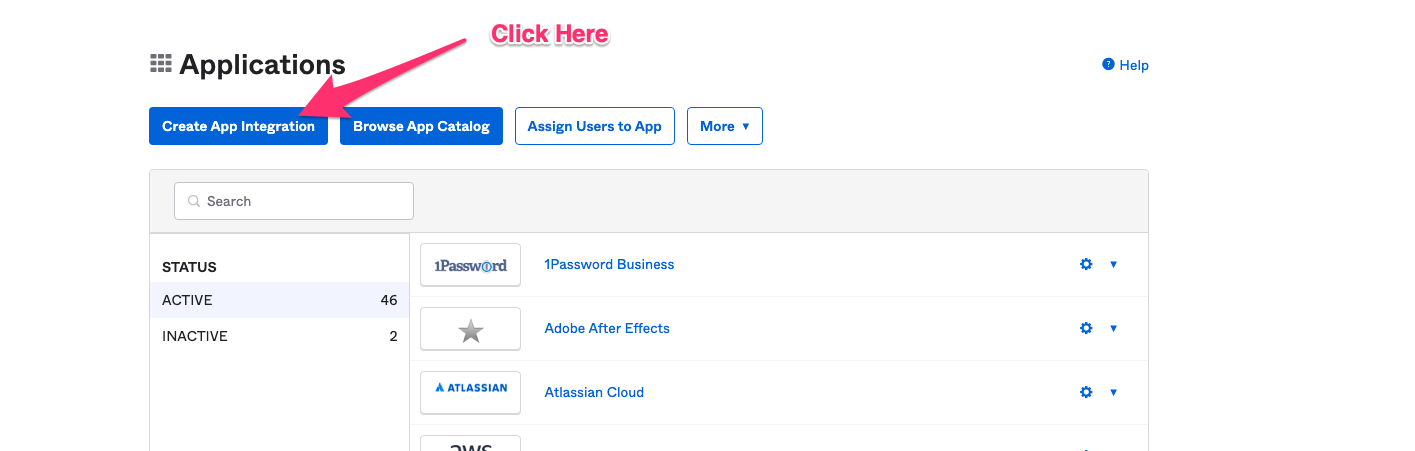
- Go to the screen in Okta that allows you to create Applications.
- Click on Create App Integration.
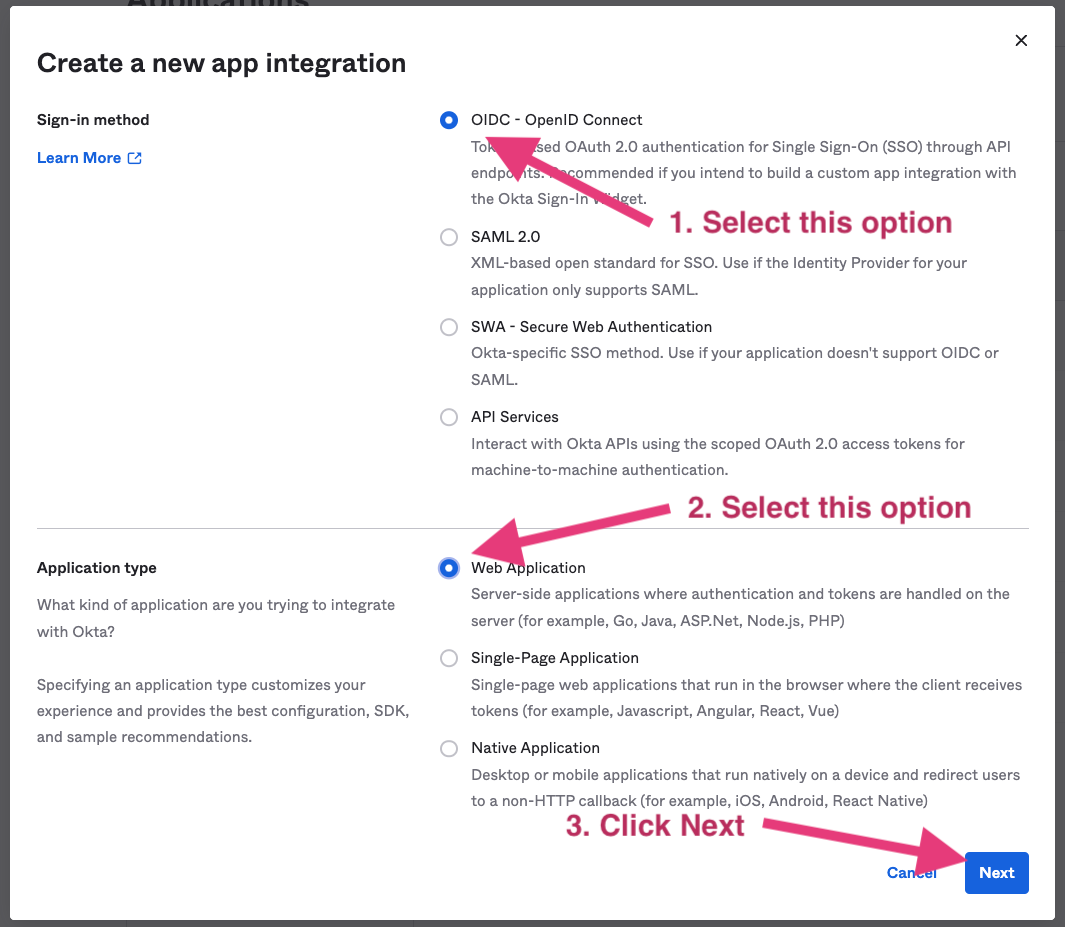
- Select OIDC - OpenID Connect in the next screen.
-
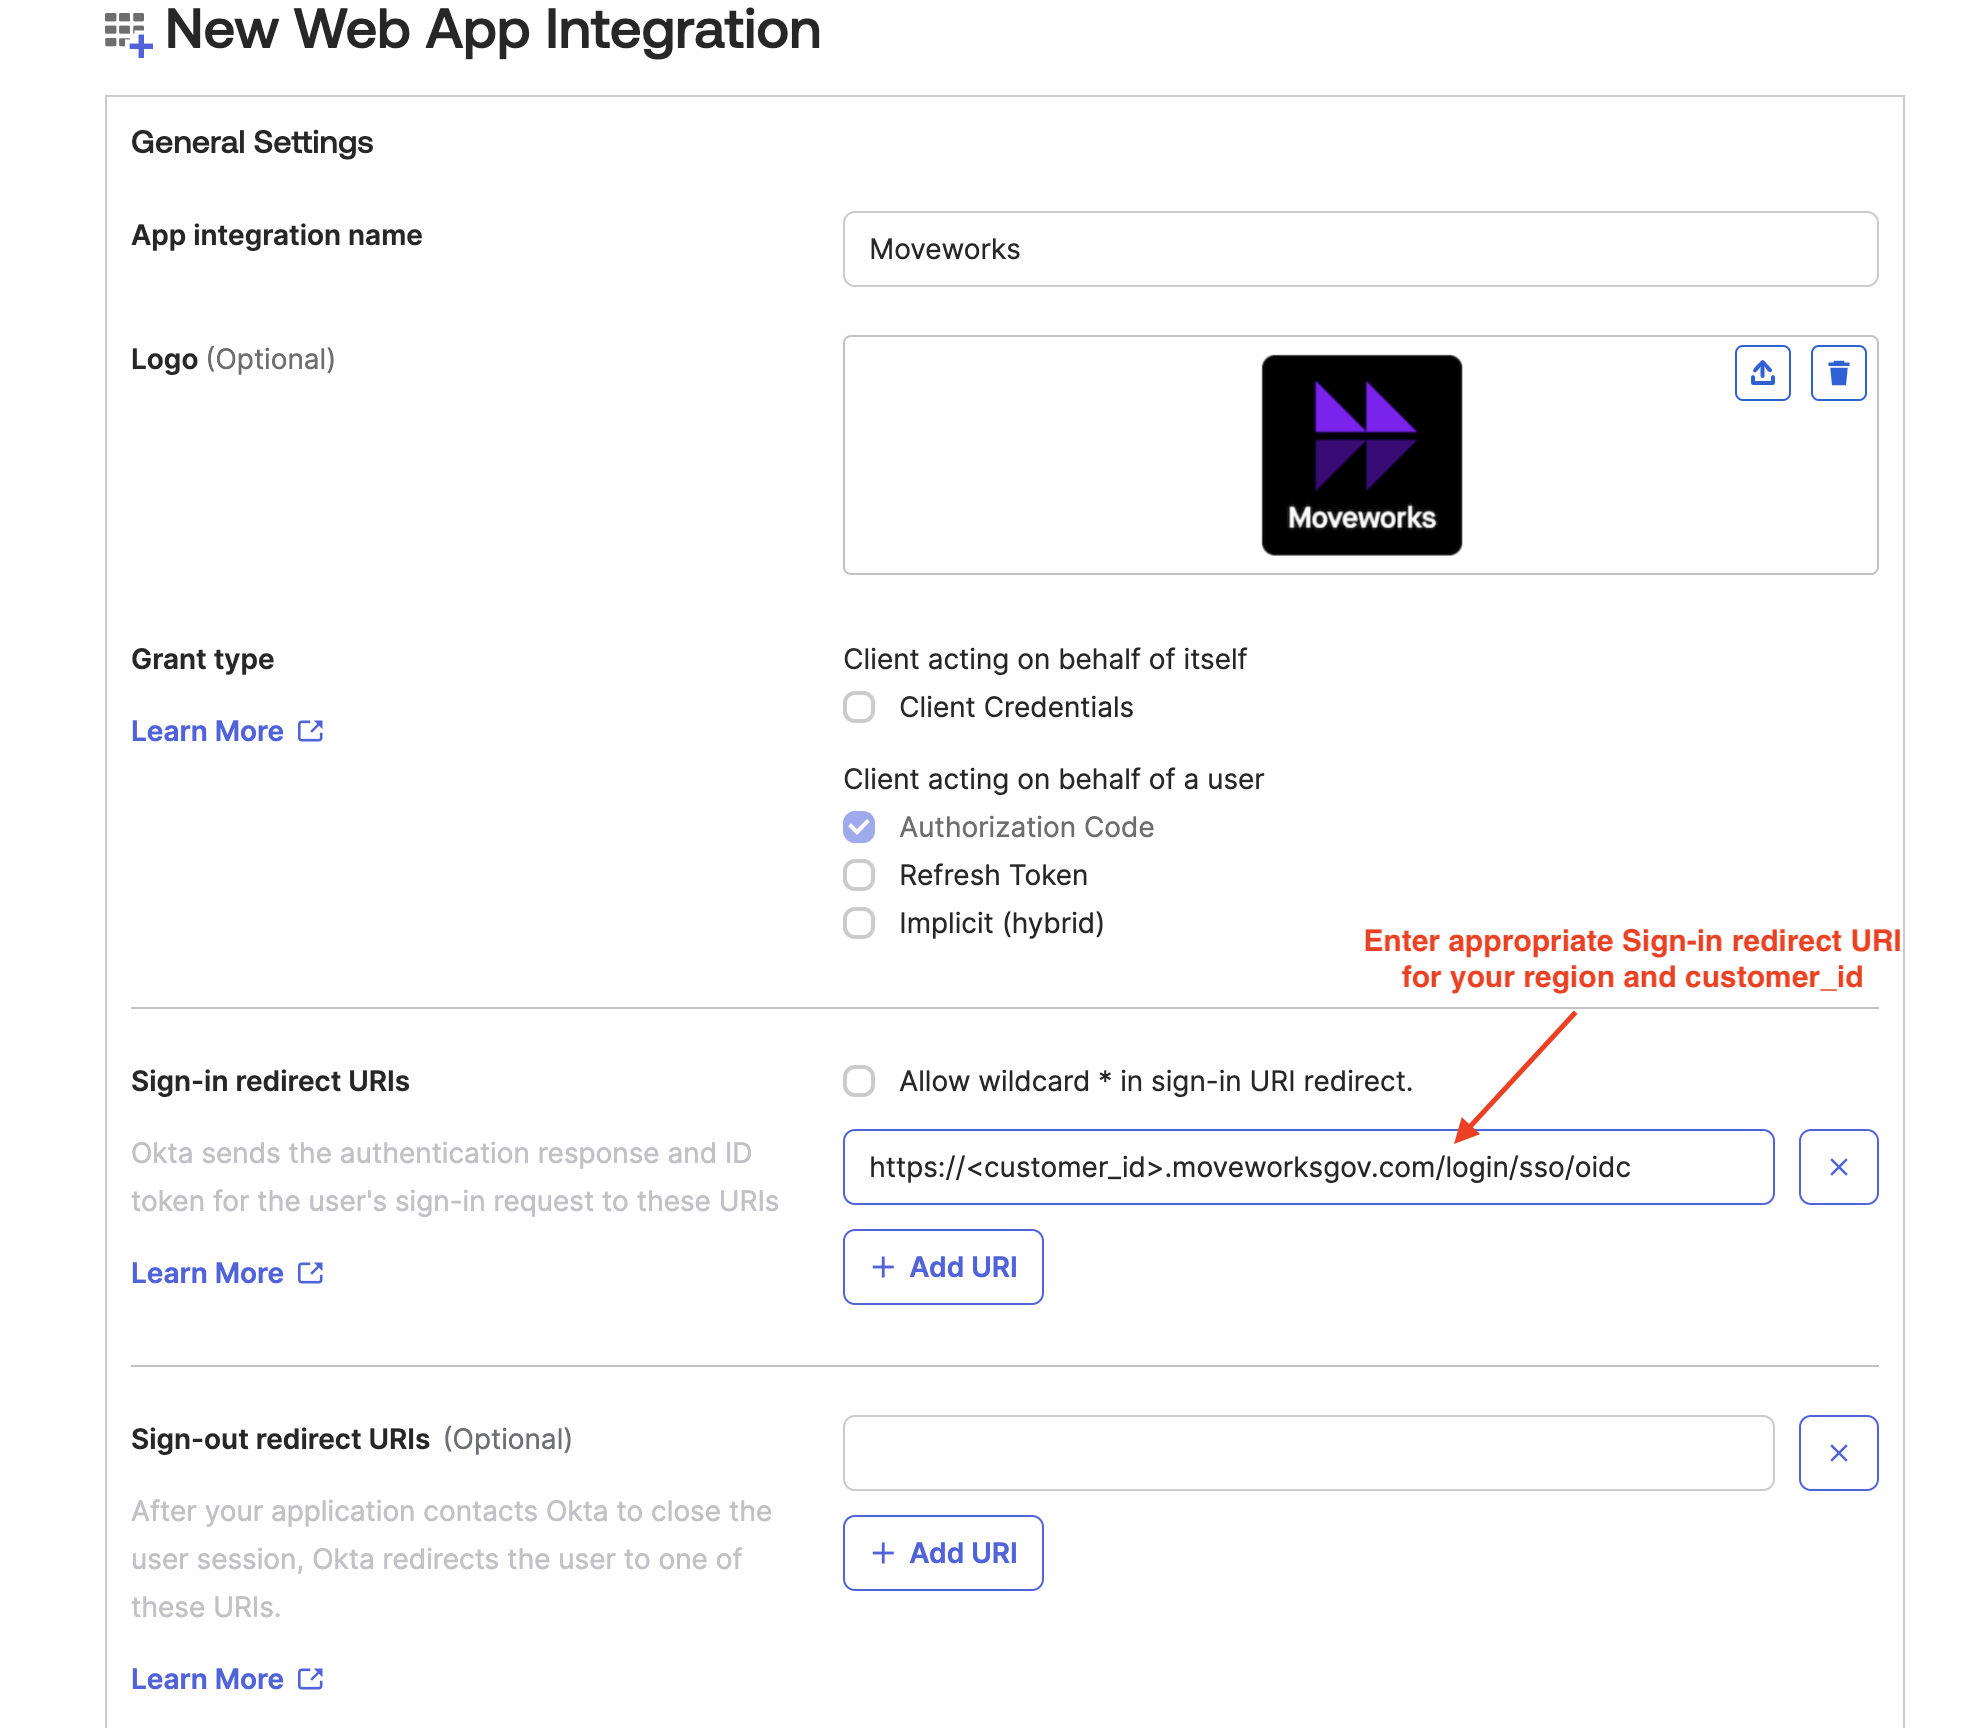
Specify a name for the application.
-
Add the logo for Moveworks application

-
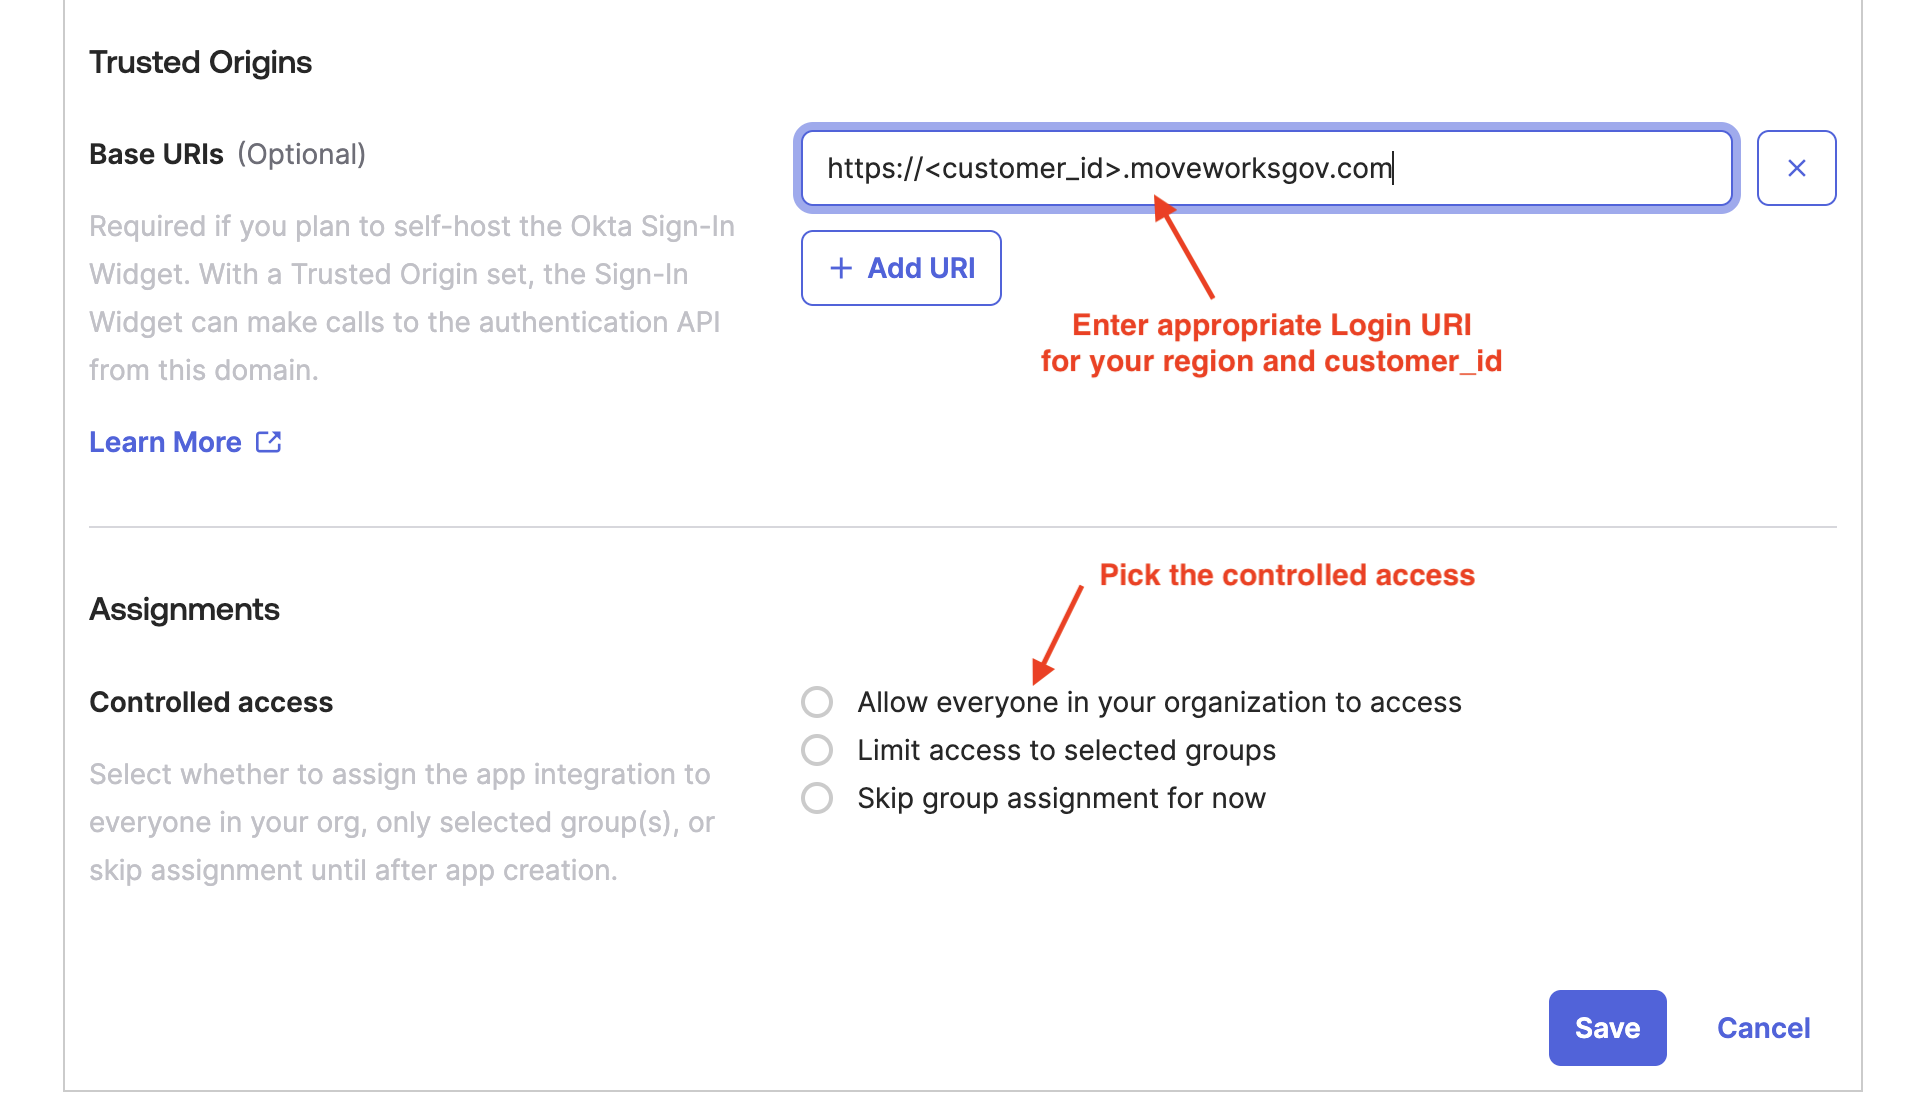
Identify the appropriate Sign-in Redirect URI and Login URI for your environment from the table below, replacing the
CUSTOMER_IDwith the value for your org which was collected as part of the Prerequisites.
- Enter the values as shown below and hit Save.
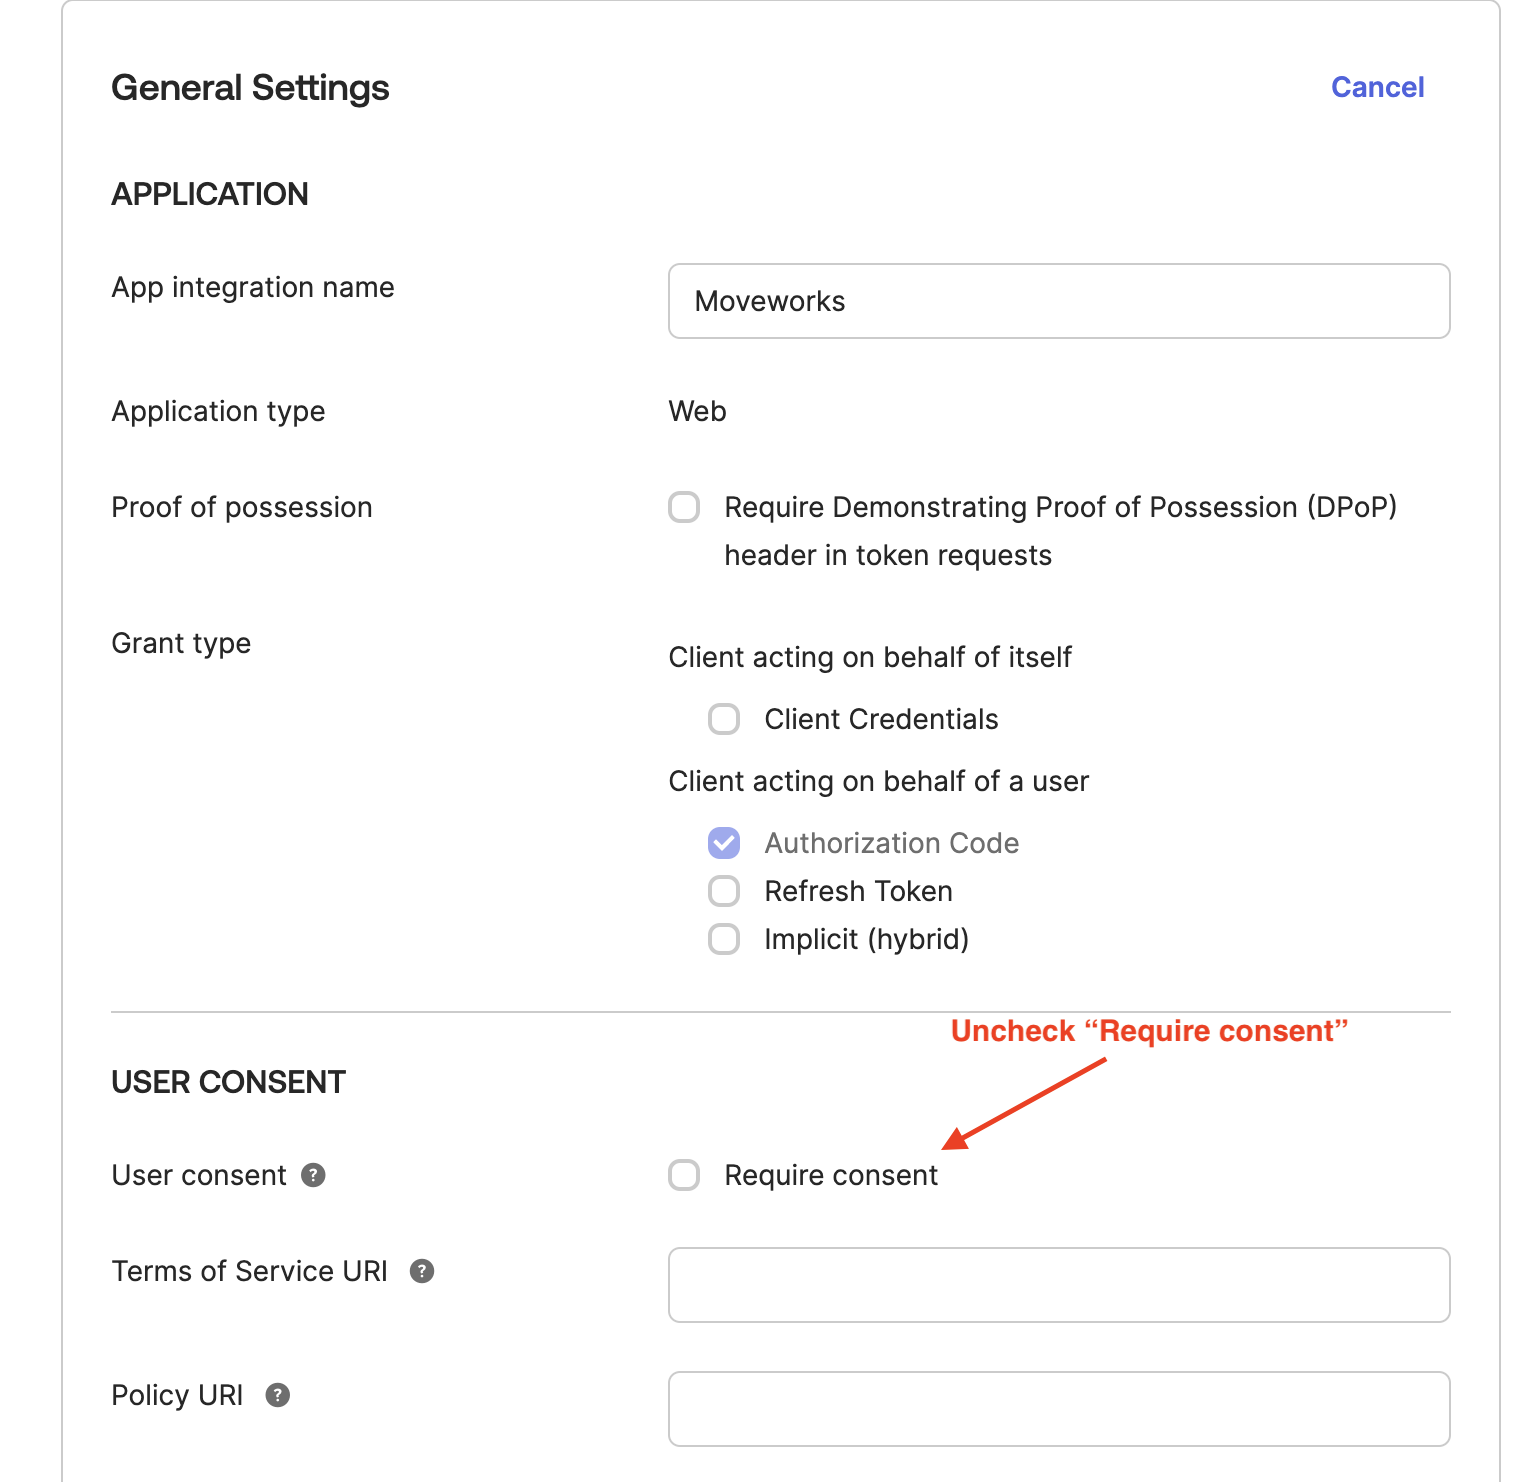
- Go back to General Settings and uncheck Require consent.
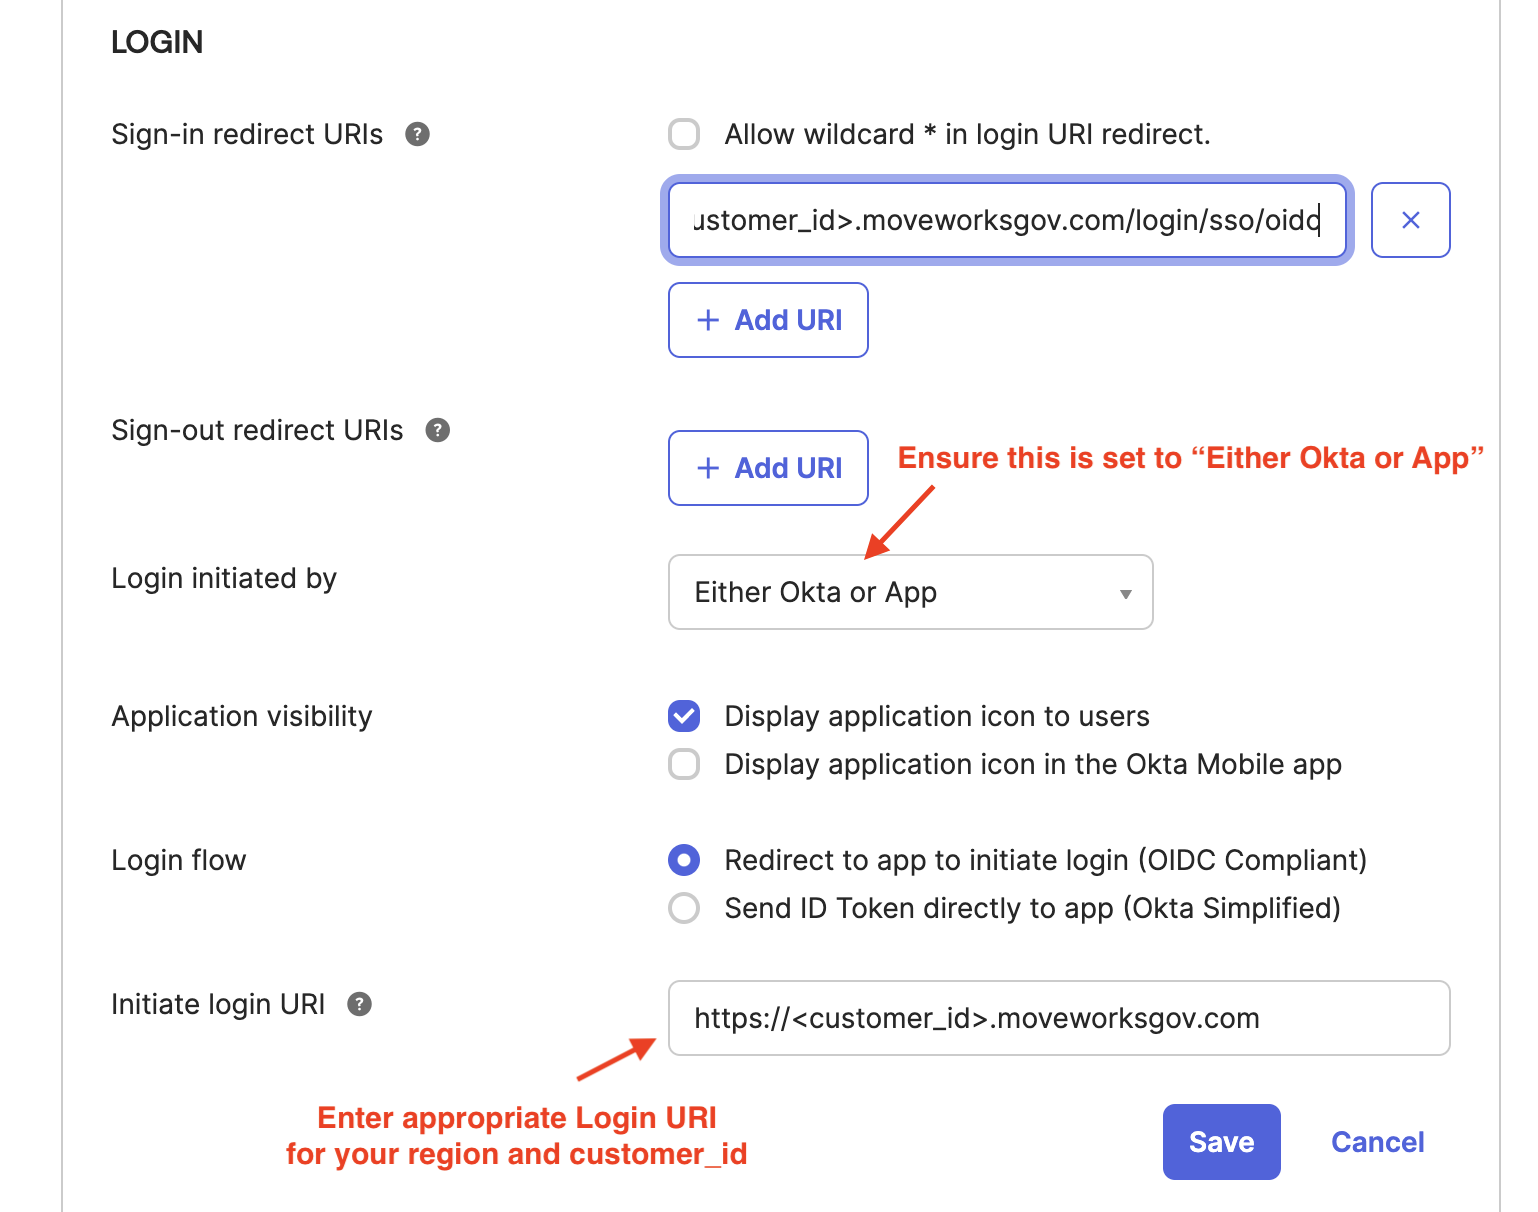
- In order to allow customer users to login without manually inputting email, set a Initiate login URI from the table below based on the Region you are setup in. Replacing the
CUSTOMER_IDwith the value for your org which was collected as part of the Prerequisites.
Finish the Moveworks side of the integration
After setup is complete, provide the following information to your Customer Success team.
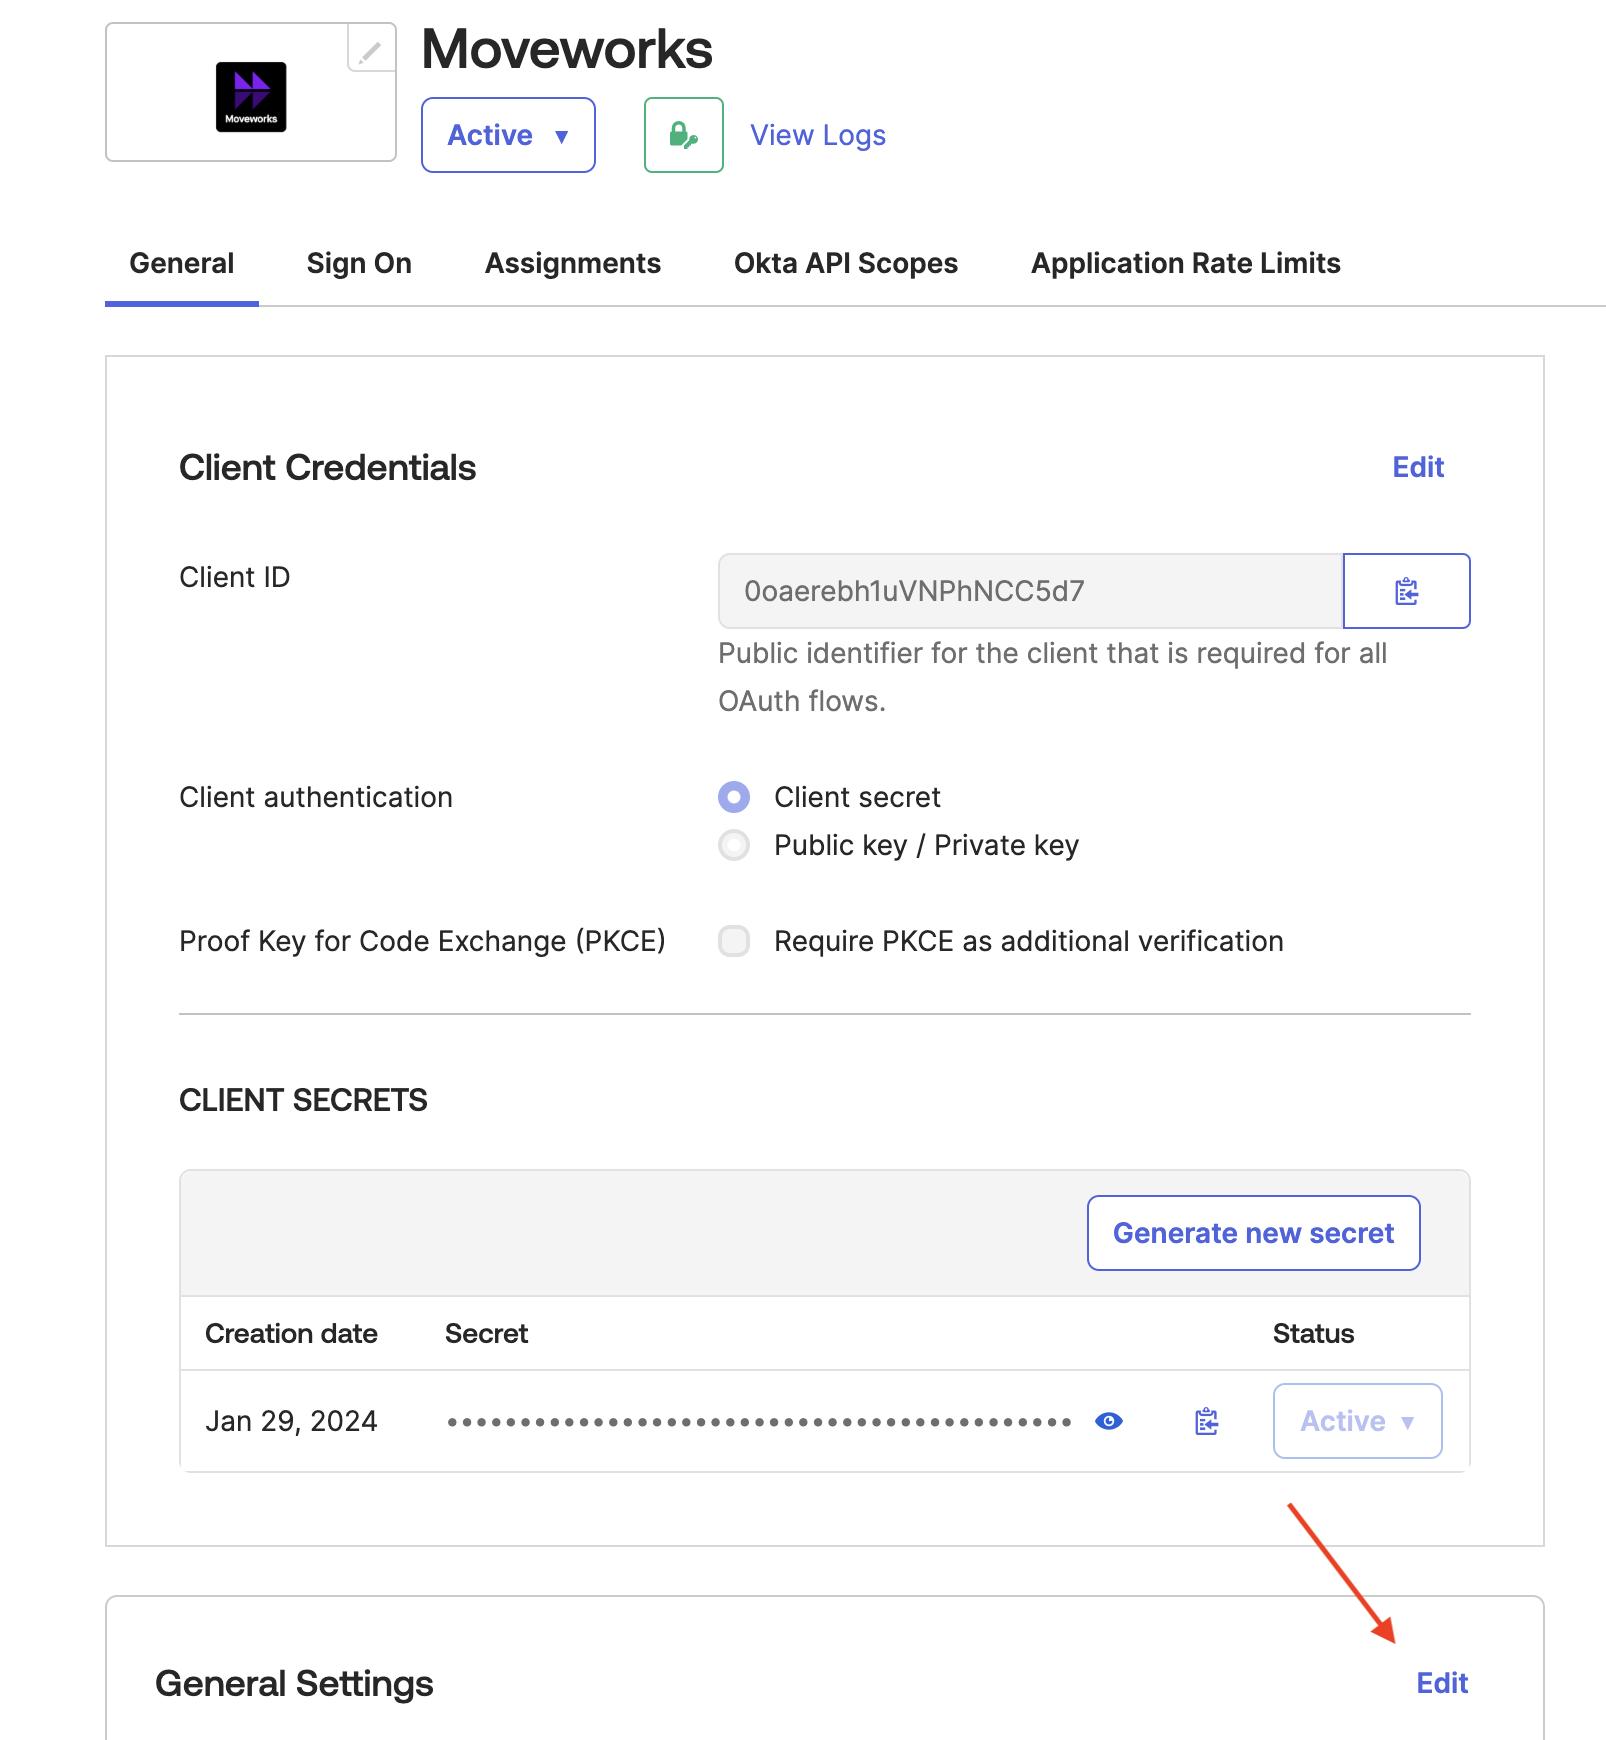
- Go to the General tab.

- Share the
idp_client_id,idp_secret, andidp_issuerwith your Customer Success team. Theidp_issueris not in the Okta settings, but it should be based on your Okta instance name (e.g. If you login at https://example.okta.com , then share that value for youridp_issuer).

-
Updated 9 months ago