SAML Setup (General)
Prerequisites
Making edits?Before you edit your SSO configuration, make sure you are logged into MyMoveworks. Otherwise, you will not be able to log in and update your SSO configuration details.
SSO Prerequisites
- Have sufficient privileges to create & configure a SAML application.
Moveworks SSO Prerequisites
-
Your Moveworks Environment should be initialized in order to continue. (Verify with your Account Team if this has been completed)
-
Note the following values.
-
data_center_domain- the data center where your organization is hosted (see table below).Data Center data_center_domain United States (default) moveworks.com Canada am-ca-central.moveworks.com EU am-eu-central.moveworks.com Australia / Asia Pacific am-ap-southeast.moveworks.com Government Secure Cloud moveworksgov.com -
subdomain- your organization's login subdomain. This should match yourcustomer_id, which can beverified from the General Information Page.WarningMake sure to use the unique subdomain. For example, if you're organization's login subdomain is acme.moveworks.com, then your
subdomainis acme and yourdata_center_domainis moveworks.com which is part of the US Data center. -
customer_id- The unique identifier for your organization . This is stored as Org Name under Organization Details > General Information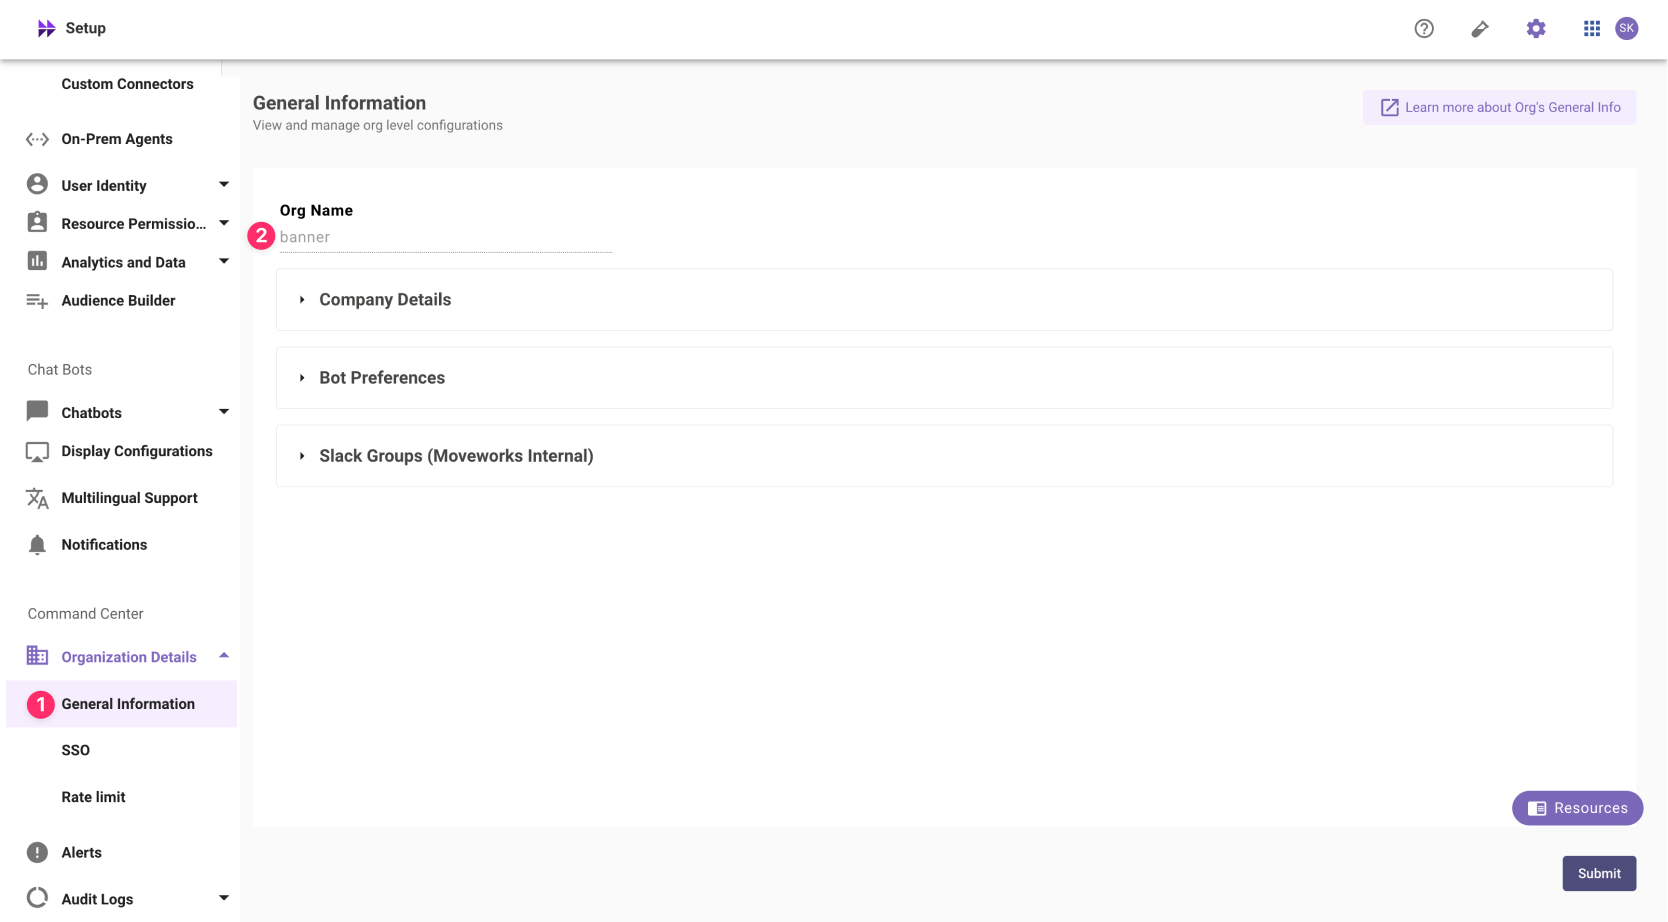 The Org name cannot be changed. Once set, the same value should be used in all cases.
In exceptional cases where you would like Moveworks to support your organisation with a different subdomain value. Please reach out to Moveworks Support.
-
Configuration Steps
Create SAML Application
Go to your SSO Admin Portal & create a new "Security Assertion Markup Language" (SAML) application. Please configure your urls based on your Moveworks SSO properties.
-
App Name:
Moveworks. -
Sign-in Method:
SAML 2.0as the sign in method. -
SAML ACS URL:
https://{{subdomain}}.{{data_center_domain}}/login/sso/samlMultiple URLs?Moveworks uses the same url for sending and receiving SAML Assertions. So you can use this SAML ACS URL for the following URLs
- Single-sign on URL
- Destination URL
- Recipient URL.
-
Audience URI (also called SP Entity ID):
https://www.moveworks.com. -
Relay State:
customer_id -
Application Icon:

Add SAML Configuration in MyMoveworks
-
Note your SAML Configuration variables from your SSO platform
- Identity Provider SSO URL
idp_url - Identity Provider Issuer:
idp_issuer - X.509 Certification:
x509_certificate
To actually set the config most SSO tools will have an XML output. Using this you should be able to get everything you need.
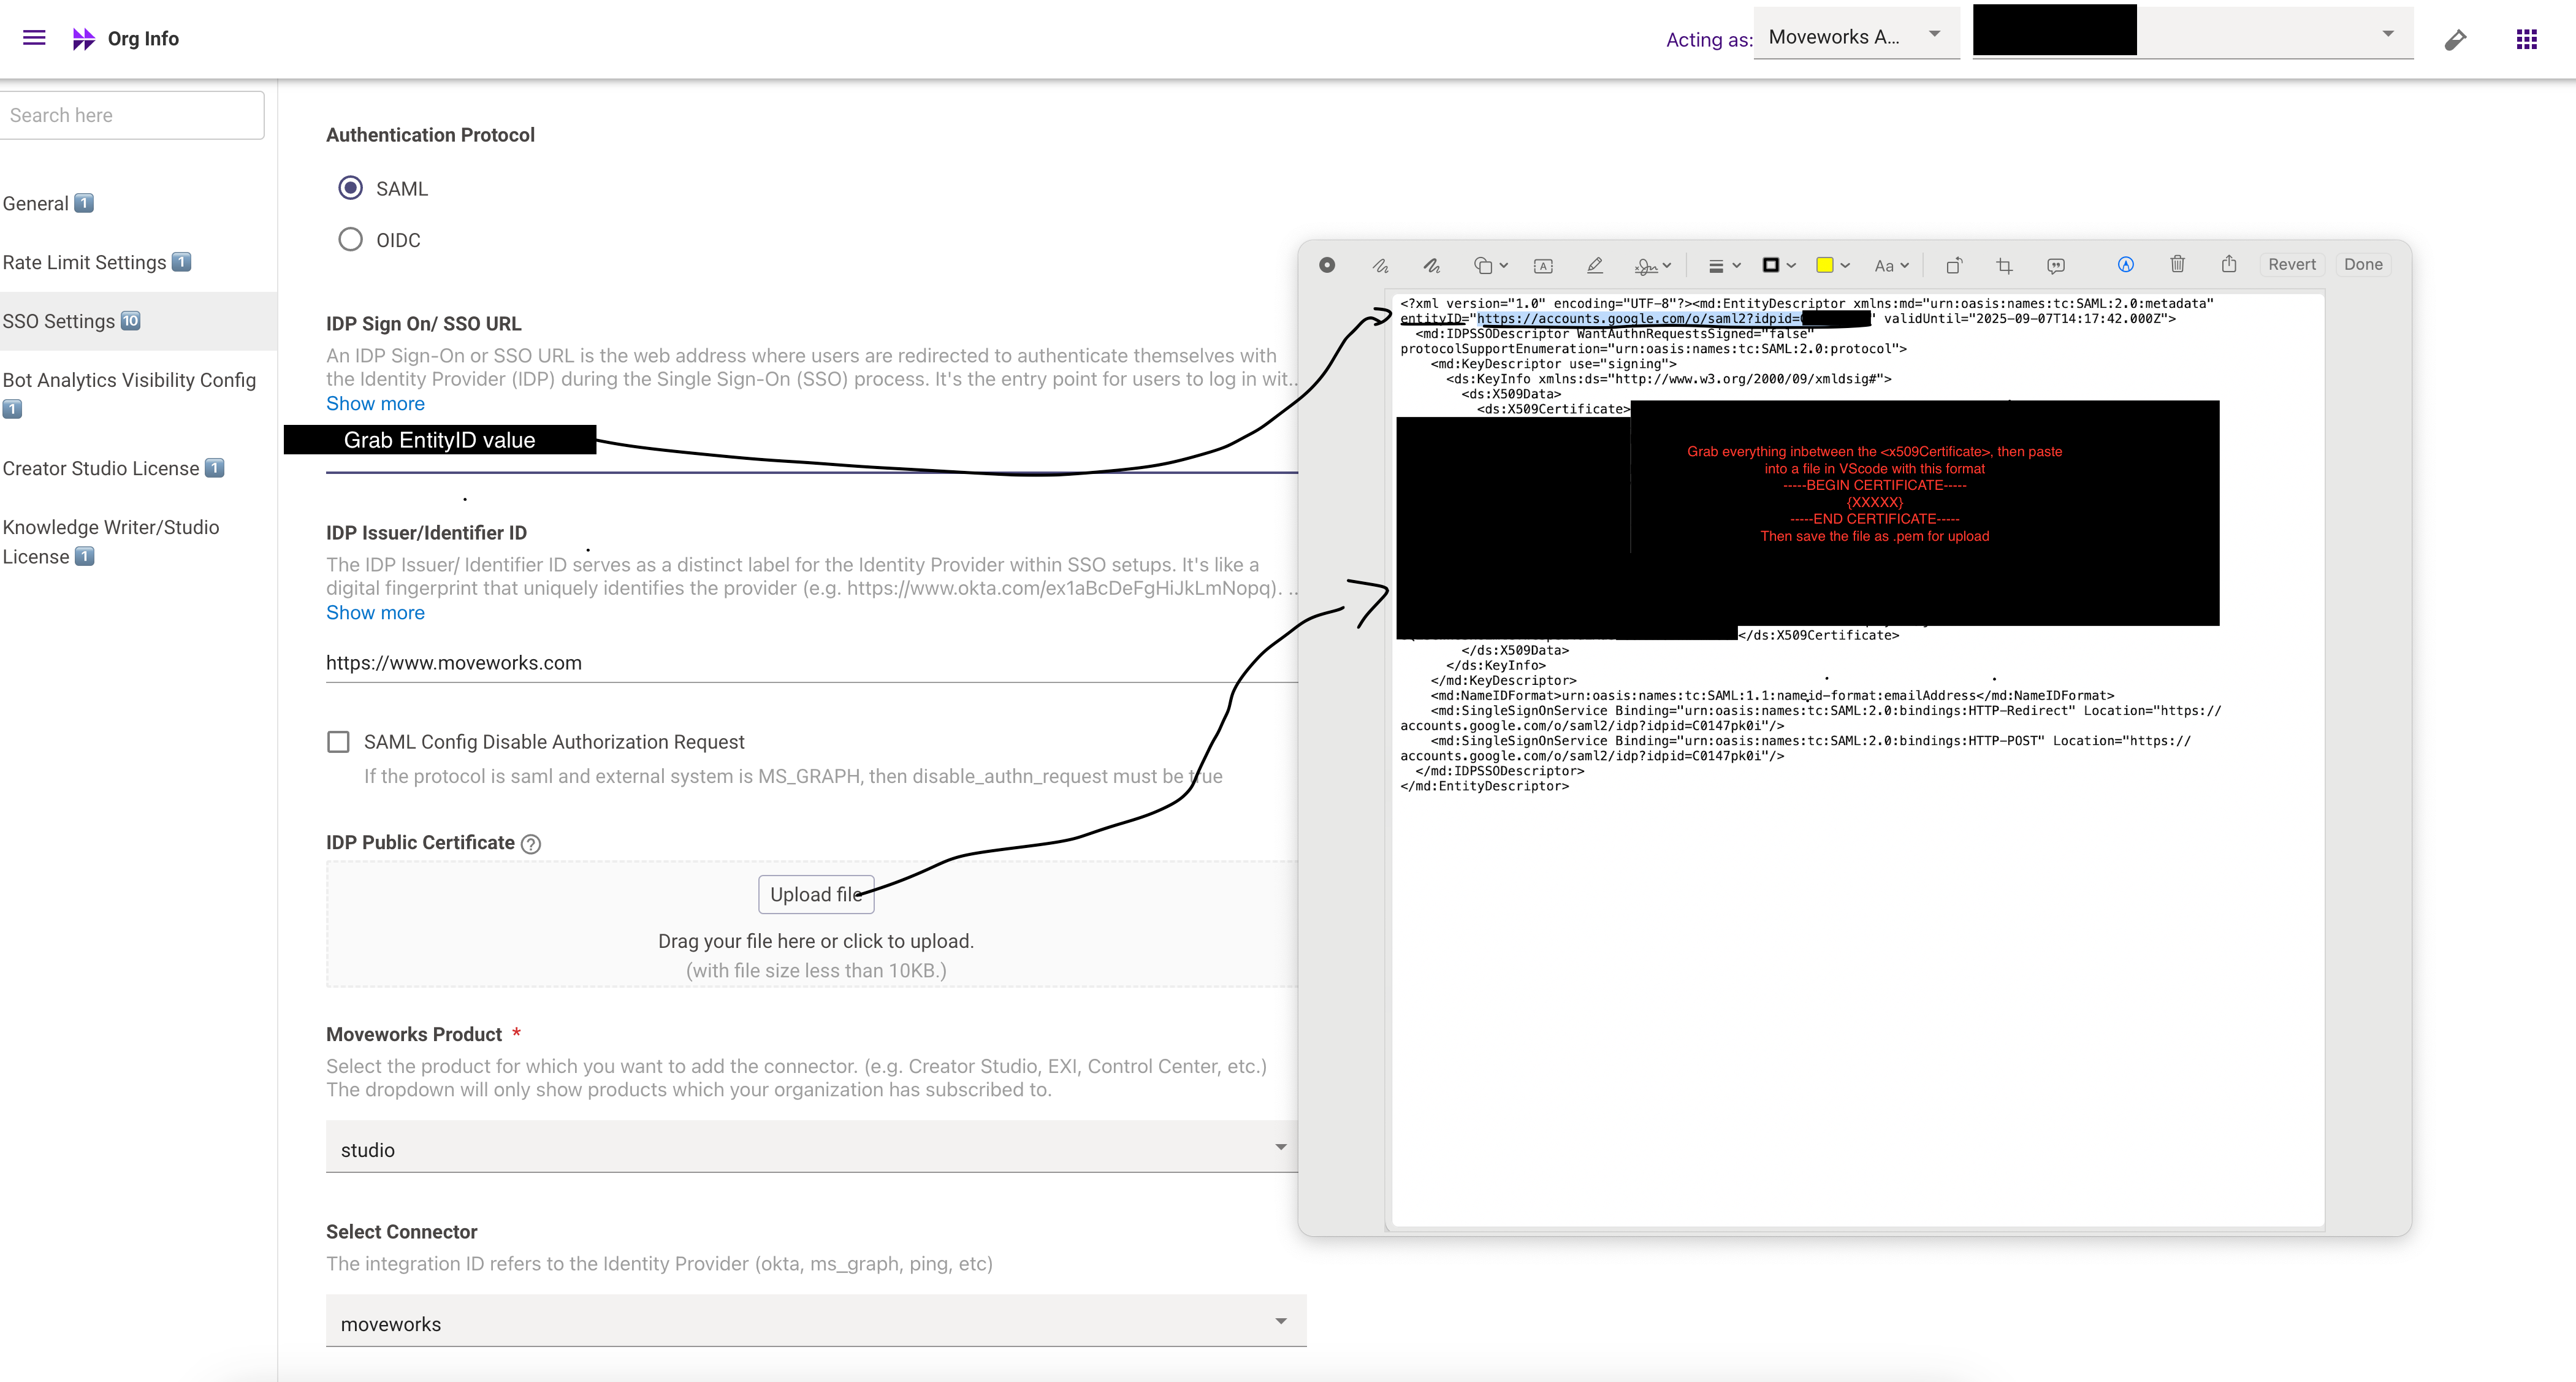
Follow this screenshot — your main tasks:
entityID
- Use the Identity Provider (IdP) Sign-On URL as the entityID.
- You can capture it during the redirect to your SSO service and validate that it matches the URL
x509 Certificate
- Format the certificate per standard: include the header -----BEGIN CERTIFICATE-----, the footer -----END CERTIFICATE-----, and wrap lines at 64 characters each (except the final line). For example, you can use the tool at SAMLTool.com: Format X.509 Cert
- We recommend using VS Code (or similar) to format and then save the certificate as a .cert or .pem file.
IdP Issuer
Use the same URL you assigned for the Audience URL (in this case: https://www.moveworks.com) as the IdP issuer.
Email Address Consistency
Ensure that the email address sent in the SSO assertion from the IdP matches the email address that the user is ingested under in the system
- Identity Provider SSO URL
-
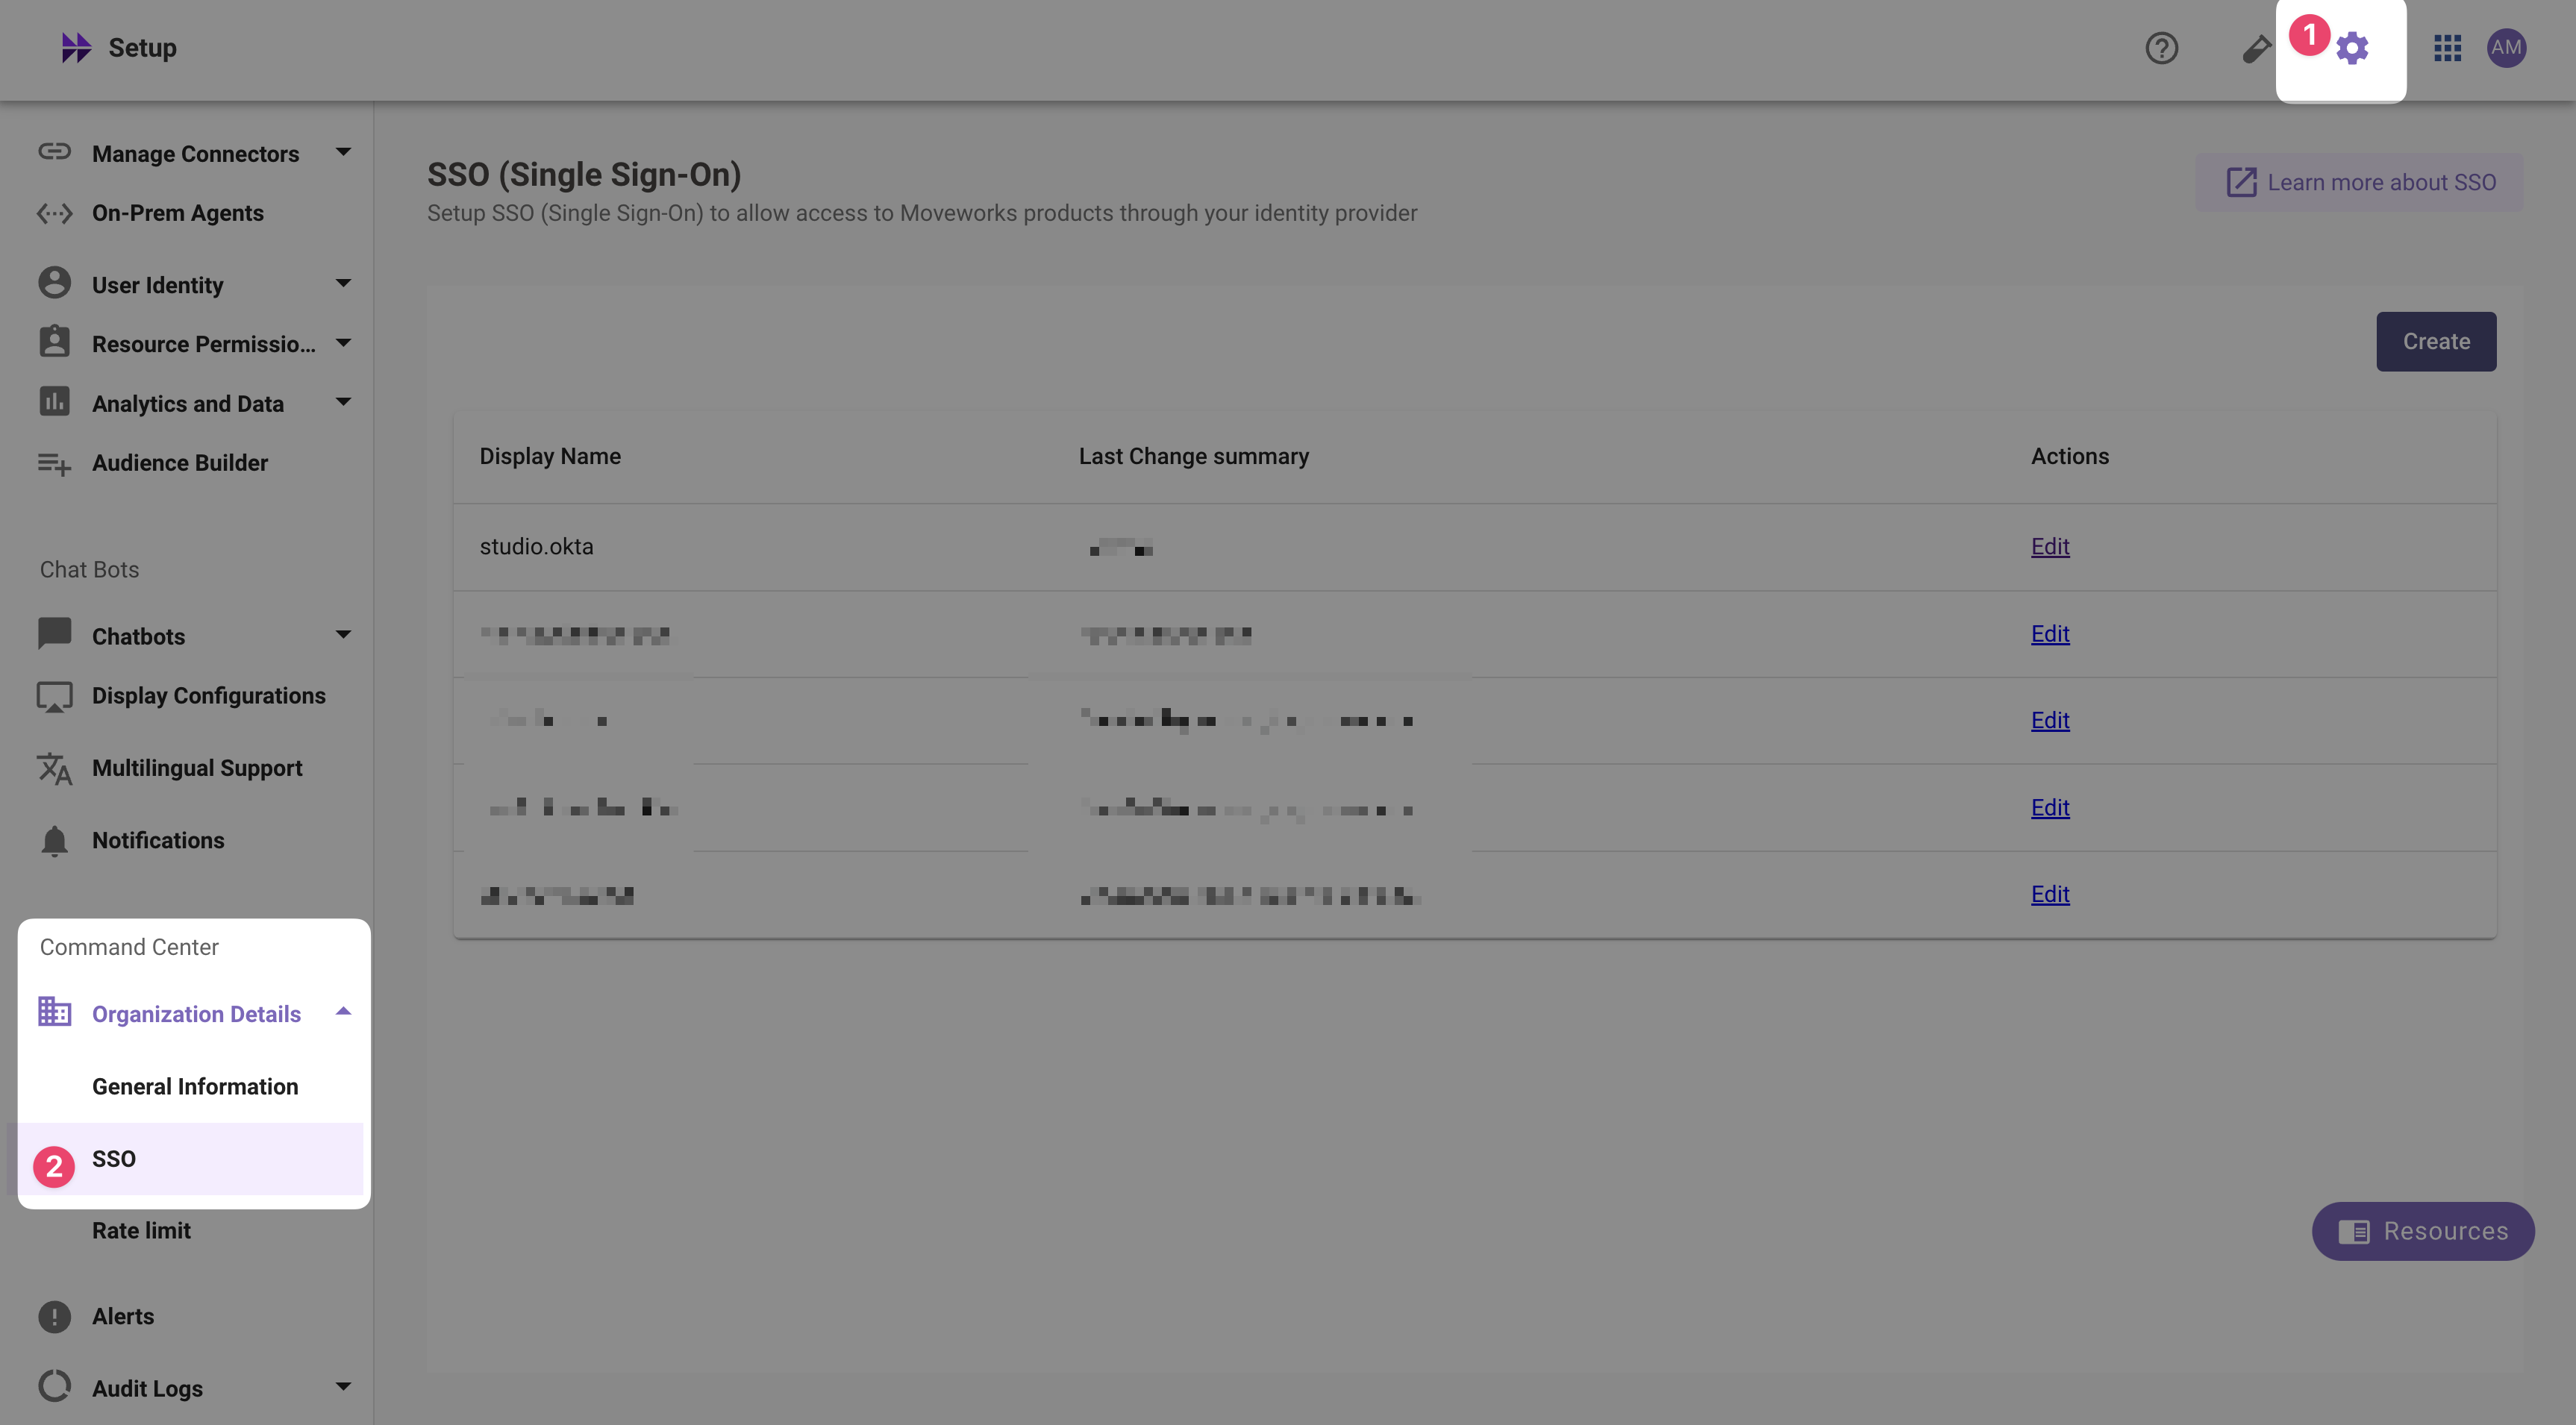
Navigate to SSO Settings in MyMoveworks
-
If you already see a
studioconfig, edit it. Otherwise, choose Create. -
Add your configuration using the values you've noted above
- Moveworks Product:
studio - Select Connector:
moveworksor{{your_idp}} - Authentication Protocol:
SAML - IDP Sign On / SSO URL:
{{idp_url}}(From Step 1) - IDP Issuer:
{{idp_url}}(From Step 1) - IDP Public Certificate:
x509_certificate(From Step 1)
- Moveworks Product:
-
Click Submit.
-
Wait a few minutes, then attempt to log into your instance at
https://{{subdomain}}.{{data_center_domain}}
Updated 4 months ago