Simpplr Access Requirements
Use this document for instructions on how to get the access setup in place for the Moveworks integration with Simpplr.
Prerequisite
Make sure you have the salesforce.crt file handy. The Moveworks team should generate and share this with you.
Process Walkthrough
Please play close attention to the listed values while configuring access. These must be exact matches - they are not just examples.
-
Create a Connected App in your Salesforce instance
- Under Setup > App Manager: Click
New Connected App - Fill basic info: {Connected App Name: Moveworks_Server, API Name: Moveworks_Server, Contact Email: [email protected]}
- Select enable oAuth settings under API (Enable oAuth Settings) & add {Callback URL: https://login.salesforce.com/}
- Check Use digital signatures. Upload the salesforce.crt that was provided as a pre-req.
- Add oAuth scopes to:
- api
- refresh_token, offline_access
- visualforce (only required for Simpplr)
- Click Save & Note down the
Consumer Keyand theConsumer Secret - After saving Update OAuth Policies, click
Manage> Edit Policies- And in the OAuth policies section, change Permitted Users to Admin approved users are pre-authorized
- And in the Session policies section, change Timeout Value to 24 hours
- Click Save
- Under Setup > App Manager: Click
-
Create a Permission Set to interact with the Connected App
- Navigate to Users >
Permission Sets& click on New - Add
moveworks_connected_appas the Label & Api Names & click Save - Now click on the moveworks_connected_app Permission Set and Click Assigned Connected Apps
- Click Edit and add Moveworks_Server to list of Enabled Connected Apps & Click Save
- Navigate to Users >
-
Create New Service Account (if it doesn’t exist)
- Navigate to Users > Users & click on
New User - Enter the following information & click Save:
- Last Name:
Moveworks - Alias:
moveworks - Email, Username & Nickname:
moveworks@{{customer-domain}}.com - Setup profile as
Standard User
- Last Name:
- Navigate to Users > Users & click on
-
Assign our service user the connected app
- Navigate to Users > Users & click on our service user account that we just created
- Click on Permission Set Assignment and then Edit Assignments
- Now add
moveworks_connected_appto list of Enabled Permission Sets & Click Save
-
Ensure we have the required field level permissions to interact with all the columns
- Note down our service account’s Profile Name under Users > Profiles
- Navigate to Setup > Object Manager > Click on the object
Label Simpplr Content (Simpplr__Simpplr_Content__c) - Click on the Fields & Relationships tab
- Then do the steps below for each of the following fields:
Steps:Id Simpplr__Title__c Simpplr__Text_Intro__c Simpplr__Site__c Simpplr__Type__c Simpplr__Is_Archived__c Simpplr__Is_Deleted__c Simpplr__Is_Published__c Simpplr__Is_Unpublished__c- Click on the column name
- Click the button
Set field-level Security - Make sure
Visiblecolumn is checked for our service account’s noted down profile for each of these columns. - Save this configuration
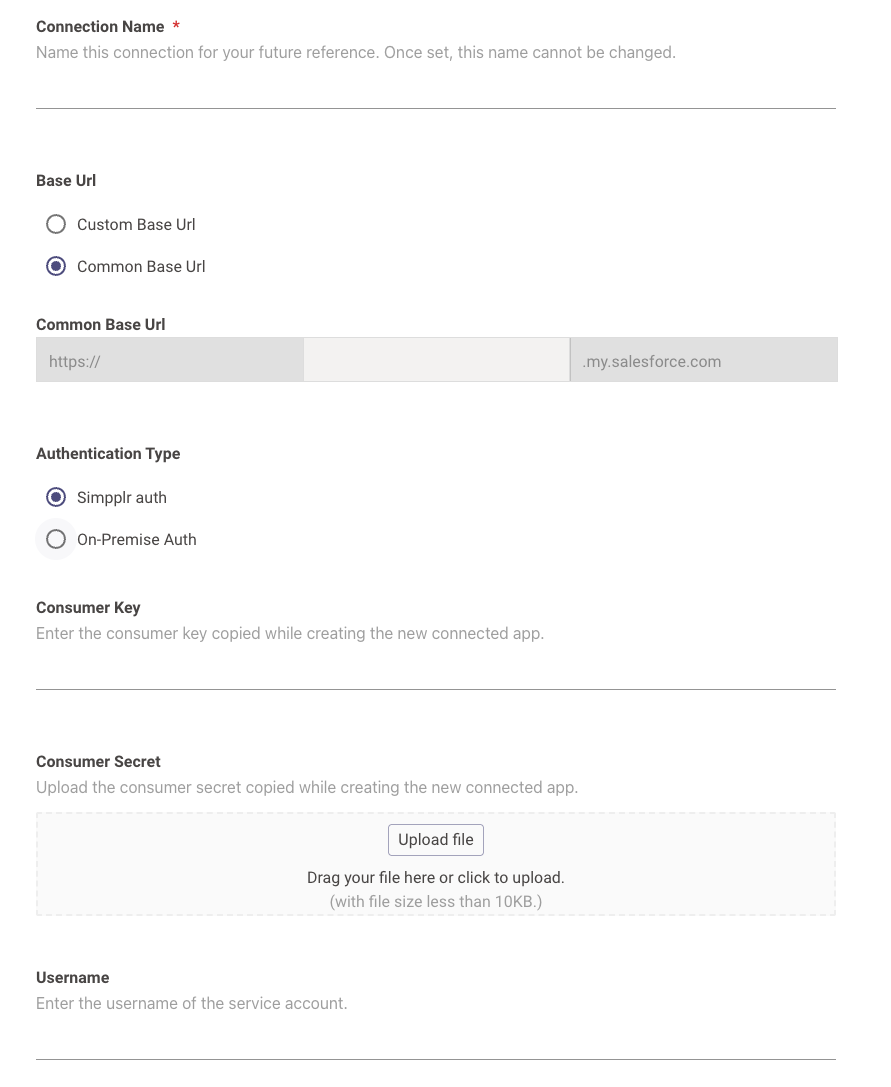
Create the Connector in Moveworks Setup
Navigate to Core Platform > System Connectors and create a new connector. Select Simpplr and enter the information below:
- Connection Name: simpplr (recommended)
- Base Url: Select “Common Base URL” and enter the tenant of your Simpplr instance if it ends with “.my.salesforce.com”. If not, select “Custom Base URL” and enter your Simpplr instance’s URL.
- Authentication Type: Simpplr auth
- Consumer Key: Enter the consumer key generated while creating the connected app
- Consumer Secret: Enter the consumer secret generated while creating the connected app
- Username: Enter the username of the service account assigned to Moveworks
Updated 5 months ago