
Embedded AI Assistant - Google SAML SSO
Making edits?Before you edit your SSO configuration, make sure you are logged into MyMoveworks. Otherwise, you will not be able to log in and update your SSO configuration details.
Prerequisites
Google:
- Google Workspace and Admin access
- Sufficient privileges to create SAML application
Moveworks:
- Org is initialized and user ingestion is complete
Configuration
Google:
Step 1: Create custom SAML app
Navigate to https://admin.google.com/ and login with your admin account.
-
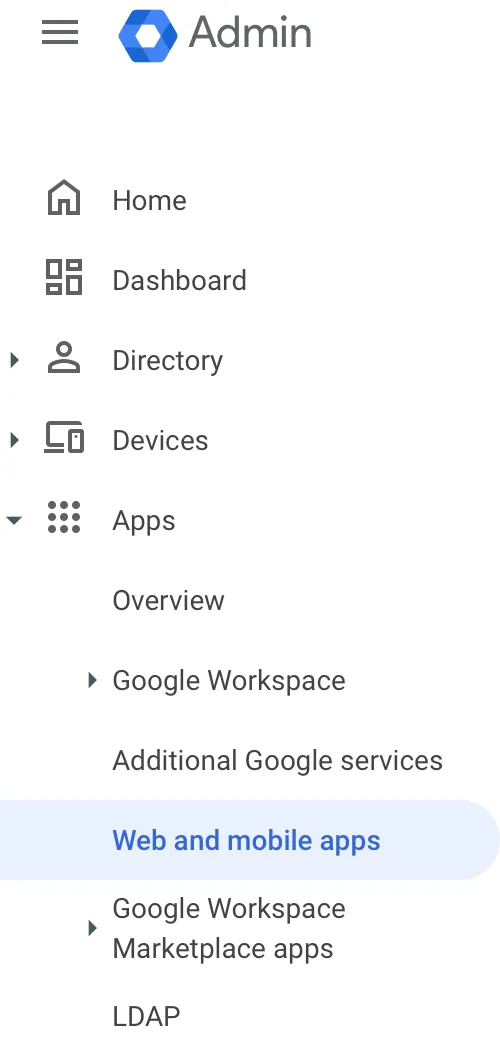
Go to “Home→Apps→Web and mobile apps”.
-
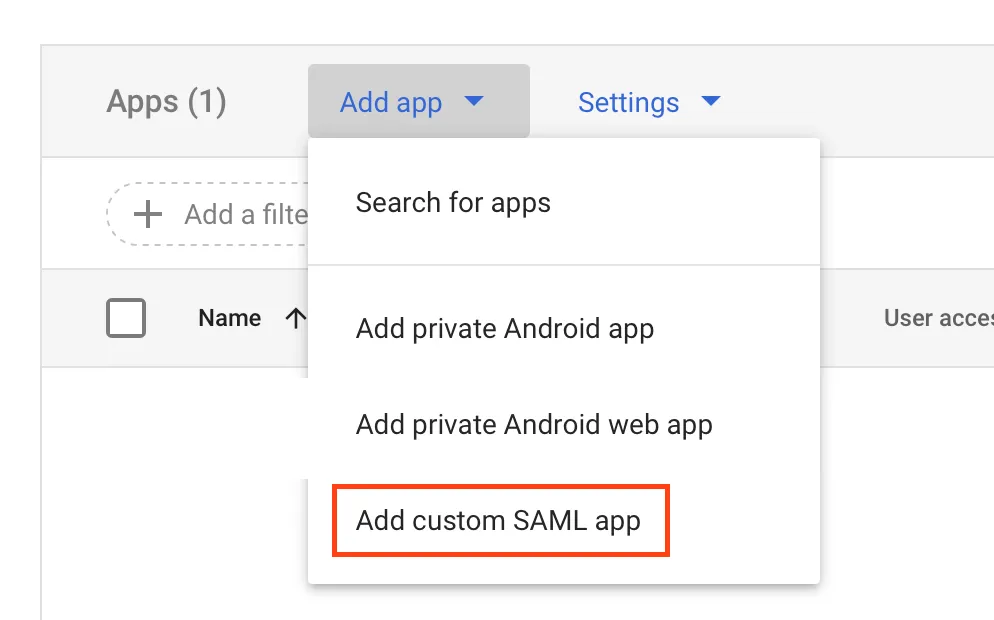
Click on “Add app” and from the drop down select “Add custom SAML app”.
-
On the “App Details” screen, please fill in the following information:
- App name: Moveworks
- Description: Moveworks Embedded AI Assistant
-
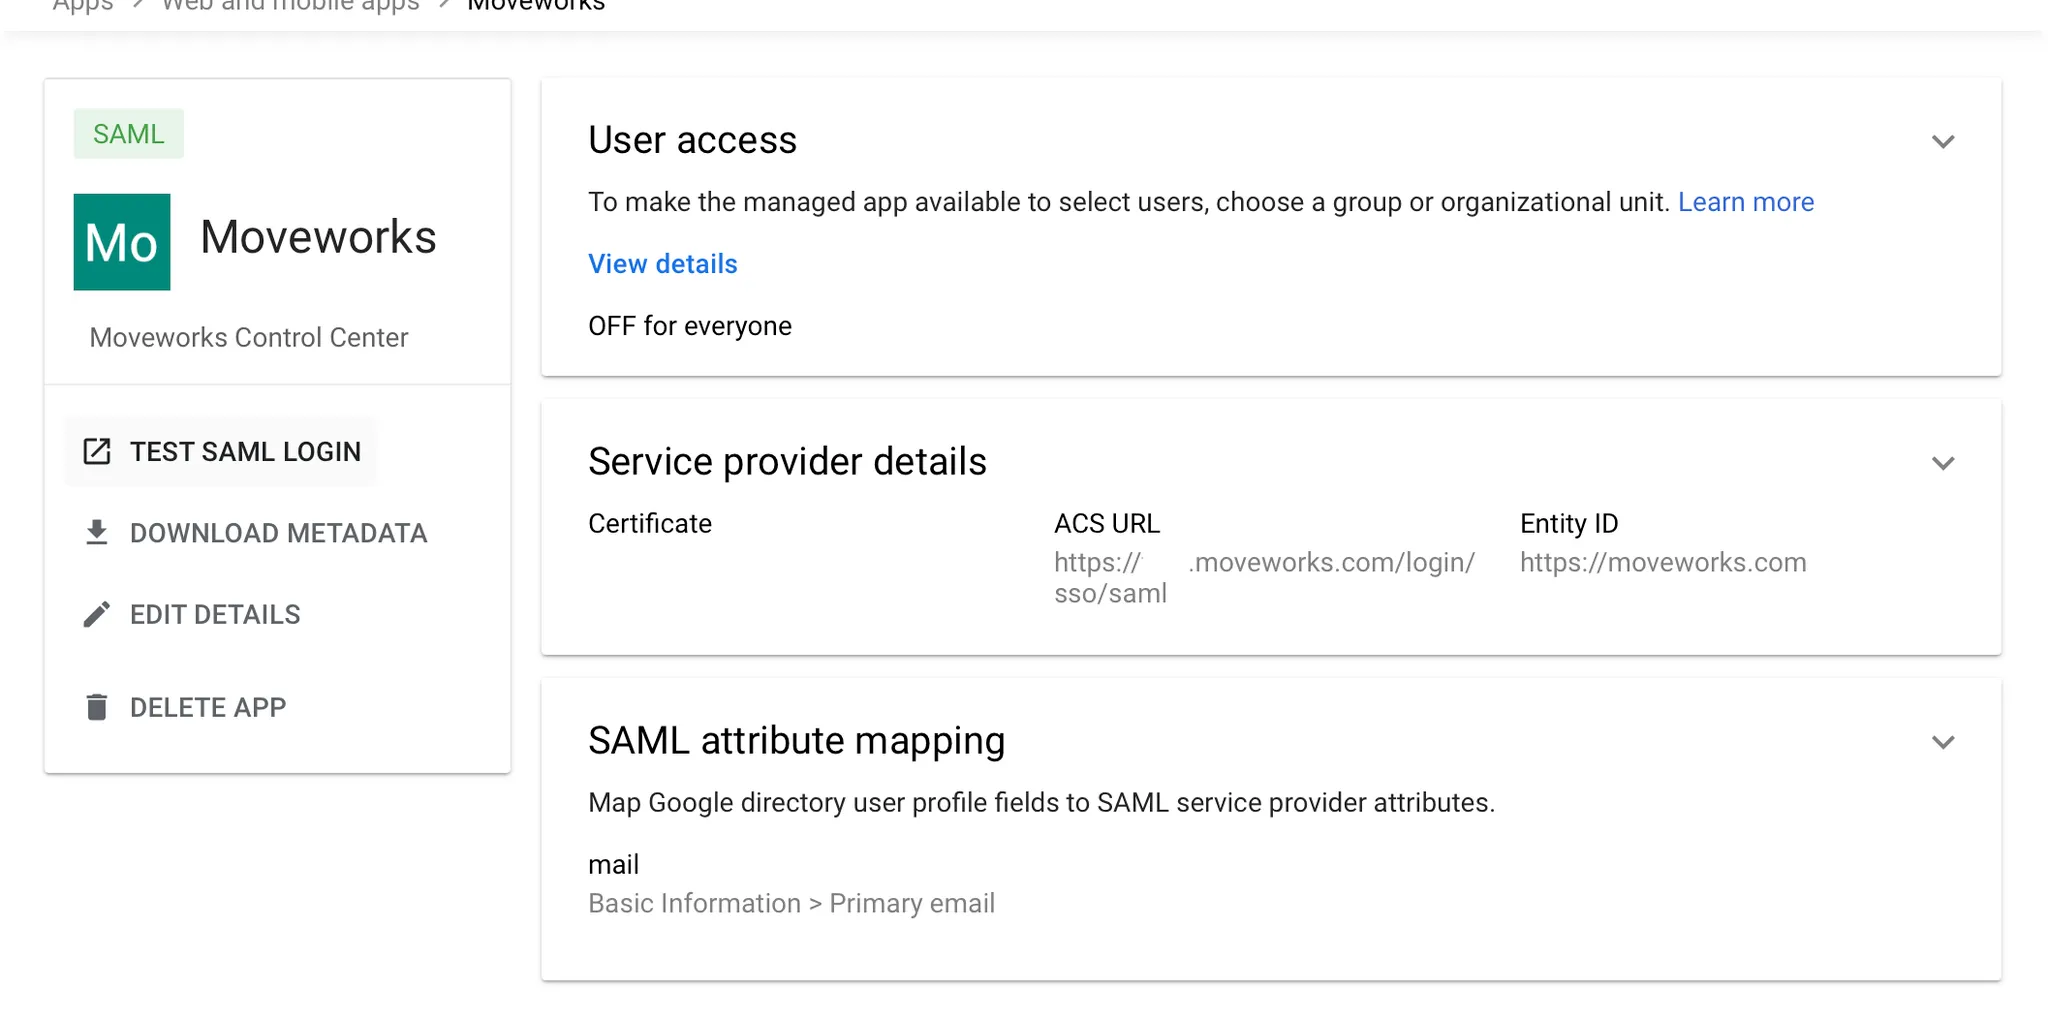
On the next page, click “Download Metadata” and also download the Certificate. These two data files will need to be provided to your CSE.
Step 2: Set up Service Provider
-
On the “Service provider details” page, please fill in the following information:
- ACS URL:https://webchat-kprod.moveworks.io/login/sso/saml
- Entity ID:https://www.moveworks.com/
- Check “Signed response”
- Name ID format: EMAIL
- Name ID: Basic Information > Primary email
-
On the next page under “Attributes”, click “Add Mapping” and fill in the following:
- Google Directory attributes: Basic Information → Primary Email
- App attributes: mail
-
Click Finish.
-
Open the “Moveworks” app you just created if it’s not open already and it should look something like this:
Step 3: User access
Navigate to the "User access" page from your app page mentioned above to enable access for necessary users.
-
User access is “OFF for everyone” by default so based on needs of the organization, please set this up accordingly. If everyone can get access, this can be changed to “ON for everyone”. To turn this on for everyone:
-
Click on the down arrow on the top right of the “User access” box:

-
Select “ON for everyone” under “Service Status”
-
Click Save
-
-
Notify your CSE that the app setup is complete and please work with them in sharing your metadata and certificate information.
Moveworks:
Step 1: Google SSO Configuration
-
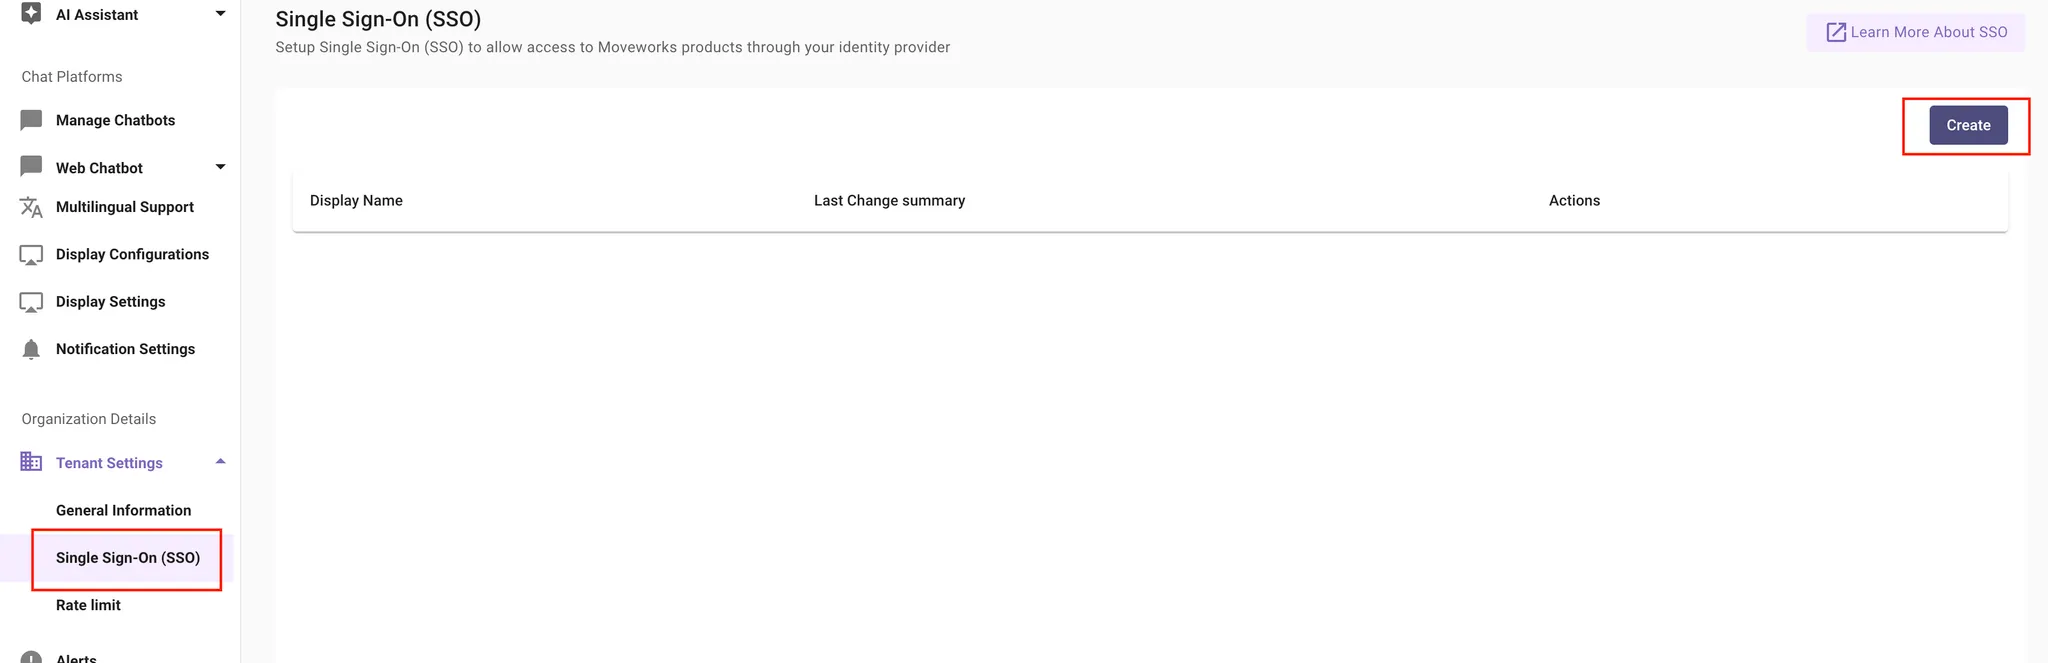
Under “Tenant Settings”, select “Single Sign-On (SSO)”.
-
Create a new SSO, by clicking the “Create” button.
-
Fill in the information as follows:
- Moveworks Product: movewebchat
- Select Connector: Moveworks
- Authentication Protocol: SAML
- IDP Sign On / SSO URL:(this will be provided to you in the Metadata file from the customer, and can be found near the bottom of the file)
- IDP Issuer/Identifier ID:https://www.moveworks.com
- IDP Public Certificate: Upload the .pem file that is provided, this value should match the X509 value in the Metadata file as well. So if you only have the Metadata file, you can create your own .pem file by extracting the X509 value and wrapping it in:
------BEGIN CERTIFICATE----- ------END CERTIFICATE-------- User attribute: mail
- Identifier Type: EMAIL_ADDR
-
Click Submit
Prepare code snippet
You will need to follow this section here to paste the code snippet onto your website.
That's it!
You can reuse the code snippet on as many host websites as you like as long as they use the same Okta SSO.
By pasting this onto a given page, or a template for a page, the AI Assistant will appear if the user successfully authenticates when they visit it. Authentication is seamless, and no login prompt will ever be seen by the user. If the user is not authenticated, the AI Assistant will simply not appear. For security purposes, no error message will be shown to the user.
If the AI Assistant does not automatically appear, please file a Moveworks Support ticket letting the team know the domains to which you added to the bot, and our support team can investigate.
Updated 27 days ago