Ingest Users
Overview
User ingestion is the process of copying relevant user data in your external systems into the Moveworks Platform.
To begin the Configuration process, navigate to User Identity > Import Users under the Core Platform module. If you are doing this configuration for the first time you will see a create button.
If an Identity Ingestion configuration already exists you will see a single configuration with it’s name, the last updated timestamp, and an edit button.
Configuring User Identity Ingestion
Step 1: Select sources to Ingest Employees
This is where we define the external sources which will be connected to in order to ingest the user identity data from them. Please ensure the required connectors have been created to interact with the source systems.
If not, please follow this guide for Access Requirements in the source system and the steps to Setup Connectors.
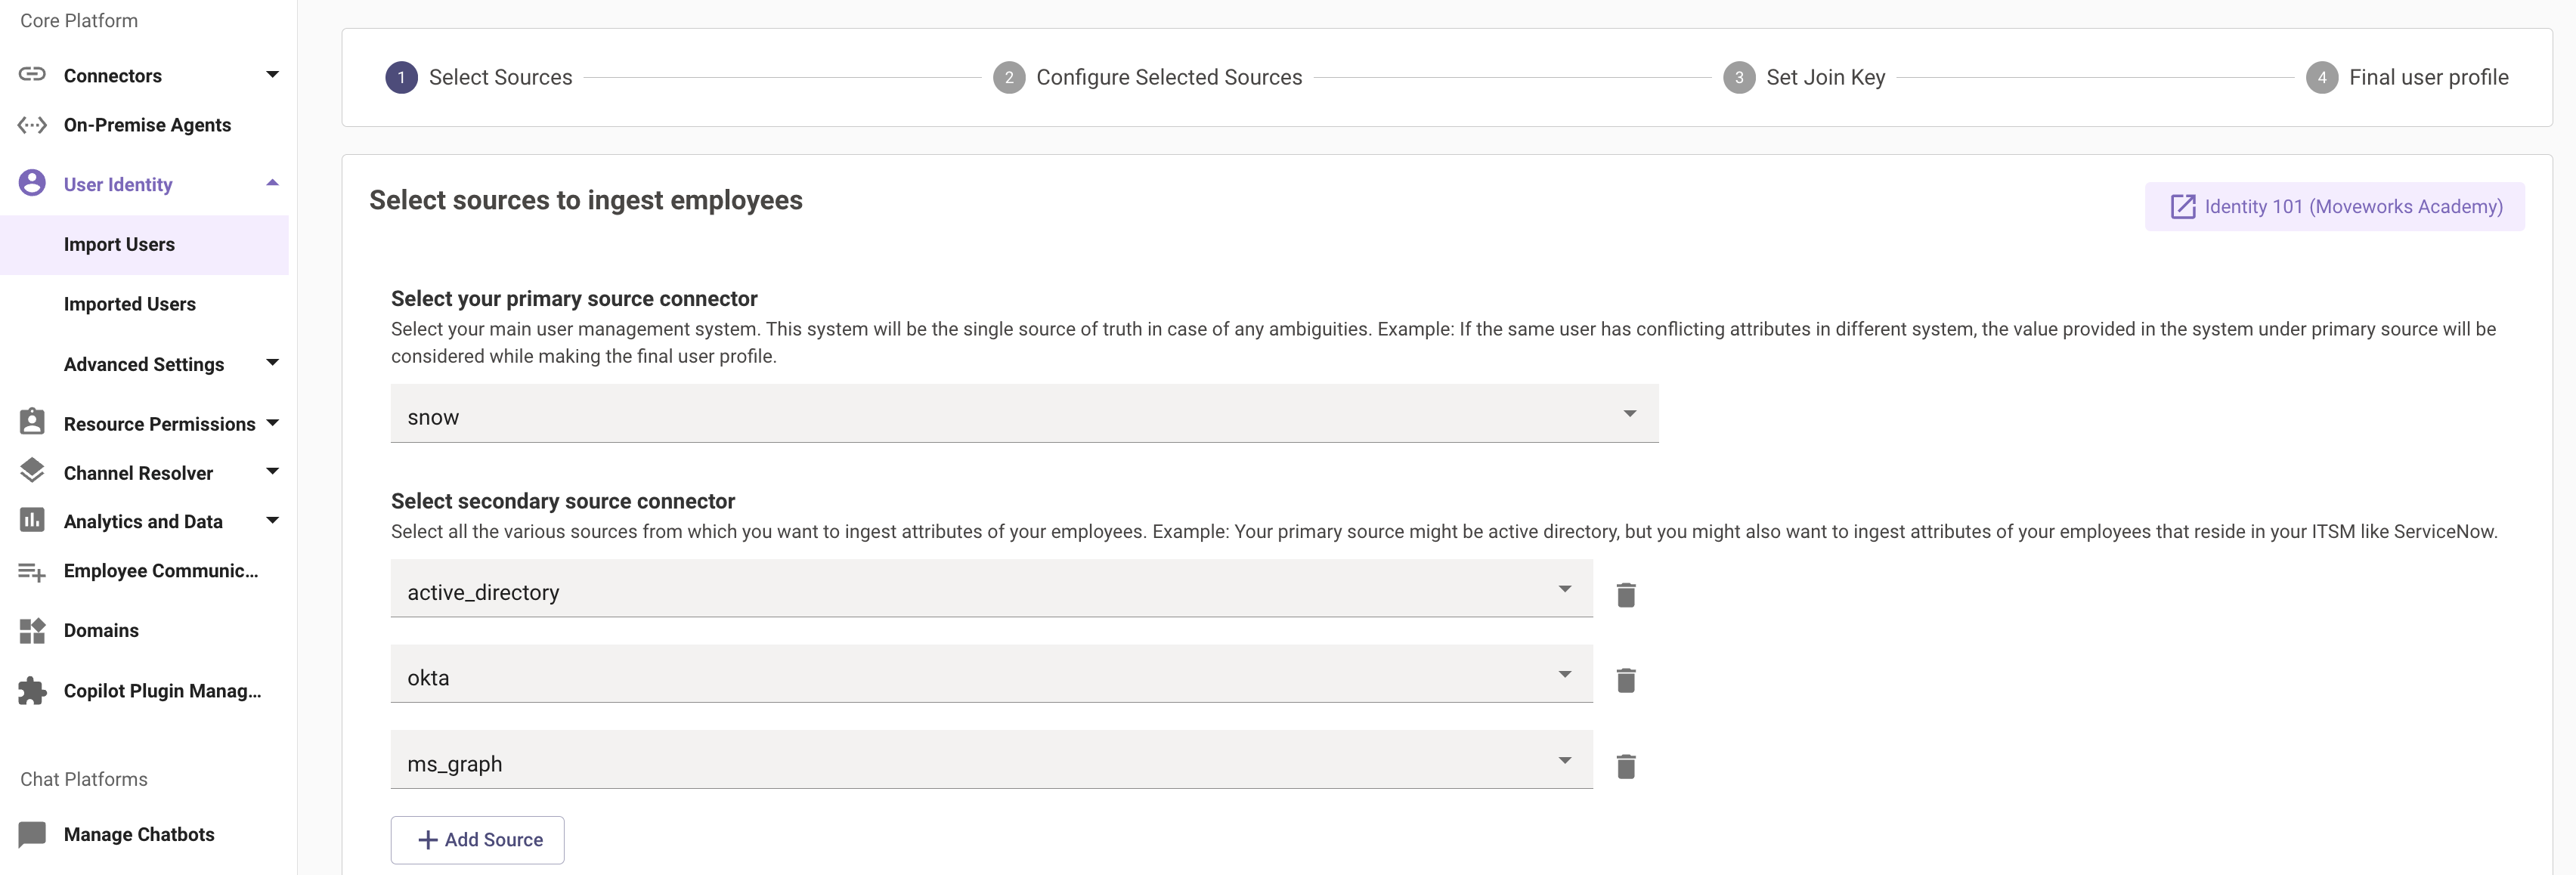
We have a categorization under the sources here which is split between the Primary Source and the Secondary sources.
Primary source
The primary source refers to your main system used for user management. This is most commonly an Identity System like Microsoft Active Directory or Okta. When you configure a source to be the primary source in Moveworks, Moveworks will leverage the attributes from this source by default when importing users into the platform.
Let's consider an example. Assume we have the following 3 sources:
- Okta - Primary
- ServiceNow
- Microsoft Graph
If Okta is configured as a primary source, and a user's department is set to Engineering in Okta, but Eng in ServiceNow, the final user object in Moveworks will contain the value Engineering for the department attribute in Moveworks.
Secondary sources
The other systems where you want to ingest the attributes of your employees are considered secondary sources.
Using the example above. Okta would be the primary source, and ServiceNow and Microsoft Graph would be the secondary source.
Secondary sources are required for overall AI Assistant functionality because in order for the employees to interact with various systems for operations like ticketing or being added to an Access Group, the employee identity in those sources need to be ingested on the Moveworks end for the interaction to take place.
Example: You might want some of the attributes of your users that reside in your ITSM for your ticketing plugin to work properly. Go ahead and add your ITSM connector under the secondary source in this case.
Step 2: Configure Selected Sources
After selecting various sources, let's add filters and configure each of the defined sources.
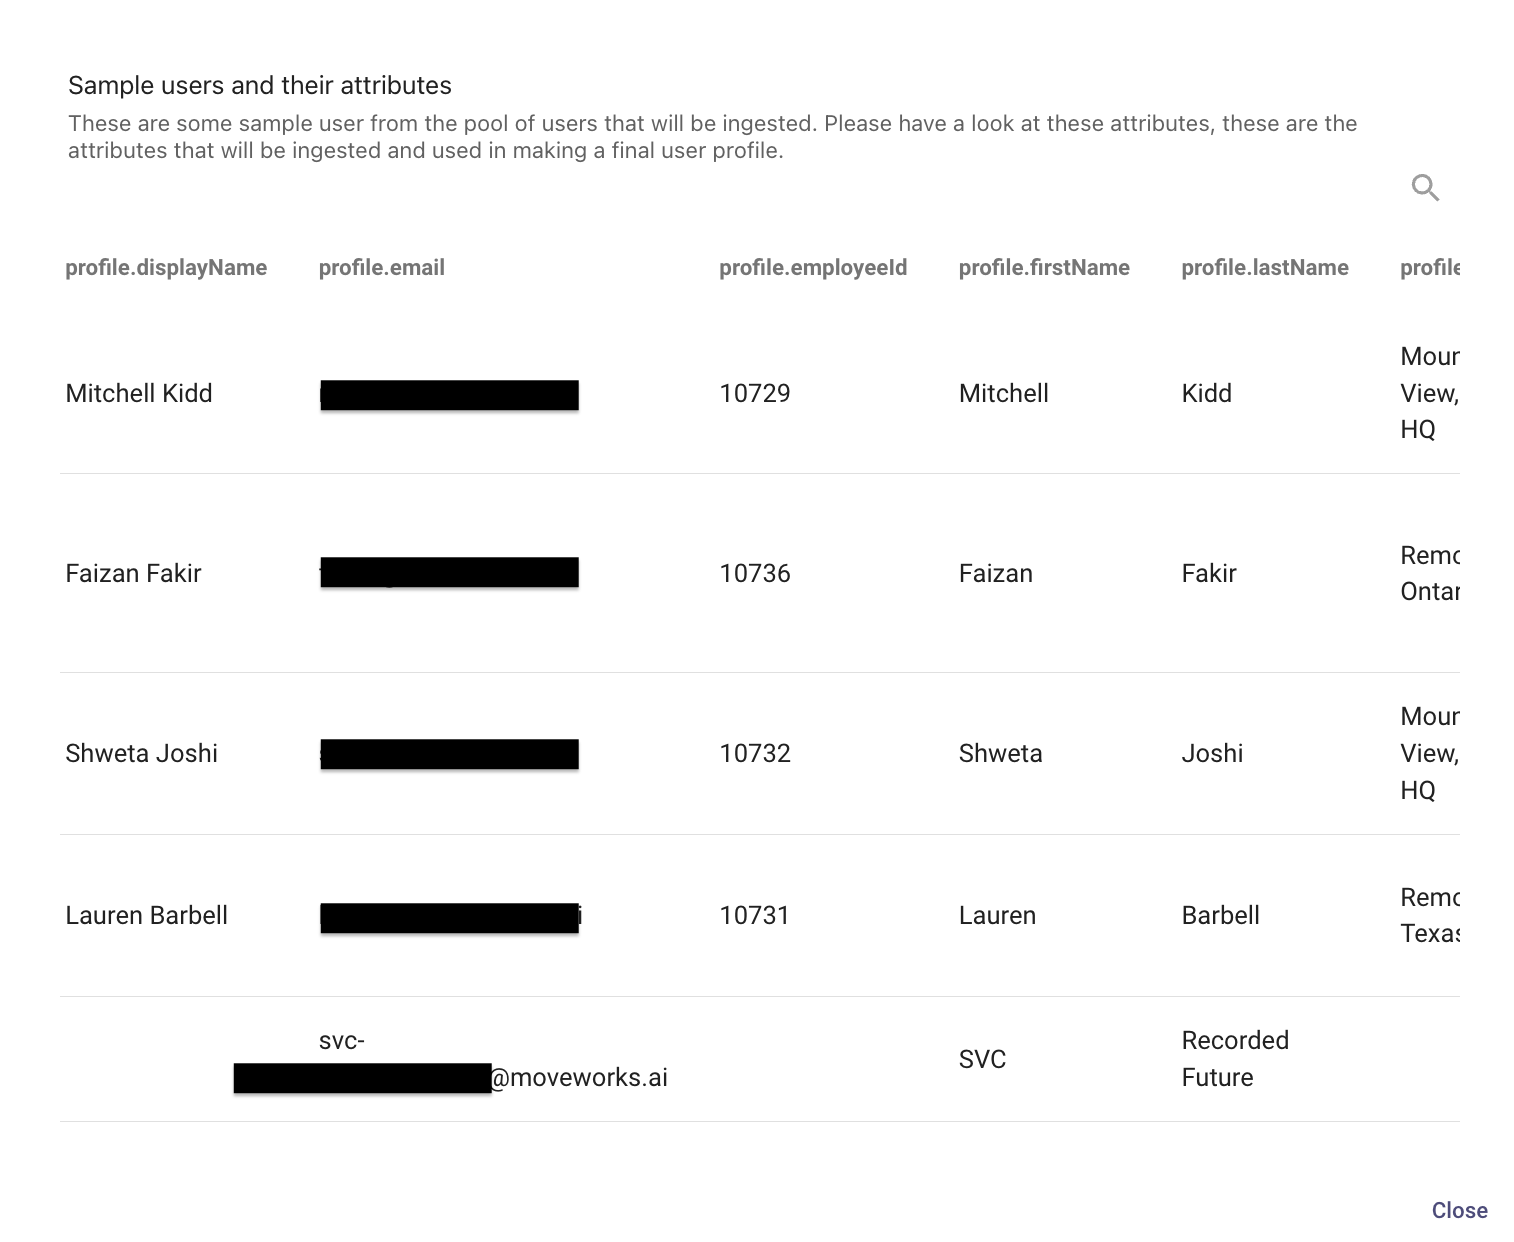
You will see a table with all the identity sources that you have previously selected. Here you will come across a "View Sample" button for each source. This is a quick way to check if the connector being used for the source system is configured correctly.
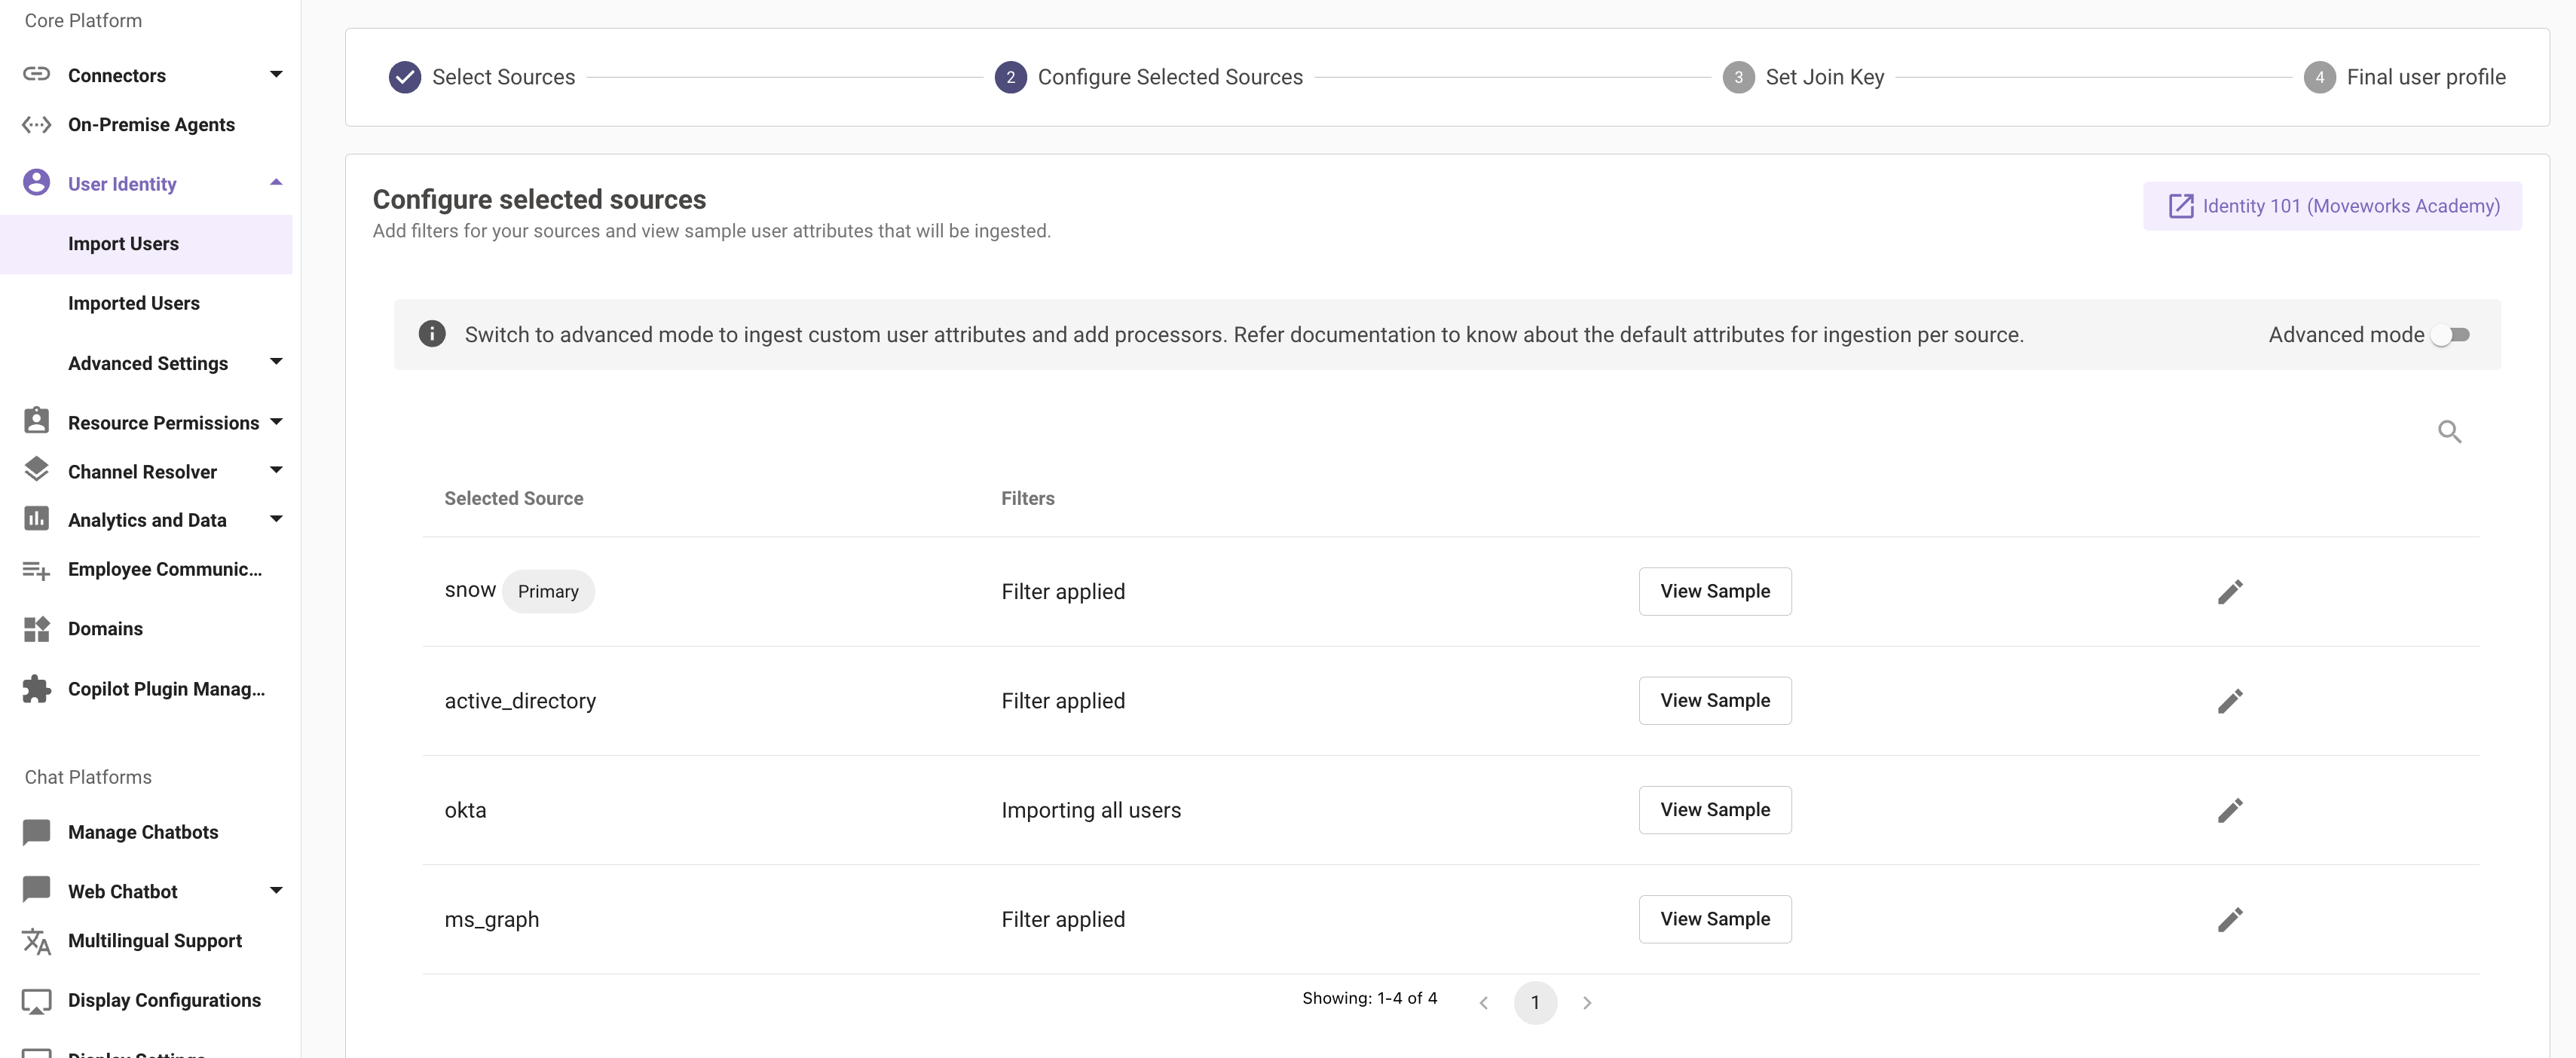
Clicking on "View Sample" makes a live API call to the source system and fetches the identity data using the default attributes.
Filters and Attributes List
On this page you can also apply filters for each source. There can be different types of filters based on the source.
For example, if you have selected ServiceNow as a source, you are given two options for filters.
- Generic source filter: This is where you can give the ServiceNow API query to filter out users who should and should not be part of your final user set. Filtering can be on the basis of geography, email, department and many more. You can go to ServiceNow API documentation here, to learn more.
- Attribute selection: Please define a list of attributes for the users identity which you would like to ingest from the source system. It is suggested to add all the attributes in this list here so the API call is filtered down to only ingest those attributes.
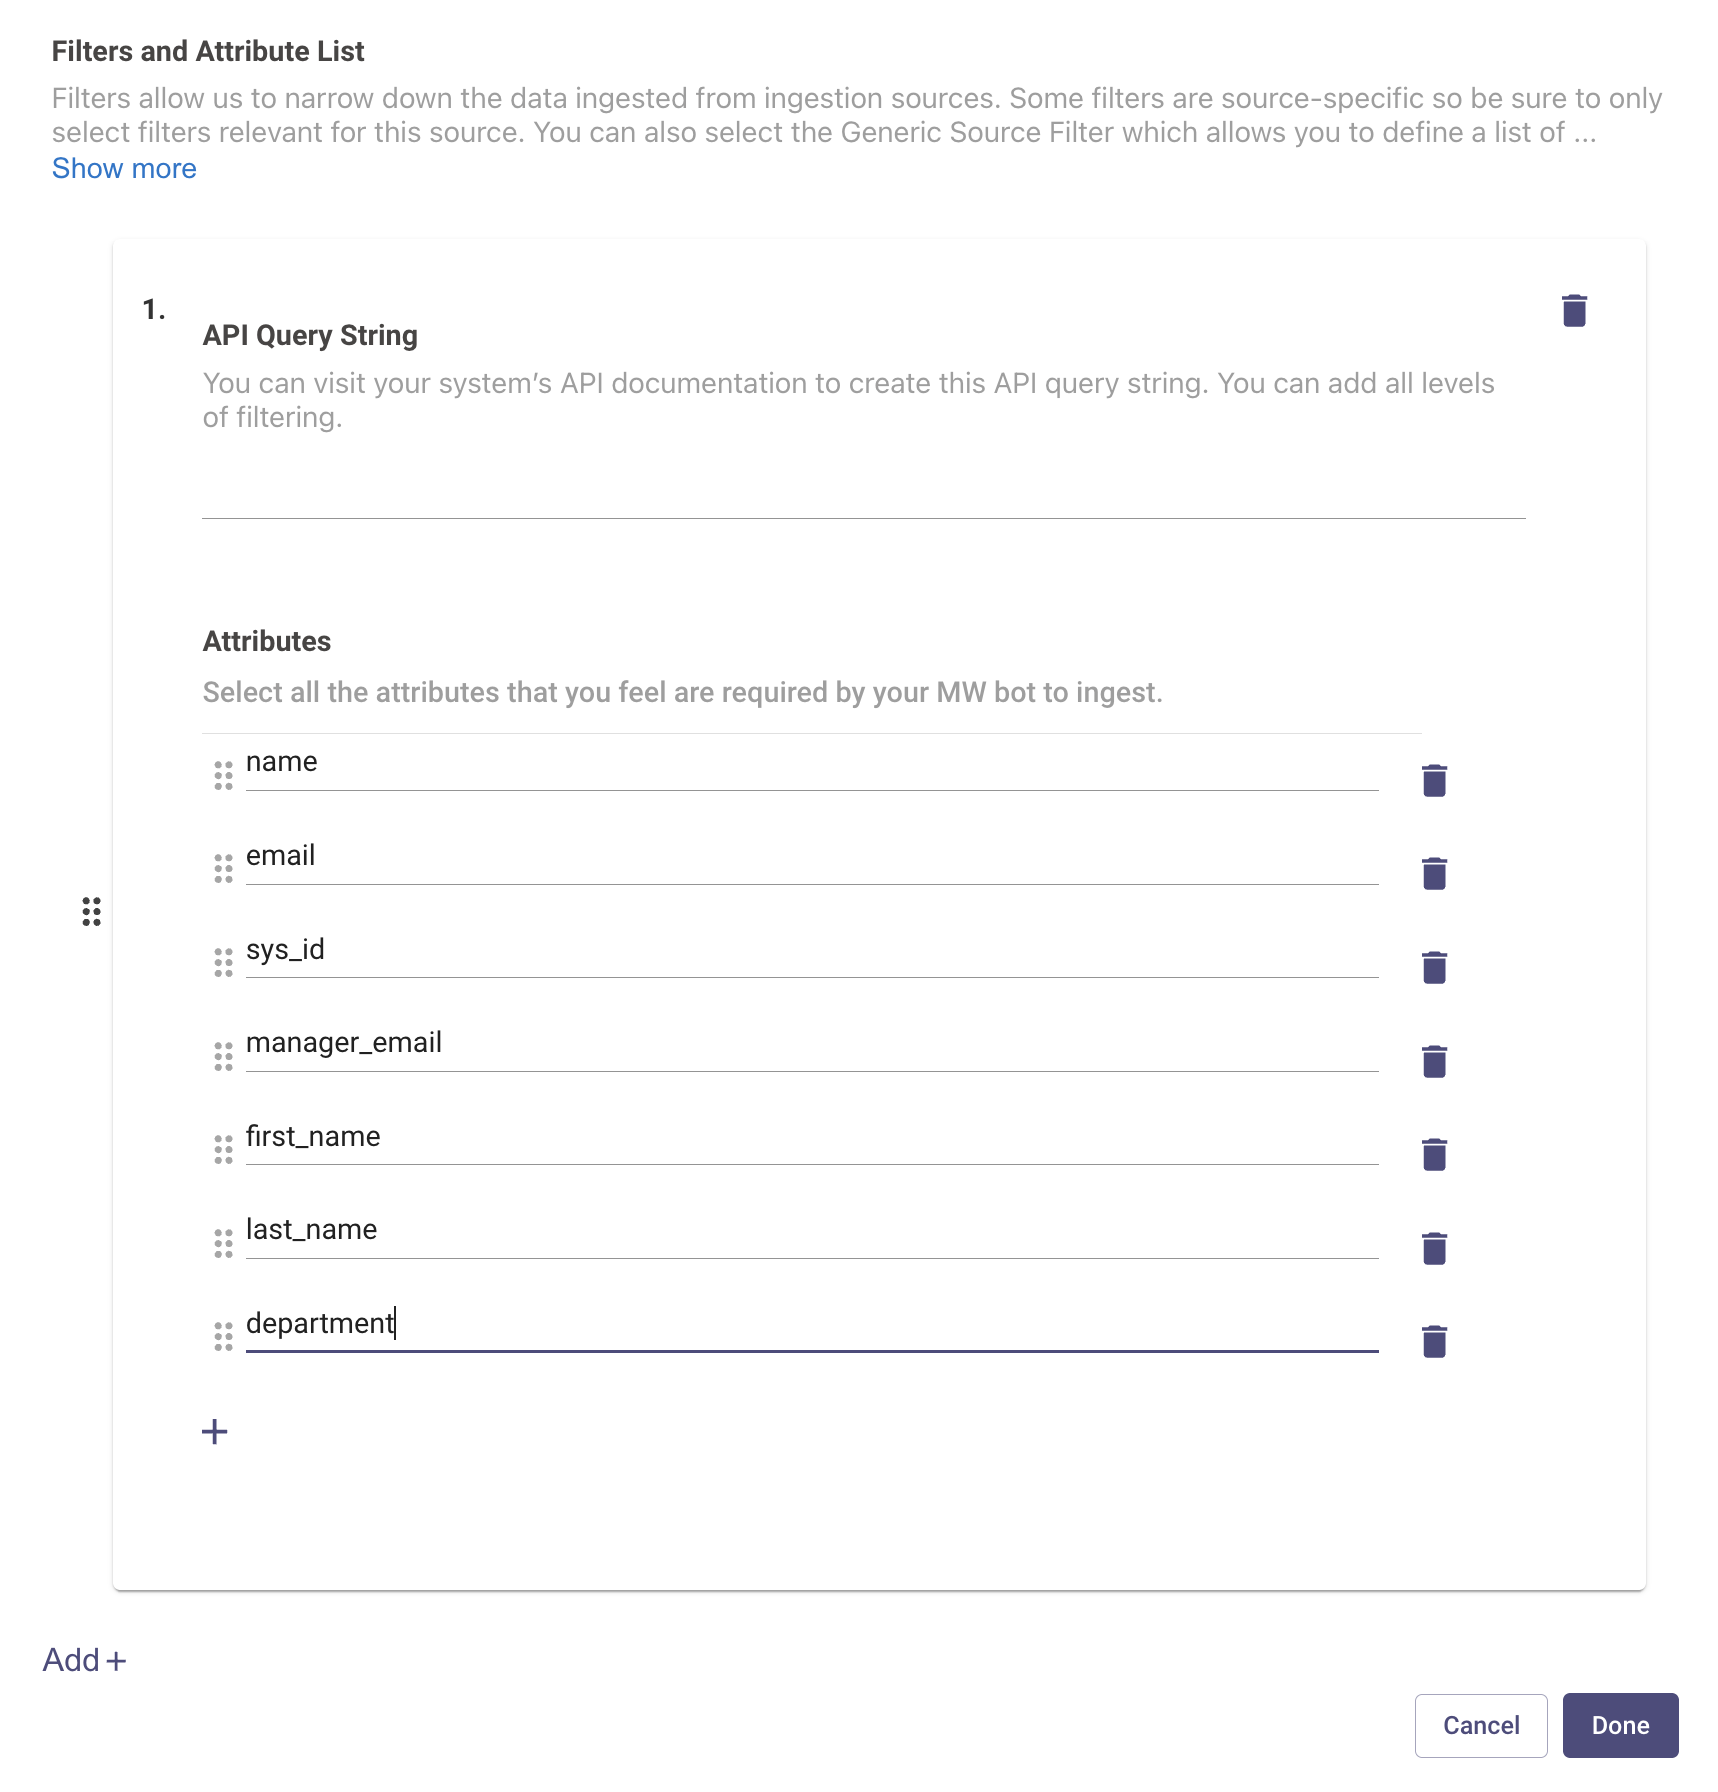
For example, if manager details is an attribute for an employee in your ServiceNow instance and you do not want this attribute to be part of final user profile, you can skip adding this attribute under filters.
You can add multiple filters for multiple sources as well.
For filtering out users based on an API query, take a look at the steps documented in the how to guide here.
Step 3: Set join key
This is a very crucial step for creating the final user profile. After you have selected all your sources and added filters to each of them, Moveworks requires the selection of an attribute that is common across all the other sources.
This attribute will be used as a key to merge all the user data from all the sources that you have configured and unify them into a single roster entry. The final user data will have all the employees with a unique set of attributes.

Please note that the join key is a very crucial element in creating the final user profile. Hence, editing the join key later is not allowed.
Note: User email is most commonly selected as a join key since this attribute is common across all systems.
Step 4: User profile
This is the step where you define the overrides to the values of the final roster. When we ingest user data from multiple sources the final roster mainly comprises of the data coming from the Primary source.
Consider a scenario where Okta is the primary source and ServiceNow is the secondary source. You have applied filters and selected the attributes for both the sources. You have seen the sample user set and are satisfied with the attributes that are about to be ingested, but there is an attribute called "department" which is defined in the attribute section for Okta.
In the final user profile this attribute is crucial for you. But the value of this attribute is something that you do not want to pick from Okta but ServiceNow.
So basically you want the attribute "department" from Okta but you want it's value to be populated by an attribute called "user_department" from ServiceNow. This is the use case that you can execute by adding overrides.
For our example, the override will look something like this:
{

"department": {
    "name": "snow.department"
  }

}
Overrides are written in json format.
Step 5: Bot Service Account
This is a very important step which is required in order for the Identity Ingestion Pipeline to succeed. After the Identity Ingestion configuration steps have been completed, please navigate to User Identity > Advanced Settings > Service Accounts under the Core Platform Module.
It is crucial to have a BOT service account defined using the below template which includes the service account information. This is required in order to give the Bot an identity and access to the systems which Moveworks will be interacting with like :
- Teams
- Jira Service Desk
- Moveworks for Web
It is important for the Bot Service Account to have its own ITSM, IDAM, CHANNEL ID Info. for the identity pipeline to complete the ingestion successfully.
{
  "user_id_info": {
    "user_email": [
      "[email protected]"
    ],
    "channel_id_info": [
      {
        "integration_id": "movewebchat",
        "user_channel_id": "[email protected]"
      },
      {
        "integration_id": "msteams",
        "user_channel_id": "28:<Azure App Client_ID>"
      }
    ],
    "user_itsm_id_info": [
      {
        "integration_id": "jira_service_desk",
        "full_name": "M8 Service Account",
        "itsm_user_id": "svc-m8",
        "first_name": "M8 Service Account",
        "external_id": "<svc_account sys_id>"
      }
    ]
  },
  "user_tags": [
    "BOT"
  ],
  "email_addr": "[email protected]",
  "user_name": "M8",
  "role": "Virtual Assistant (Bot)",
  "department": "IT",
  "manager": "Zeeshan Yousuf",
  "record_id": "[email protected]",
  "full_name": "M8",
  "location": "slack"
}
The information which is added into the template is based on the Access Requirements for the source systems where the service accounts were created.
The email for the Bot service account can be set to anything fictitious, please ensure the domain of the email is inline with the current org email structure.
FAQ
Q: Are there any native filters applied to user ingestion?
A: Yes, for Azure user ingestion specifically, Moveworks will only ingest users that have accountEnabled eq true. This field must to be set to true, otherwise the Moveworks ingestion will skip over that user(s).
Updated 2 months ago