Slack (Live) Setup for Enterprise Search
Slack (Live) Setup for Enterprise Search
This page is for the Slack (Next Gen) connector and it can only be configured within the new enterprise search configuration experience explained below.
This connector cannot be used to set up a Chat Platform integration under Manage Chatbots in Moveworks Setup.
Please visit this documentation to learn more about Max Capacity and Classic connectors.
System Overview
Slack is a collaboration platform that enables real-time communication, file sharing, and knowledge discovery across teams. Moveworks Enterprise Search integrates with Slack to enable Live Search — allowing users to securely search for Slack messages and content through Moveworks. This setup guide describes how to configure the Slack app and connect it to Moveworks using the provided app manifest.
Powered by Slack’s Real-Time Search (RTS) API. Live Search uses Slack’s assistant.search.context (v2) endpoint rather than the legacy search.messages API. RTS provides keyword + semantic retrieval across Slack messages, files, and users, with results scoped to each user’s own access. (Semantic ranking triggers for natural-language questions; otherwise RTS falls back to keyword.)
Requirements & limitations
- Slack plan: Semantic (RTS) search is available only on workspaces whose plan includes Slack AI Search (Business+ / Enterprise+).
- Gov Cloud: RTS is not currently supported in Gov Cloud environments. Gov Cloud orgs remain on the legacy
search.messagesflow. - Rate limits: RTS applies a ~10 rpm per-user limit plus a workspace-level limit that scales with seat count (for example, ~800 users ≈ ~180 rpm with reasonable burst). Higher workspace limits can be requested from Slack.
- File search: Returning Slack file content in search results is not yet supported and is planned for a near-future release. Message search is unaffected.
Authentication
The Moveworks Enterprise Search Slack app uses OAuth 2.0 for authentication. During setup, Slack admins authorize Moveworks to securely access limited workspace data via read-only scopes.****
Permissions Enforcement
Moveworks adheres to Slack’s permission boundaries at all times. Search results are restricted to the authorizing user’s access level, ensuring that Moveworks only returns Slack messages and content the user is permitted to view.
Access Requirements
Moveworks connects with your Slack workspace using a dedicated Live Search Integration app. This app allows Moveworks Enterprise Search to perform secure, real-time searches on behalf of authorized users within Slack.
Pre-requisites
Before you get started, make sure you have everything you need:
- Admin permissions : Slack Workspace Admin or Org Admin permissions are required to create and install Slack apps in your enterprise workspace.
- App setup requirements : You must create one Slack application specifically for Live Search Integration (OAuth 2.0 with User Token).
- Enables Moveworks to execute Slack searches securely using the RTS (
search:read.*) user scopes:search:read.public,search:read.private,search:read.mpim,search:read.im,search:read.files,search:read.users. - Uses OAuth 2.0 credentials — Client ID and Client Secret.
- Requires the following redirect URIs:
- Enables Moveworks to execute Slack searches securely using the RTS (
Setup Slack Apps
Create the Live Search Integration App
- Visit https://api.slack.com/apps and click Create New App → From an App Manifest.
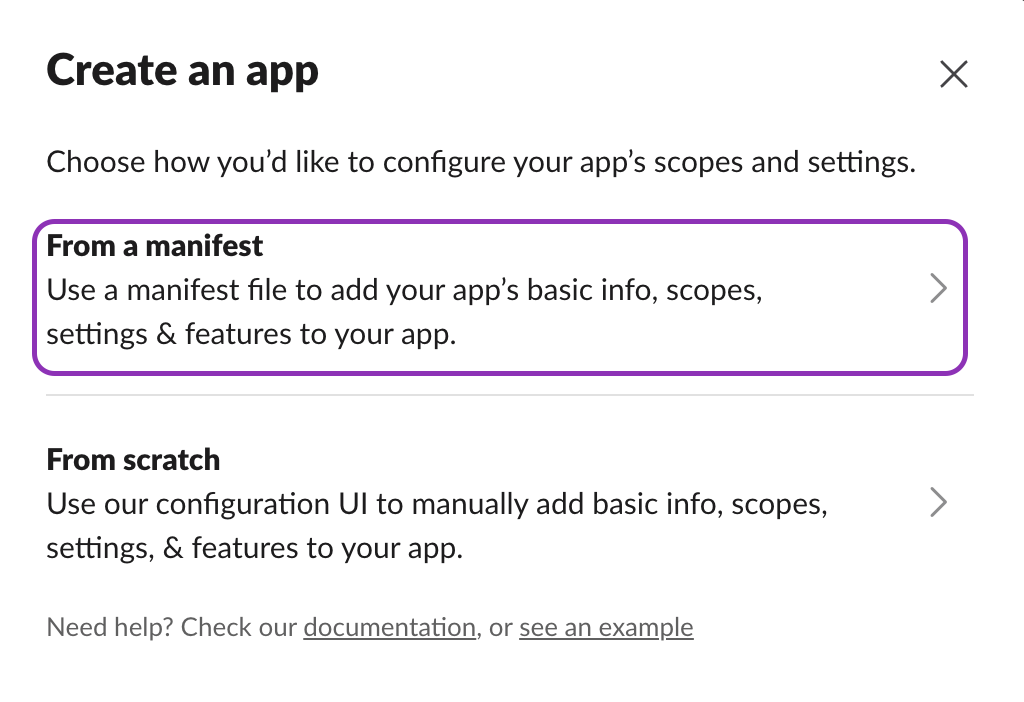
- Select your workspace and paste the following manifest, replacing
{org}with your Moveworks organization name ((e.g.https://acme.moveworks.com/auth/oauthCallback ).
Enterprise Grid (multi-workspace) orgs — make the app organization-ready. The manifest above sets "org_deploy_enabled": false, which installs the app to a single workspace only. If your Slack org is an Enterprise Grid spanning multiple workspaces and you want Live Search to cover all of them, set this flag to true:
Then install the app at the organization level as an organization-ready app. This gives Moveworks a single org-wide user token, which Slack’s Real-Time Search API uses to search every workspace the user and app can access in a single request, and each user authenticates only once for all workspaces — no per-workspace OAuth or token setup is required. However, the app must still be added to each workspace you want Live Search to cover, from the Slack admin dashboard:
- As an admin user, open your org’s admin dashboard (click the workspace name in Slack and select Organization Settings; the URL looks like
app.slack.com/manage/<your-enterprise-id>). - Click Integrations in the left-hand sidebar, then Installed apps.
- Find the app, click the three dots to the right of its name, and select Add to more workspaces. Select the workspaces you’d like to add it to, then click Next.
- Review the permissions the app requires and click Next, select I’m ready to add this app, then click Add App.
For details, see Slack’s guide: How to add the app to a workspace from the admin dashboard. (Single-workspace orgs can leave org_deploy_enabled as false.)
- After creating the app, navigate to OAuth & Permissions:
- Confirm that the RTS user scopes are present under User Token Scopes:
search:read.public,search:read.private,search:read.mpim,search:read.im,search:read.files,search:read.users. - Verify that the redirect URI matches your Moveworks org callback URL.


- Navigate to the Install App section in your Slack app’s left-hand menu and install the app to your workspace.
- Retrieve the Client ID and Client Secret from Basic Information section. These will be required later when setting up the Slack connector in Moveworks Setup.

Testing your credentials
You can validate access by running the following Slack API calls:
-
Validate ChatBot Token
Query the following endpoint using the Bot User OAuth Token (starting with xoxb-).
If your credentials are valid, the API will return a JSON response containing your workspace and bot user information, for example:
If “ok”: true appears in the response, your bot token is active and authorized.
Copy the workspace/org identifier from the response — you will paste it into the Workspace Team ID field during Connector Creation. Which field to copy depends on whether the response includes an
enterprise_id:- Single-workspace install (no
enterprise_idin the response): copy theteam_idvalue (starts withT, e.g.,T12345678). - Enterprise Grid org-level install (the response also includes an
enterprise_id): copy theenterprise_idvalue (starts withE, e.g.,E12345678). In an org-levelauth.testresponse,team_idcarries the sameE-prefixed value asenterprise_id, so either field works — copyenterprise_idto be explicit. Example:
- Single-workspace install (no
-
Validate Live Search Scope
Authorize the Live Search app for a test user, then complete the OAuth 2.0 flow to obtain a user token and validate it:- Get the Authorization (Sharable) URL
- Go to your Live Search app in the Slack API dashboard.
- Under **Manage Distribution → copy the Sharable URL.
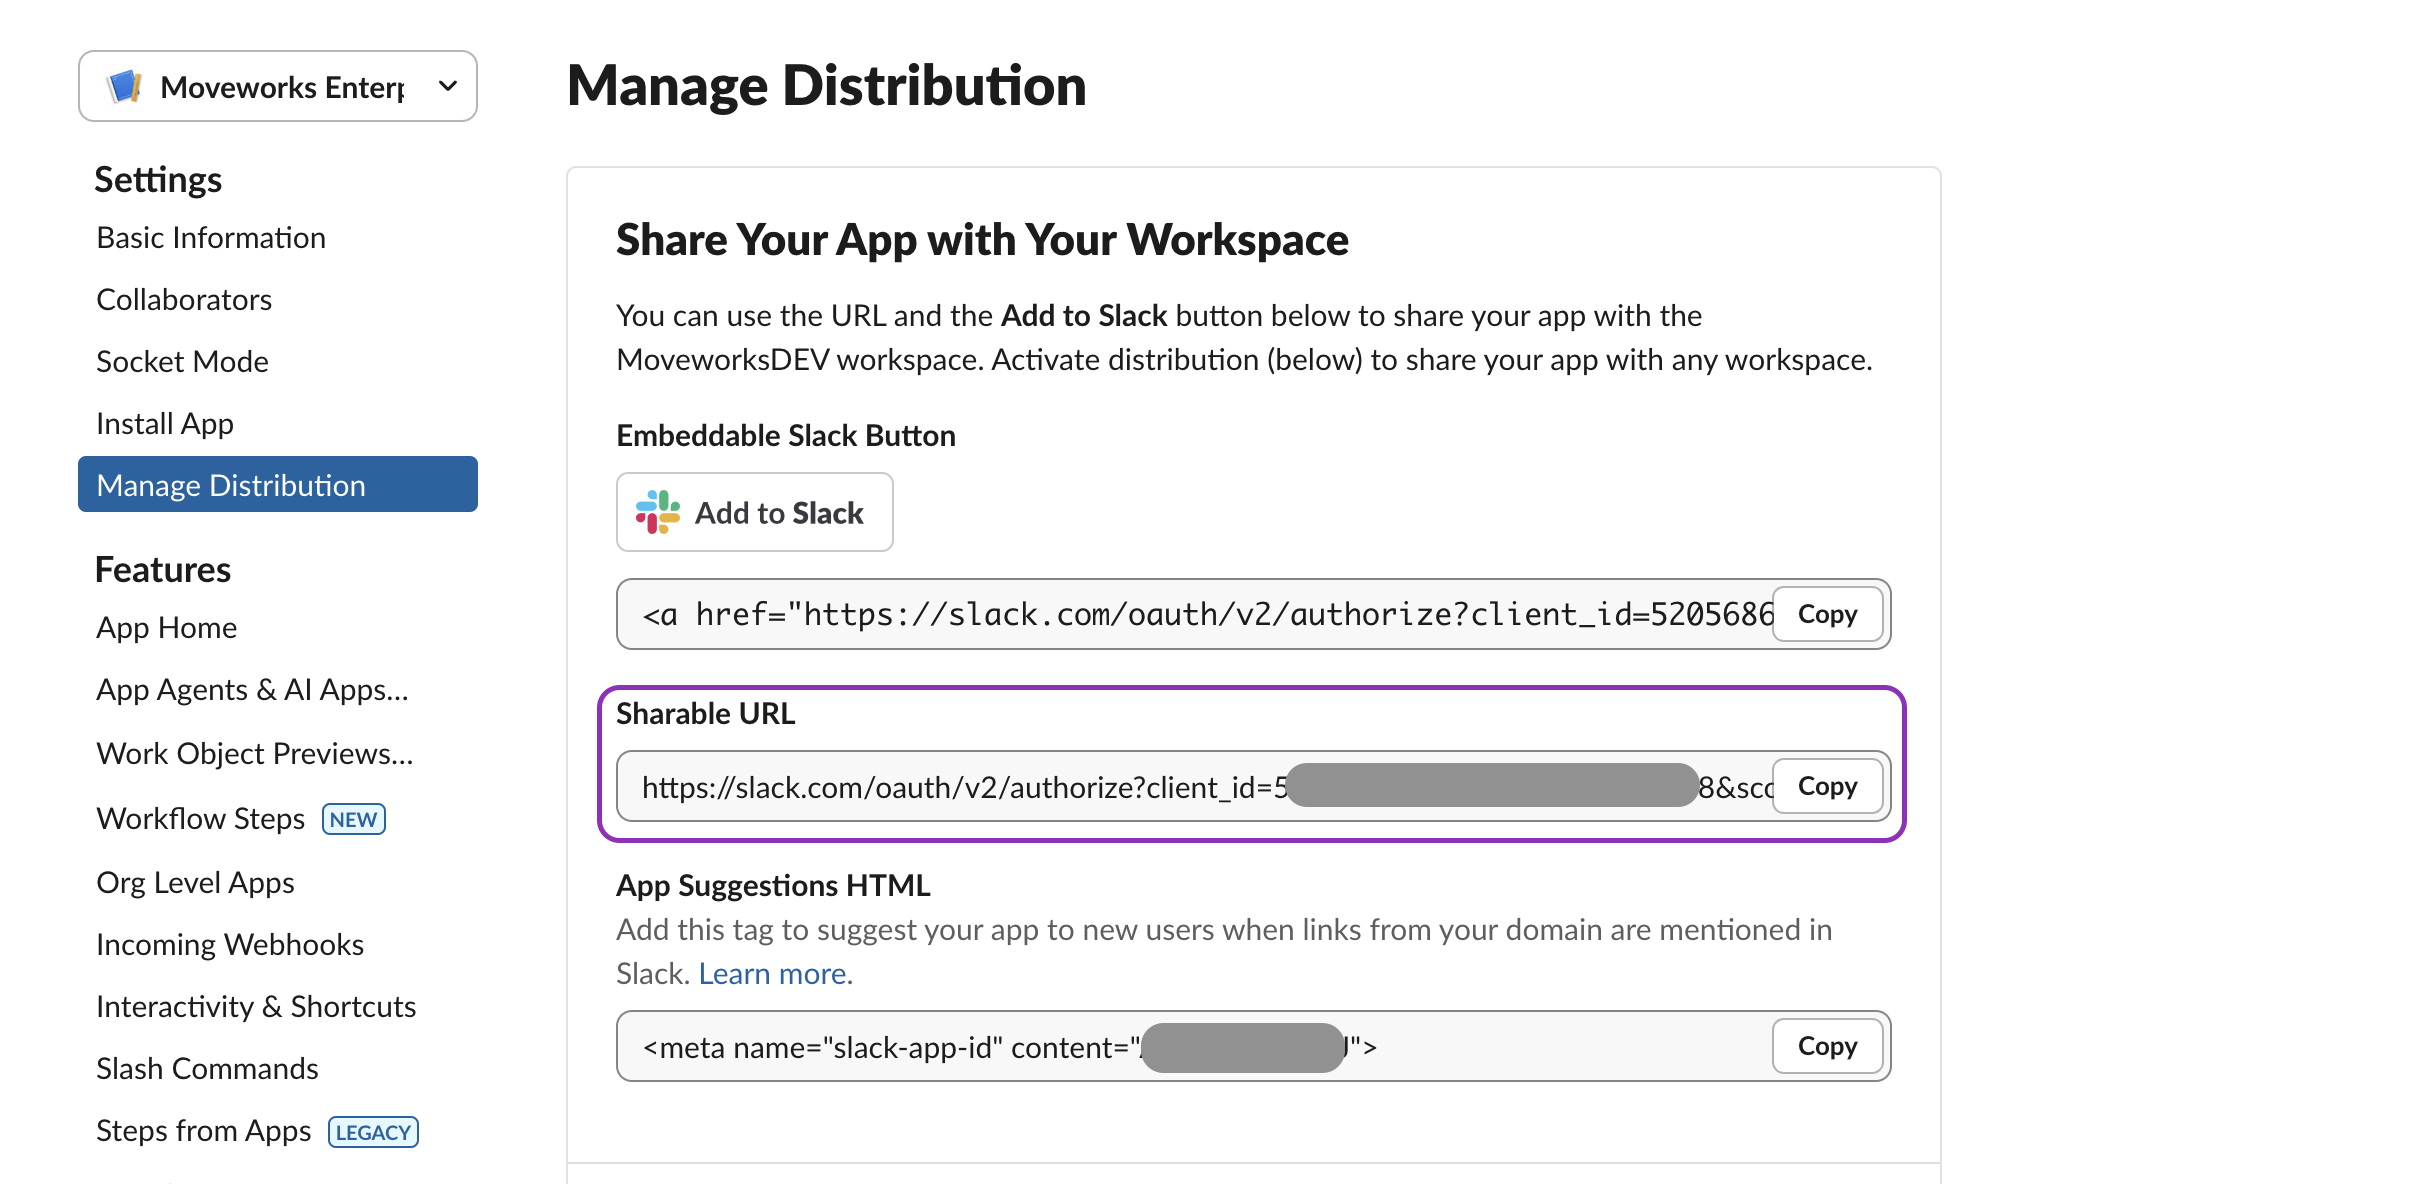
- It will look like this:
- Paste this URL into your browser and authorize the app using a Slack account from your workspace.

- After authorizing, you will be redirected to your Moveworks callback URL:
Copy the value of
<AUTH_CODE>from the URL — you’ll use it in the next step.
- Exchange the Authorization Code for a User Token
Run the following cURL command to exchange the authorization code for a user token:You will receive a JSON response similar to:Copy the authed_user.access_token value — this is the user access token that Moveworks will use for search queries. - Validate the Token
Test that the token has the correct RTS (search:read.*) scopes by calling the Real-Time Search endpoint:If successful, a JSON response ("ok": true) with matching search context will be returned. (If the token is missing the RTS scopes, the call returns an error such asmissing_scope.)
- Get the Authorization (Sharable) URL
Setup in Moveworks
Connector Creation
- Log in to your org’s MyMoveworks portal
- Navigate to Moveworks Setup > Connectors > Built-in Connectors
- Click Create New
- Search and Select Slack (Next Gen)
- Click on Next: Add Creds
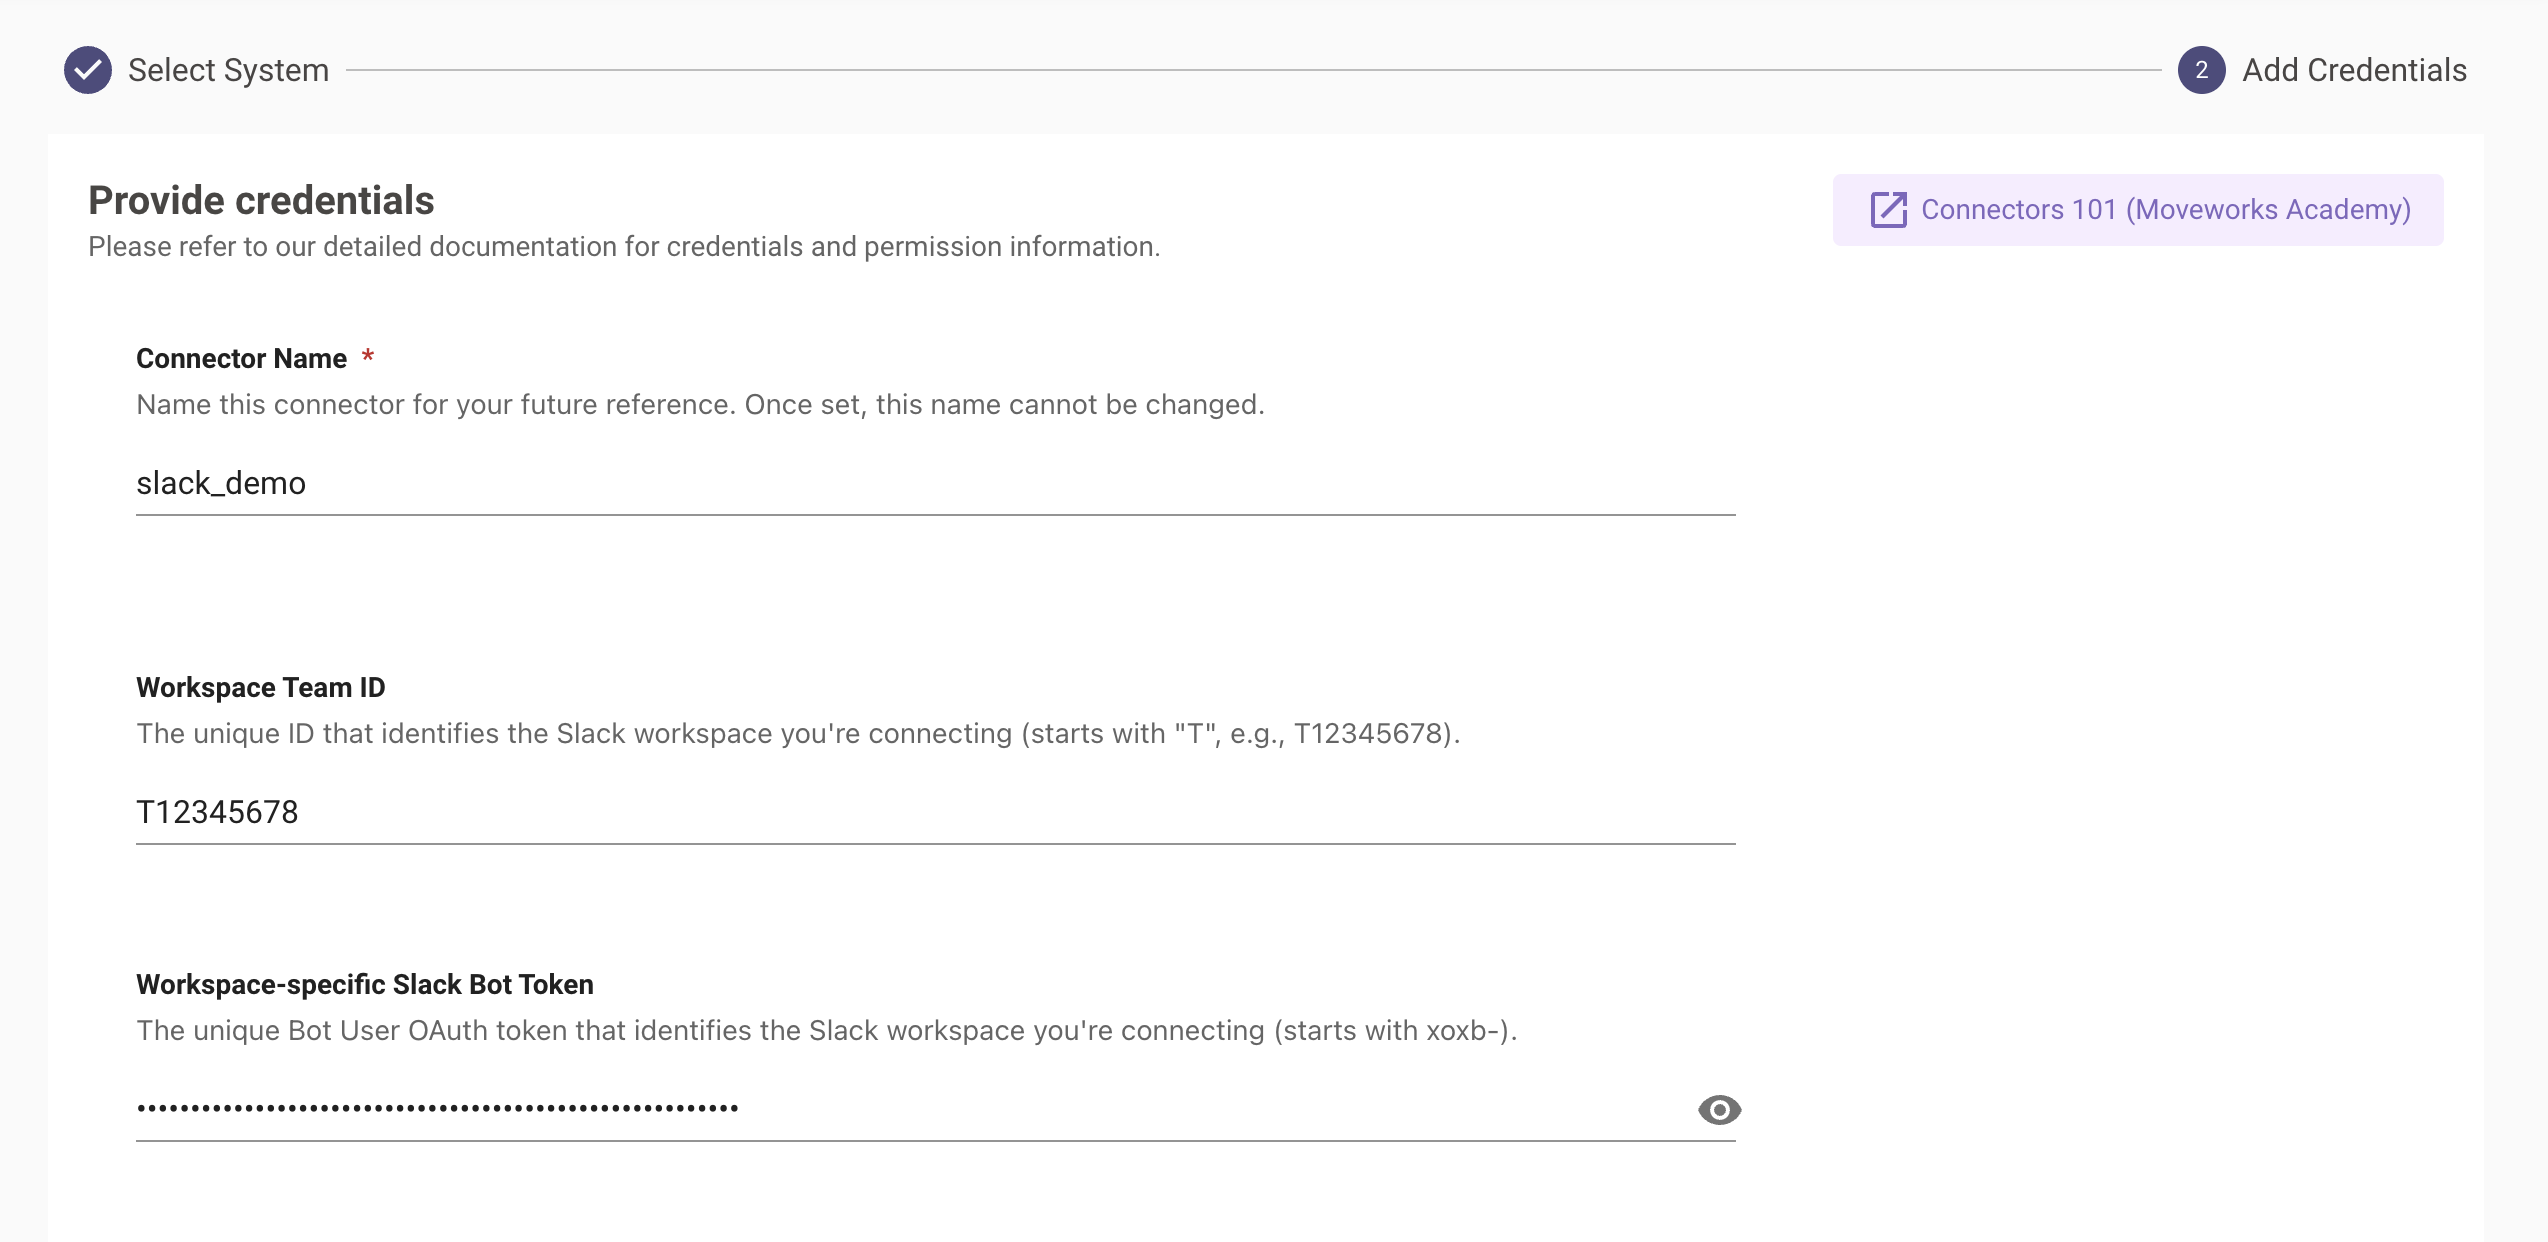
- Input the following details and click Save
- Connector Name : Name this connector for your future reference. Once set, this name cannot be changed.
- Workspace Team ID: Paste the identifier you copied earlier from the
auth.testresponse — theteam_id(starts withT, e.g.,T12345678) for a single-workspace install, or theenterprise_id(starts withE, e.g.,E12345678) for an Enterprise Grid org-level install. - Workspace-specific Slack Bot Token: Paste the Bot User OAuth token you copied earlier (must start with xoxb-).
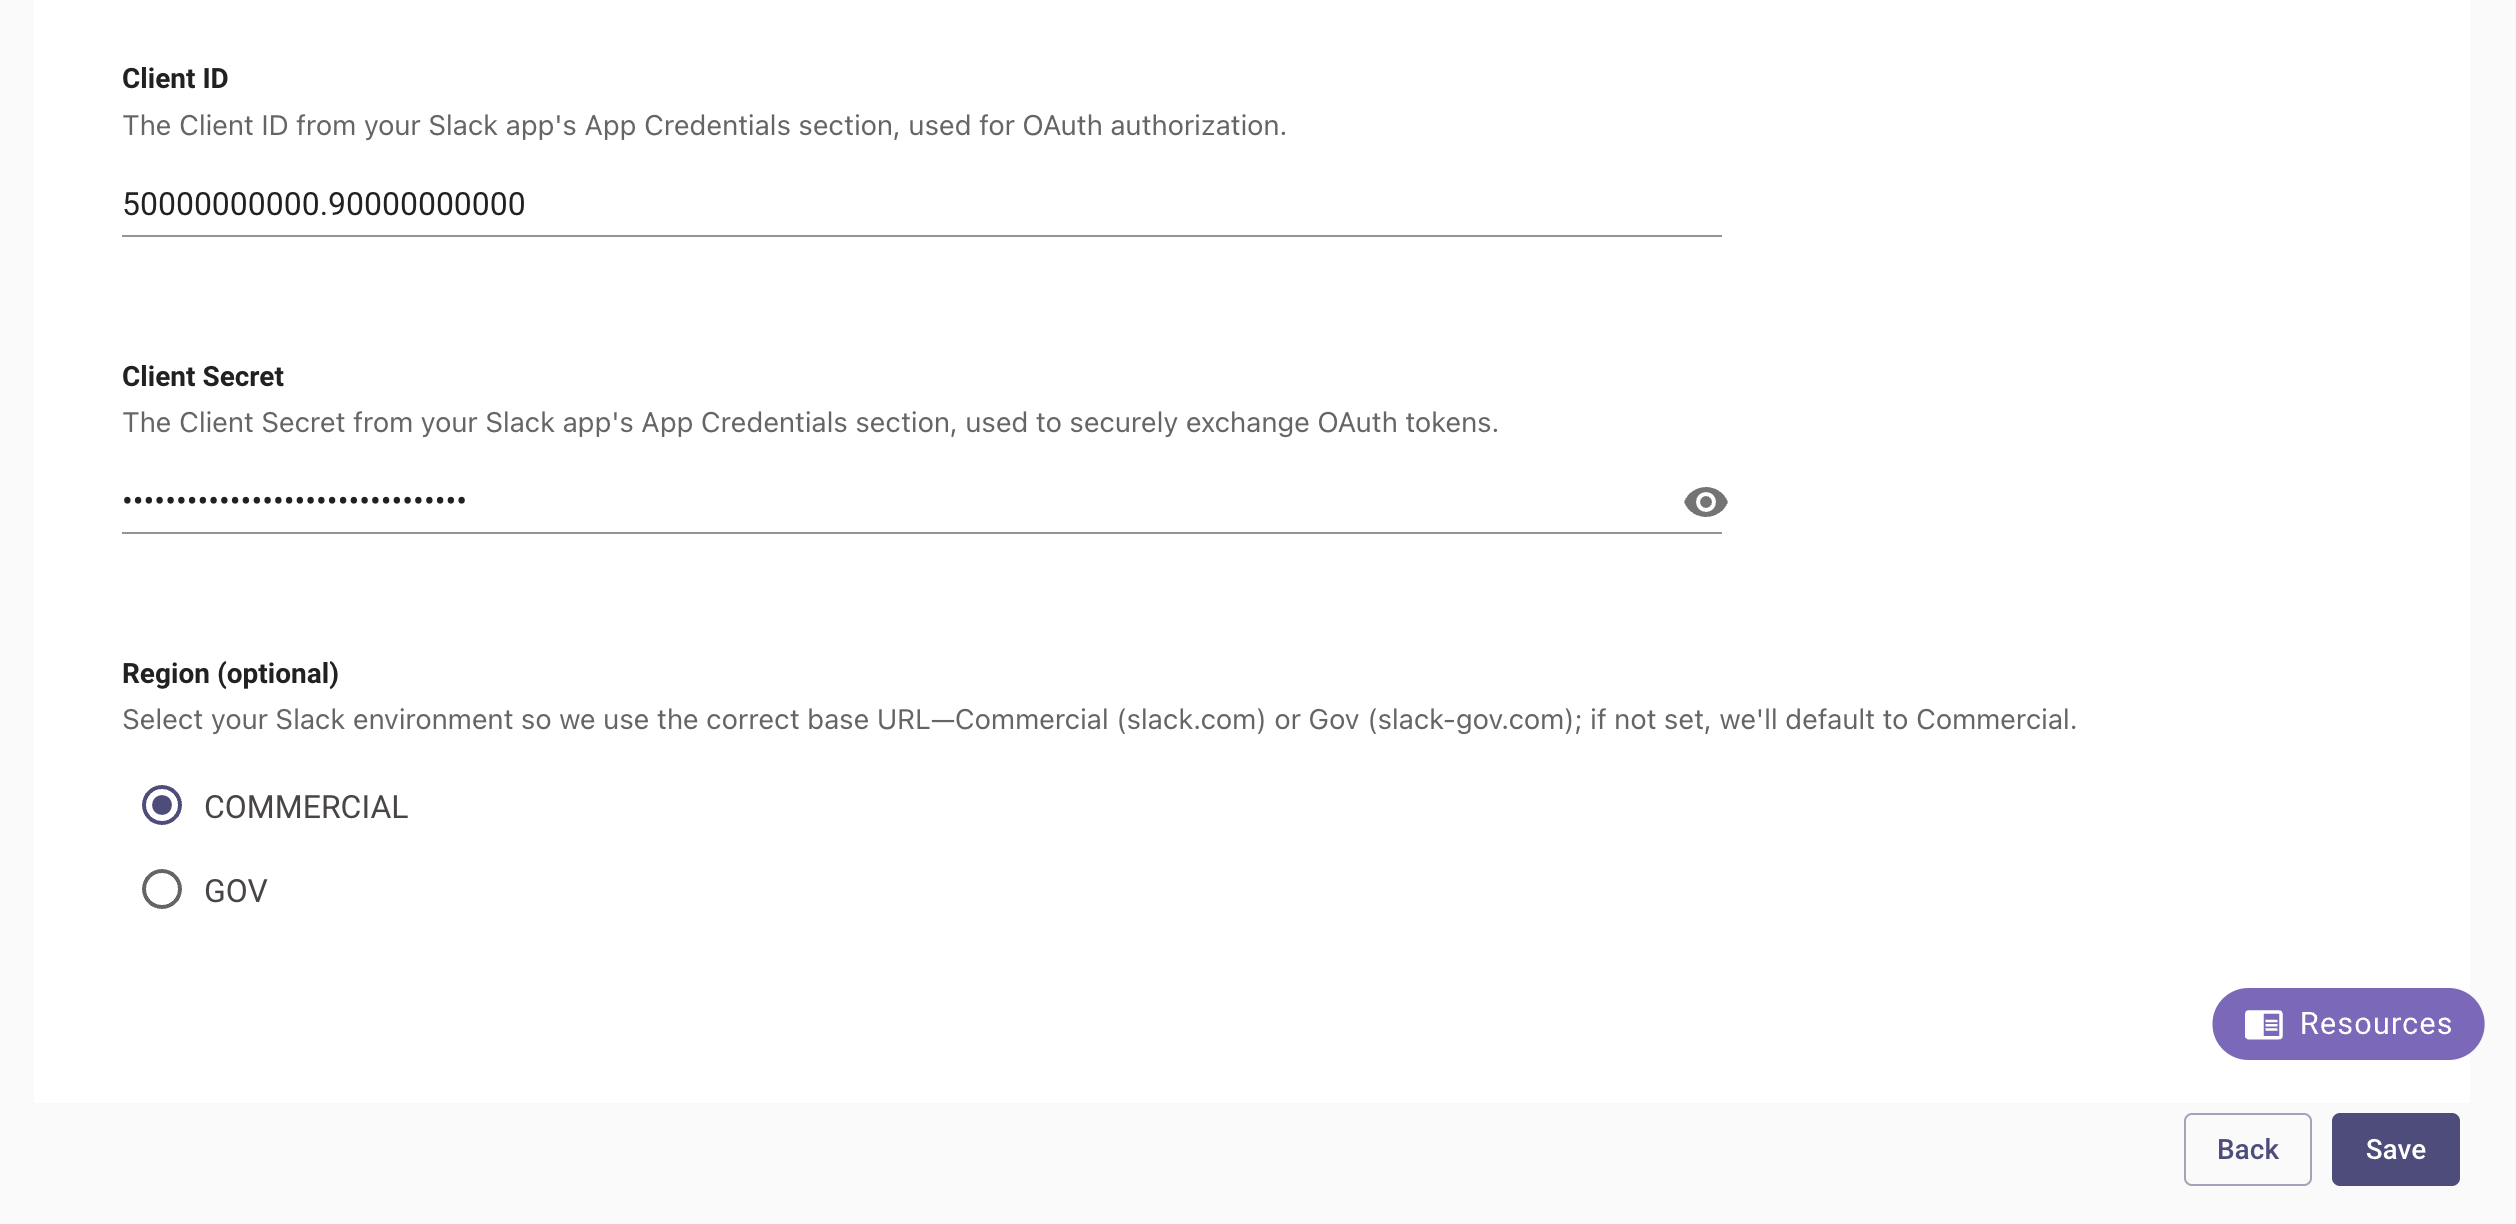
- Client ID: Paste the Client ID you copied earlier from the Live Search Slack app (App Credentials).
- Client Secret: Paste the Client Secret you copied earlier from the Live Search Slack app (App Credentials).
- Region (optional): Select Commercial or GOV to match your Slack environment.
Initialising setup
- Log in to your org’s MyMoveworks portal
- Navigate to Moveworks Setup > Search > Configure Search > Max Capacity
- Click on Create New or Get Started
- Select Slack from the dropdown list and click on Get Started
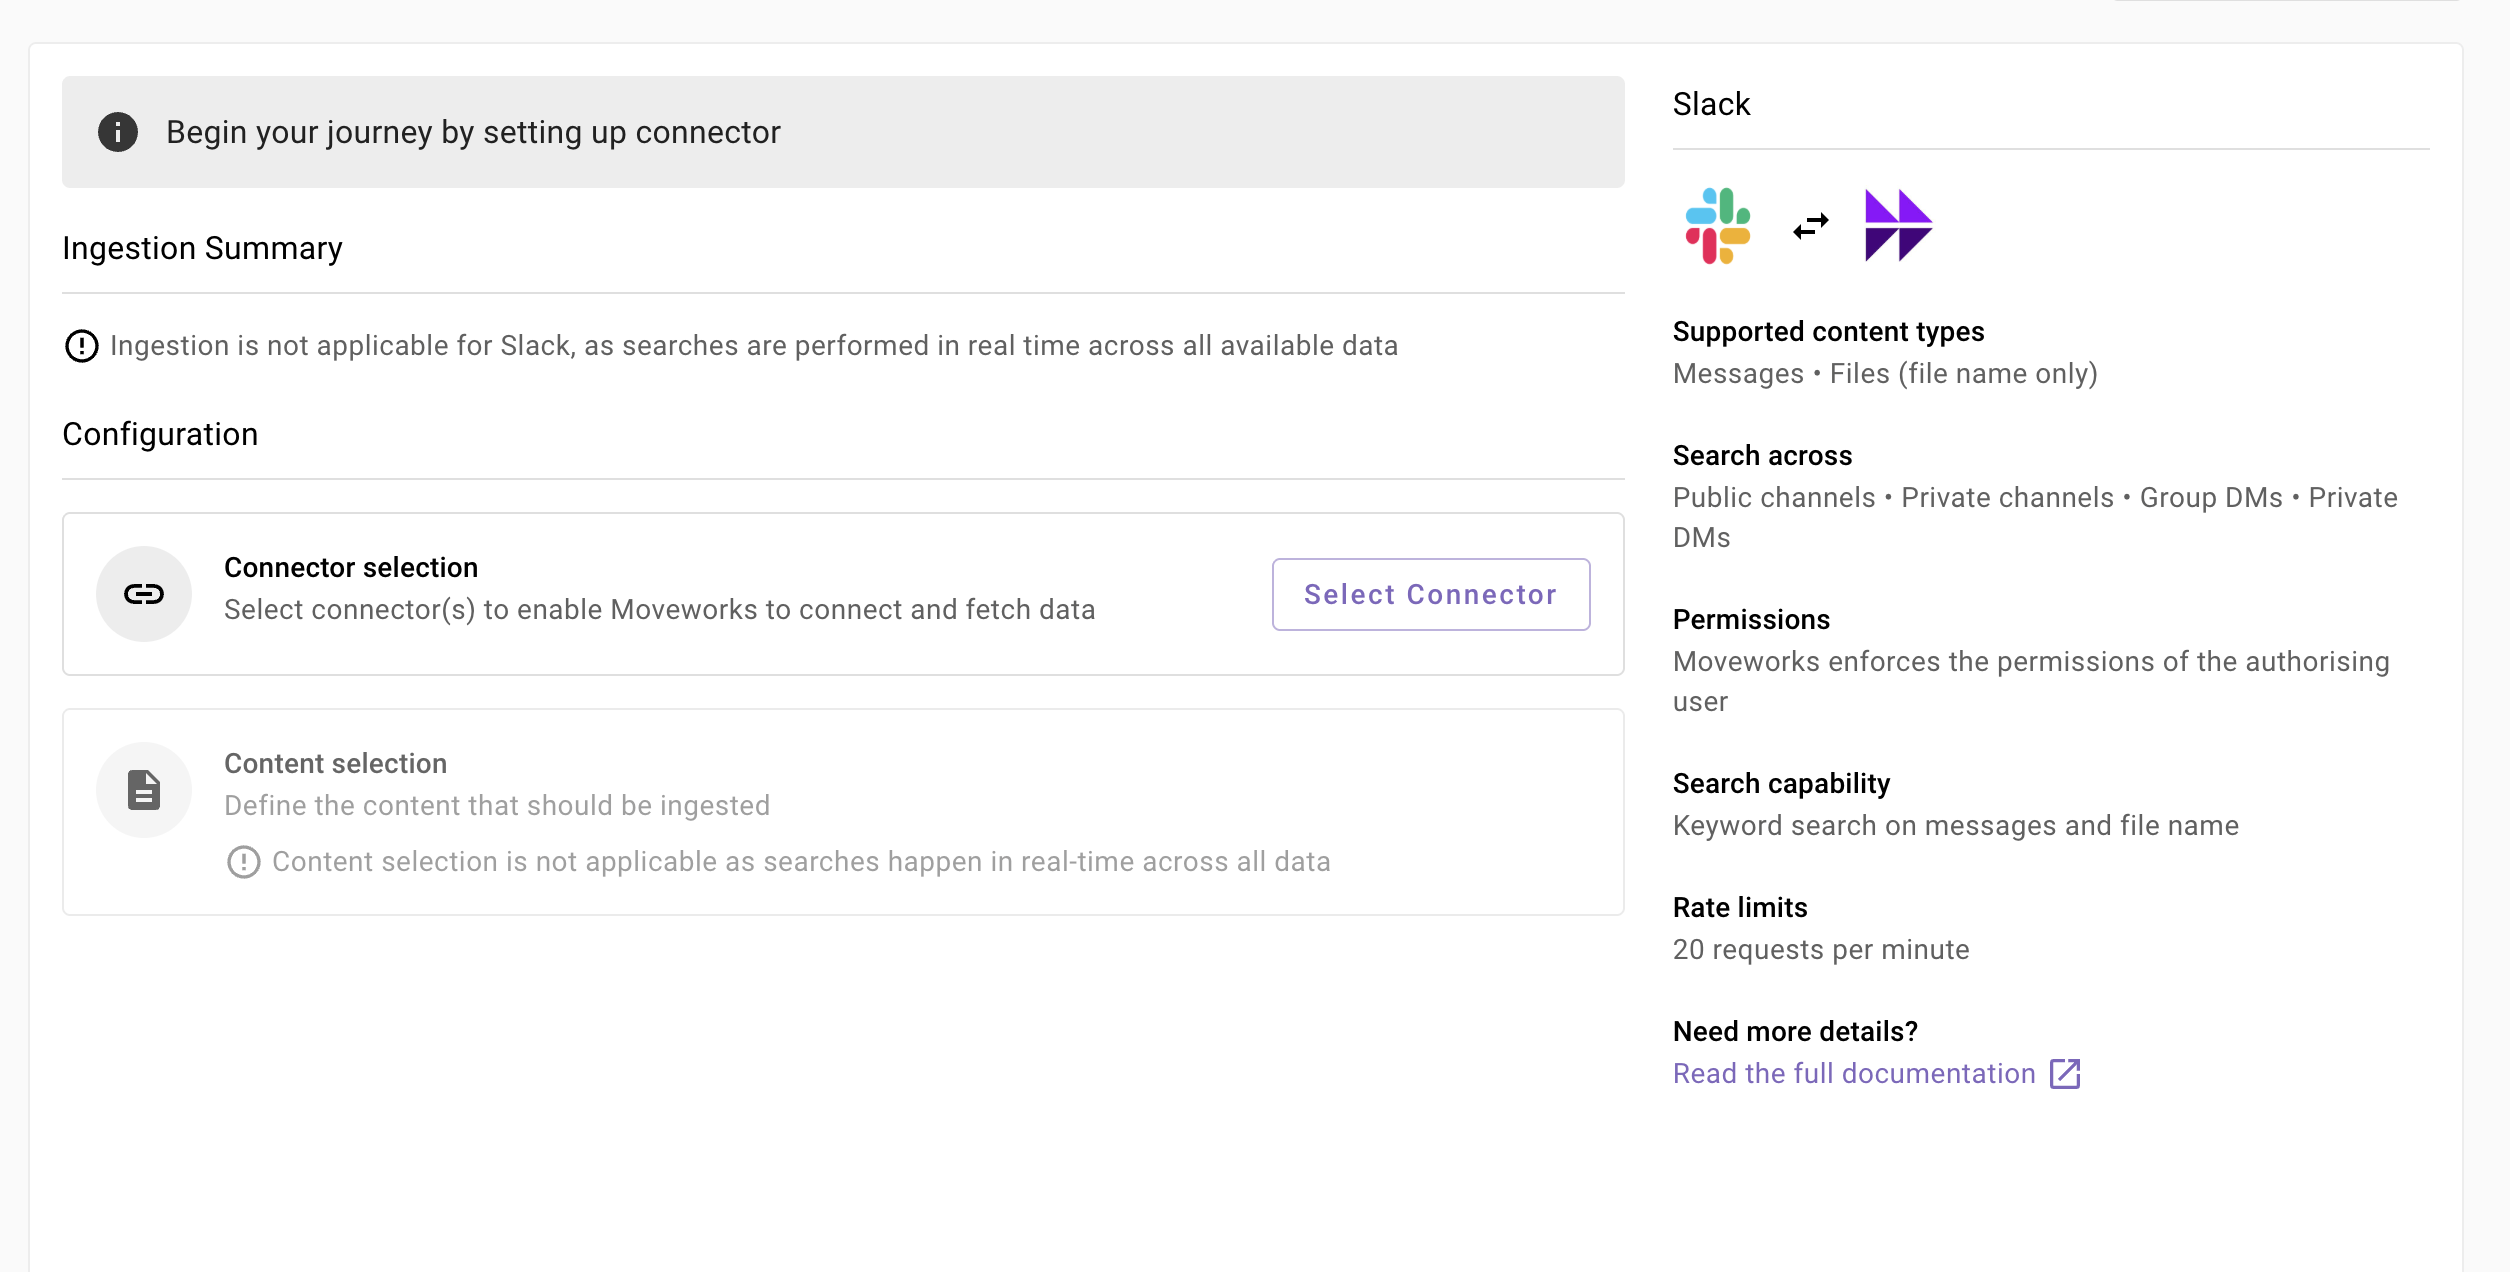
- You will be redirected to the Slack ingestion overview page. In the overview page, you will find few info blocks and few configuration blocks.
- System Overview: This presents an overview of Slack support from Moveworks
- Connector Selection: In this configuration block, you are required to select the required connector to enable Moveworks to connect and fetch data
Configuring Slack for Enterprise Search
Connector selection and validation
-
Once you click on Select Connector, a connector setup screen will appear as follows
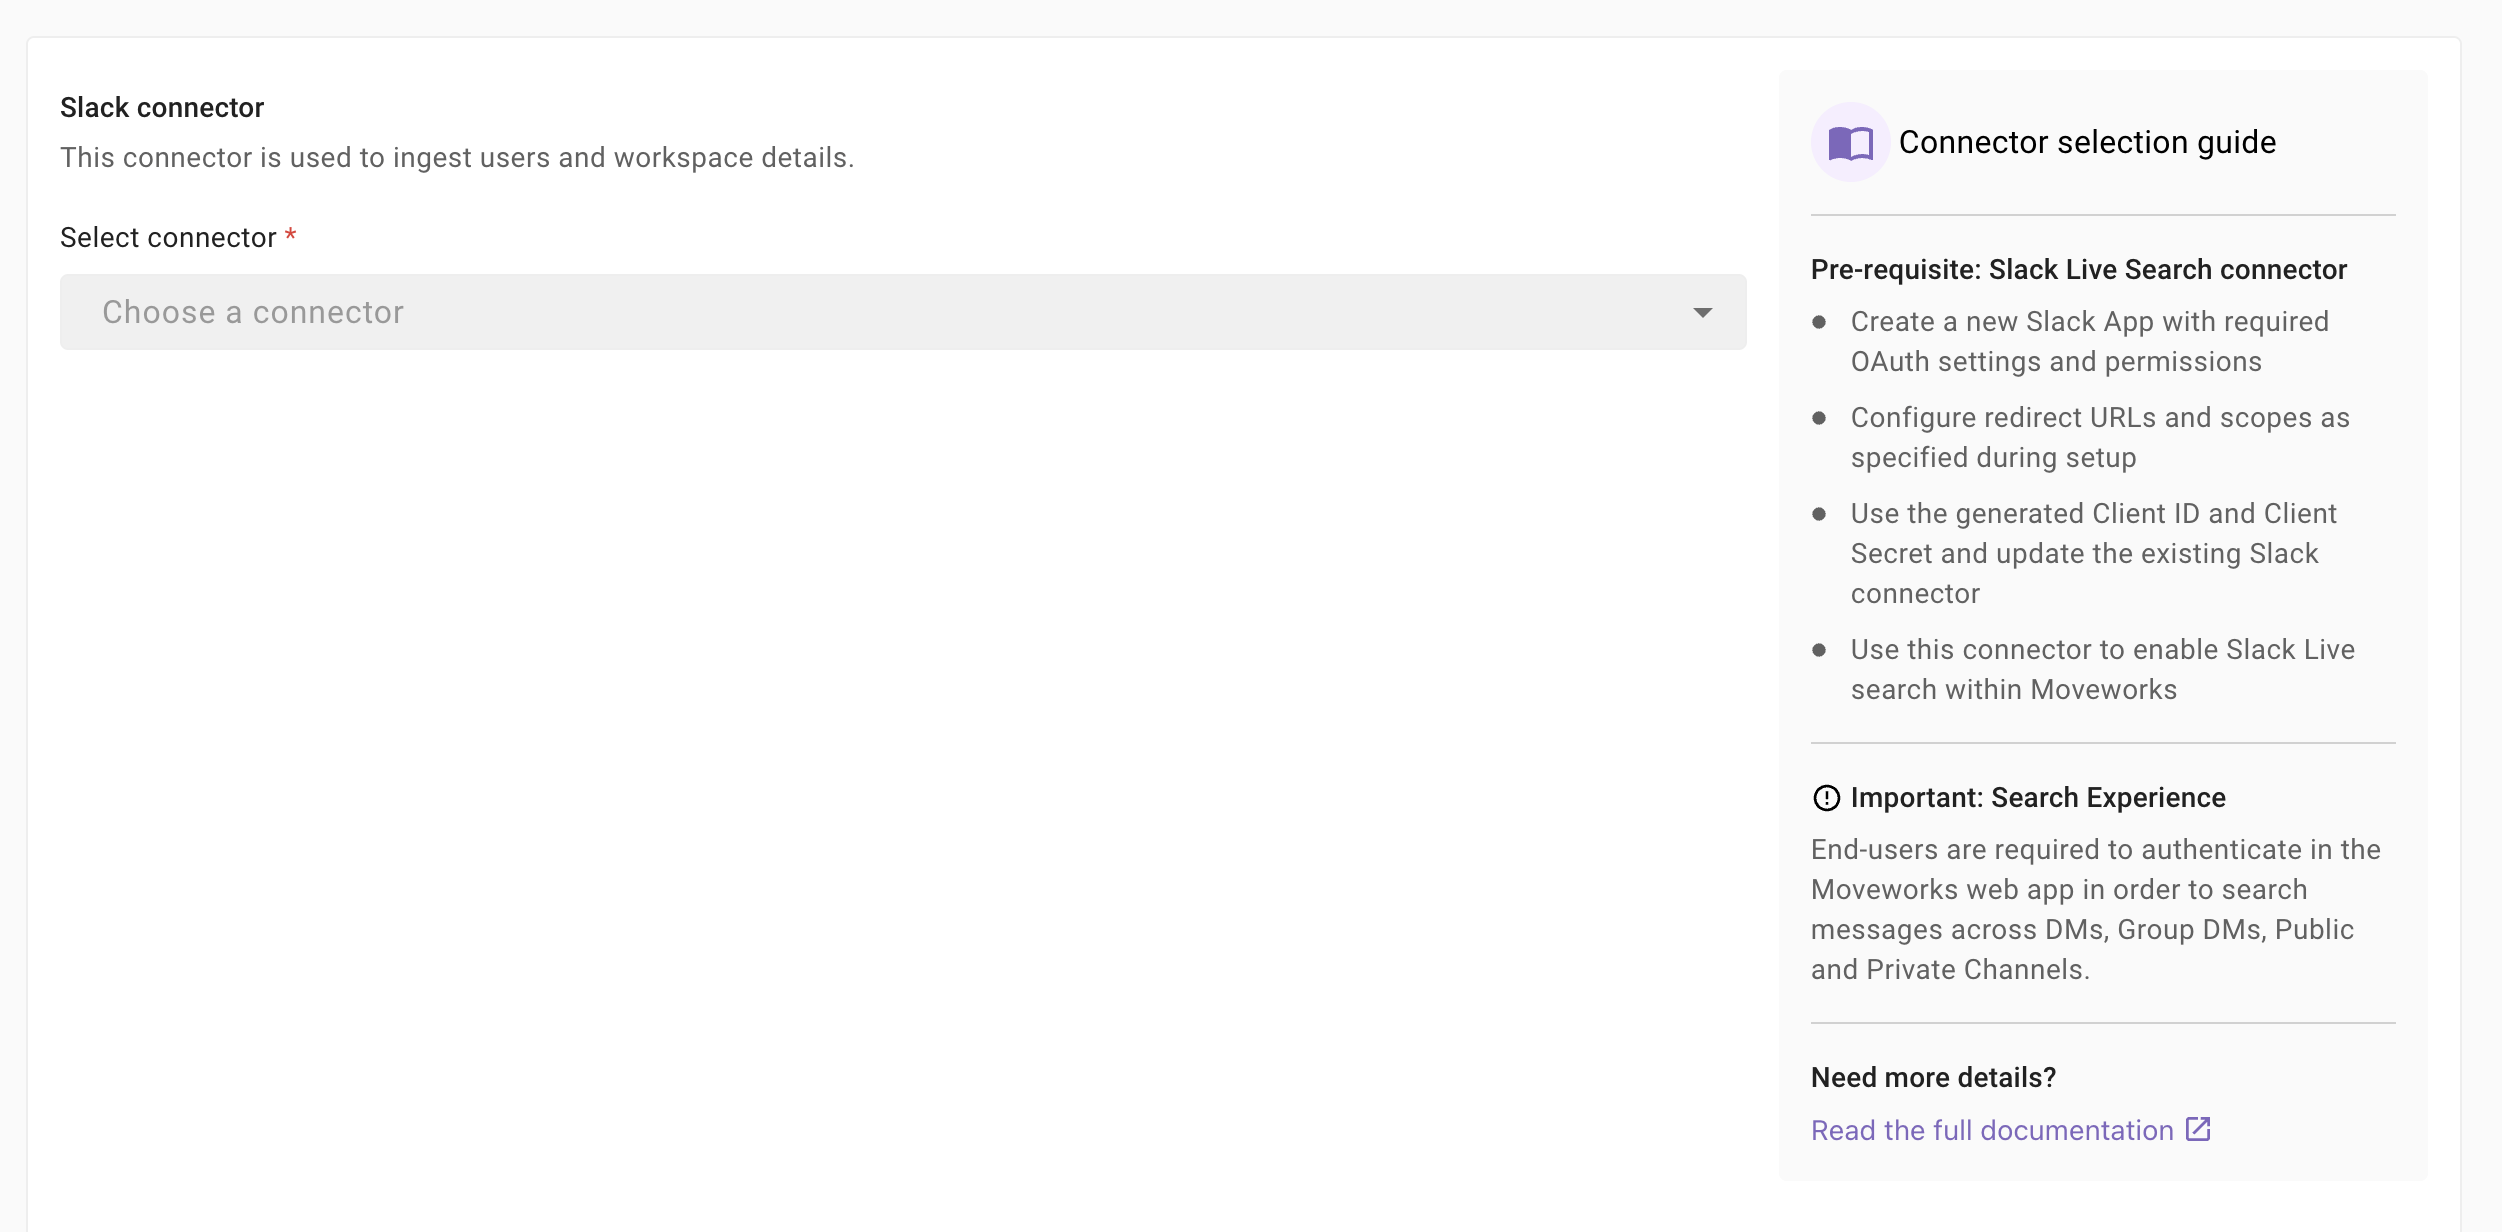
-
Select the connector (from the dropdown) that you have created in the Connector Creation step.
Please note: Only the Slack (Next Gen) connectors will appear in this list.
-
Once the connector is selected, you need to click on Start Validation to validate the connector credentials and required scopes. Validation runs in two stages:
Connector Validation
This is a mandatory step in order to save the configuration and move to the next step.
Stage 1 — Connector scopes (Bot token). Moveworks validates that the connector’s bot token has the right scopes to fetch:
- Channels: scopes to fetch channels information
- Users: scopes to fetch user data
- Groups: scopes to fetch user groups data
Each check confirms both the scopes and that the fetch returns data — the workspace must contain at least one channel, one user, and one user group. For example, if a workspace has no user groups, the Groups check fails even when the scopes are correct; create at least one user group in that workspace and re-run validation.
For Enterprise Grid org-level installs, Moveworks runs these checks against a single workspace resolved from the org token, so make sure every workspace where the app is installed has at least one channel, one user, and one user group.
")
Once Stage 1 passes, the second stage runs:
Stage 2 — Live Search (Real-Time Search). Moveworks validates the Real-Time Search (
assistant.search.context) endpoint using the user (RTS) scope of the user configuring the Max Capacity flow:- Content: scopes to fetch content via live search
")
-
If both stages validate successfully, you will see a green info banner as follows.

- If there are any credentials or scope issues, you will receive an error message as follows. Click on View Details to identify the issue.
-
Once the connector is validated successfully, you will be able to Save the configuration.
-
Input the unique configuration name and Save.
-
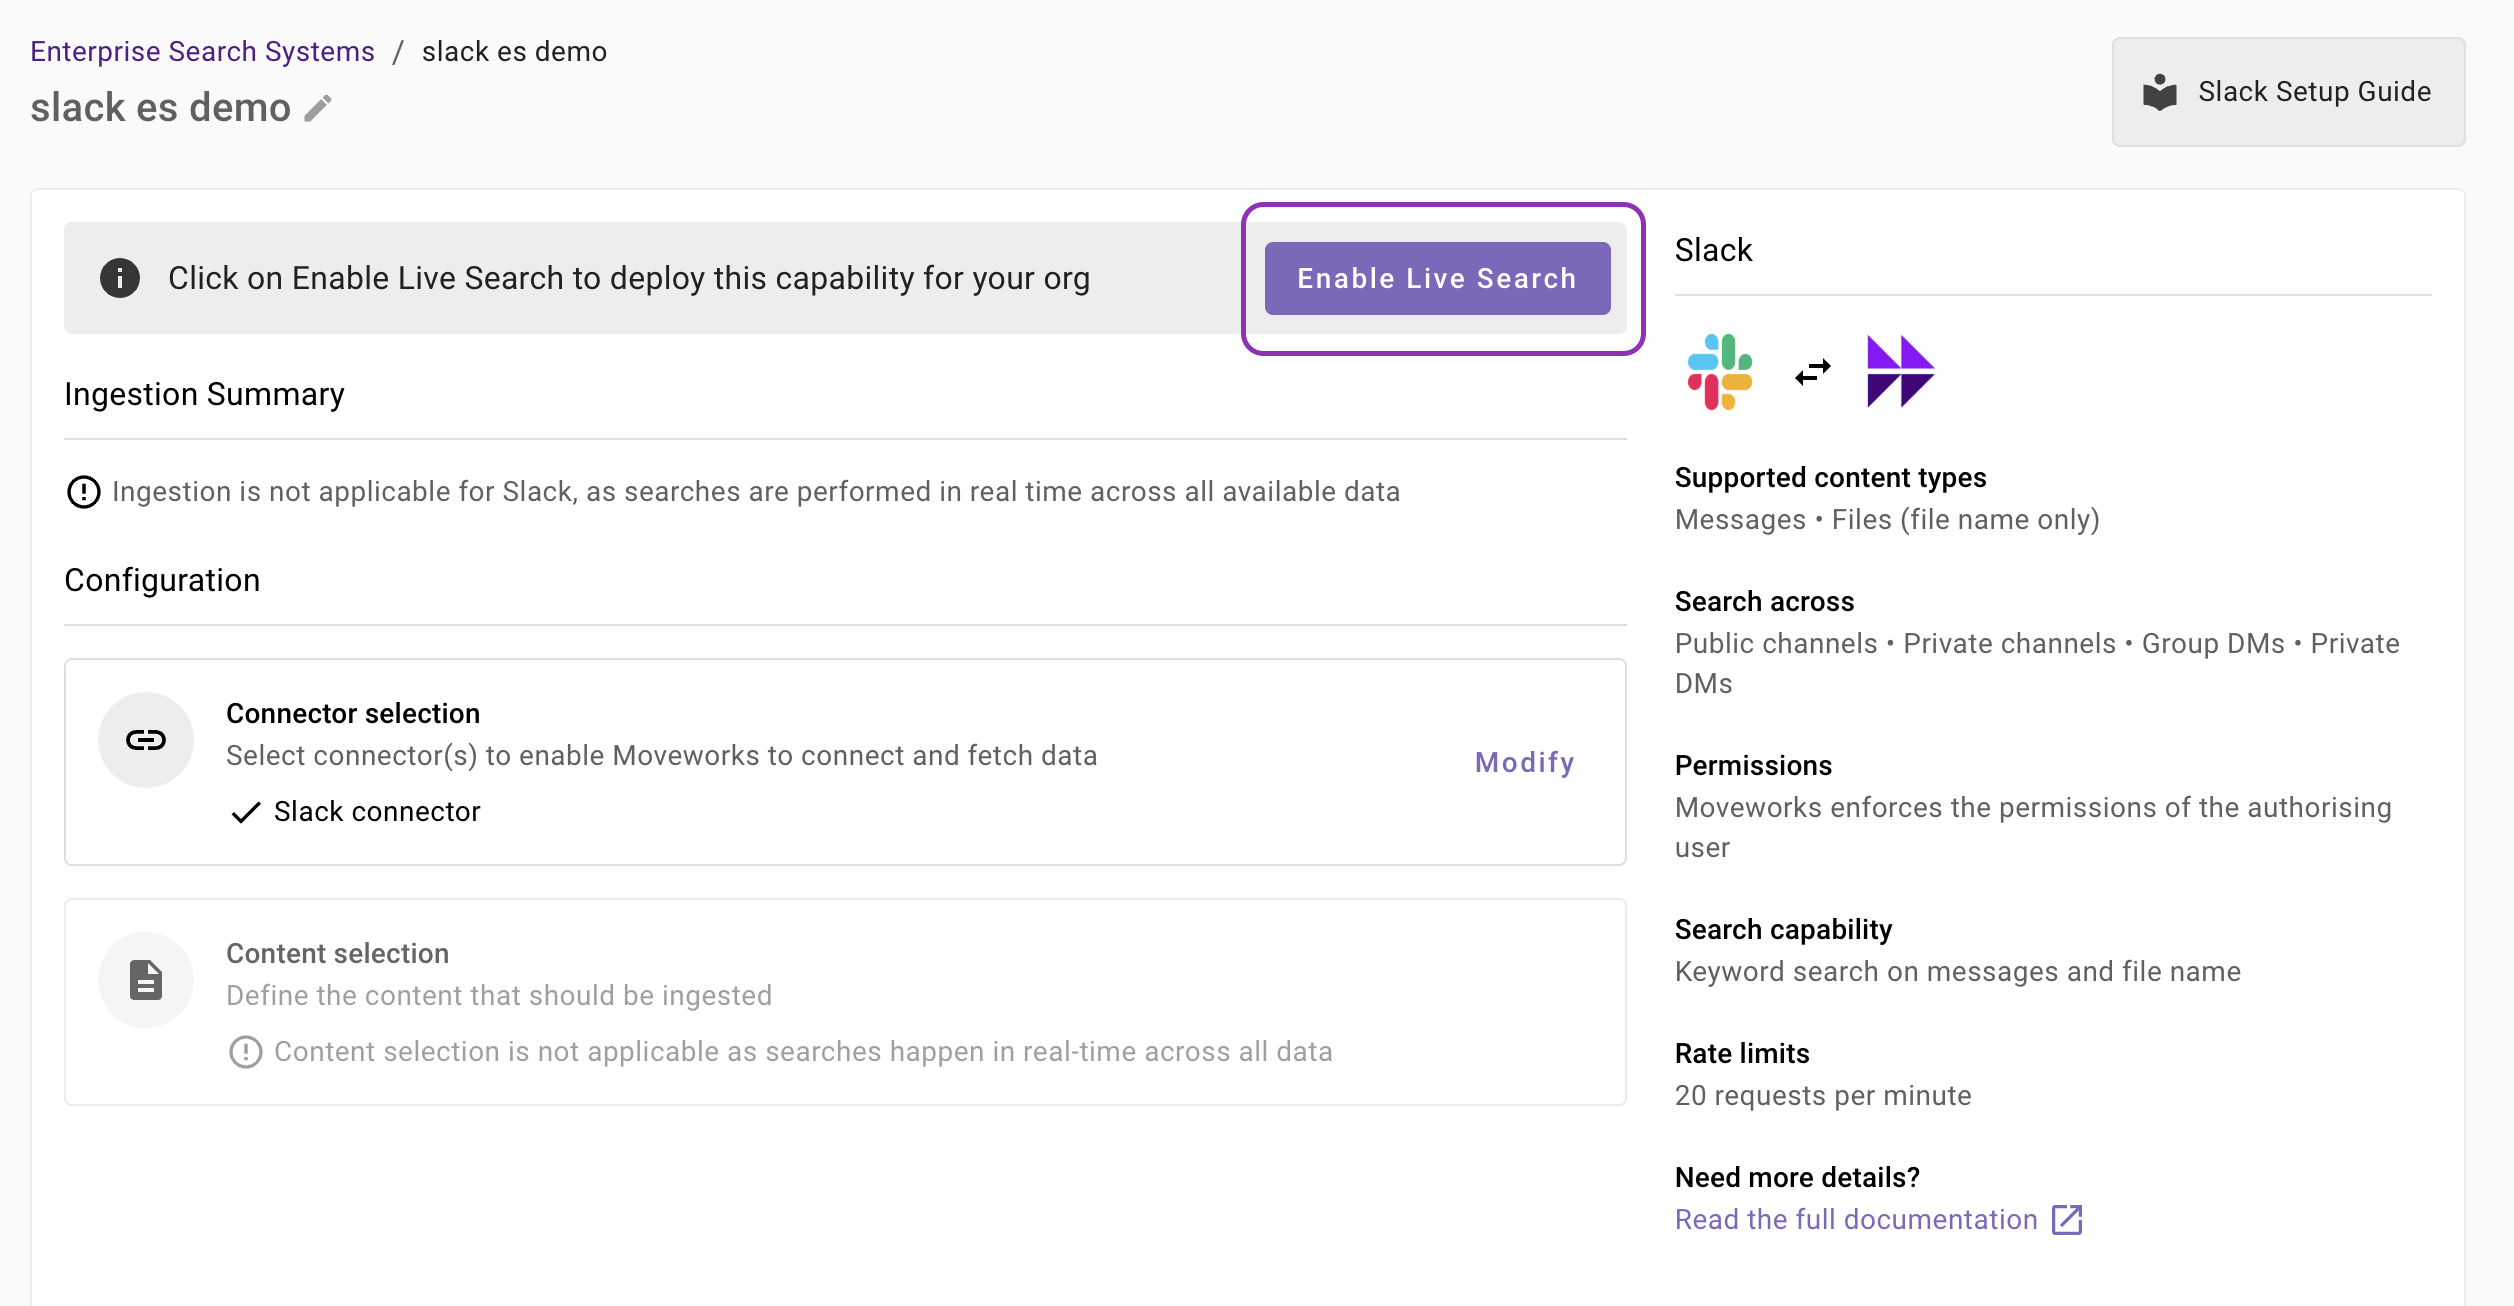
Once the configuration is saved, you can view the unique configuration name at the top of the screen. You can also click the pencil 🖊️ icon to edit the configuration name.

-
Additionally, you will see a banner at the top of the screen with an Enable Live Search button. Click it to activate the Slack Live Search feature for your Enterprise Search web application.
Audience configuration
Live Search does not serve results until you set the audience. From the configuration’s home page, open the Target audience tab and choose who can search — source permissions are always enforced on top of your selection.
Audience configuration is the same for every Max Capacity connector. For the full steps and options, see Step 4: Define Target Audience in the Max Capacity Setup overview.