
Jira (Live) Setup for Enterprise Search
Jira (Live) Setup for Enterprise Search
This page is for the JIRA (Next Gen) connector and it can only be configured within the new enterprise search configuration experience explained below.
This connector cannot be used to configure Ticketing and Ticketing Workflows within Moveworks Setup.
Please visit this documentation to learn more about Max Capacity and Classic connectors.
System Overview
Jira is your organization’s primary project management and issue tracking platform for managing development workflows, bug reports, and project deliverables. From an enterprise search perspective, Jira contains valuable knowledge in tickets, comments, attachments, and project documentation that teams reference for troubleshooting and project context. Moveworks connects to Jira to perform live search across projects and issues, returning results that based on user permissions, without storing or indexing any data.
Authentication
Authentication is accomplished by creating and registering an Atlassian OAuth 2.0 application for the following approach for live search:
- Uses delegated OAuth 2.0 with a separate Atlassian app registration and client secret
- End users sign in and provide consent for the first time; Moveworks then searches only the projects and issues they can access in Jira
- No enterprise-wide indexing of Jira content occurs
Permissions Enforcement
Live Search: Results are retrieved on behalf of the signed-in user using their token, so source-system permissions are inherently enforced.
API Usage
Moveworks uses the standard Jira Cloud REST API v3 to perform live search from Jira. We use only permissions granted through user consent for live search.
Content Types
Live Search
- On-demand results from the signed-in user’s accessible Jira projects and issues
- Not indexed into the enterprise corpus; fetched at query time after user consent
Max Capacity always auto-generates this system’s permission configuration. It also auto-generates the user identity configuration, but only when your organization already has an identity configuration and its joining key resolves to an email address (the joining key is the email itself, or a non-email key such as an employee ID is mapped to the email field of your primary identity source). If either condition is not met, only the user identity configuration is skipped — your Max Capacity setup is not blocked. User identity is a separate, independent configuration you can complete before or after connecting this system. See Configure User Identity.
Access Requirements
Pre-requisites
Before you get started, make sure you have everything you need:
Understanding Permissions Scopes required for Enterprise Search
jira-work: Required to search for jira projects and issues.jira-user: Required to view information about users.
Instructions for Jira Live Search
1. Register a new App
- Sign in to the Atlassian Developer Console
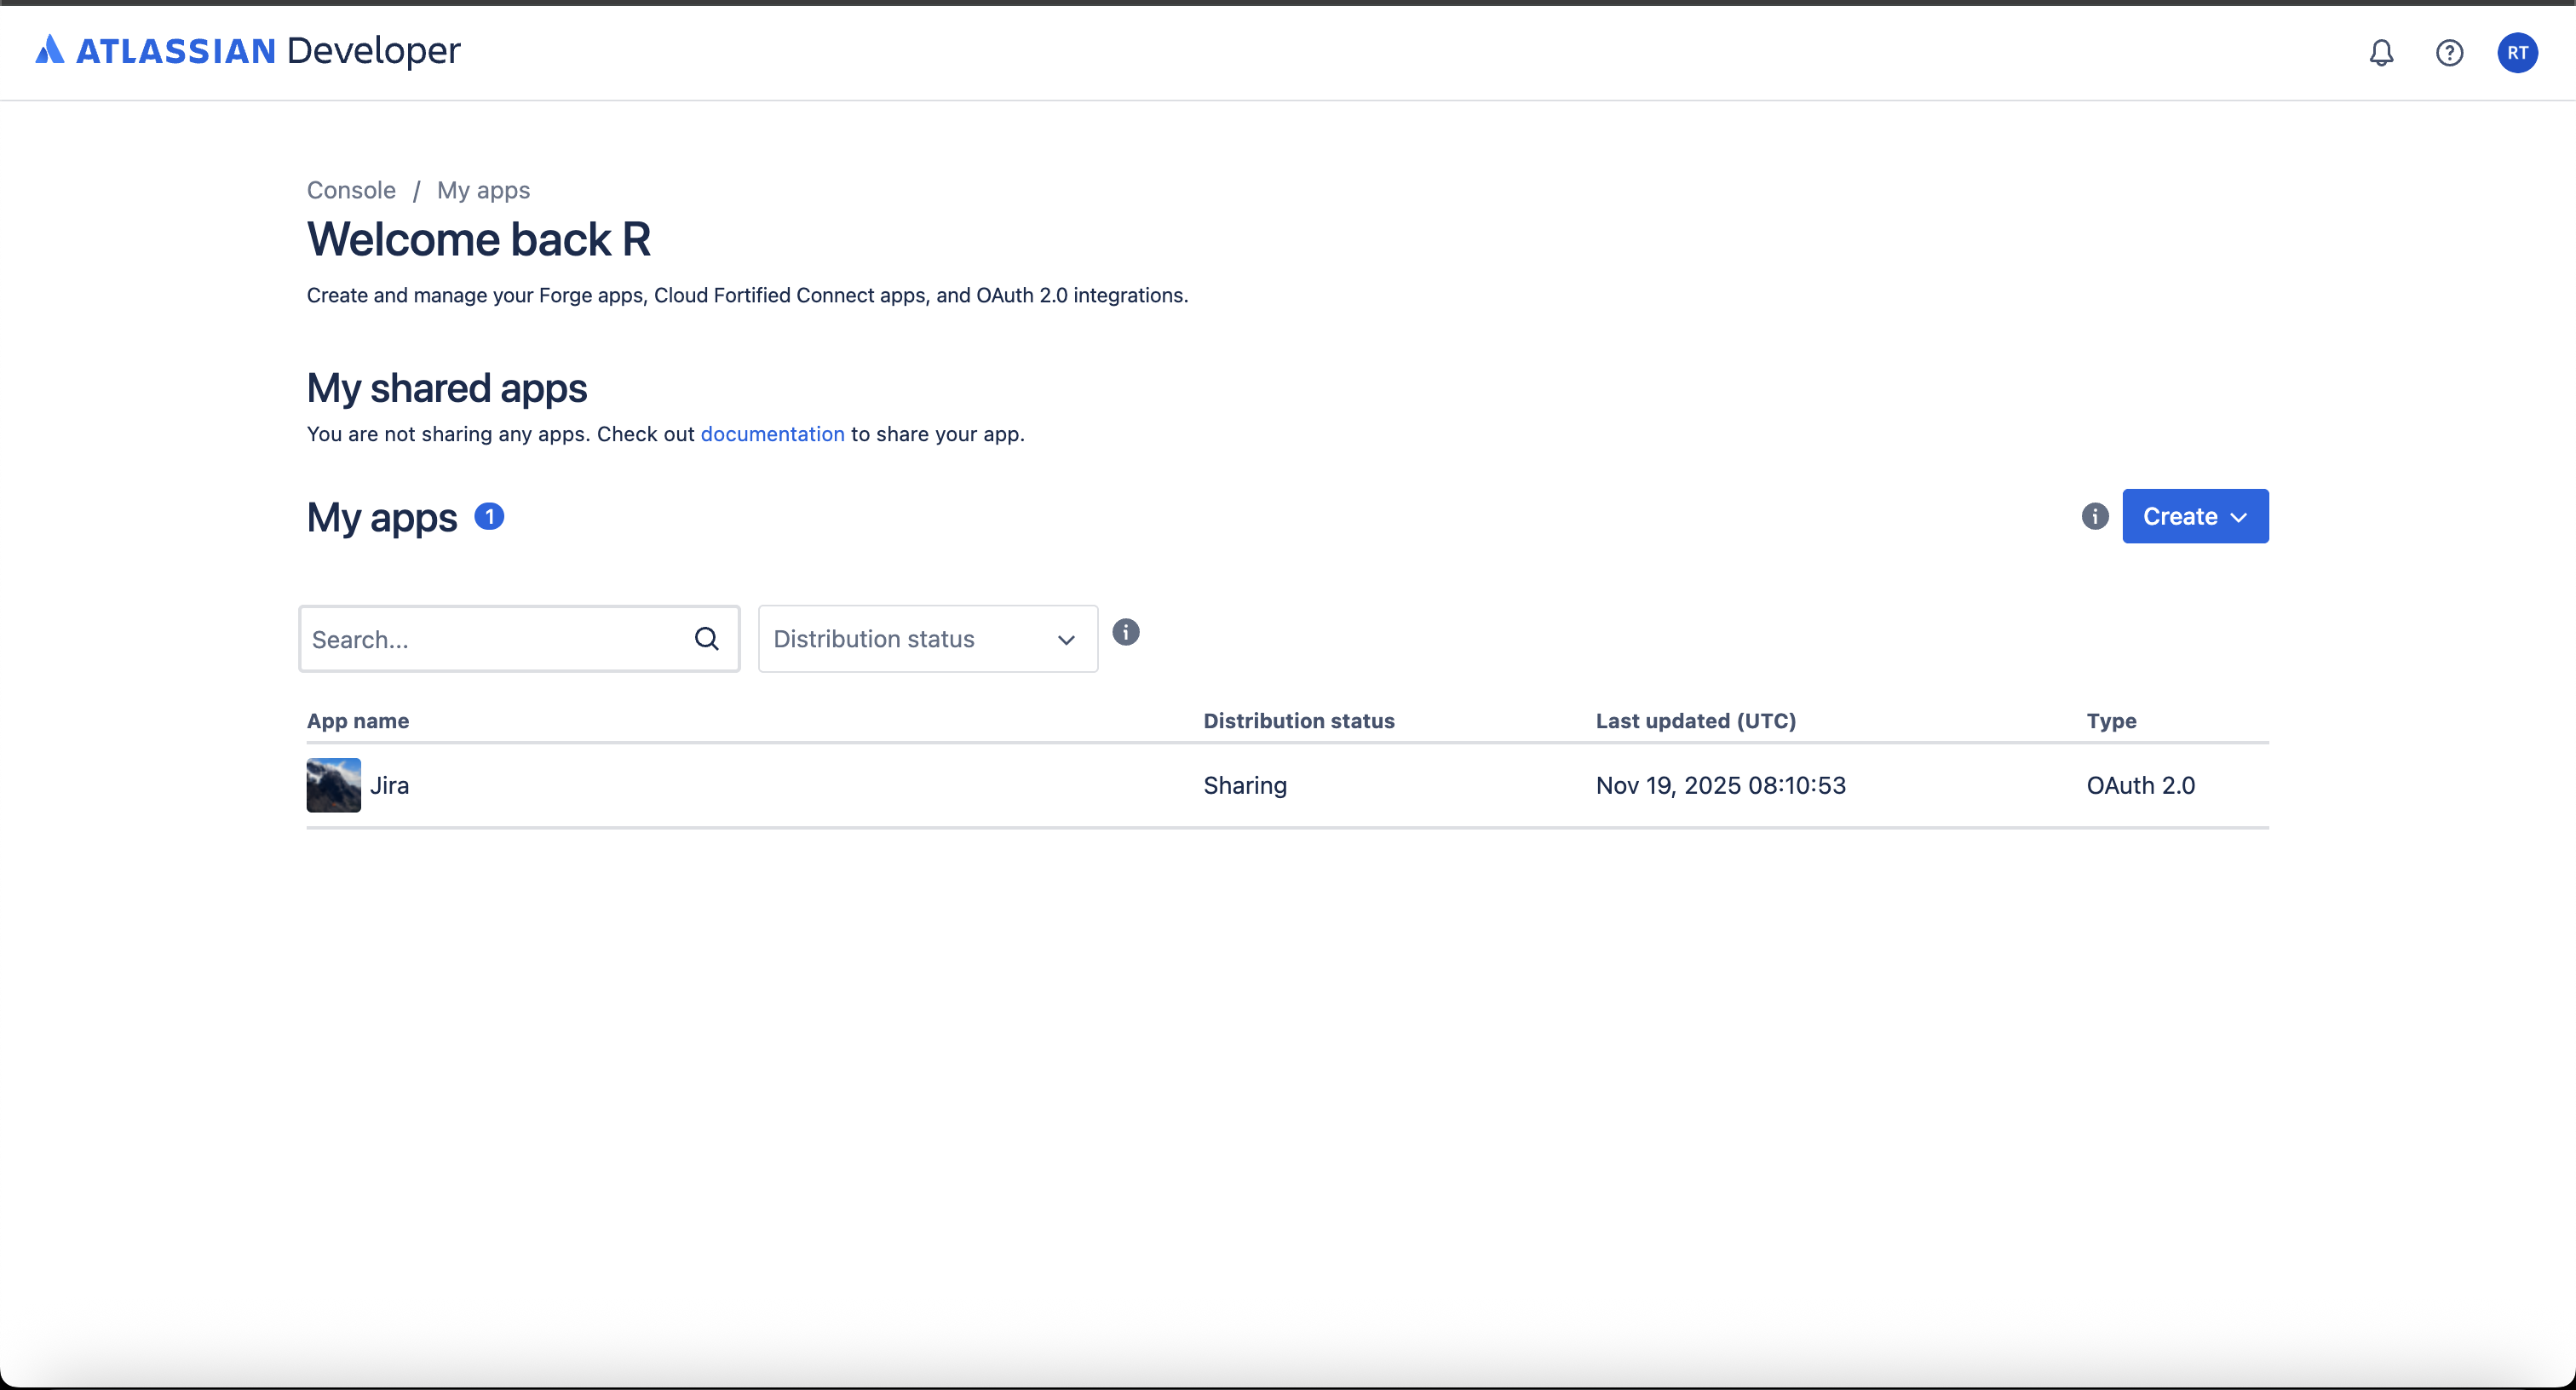
- Click on ‘Create’ button
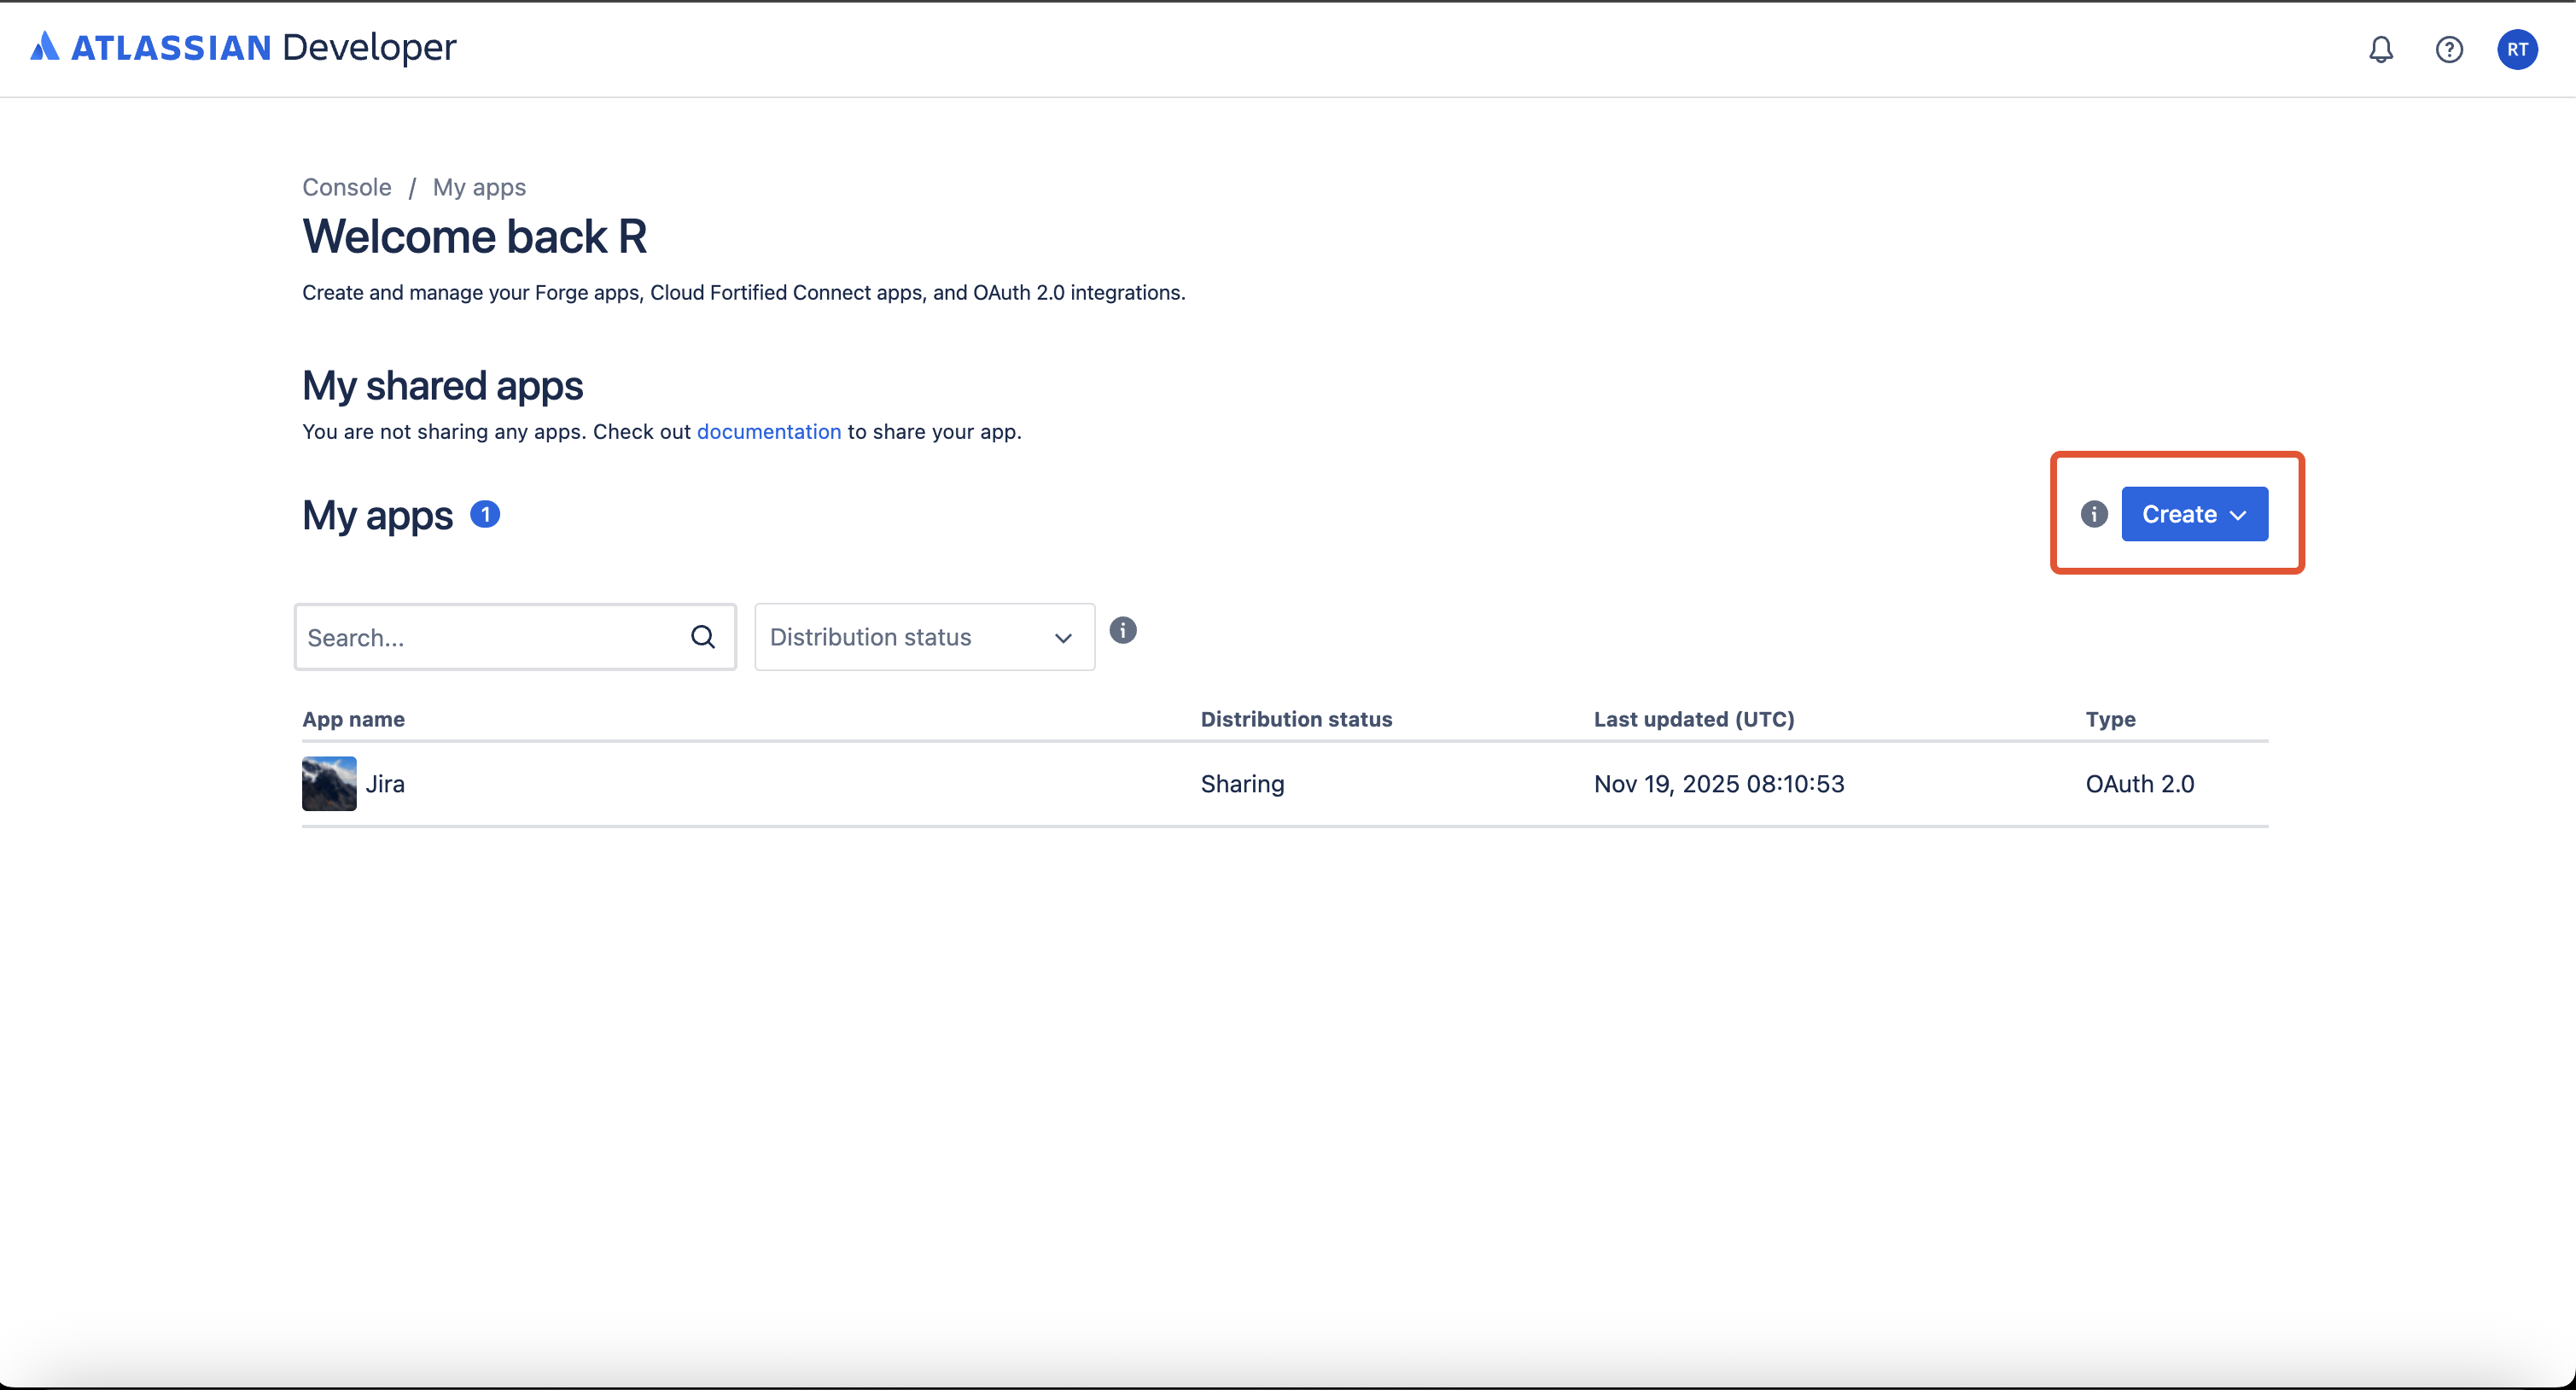
- Click on OAuth 2.0 integration option
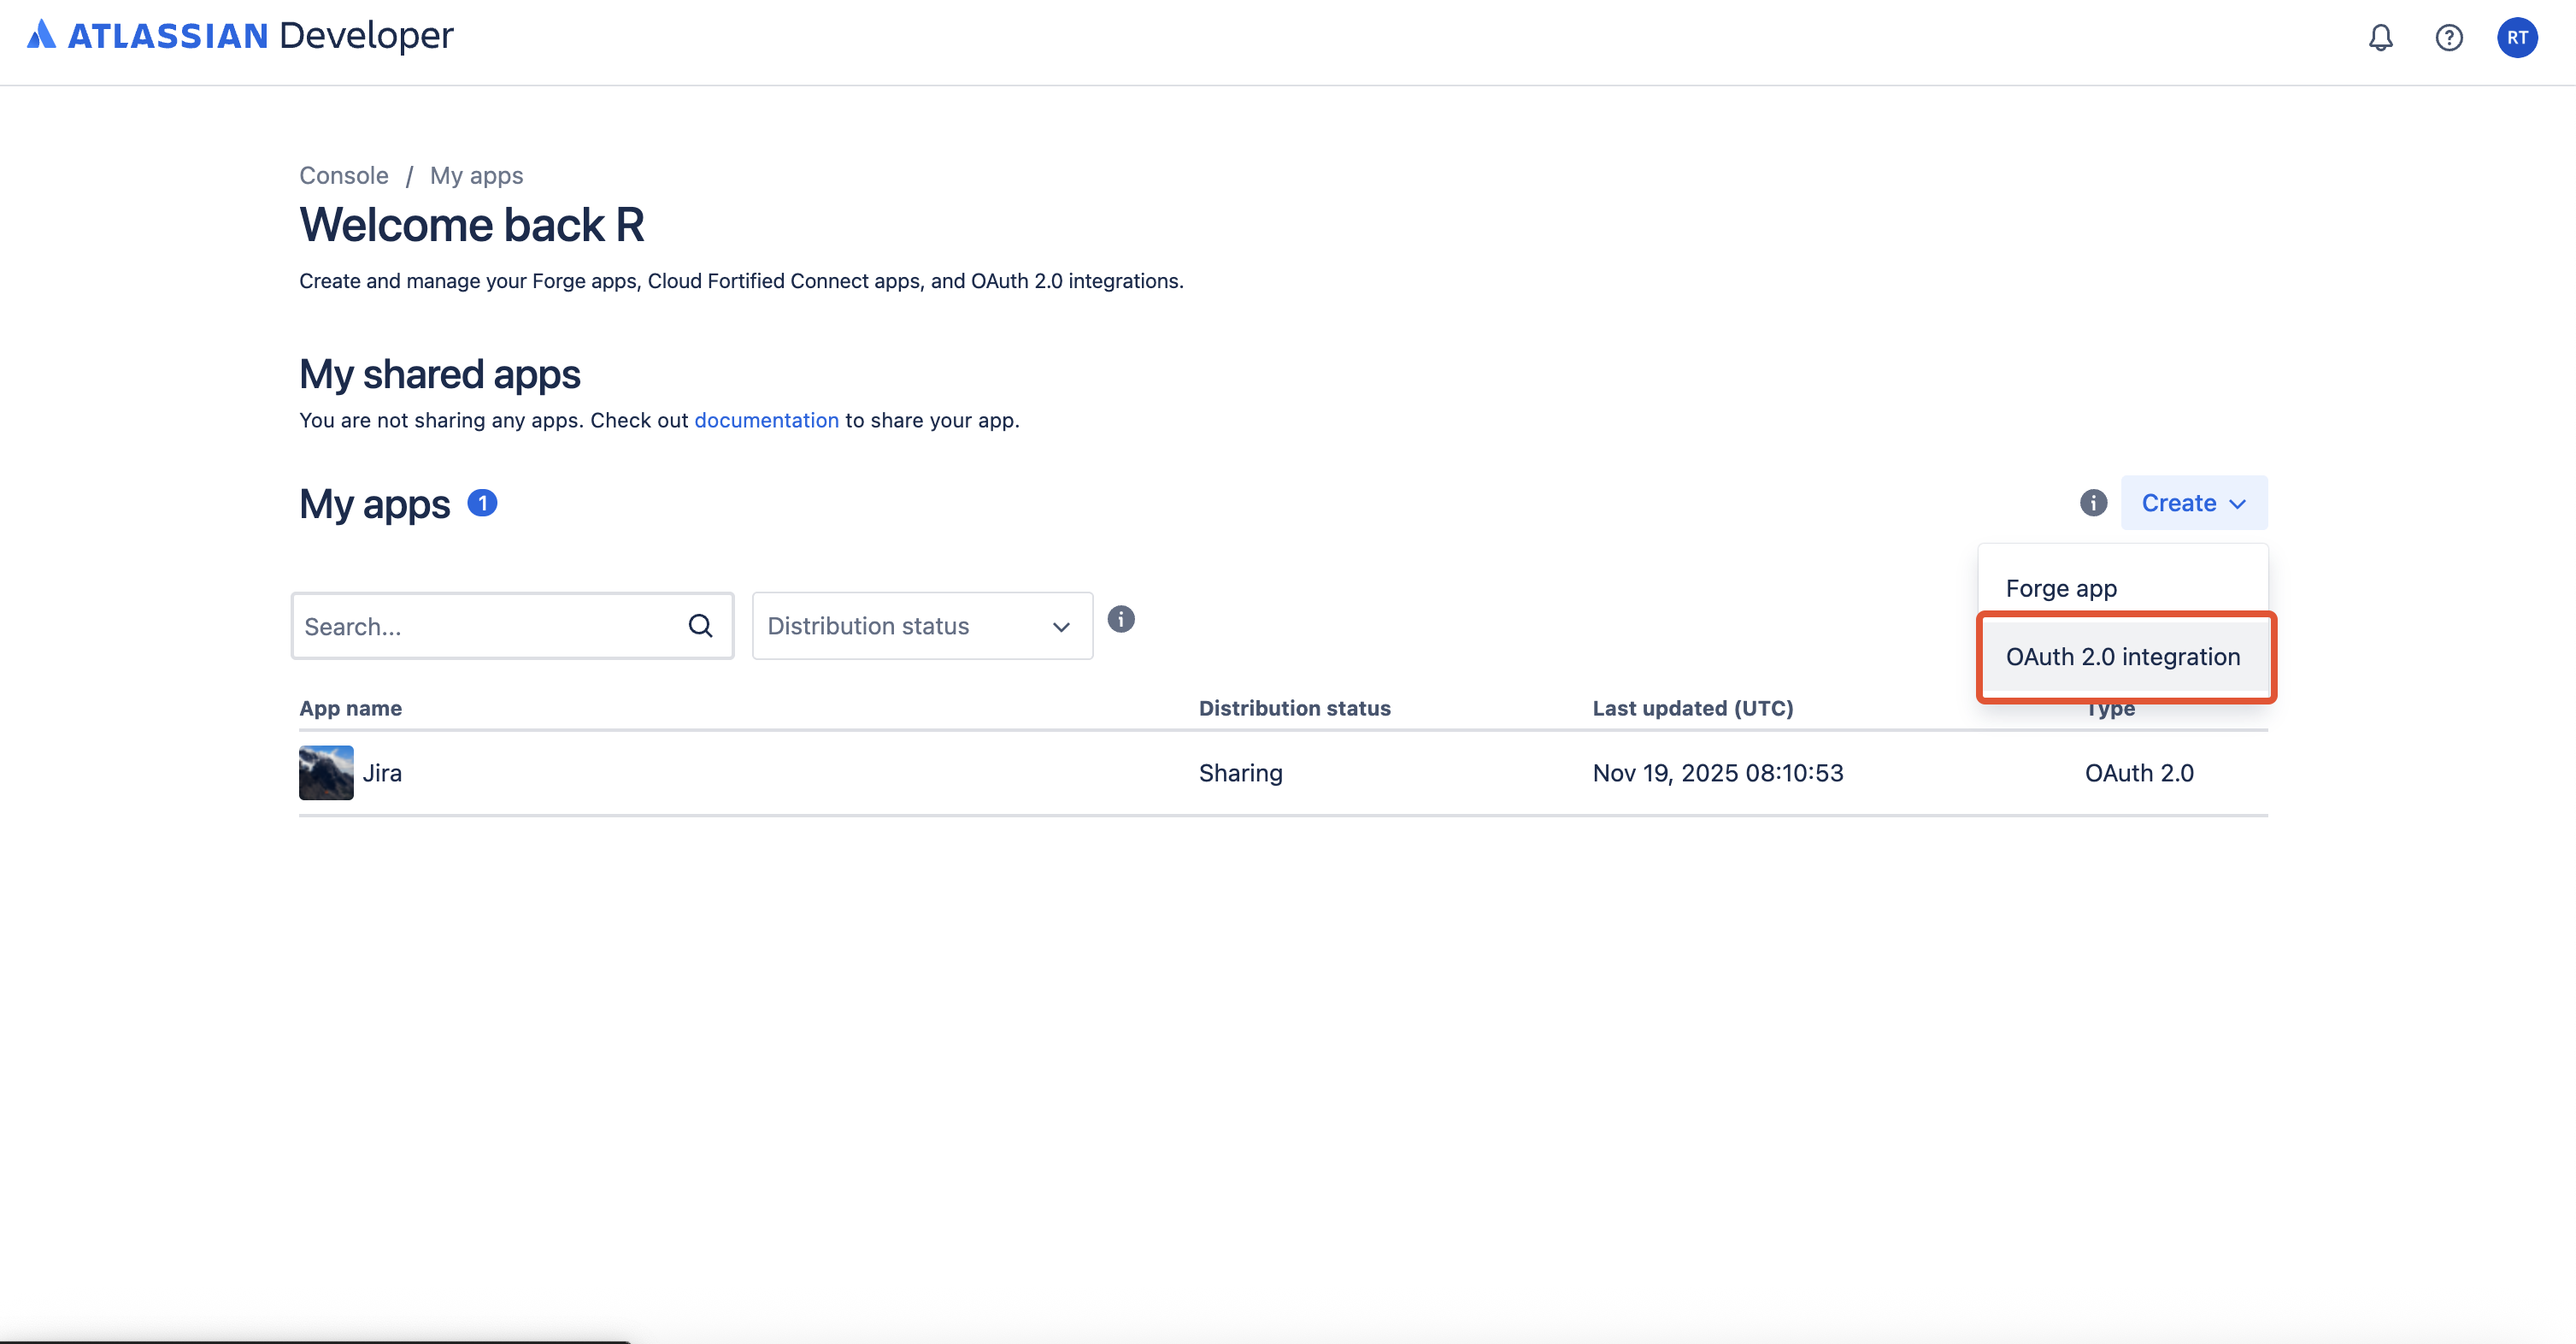
- Name your Jira OAuth 2.0 app and Click on Create button
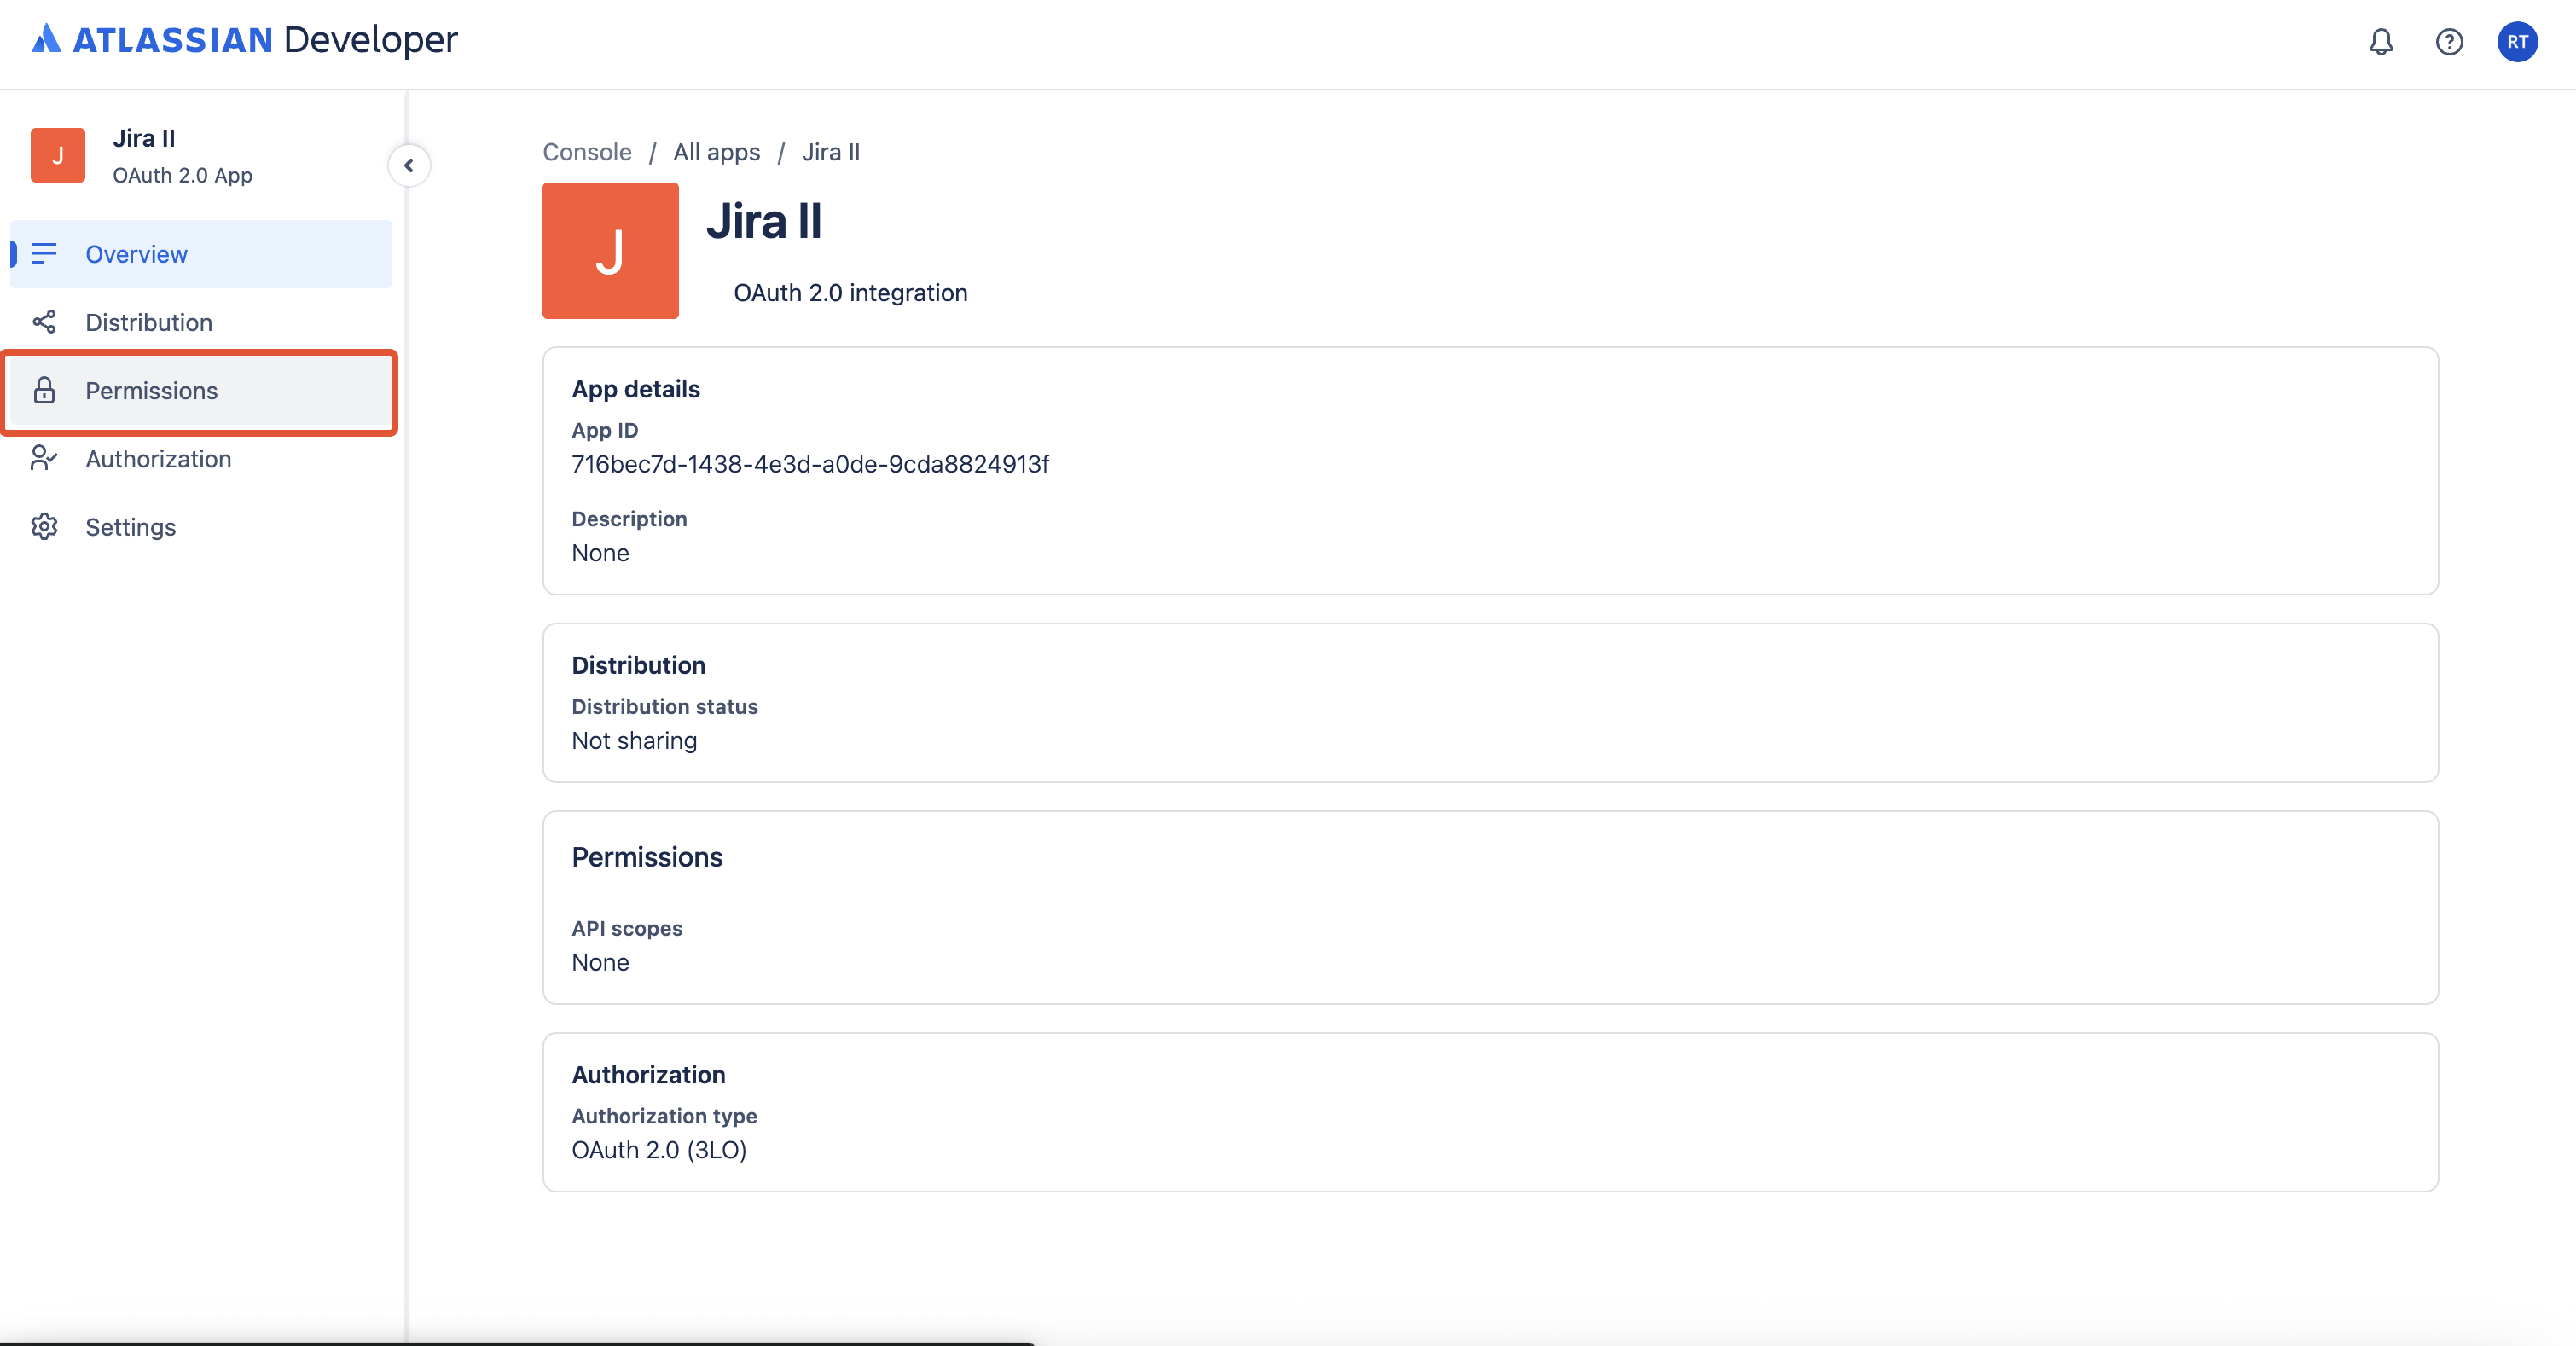
- In the left sidebar, click on the Permissions tab
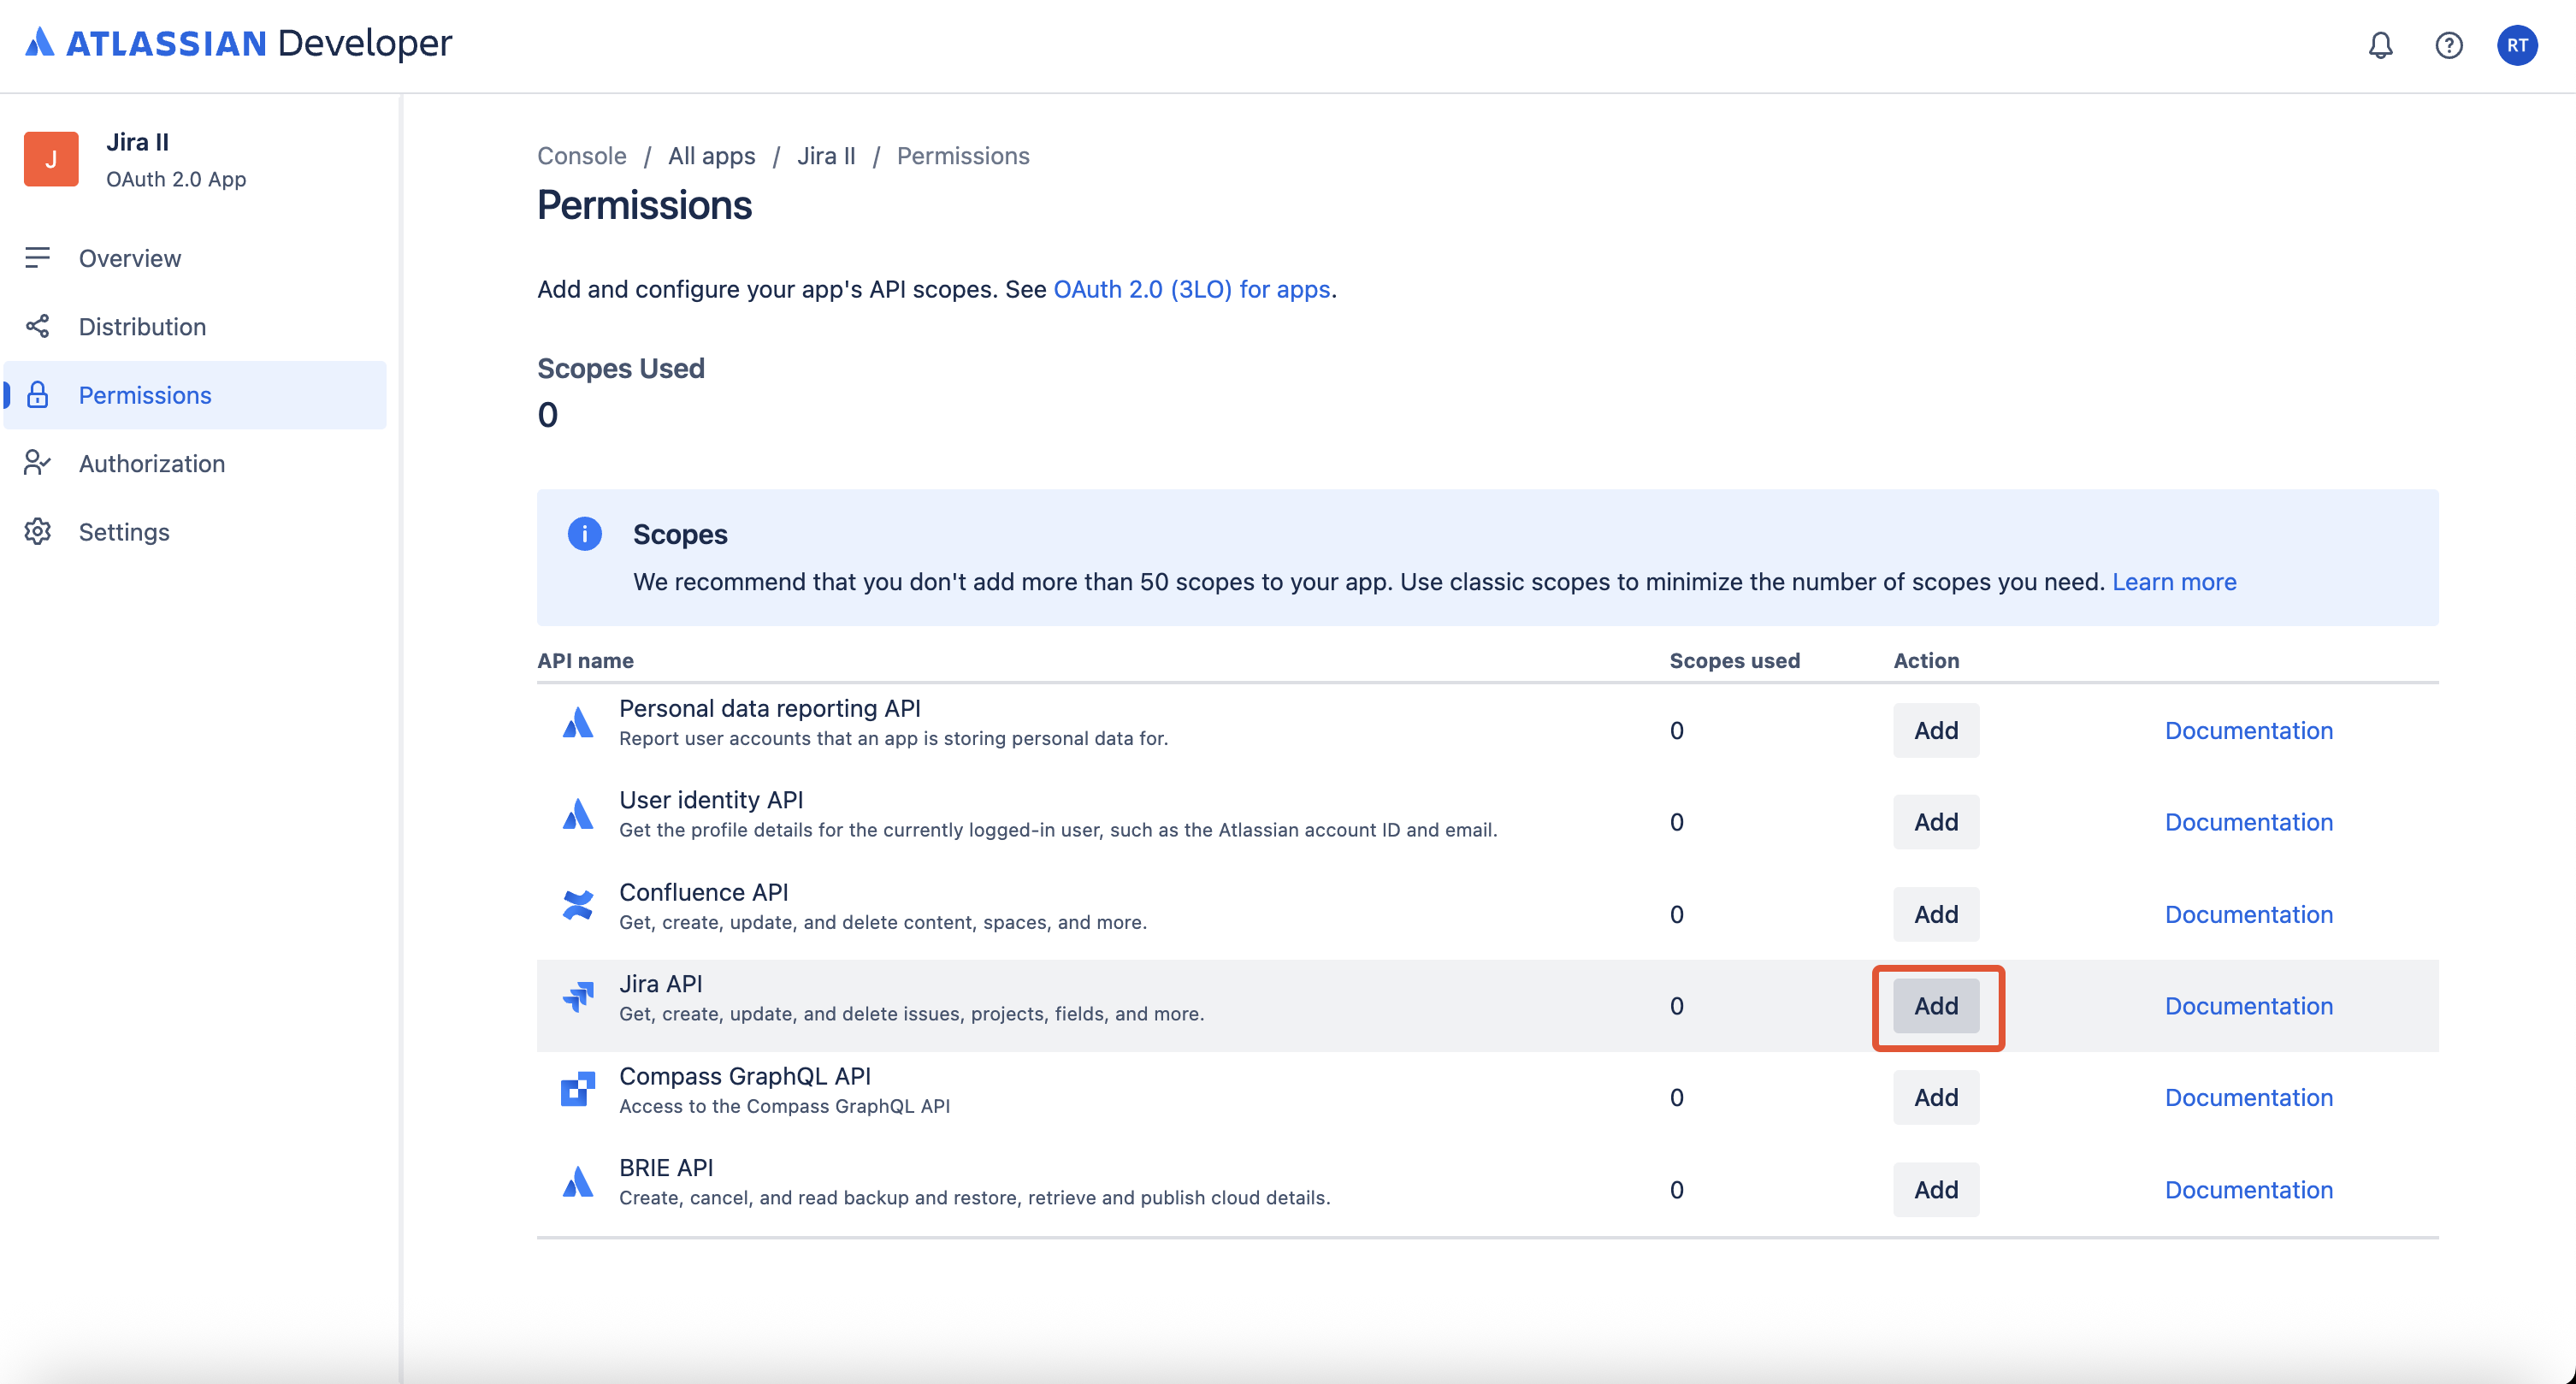
- In the Permissions table, click on the Add button for the Jira API
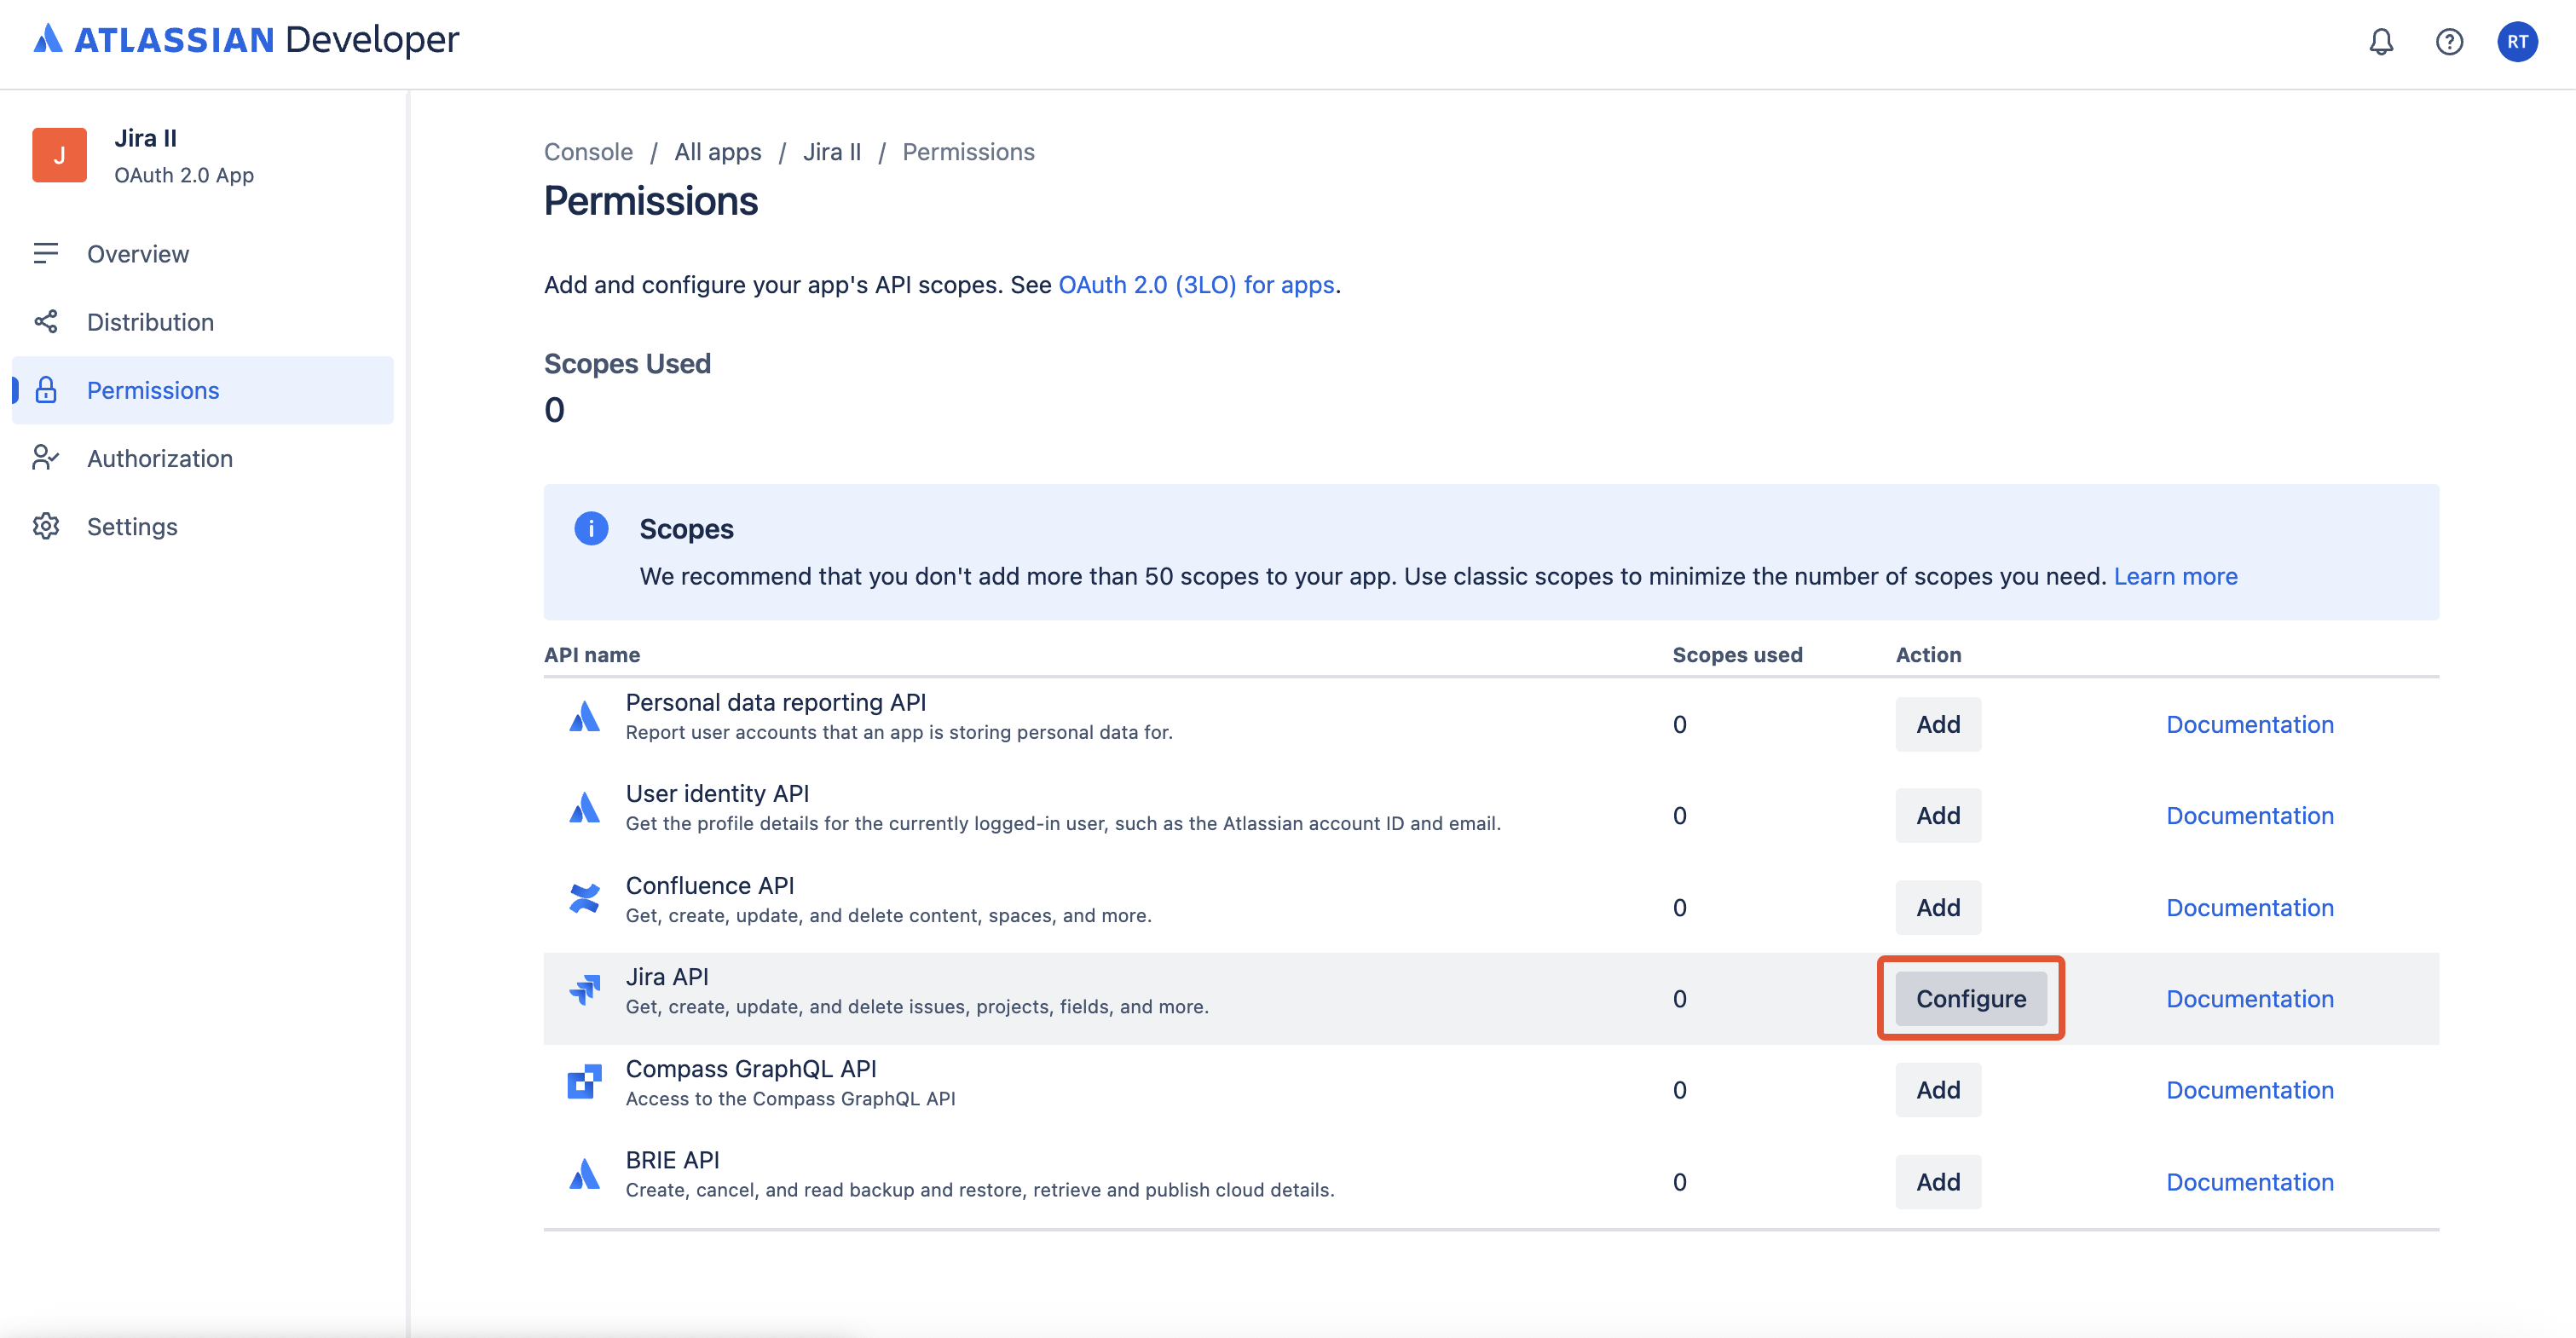
- Click on the Configure button
- Under the Jira Classic scopes tab, click on the Edit Scopes button
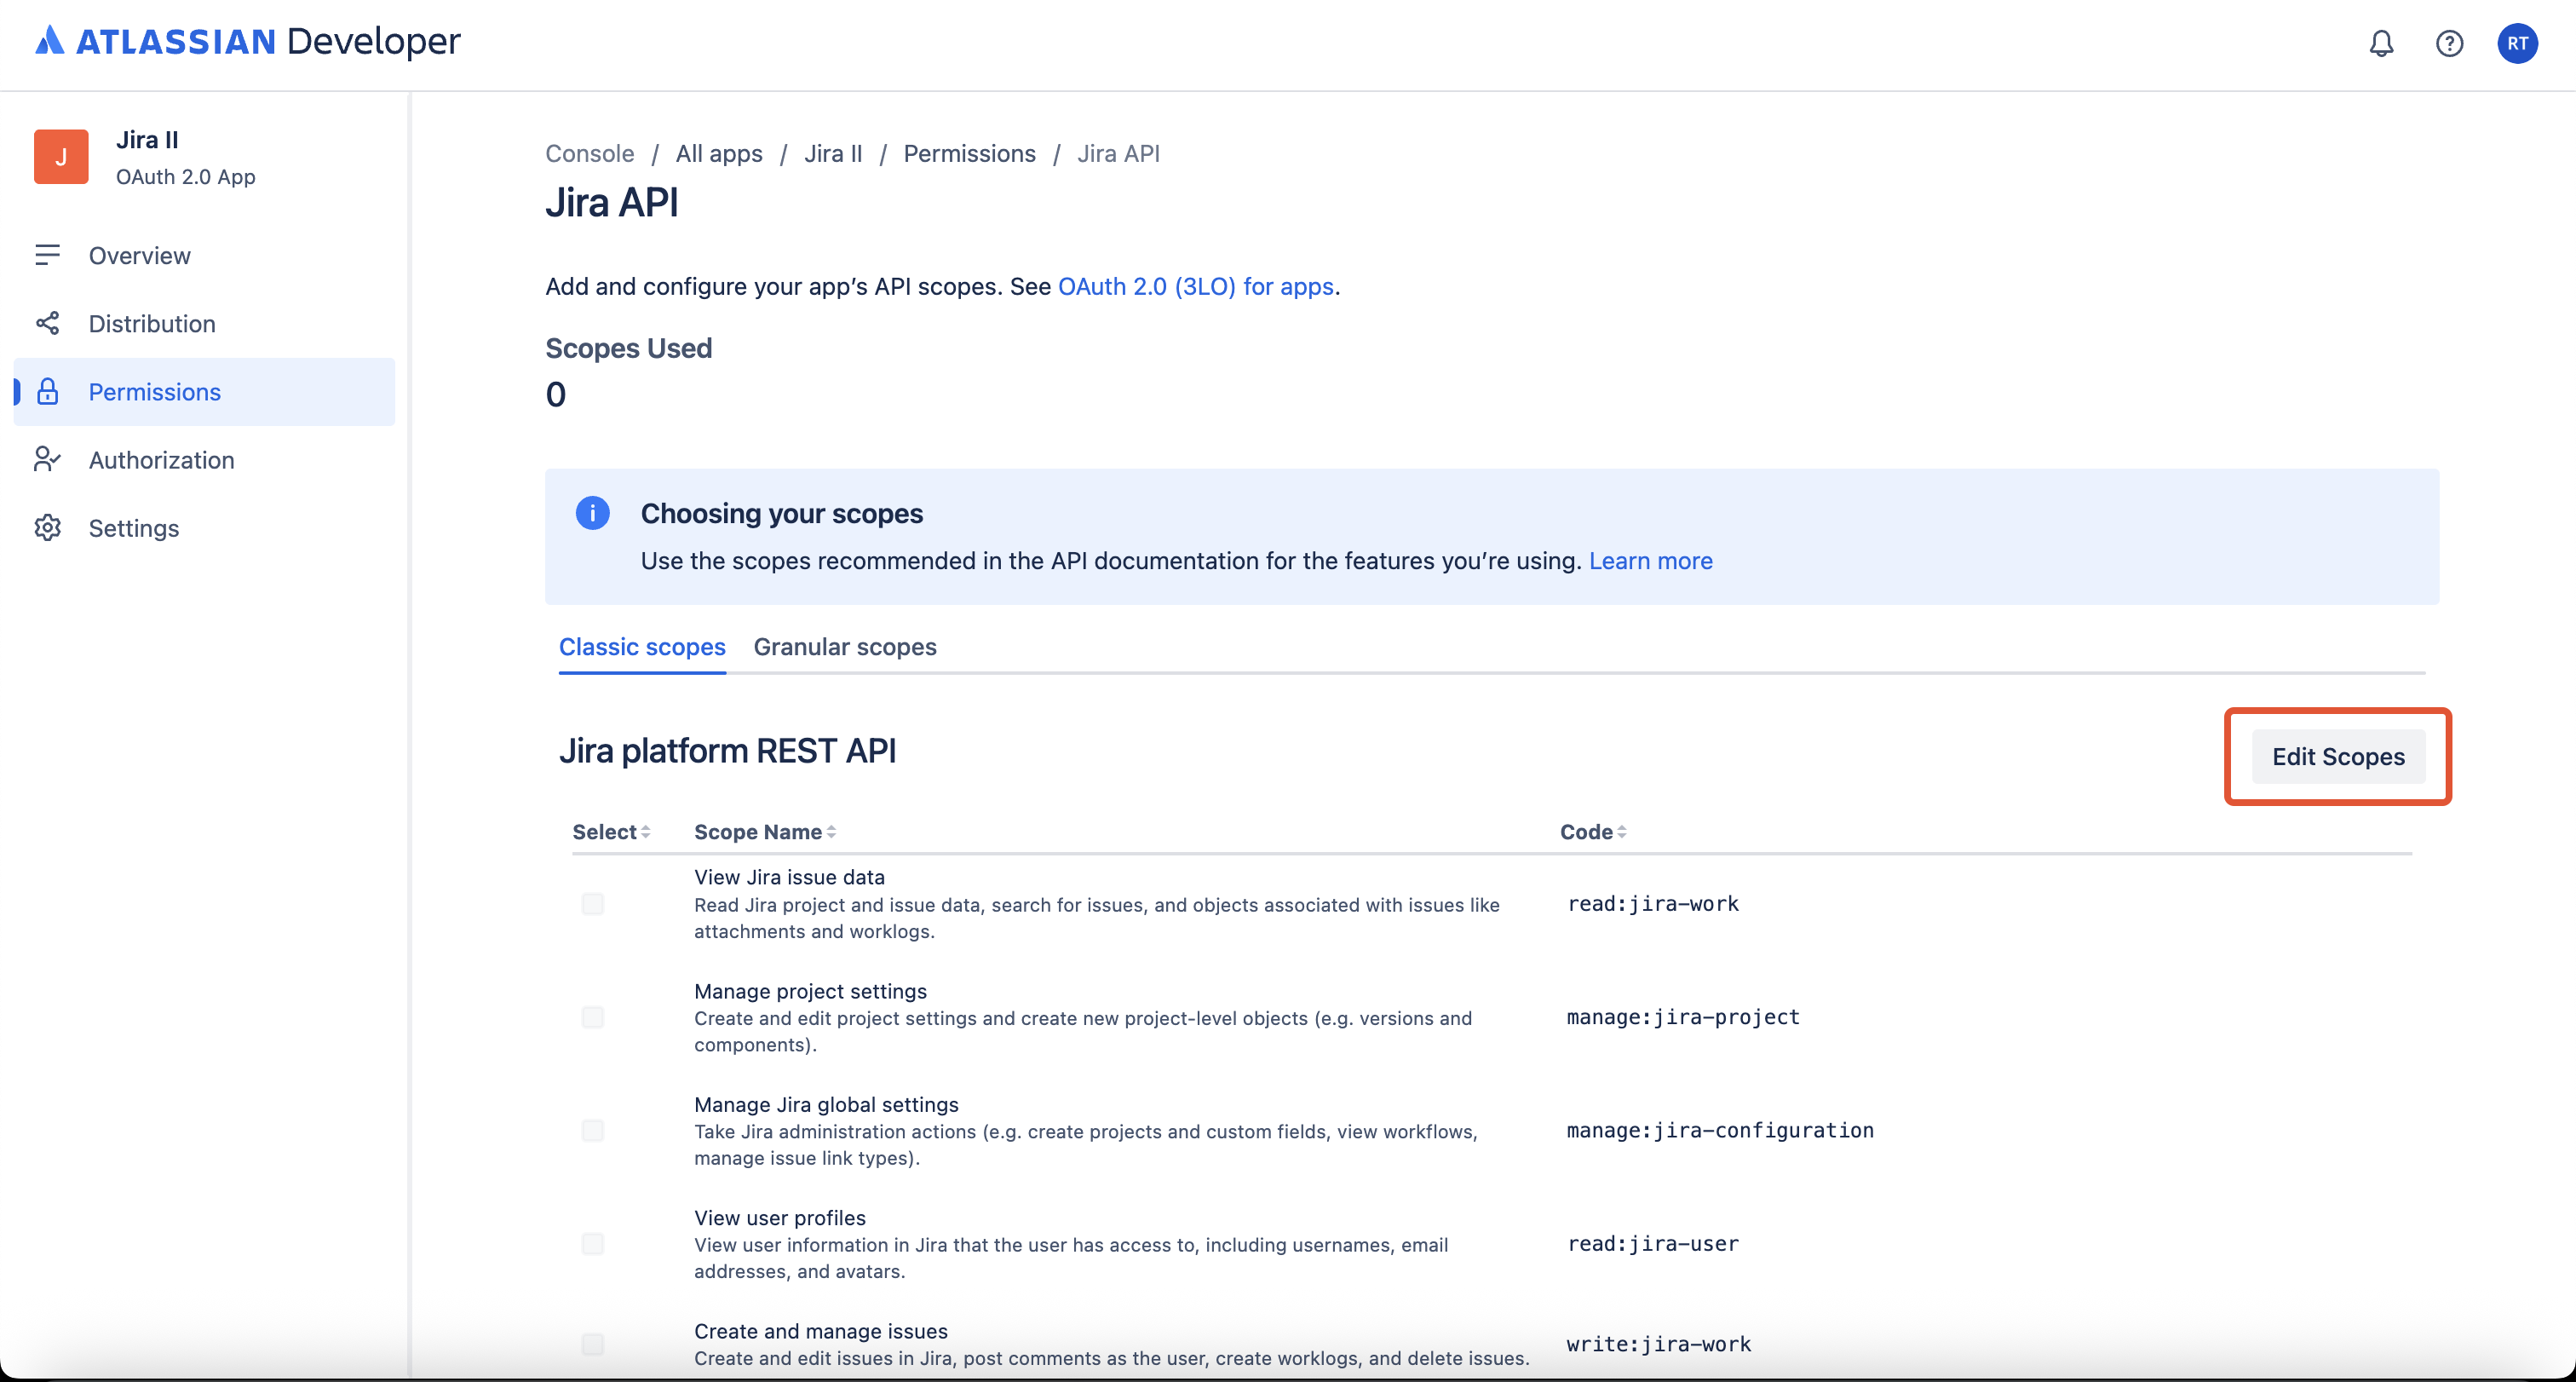
- Add both
read:jira-workandread:jira-userscopes, and Click on the Save button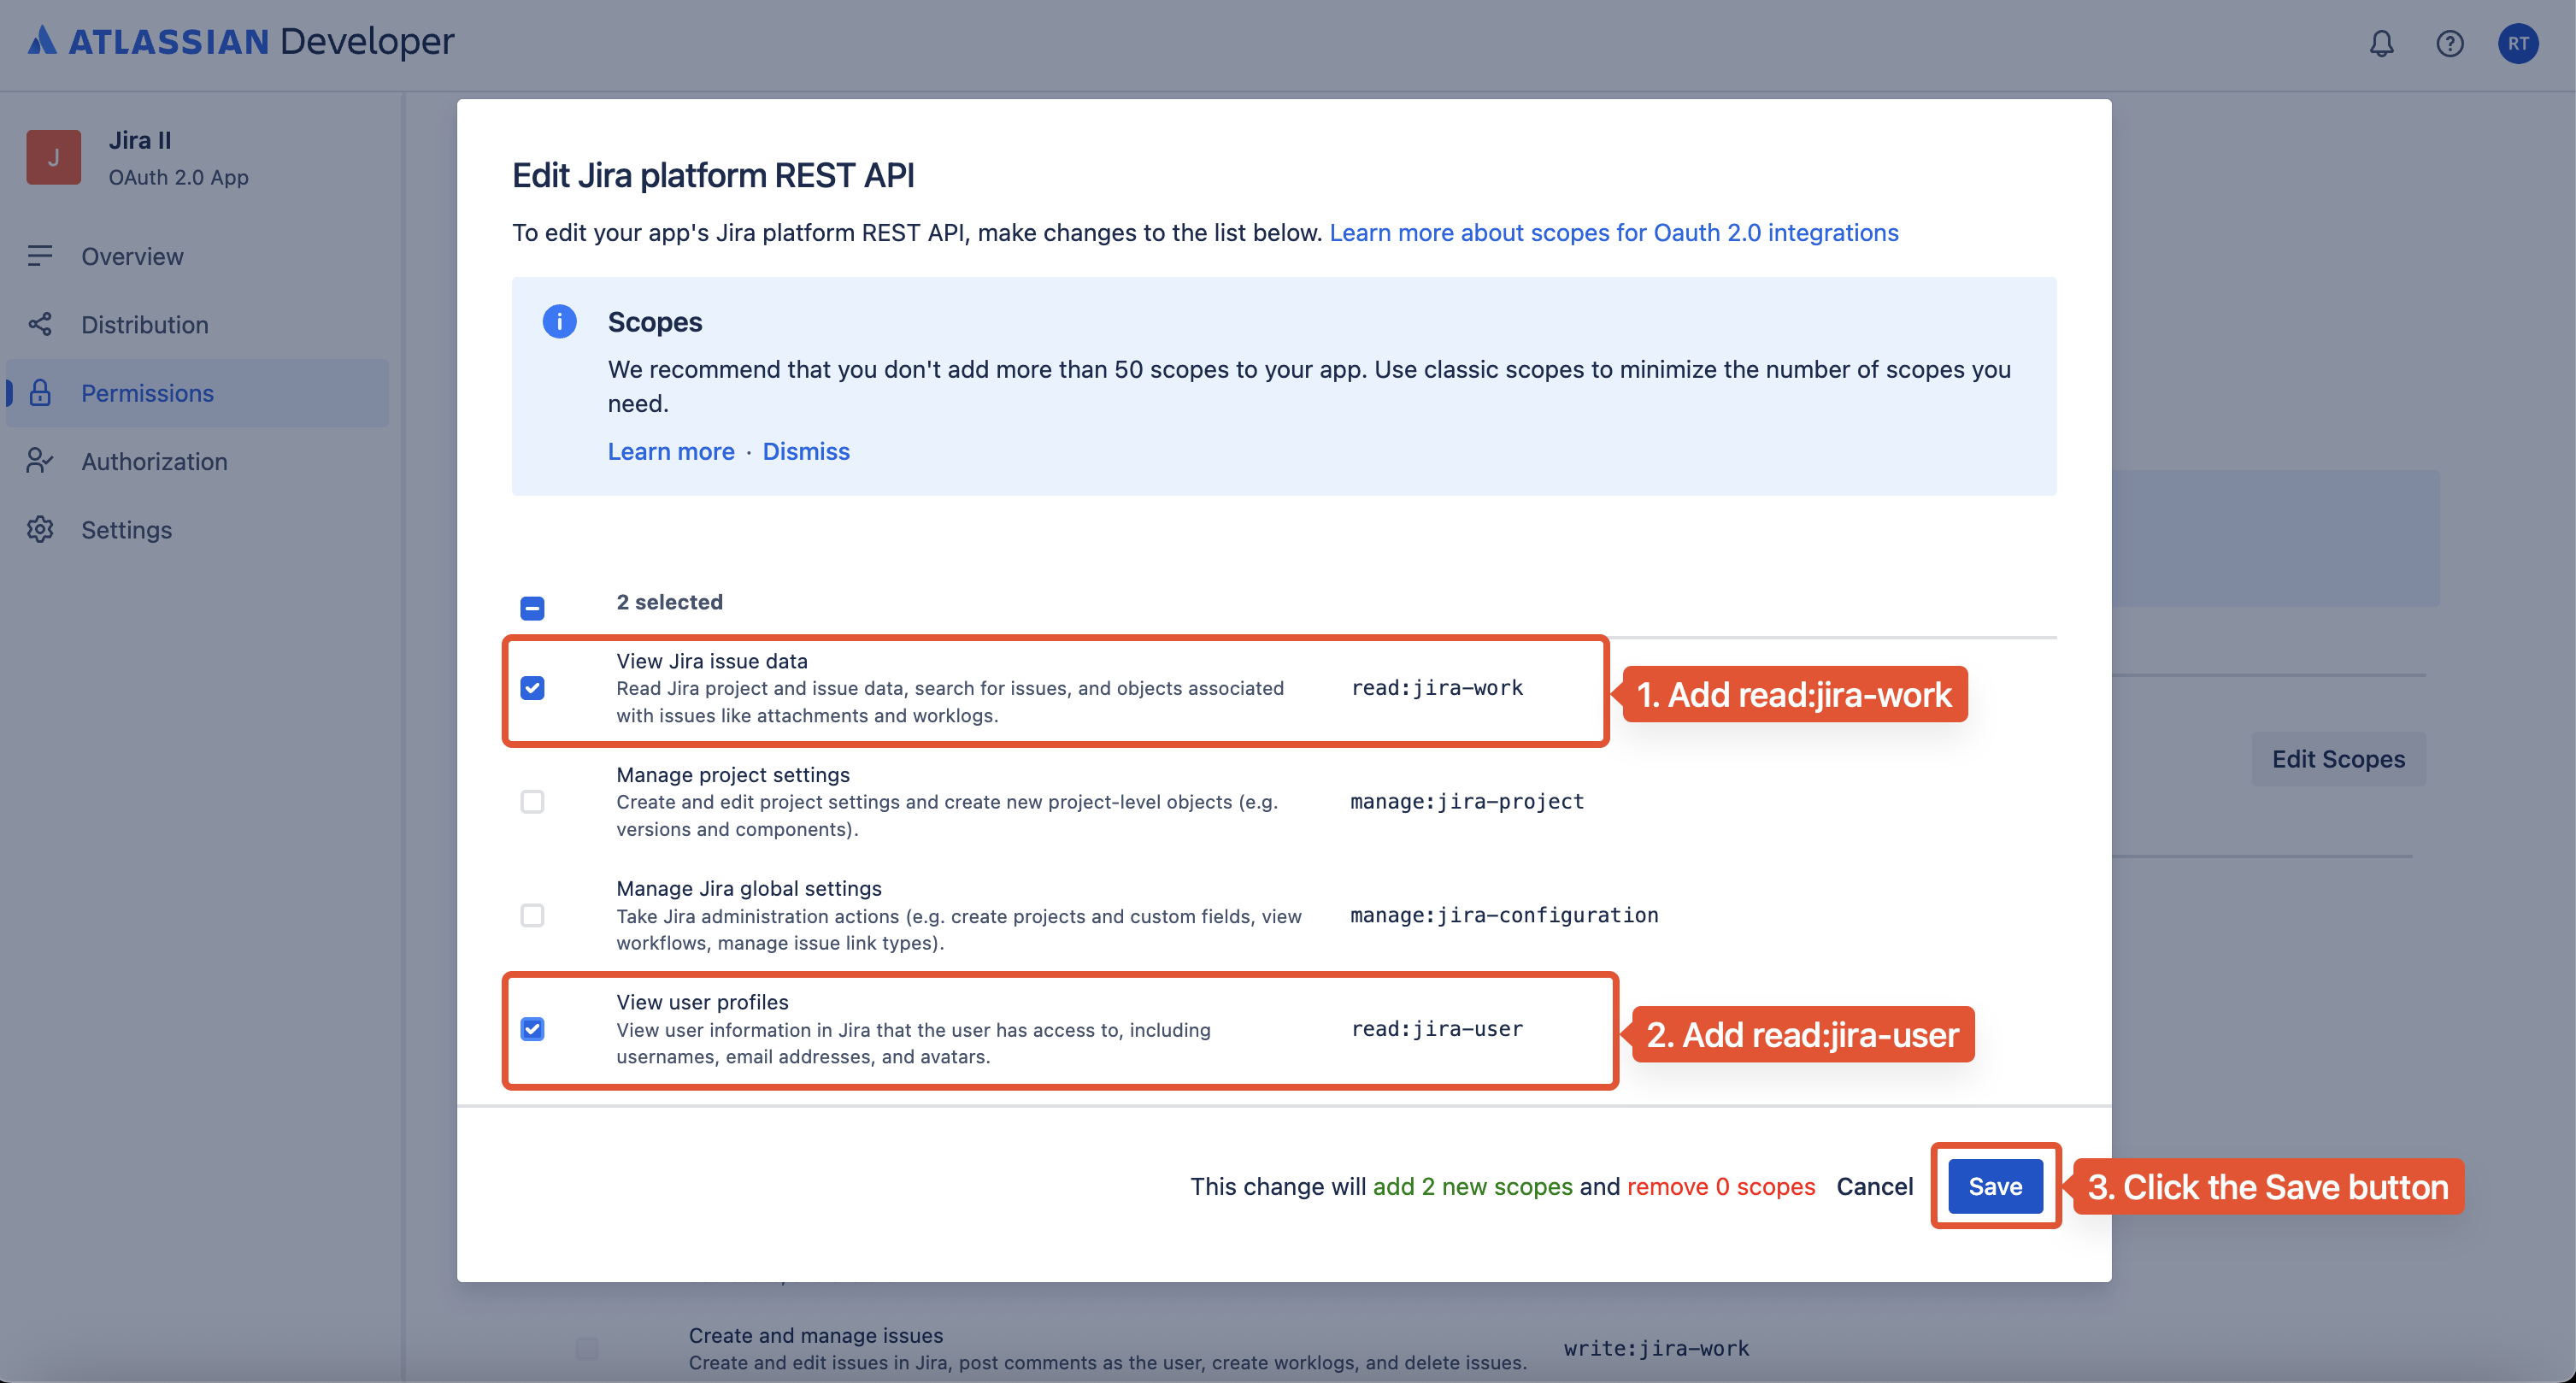
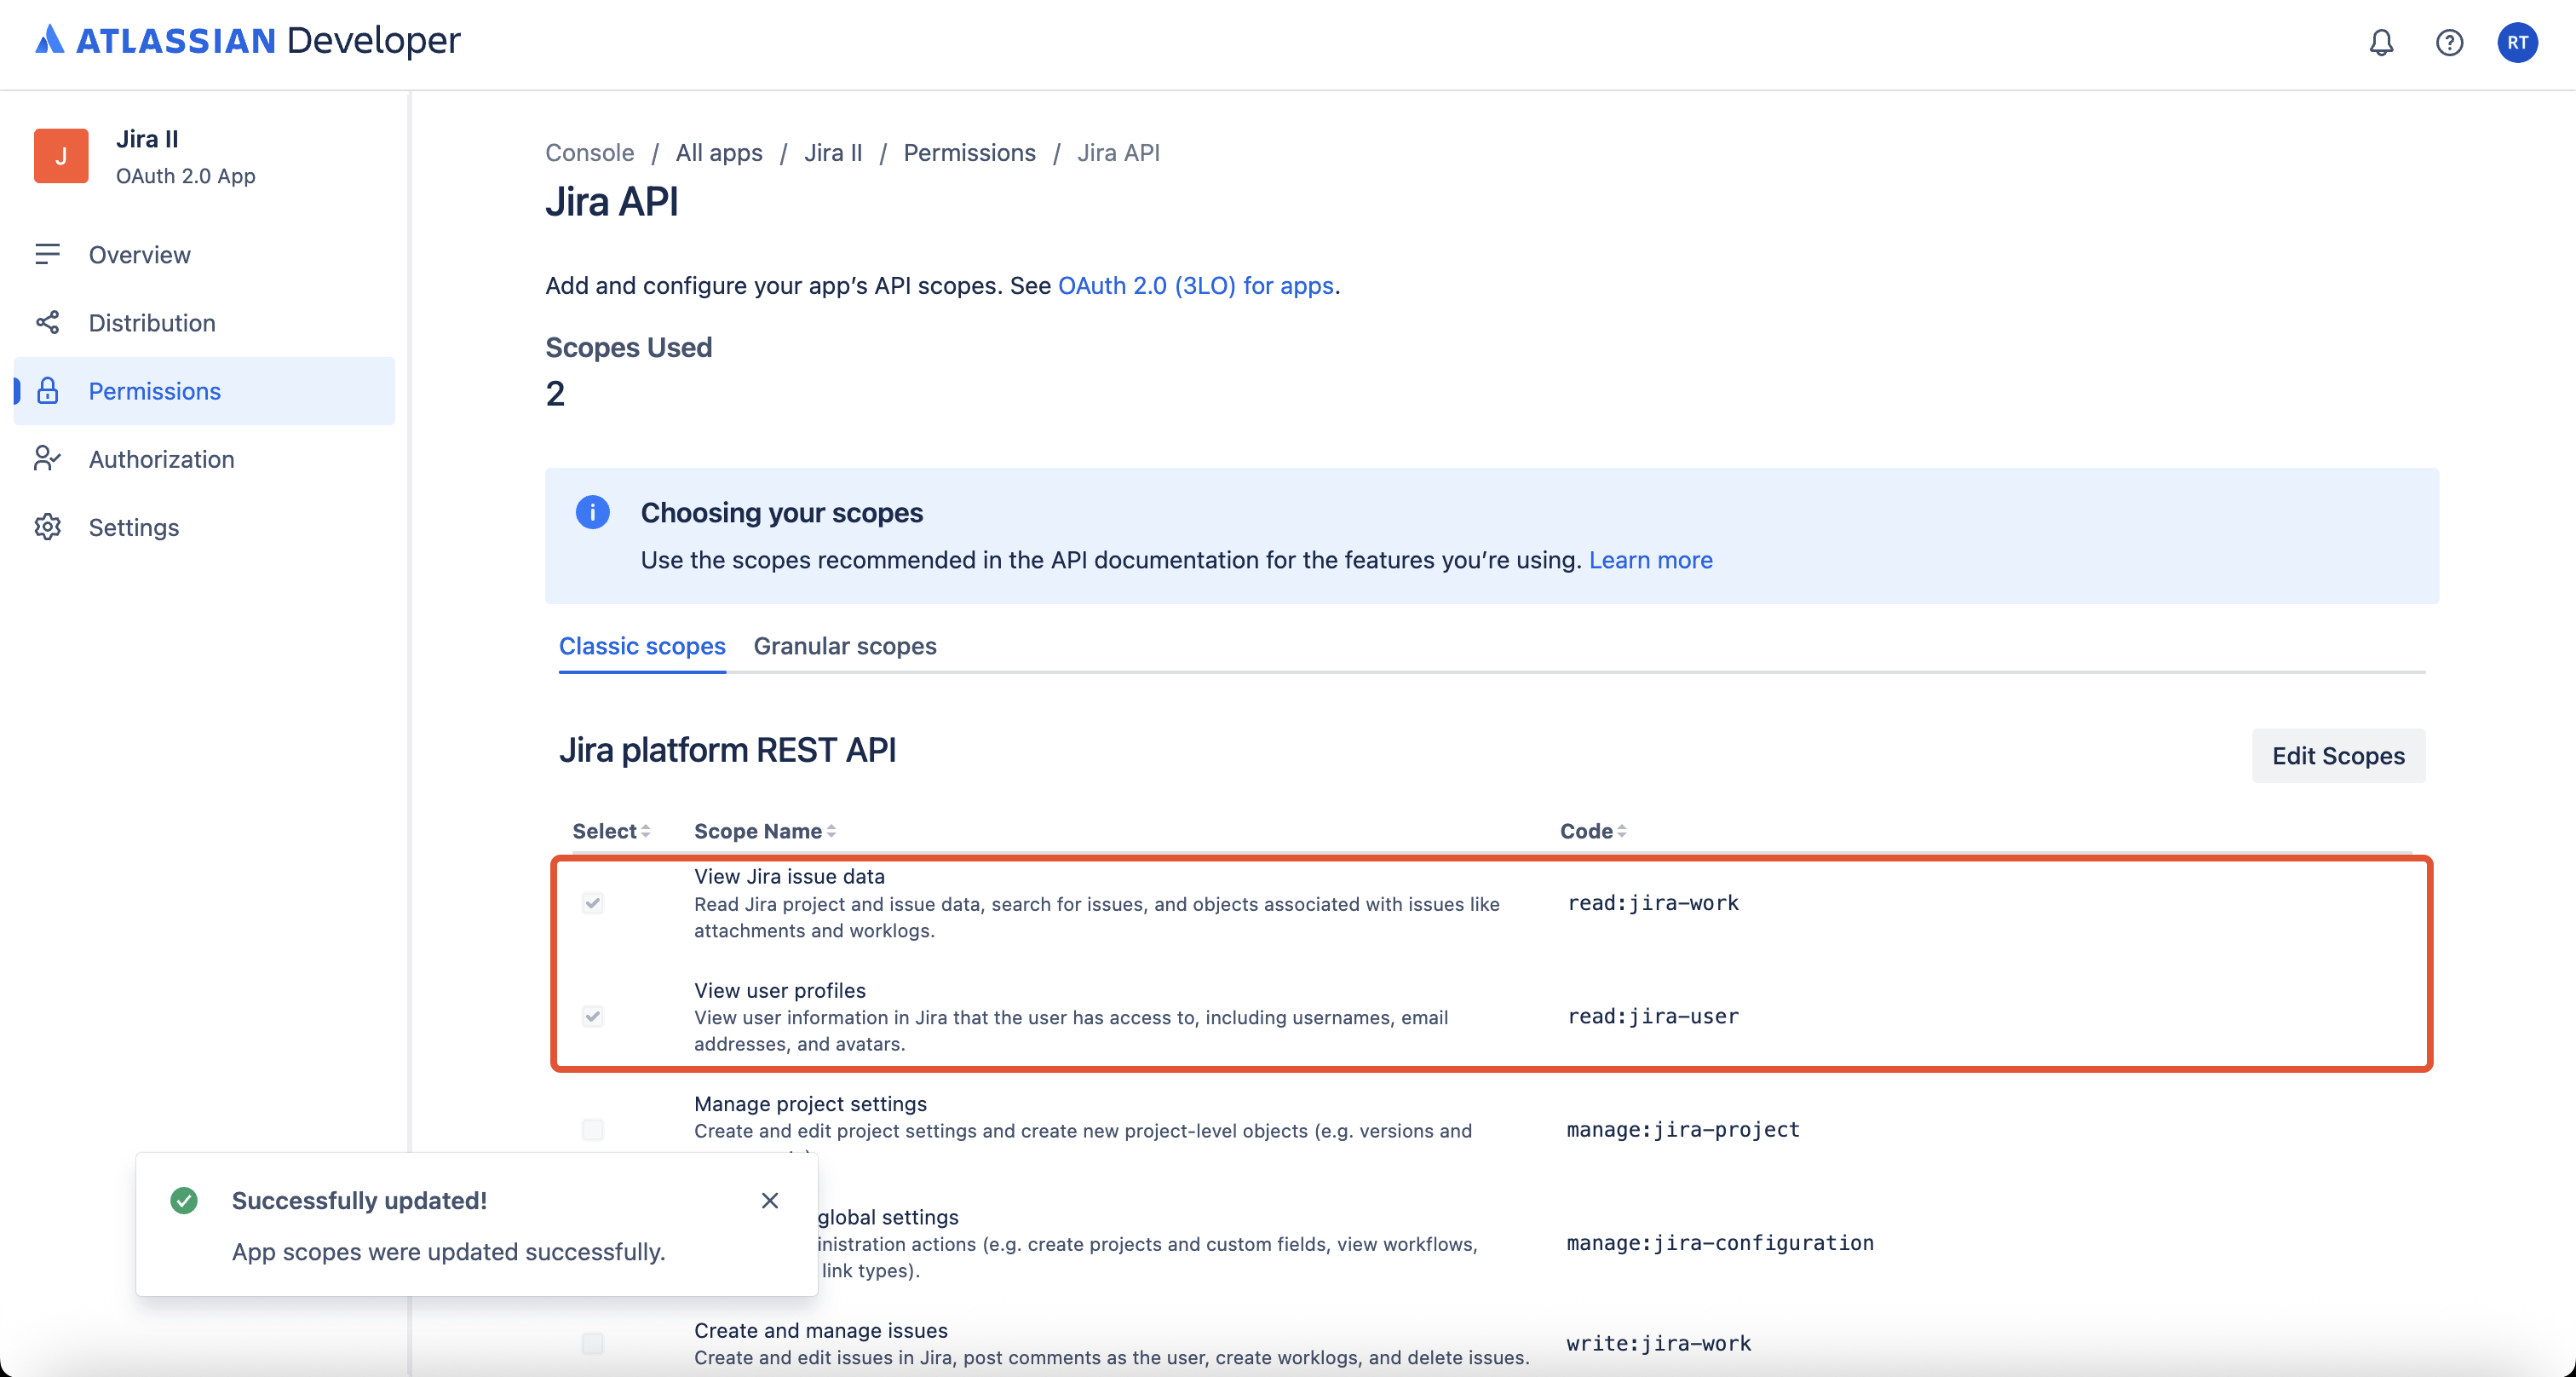
- Verify whether both the scopes have been added successfully
2. Setup Authorization URL
-
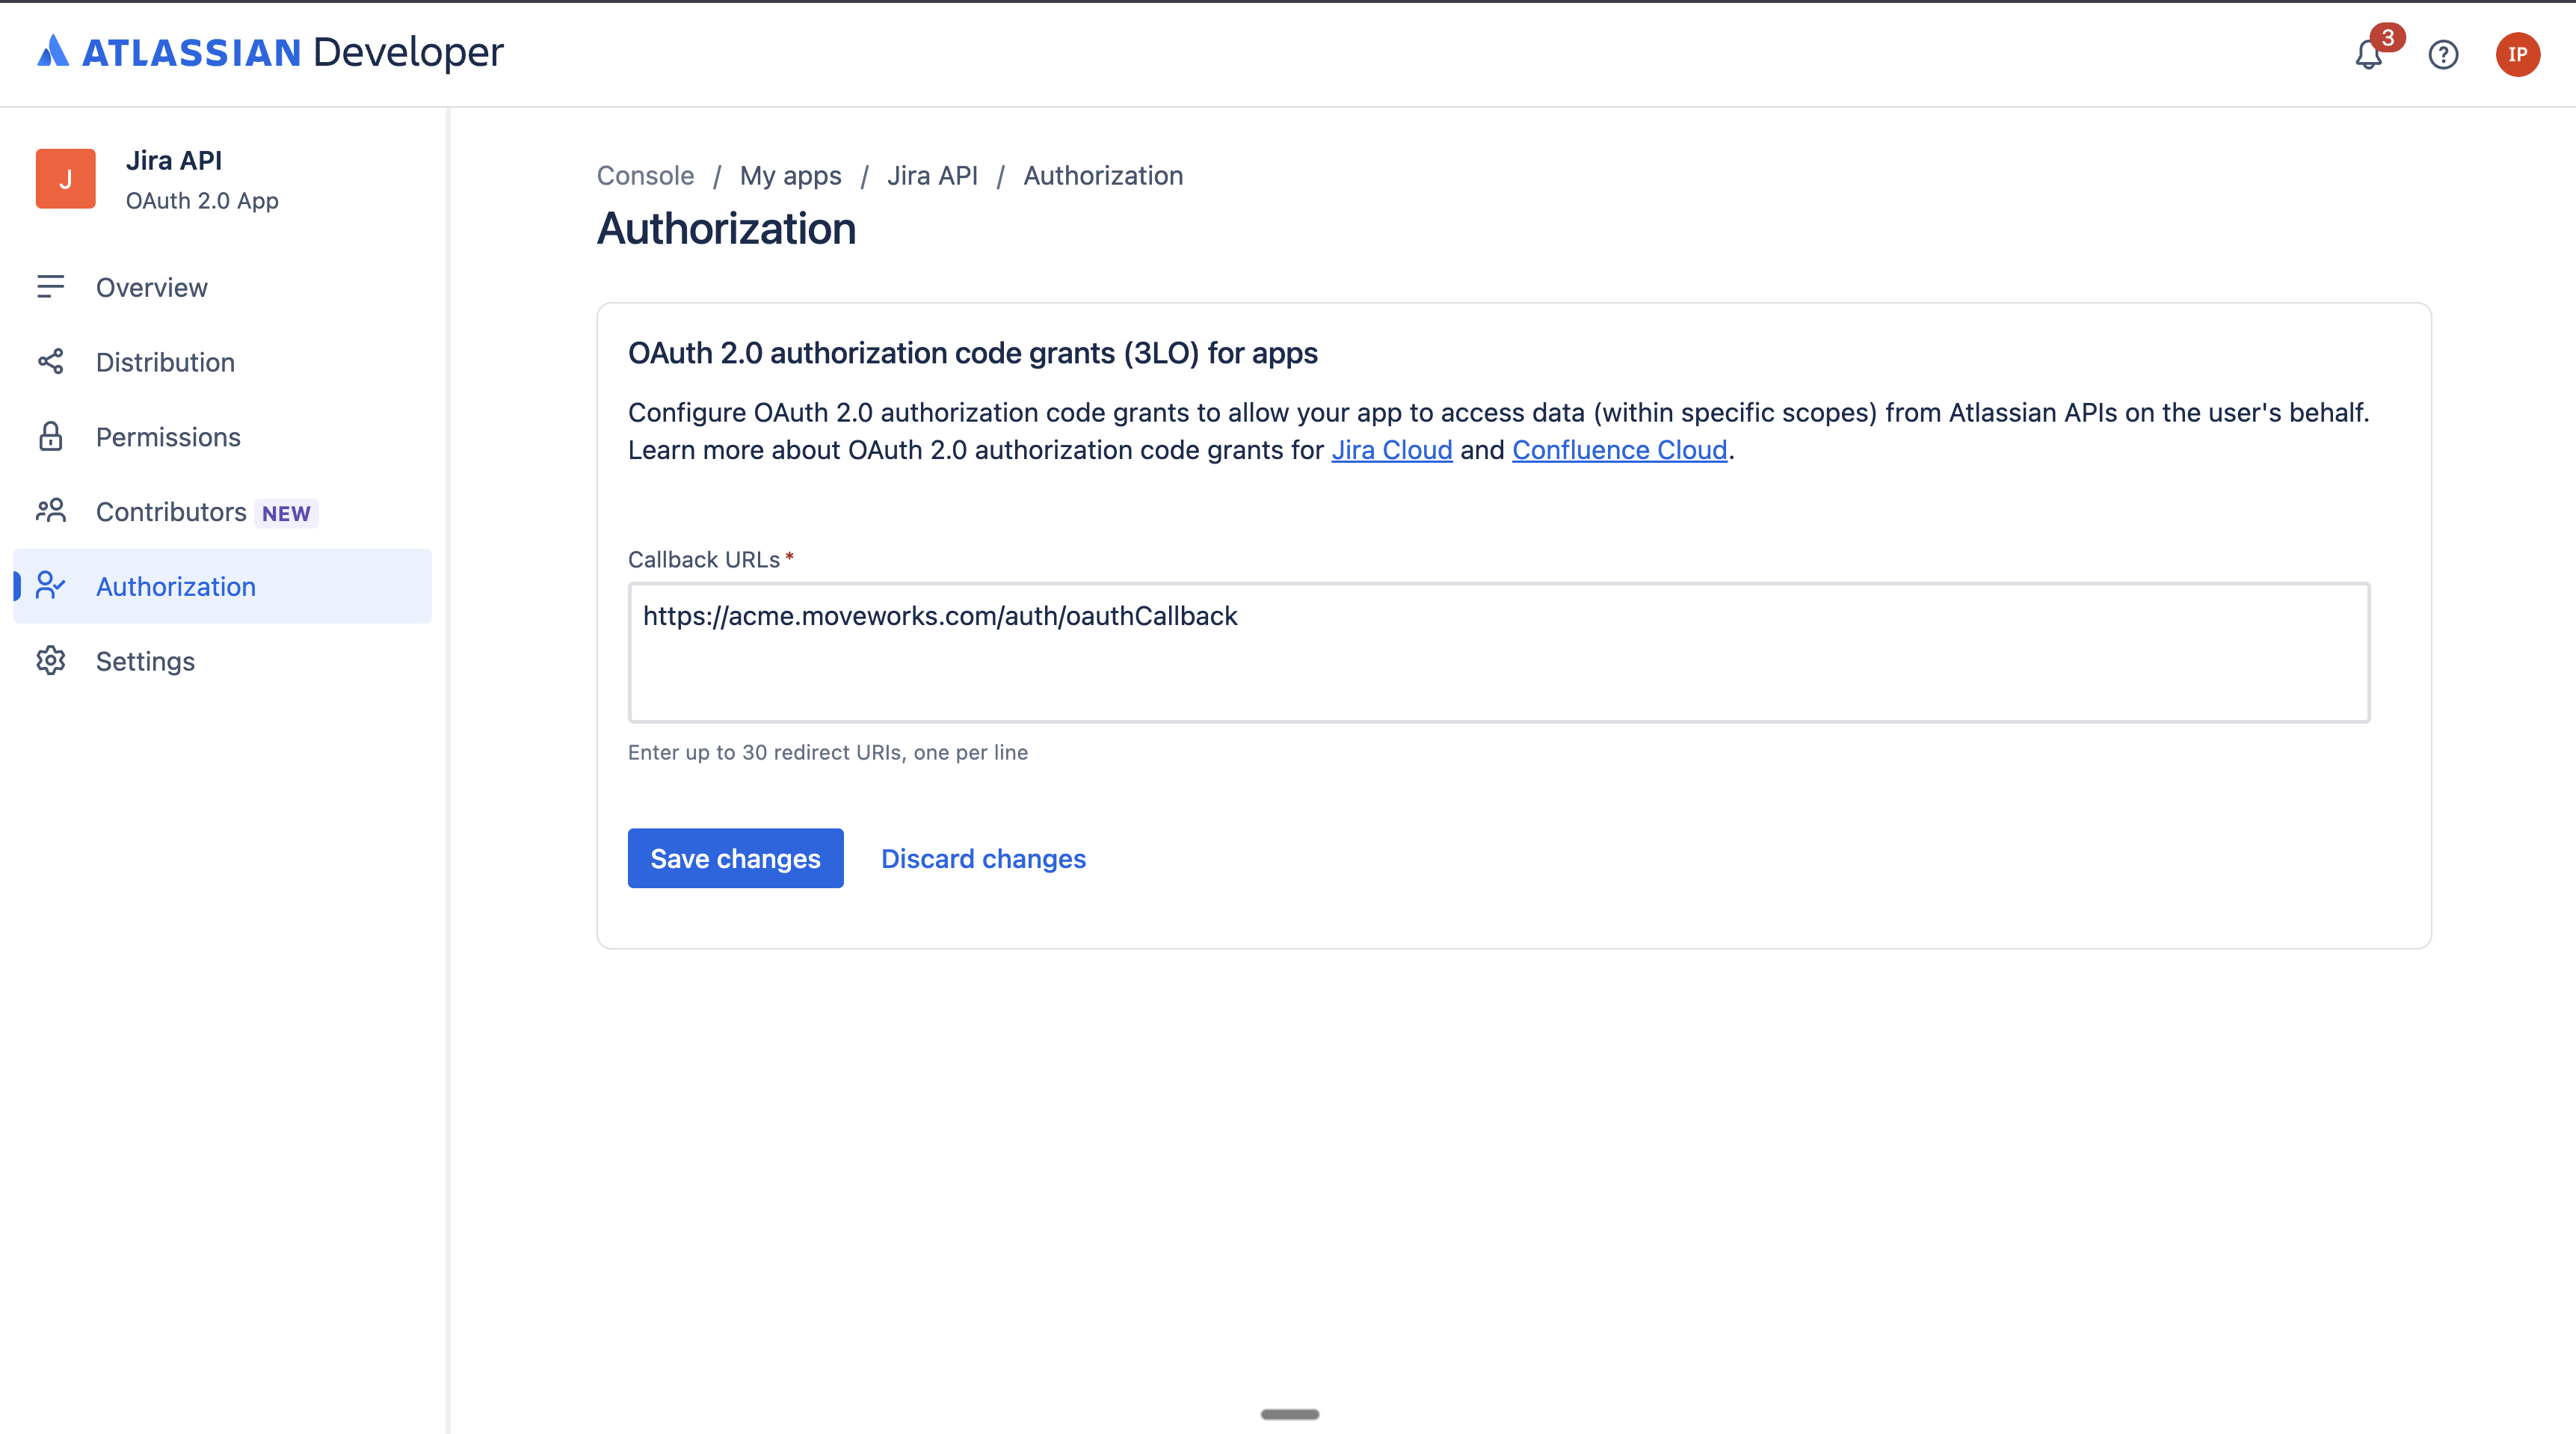
Go to the Authorization tab and click on the Add button for OAuth 2.0 (3LO)

-
On this page setup the callback URLs for this application based on your Moveworks instance. It should be of the following format:
https://<MyMoveworks-URL>/auth/oauthCallback
If your MyMoveworks URL isacme.moveworks.comthen the resulting generated URL will behttps://acme.moveworks.com/auth/oauthCallback -
Click on Save changes once configured
3. Setup Distribution
-
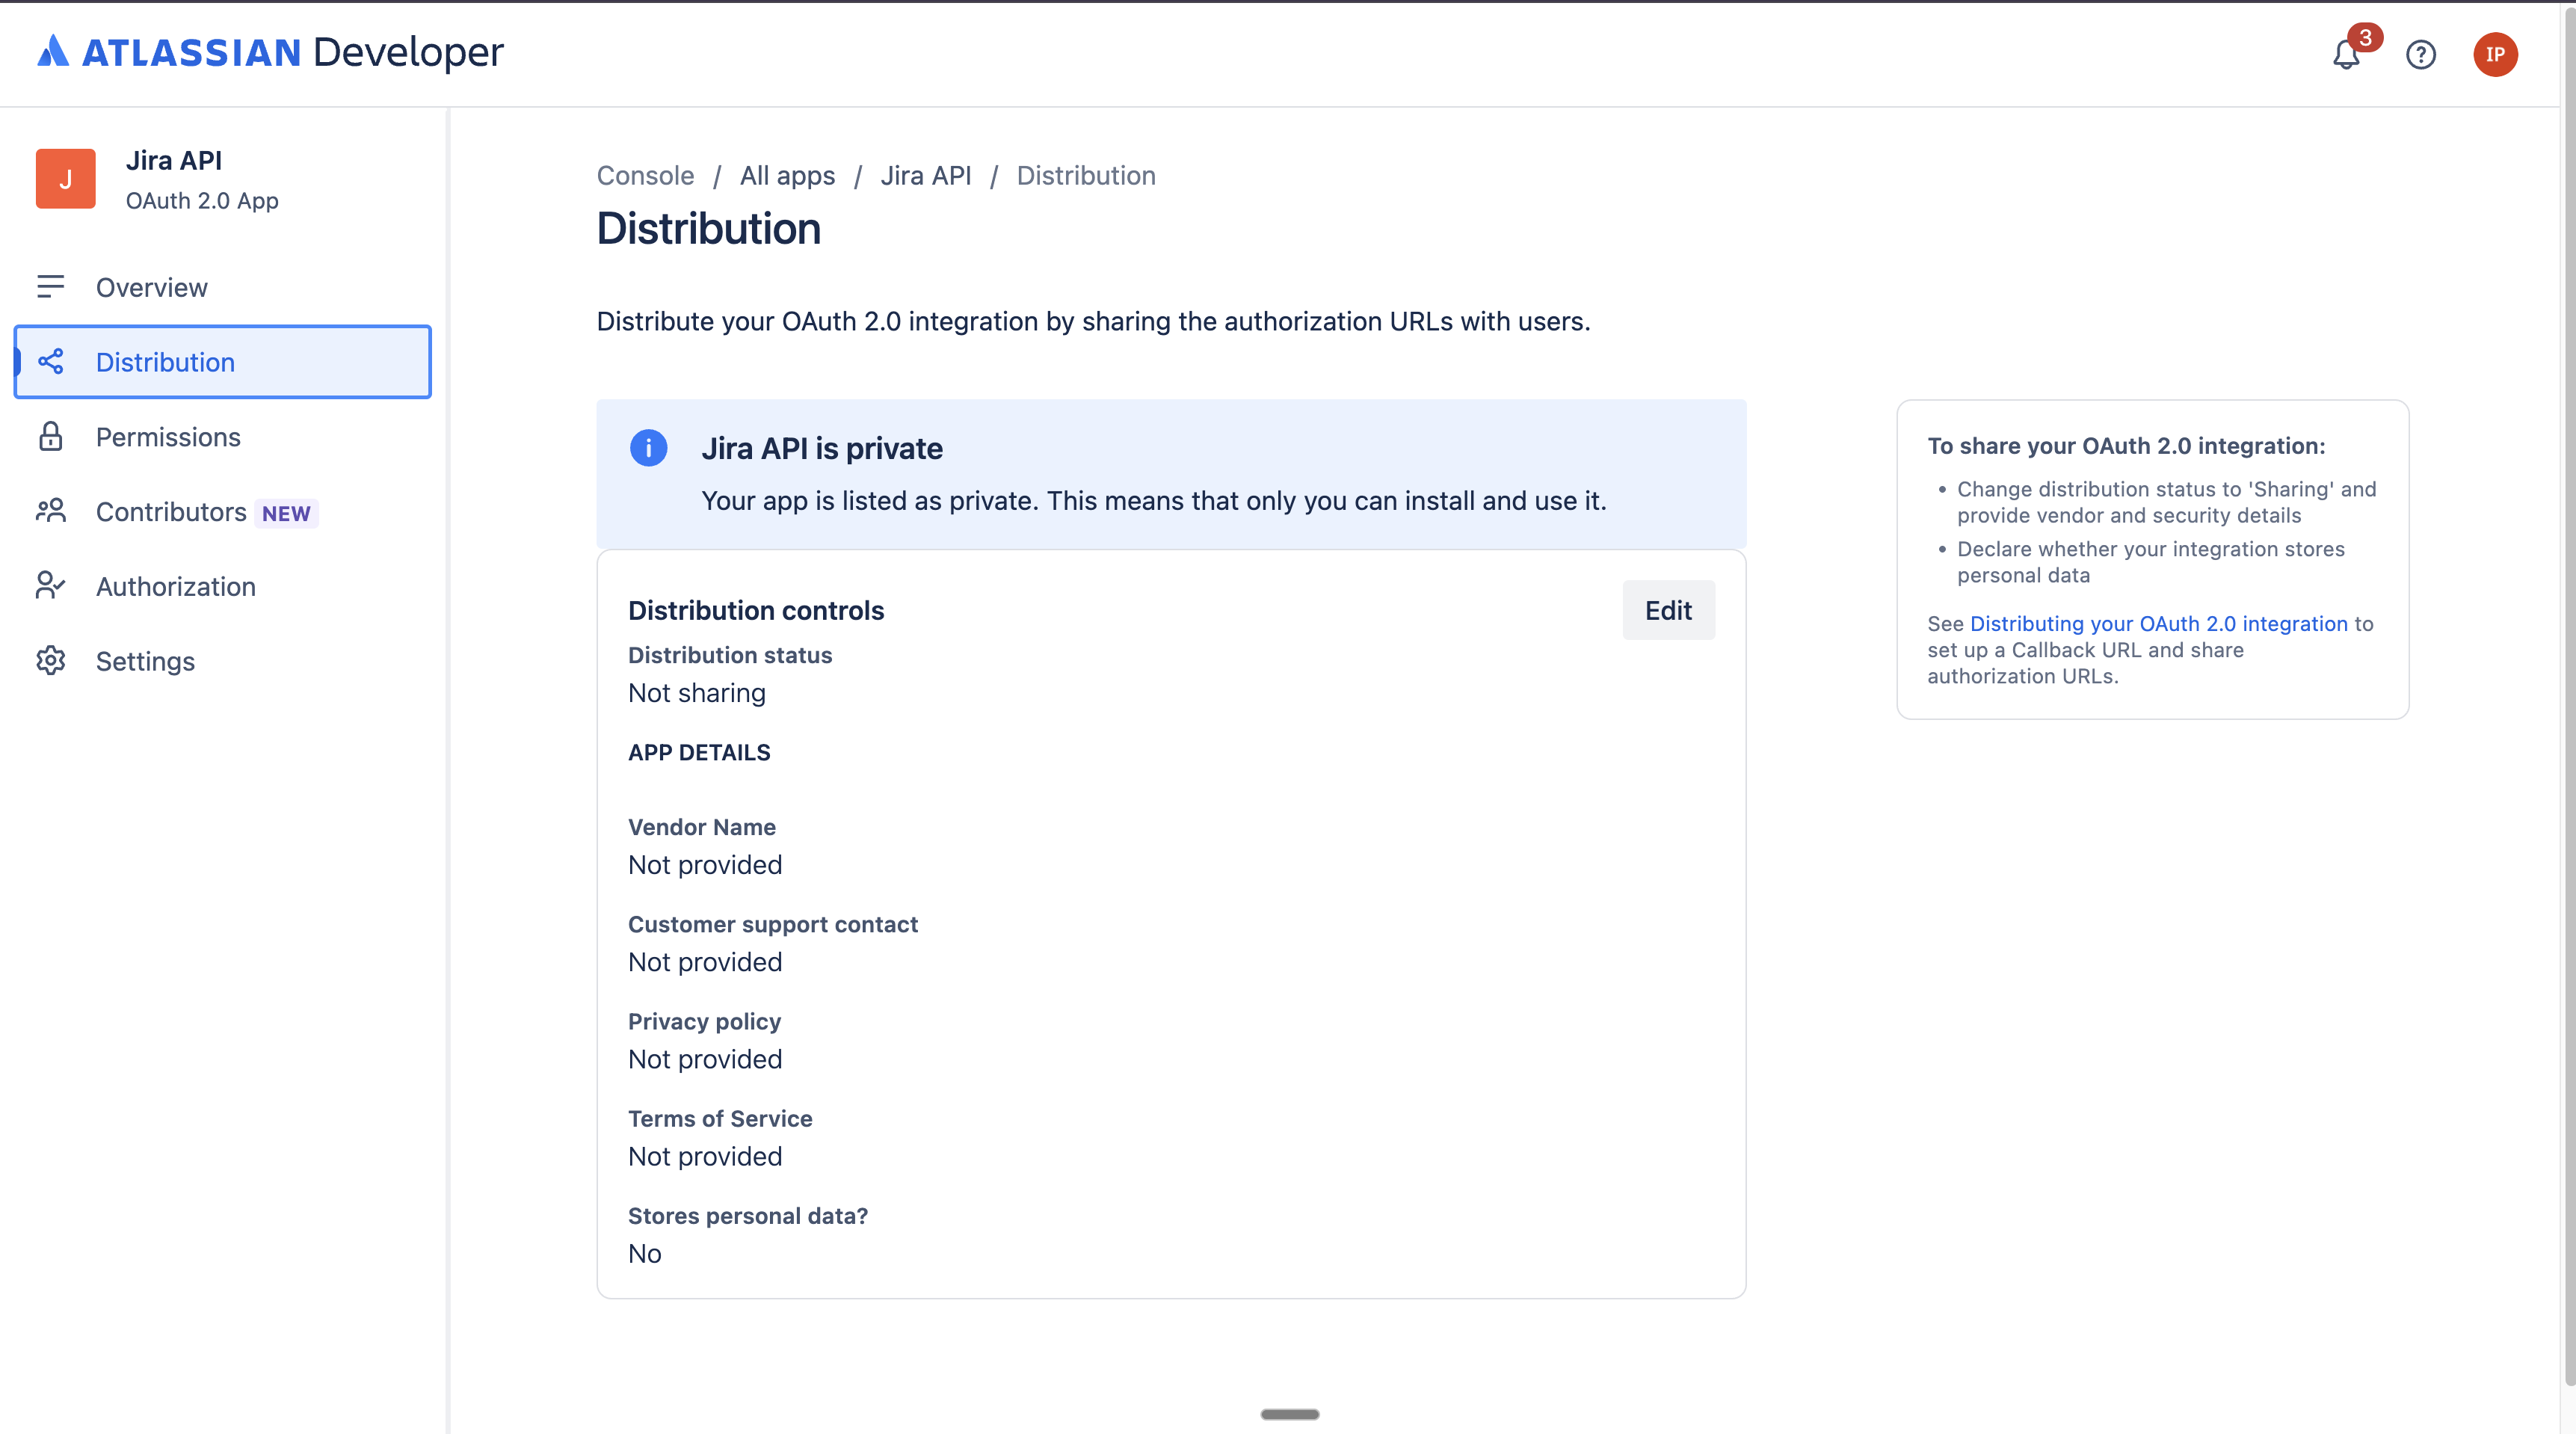
Head over to the Distribution tab. You will notice that the app is currently listed as private.
-
Click on Edit and set up the following values
Distribution Status: Sharing
Vendor name: Moveworks
Privacy Policy: https://www.moveworks.com/us/en/legal/privacy-policy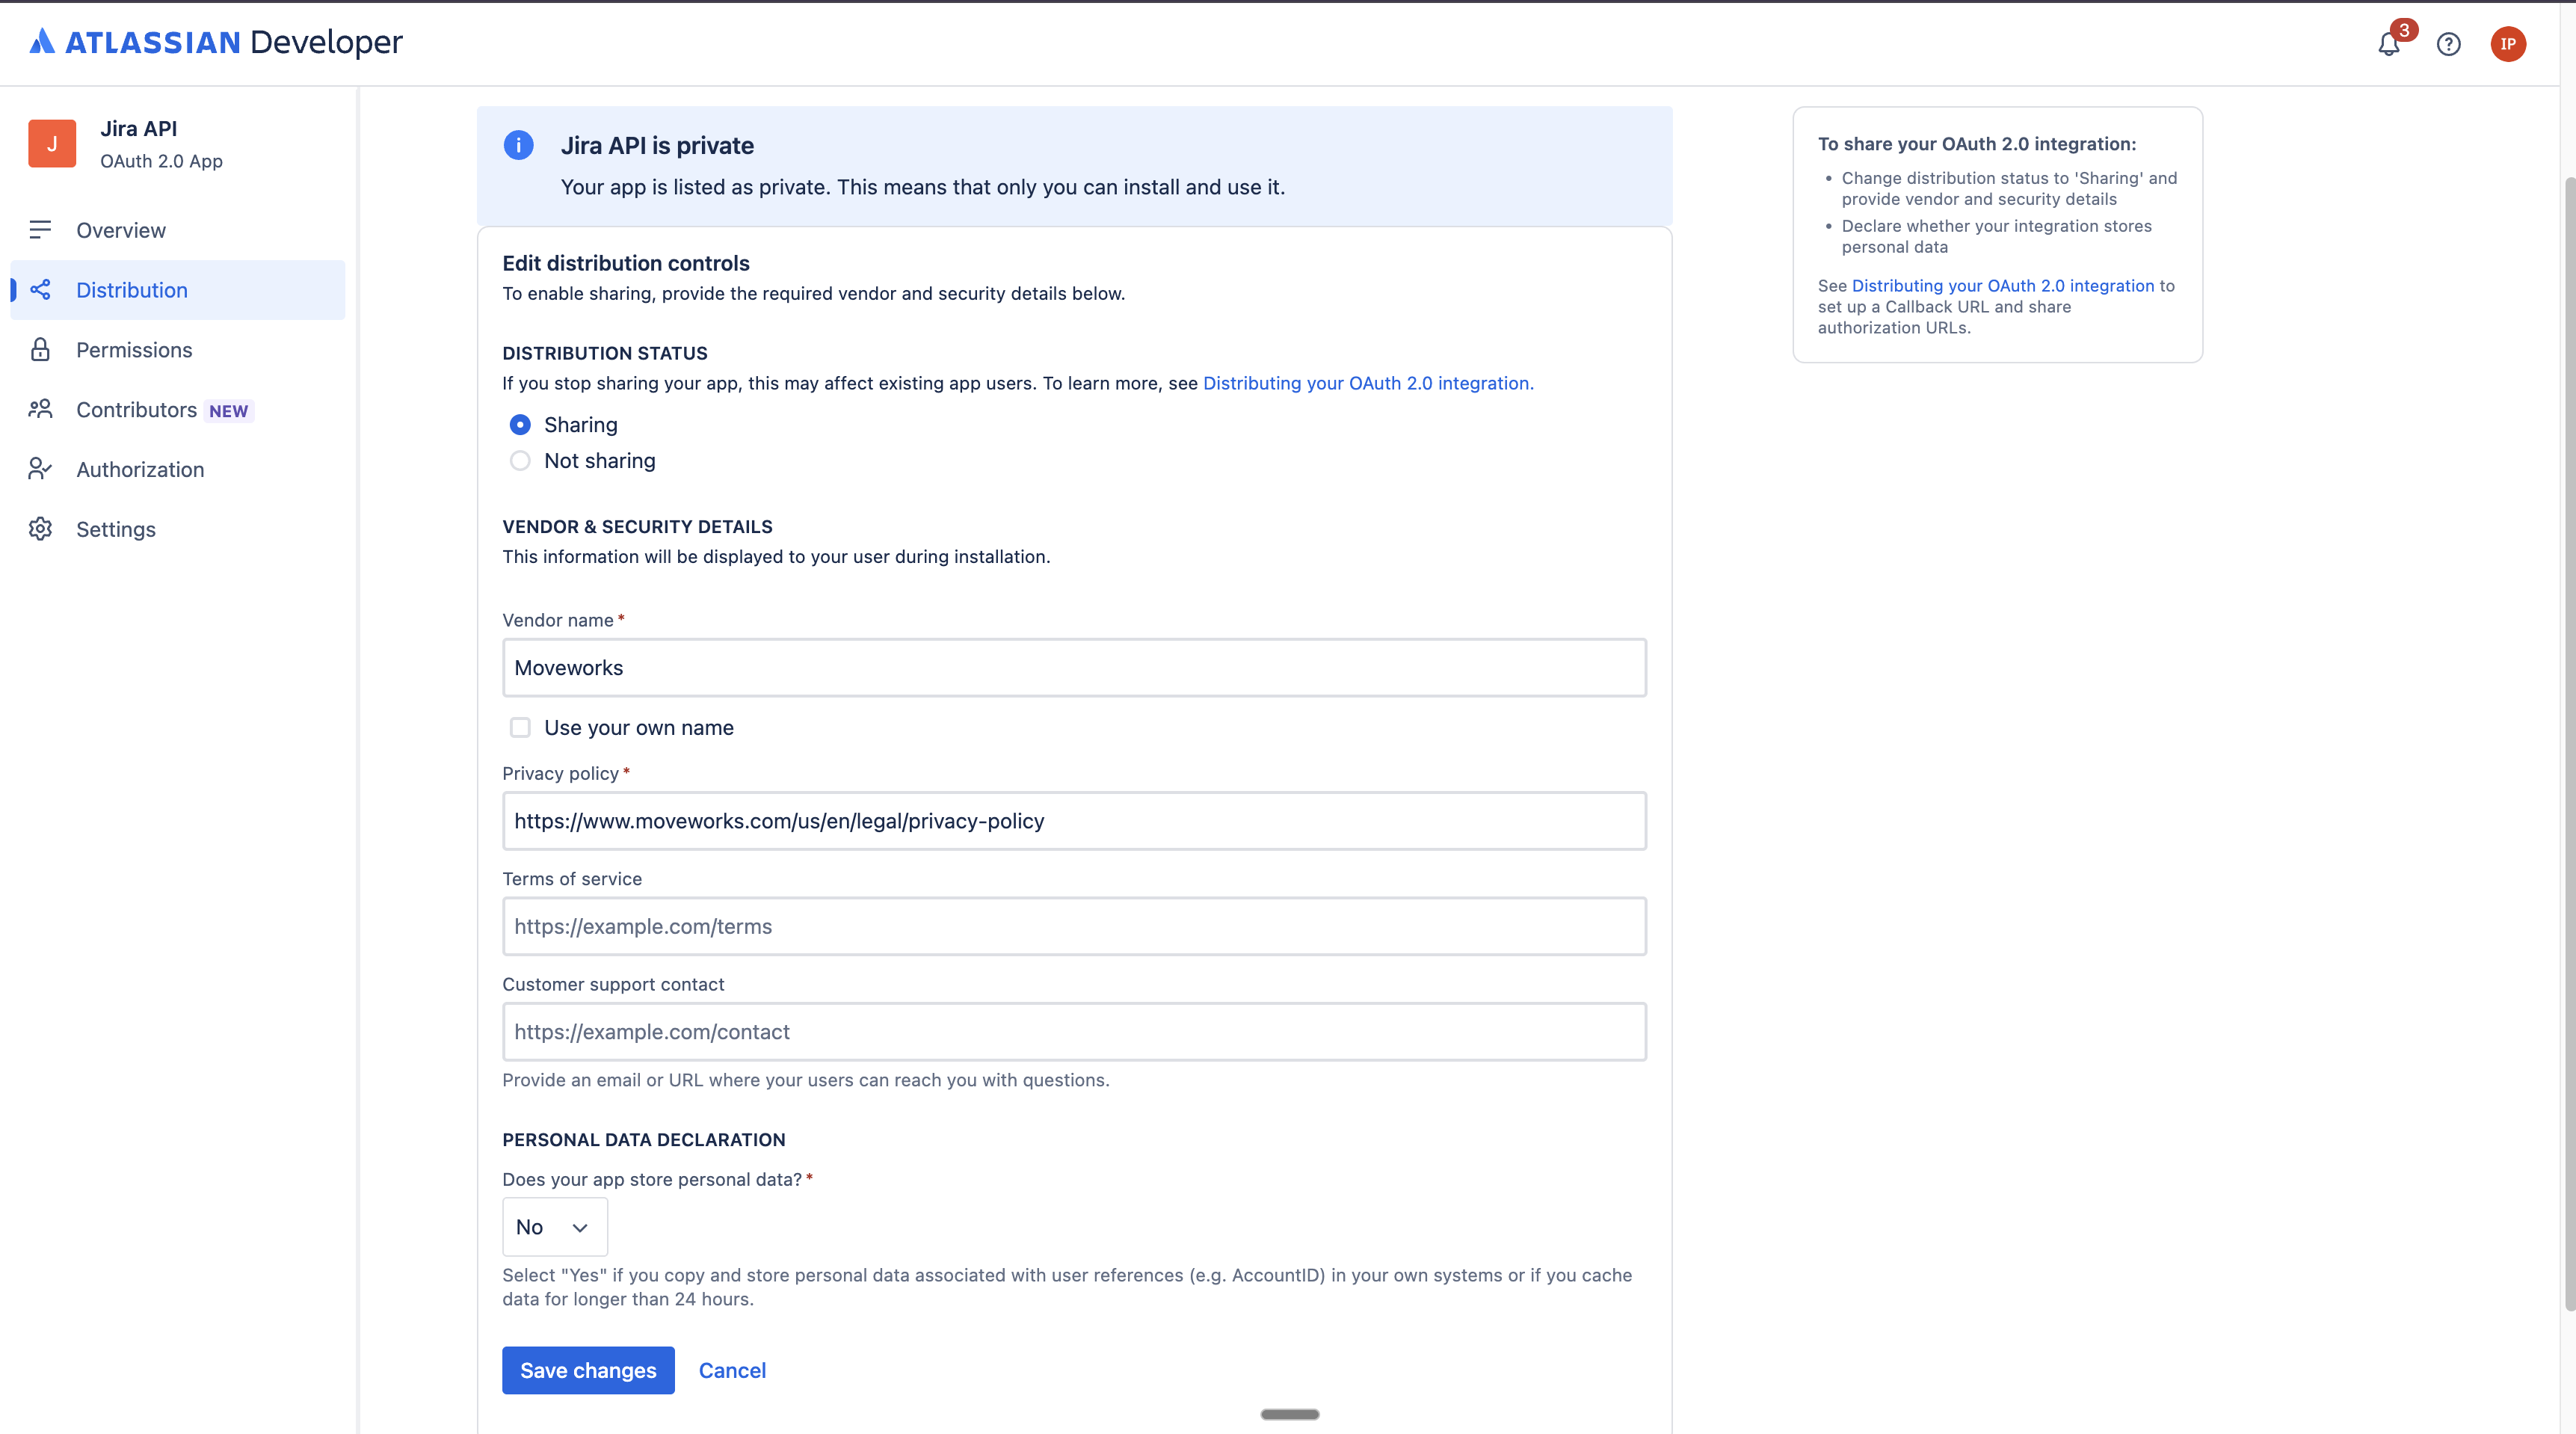
-
Click on Save changes
4. Locate the credentials
- Go to the Settings tab
- Under the Authentication details section, you will find both the
Client IDand theSecret. - Now, visit
https://your-domain.atlassian.net/_edge/tenant_infoin your browser. This URL returns a JSON object containing your uniquecloudId.
Setup in Moveworks
- Log in to your org’s MyMoveworks portal
- Navigate to Moveworks Setup > Connectors > Built-in Connectors
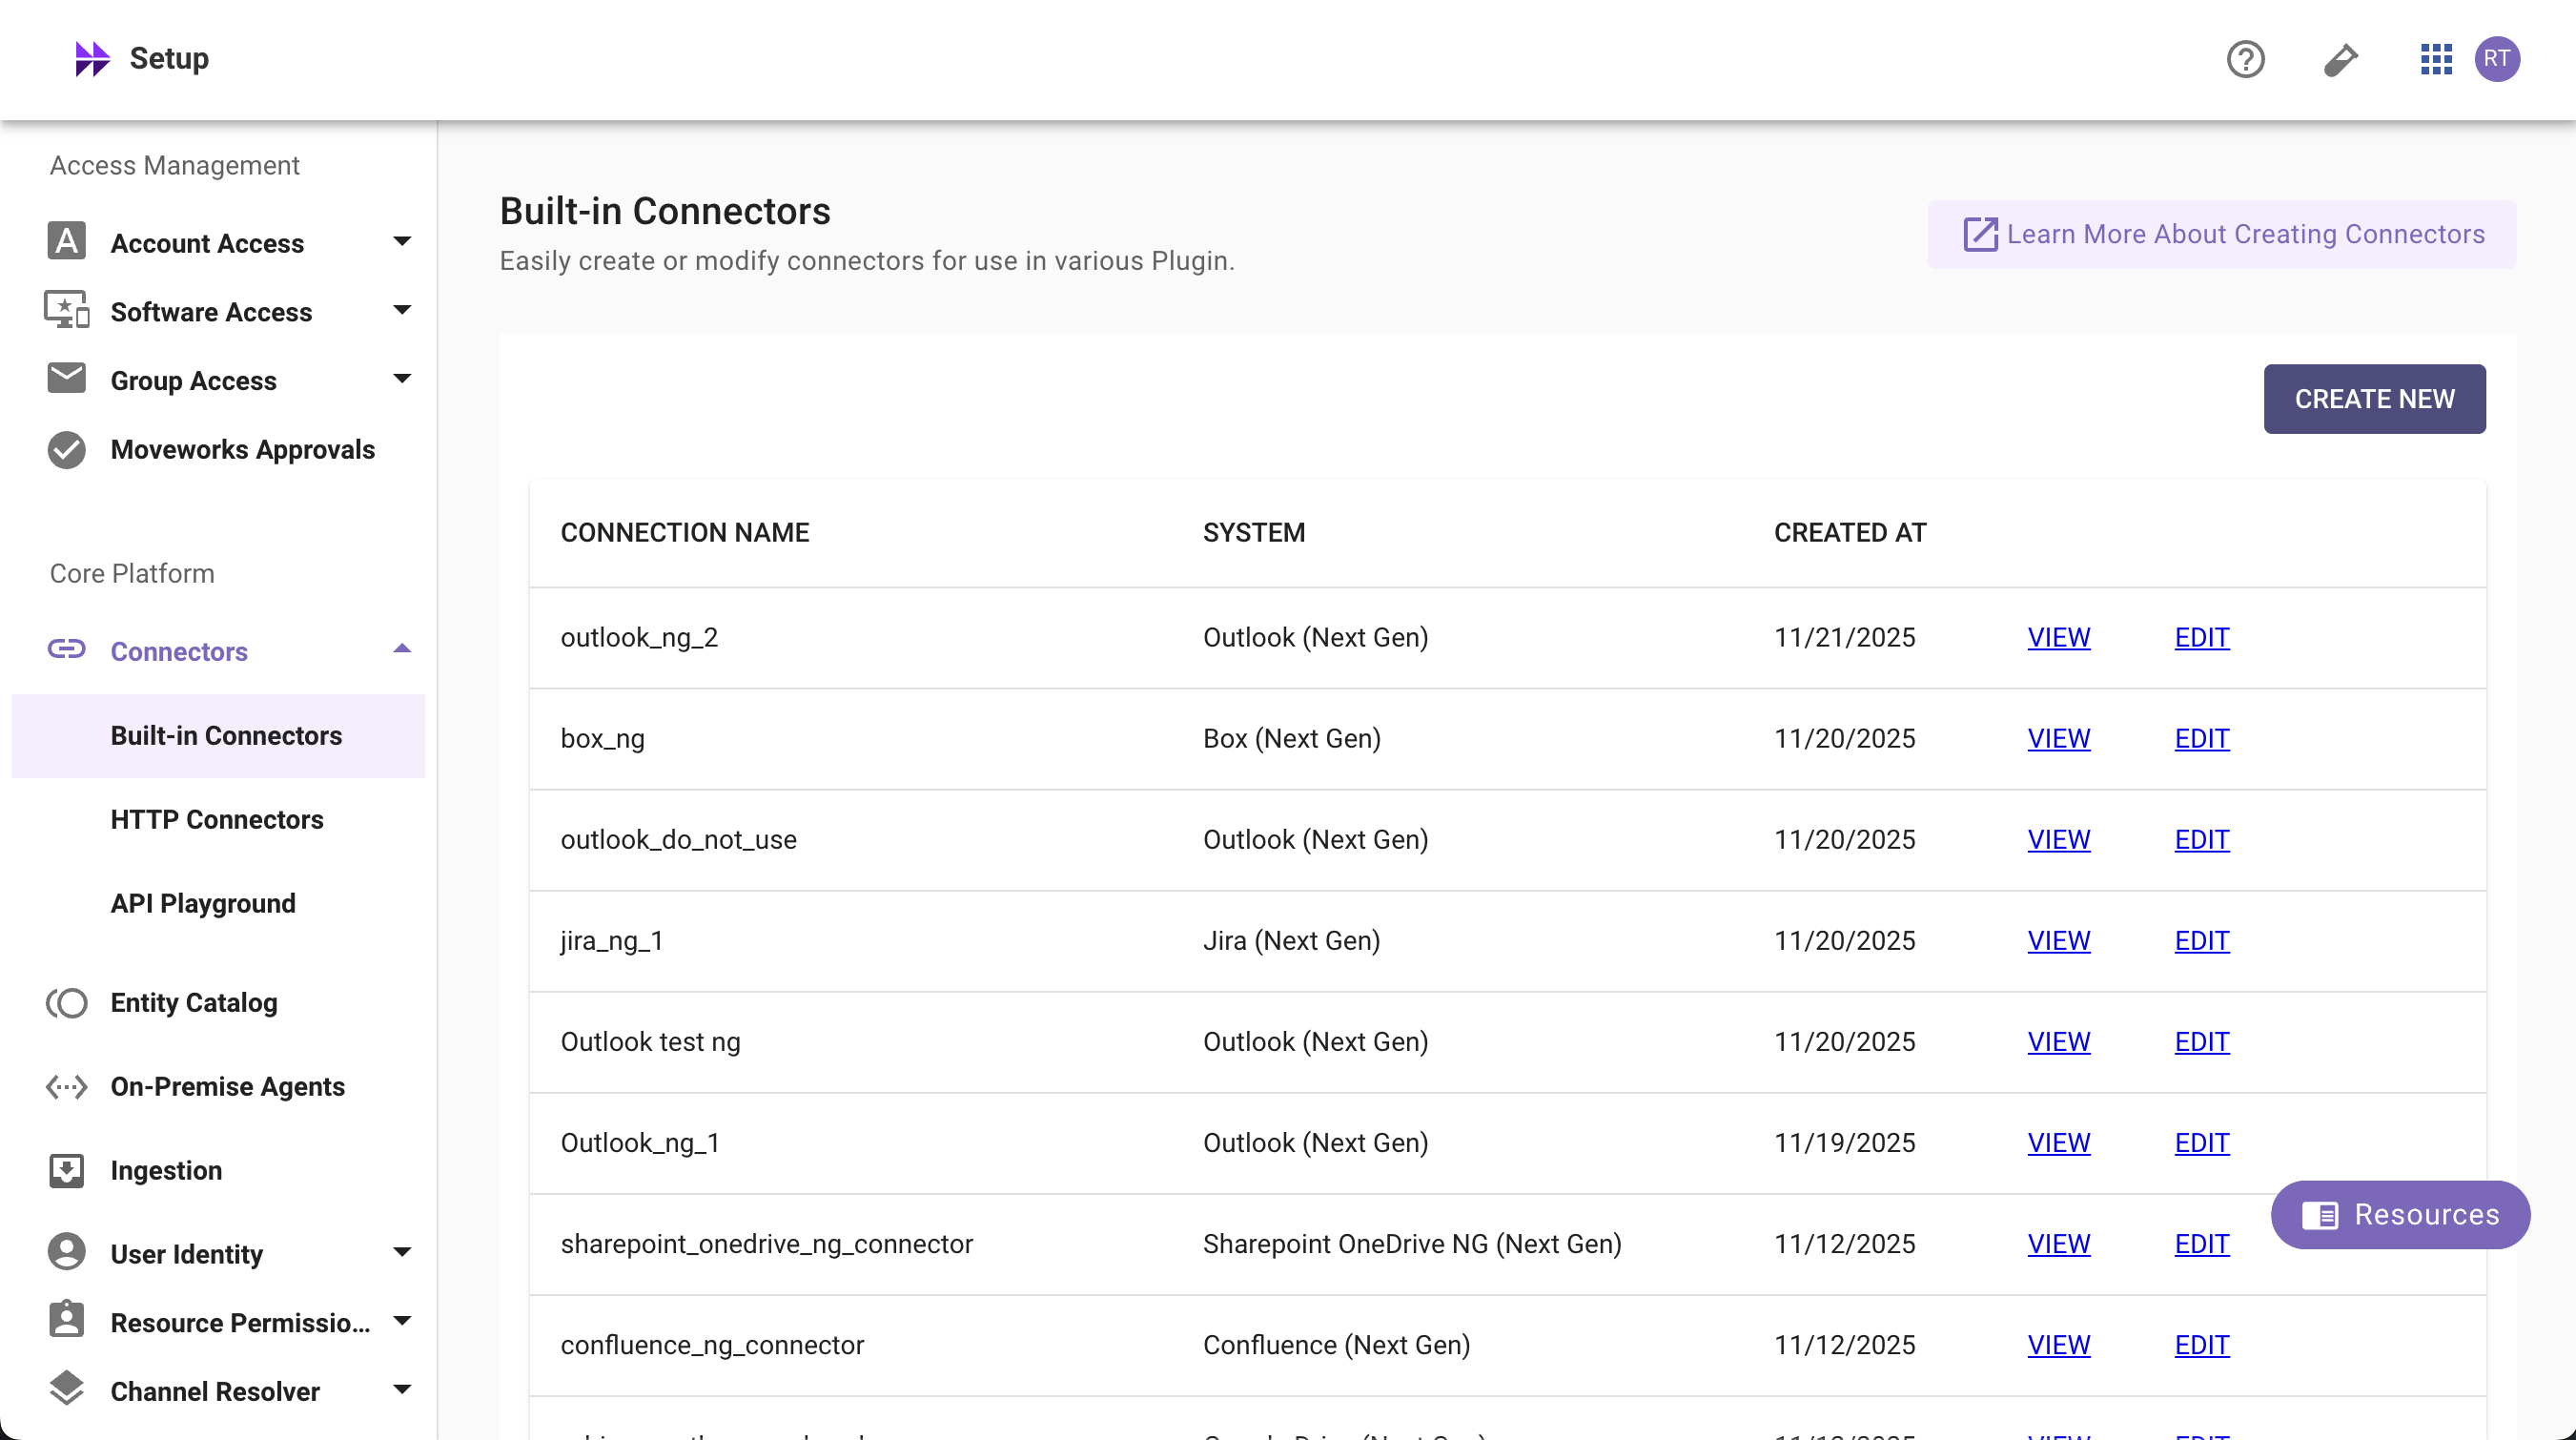
- Click on the Create New button
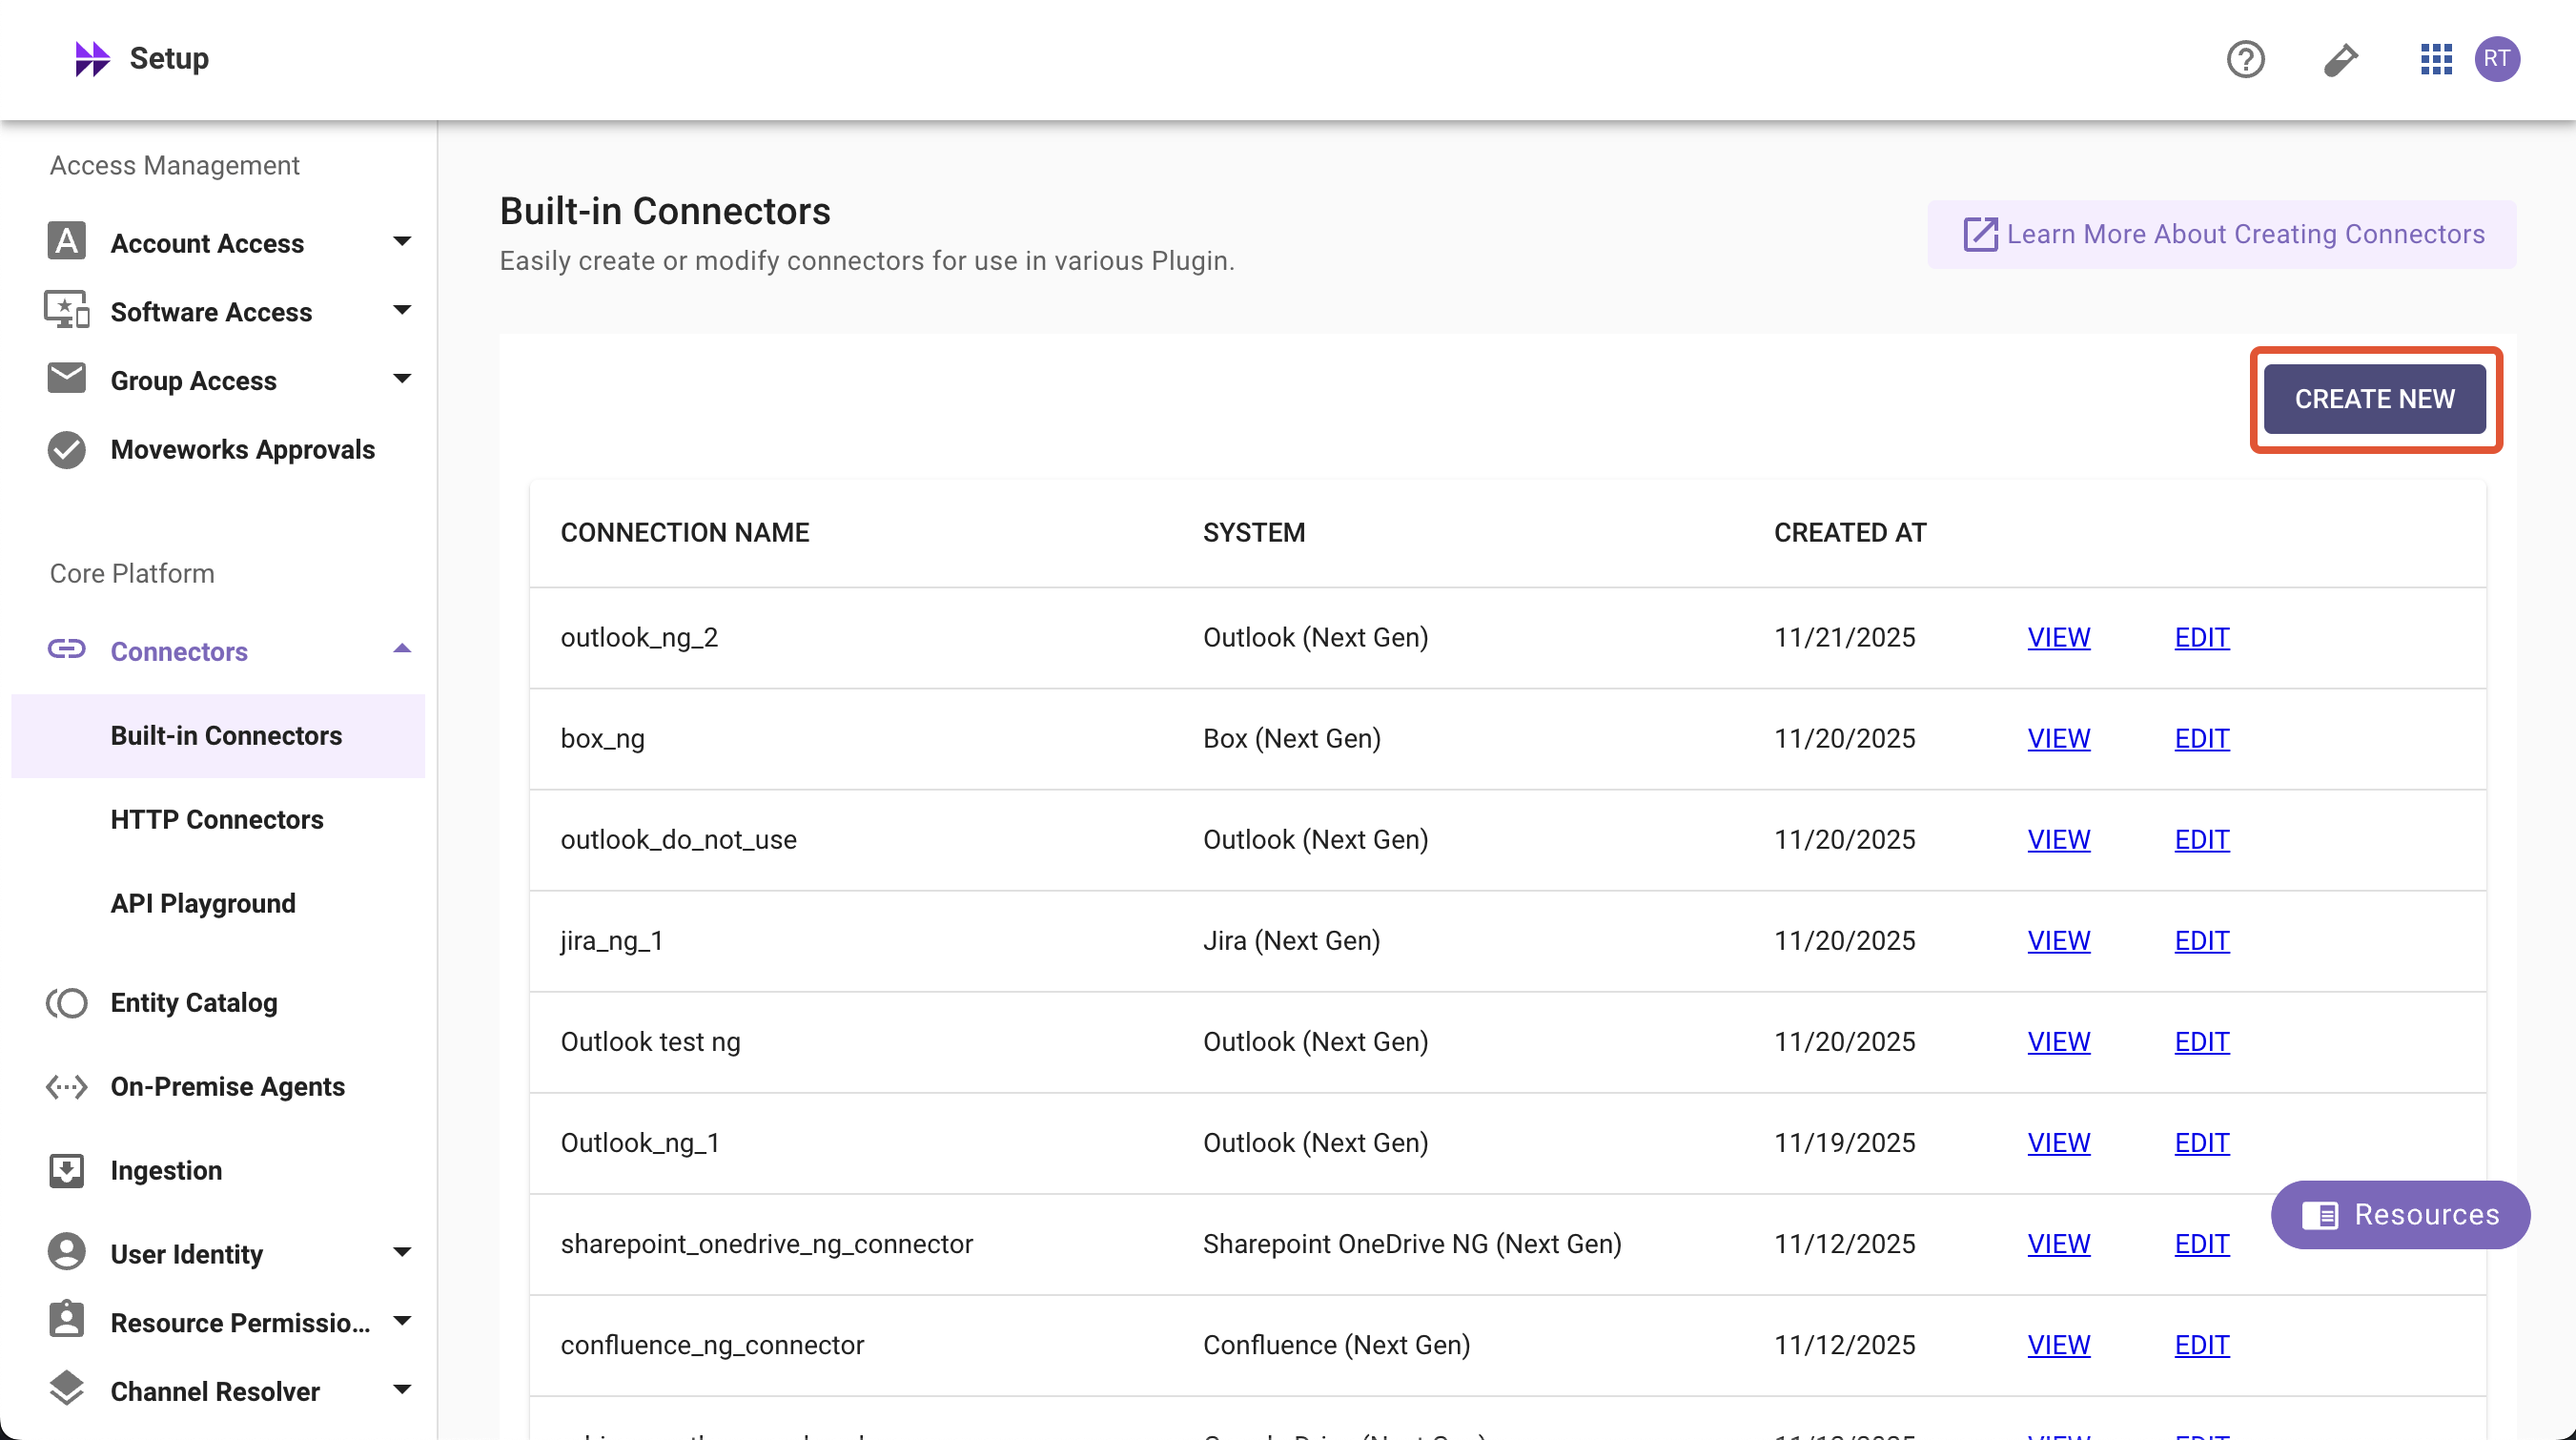
- Search and Select Jira (Next Gen)
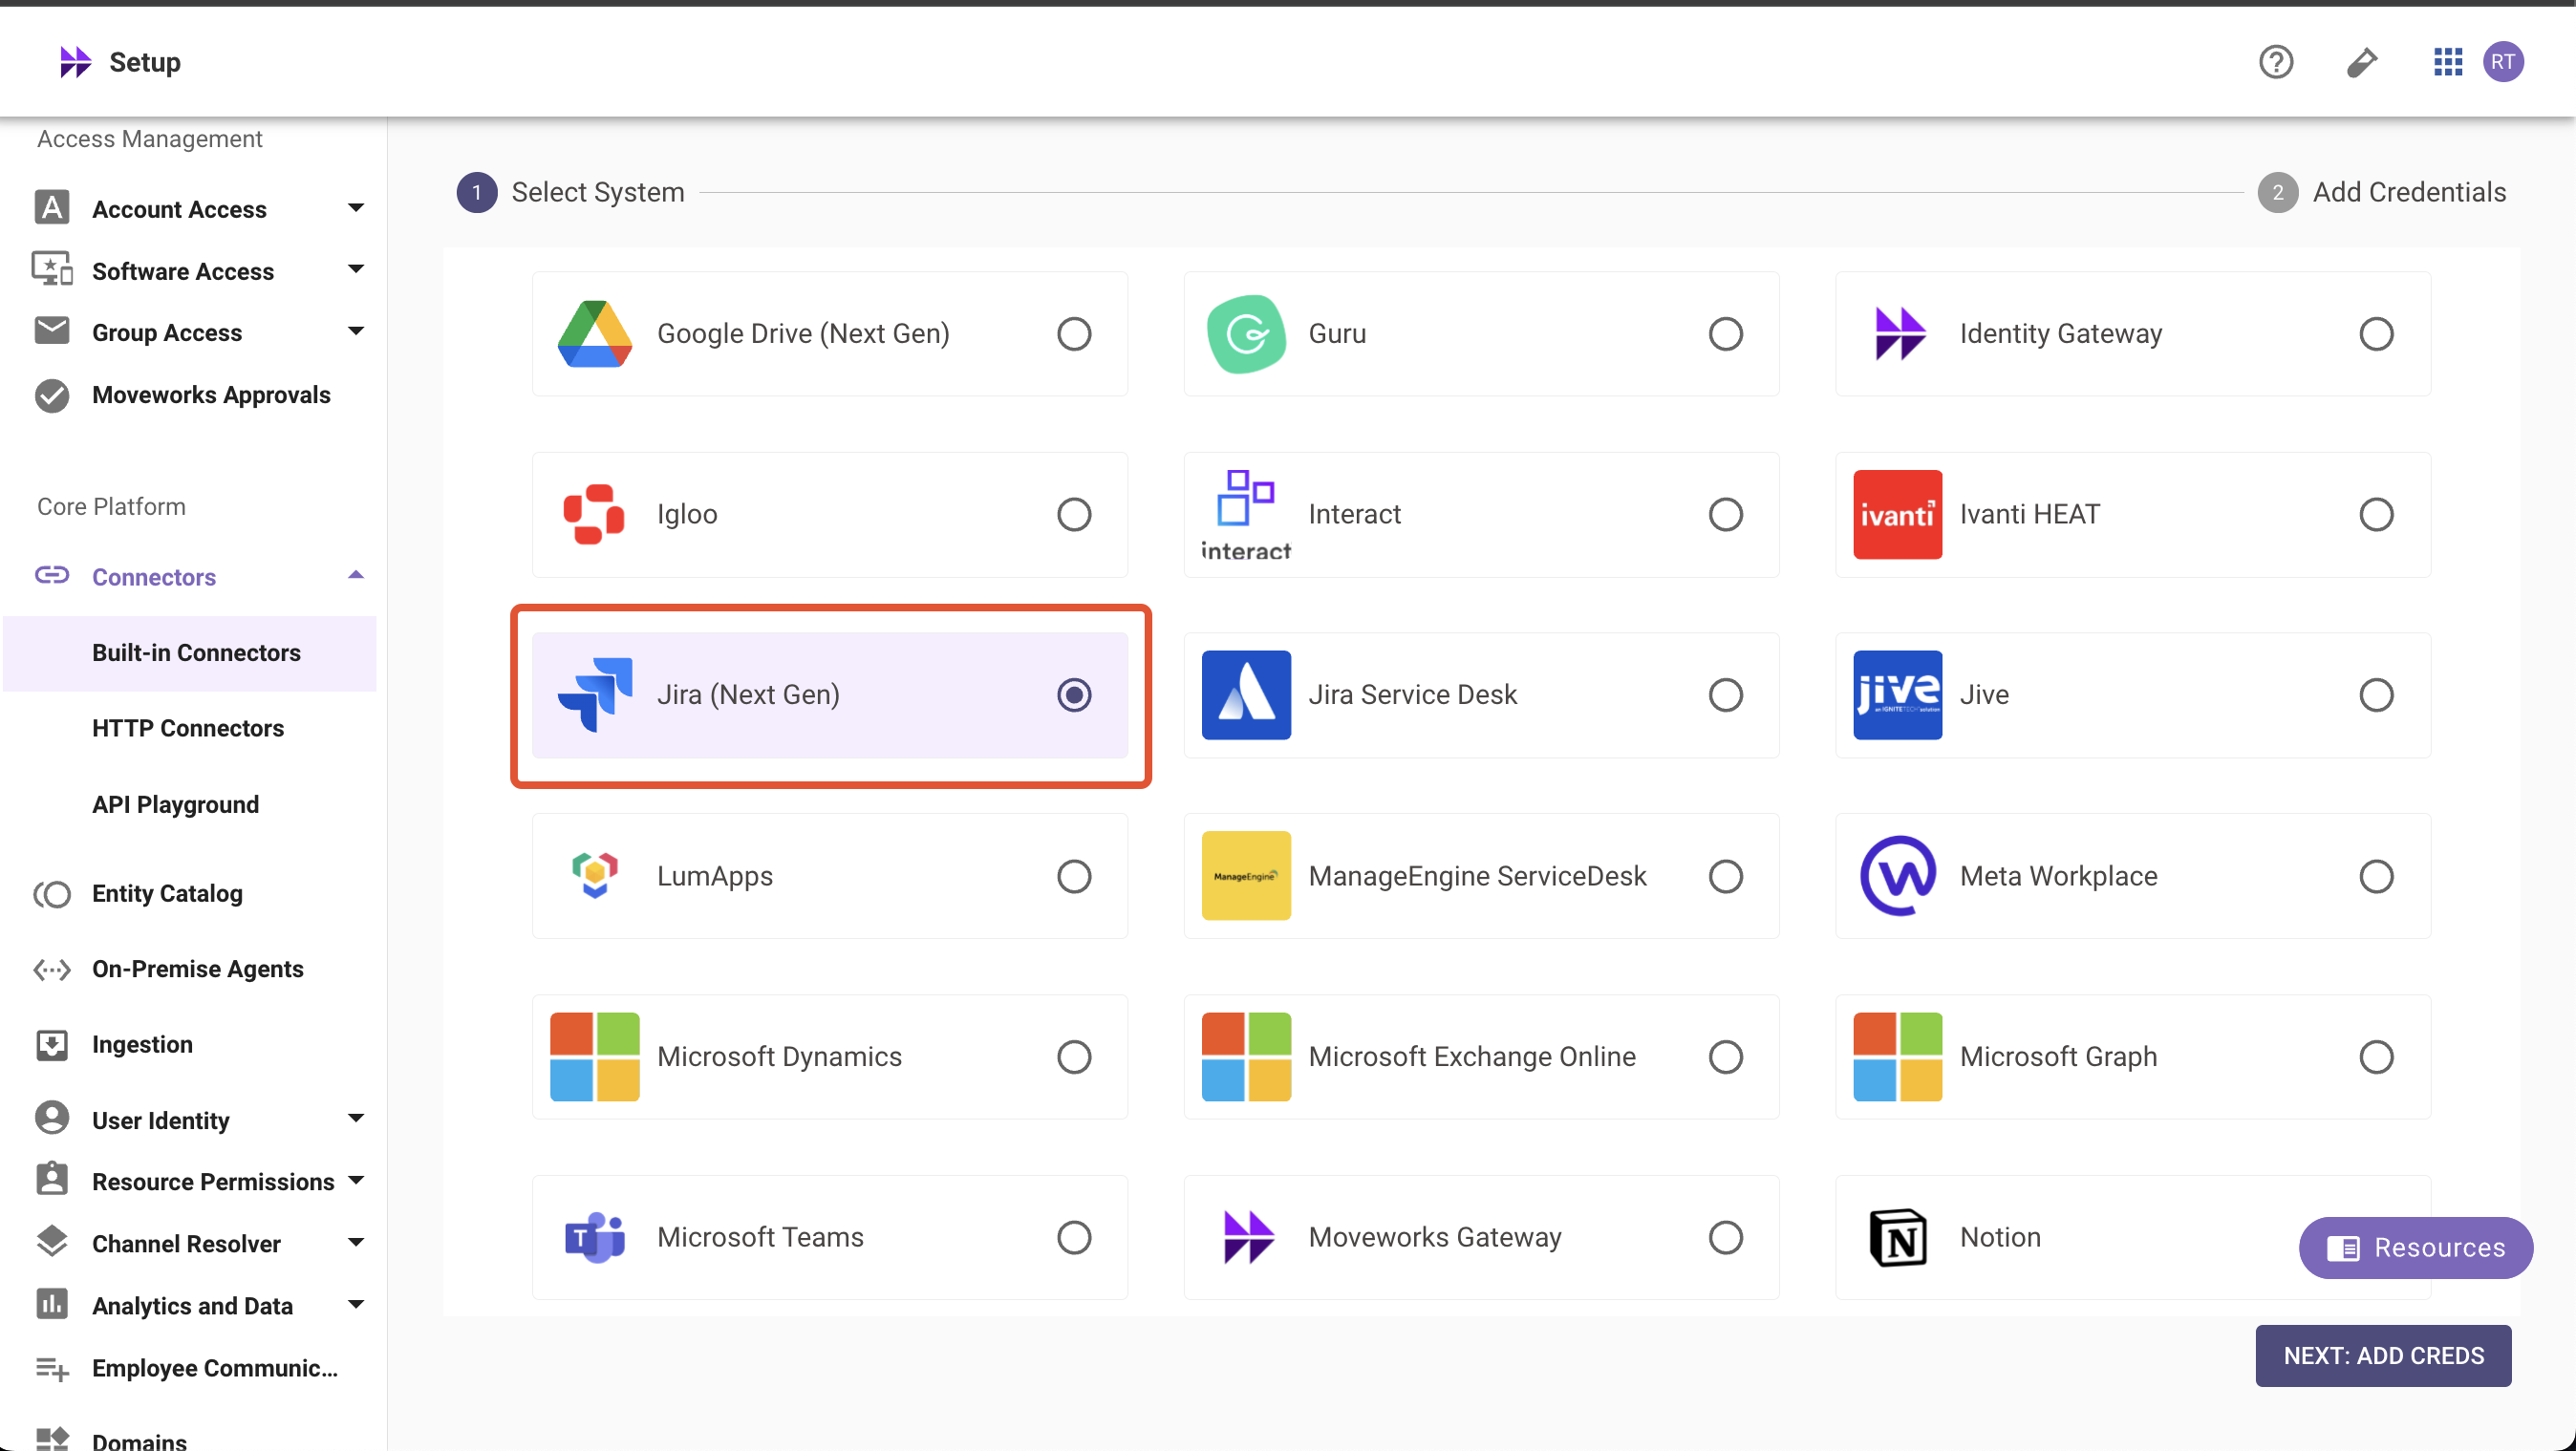
- Click on Next: Add Creds
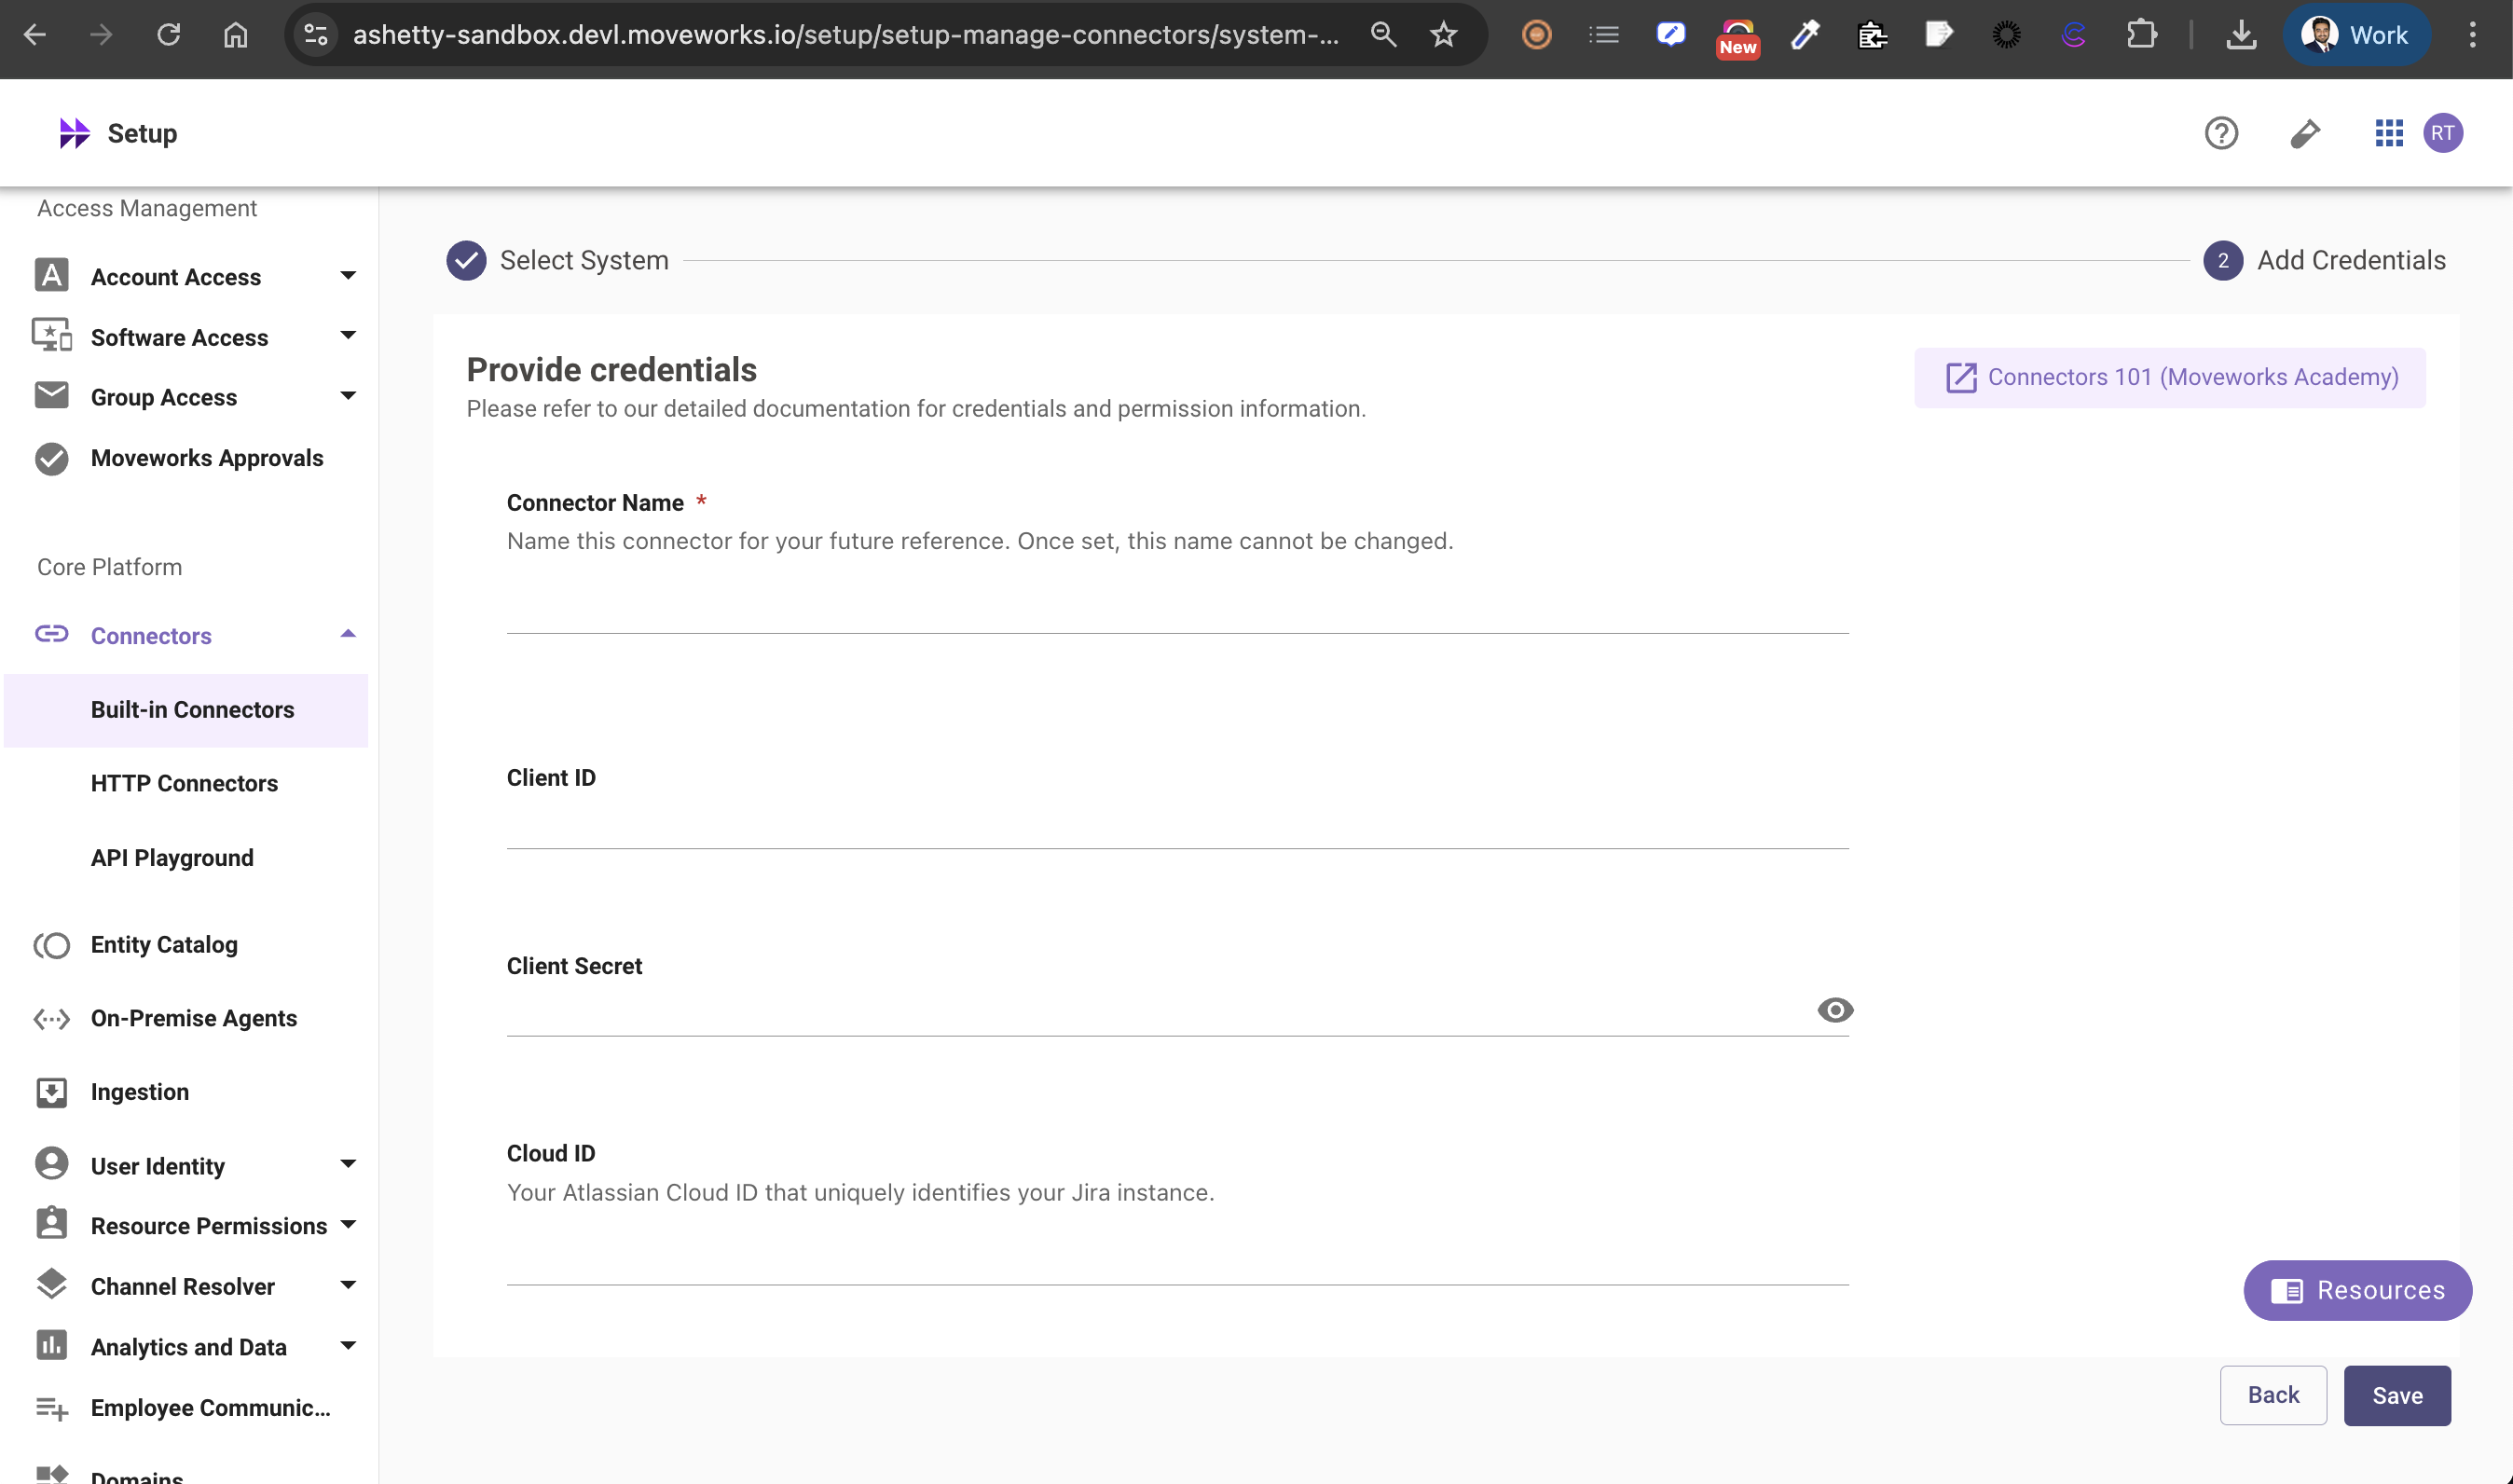
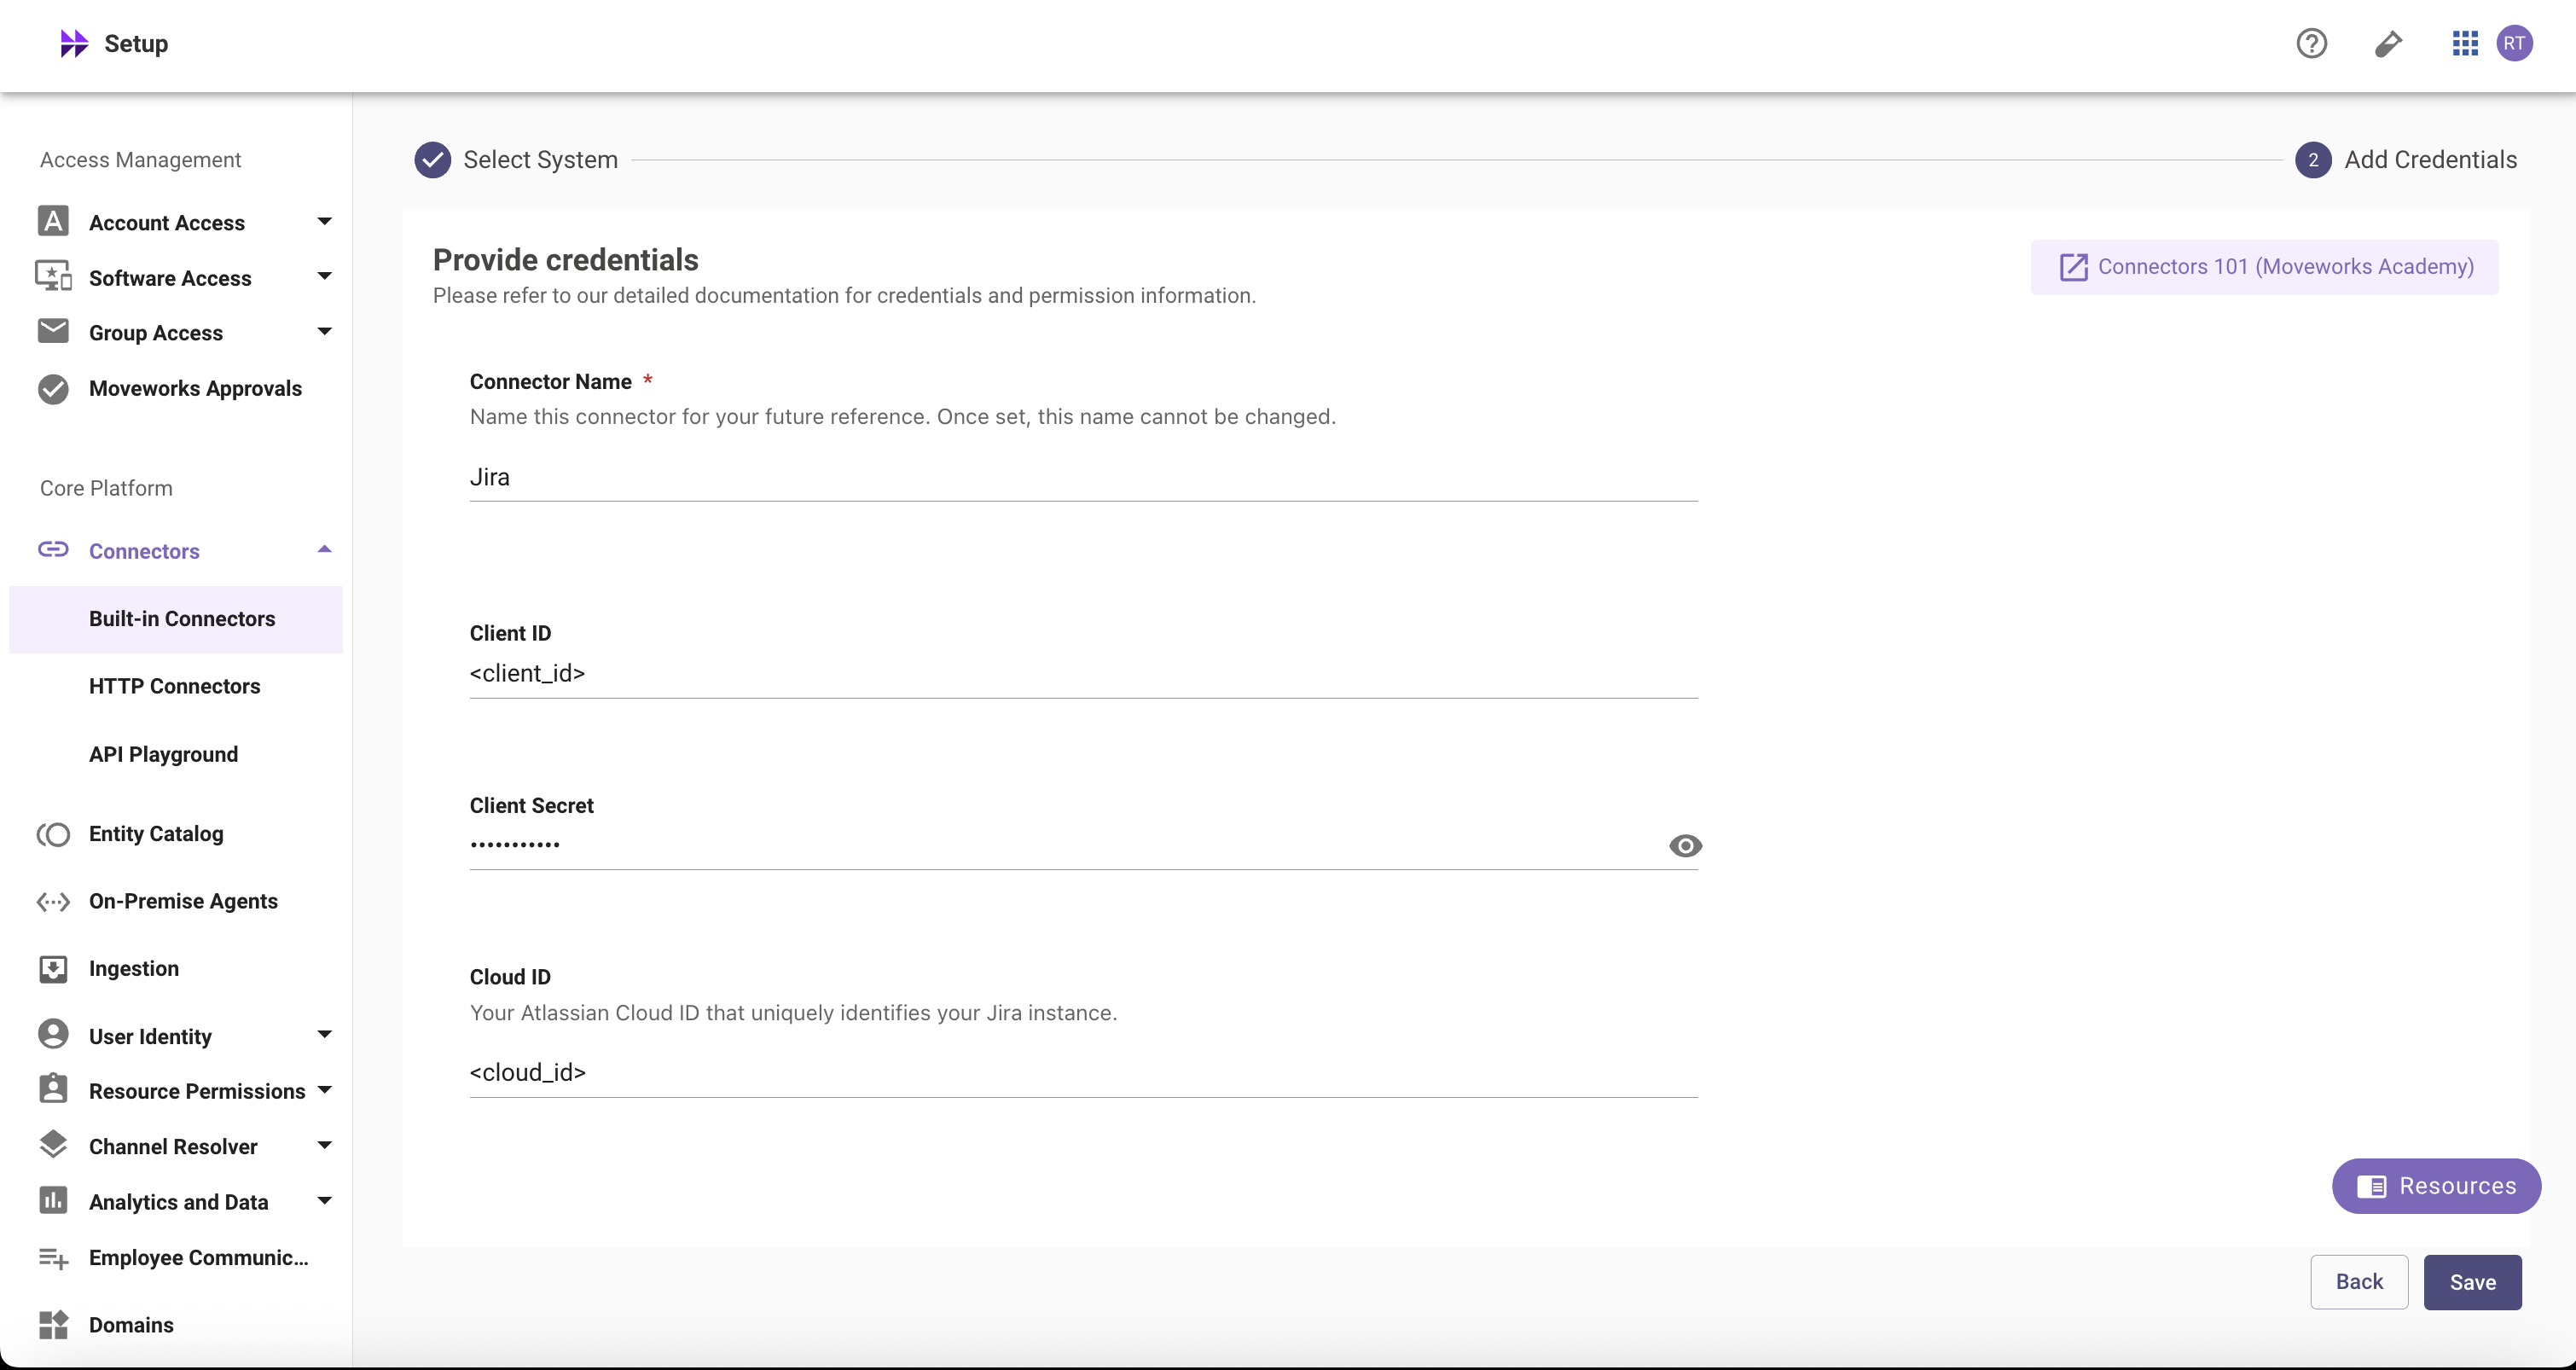
- Input the following details (copied from steps above)
- Connector Name: Name this connector for your future reference. Once set, this name cannot be changed
- Client ID: The Client ID for your Jira app registration
- Client Secret: The Secret for your Jira app.
- Cloud ID: Your organization’s unique Jira Cloud instance identifier
Click on the Save button. This connector will now be used to configure live search from Jira.
Configuring Jira for Enterprise Search
Initialising setup
-
Log in to your org’s MyMoveworks portal
-
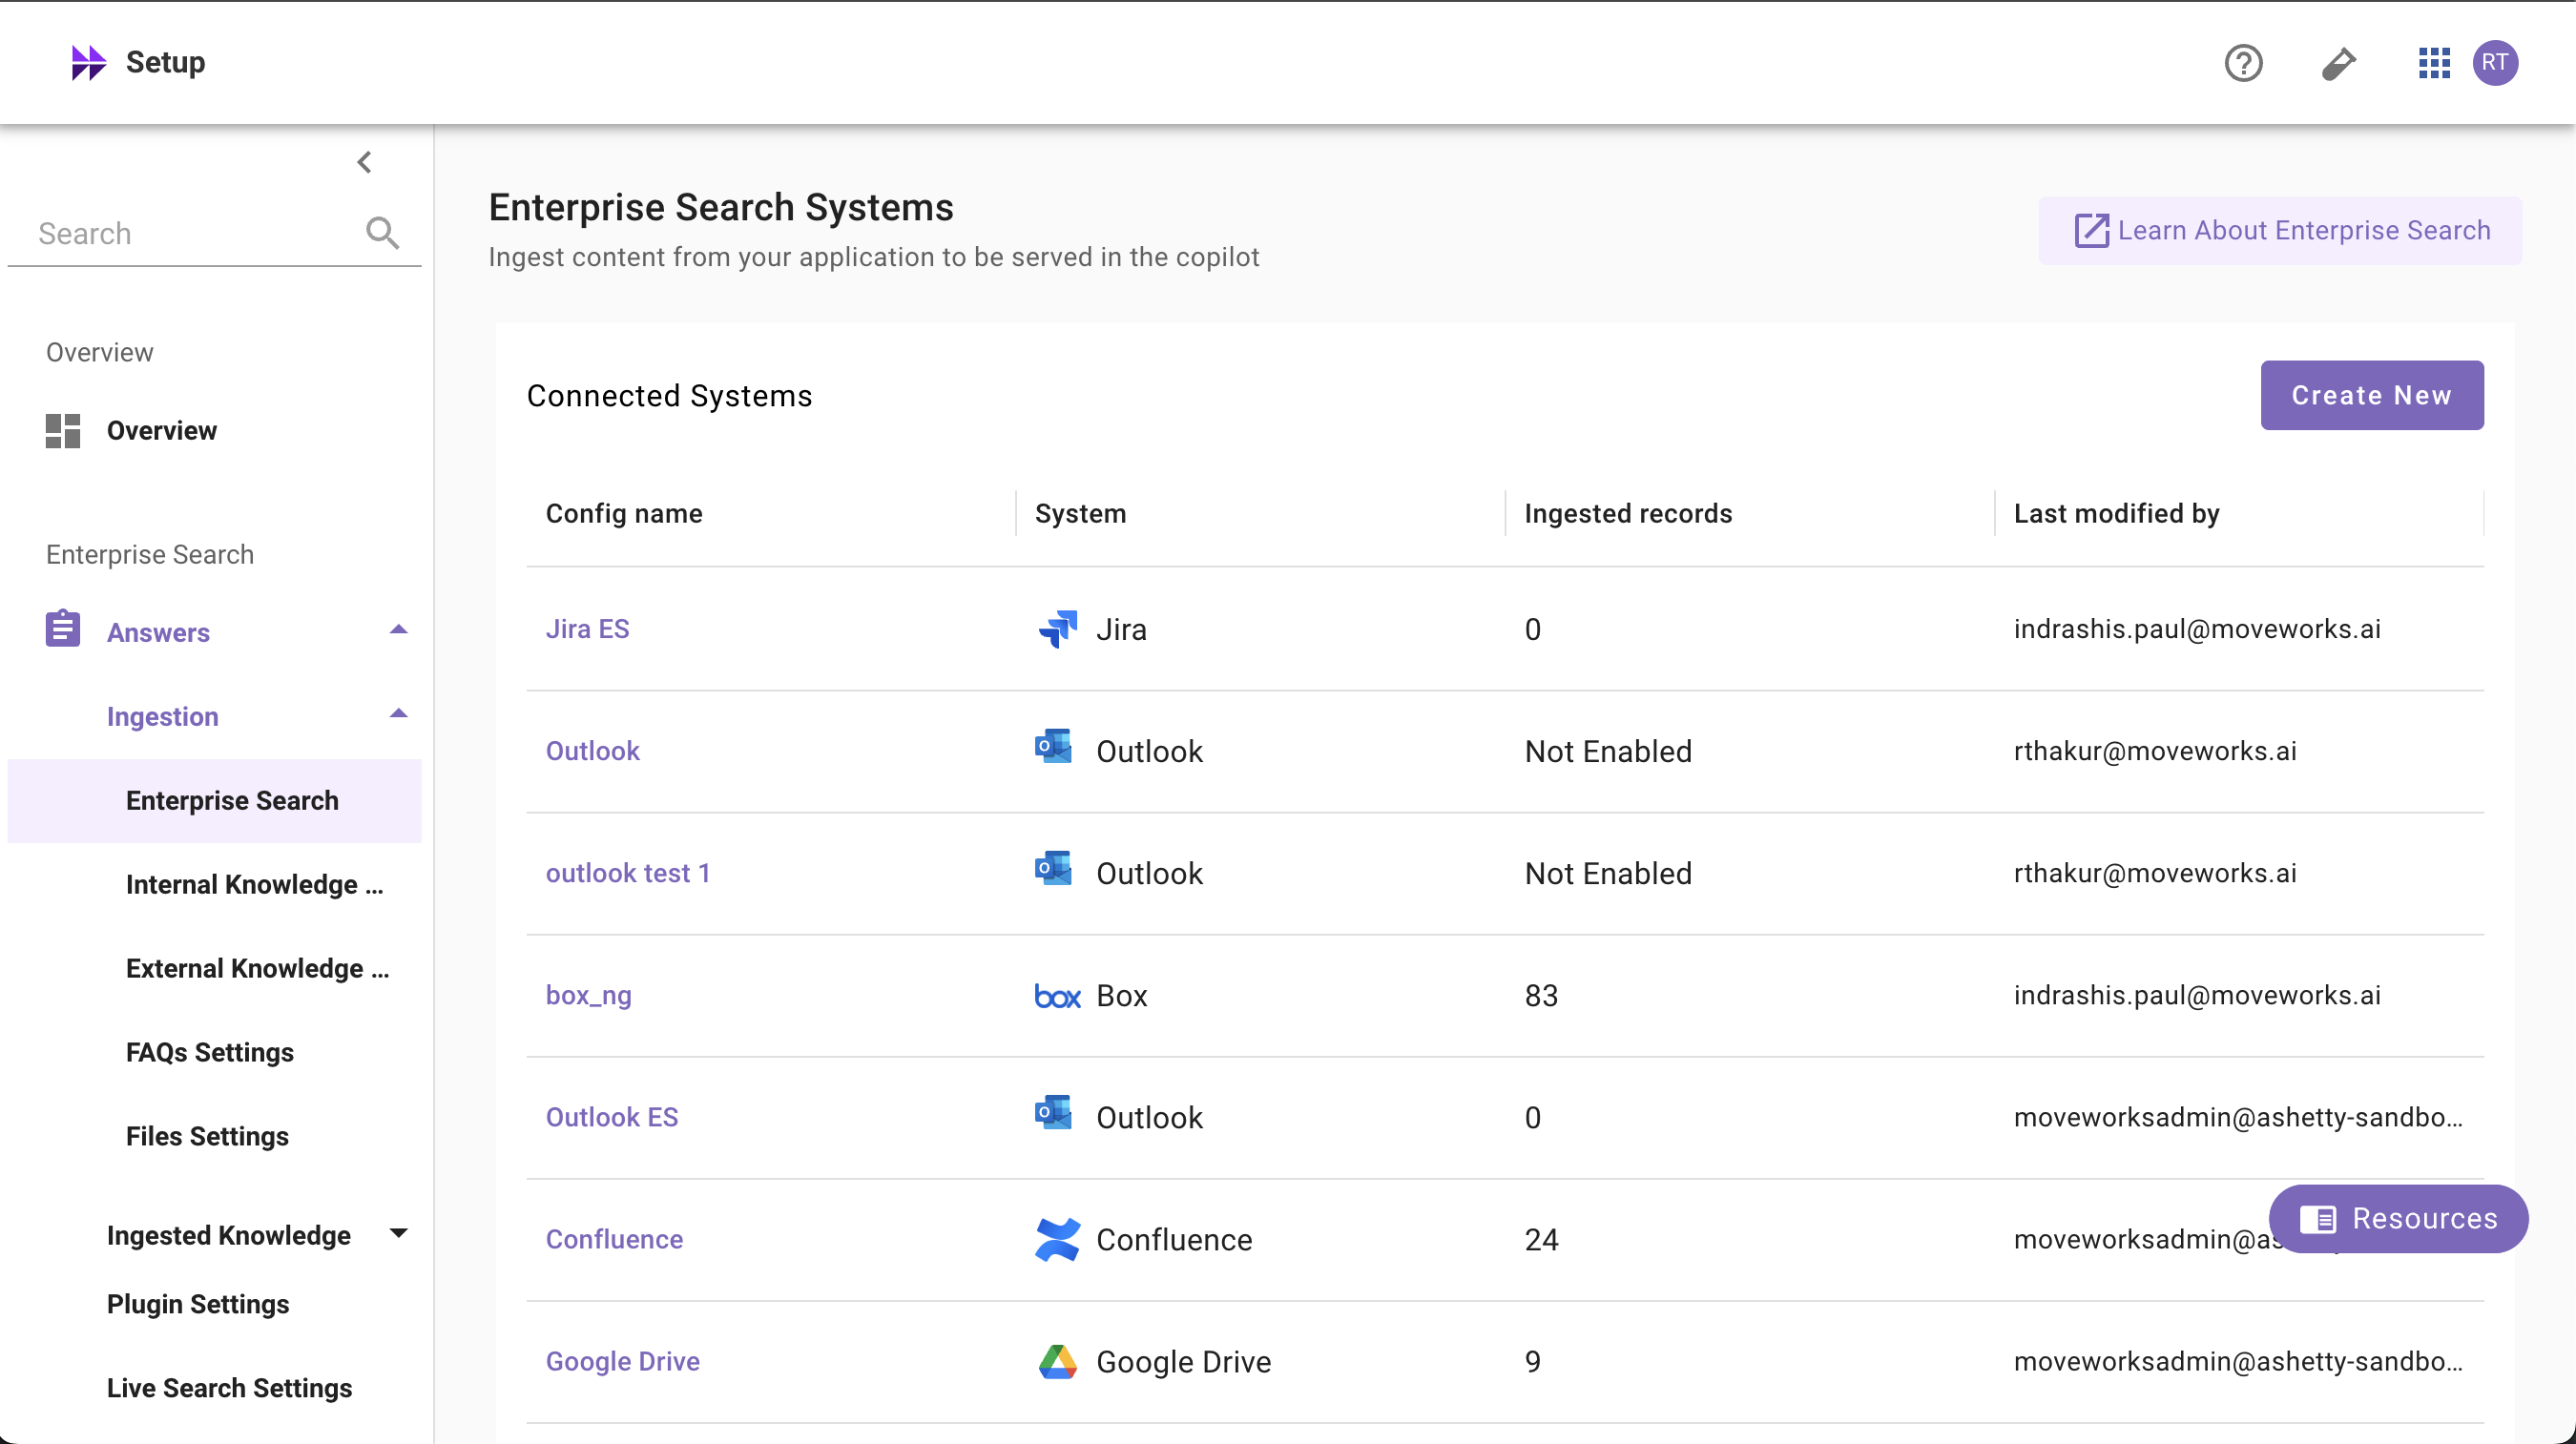
Navigate to Moveworks Setup > Search > Configure Search > Max Capacity
-
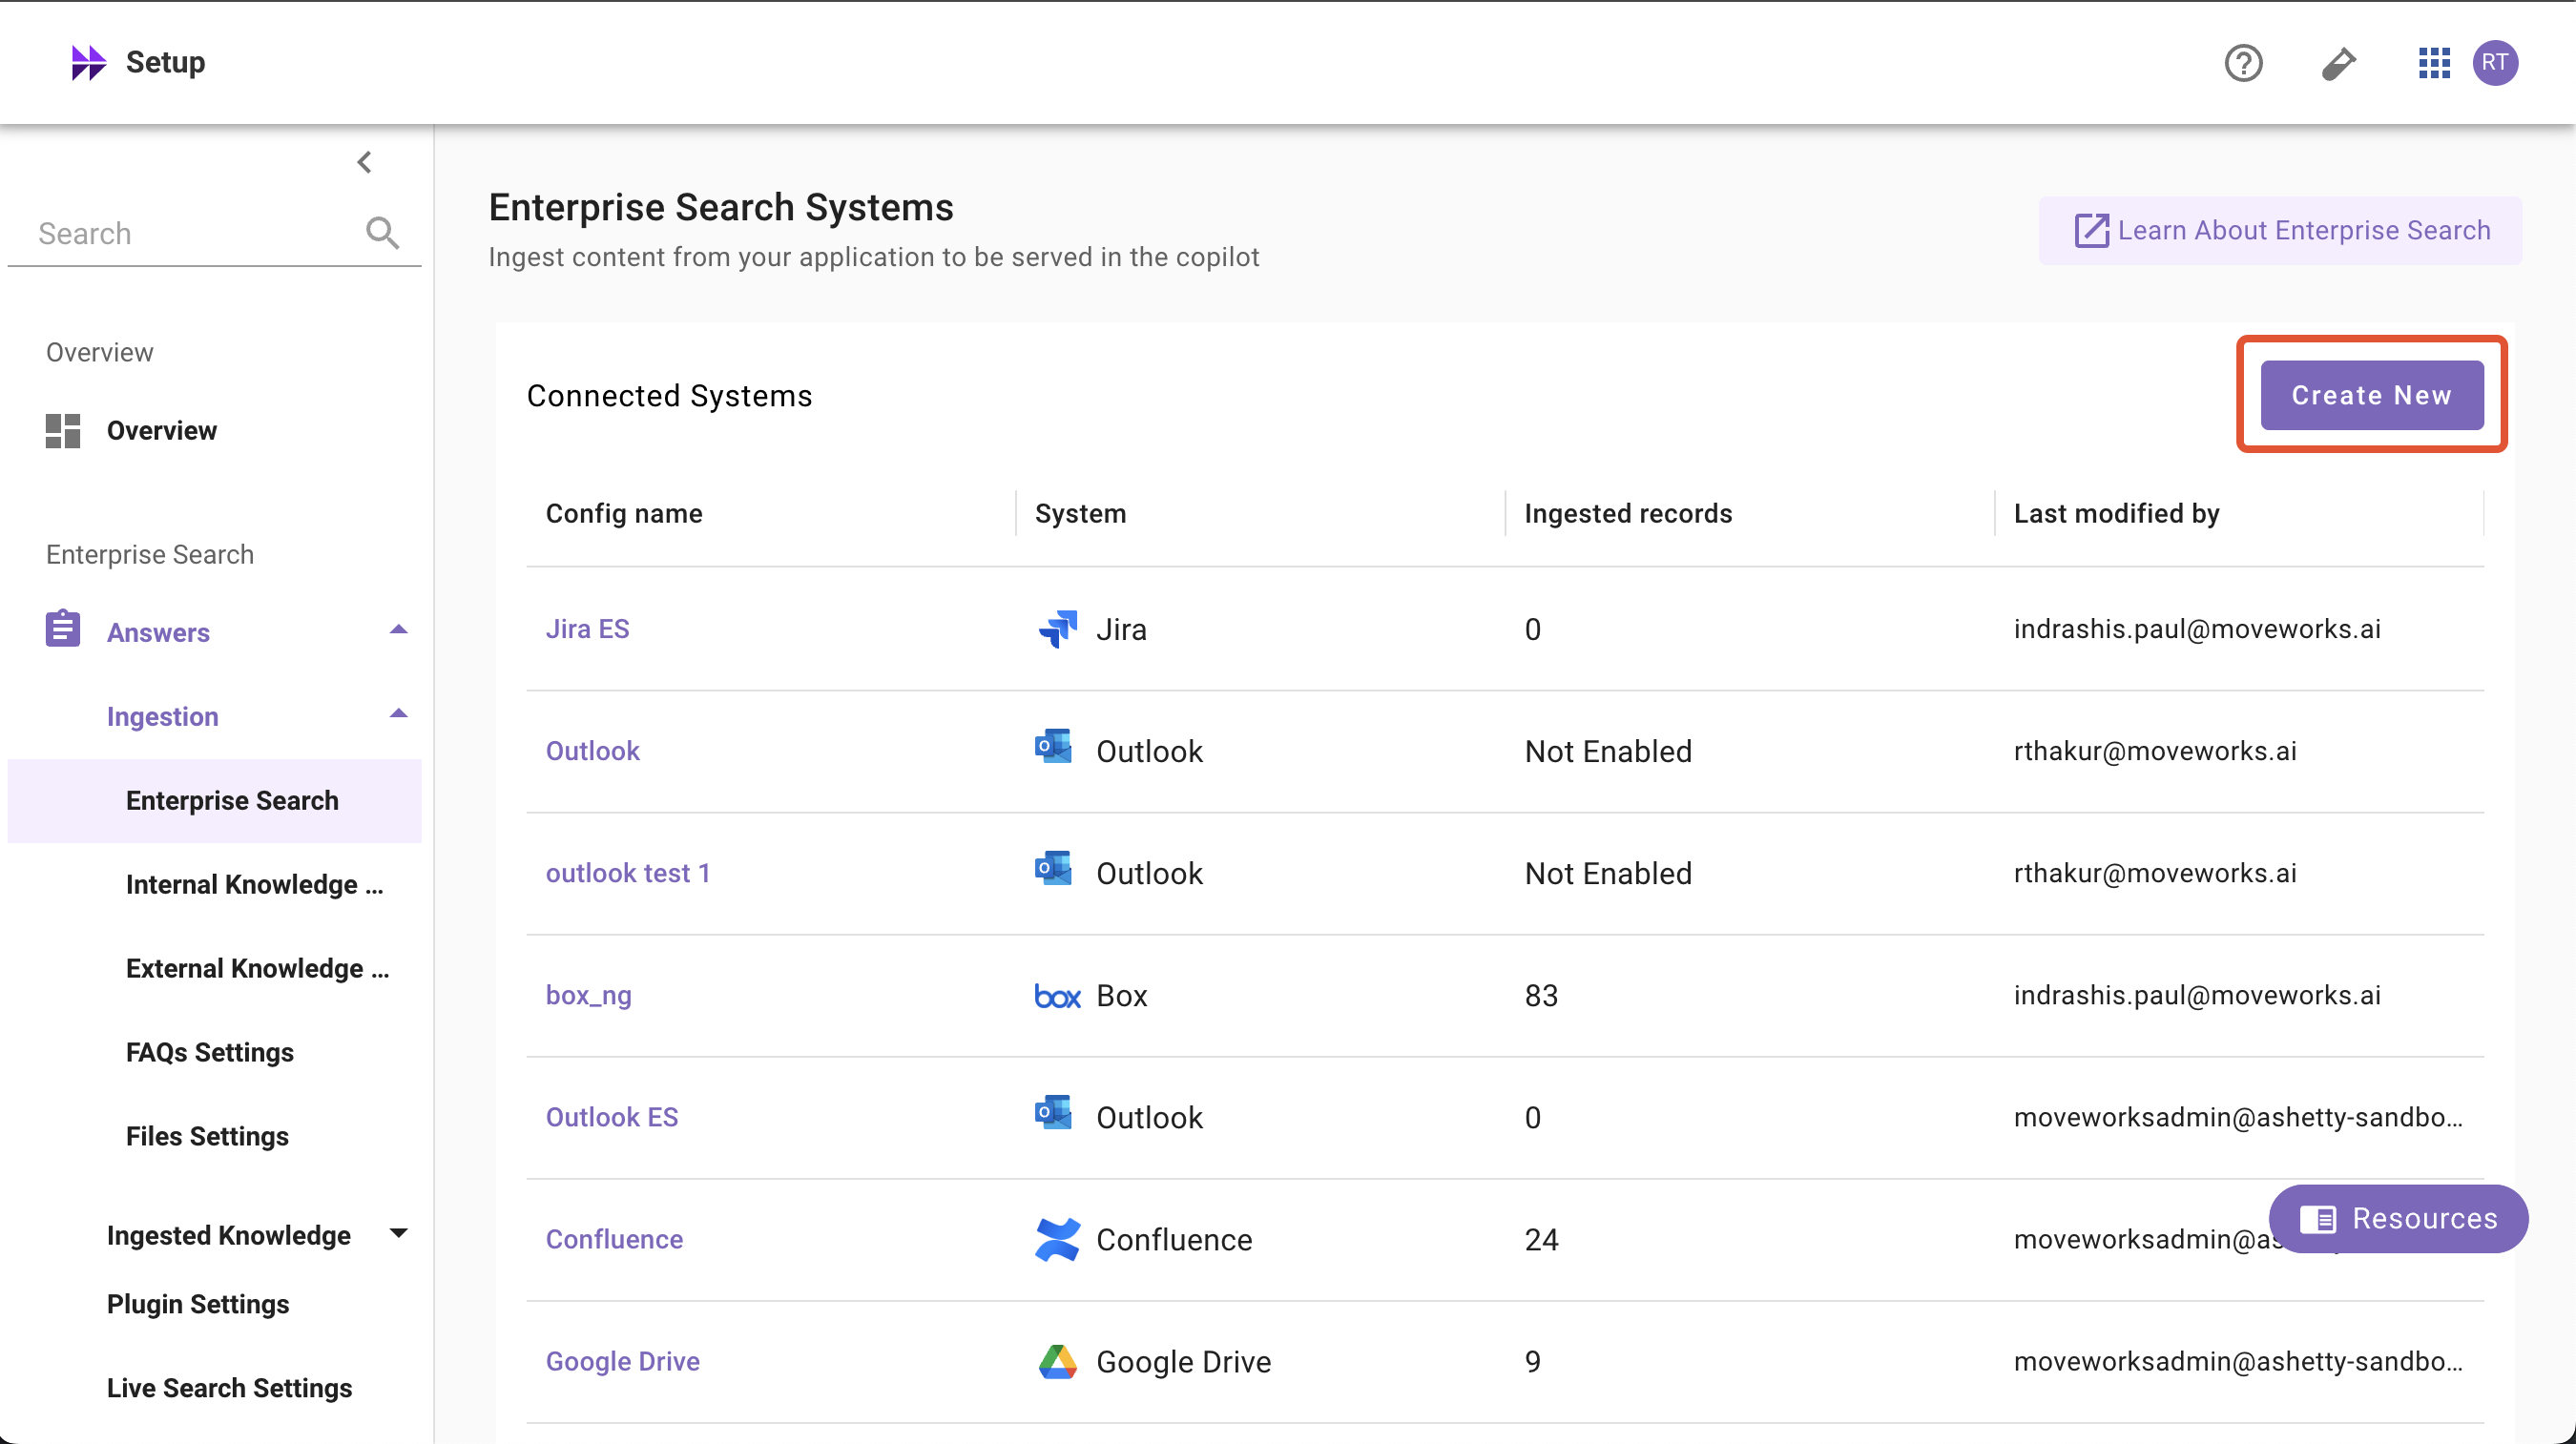
Click on Create New or Get Started
-
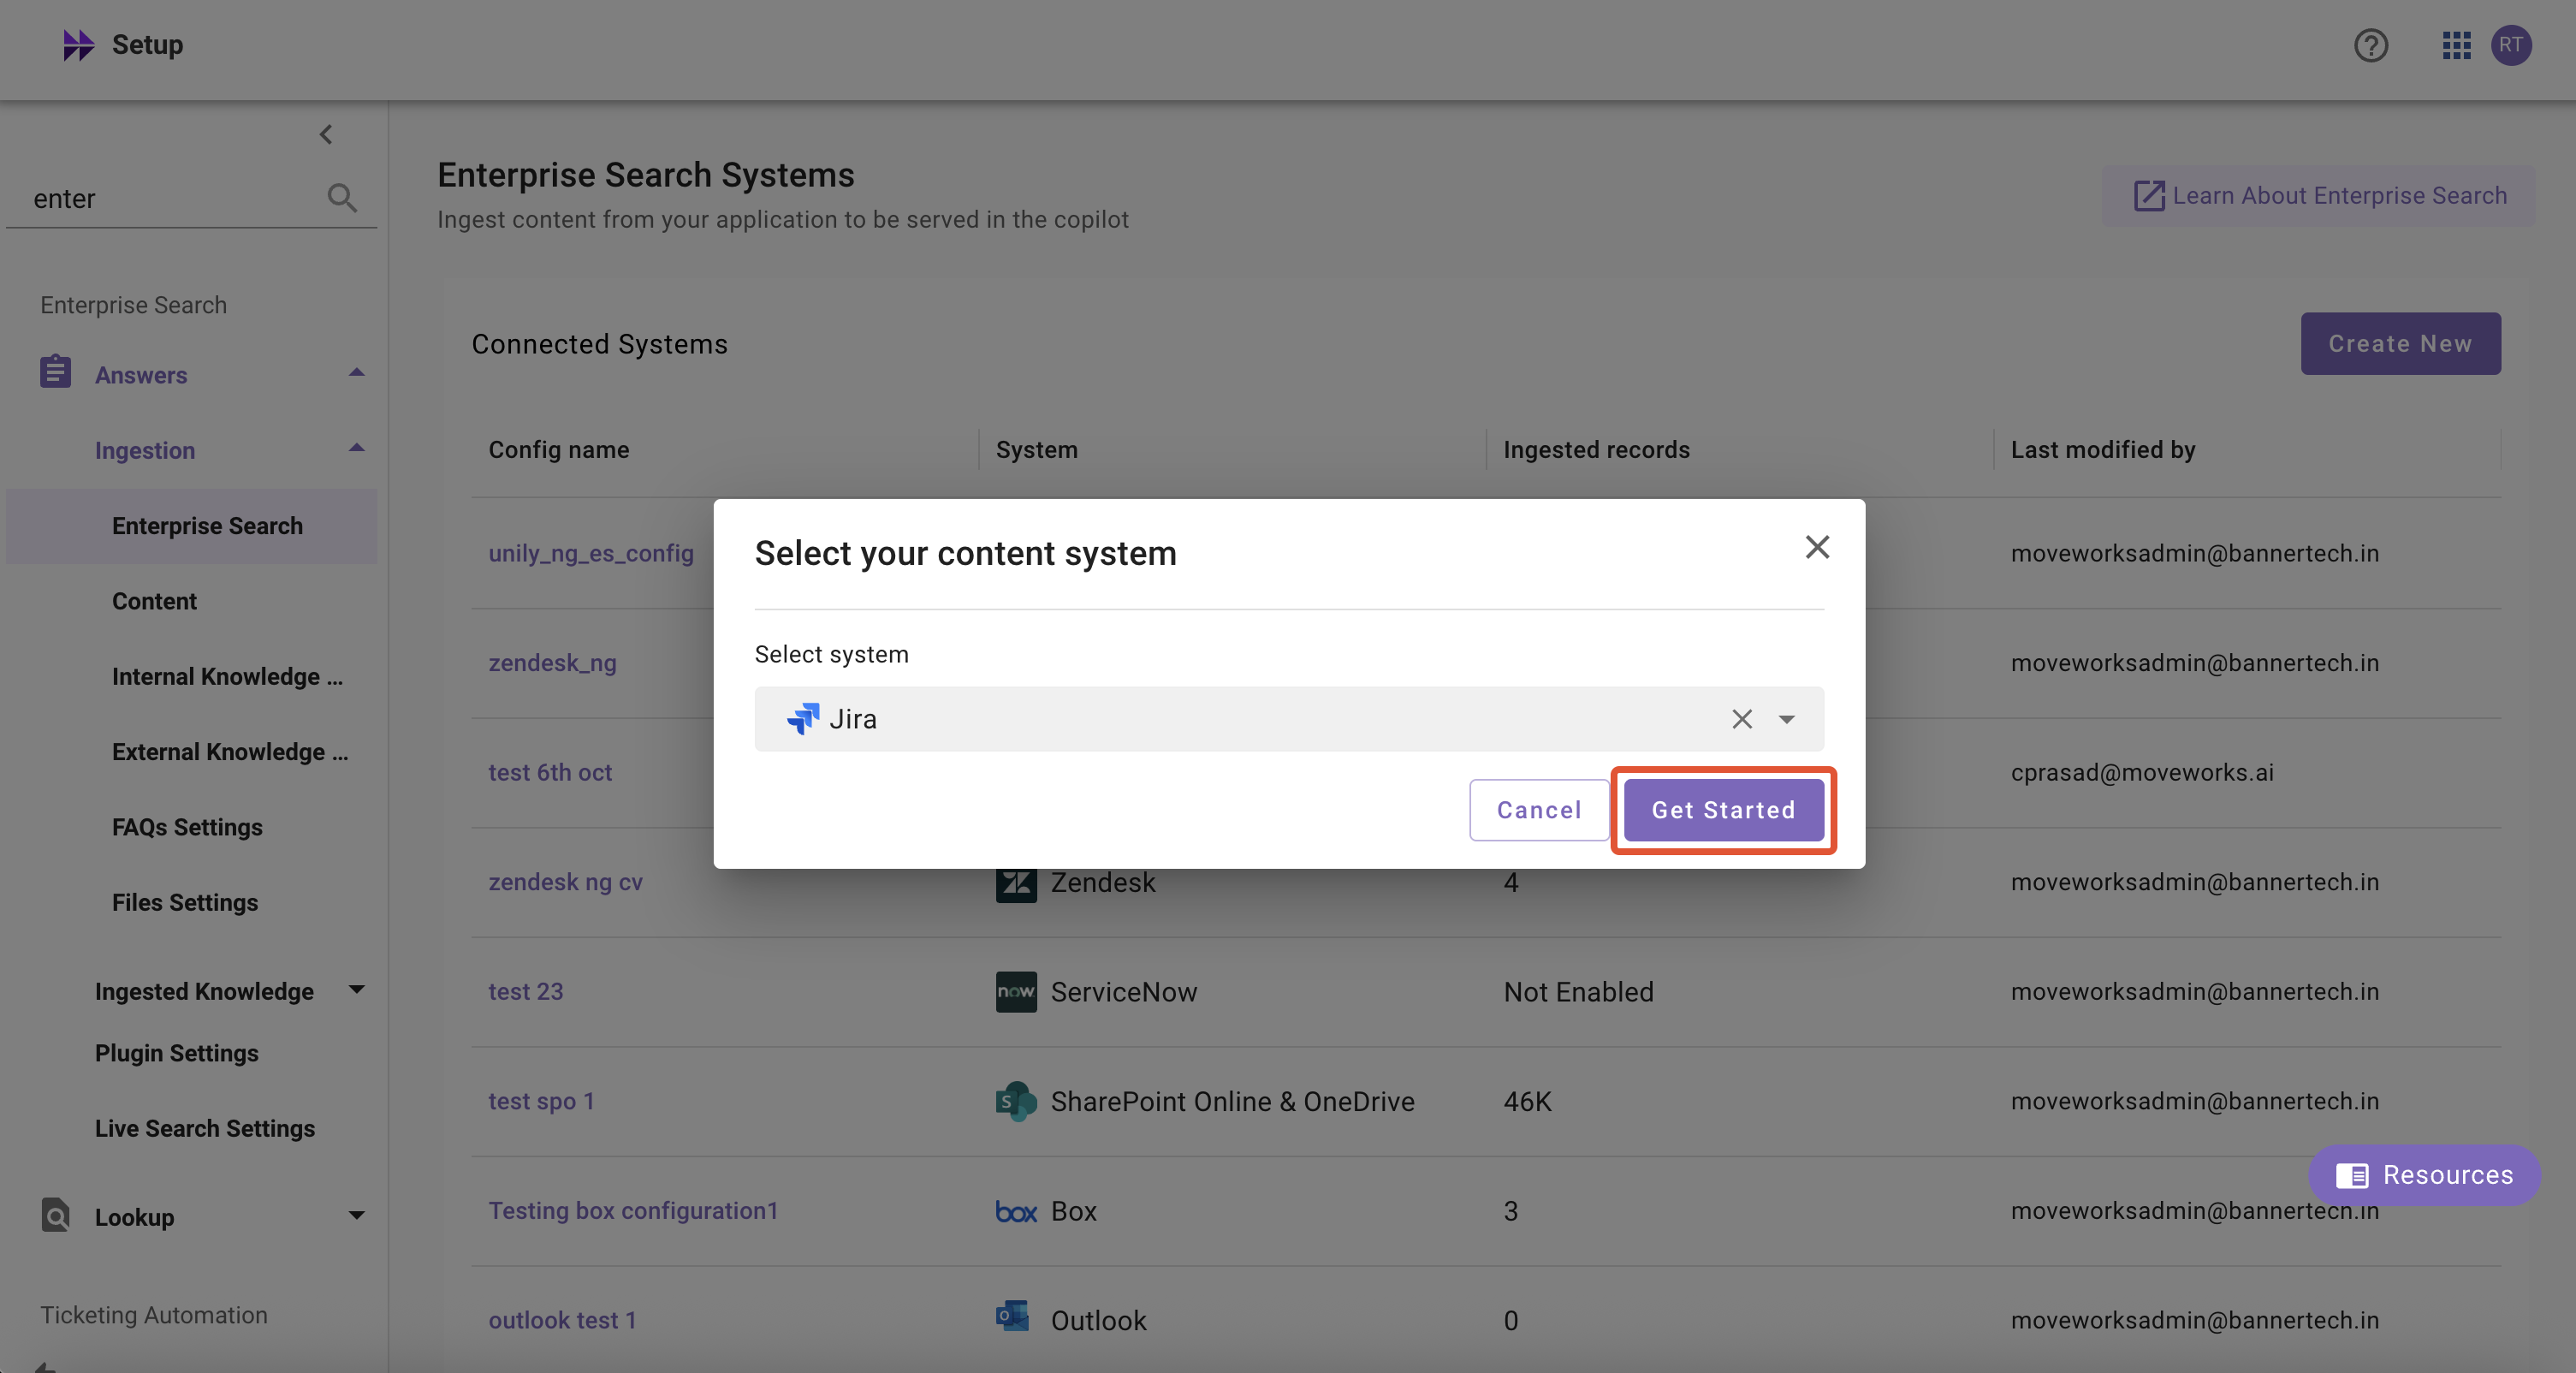
Select Jira from the dropdown list and click on Get Started button
-
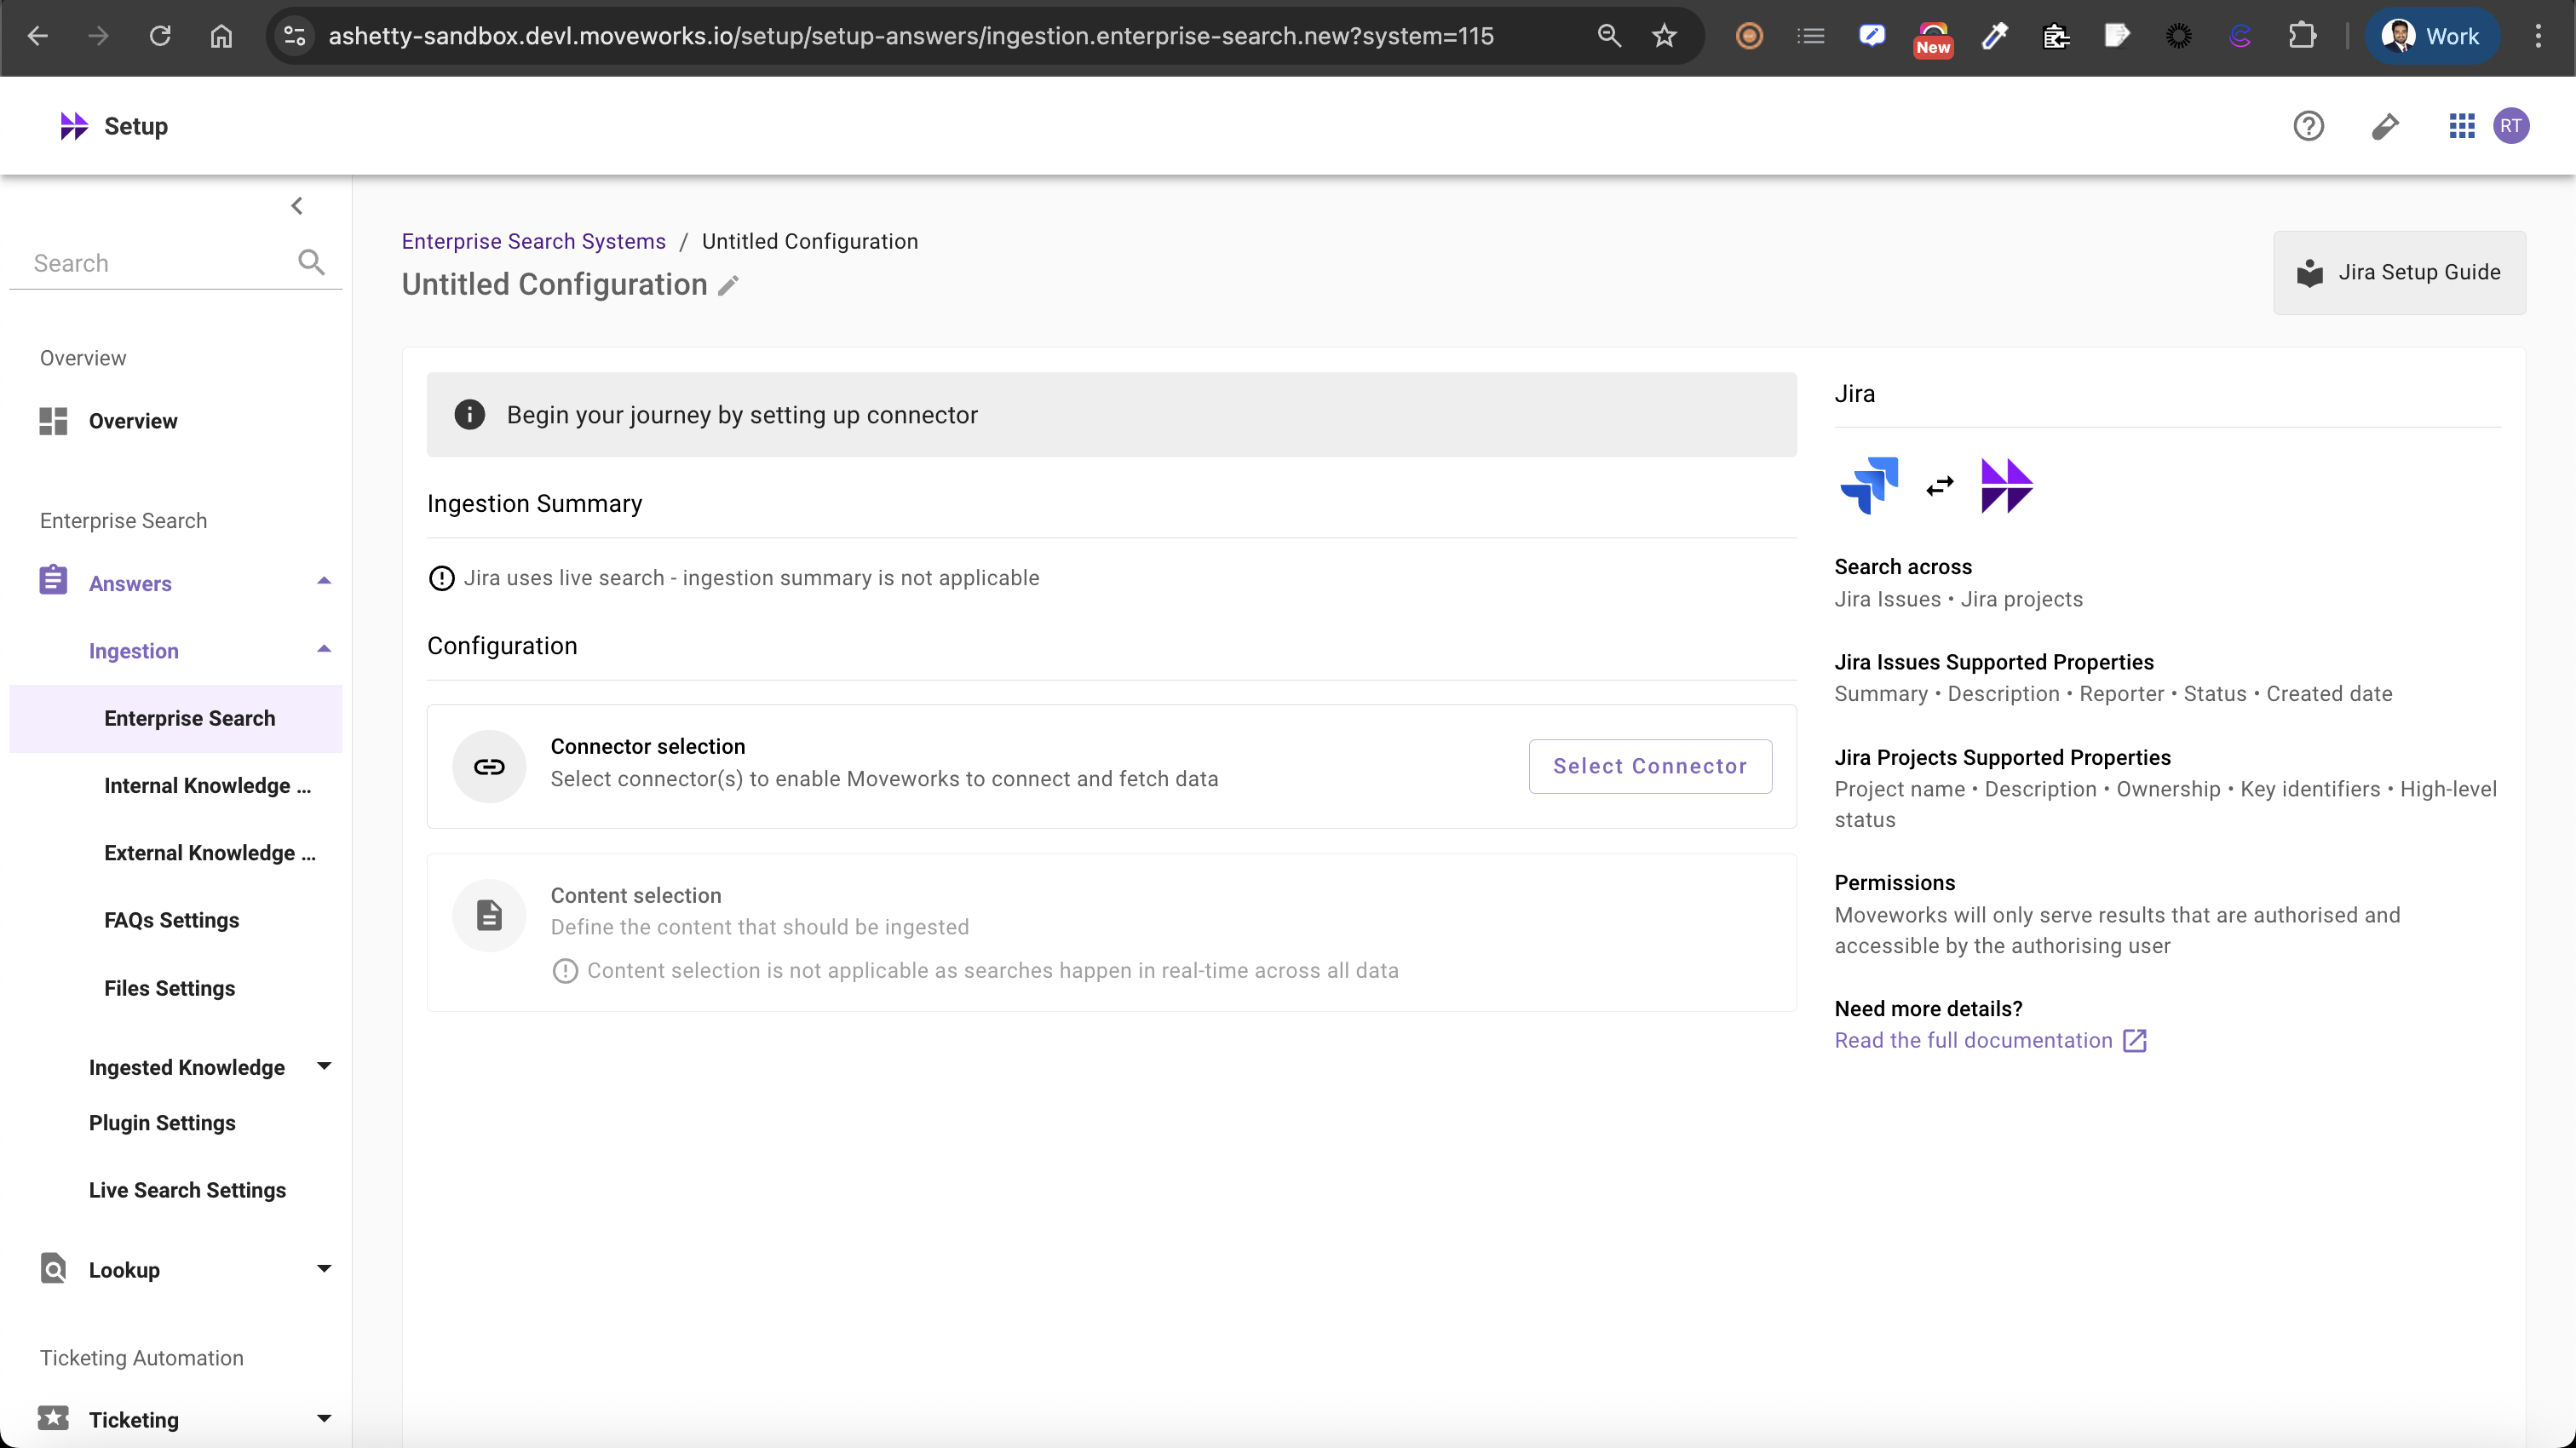
System Overview: This presents an overview of Jira support from Moveworks
- Ingestion Summary: Not applicable for Live Search systems
- Connector Selection: In this configuration block, you are required to select the required connector to enable Moveworks to connect and fetch data or enable live search
- Content Selection: In this configuration block, you are required to define the content that should be ingested within Moveworks
Connector Selection and Validation
-
Once you click on Select Connector, a connector setup screen will appear as follows
-
Select the connector (from the dropdown) that you have created in the Connector Creation step
Please note: Only the Jira connectors will appear in this list.
-
Once the connector is selected, you need to click on Start Validation to validate the connector credentials and required scope
Connector Validation
This is a mandatory step in order to save the configuration and move to the next step.
Moveworks validates the selected connector to check:
- Content: Moveworks validates whether connector has right scopes to fetch content
-
If there are any credentials or scope issues, you will receive an error message as follows. Click on View Details to identify the issue.
-
Once the connector is validated successfully, you will be able to Save the configuration
-
Input the unique configuration name and Save
-
Once the configuration is saved, you can view the unique configuration name at the top of the screen. You can also click the pencil 🖊️ icon to edit the configuration name
-
Additionally, you will see a banner at the top of the screen with an Enable Live Search button. Click it to activate the Jira Live Search feature for your Enterprise Search web application
-
Additionally, you will start seeing an entry of your configuration in the Enterprise Search home page. You can click on your configuration to go to edit/ complete the configuration
Audience configuration
Live Search does not serve results until you set the audience. From the configuration’s home page, open the Target audience tab and choose who can search — source permissions are always enforced on top of your selection.
Audience configuration is the same for every Max Capacity connector. For the full steps and options, see Step 4: Define Target Audience in the Max Capacity Setup overview.