Coupa - Lookup and Modify PO Headers
Coupa - Lookup and Modify PO Headers
Scenario
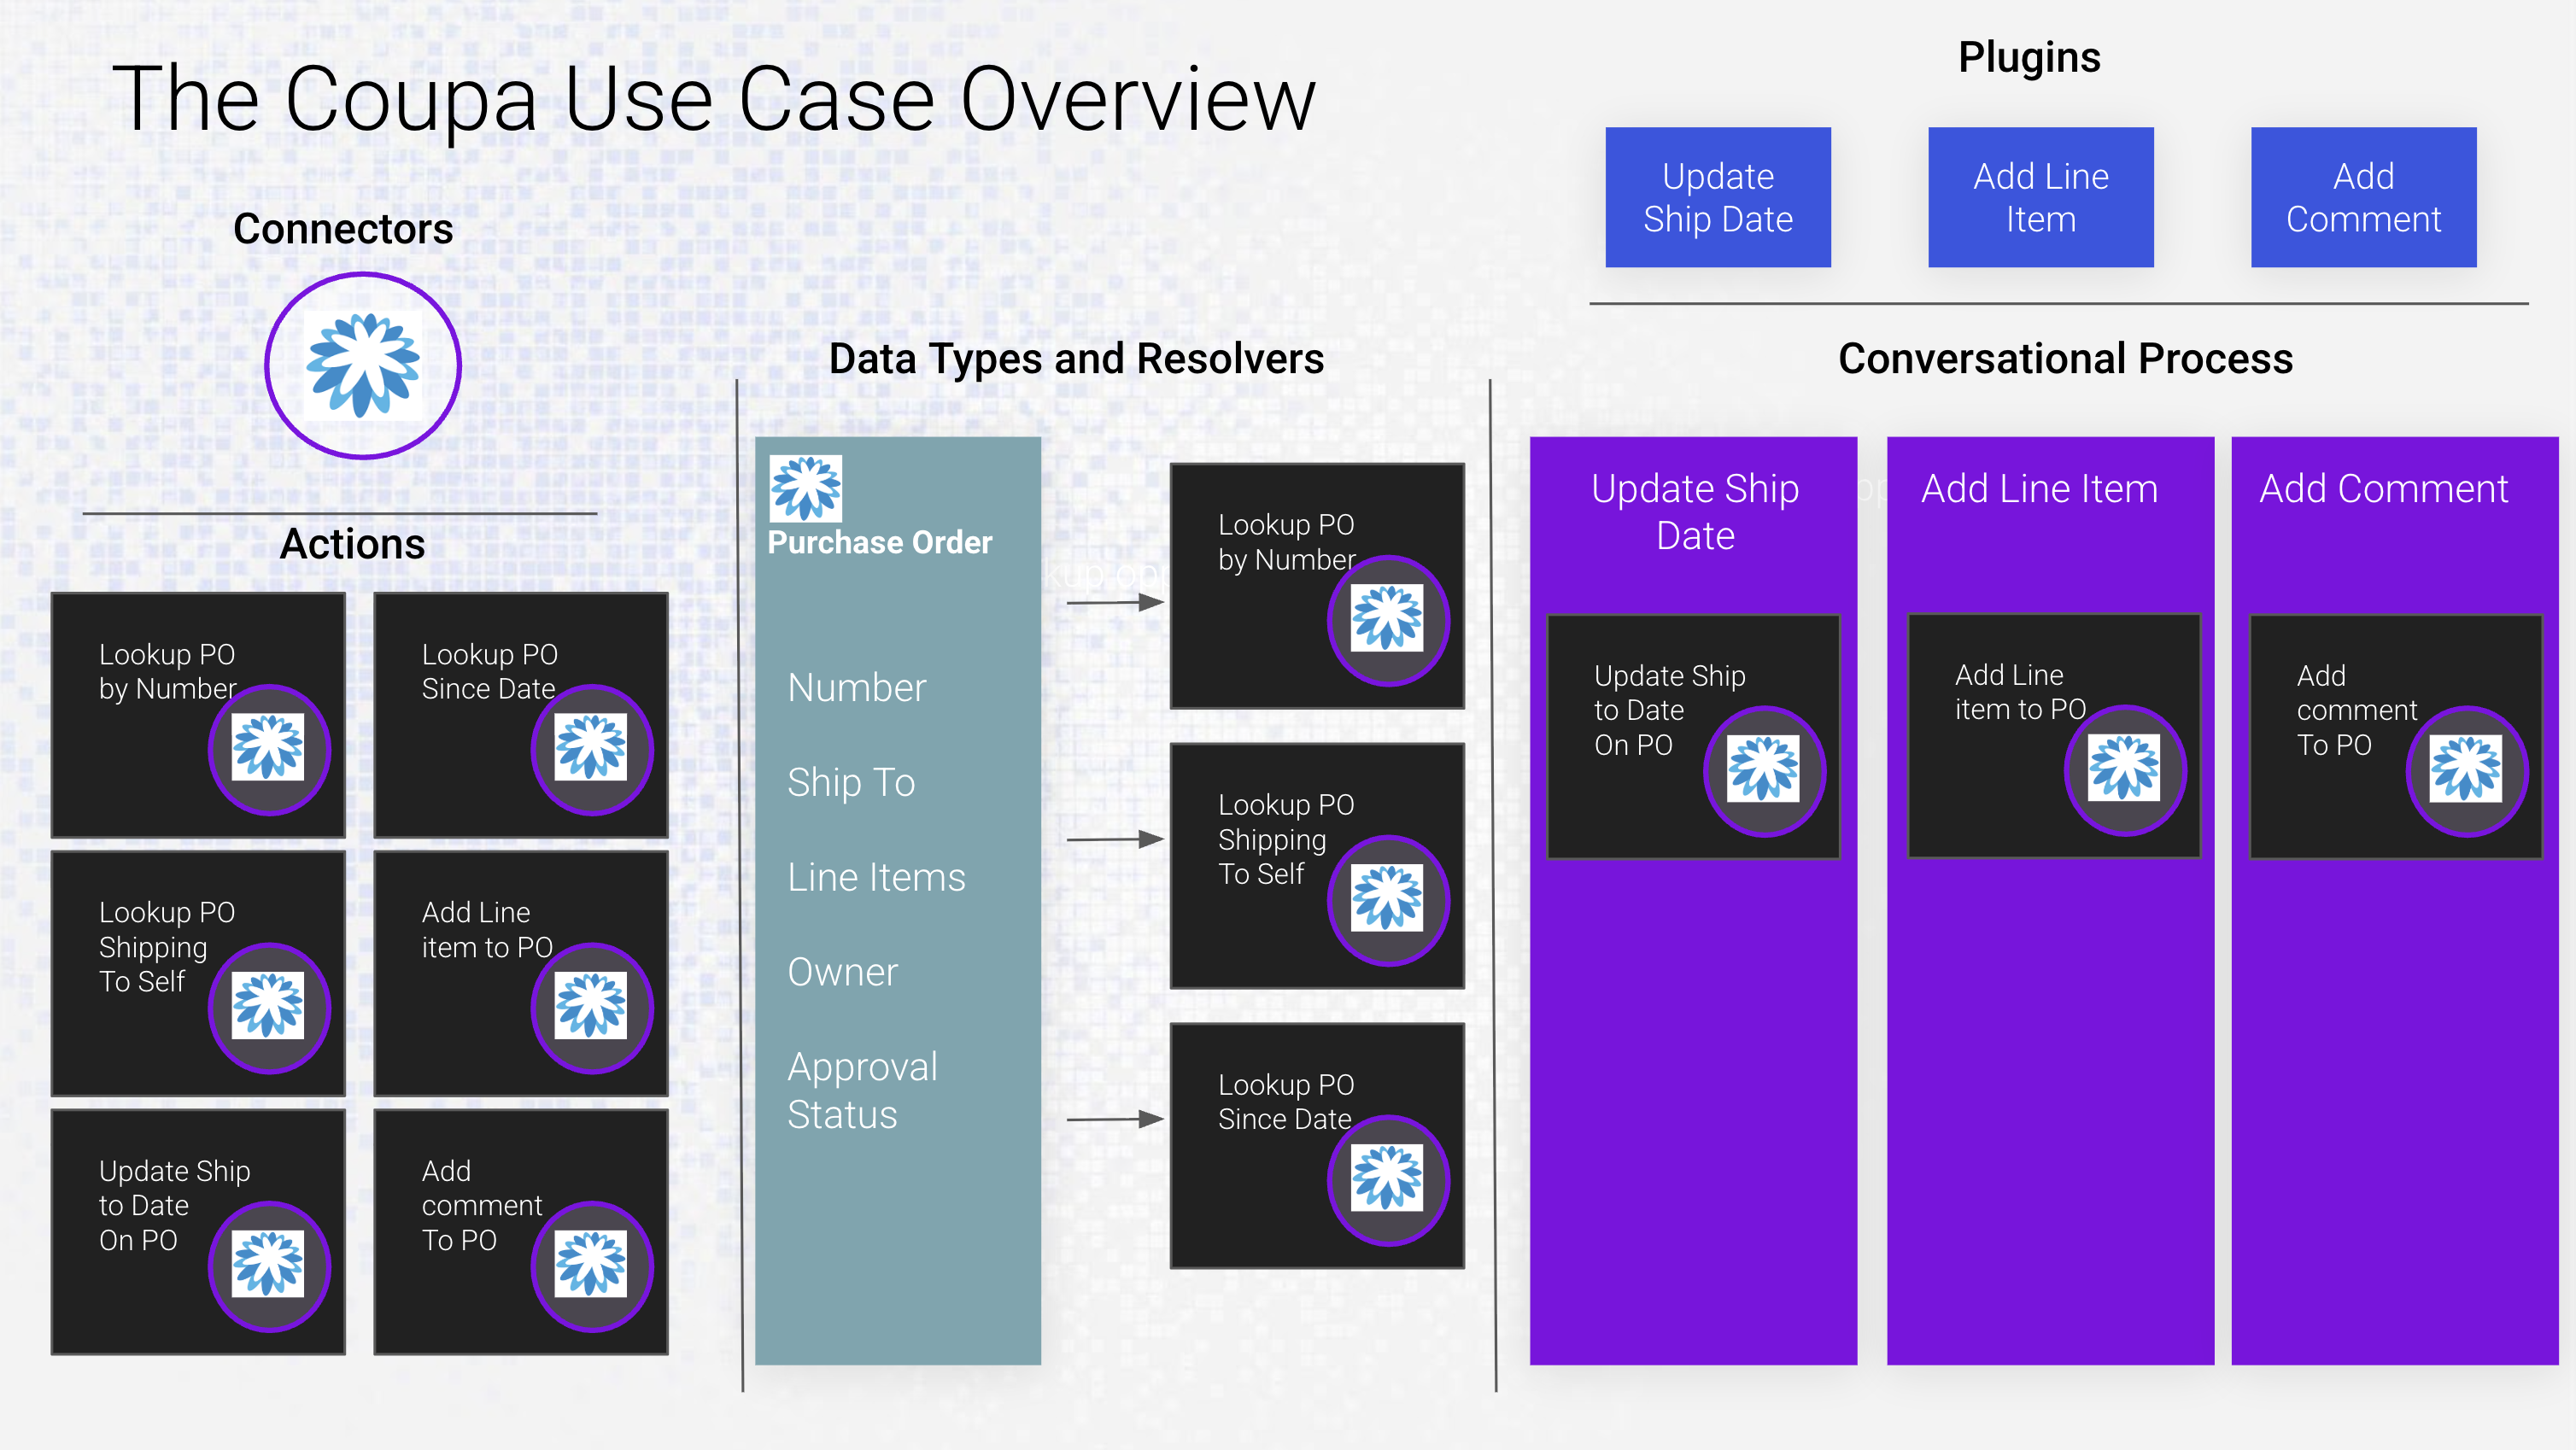
In this case we will build the ability for a user to lookup purchase order headers in Coupa, as well as some ways to add and update the Order Header
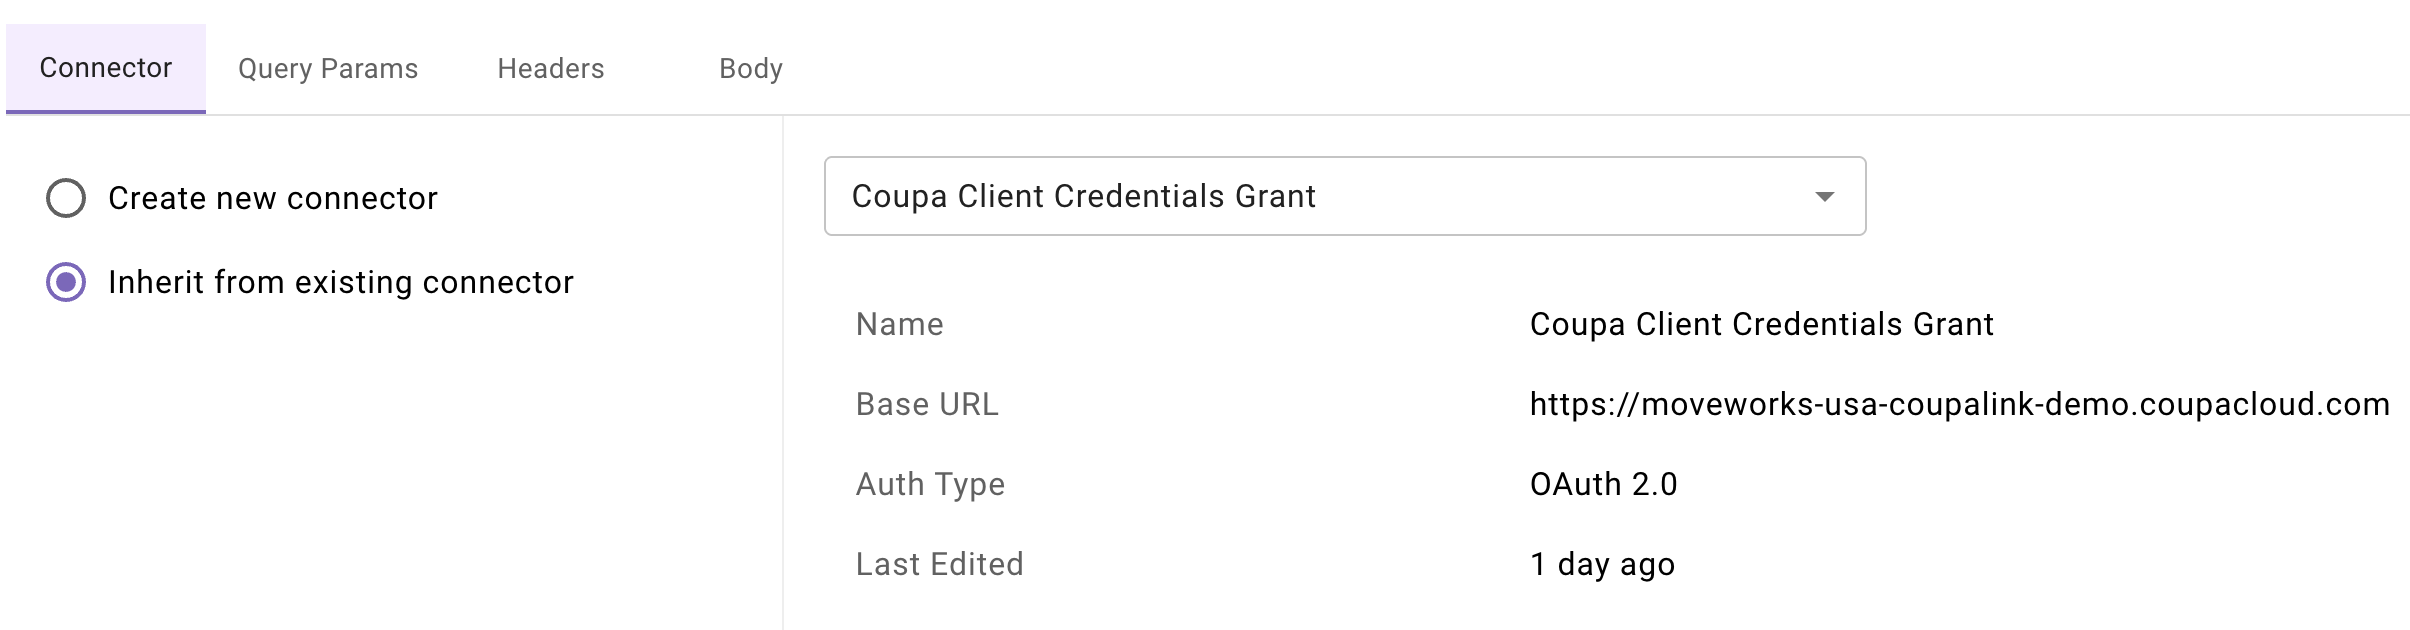
NOTE: You are provided a Coupa Sandbox instance in order to do this. You see an “Coupa Sandbox” connector in Agent Studio that has already been setup to make API calls. You will also be granted a login to the Coupa instance in the Okta Portal indicated by this icon. Since SSO is not provided here, so when you click on the tile you will have to login with the same credentials again that were given to you for your Okta login.

Tips
-
You’ll be using the “Coupa Client Credentials Grant” connector for this exercise.
-
Start with building your actions first. These are the building blocks that will be the foundation of your use case. You can find all the cURL commands listed below. You can import these cURL commands directly into the HTTP editor for HTTP actions.
-
Remember the “Import JSON” feature when you create your Purchase Order object. This comes in handy.
Things to Know
GraphQL
Depending on the REST API call you are making to Coupa, the payload for a given object can get very large due to the amount of relational objects. For this reason, instead of directly invoking the API calls to retrieve purchase order information, we are able to leverage Coupa’s GraphQL API. This will allow us to control, refine and filter the data we receive in the response payload to display only the fields we care about for this use case.
Actions
- Get PO by number
- Get POs by Ship To Name
- Get POs Since Created Date - NOTE: Date must be in the format YYYY-MM-DD
- Add a Line Item to a PO
- Update the Ship To Person of a PO
- Add a comment to a PO
Coupa Specifics You Should Know
-
You’ll notice some things are hardcoded in these API calls such as “code” being “SF-IT-Indirect”. This is specific to this Sandbox instance - this can also be taken as a variable but for simplicity sake of this exercise we will hardcode it.
-
In order to find Purchase Orders to interact with, navigate to the menu as shown on the screenshot below upon logging in. You’ll see a list of Purchase Orders here.
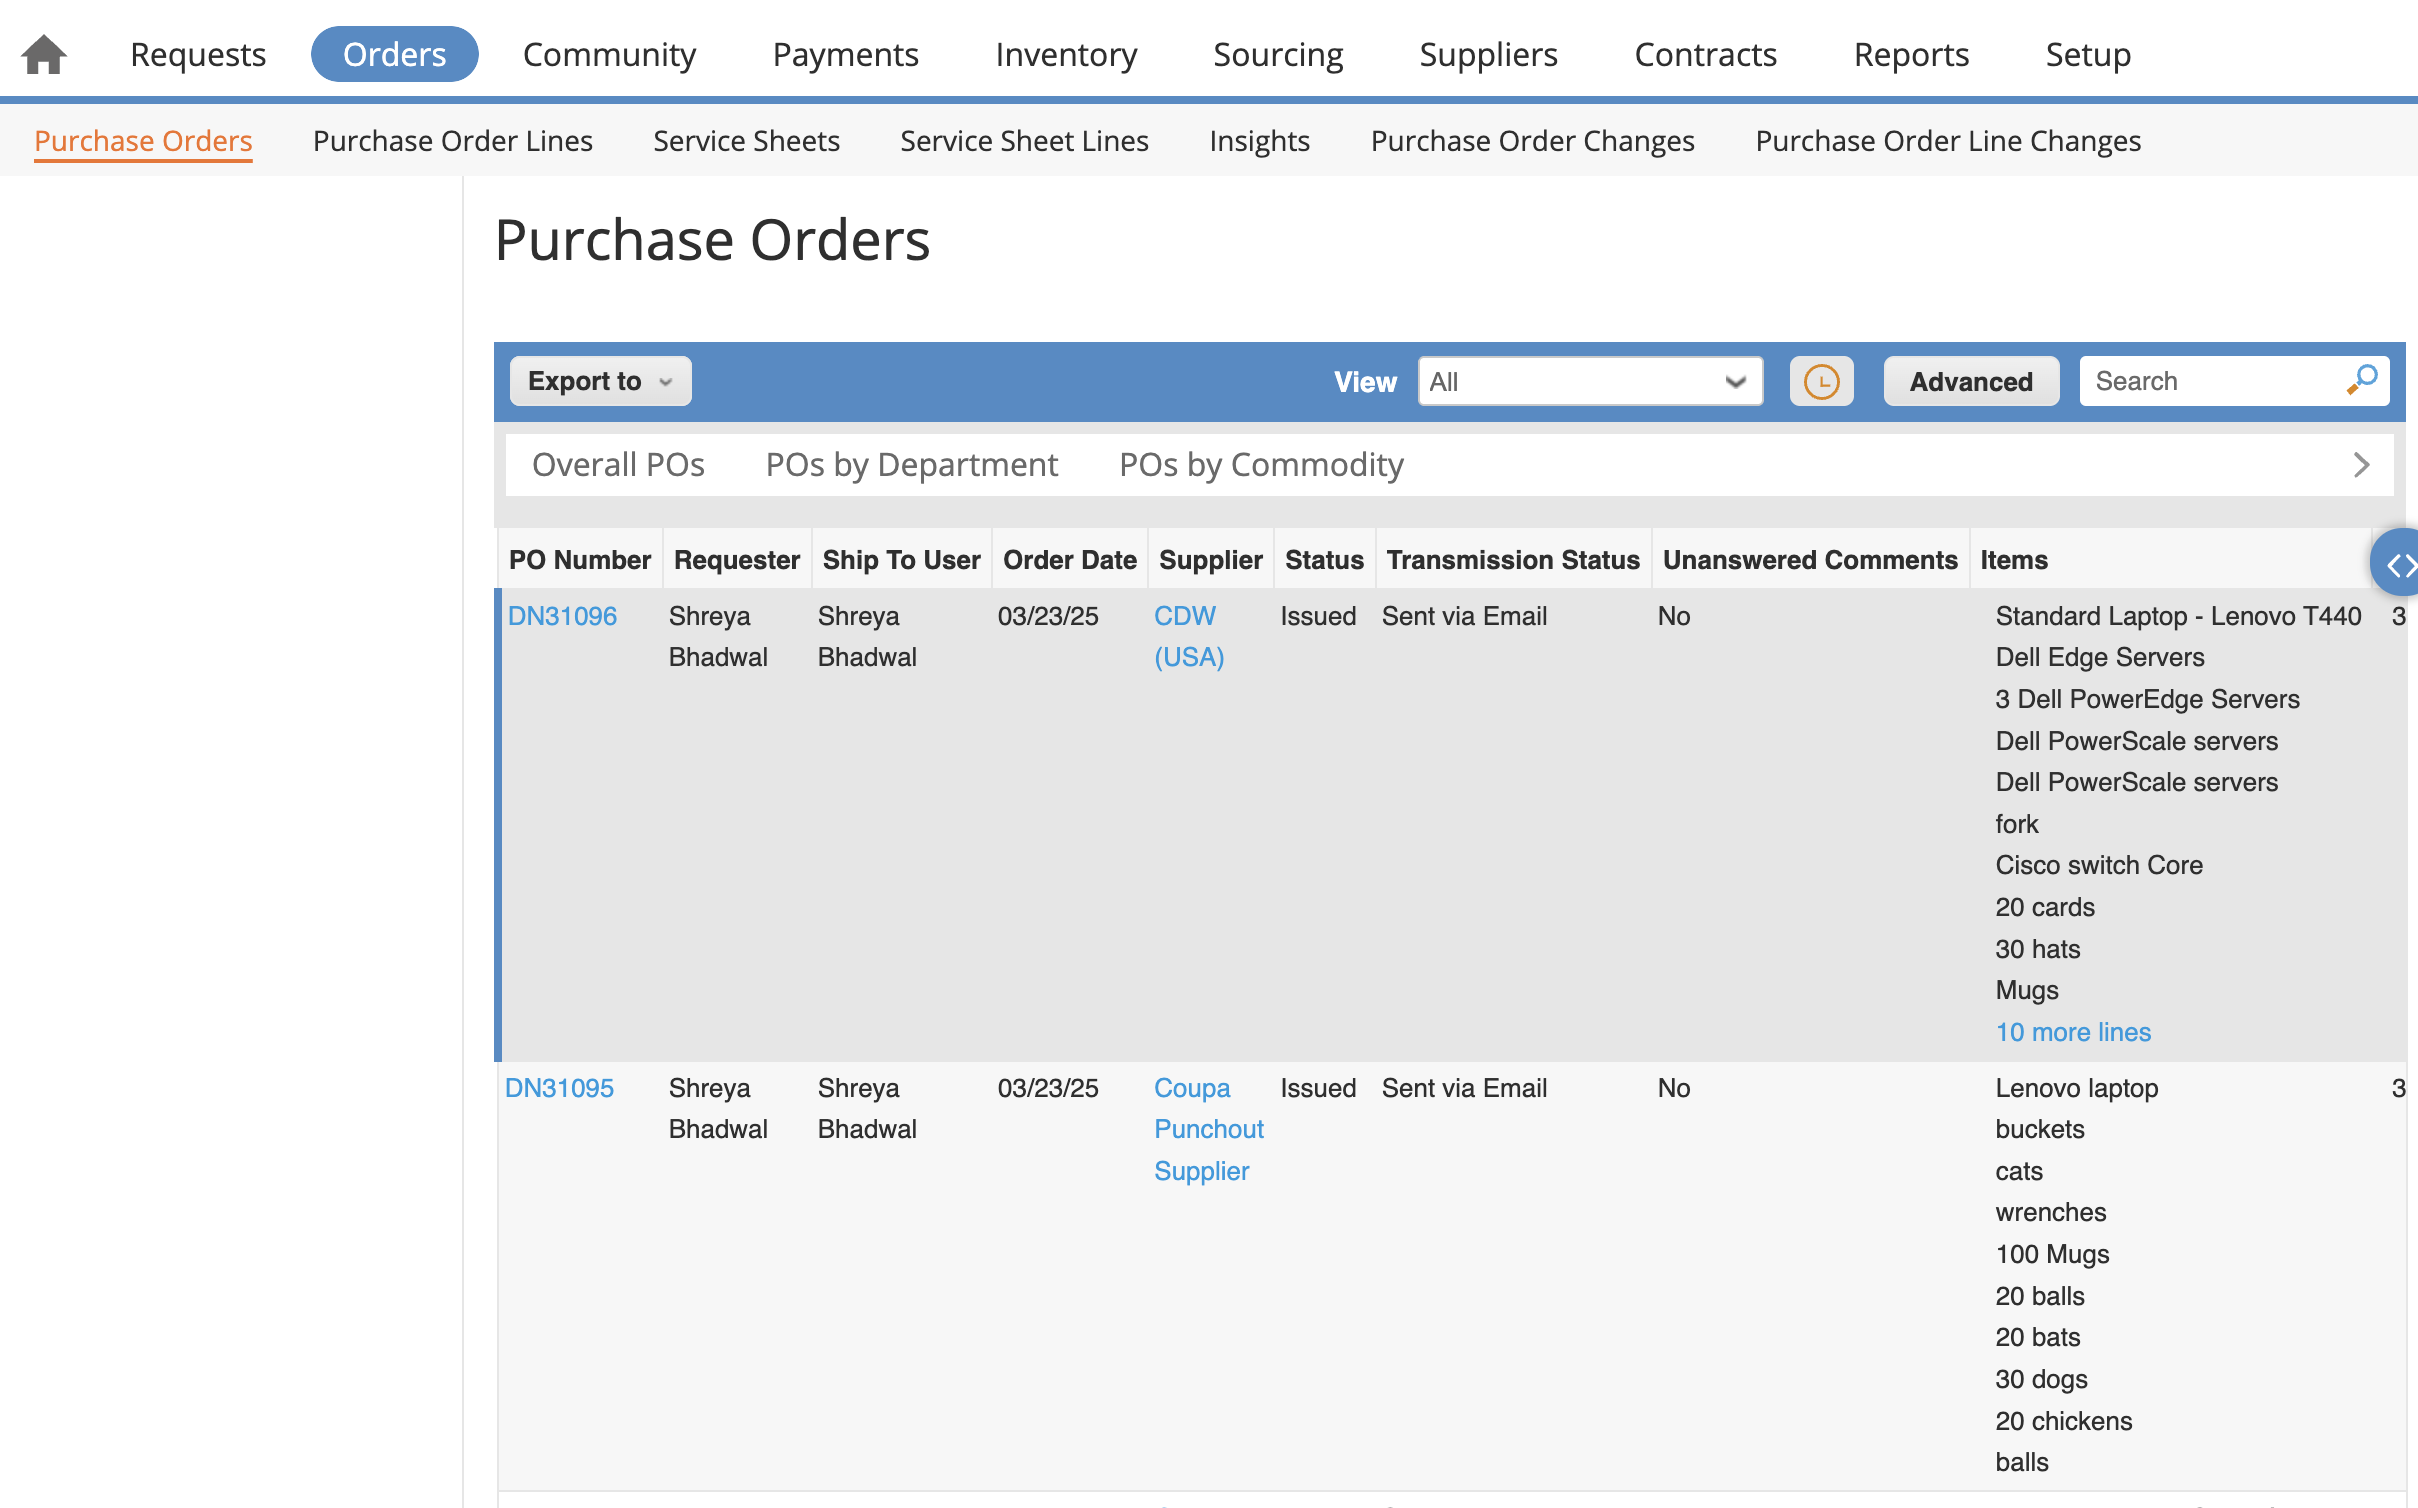
-
You’ll notice the PO Number in the Coupa Portal starts with “DN”. When interacting with the API however, the “DN” is not used, only the number after it. Do not use the “DN” prefix when testing or taking input from the user. Have them enter simply the number because of this.