Box Setup for Enterprise Search
This page is for the Box (Next Gen) connector and it can only be configured within the new enterprise search configuration experience explained below.
Please visit this documentation to learn more about Max Capacity and Classic connectors.
System Overview
Box is your organization’s secure Content Cloud for managing files, collaborating on documents, and streamlining workflows. It acts as a central repository where teams store everything from strategic plans to technical specifications. Moveworks connects to Box to index the files within your folders—including PDFs, presentations, and spreadsheets—along with their associated metadata and permissions, ensuring that users can instantly locate the specific documents they need while strictly adhering to the access controls you’ve established.
Authentication
Moveworks supports two primary authentication methods for Box: OAuth 2.0 with the Refresh Token grant and Service Accounts with the Client Credentials grant.
Moveworks App with OAuth 2.0 Refresh Token Grant (Recommended) : The OAuth 2.0 refresh token enables the ingestion of both shared and private data for end users. This method utilizes the official Moveworks partner application, which facilitates full indexing of your data.
- Setup: A Box Admin or Co-admin installs the Moveworks application from the Box Marketplace and completes the OAuth 2.0 flow to configure the refresh token.
- Authorization: This method uses the Box Admin’s access token to authorize the connection with your Box instance.
Custom App with Server Authentication (Service Account)
- Setup: A Box Admin creates a new custom application within the Box instance that is tied to a service account.
- Authorization: This method uses an access token generated via the Client ID and Client Secret of the custom application to authorize the connection.
Permission enforcement
Moveworks preserves the collaboration permissions applied at the file or folder level within your Box instance. These collaborations are ingested regardless of which authentication method you choose.
Currently, we do not support showcasing files to a user that are accessible through shared links (if the user is not added as a collaborator and only has access via the shareable link). However, if the user is added as a collaborator, they will be able to access the file
Recommendation: We strongly recommend that the primary Box Admin generates the refresh token or completes the credential setup for the Moveworks application (OAuth 2.0 Refresh Token Grant).
Note: Do not use a Co-admin account for this setup. Co-admins generally cannot access items owned by other Co-admins or the primary Admin. Therefore, if a Co-admin sets up the integration, Moveworks will be unable to crawl or index all expected information.
API usage
- Standard API: Moveworks uses Box’s standard API for Box to ingest all data
Content types
Moveworks supports the ingestion of files from your Box shared or private folders.
- Supported file formats: doc, docx, pdf, ppt, txt, html
Moveworks delivers comprehensive data coverage—including metadata, identity data, permissions data, and activity data—and keeps content in sync in real-time, ensuring that updates and permission changes are immediately reflected in search results.
Files with no extractable text content are excluded from ingestion and will not appear in Moveworks search results. This includes image-only PDFs, scanned documents without an OCR text layer, and blank documents.
Ensure that files you want to be searchable contain readable text rather than purely image-based or blank content.
Access Requirements
To set up Enterprise Search, please ensure you have the necessary Box inputs and have completed the prerequisites before proceeding to Moveworks Setup.
Moveworks Partner Application with OAuth2 refresh token grant
BOX Instance level API quota
Every Box instance has an API quota, and any API calls made to your instance consume this quota. However, Box has made special provisions for partner applications deployed on the Box Marketplace—API calls made through these applications do not consume your API quota and are not chargeable.
Moveworks recommends installing the Moveworks partner application when setting up Box within Enterprise Search, as it allows Moveworks to fully index your Box instance without any pricing implications or risk of surpassing the API quota.
Private data ingestion
In Enterprise Search, Moveworks offers private data ingestion. Each end user can authenticate with the Box instance and allow indexing of their data. All files related to an end user are stored in a secure user vault. Private data ingestion within Box can only be supported by using the Moveworks partner application.
The Moveworks partner application is a Moveworks-deployed app available on the Box Marketplace listing screen. A Box Admin must complete the installation to ensure the application is fully set up, enabling Moveworks to connect with Box.
How to install the application ?
- Ensure that you are the Box admin for your instance before proceeding with the steps below. If you are not a Box admin, please contact one and ask them to follow these instructions.
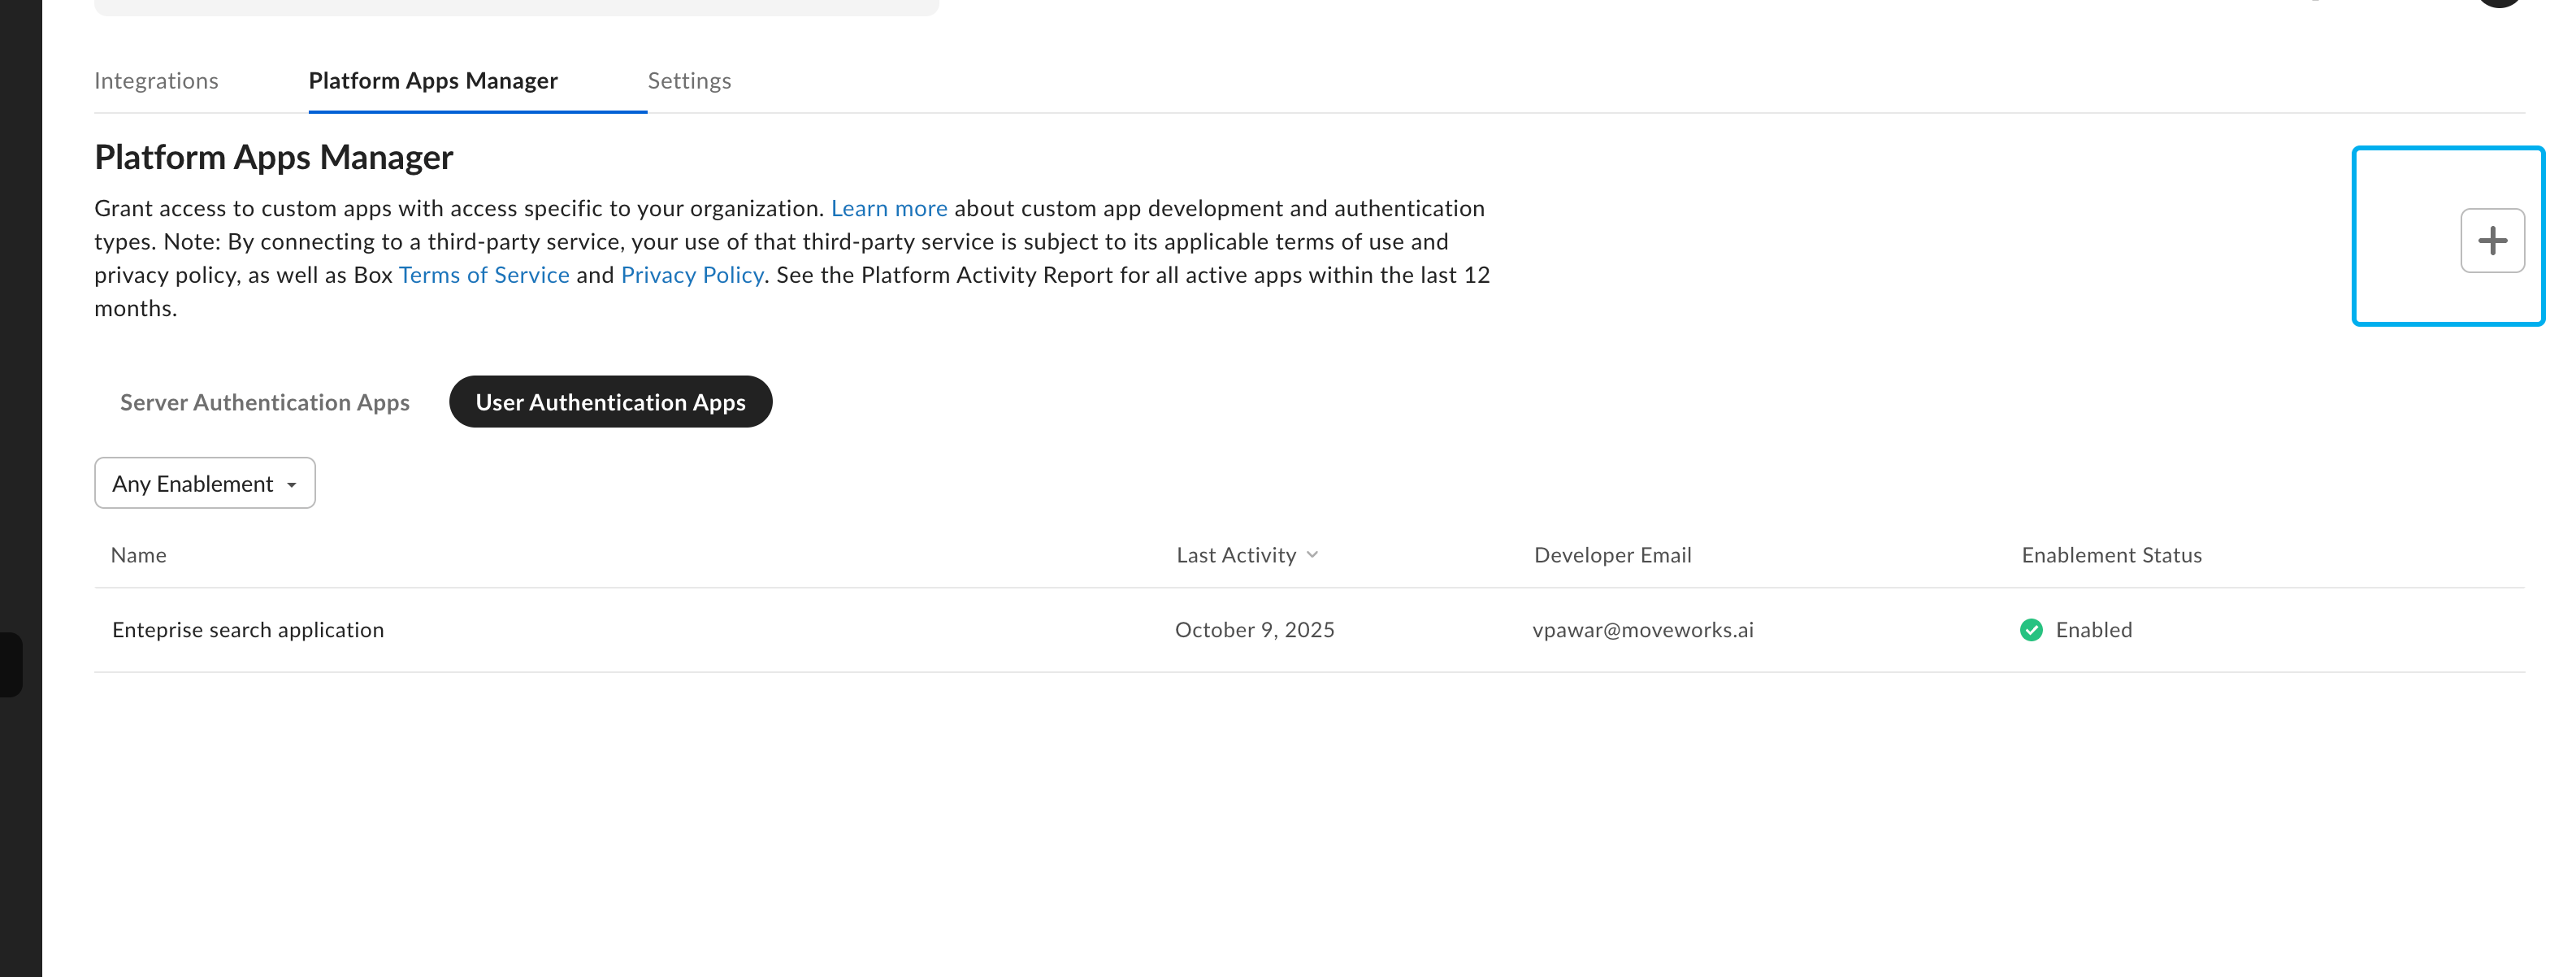
- Navigate to the Administration Console and go to the Platform Apps Manager section. You will see two options on the screen: Server Authentication Apps and User Authentication Apps. Click on User Authentication Apps. These apps require end users to authenticate with the instance.
- Only partner applications deployed on the Box Marketplace that have no pricing implications appear under User Authentication Apps. Click the “+” icon in the top-right corner to install the Moveworks partner application.
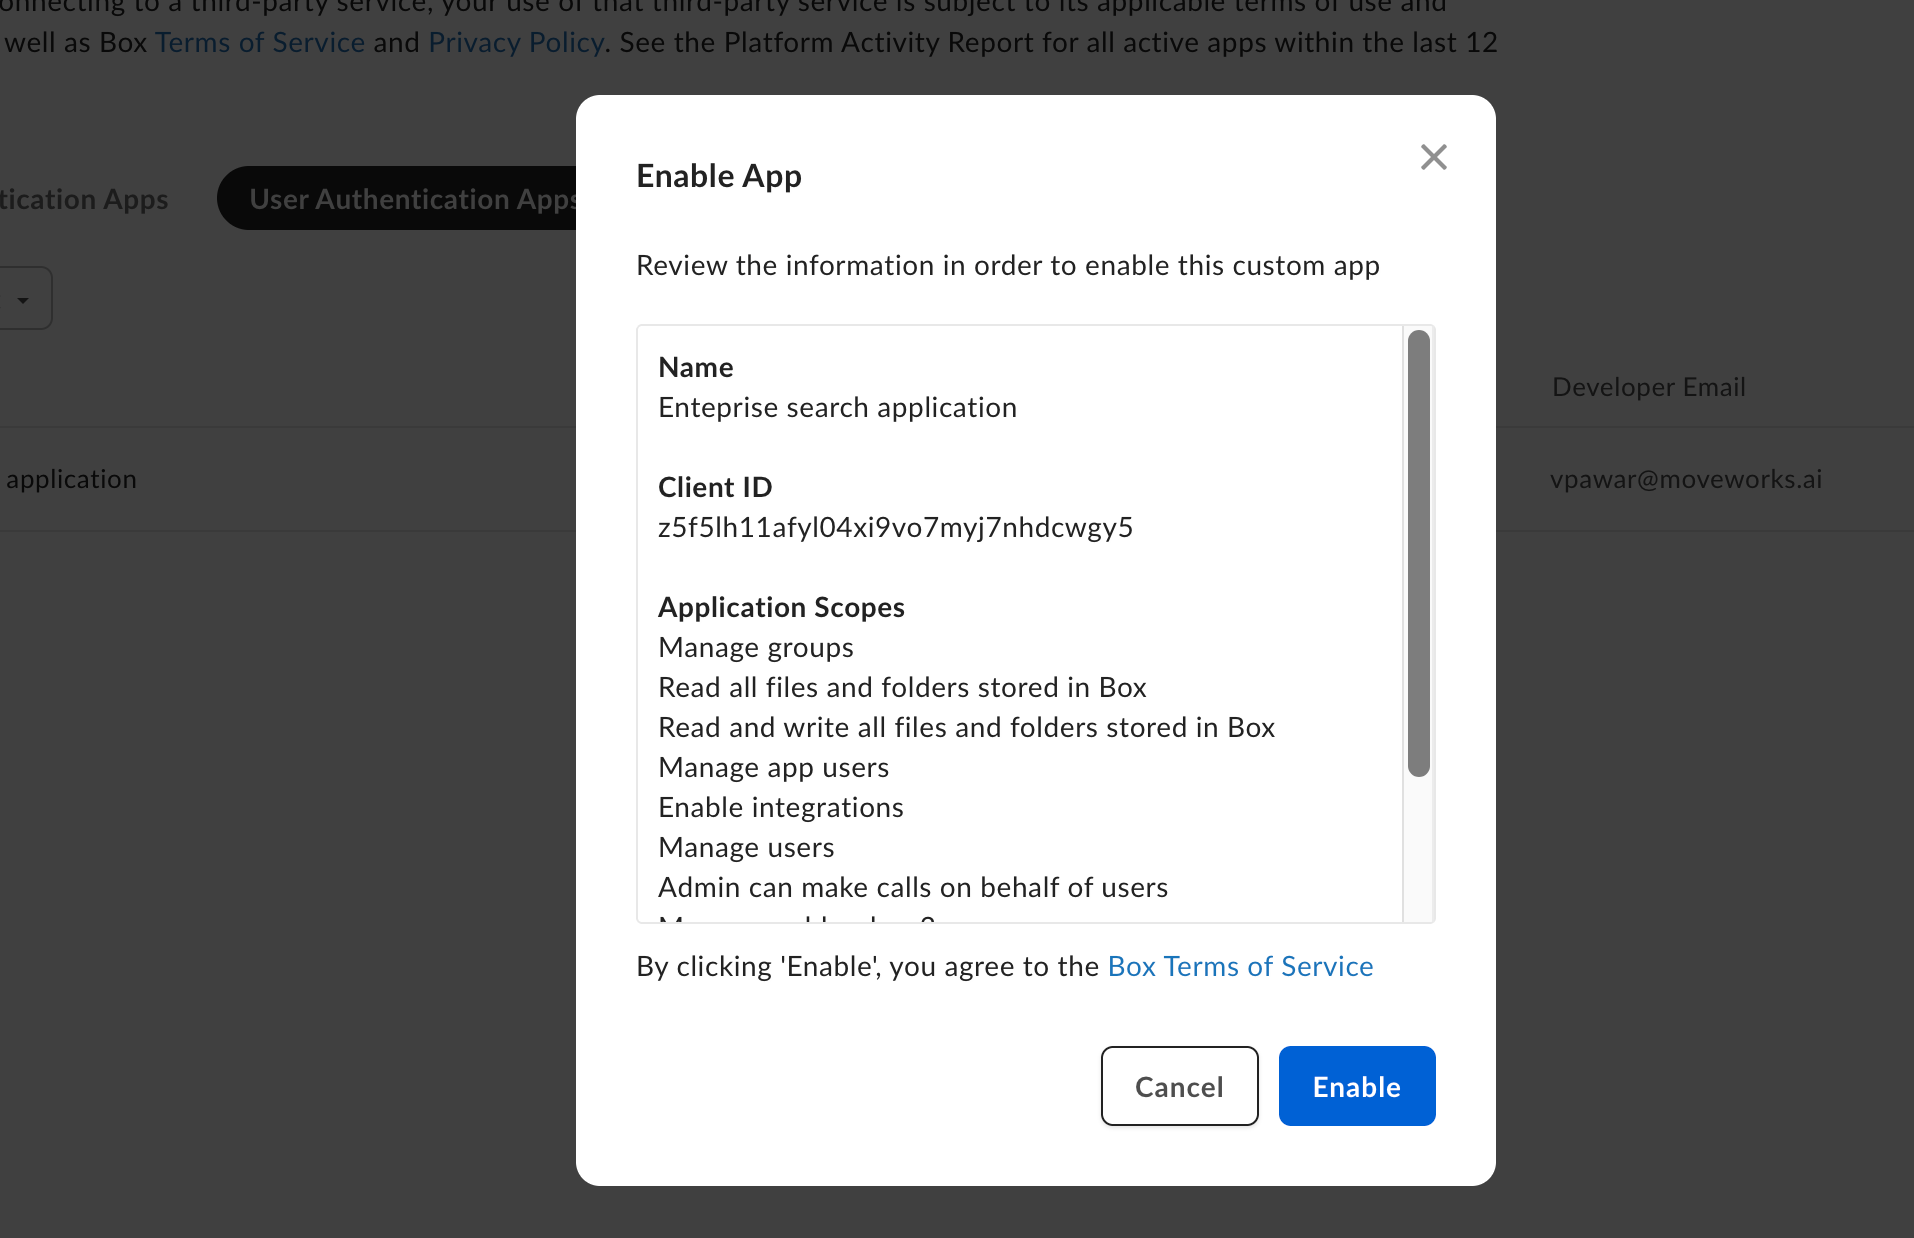
- You will see an input box where you need to enter the client ID. Enter the following ID to install the application:
Client ID: 4gjixwt10e2hpve9o0v2erfn4ynzruud - After submitting the form, a pop-up will appear. Click “Enable” to complete the onboarding of the application. Once this is done, the Moveworks application will be installed in your instance.
Configuration of the Moveworks Setup BOX connector
When using the Moveworks Partner application, we expect the refresh token to be configured in the Moveworks connector.
This can be generated by completing the following steps in Postman (API testing tool). You can search for postman directly in browser and download the tool, postman can also be used directly within the browser. You will need to create a account for it.
- Click a “New” button and create a new HTTP request
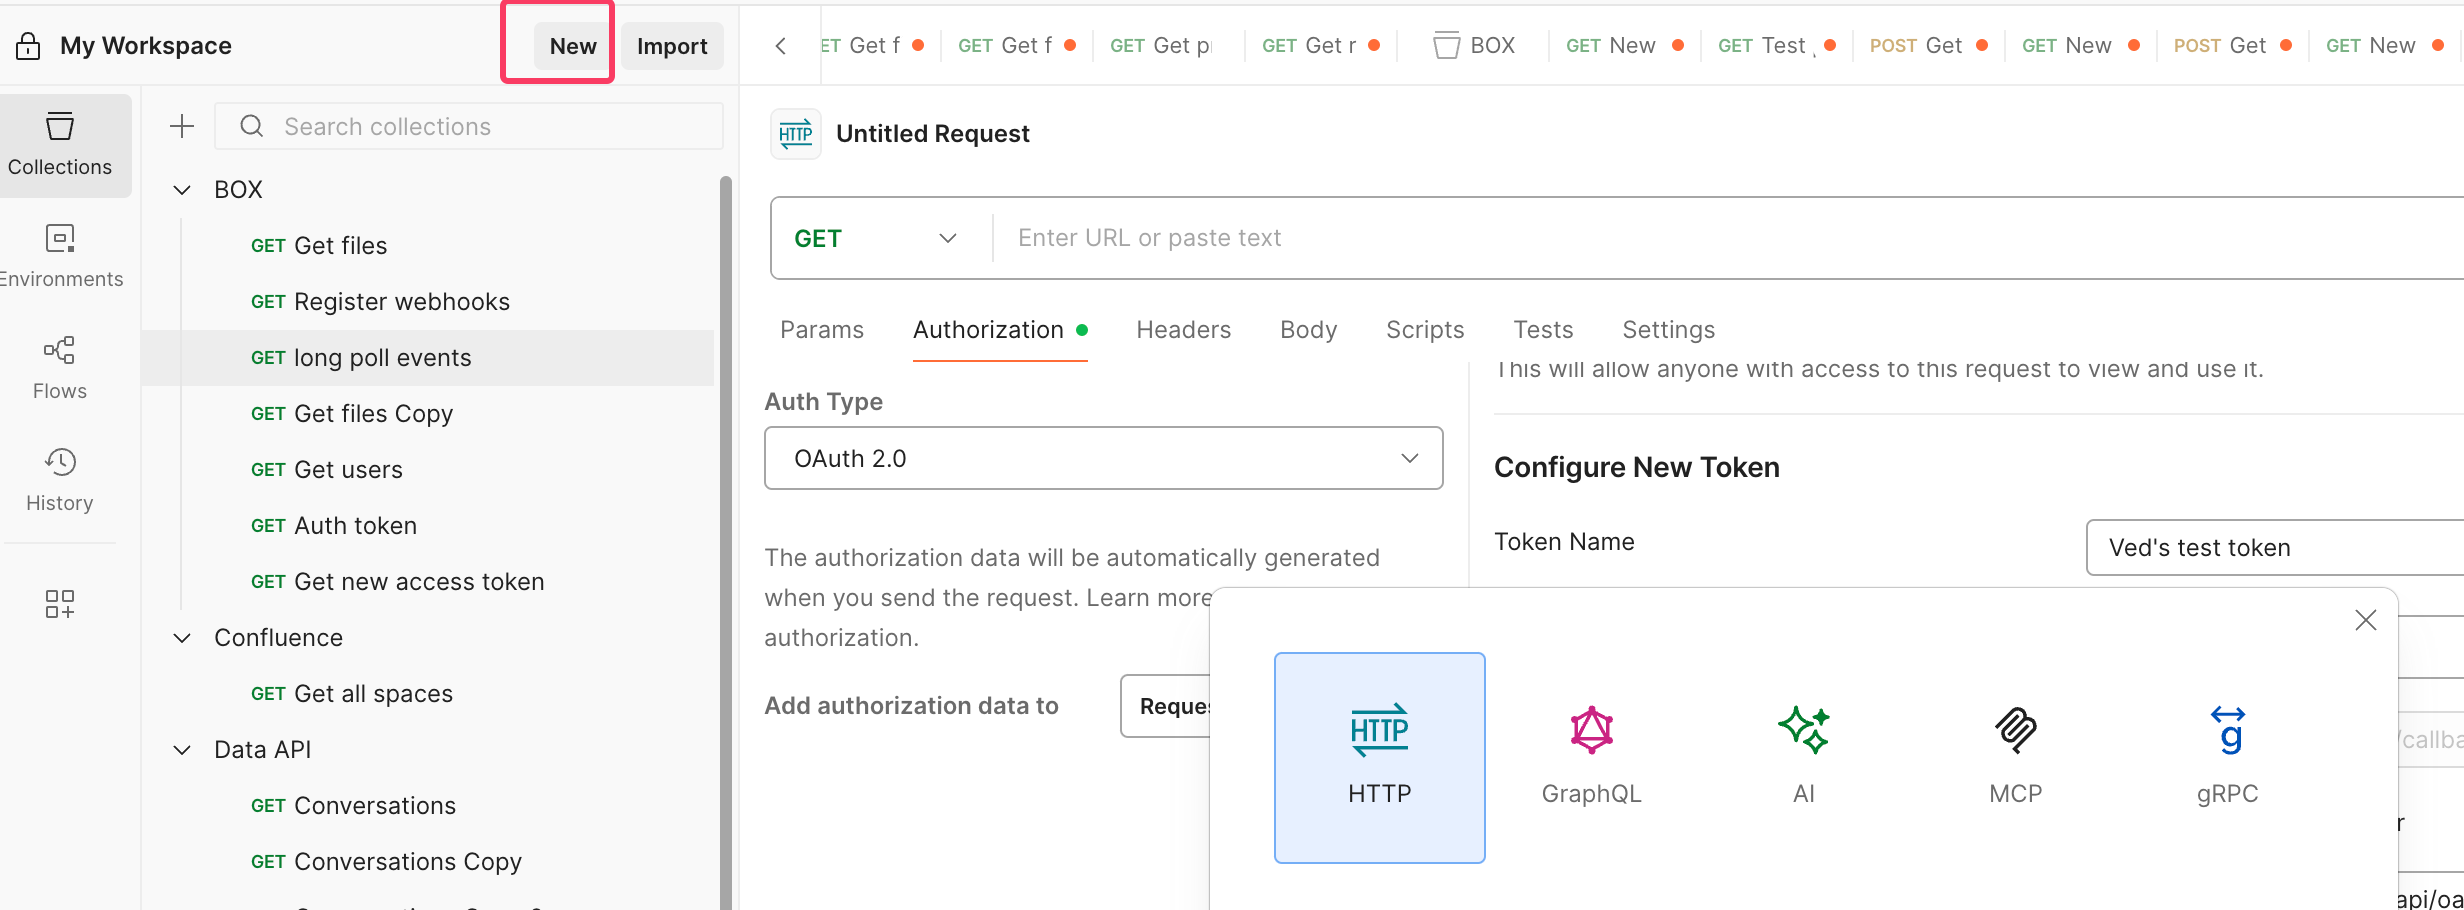
- Go to the Authorization tab and select the authentication type as OAuth 2.0. The grant type must be authorization code.
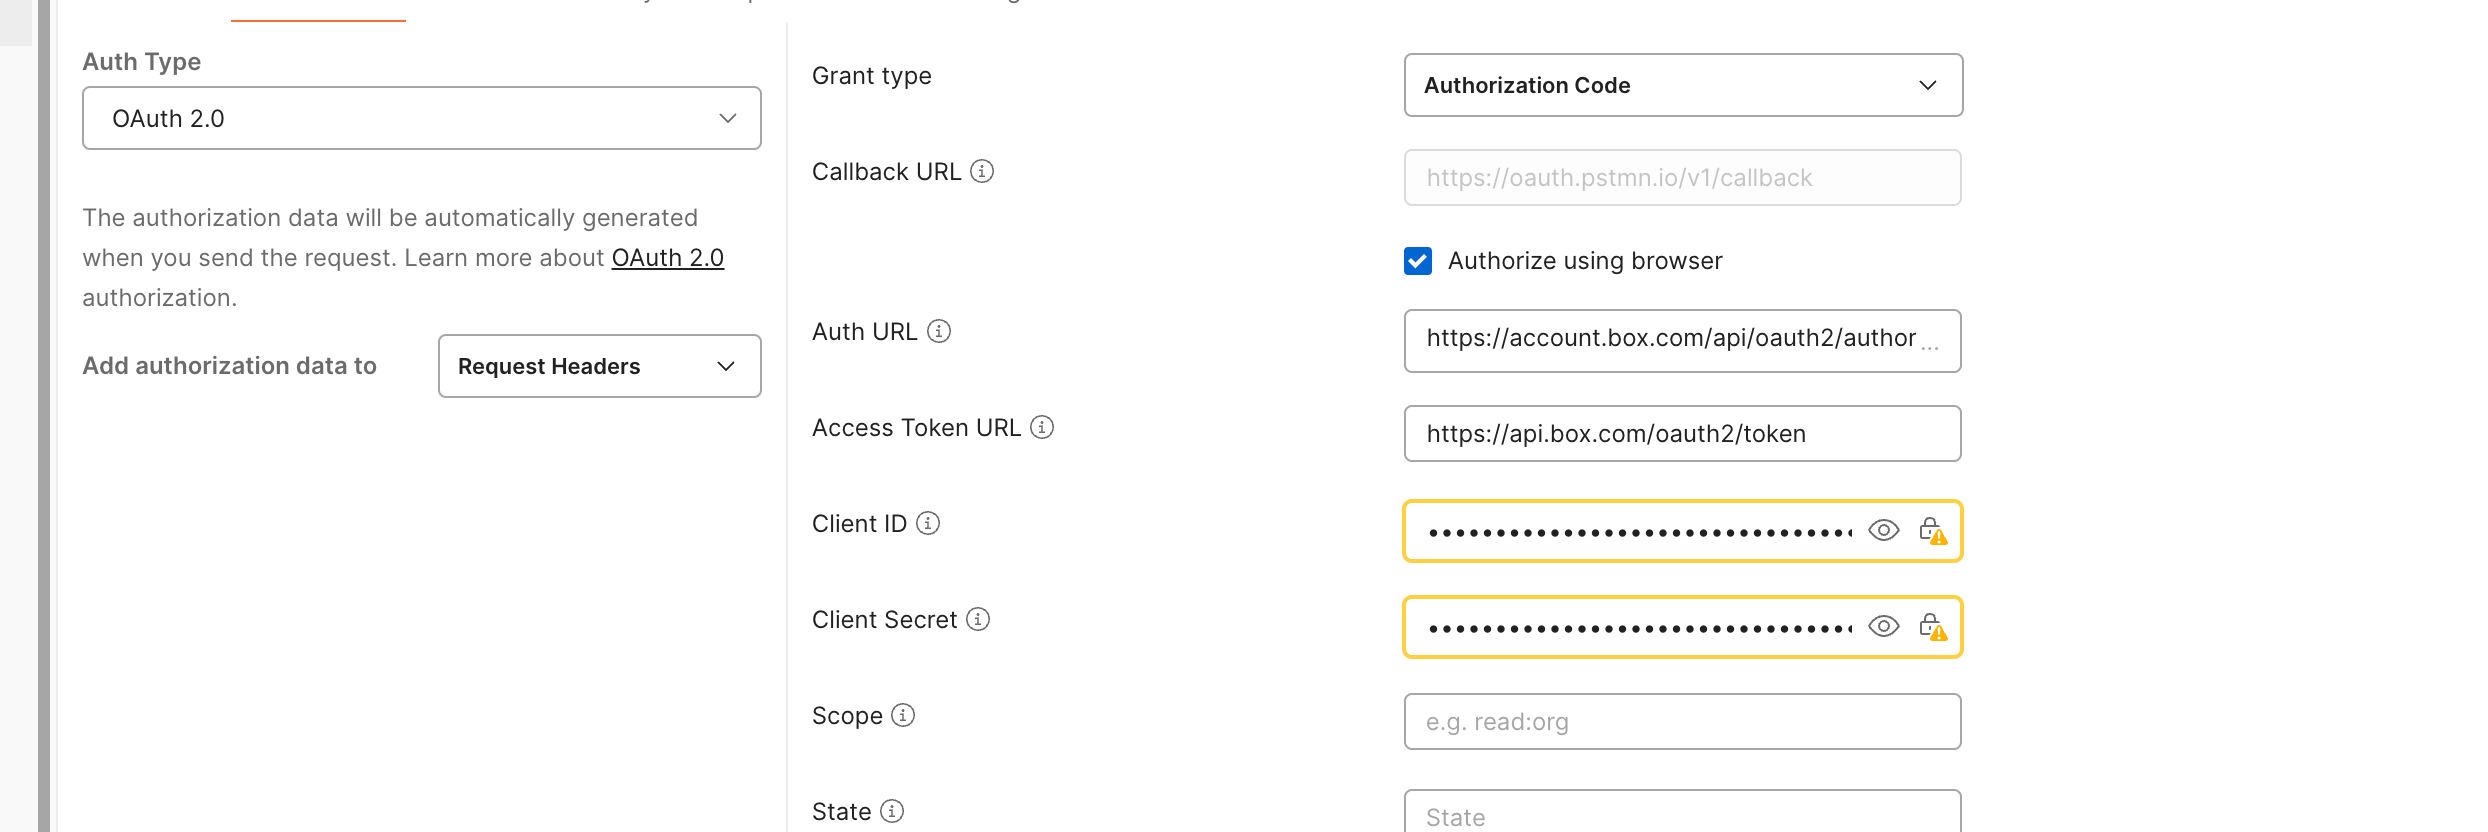 Set the following values in the fields accordingly
To get the Client Secret please reachout to the Moveworks. Through your customer success team
- Once done you will need click on the “Get New Access Token” button. This will redirect you to your browser to complete the OAuth2 flow and redirect back to postman to show the generated access token and refresh token URL. Copy the refresh token and keep it in a secured manner
This refresh token needs to be now entered into the Moveworks BOX connector as credential. This allows Moveworks to generate the Access token and ingest your documents.
Custom application with server authentication
In case you don’t want to enable the BOX private data ingestion or do not want to install the Moveworks application, a custom application can also be created which utilizes the client credentials based OAuth2 authorization in order to connect with your BOX instance.
Follow the below steps for creating the custom application
1. Create Box App and Grant Scopes
Creating an app
- Log in to https://cloud.app.box.com/developers/console.
- Select Create New App.
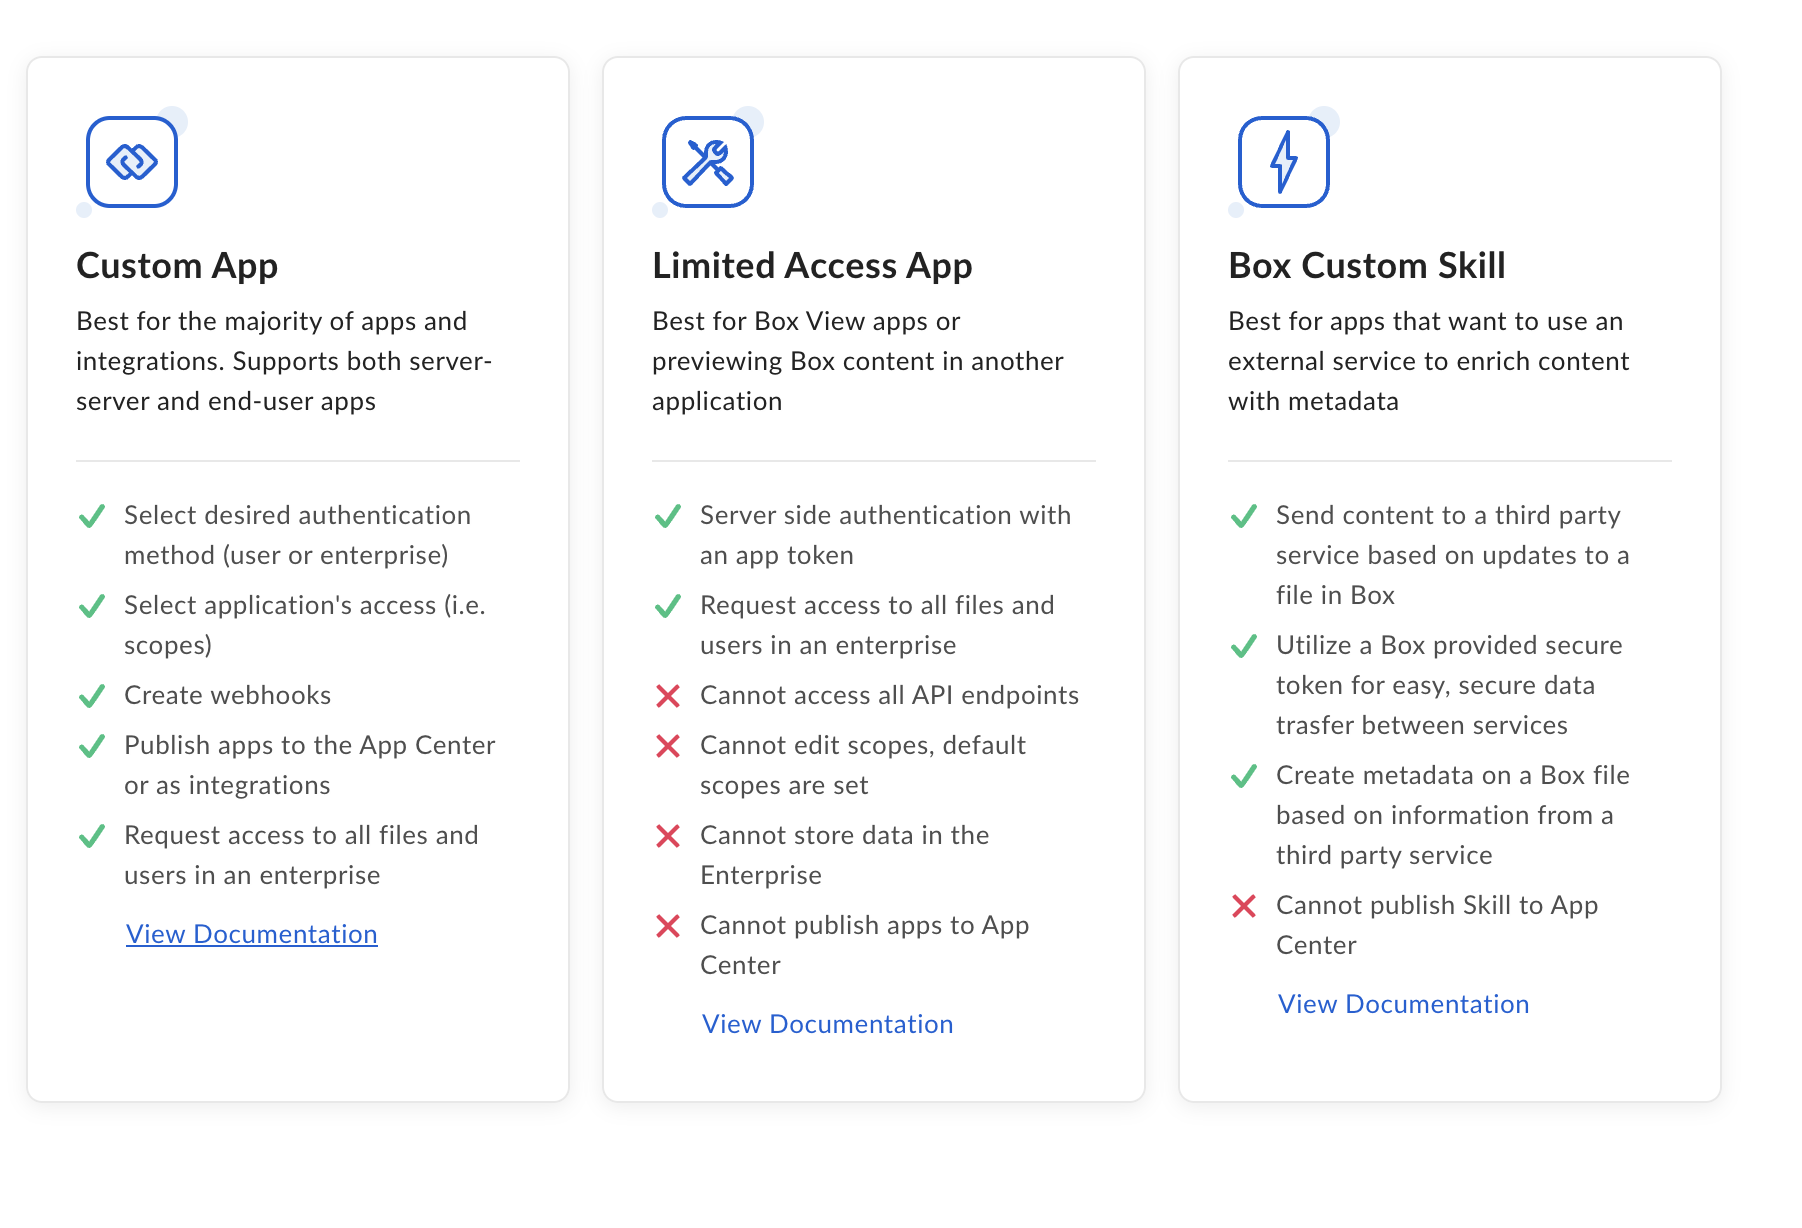
- Select Custom App.
The reason for Selecting Custom App is as follows: - Name your application under App Name, i.e. “Moveworks”.
- In the Description field, select “Integration” (or another field of preference).
- Select Next.

- Under Purpose, select “Integration” (or another field of preference).
- Under Categories, select “Productivity” (or another field of preference).

Select Auth Method, and Create app
- Select “Server Authentication (Client Credentials Grant).
- The Server Authentication Auth method provides the best and most secure option:
- File Search functions via server-side operations to ingest your files and your source file ACL permissions.
- Ensuring server to server interactions without exposing user credentials.
- Simplifies credential management, as only a single set of credentials (client ID and secret) are used for authentication.

- The Server Authentication Auth method provides the best and most secure option:
Grant Moveworks the necessary scopes for your App
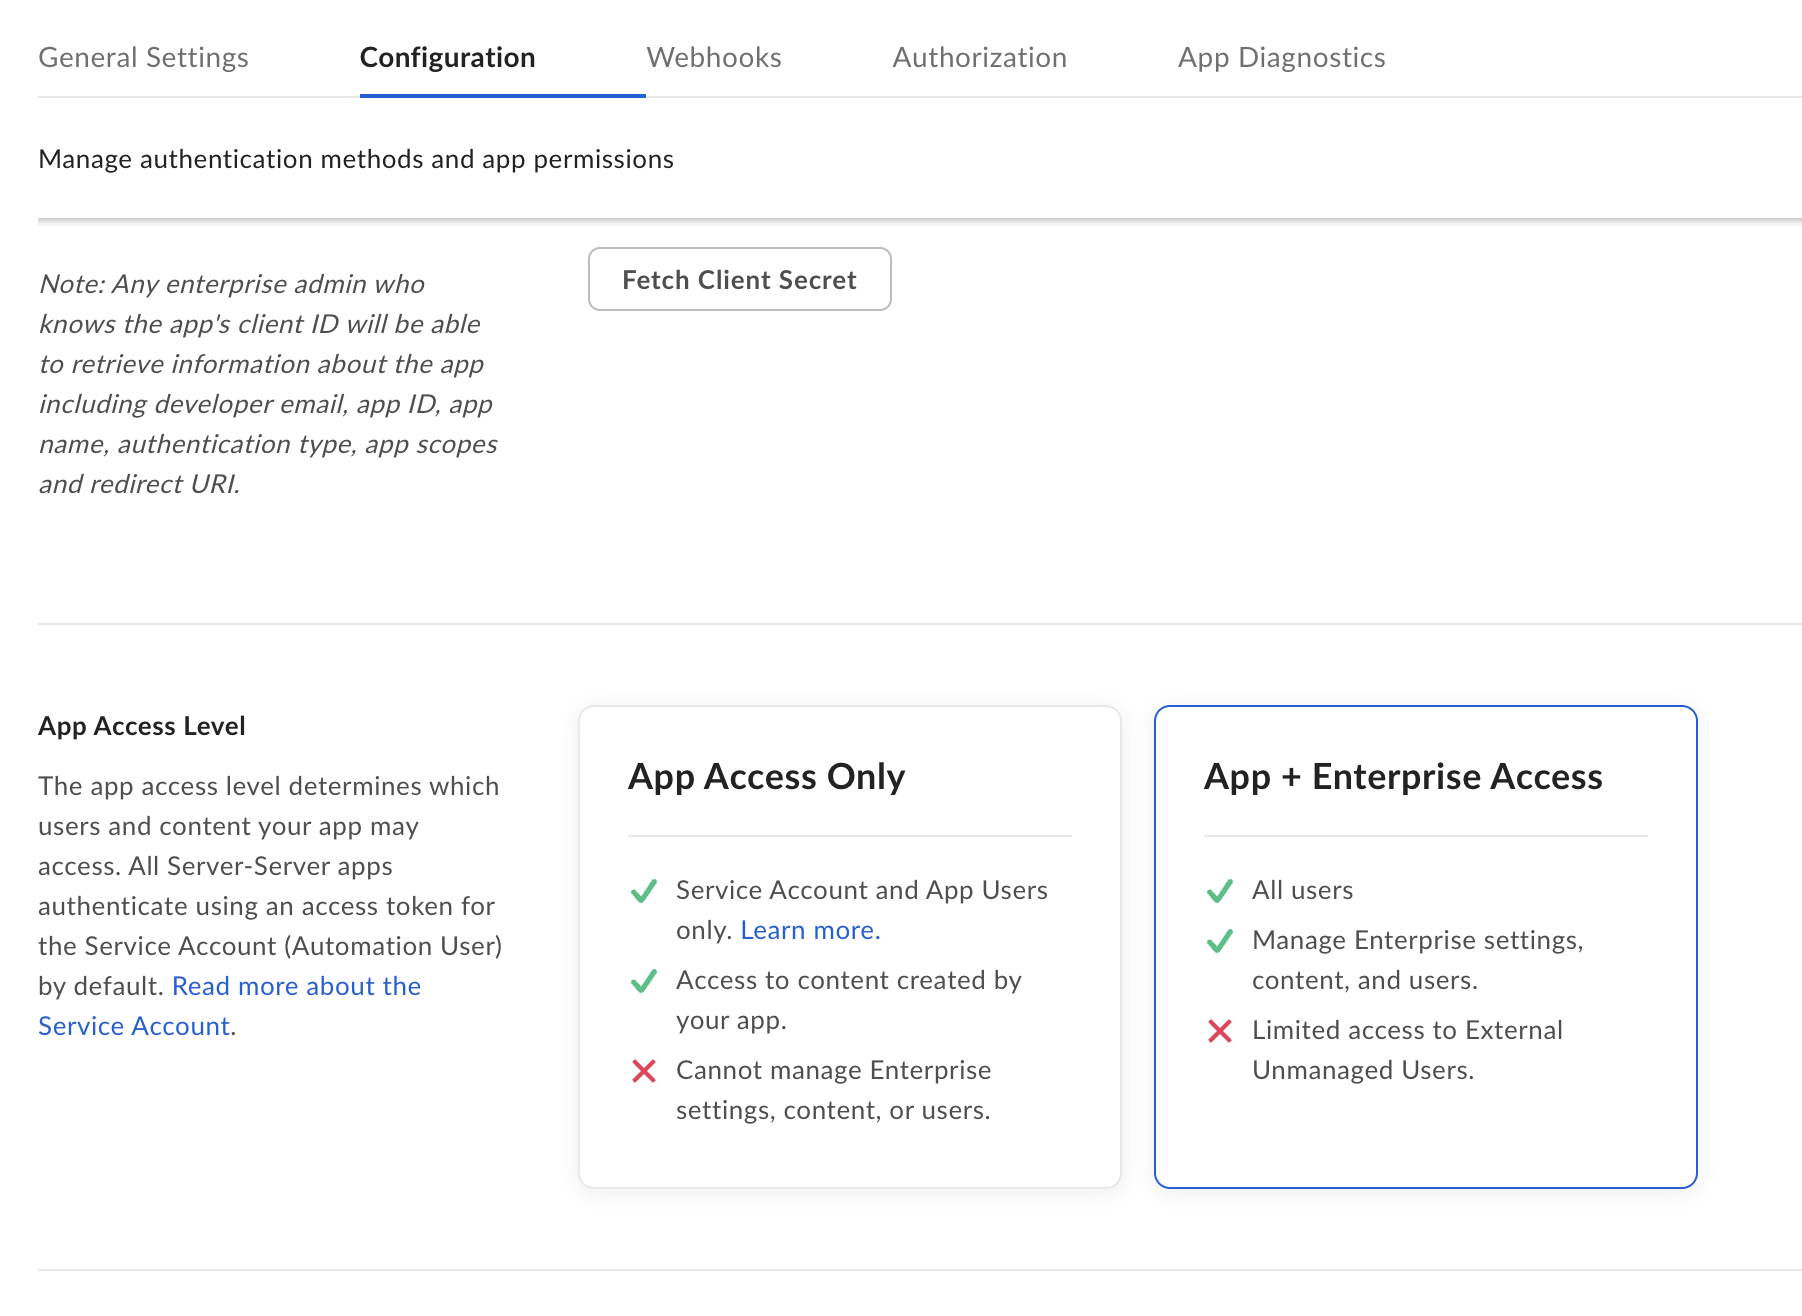
- Go to the Configuration Tab for your App.
- Select App + Enterprise Access.
- We need App + Enterprise access because we need to be able to ingest all of your organizations’ User profiles – these User profiles are essential for enforcing ACL permissions in our File Search product, and our validations that users can never access files they don’t have access to via File Search.
- We need App + Enterprise access because we need to be able to ingest all of your organizations’ User profiles – these User profiles are essential for enforcing ACL permissions in our File Search product, and our validations that users can never access files they don’t have access to via File Search.
- Continue below on the configuration page, and select the below Application Scopes:
- “Read all files and folders stored in Box”
- “Write all files and folders stored in Box”
- Write file access, like suggested in the screenshot, is required to download files.
- “Manage users”
- Manage users is to get list of users for identity mapping from Moveworks to Box.
- “Manage groups”
- Group ingestion is used to enforce permissions when they are granted access to certain internal groups, and allows us to map access to the users within those groups.
- “Manage enterprise properties”
- Manage enterprise properties enables us to crawl recent enterprise logs activity to ingest newly created/modified data

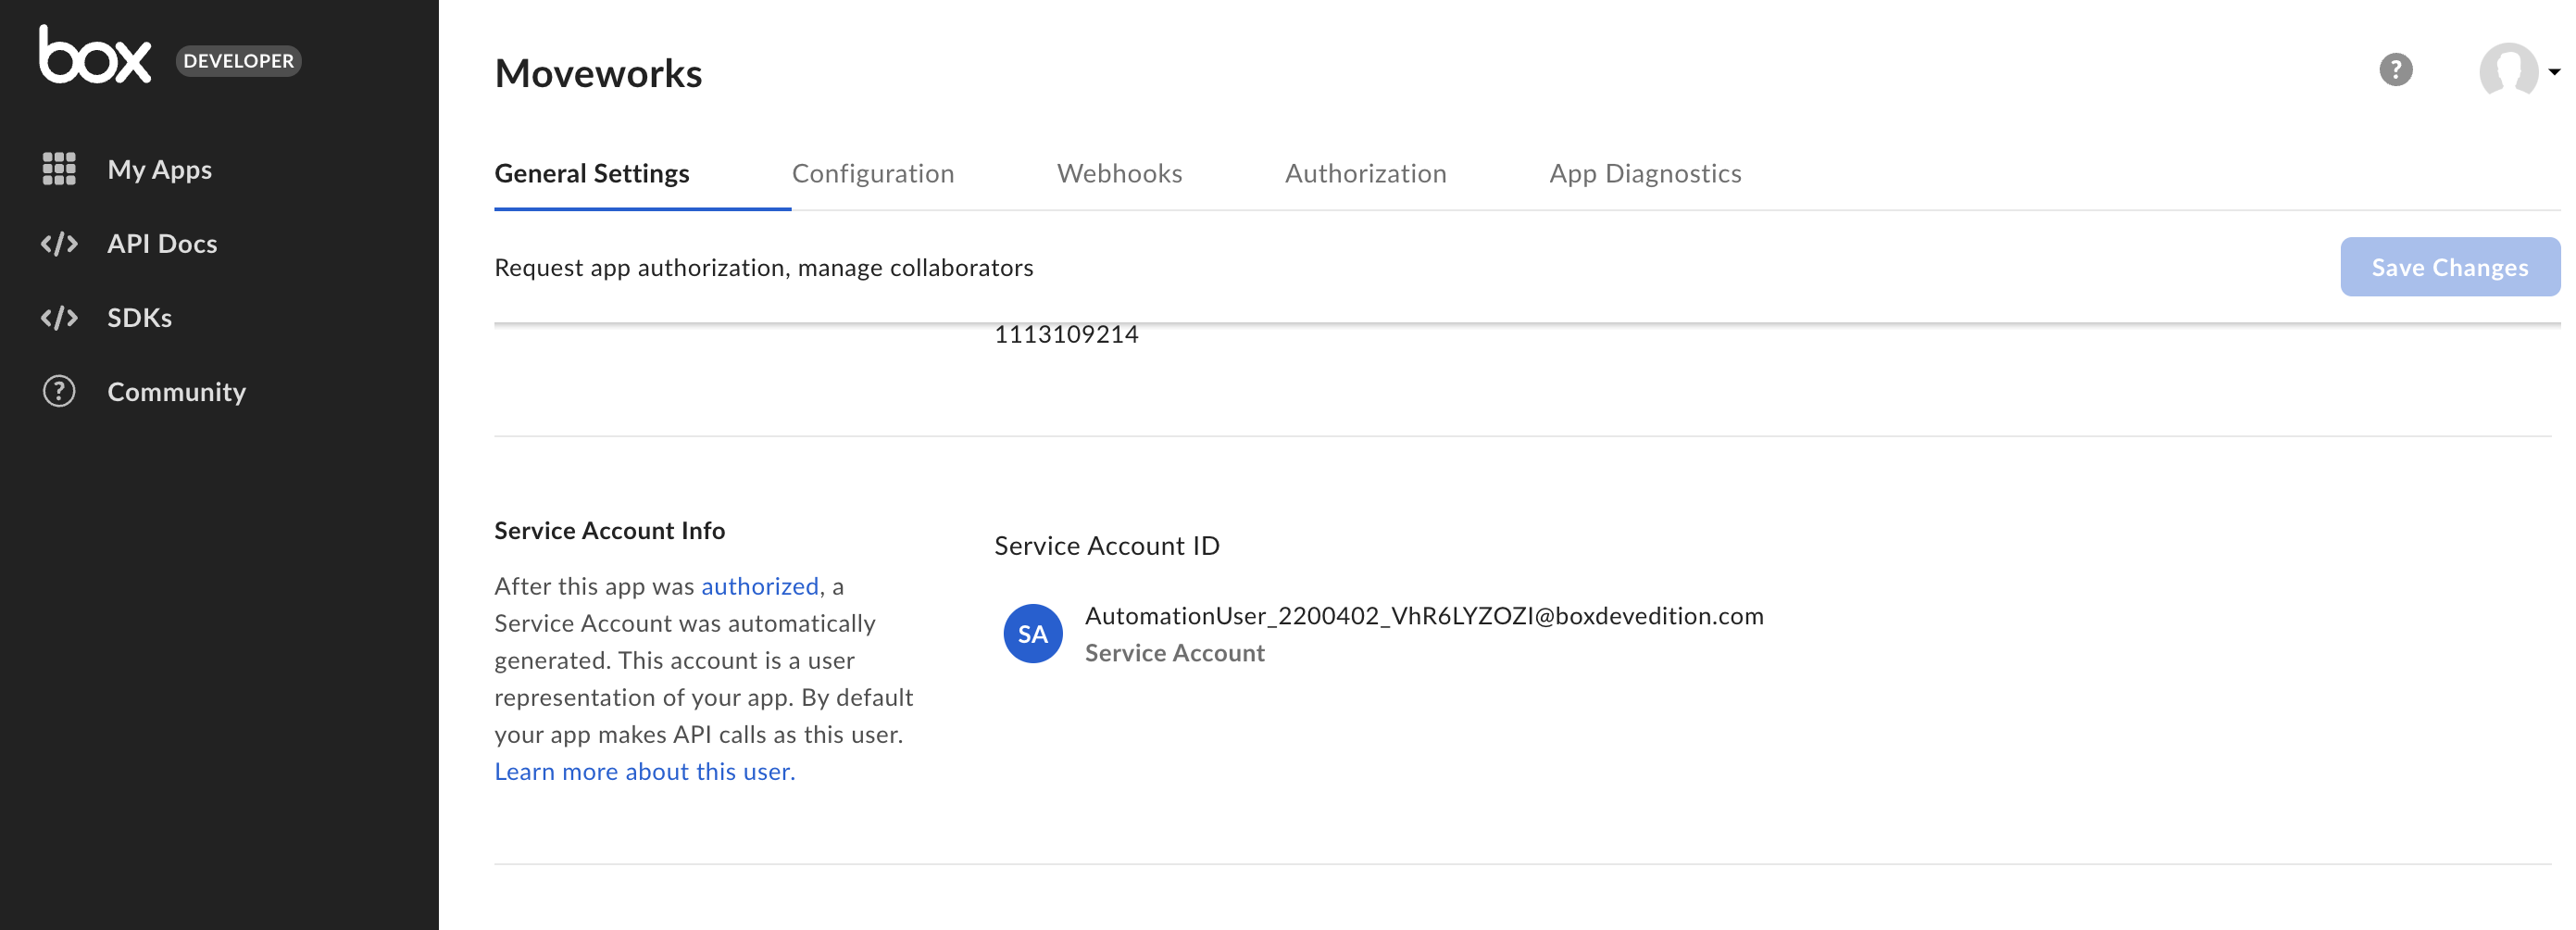
Retrieve the Client ID, Client Secret, and Enterprise ID
After this stage, you should have retrieved the Client ID, Client Secret, and Enterprise ID, and forwarded to your representative at Moveworks.
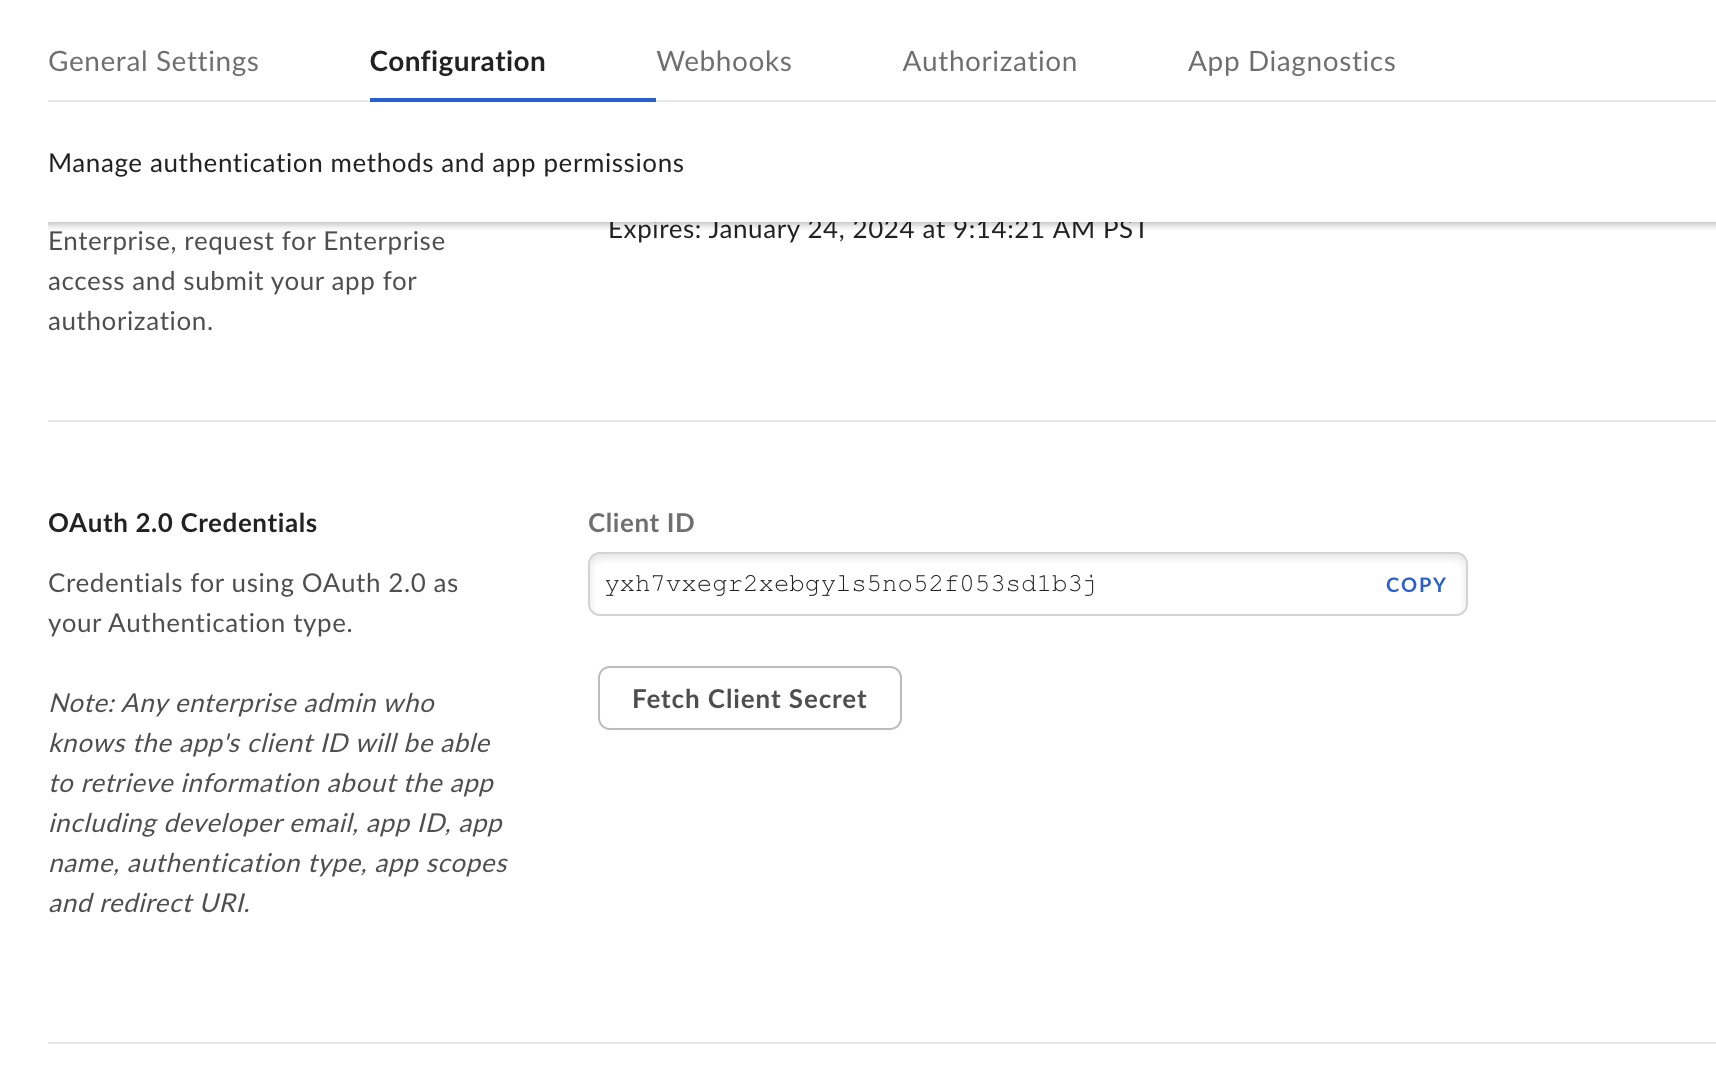
- Scroll to the OAuth 2.0 Credentials Section.
- Select your Client ID, and and save it for yourself – you’ll need this later.
- Select Fetch Client Secret, and and save it for yourself – you’ll need this later.
- Go to the General Settings Tab.
- Scroll down to Enterprise ID, and save it for yourself – you’ll need this later.

- Scroll down to Enterprise ID, and save it for yourself – you’ll need this later.
Authorize your App
- Review and Submit your app for Authorization, by navigating to the Authorization Tab.
- Select Review and Submit.
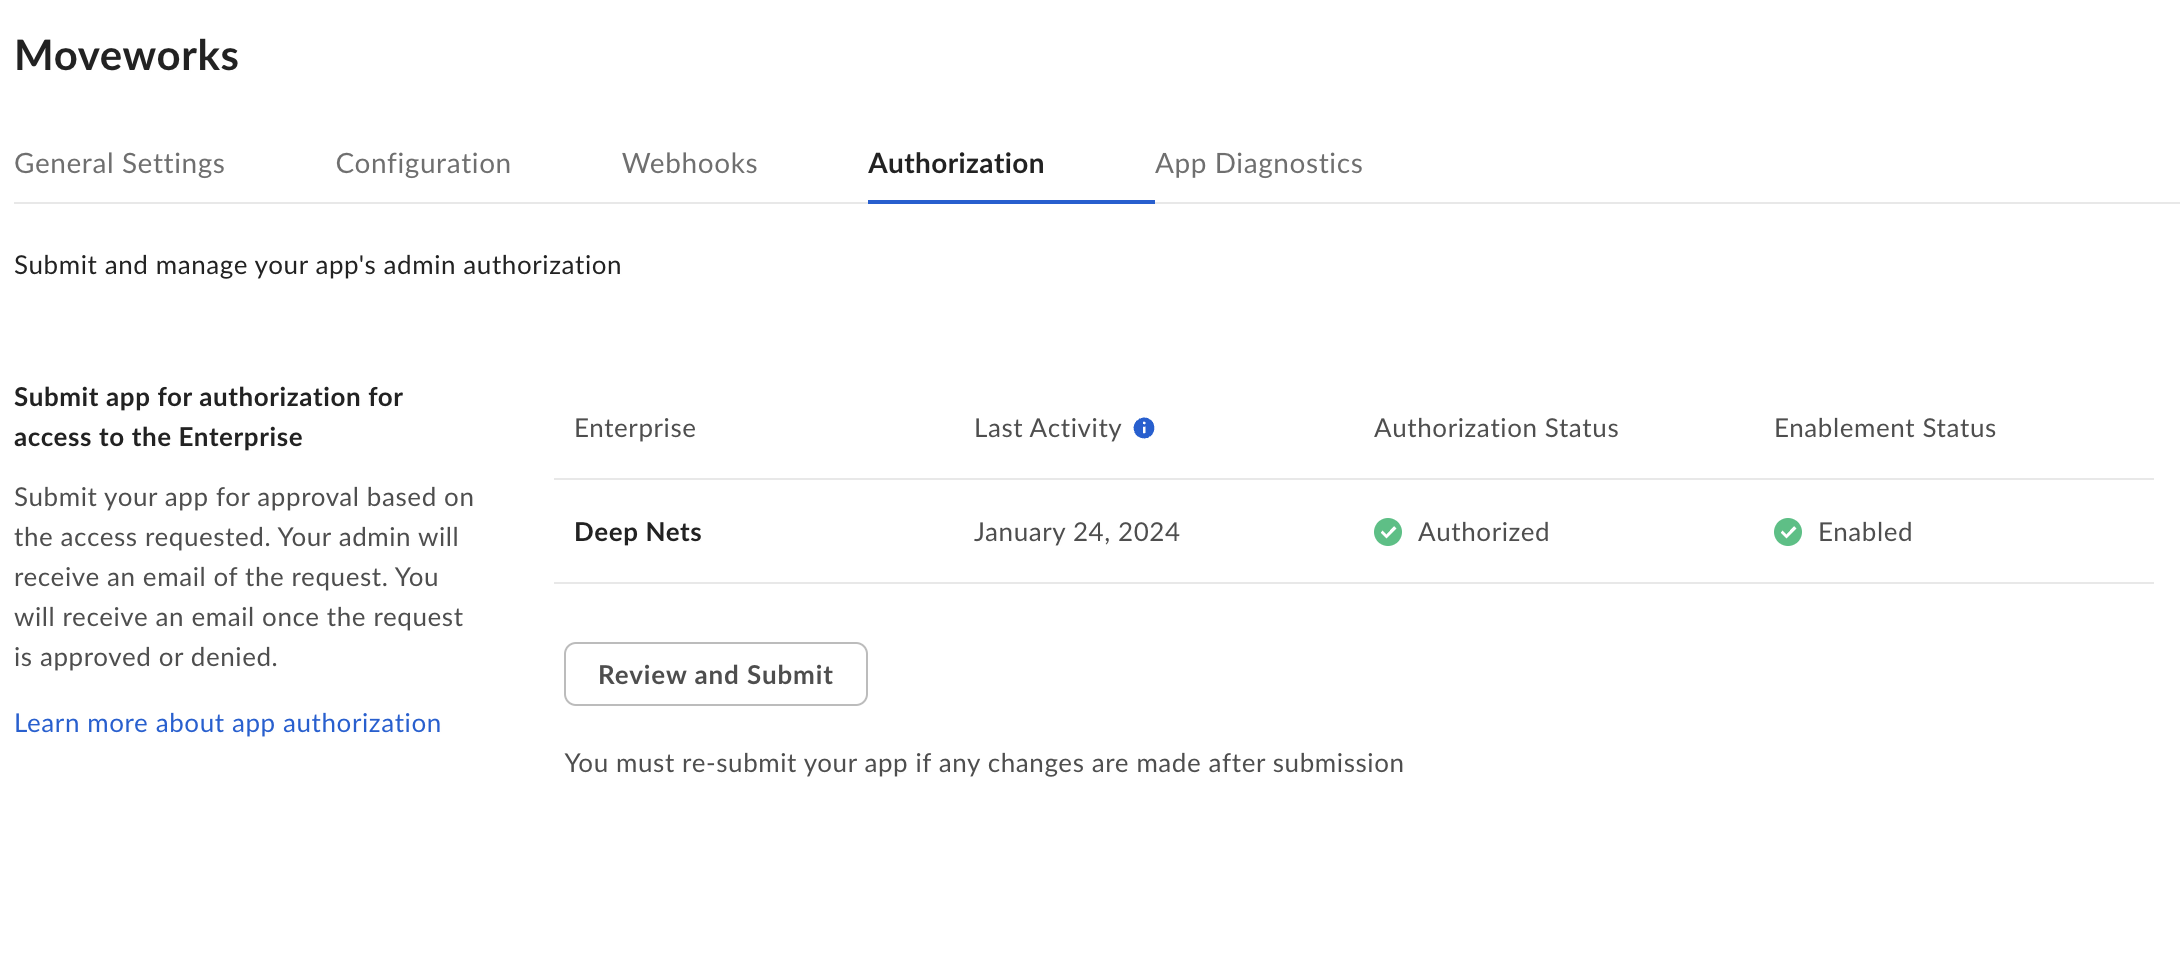
- Accept the request by navigating here: https://app.box.com/master/custom-apps.
- In our image below it is “Reauthorize App”, but you should see an option that says “Authorize app” – select Authorize App.

- In our image below it is “Reauthorize App”, but you should see an option that says “Authorize app” – select Authorize App.
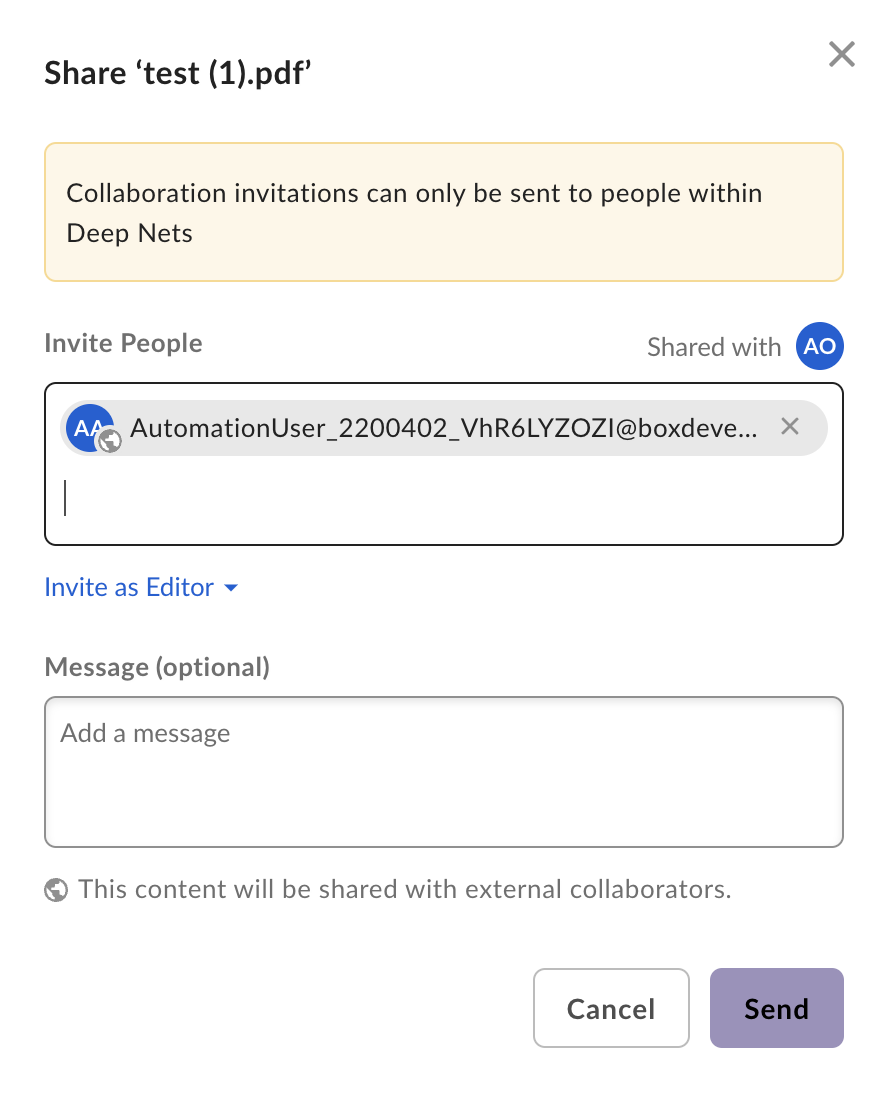
Share Folders with the Authorized App created for Moveworks
- Go to your Folders in Box, and open the Share button of your desired Box Folders
- Grab the Service Account ID email for the App, which can be found in the General Settings tab for the app you created
Configure Moveworks Setup Connector for BOX custom application
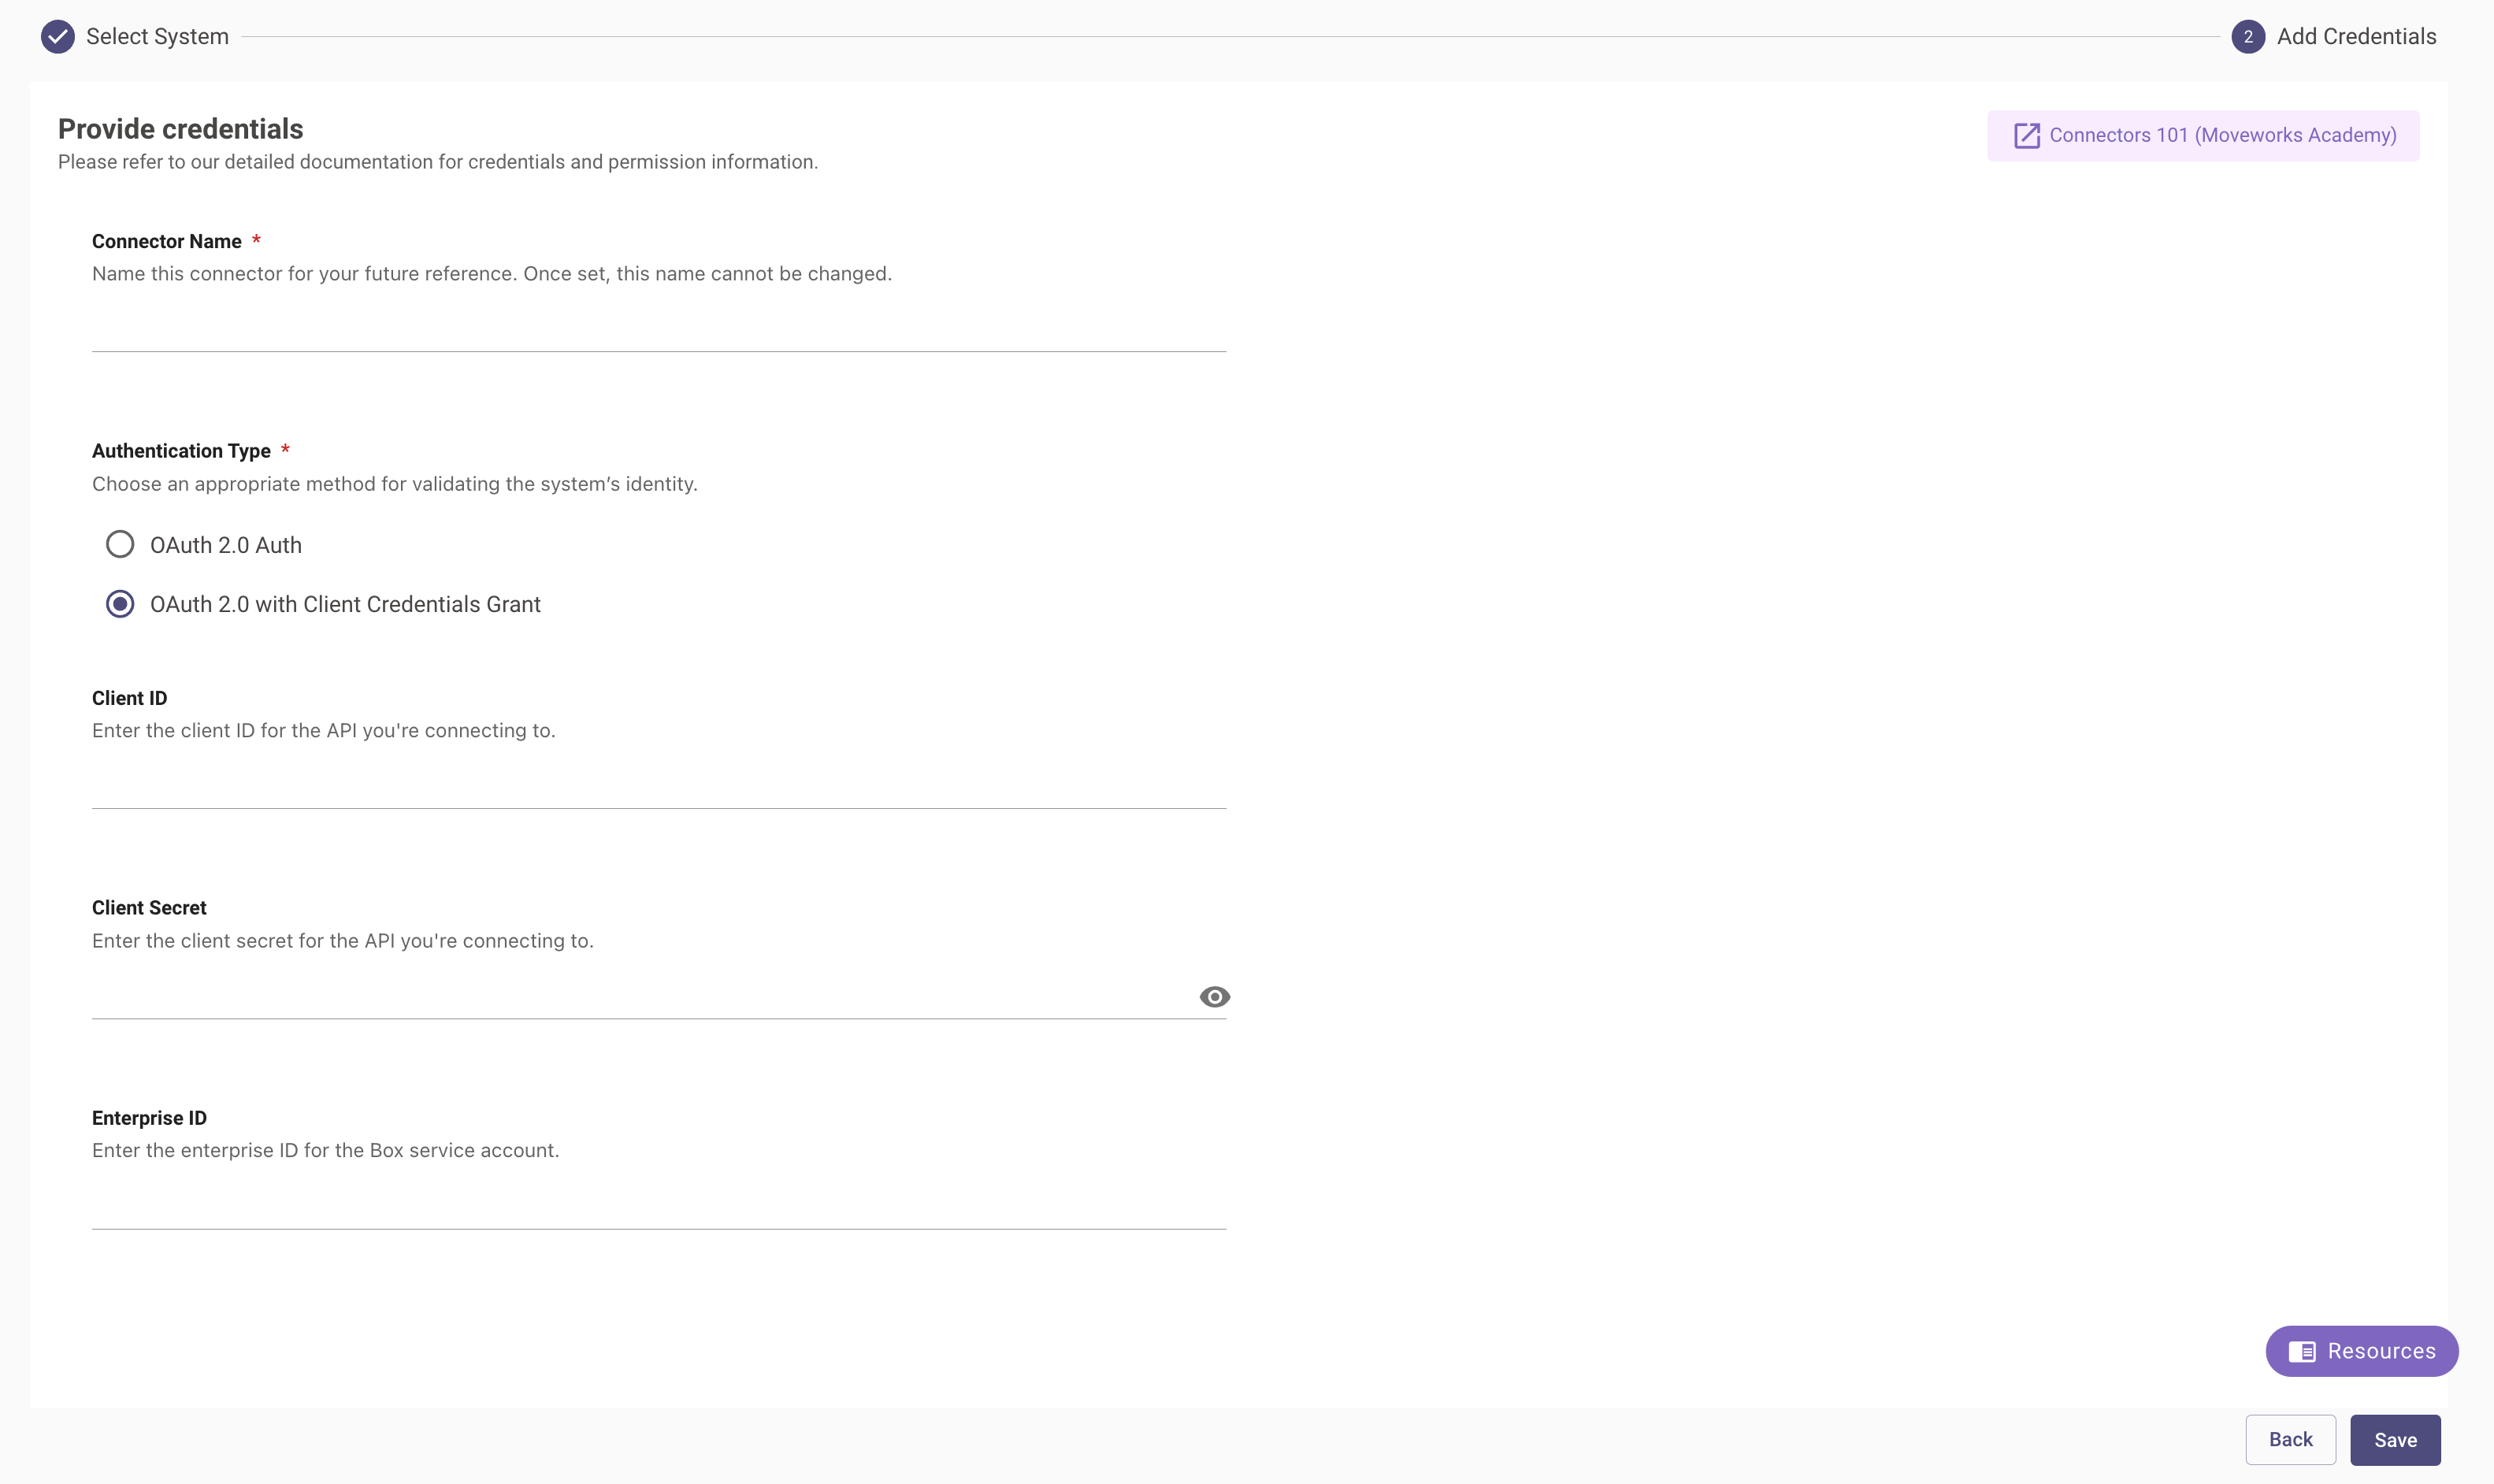
- Navigate to the built-in connectors and click on the create new button. Once done search for Box. Click on the Box (Next Gen) option.
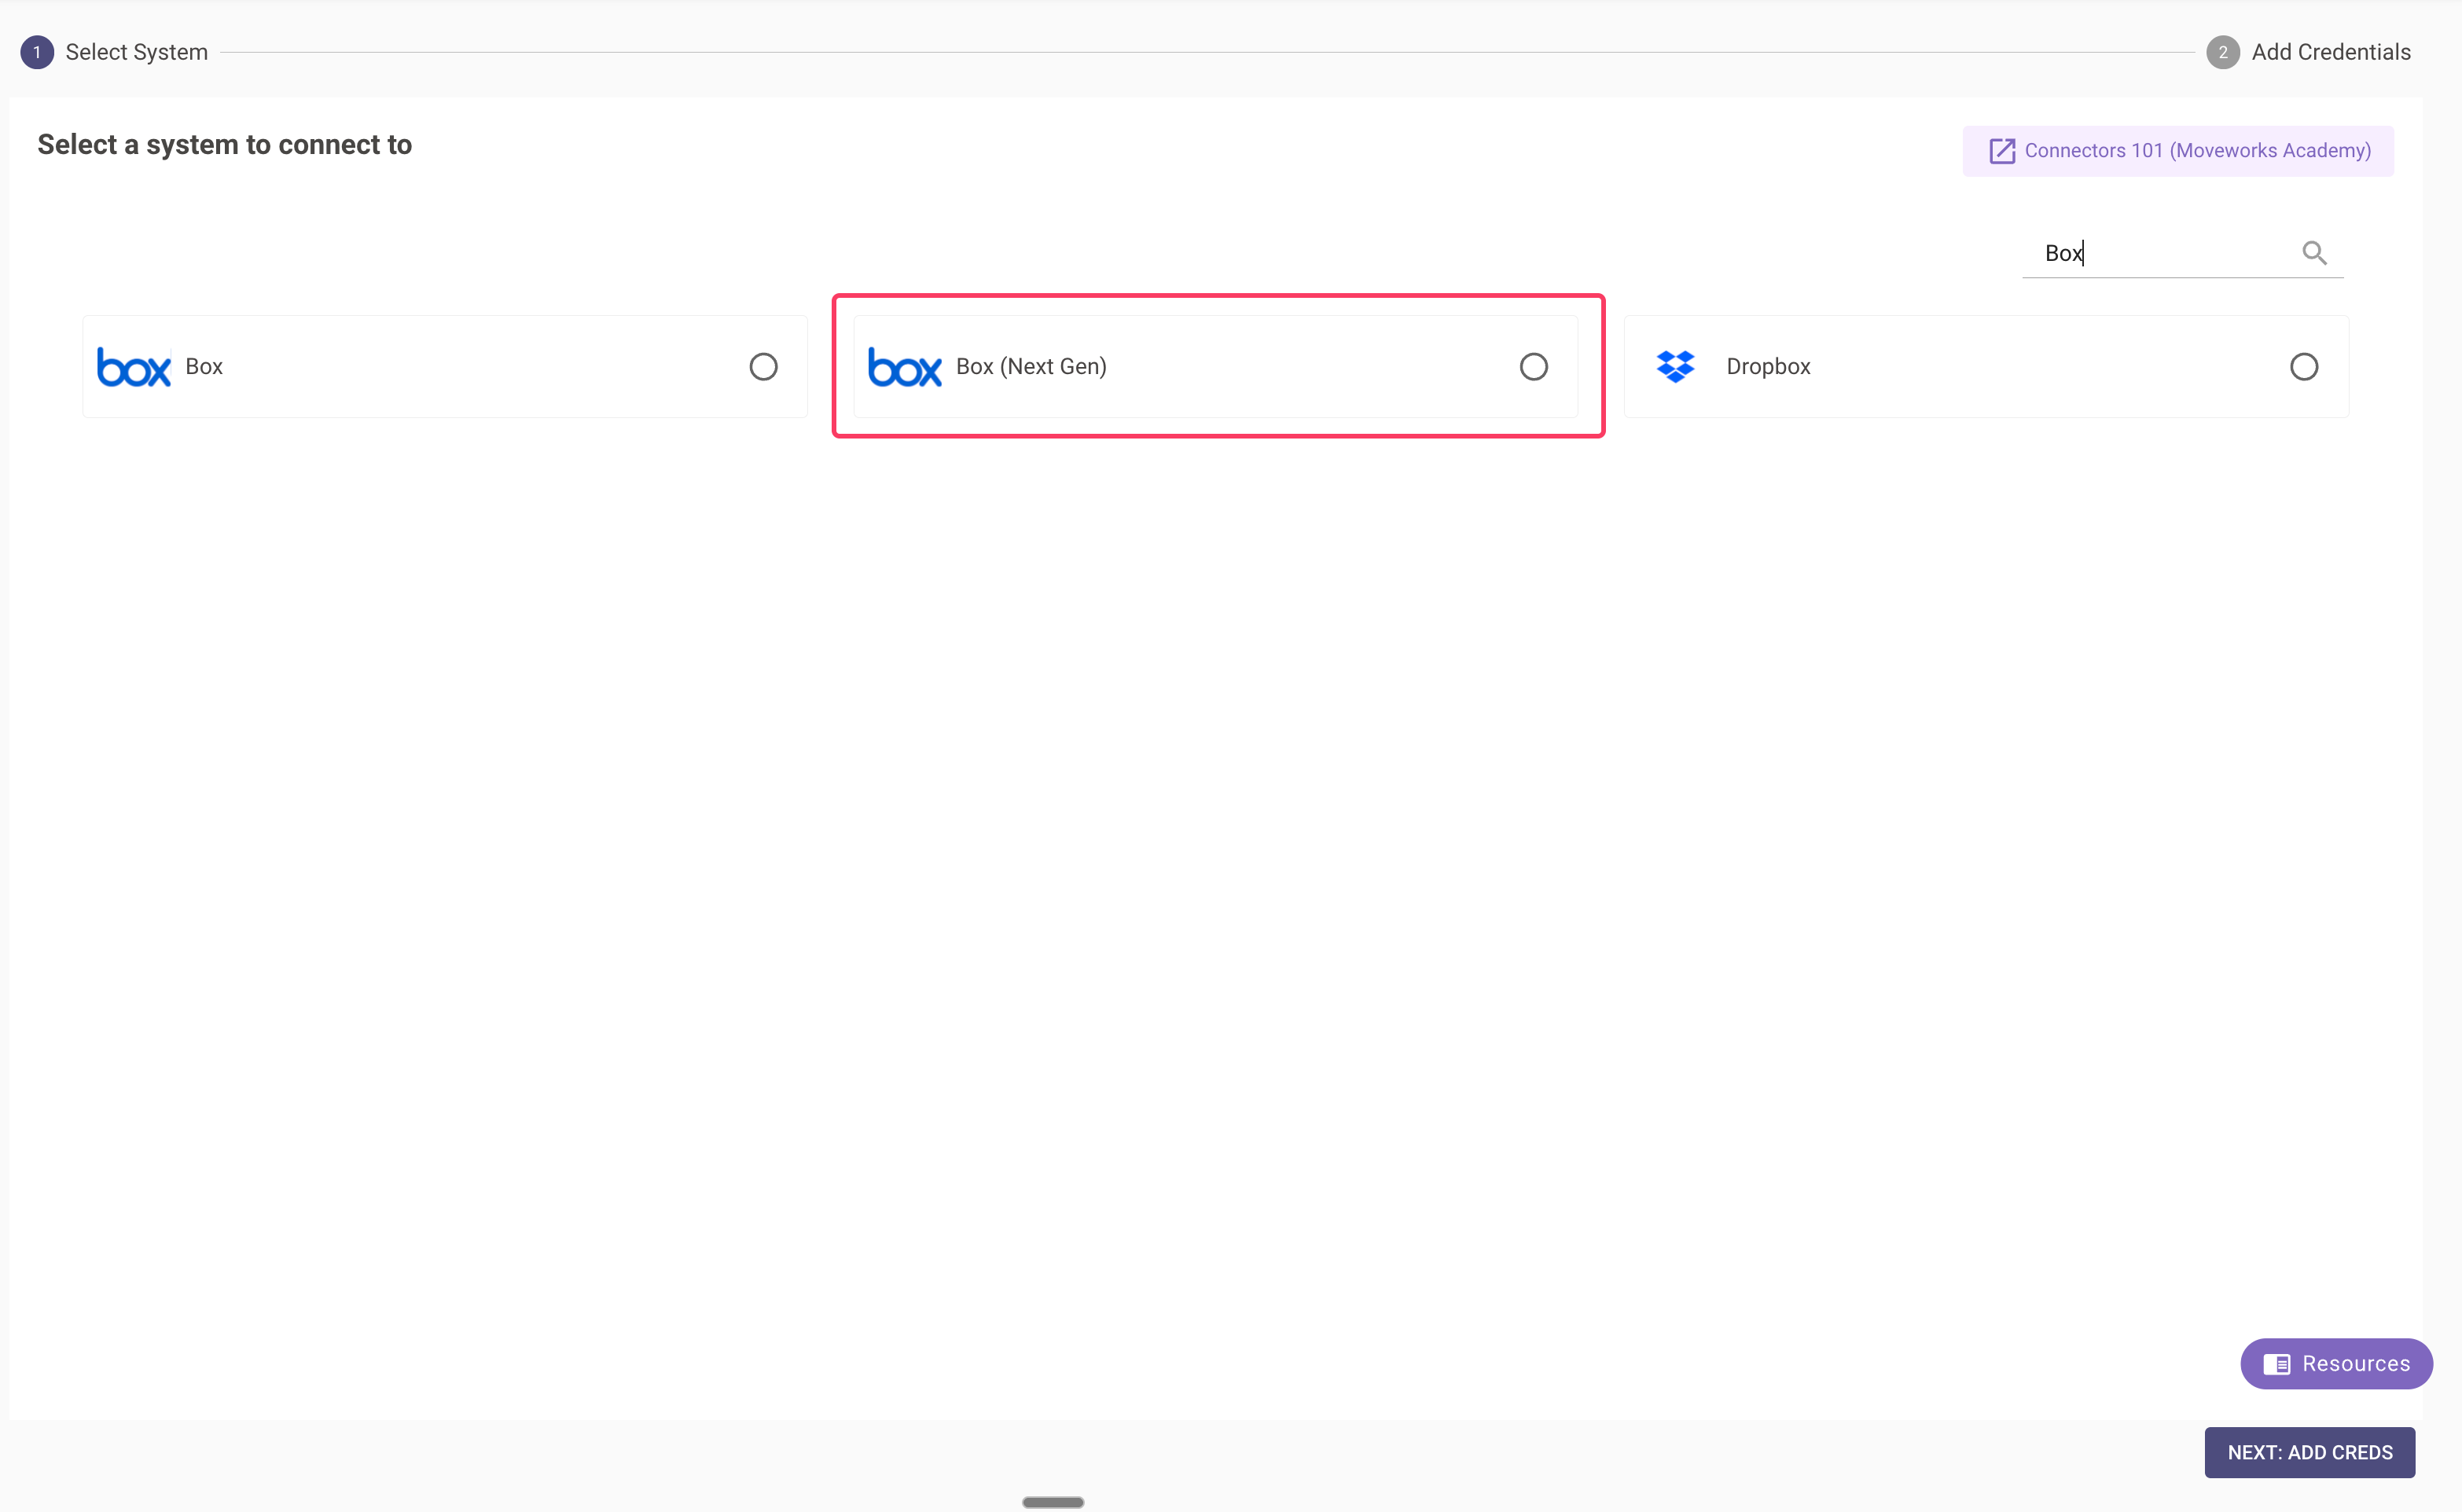
- Click “NEXT: ADD CREDS” and enter the details you captured while creating the connector. Select OAuth2 with Client Credentials Grant as the authentication type.
Configuring BOX for enterprise search
Initialising setup
- Log in to your org’s MyMoveworks portal
- Navigate to Moveworks Setup > Search > Configure Search > Max Capacity
- Click on Create New or Get Started
- Select Box (Next Gen) from the dropdown list and click on Get Started
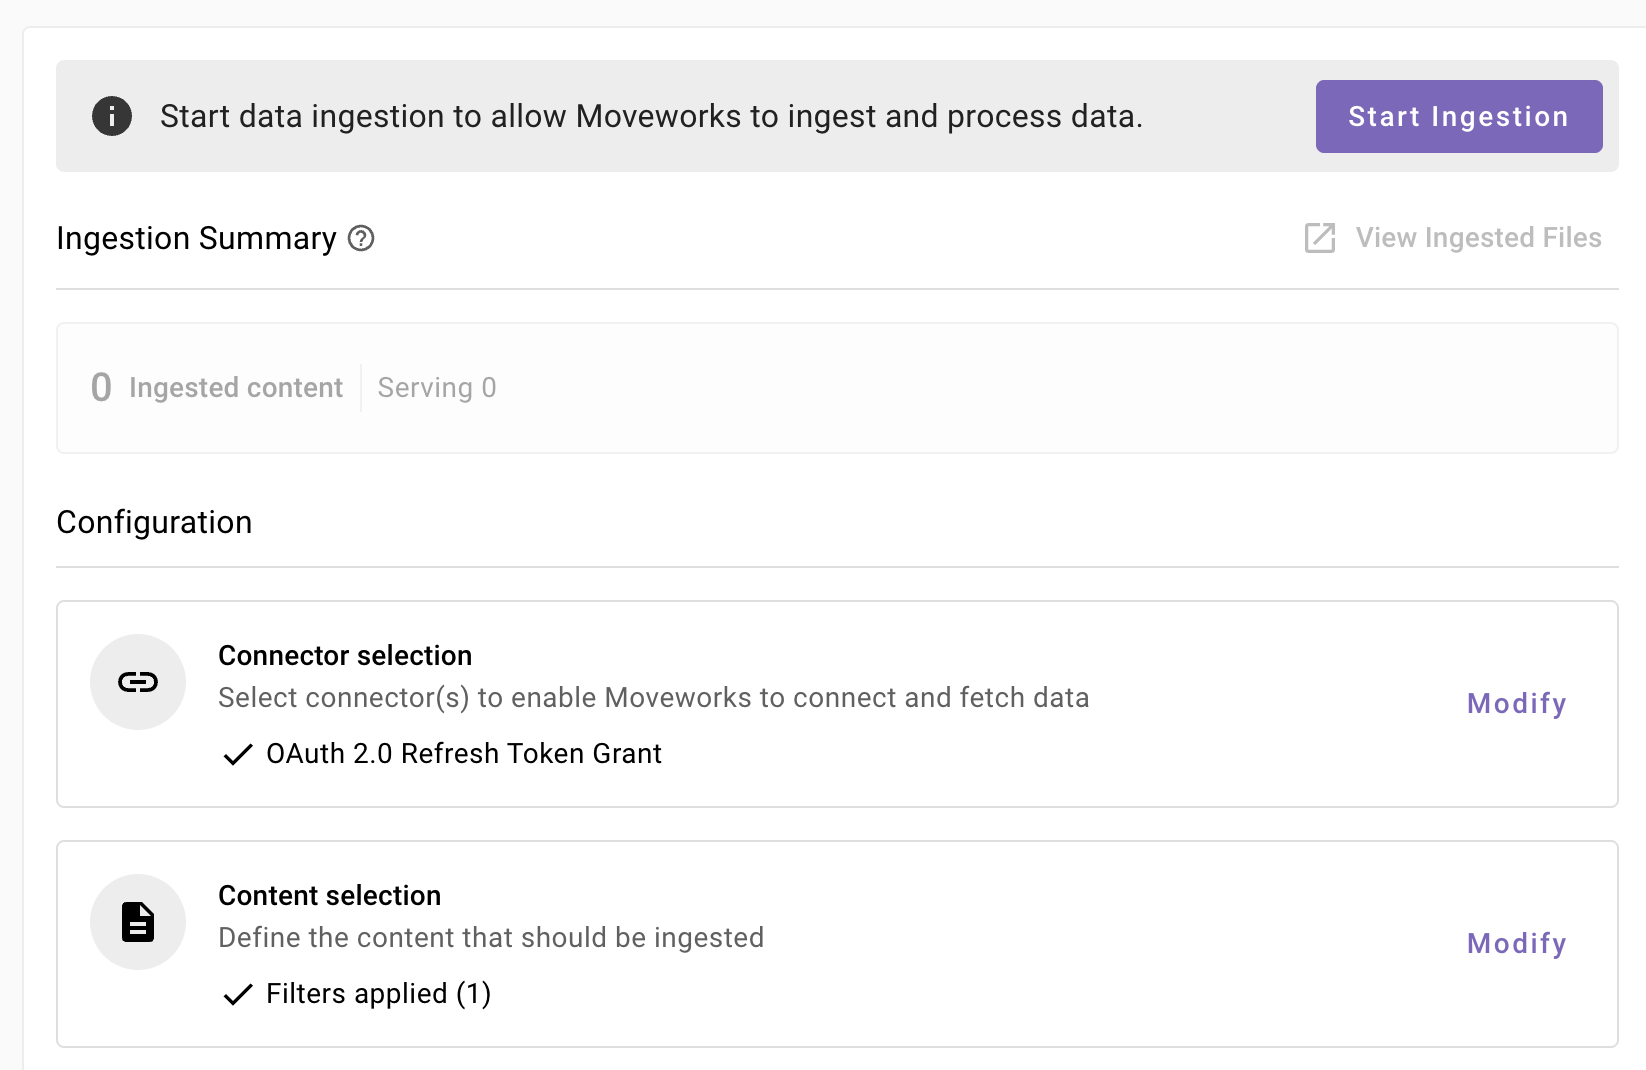
- You will be redirected to the Box ingestion overview page. In the overview page, you will find few info blocks and few configuration blocks.
- System Overview: This presents an overview of Box support from Moveworks
- Ingestion Summary: This provides information on the count of records that has been ingested and serving. The values will appear after the first successful ingestion run.
- Connector Selection: In this configuration block, you are required to select the required connector to enable Moveworks to connect and fetch data
- Content Selection: In this configuration block, you are required to define the content that should be ingested within Moveworks
Connector selection and validation
-
Once you click on Select Connector, a connector setup screen will appear as follows
-
Select the connector (from the dropdown) that you have created in the Connector Creation step.
Please note: Only the Box (Next Gen) connectors will appear in this list.
-
Once the connector is selected, you need to click on Start Validation to validate the connector credentials and required scope.
Connector Validation
This is a mandatory step in order to save the configuration and move to the next step.
Moveworks validates the selected connector to check:
- Auth: Moveworks validates if the connector has right credentials to authenticate
- Content: Moveworks validates if connector has right scopes to fetch content
- Permissions: Moveworks validates if connector has right scopes to fetch user permissions
- Users: Moveworks validates if connector has right scopes to fetch user data
- Groups : Moveworks validates if connector has right scopes to fetch group data
-
If the connector is validated successfully, you will see a green info banner as follows
- If there are any credentials or scope issues, you will receive an error message as follows. Click on View Details to identify the issue.
-
Once the connector is validated successfully, you will be able to Save the configuration.
- Input the unique configuration name and Save.
- Once the configuration is saved, you can view the unique configuration name at the top of the screen. You can also click the pencil 🖊️ icon to edit the configuration name.
- Additionally, you will start seeing an entry of your configuration in the Enterprise Search home page. You can click on your configuration to go to edit/ complete the configuration.
Content Selection
Once the connector selection step is complete and the configuration is saved, you will now be required to define the scope of content that will be ingested in Moveworks.
- Once you click on Select Content, a content selection screen will appear as follows
- In this screen, you are required to define the Knowledge Base from which Moveworks will ingest content and apply filters (optionally) to filter down the content further.
- Knowledge Base configuration: This is a mandatory configuration. This configuration defines which Knowledge Base Moveworks will crawl and ingest content from. As an admin, you get three option
- All folders (Recommended): Moveworks will ingest content from all knowledge base
When to choose this option?
- Only selected folders : Moveworks will ingest content only from the selected knowledge base
When to choose this option?
- **All except selected **: Moveworks will ingest all content excluding content from the selected knowledge base
When to choose this option?
- All folders (Recommended): Moveworks will ingest content from all knowledge base
- Additional Filters: Use these filters to narrow the content ingestion scope further. Only records matching ALL of the the specified criteria will be included.
Currently following filters are supported:
- Modified date: Use this filter to include only those content records whose Modified date is after a specified date.
- Created date: Use this filter to include only those content records whose Created date is after a specified date.

Save and Start Ingestion
Once Knowledge Base selection is configured, you have two options:
-
Save: Clicking this will just save the configuration and not initiate the first ingestion crawl. Use this option, if you would want to complete your configuration in multiple sessions/ sittings.
- Once you click on Save, you will be redirected to the BOX overview screen
- You will notice a banner that prompts you to Start Ingestion
- Once you are satisfied with your configuration, you can click on Start Ingestion
- A confirmation popup will come that provides a summary of the configuration
- Click on Confirm
- After you click on Confirm, ingestion will start shortly.
- For the first crawl to complete, this generally takes anywhere from few hours to 48 hours depending upon the size of the data.
-
Save and Start Ingestion: Click this option if you have completed and validated your content selection configuration and you are ready to initiate the first ingestion crawl.
- A confirmation popup will come that provides a summary of the configuration
- Click on Confirm
- After you click on Confirm, ingestion will start shortly.
Important Note for Admins:
- It generally takes anywhere from few hours to 48 hours for the first crawl to complete depending upon the size of the data.
- You can review the status of ingestion via Data Ingestion Viewer and view ingested record in the Indexed Content > Files and Indexed Content > Internal Knowledge screens.
Audience configuration
A configuration does not serve content in search until you set its audience. From the configuration’s home page, open the Target audience tab, choose who can search this content, and save — source permissions are always enforced on top of your selection.
Audience configuration is the same for every Max Capacity connector. For the full steps and options, see Step 4: Define Target Audience in the Max Capacity Setup overview.