
Configure Ticketing
Configure ServiceNow ticketing in Moveworks so users can file, track, comment on, and resolve tickets from the AI Assistant - and so form submissions can complete.
For administrators. This page covers the minimum ticketing configuration using Moveworks defaults. For field customization and advanced mappings, see Configuring Ticketing for ServiceNow.
Before You Begin
- Connect ServiceNow is complete, including user ingestion and the Bot Account.
- The integration account can reach the ticketing tables (
incident,sc_request,sc_req_item,sc_task).
Save after every change. Moveworks Setup does not auto-save. Any time you add or modify a field, click Save before navigating away, or your changes are lost. This is the most common ticketing configuration mistake.
Procedure
1. Create the Ticketing Configuration
-
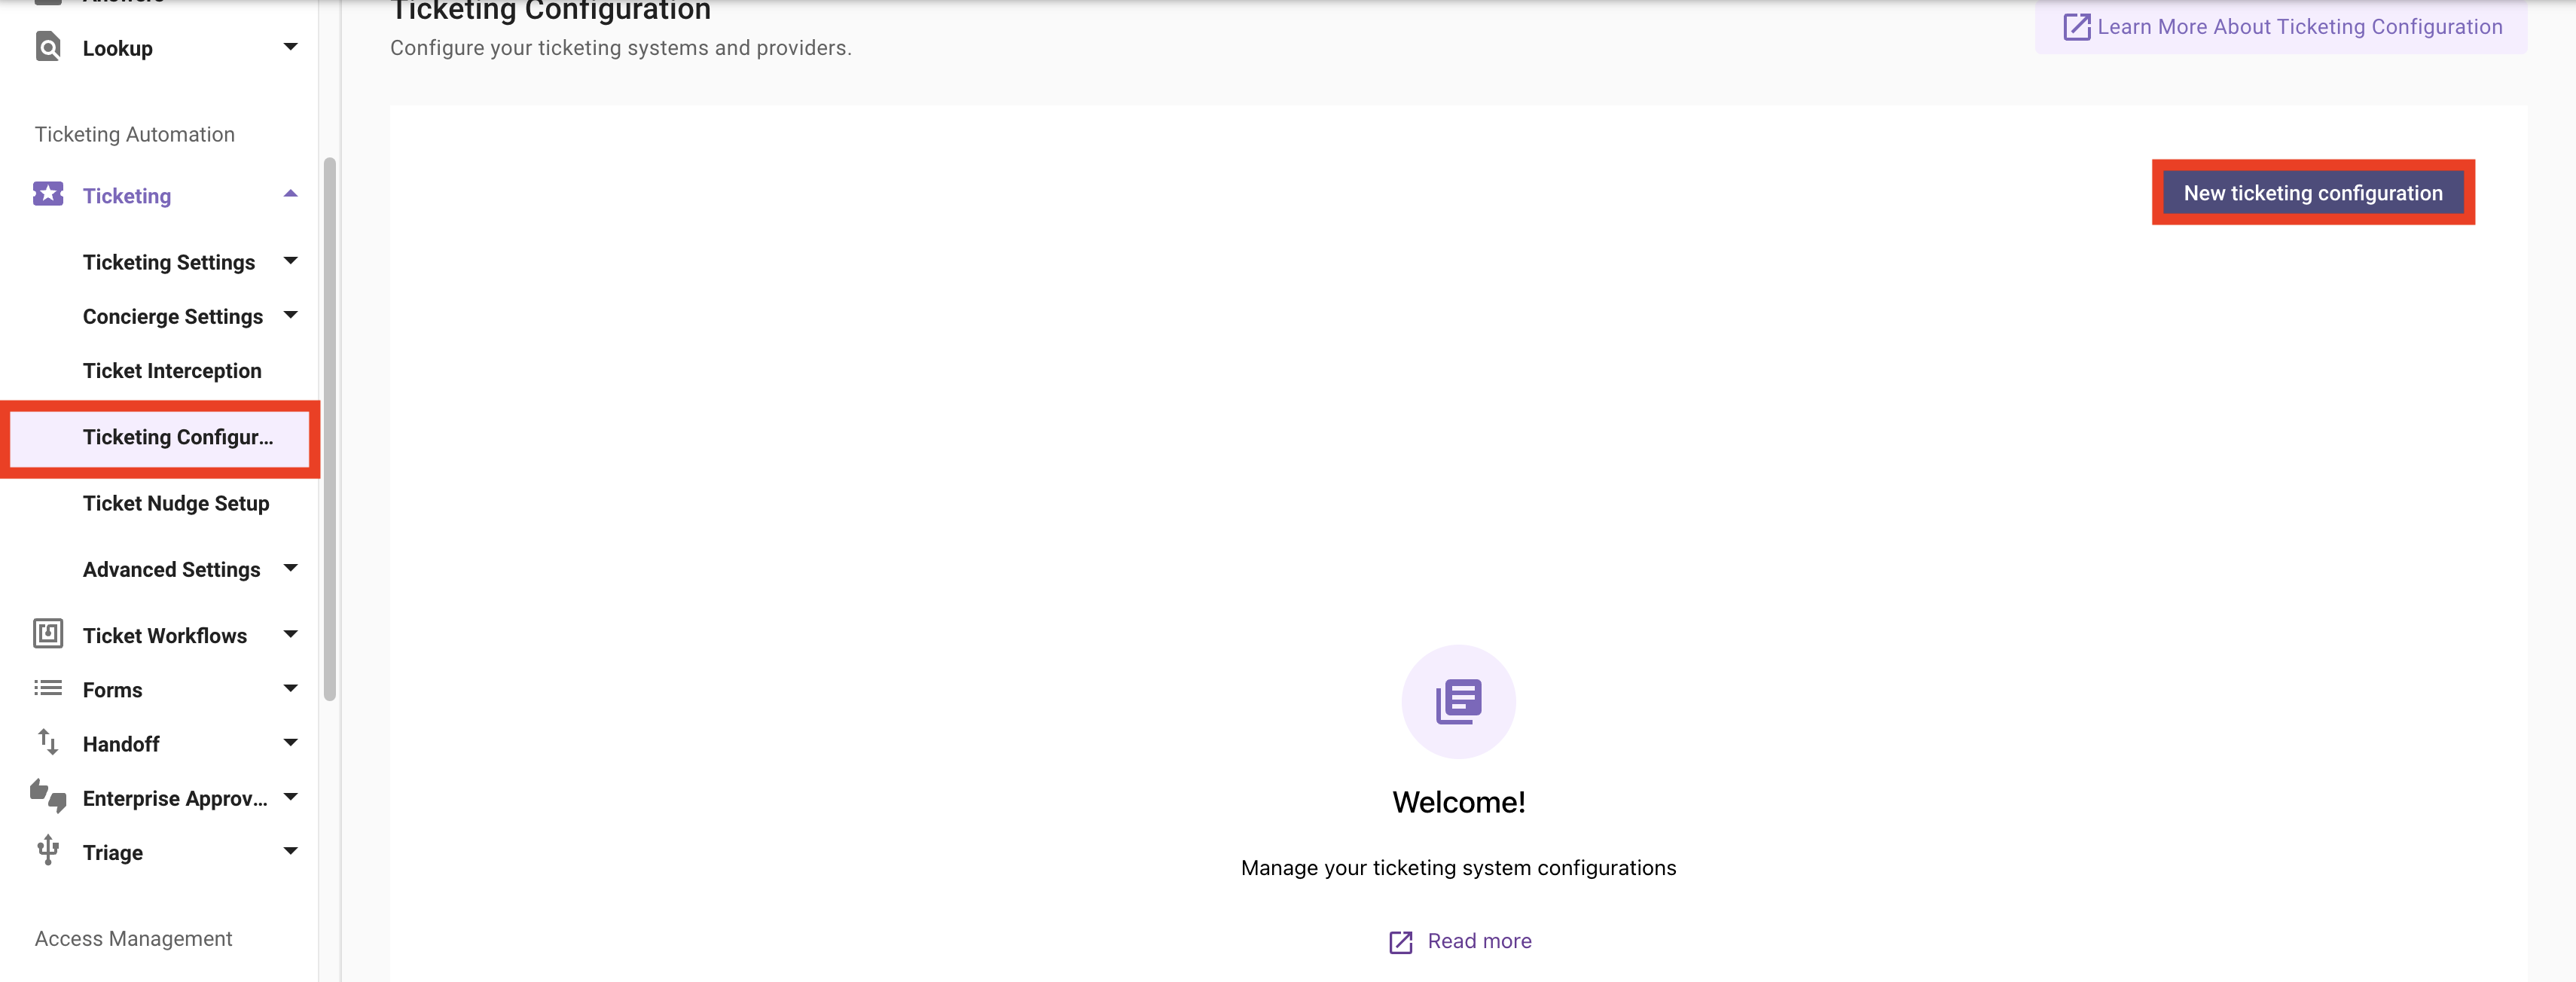
In Moveworks Setup, go to Ticketing > Ticketing Configuration > New ticketing configuration and click Get Started.
-
Select ServiceNow as the source system.
-
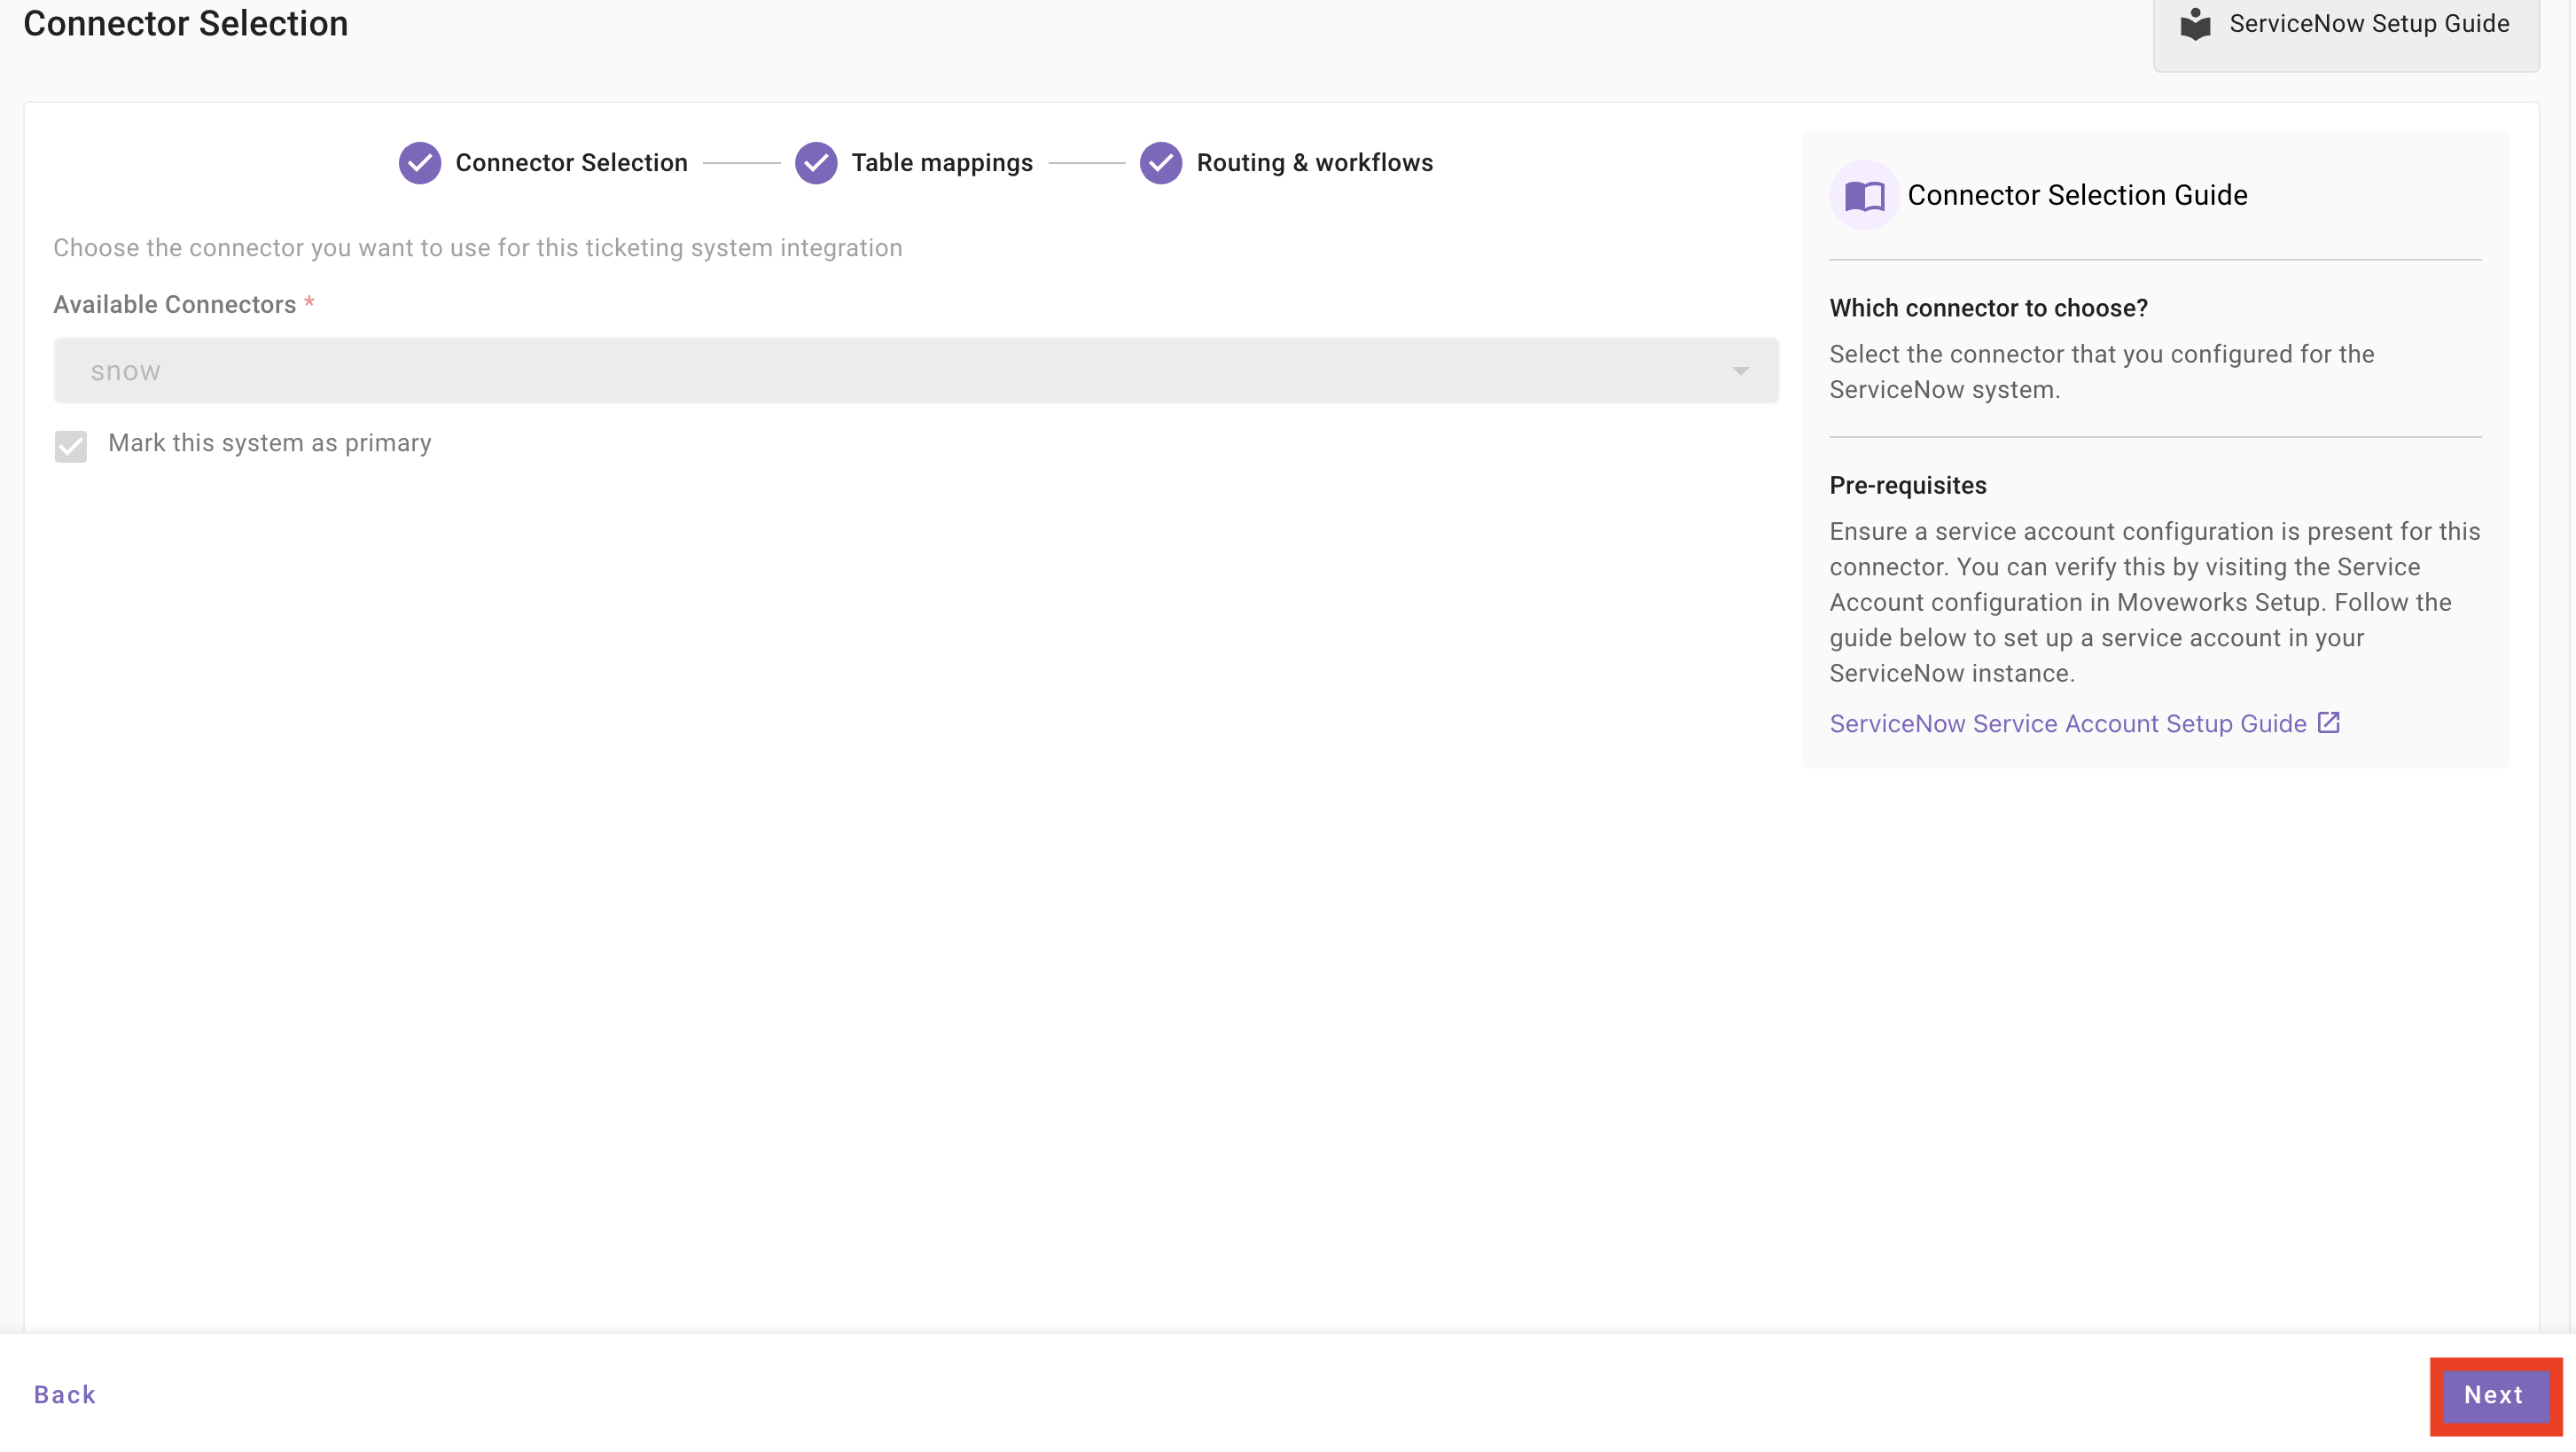
Under Connector Selection, choose your connector and mark the system as primary.
-
Give the configuration a name and Save.
2. Load the Default Table Mappings
Click Setup Defaults at the top of the page. Moveworks pre-loads mappings for the four standard ServiceNow ticket tables:
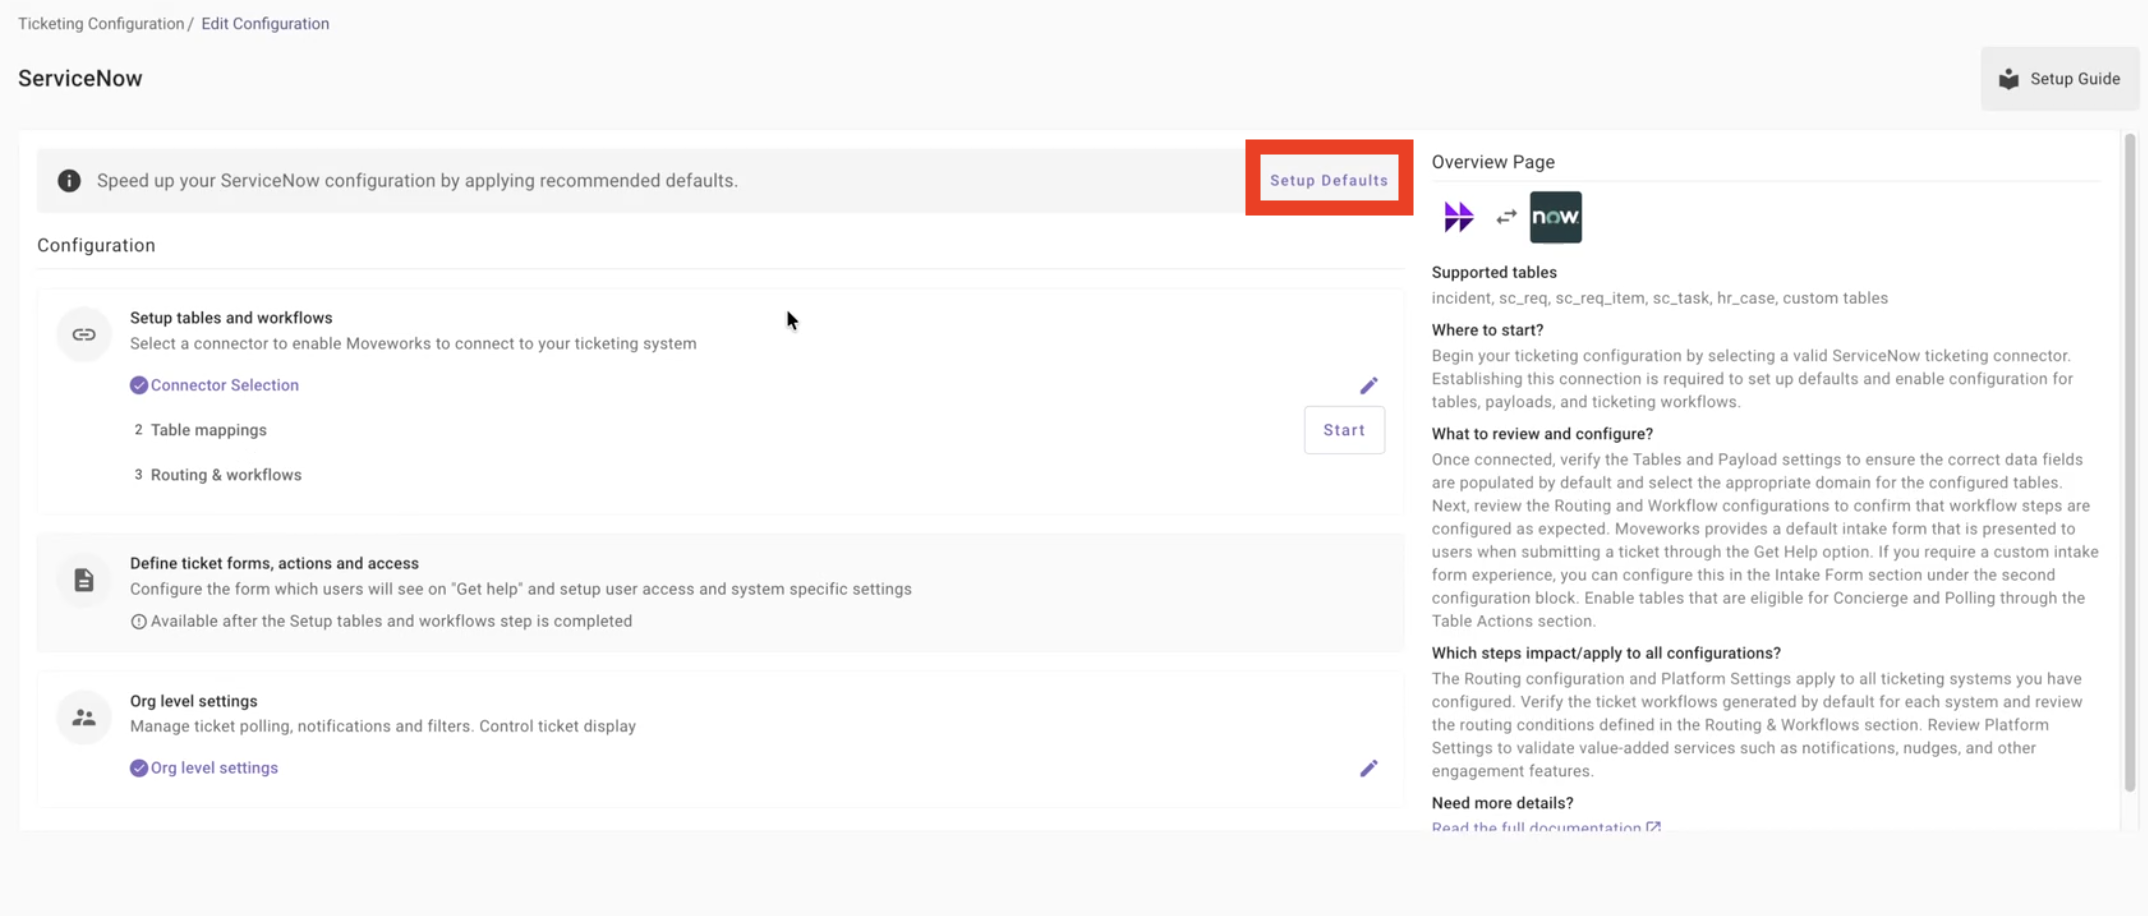
Why all four tables: when the AI Assistant submits a form, it invokes Create on sc_request - the parent record. ServiceNow’s own workflows then generate the Request Item (RITM) and any fulfillment tasks. That is why only sc_request needs Create enabled on the Moveworks side.
3. Review the Table Mappings
On the Table Mappings page, click into each table and confirm the definition matches your instance. The key fields:
Then open Query > States Configuration for each table:
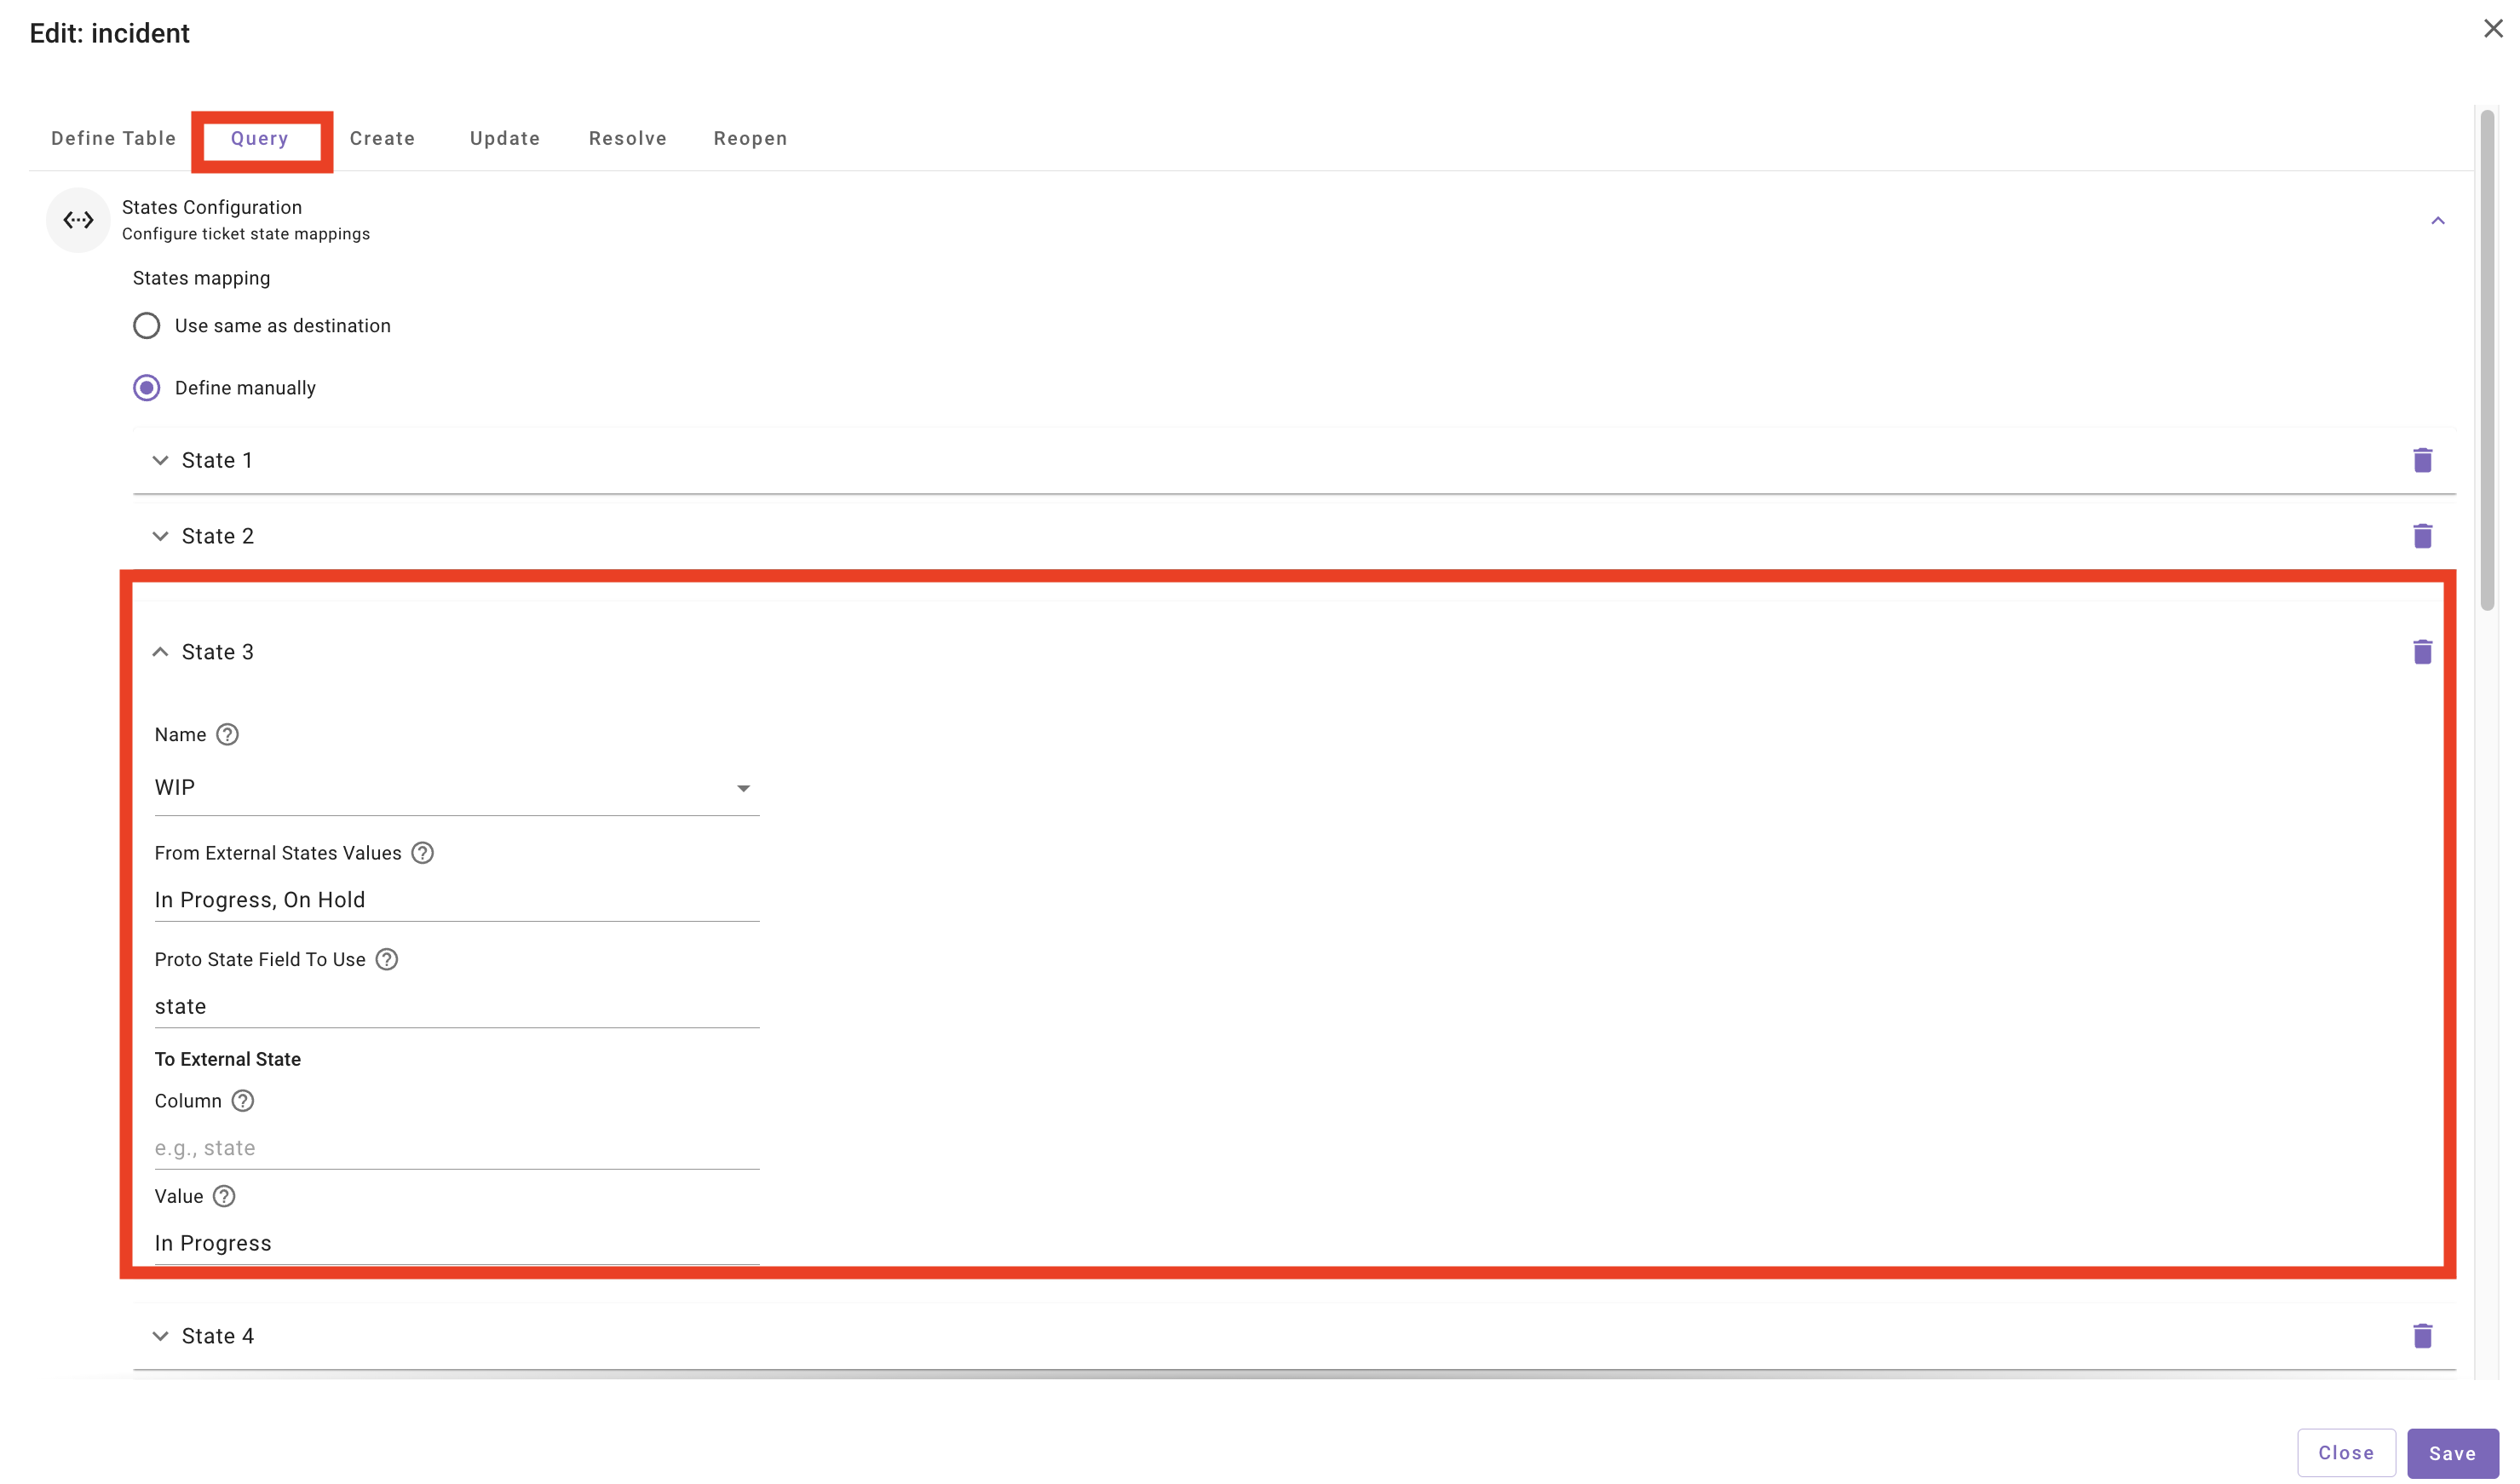
The default state mappings match out-of-the-box ServiceNow states. If your instance uses custom states, check every state in your source tables and map any missing ones into Moveworks - unmapped states cause tickets to display or transition incorrectly.
4. Enable Table Actions and Access
-
On Table Actions, confirm the tables you want live updates for (at minimum Incident) are enabled for Polling and Concierge Updates. Save.
-
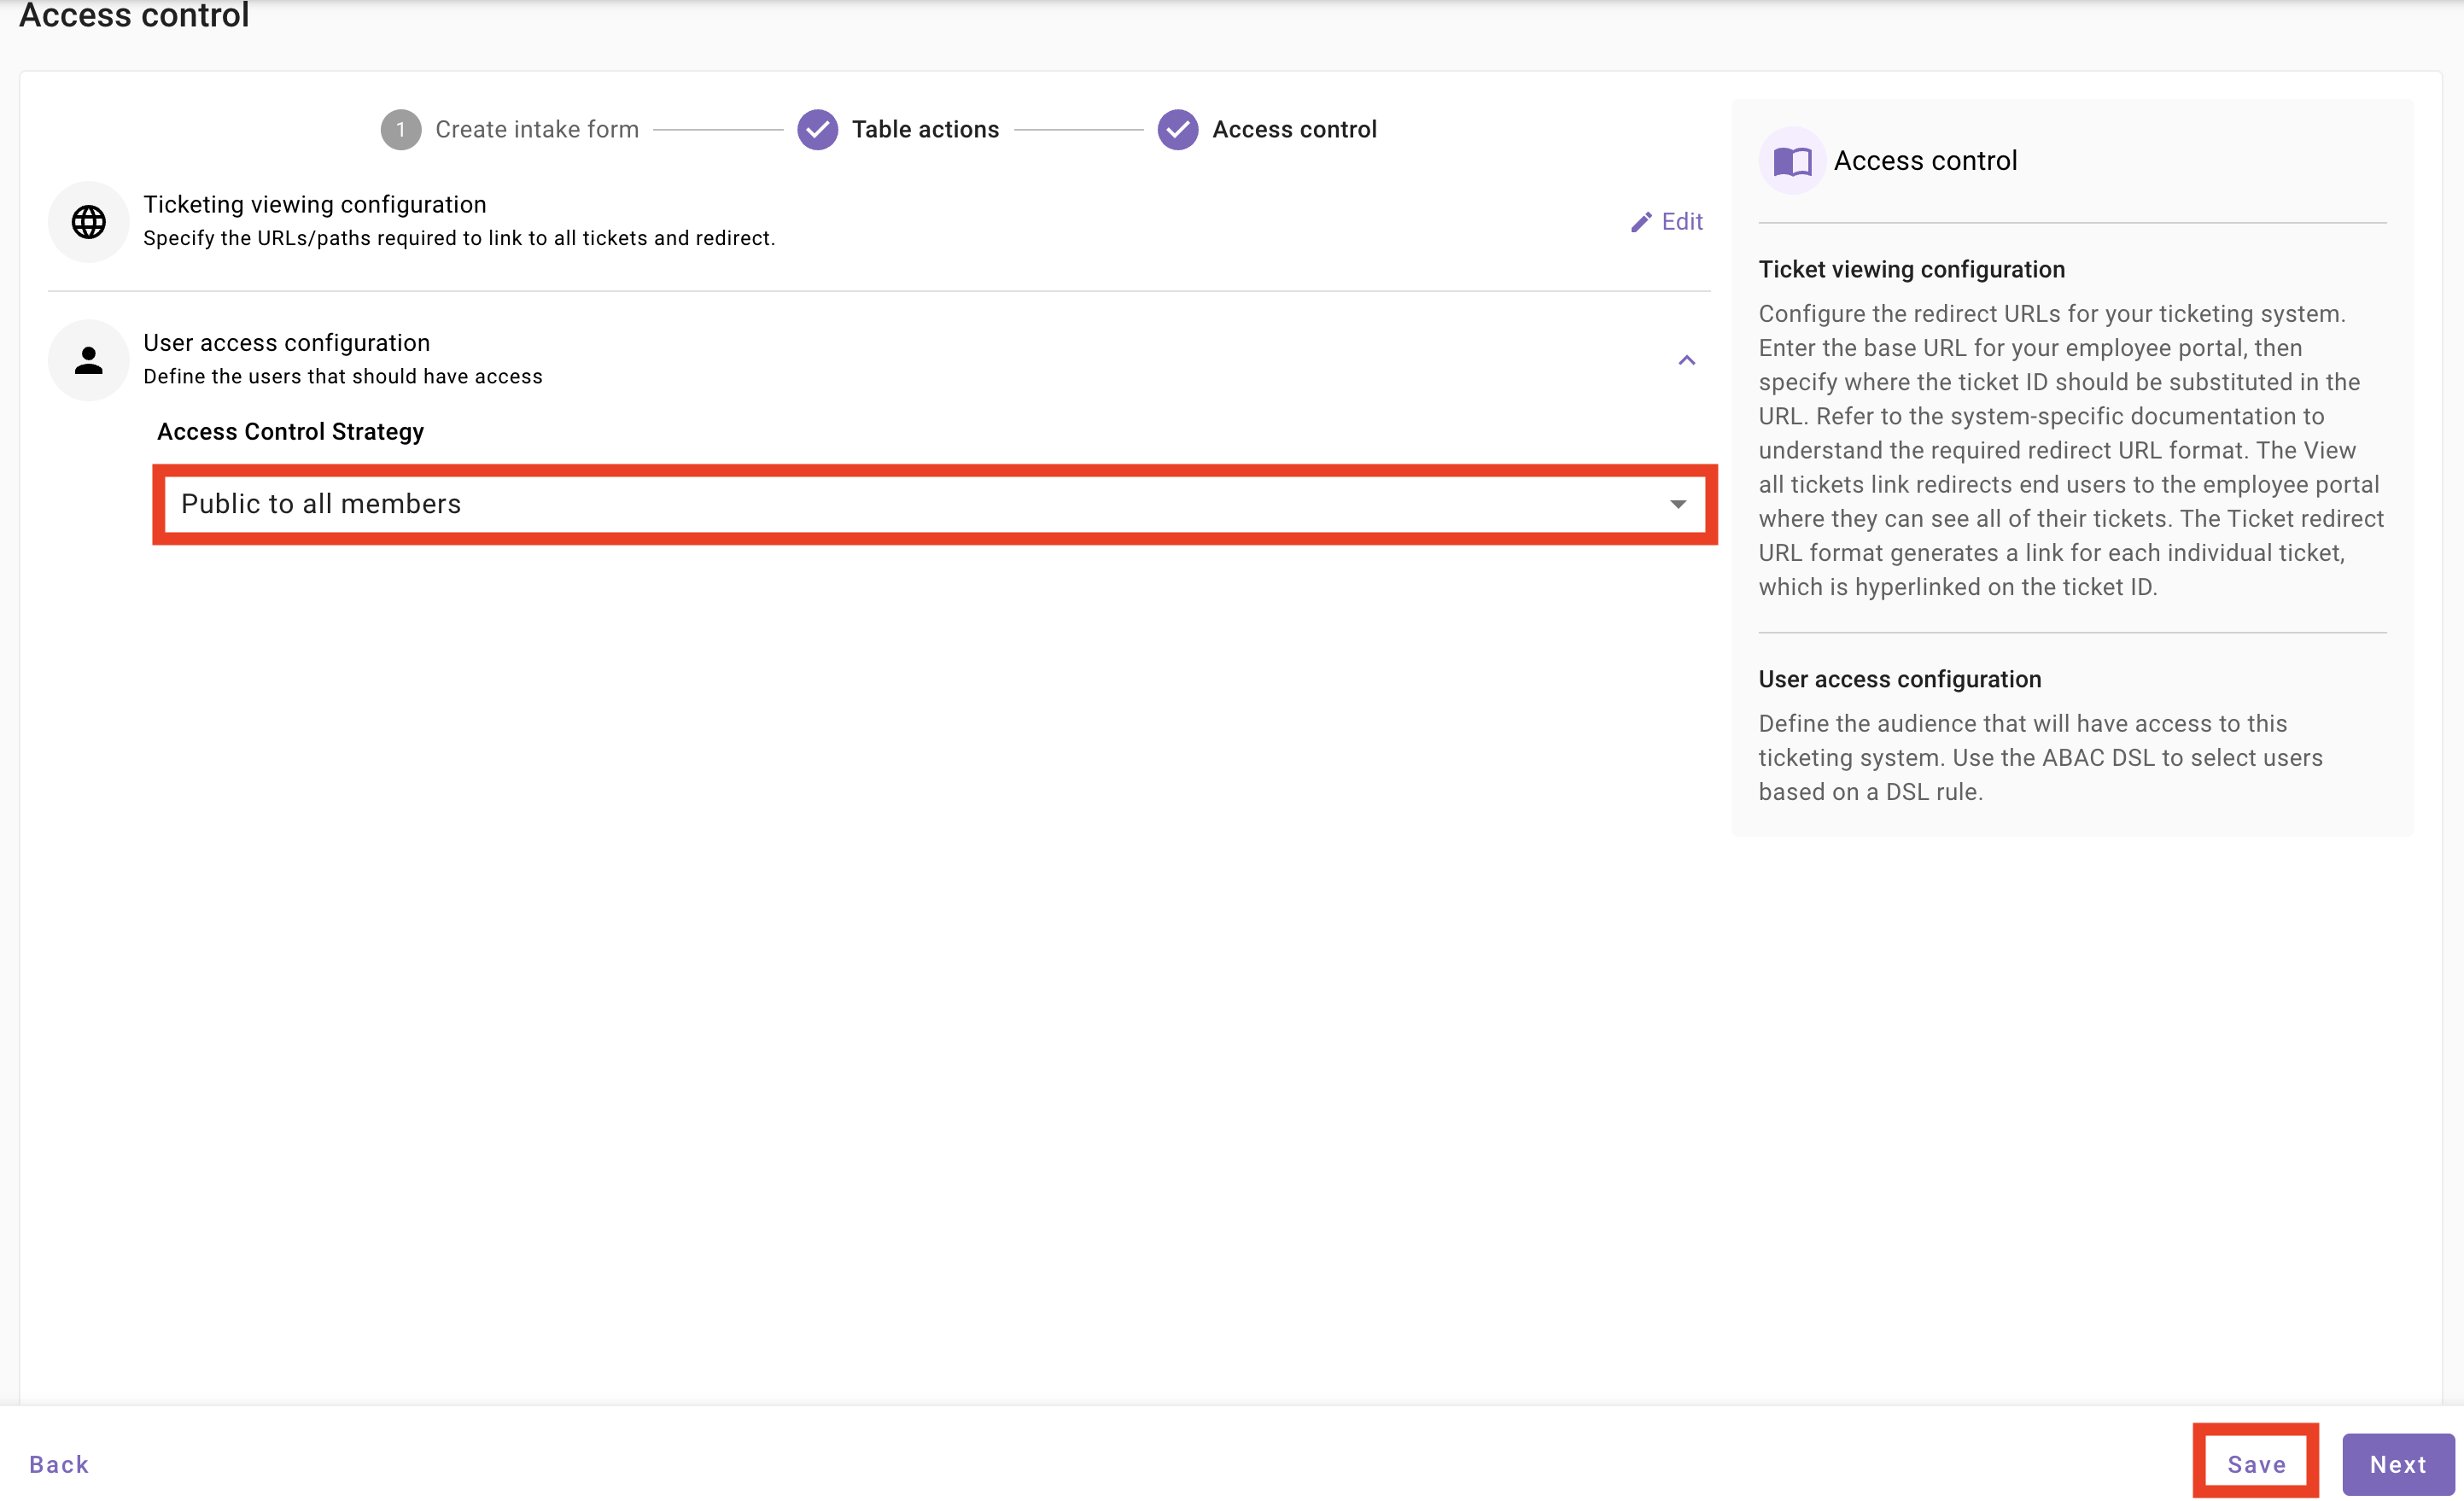
Set the Access Control Strategy (for example, Public to all members). Save.
5. Set the Service Portal URL
Go to Service Portal URL and create a configuration with your connector and your portal’s base URL (for example, https://[your-instance].service-now.com/esc). This controls where users land when they click a ticket link in chat. Save.
Result
From the AI Assistant, users can file a ticket, check the status of their tickets, add comments, resolve, and reopen - and form submissions now complete end to end, creating a REQ/RITM in ServiceNow (verify under sc_req_item.list).
What to Do Next
- Test each ticket action in the AI Assistant: file, query, comment, resolve, reopen. If an action fails, the API Logs page in Moveworks Setup shows exactly what was sent and which field ServiceNow rejected - misalignment between the ticket mapping and your instance’s required fields is the most common cause.
- Deploying inside the ServiceNow Employee Center? Continue to Configure EmployeeWorks Web App (Formerly Slate).
- Complete the Launch Checklist before announcing the AI Assistant to employees.