Genesys Access Requirements
Moveworks integrates with Genesys Cloud so that your employees can chat with a live Genesys agent without leaving the Moveworks AI Assistant. This page covers everything required before configuring the handoff in Moveworks: all Genesys-side setup, the Moveworks credentials, and the Genesys Connector. Once these steps are complete, the connection between Moveworks and Genesys is established, and you can continue with Configure Genesys Live Agent Message Brokering.
Prerequisites
- A Genesys Cloud organization. The integration uses the Genesys Cloud Open Messaging capability, which is not available on Genesys Engage, Genesys Multicloud CX, or PureConnect.
- A Genesys Cloud license that includes Open Messaging. Per Genesys documentation, this is one of: Genesys Cloud CX 4, Genesys Cloud CX 2 Digital, Genesys Cloud CX 3 Digital, or Genesys Cloud CX 1 with the Digital Add-on II.
- Administrator access to the Genesys Cloud Admin console and Architect, with the following permissions:
- Messaging > Integration > All (to create the Open Messaging integration)
- Process Automation > Trigger permissions (to create the event triggers used for agent notifications). The Genesys requirements article lists trigger support for CX 1, CX 2, and CX 3 licenses and does not mention CX 4, so CX 4 customers should confirm trigger entitlement with Genesys.
- Architect > Flow Add / Edit / View (to update your message flow and create notification workflows)
- Integrations > Integration Edit / View and Integrations > Action Add / Edit / Execute / View (to create the data actions used for agent notifications)
- OAuth > Client > Add (to create the OAuth client in Step 3). Genesys only lets you grant an OAuth client roles that are already assigned to your own profile.
- A working contact center to hand conversations to: at least one queue with assigned agents (see the Genesys article Create and configure queues), and an Architect inbound message flow to receive Moveworks conversations. Step 4 can attach the integration to an existing flow, or you can create a dedicated one.
There is no Genesys platform version requirement. Genesys Cloud is continuously delivered and its Platform API has a single supported version (v2).
Moveworks webhook URL
Several of the steps below use the Moveworks webhook URL. It is specific to the Moveworks data center hosting your organization, and the same region-specific URL is used in two places: as the Outbound Notification Webhook URL of the Open Messaging integration (Step 1) and as the Request URL of the two notification data actions (Step 6). Do not copy the United States URL unless your organization is hosted there:
You can identify your data center from your organization’s Moveworks login domain: for example, a login domain of acme.moveworks.com means the United States data center (use api.moveworks.ai), while acme.uk.moveworks.com means UK (use api.uk.moveworks.com). If you are still unsure, confirm the URL with Moveworks support.
Step 1: Create the Open Messaging integration in Genesys
This step produces two values that the Moveworks credentials in Step 2 need: a webhook signature secret that you generate, and the integration ID that Genesys generates when you save the integration.
- Generate a webhook signature secret. This is a strong random secret of your choosing, at least 32 characters long. Any standard method works, for example running
openssl rand -base64 32in a terminal or using your password manager’s password generator. Treat it like a password and store it securely. You will enter this exact value in two places: in Genesys in this step, and in Moveworks in Step 2. - In Genesys Cloud Admin, go to Admin > Message > Platforms (in the newer navigation, Menu > Digital and Telephony > Message > Platform Integrations) and select Create New Integration > Open Messaging.
- Configure:
- Name: a recognizable name, for example
Moveworks_Integration. No later step uses this name. - Outbound Notification Webhook URL: the Moveworks webhook URL for your data center (table above).
- Outbound Notification Webhook Signature Secret Token: the webhook signature secret you generated above. Genesys hides this value after you save it, which is why you generated and stored it first.
- Supported Content Profile:
default, or a profile matching your attachment policy. - The remaining fields (for example Platform Config and Engagement Source) can be left at their defaults.
- Name: a recognizable name, for example
- Save the integration and record its integration ID (the UUID visible in the page URL, or via the Genesys API). You will need it twice: in the Moveworks credentials in Step 2, and in the Live Agent Handoff configuration in the configuration guide.
Step 2: Create the credentials in Moveworks
In Moveworks Setup, under HTTP Connectors > Credentials, create the two credentials below.
-
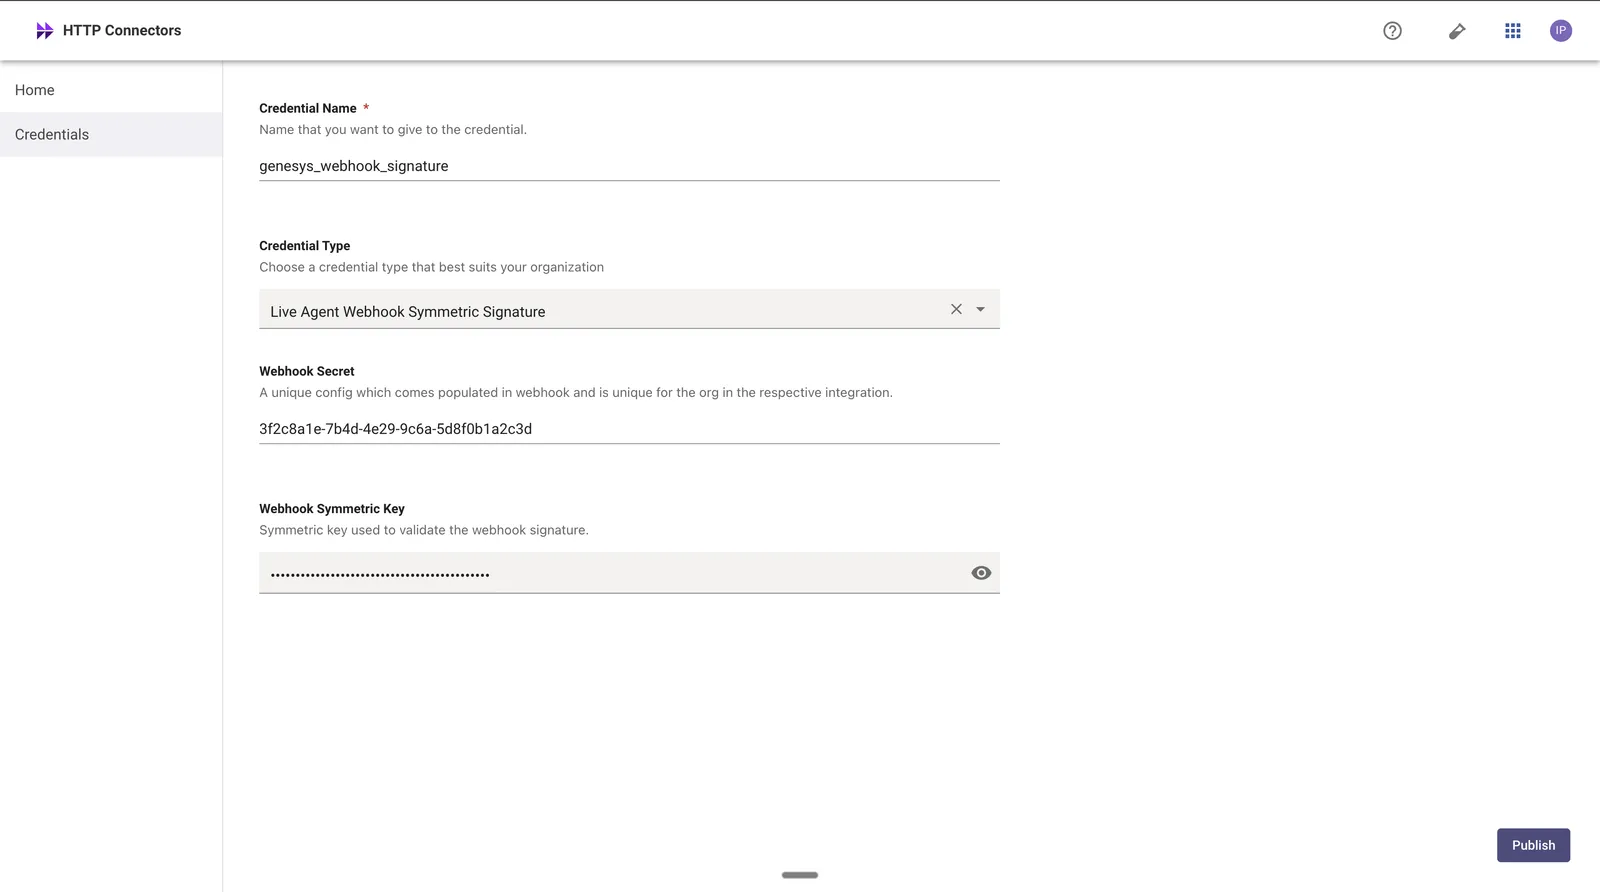
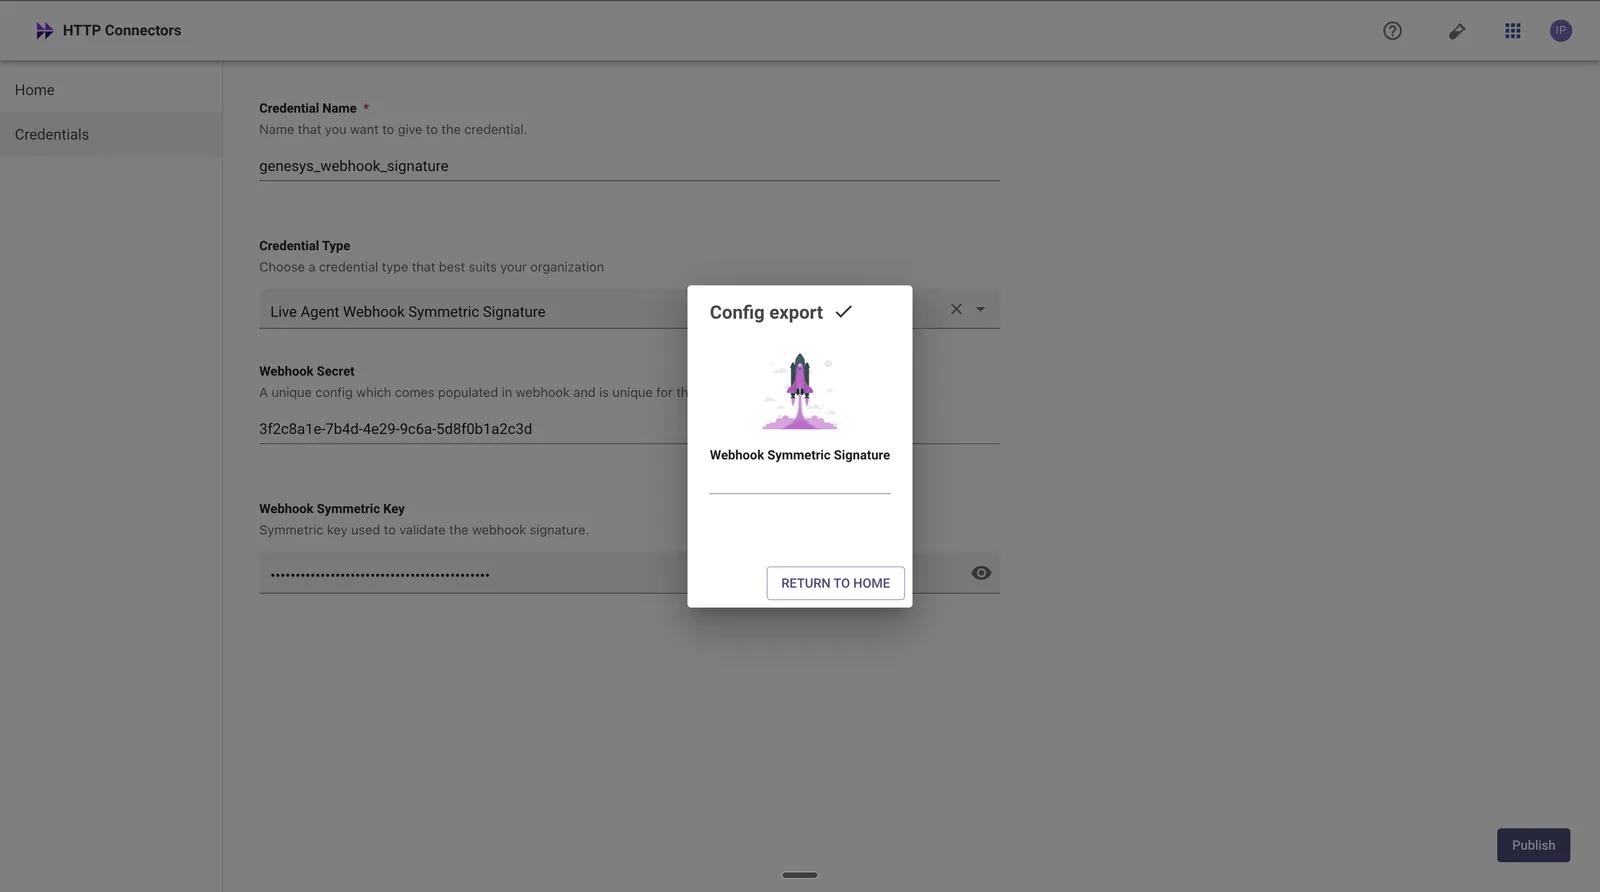
A Live Agent Webhook Symmetric Signature credential, which lets Moveworks verify that webhook calls come from your Genesys organization (Genesys signs every webhook request with an
X-Hub-Signature-256HMAC header):- Webhook Secret = the Open Messaging integration ID from Step 1.
- Webhook Symmetric Key = the webhook signature secret you generated in Step 1. Enter the exact same value here.
-
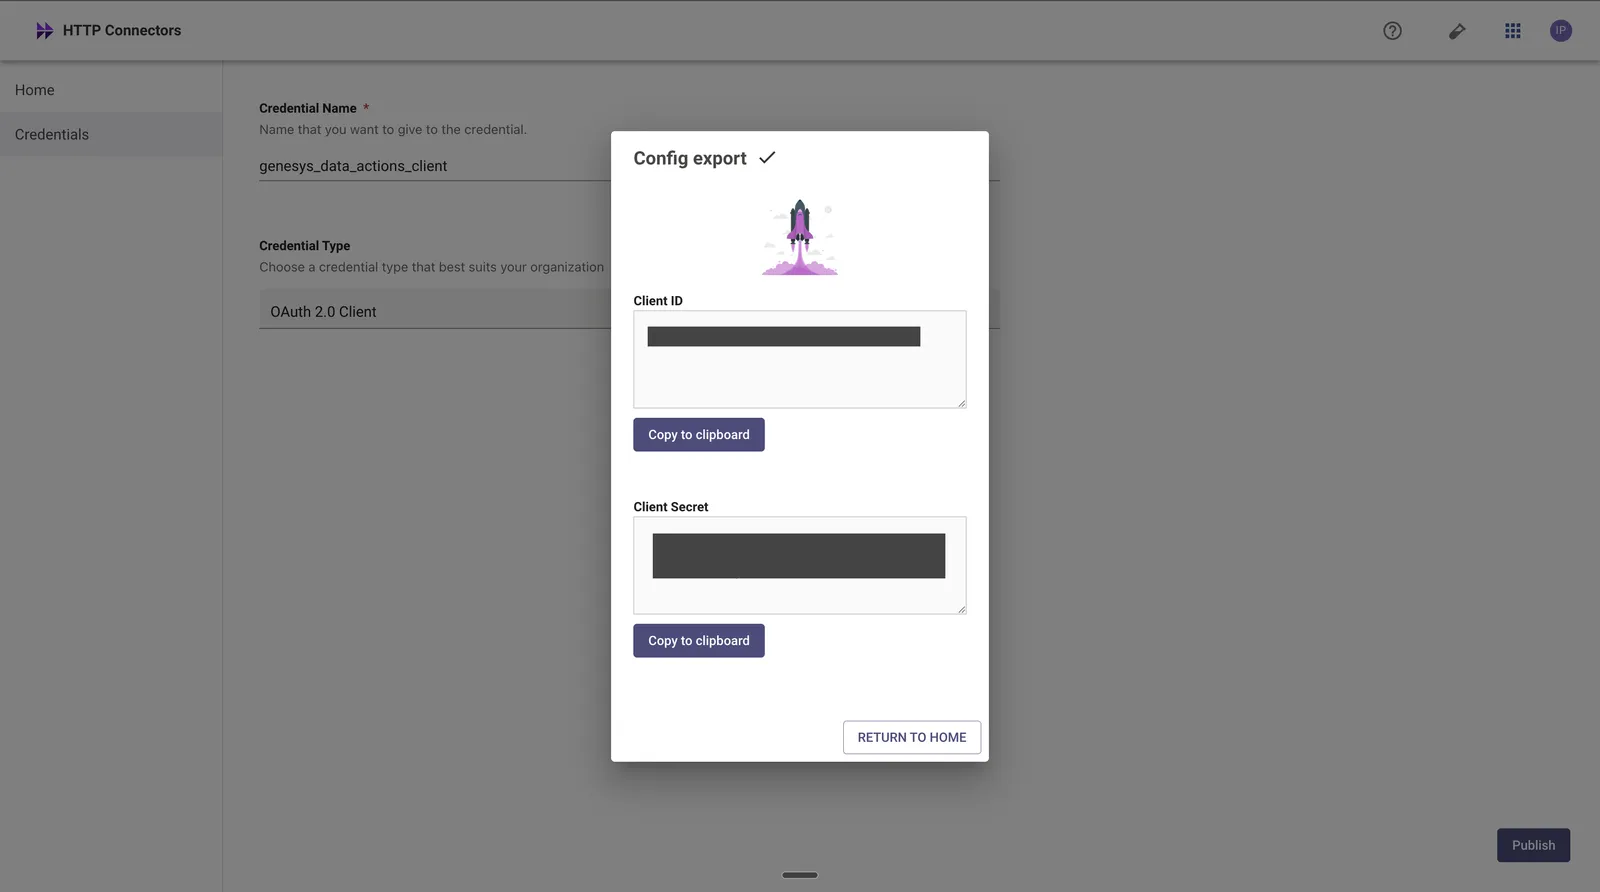
An OAuth 2.0 Client credential. Moveworks generates the client ID and client secret when you create it. Store them securely when they are shown. Genesys uses this credential to authenticate the agent-accept and agent-disconnect notifications built in Step 6, exchanging it for an access token at the Moveworks token endpoint:
Replace the host with your data center’s API host from the table above, matching the host in your webhook URL. The request body (JSON or form-encoded) carries
grant_type=client_credentials,client_id, andclient_secret. Access tokens are valid for 1 hour, and the Genesys credential configuration in Step 6 refreshes them automatically.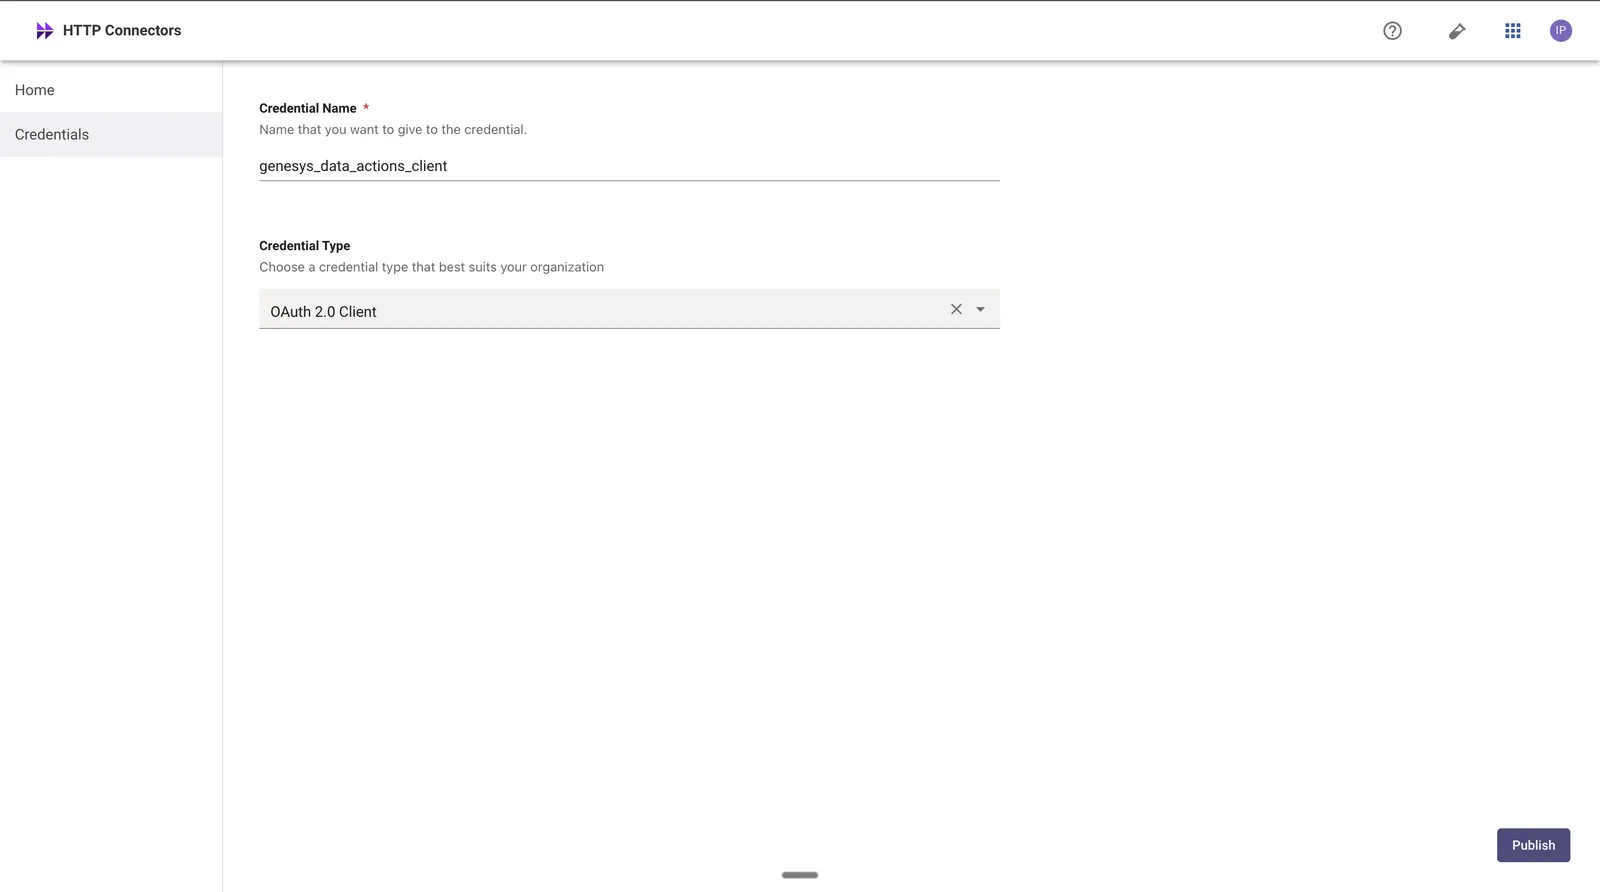
Step 3: Create a Genesys OAuth client for Moveworks
Moveworks starts conversations and relays employee messages into Genesys through the Genesys Cloud API, authenticating with credentials you create.
-
In Genesys Cloud Admin, go to Admin > Integrations > OAuth (in the newer navigation, Menu > IT and Integrations > OAuth) and add a client using the Client Credentials grant type. See the Genesys article Create an OAuth client.
-
Assign a role to the client. Client Credentials clients have no scope setting in Genesys Cloud, so the assigned role’s permissions determine what the token can do. Create a dedicated role with the following permissions and assign it to the client:
- Conversation > Message > Receive (
conversation:message:receive), which authorizes starting conversations, relaying employee messages, and delivery receipts - Conversation > Communication > Disconnect (
conversation:communication:disconnect), which authorizes ending the conversation when the employee leaves the chat - Conversation > Message > Create (
conversation:message:create), Conversation > Message > View (conversation:message:view), and Analytics > Conversation Detail > View (analytics:conversationDetail:view), which cover related conversation reads and message operations
The first two permissions are required by the Moveworks calls. The remaining three are recommended so the role also covers adjacent conversation lookups without needing a role change later.
- Conversation > Message > Receive (
-
Store the client ID and client secret securely, along with your Genesys Cloud region. Your region is visible in your Genesys Cloud login domain: for example, logging in at
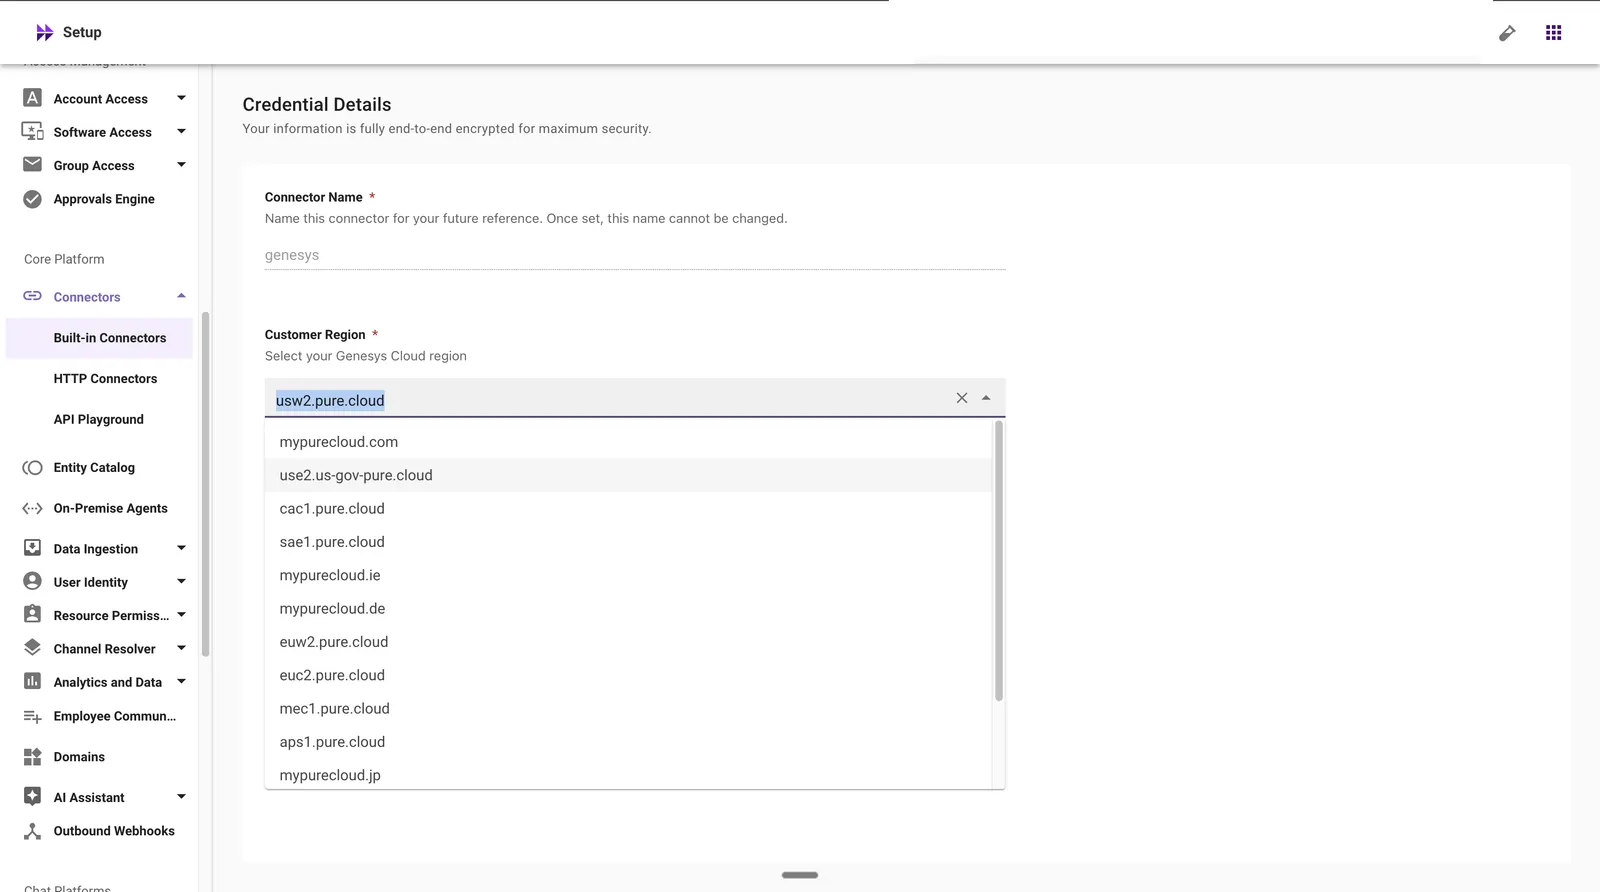
apps.usw2.pure.cloudmeans the region hostusw2.pure.cloud, which is the value the Genesys Connector’s region dropdown expects. You will enter all three in the Genesys Connector in Step 7.
Step 4: Route the integration to a message flow in Genesys
- In Genesys Cloud Admin, go to Admin > Routing > Message Routing and select Attach New Addresses to a Flow (labeled Attach New Addresses in some versions of the Genesys Admin UI).
- Select the Architect inbound message flow that should receive Moveworks conversations and attach the Open Messaging integration as its address.
You can attach the integration to an existing chat flow (many organizations reuse their service desk chat flow) or create a dedicated flow for Moveworks. To create a dedicated one, see the Genesys article Add an inbound message flow.
Step 5: Handle Moveworks conversations in the Genesys flow
Open the flow in Architect and make sure it does three things for Moveworks traffic:
- Detect Open Messaging conversations. If the flow is shared with other channels, branch on the message type. A Decision step with the expression
Message.Message.type == "open"identifies conversations arriving through Open Messaging. - Read the employee identity. Moveworks sends the employee’s email address as the message sender. Capture it with
Message.Message.senderAddressand set whatever participant data your agents rely on with the Architect Set Participant Data action (for example a display name derived from the address, and a marker attribute identifying the Moveworks channel). - Send an automated greeting from the flow. This step is required. Moveworks treats the first automated (bot-originated) message coming back from your flow as the signal that the handoff session is active. A flow that stays silent until an agent replies will never activate the session. A simple welcome message such as “Connecting you with the service desk…” is enough (the Architect Send Response action), and it also gives the employee immediate feedback.
After that, route to your queue with the Architect Transfer to ACD action (see the Genesys article Transfer to ACD action). Moveworks sends the employee’s full request text, so you can either transfer directly to a single queue or add intent-based routing (see the optional section at the end of this page). When you finish editing, save and publish the flow. Changes do not take effect until the flow is published.
Step 6: Set up agent-accept and agent-disconnect notifications in Genesys
The Open Messaging webhook does not include agent details, and it does not tell Moveworks when the agent leaves. You provide both with two notifications built from standard Genesys Cloud features: event triggers invoke workflows, and the workflows call data actions that notify Moveworks.
This is the longest step, but each part is a small, standard Genesys object:
Build them in the order below. Each subsection uses what the previous one created.
6a. Create the web services data actions integration
In Admin > Integrations, add a Web Services Data Actions integration (see the Genesys article Add a data actions integration). Then configure its credential so Genesys can authenticate to Moveworks:
-
On the integration’s Configuration > Credentials tab, select the User Defined (OAuth) credential type and add three fields holding the values from Step 2:
clientId,clientSecret, andtokenUrl. Field names in this credential type are your choice, and these three names are referenced below. -
Genesys automatically creates a custom auth action for the integration. Open it from the Credentials page (Custom Auth Action) and configure it to call the Moveworks token endpoint: Request URL Template
${credentials.tokenUrl}, Request TypePOST, aContent-Type: application/x-www-form-urlencodedheader, and this request body template: -
The fields of the token response become available to your data actions as
${authResponse.access_token}. For details, see the Genesys articles How to use the User Defined (OAuth) credential type and Workflow for the User Defined (OAuth) credential type.
6b. Create the two notification data actions
Create both under the Web Services Data Actions integration in Admin > Integrations > Actions > Add Action, and publish them when done (see the Genesys article Create a custom action). Configure both with:
- HTTP Method:
POST - Request URL: the Moveworks webhook URL from the table above, the same region-specific URL used in the Open Messaging integration (Step 1)
- Headers:
Content-Type: application/json, plusAuthorization: Bearer ${authResponse.access_token}(the access token from the integration credential configured above) - Execution Timeout: 60 seconds
- Input contract and request body template:
Agent accepted (input contract: conversationId required, userName):
Agent disconnected (input contract: conversationId required):
The event value is what Moveworks reads. agent_accepts updates the agent name shown to the employee, and agent_disconnect ends the Moveworks handoff session. Additional fields are ignored, so contracts that also pass addressFrom or disconnectType work unchanged.
6c. Create the conversation-lookup data action
Add a Genesys Cloud Data Actions integration (if you don’t already have one). This integration authenticates with its own Genesys OAuth client, and that client’s role must include the Conversation > Communication > View permission. On it, create a data action that calls GET /api/v2/conversations/{conversationId}, with a conversationId input and a Request URL template of /api/v2/conversations/${input.conversationId}. The response’s participants array carries each participant’s purpose and name, which the accept workflow reads to look up the name of the agent who joined.
6d. Create the two workflows
- Accept workflow: call the conversation-lookup data action with the conversation ID, find the participant whose
purposeis"agent"and take itsnameas the agent’s display name, then call the agent-accepted data action with the conversation ID and the agent name. - Disconnect workflow: call the agent-disconnected data action with the conversation ID.
Create the workflows in Architect under the Workflow flow type (see the Genesys article Work with workflows). The triggers below deliver the event’s fields (conversationId, participantId, sessionId, disconnectType, and others) directly as workflow variables when the trigger’s Data Format is set to TopLevelPrimitives, so no extra lookups are needed for the conversation ID. For this to work, each workflow must declare an input variable for every event field it uses (at minimum conversationId): when creating the variable in Architect, mark it as an input on its Data tab. Event fields without a matching input variable are not passed in.
6e. Create the two event triggers
In Admin > Architect > Triggers, on the Event Based Triggers tab (see the Genesys article Create a trigger), create:
Configure both triggers with Data Format: TopLevelPrimitives and add match conditions so they fire only for Open Messaging conversations:
mediaTypeEquals"MESSAGE"messageTypeEquals"OPEN"
On the agent-left trigger only, add a third condition so that transfers do not end the session. The goal is to exclude every transfer-type disconnect value:
disconnectTypeNot In["TRANSFER", "CONFERENCE_TRANSFER", "CONSULT_TRANSFER", "FORWARD_TRANSFER", "NO_ANSWER_TRANSFER", "NOT_AVAILABLE_TRANSFER", "DND_TRANSFER"]
Both topics are built into Genesys Cloud, so you select them from the topic list when creating the trigger. The user.start event also fires when a chat is auto-answered. New triggers are created in an Inactive state, so activate both after configuring them.
Genesys fires user.start for any agent-side participant who joins the conversation, including a supervisor who starts Live Monitoring. Without a filter, a monitoring session re-runs the accept workflow and the employee sees the supervisor’s name instead of the agent’s. Add match conditions to your accept trigger or workflow to exclude monitoring participants. The reference filter configuration is still being validated, so confirm the exact conditions with Moveworks support.
Step 7: Create the Genesys Connector in Moveworks
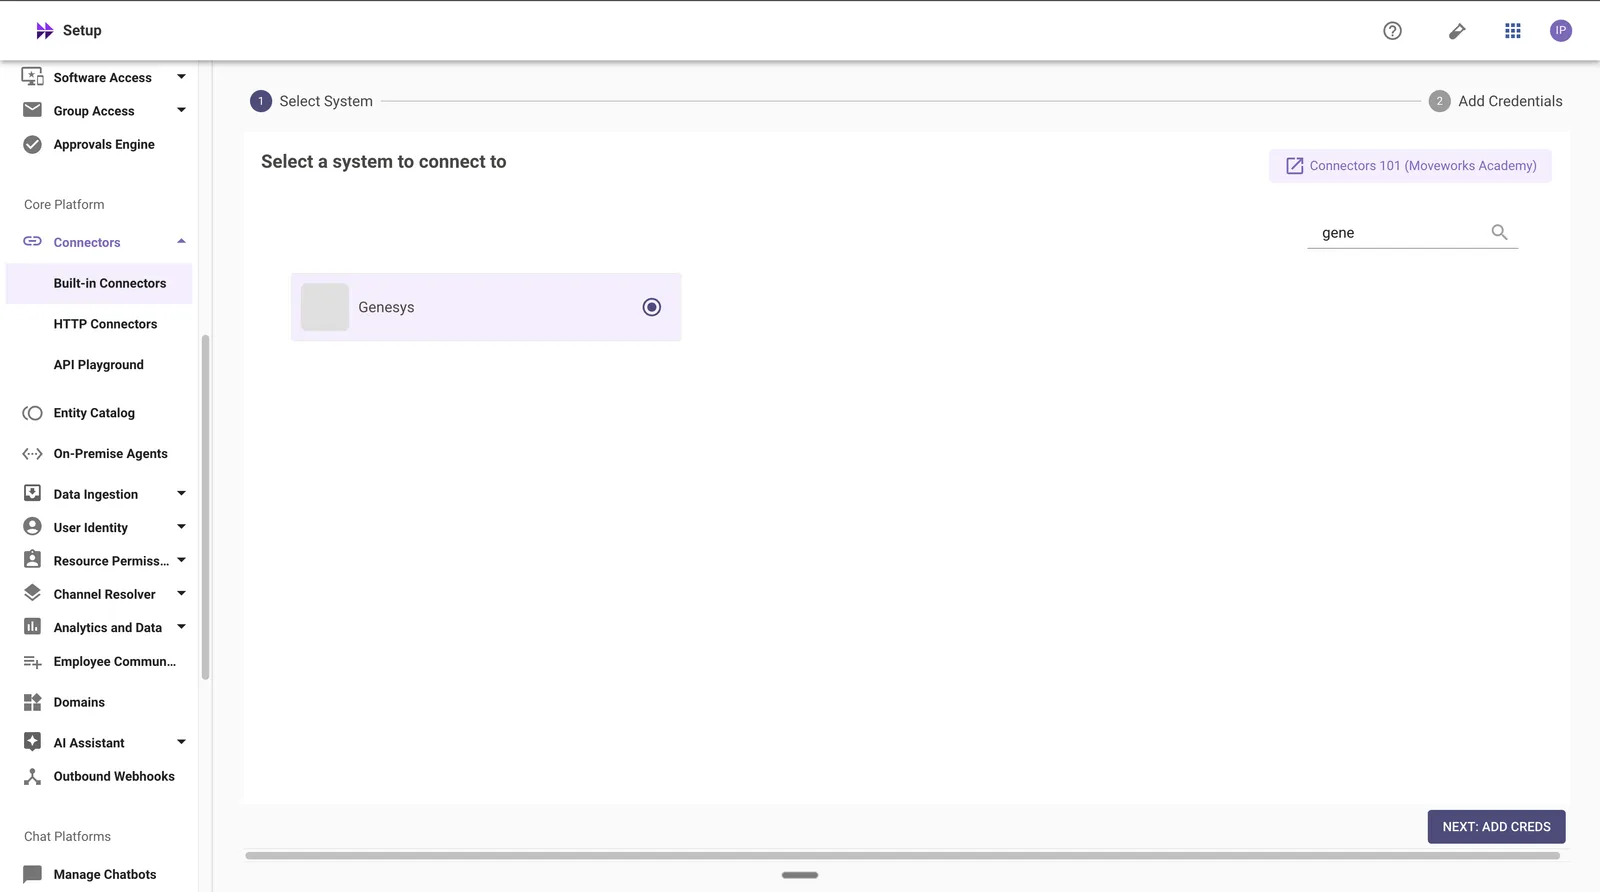
In Moveworks Setup, go to Connectors > Built-in Connectors, select Genesys, and configure the connector with your Genesys Cloud region and the OAuth client ID and secret created in Step 3. This is what lets Moveworks call the Genesys Cloud API in your region.
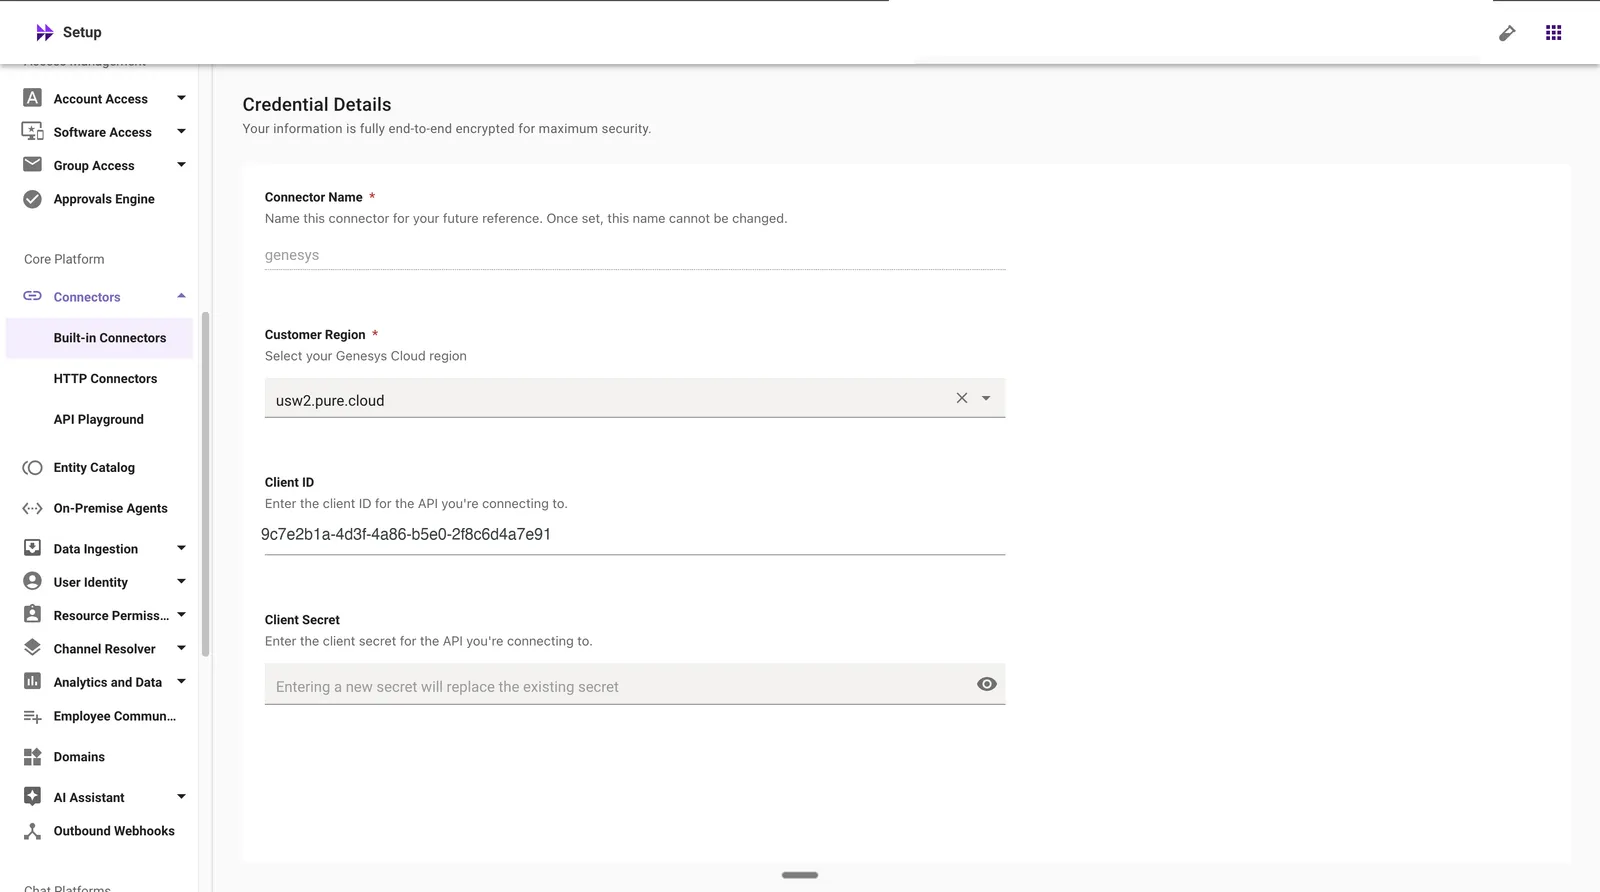
With this step, the connection between Moveworks and Genesys is established. Continue with Configure Genesys Live Agent Message Brokering, keeping the Open Messaging integration ID from Step 1 at hand.
Optional: intent-based queue routing
Moveworks sends the employee’s request as free text (for example “my VPN keeps disconnecting”), not a menu selection. If you route different issue types to different queues, add a Digital Bot Flow in front of the queue transfer:
- Pass
Message.Message.body(the employee’s text) as the bot input. - Classify it to intents. A common approach is a slot with List slot-type values whose synonym lists cover your issue vocabulary (for example a telephony intent matching “ringing” or “calls dropping”, and a software intent matching “VPN”, “Citrix”, or “Outlook”), with a fallback intent for everything else.
- Route each intent to its queue.
This is optional. If all live chats go to one queue, transfer directly and skip the bot. Genesys prices bot flows separately (usage-based), independent of the Moveworks integration.
Next step
With the access requirements complete, continue with Configure Genesys Live Agent Message Brokering, keeping the Open Messaging integration ID from Step 1 at hand.