Configuring Conditional Subfields in RTF
What this covers: How to configure Update Rules on a Rich Ticket Filing (RTF) form so that fields show, hide, or become required/optional dynamically — based on values the user has already entered.
How It Works
Update Rules evaluate a condition against the current field values in the form. When that condition is met (or not met), Moveworks applies a set of field updates — toggling visibility or required state — in real time as the user fills out the form.
Each rule has three parts:
Supported update types: Only REQUIRED / NOT REQUIRED and VISIBLE / NOT VISIBLE are currently supported for dynamic field updates.
Rule execution order matters. Rules are executed in the order they are defined. If two rules target the same field, the last rule wins. Design your rules accordingly.
When to Use Update Rules
Use Update Rules when the answers a user gives earlier in a form should change what fields they see or are required to fill out next. Common scenarios include:
- Conditional fields: Only show a “Manager Approval Required” field when the request cost exceeds a threshold
- Mutually exclusive options: Show different dropdown options depending on a prior selection (e.g., different software tiers based on department)
- Progressive disclosure: Keep the form simple by hiding fields that are irrelevant given the user’s earlier choices
The Key RTF Pattern
RTF Update Rules work by toggling the visibility and required state of named fields. This means that to present a user with different options for the same question, you need to model it as two separate fields — one per option set — and show only the relevant one at a time.
For example: if users in different departments should see different priority options, you’d create priority_it and priority_hr as separate fields (both labeled “Priority”), and use an Update Rule to show only the one that matches the user’s department. The user sees a single “Priority” question; the form handles the branching behind the scenes.
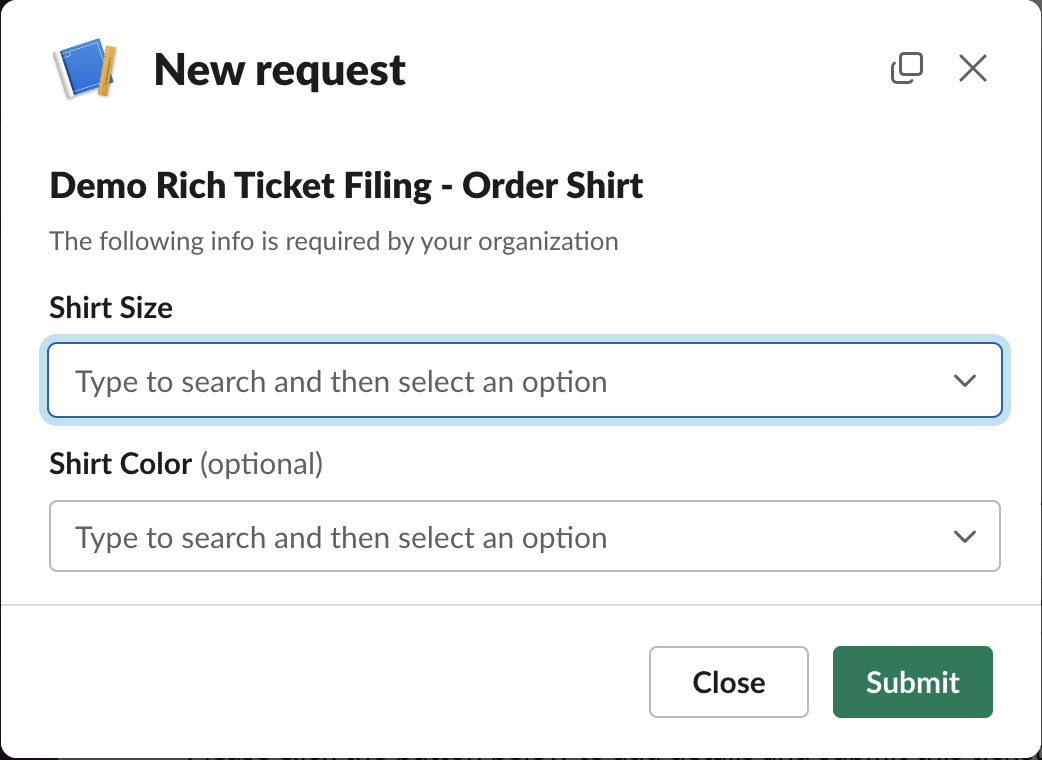
Worked Example: Shirt Order Form
This example walks through a form where a user orders a shirt by selecting a Size (Small, Medium, or Large) and a Color. The business constraint: Medium Blue and Large Blue shirts are not available, so the color options must change based on the size selected.
The Scenario
The form presents two visible labels — Shirt Size and Shirt Color — but the color field is actually implemented as two separate fields with different option sets:
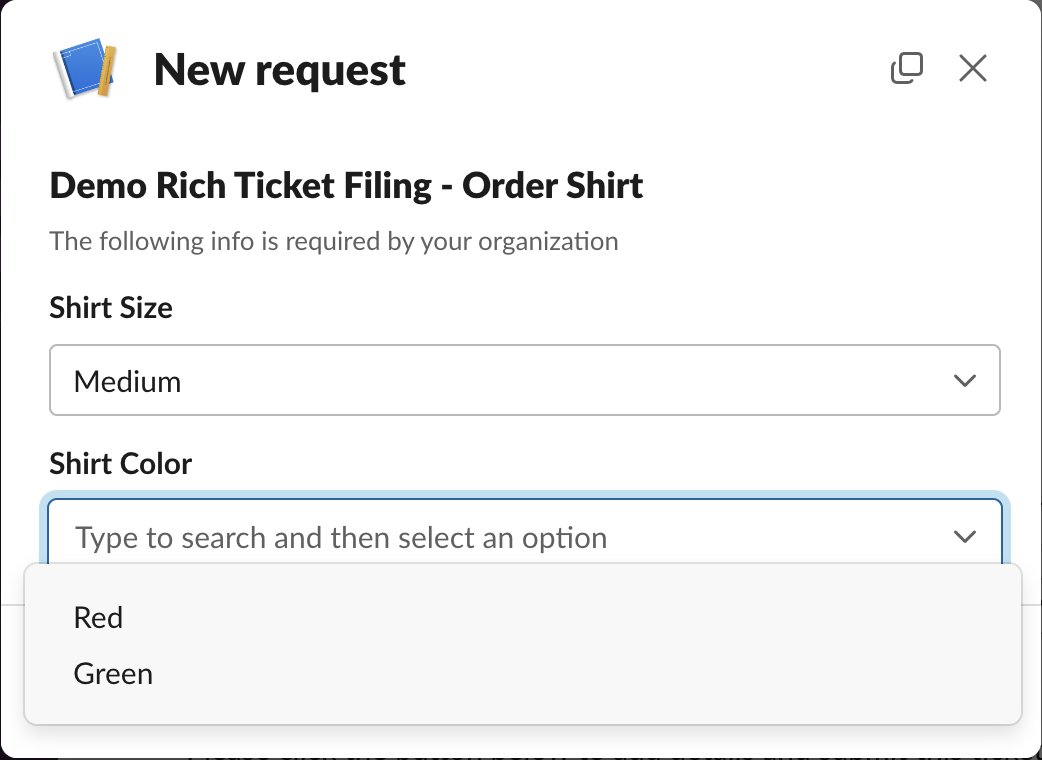
This lets you offer Red/Green/Blue for Small, but only Red/Green for Medium and Large.
The form as the user sees it — initial state:
Depending on which size is selected, the correct color field appears:

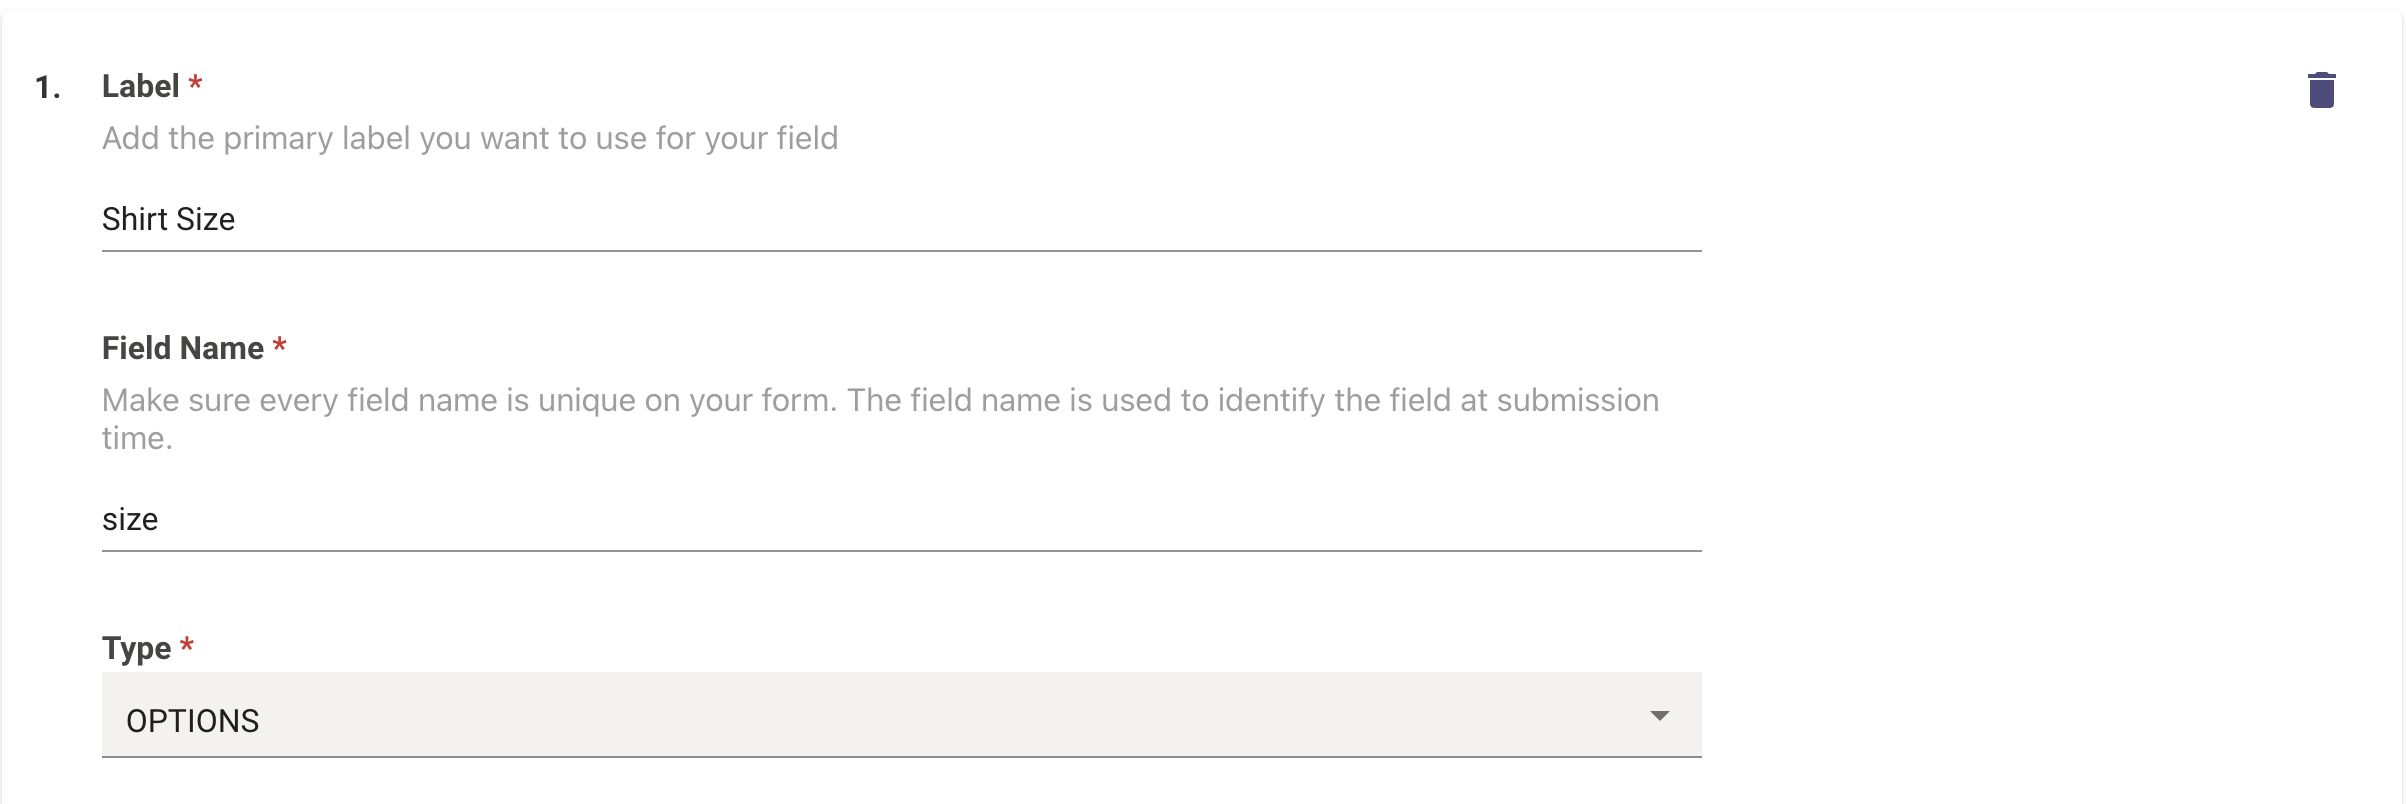
Step 1: Identify Your Field Names
Before opening Moveworks Setup, confirm the exact field names for every field involved — both the field driving the condition and the fields being updated.
size field:
color_options_small_size field:
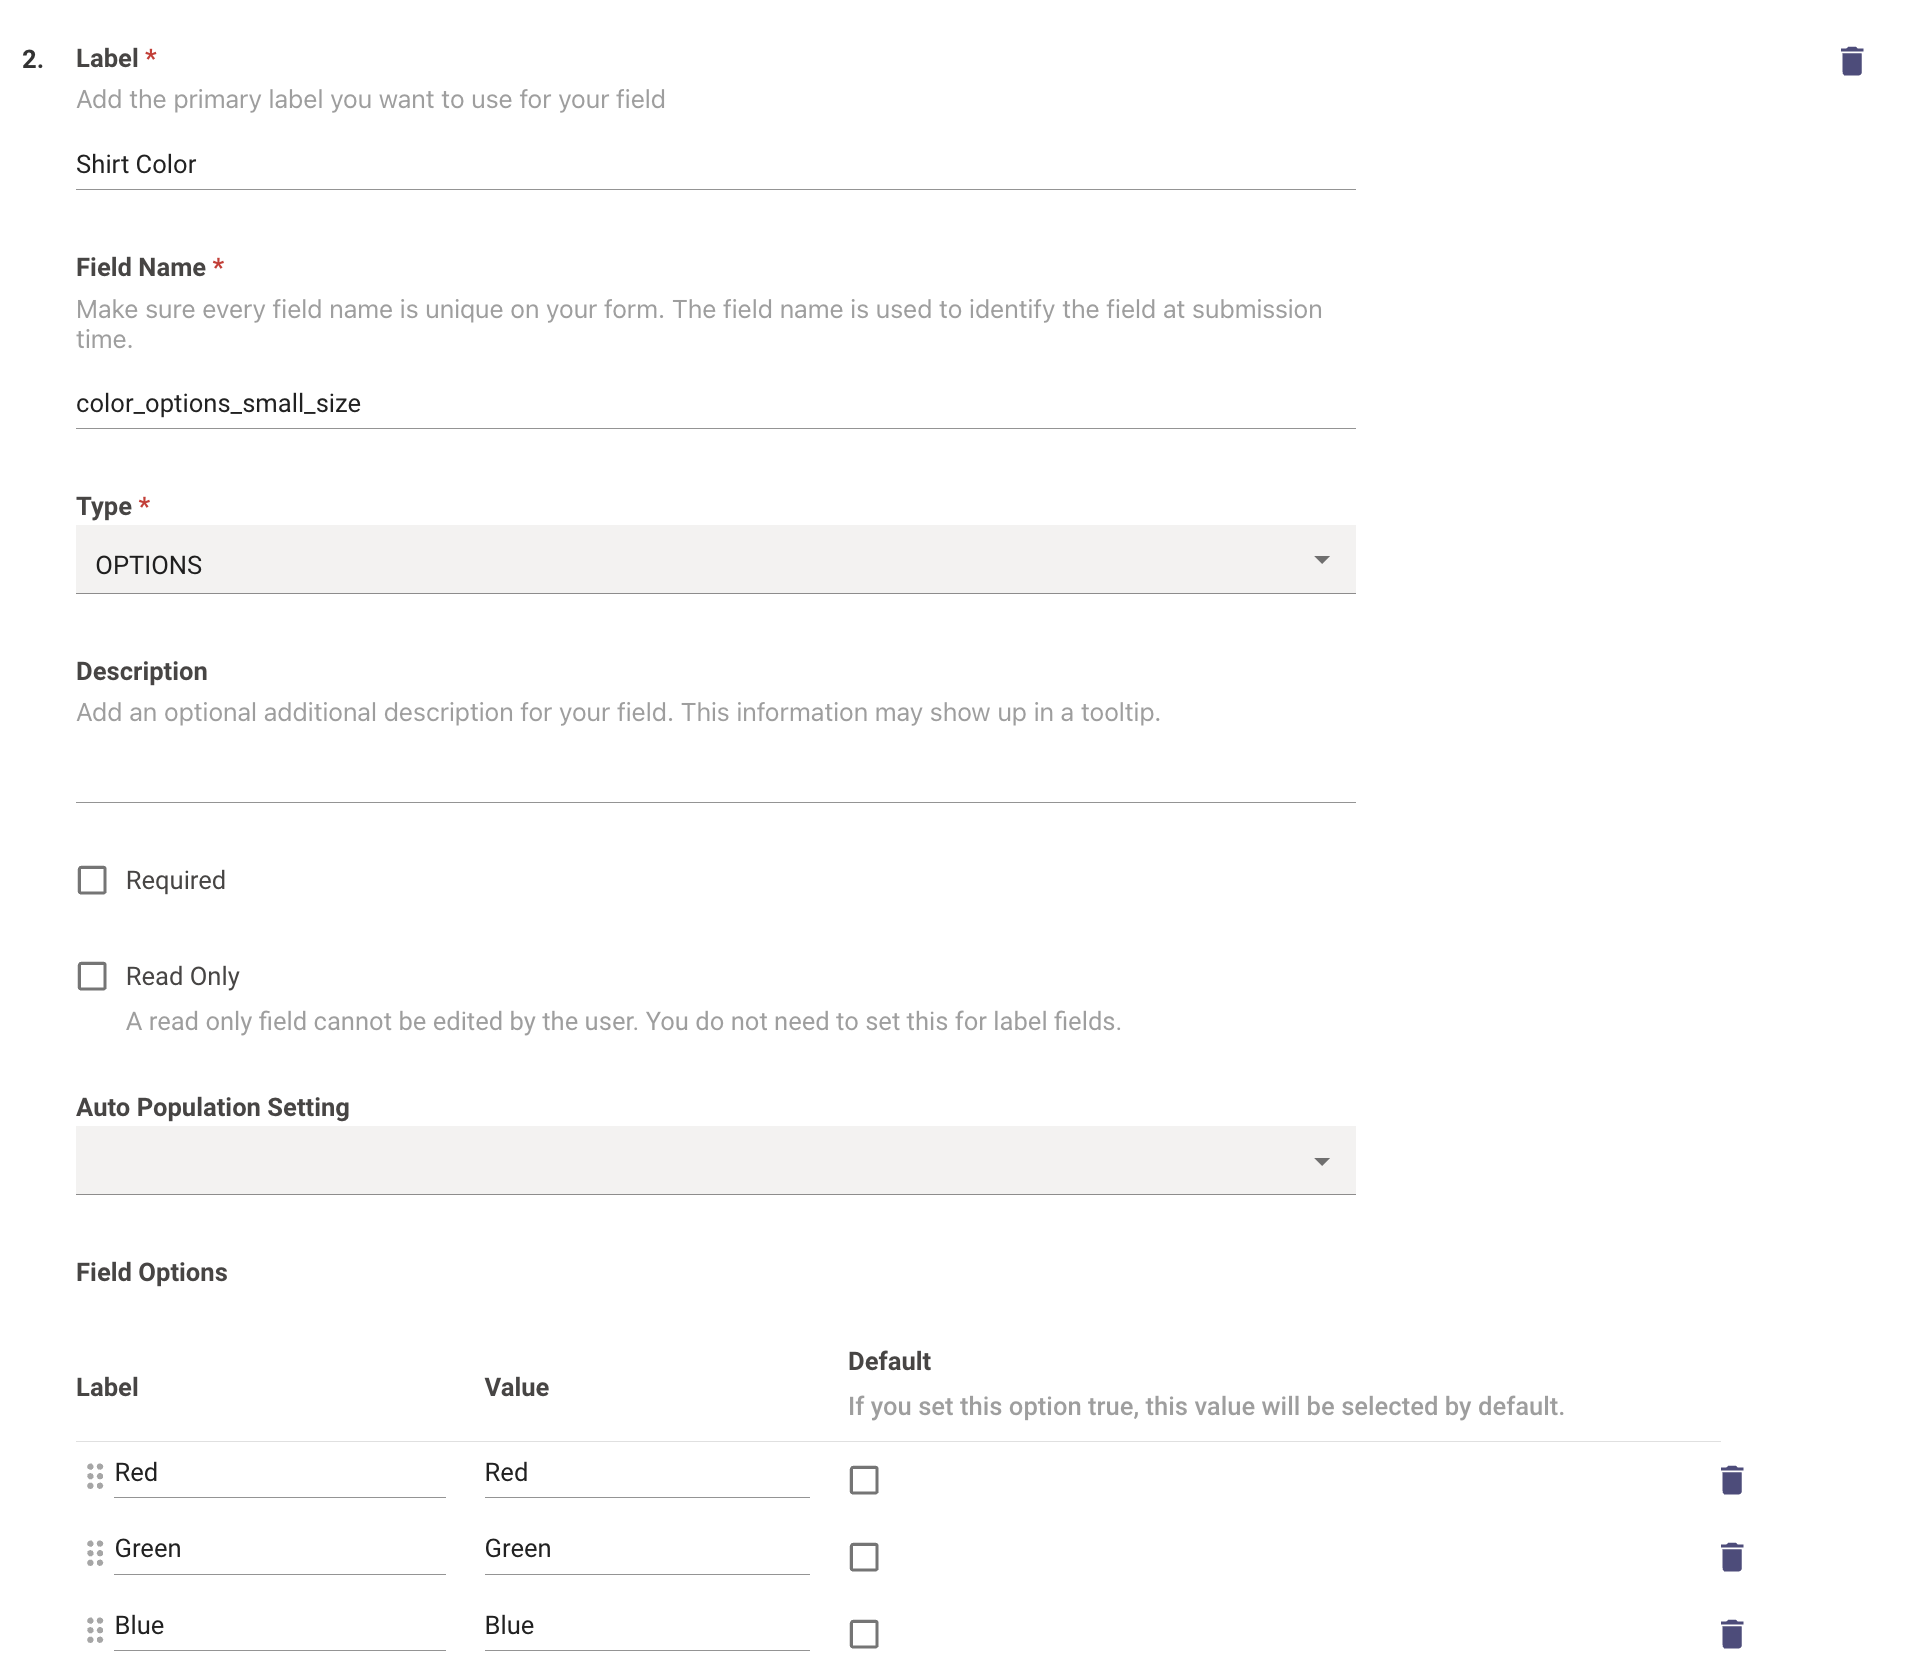
color_options_medium_or_large_size field:
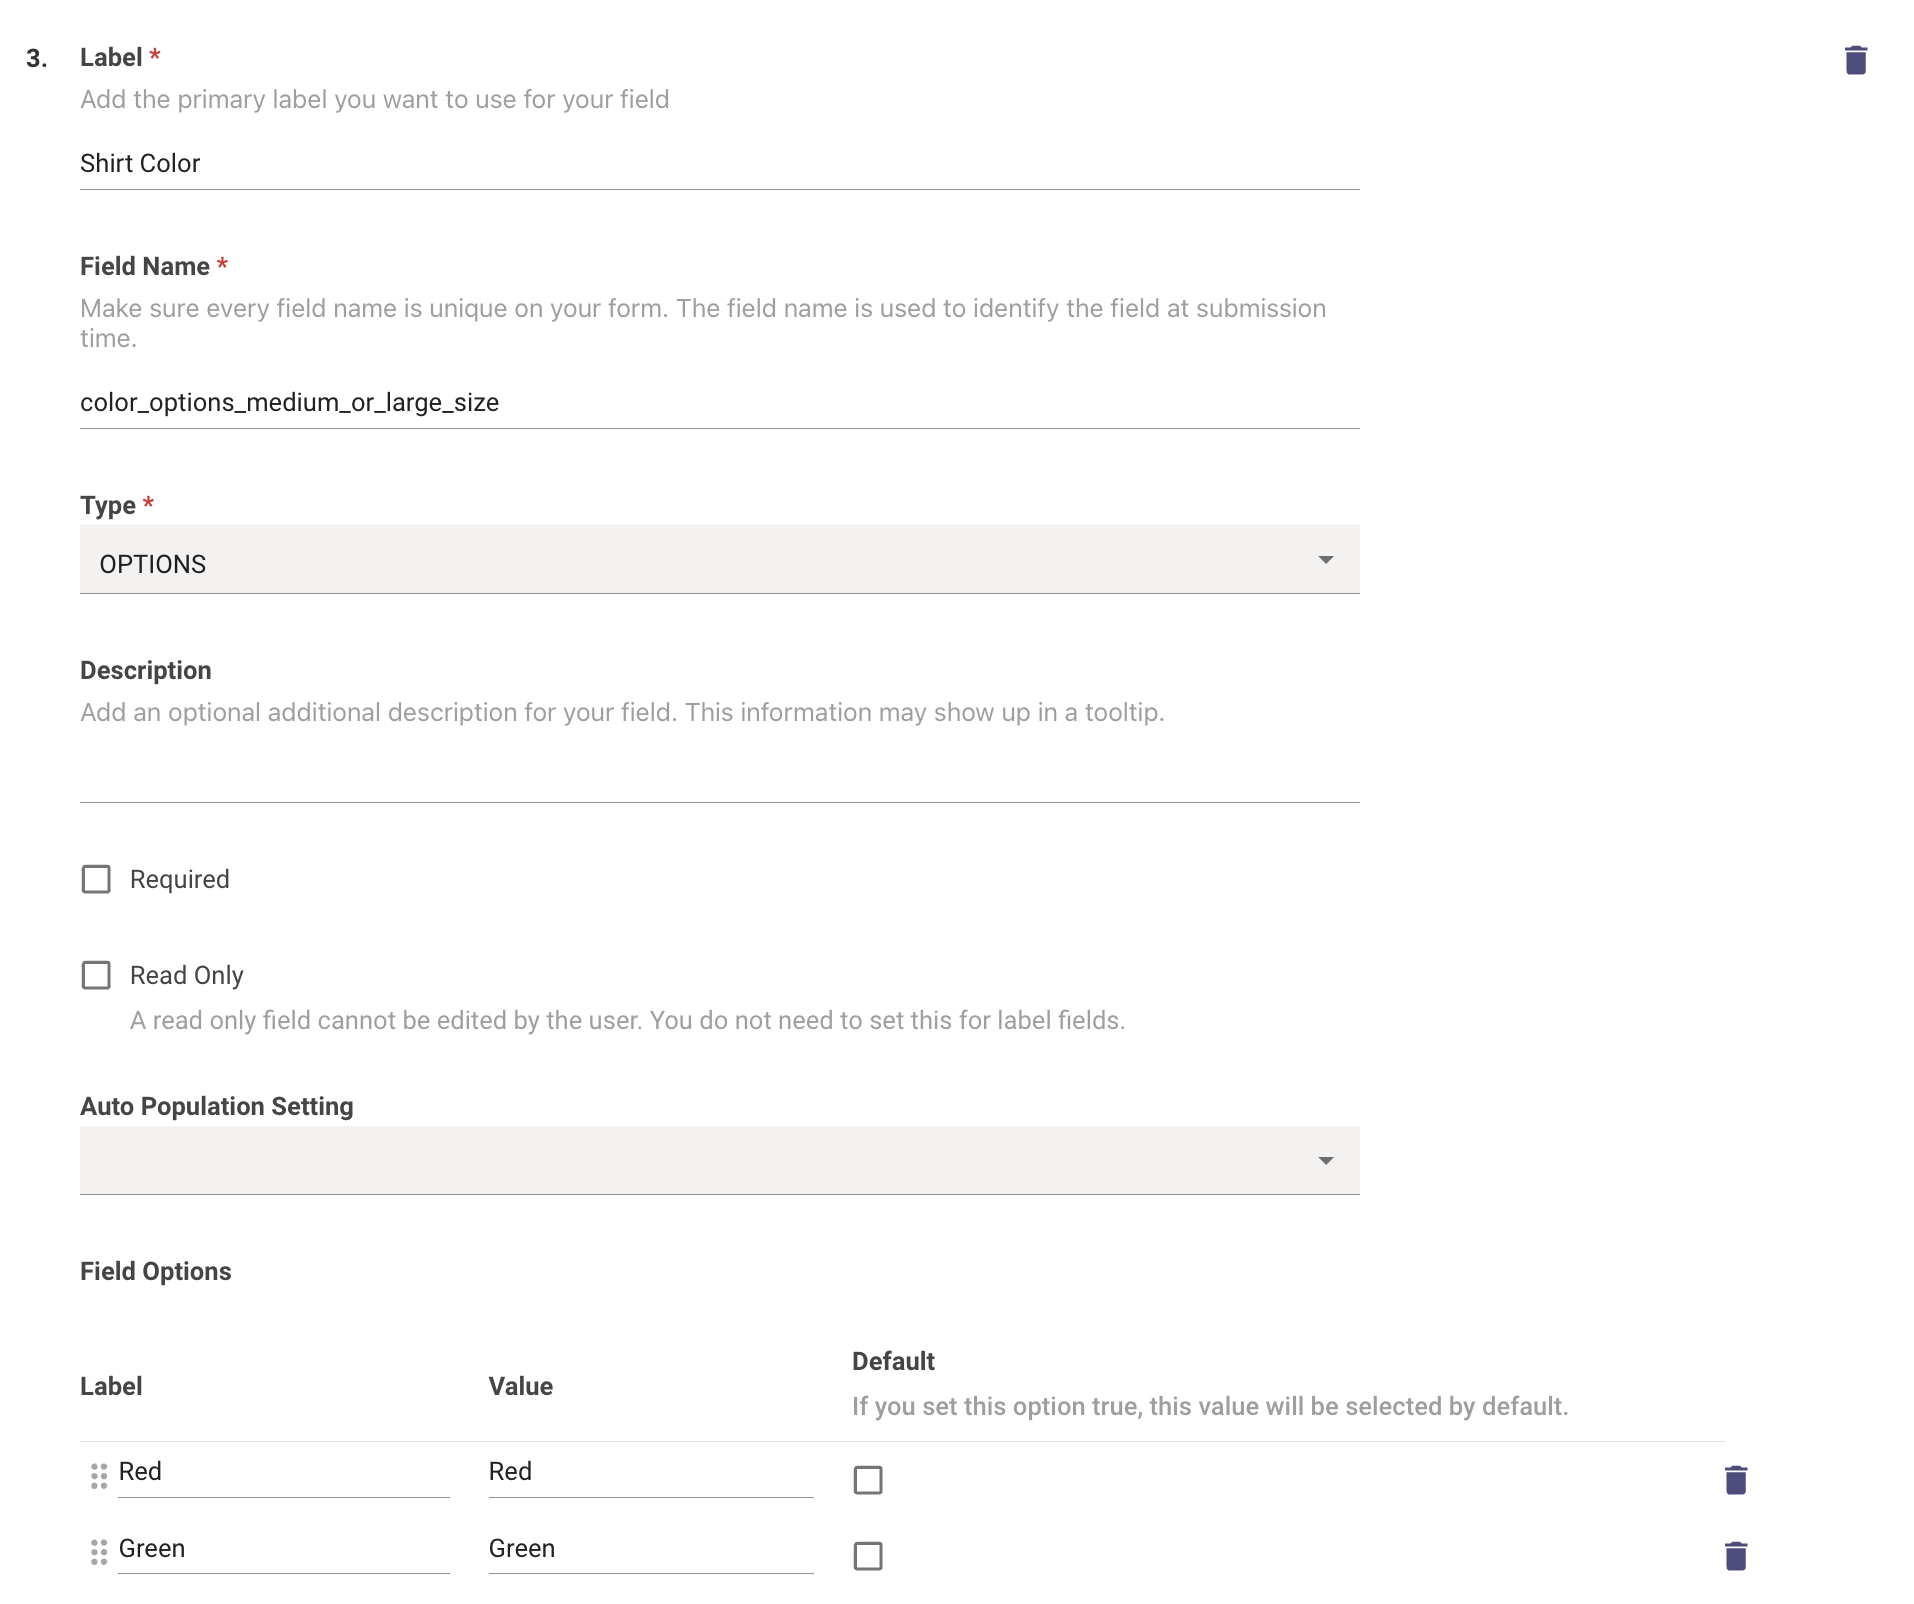
The field label (what the user sees) and the field name (used in rules) are different. Always use the field name — not the label — in your condition expressions and update targets.
Step 2: Define the Logic
Before touching the UI, write out the intended behavior. For this example:
In Moveworks, this becomes two Update Rules — one for each condition branch.
Step 3: Locate the Update Rules Section
- Navigate to Moveworks Setup
- Search for Rich Ticket Filing
- Select Edit on the form you want to configure
- Scroll down to the Update Rules section

Step 4: Configure Rule 1 — “If Small”
4.1 Add the condition
Enter the condition expression. Always prefix field names with field_ when referencing them in expressions.
- Condition:
field_size == 'Small' - Policy Field IDs: add any fields referenced in the condition (e.g.,
size)
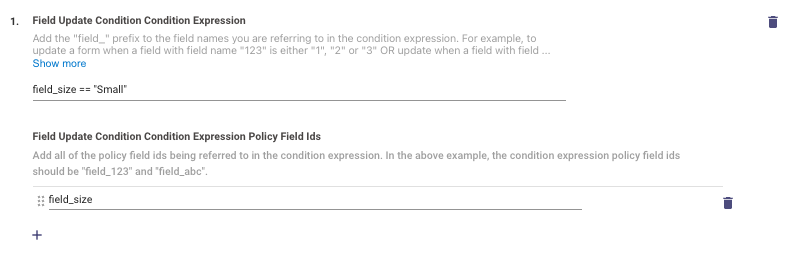
Always use the field_ prefix in condition expressions. To reference the size field, write field_size — not size.
4.2 Add updates when the condition is True
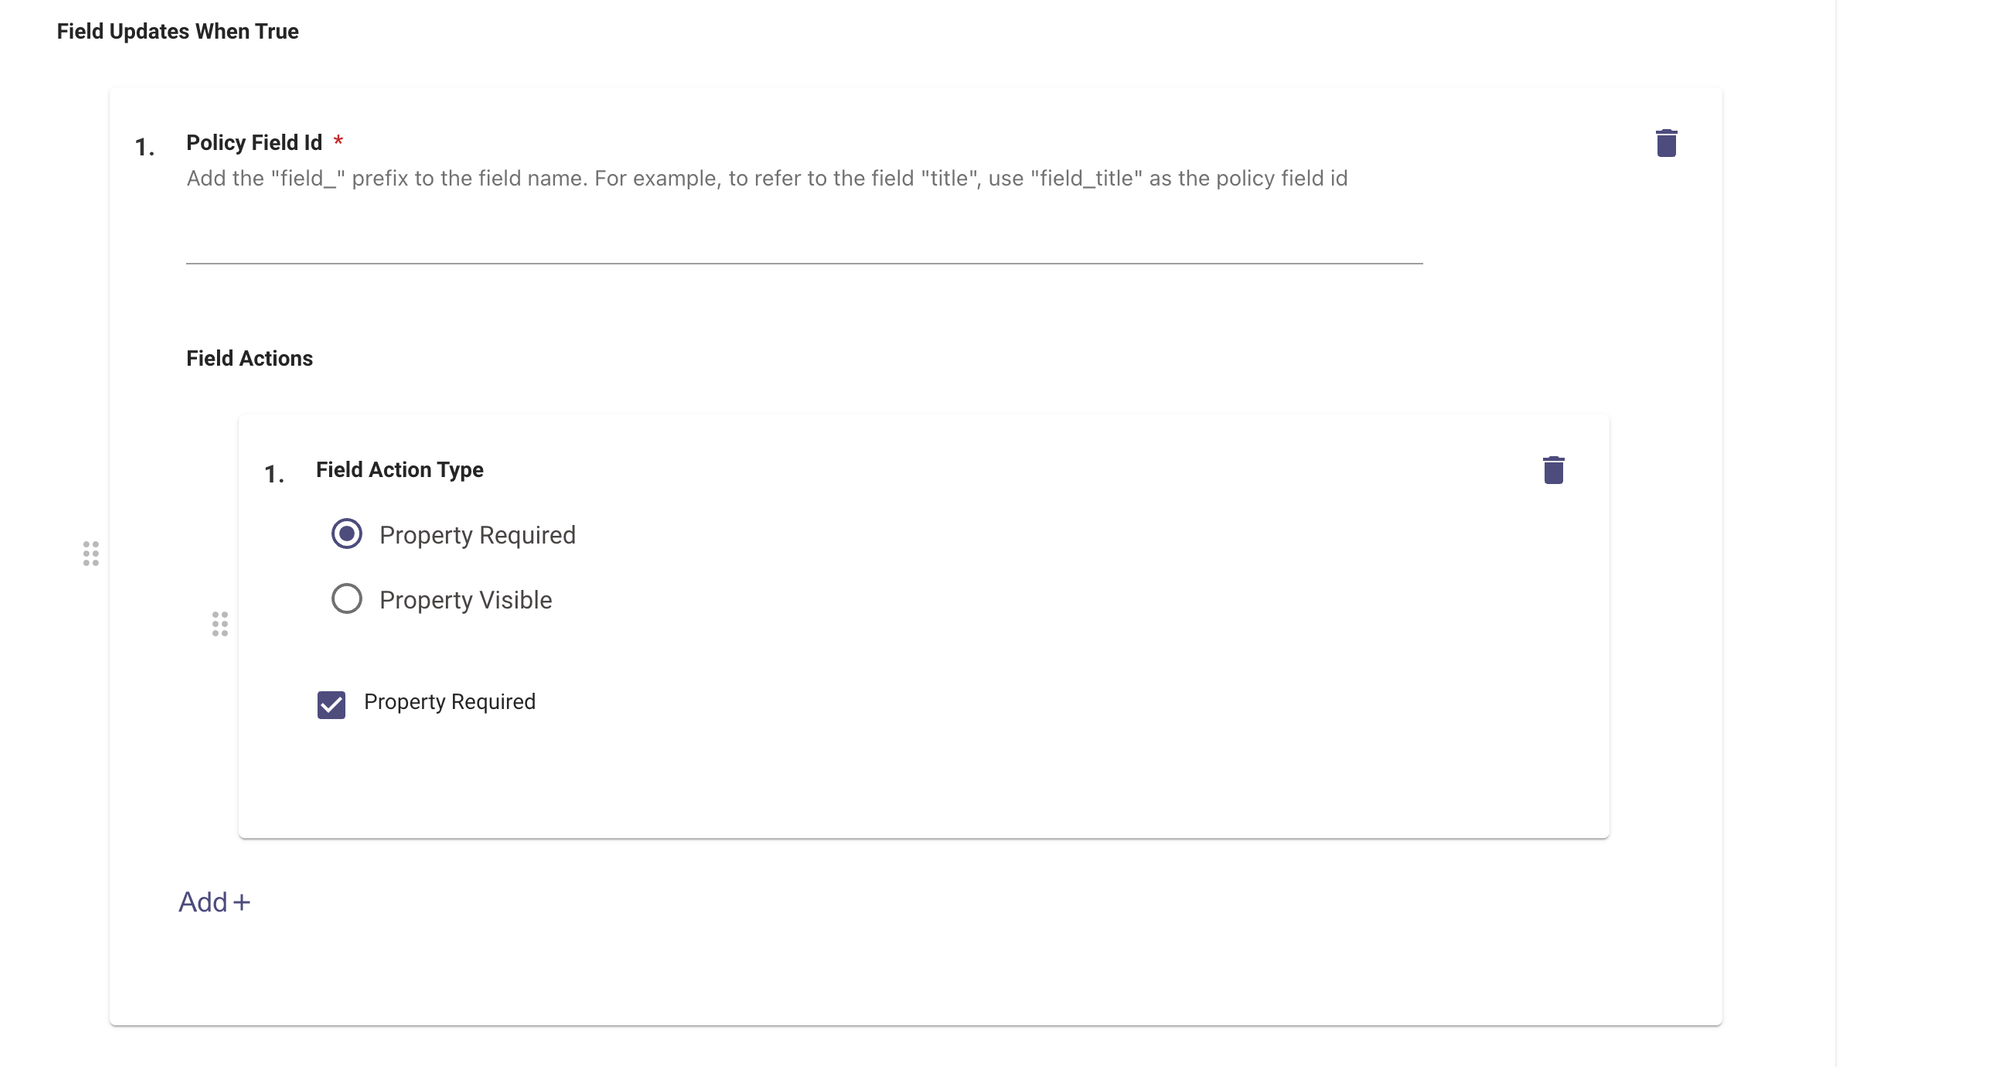
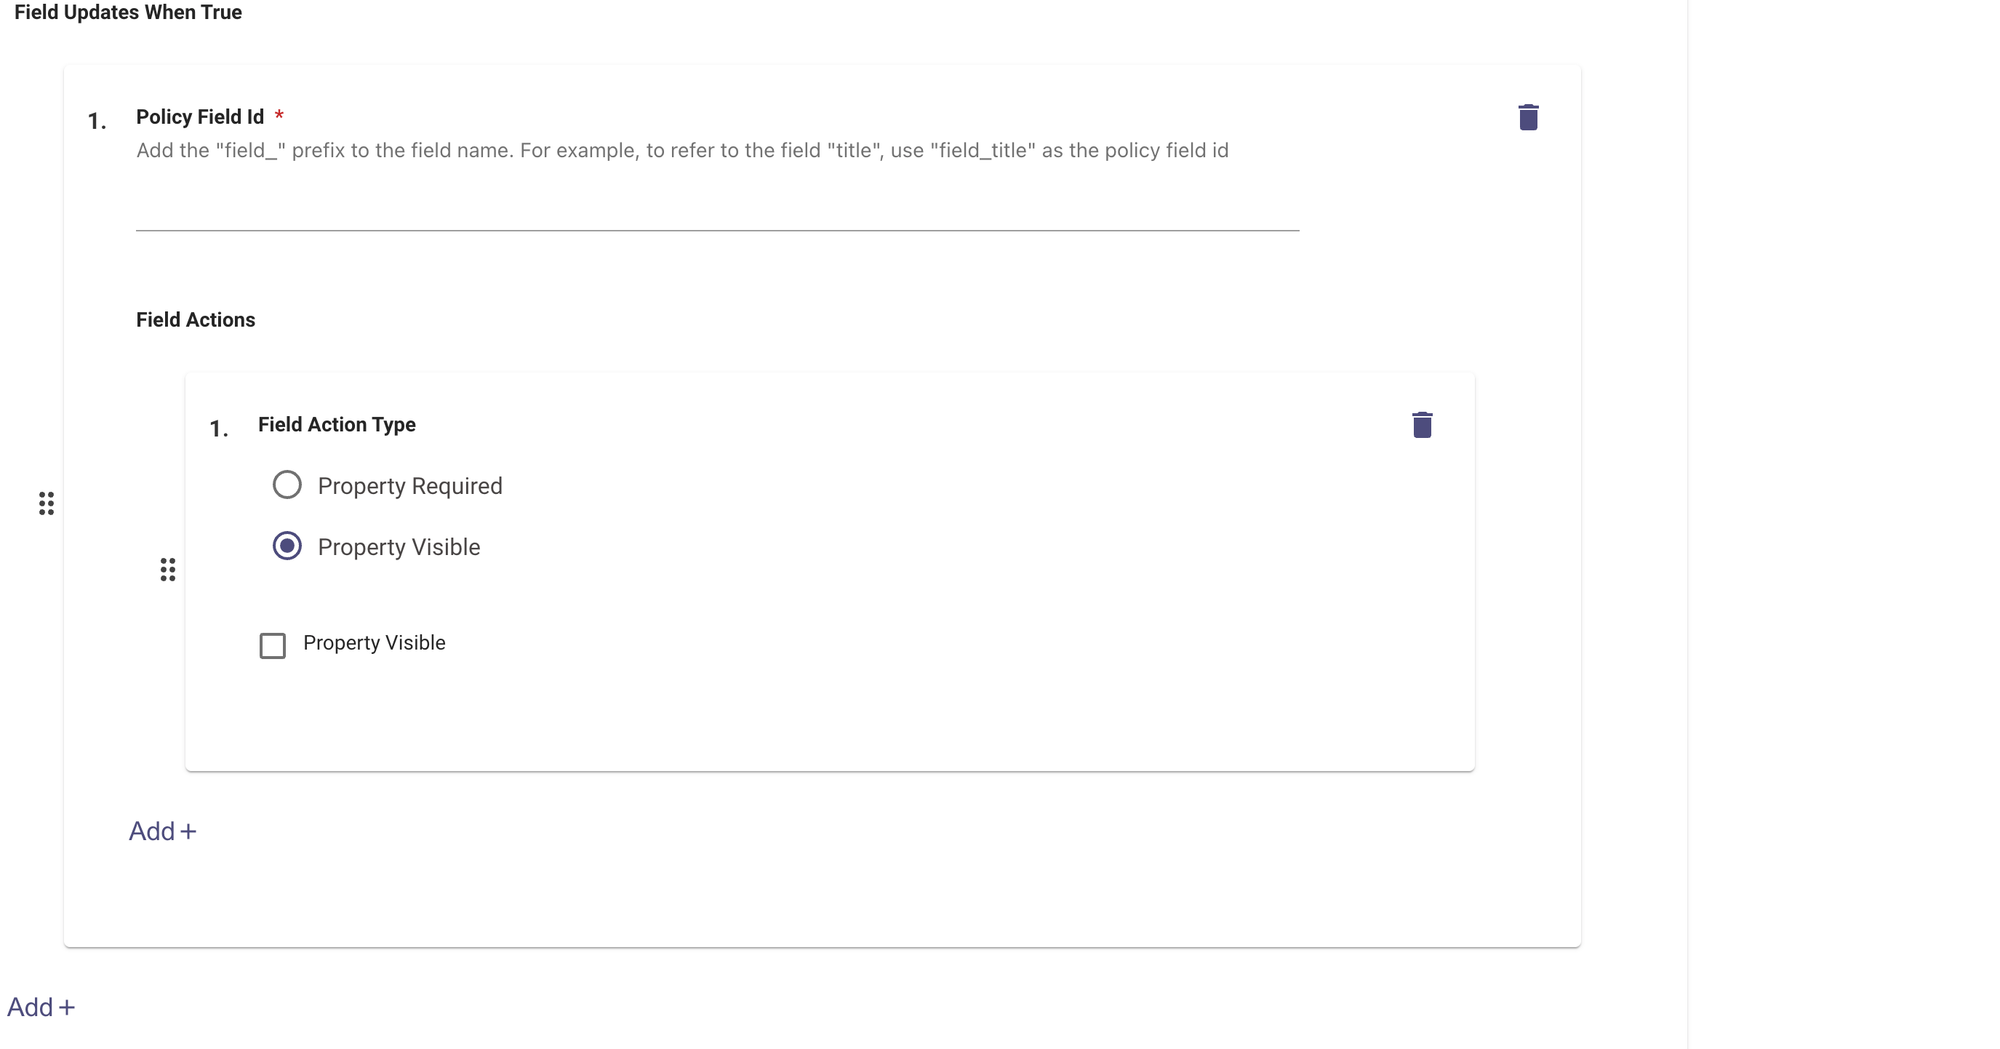
Each field update entry in the UI has two parts:
- Policy Field Id — the field to update, using the
field_prefix (e.g.,field_color_options_small_size) - Field Action Type — a radio button selecting which property to change (
Property RequiredorProperty Visible), followed by a checkbox that sets the value: checked = true, unchecked = false
When size is Small, add four entries — two per field:
Setting a field to Required (checkbox checked):
Setting a field to Not Visible (checkbox unchecked):
4.3 Add updates when the condition is False
When size is not Small, reverse the visibility and required state:
4.4 (Optional) Add a description
Adding a description helps future editors understand what the rule is doing at a glance.

Step 5: Add Rule 2 — “If Medium or Large”
Follow the same steps to create a second rule for the Medium and Large case:
- Condition:
field_size == 'Medium' or field_size == 'Large' - Updates when True: set
color_options_medium_or_large_sizetoVISIBLE+REQUIRED, setcolor_options_small_sizetoNOT VISIBLE+NOT REQUIRED - Updates when False: reverse of the above
In this example, Rule 1’s “when False” branch already handles the Medium/Large case. Whether you add a second explicit rule or rely on the False branch is a design choice — either works. Adding the explicit rule makes the intent clearer and is recommended for maintainability.