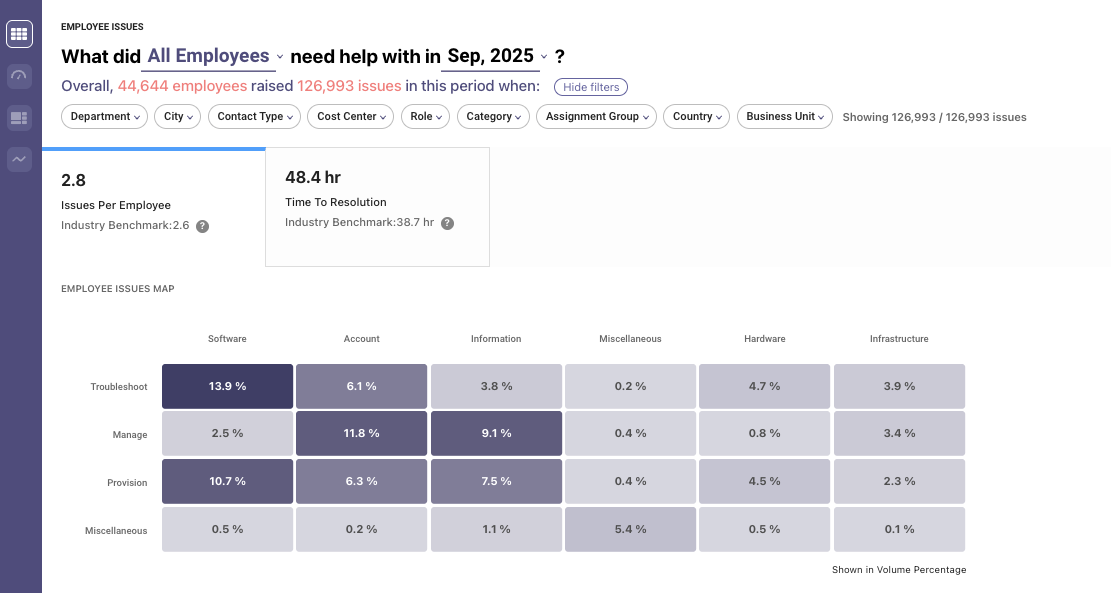
Configure Employee Experience Insights
Pre-Requisites
- Ensure the required ITSM Connector has been created with the necessary permissions. Please refer to the Ticketing Systems & ITSMs Access Doc for details.
- Ensure the required Ticketing System has been integrated with Moveworks. Please refer to the How to Guides for Ticketing Plugin Doc for details.
- Ensure the required Identity attributes are being ingested from the ITSM system. Please refer to the How to Guides for User Identity Plugin for details.
- Ensure access to your tenant’s MyMoveworks portal and the Moveworks Setup module.
Completing these pre-requisites ensures that Moveworks has access to your External ITSM system which will be leveraged to derive the configuration of EXI.
Configuration Steps
Step 1: Configure EXI Ticket Filtering
By default, EXI imports all IT tickets from the ITSM except those with empty request_for_record_id. This is what defines the data seen within EXI and if we want to further filter that down to make it more specific we need to follow the below steps.
-
Navigate to Analytics and Data > Advanced Settings > App Data Filter under the Core Platform module.
-
Here we need to Select Ticket as the Entity and then define a Condition rule in DSL format for the Filter which will only the Conditional Ticket data to go through.
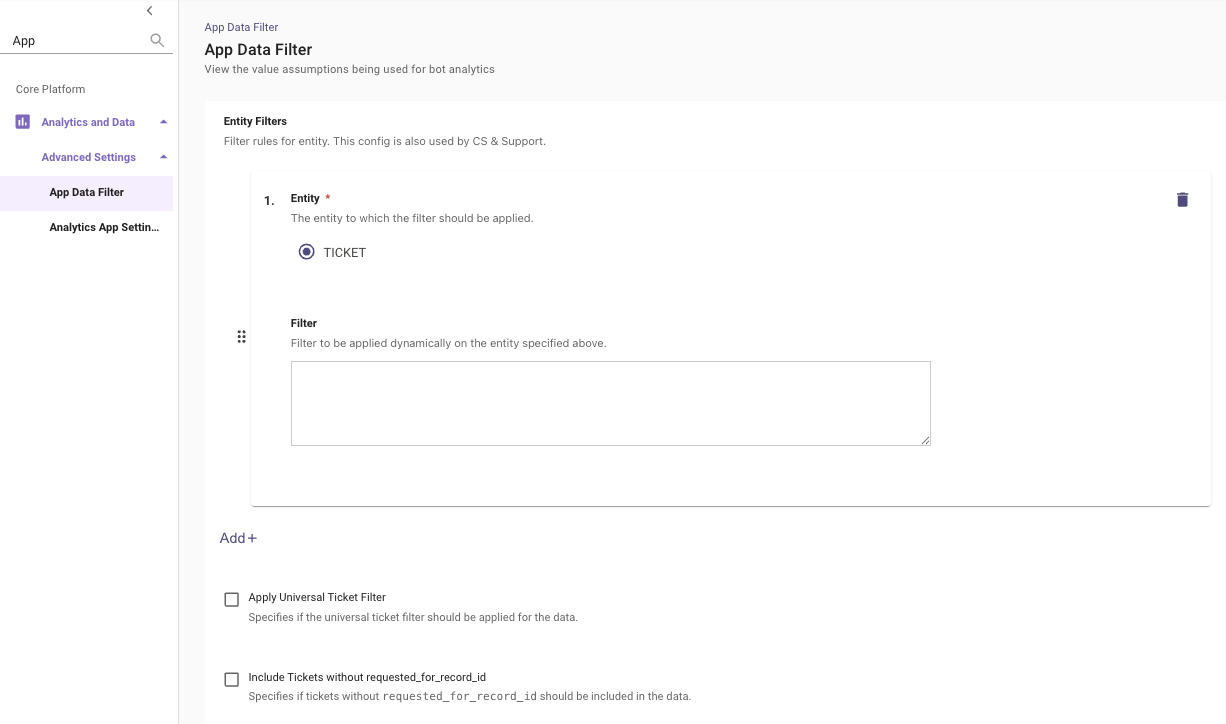
-
You can leverage the following Available Standard Fields to Write the Rules:
- contact_type
- priority
- category
- subcategory
- assignment_group
- internal_state_code
- ticket_type
- department
- location
- cost_center
- region
- role
-
Here is how you can Leverage Custom Fields from the ticket in the rule :
-
There are 2 types of Filters you can define here, and you can leverage the attributes mentioned above :
- Single Condition Filter
- Multiple Conditions Filter (Nested Clause)
- Single Condition Filter
To write different kind of rules we can use the below Operators and Comparators.
-
Operators
-
Comparators
Beyond defining out own filter, Check the appropriate box to enable the desired filtering option:
Include Tickets without requested_for_record_id: To Pull tickets with emptyrequest_for_record_idin EXI.Apply Universal Ticket Filter: To Apply Universal Ticket Filter in EXI. This is found under Ticket Filtering
Step 2: Adding Filters to the EXI Dashboard
When you first use the EXI Dashboard, you will notice that it will benefit from using additional Filters which can be leveraged to look at specific chunks of data.
These filters need to be configured before they can show up in the dashboard. Please follow the below steps to configure filters:
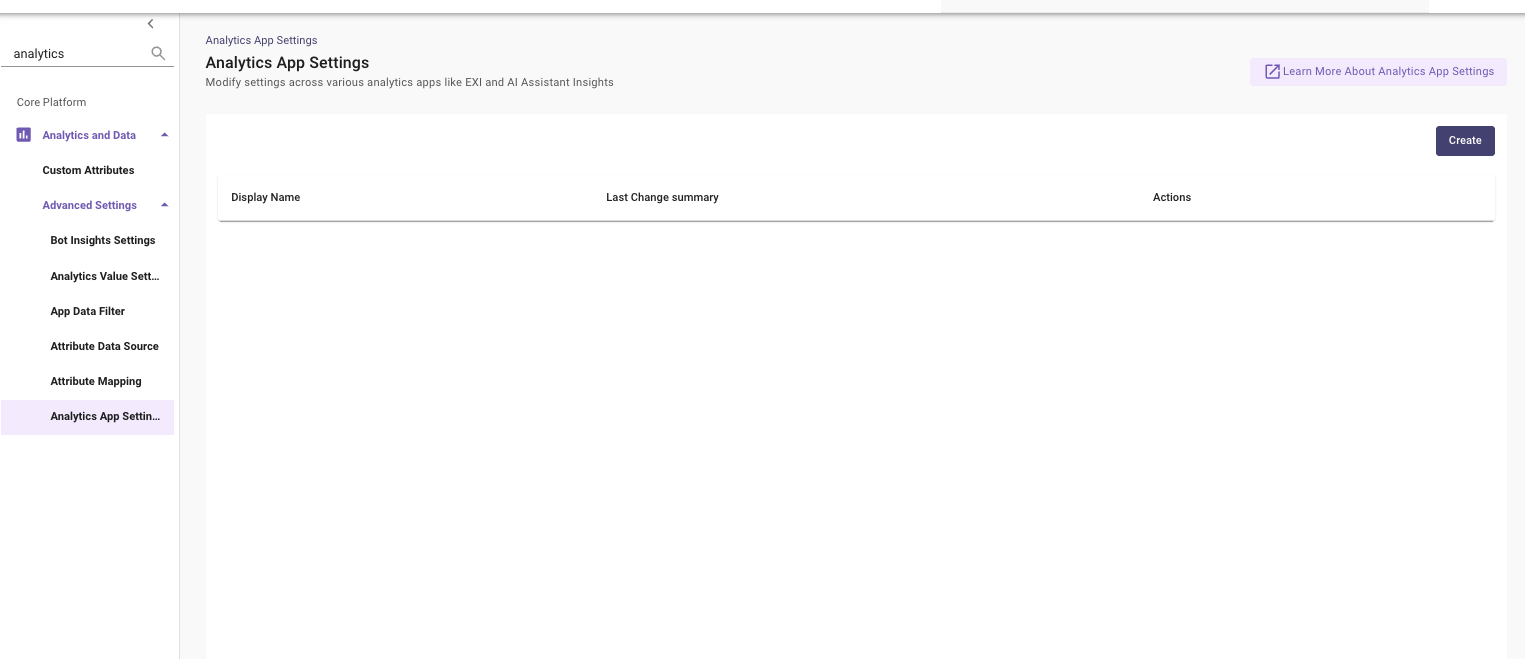
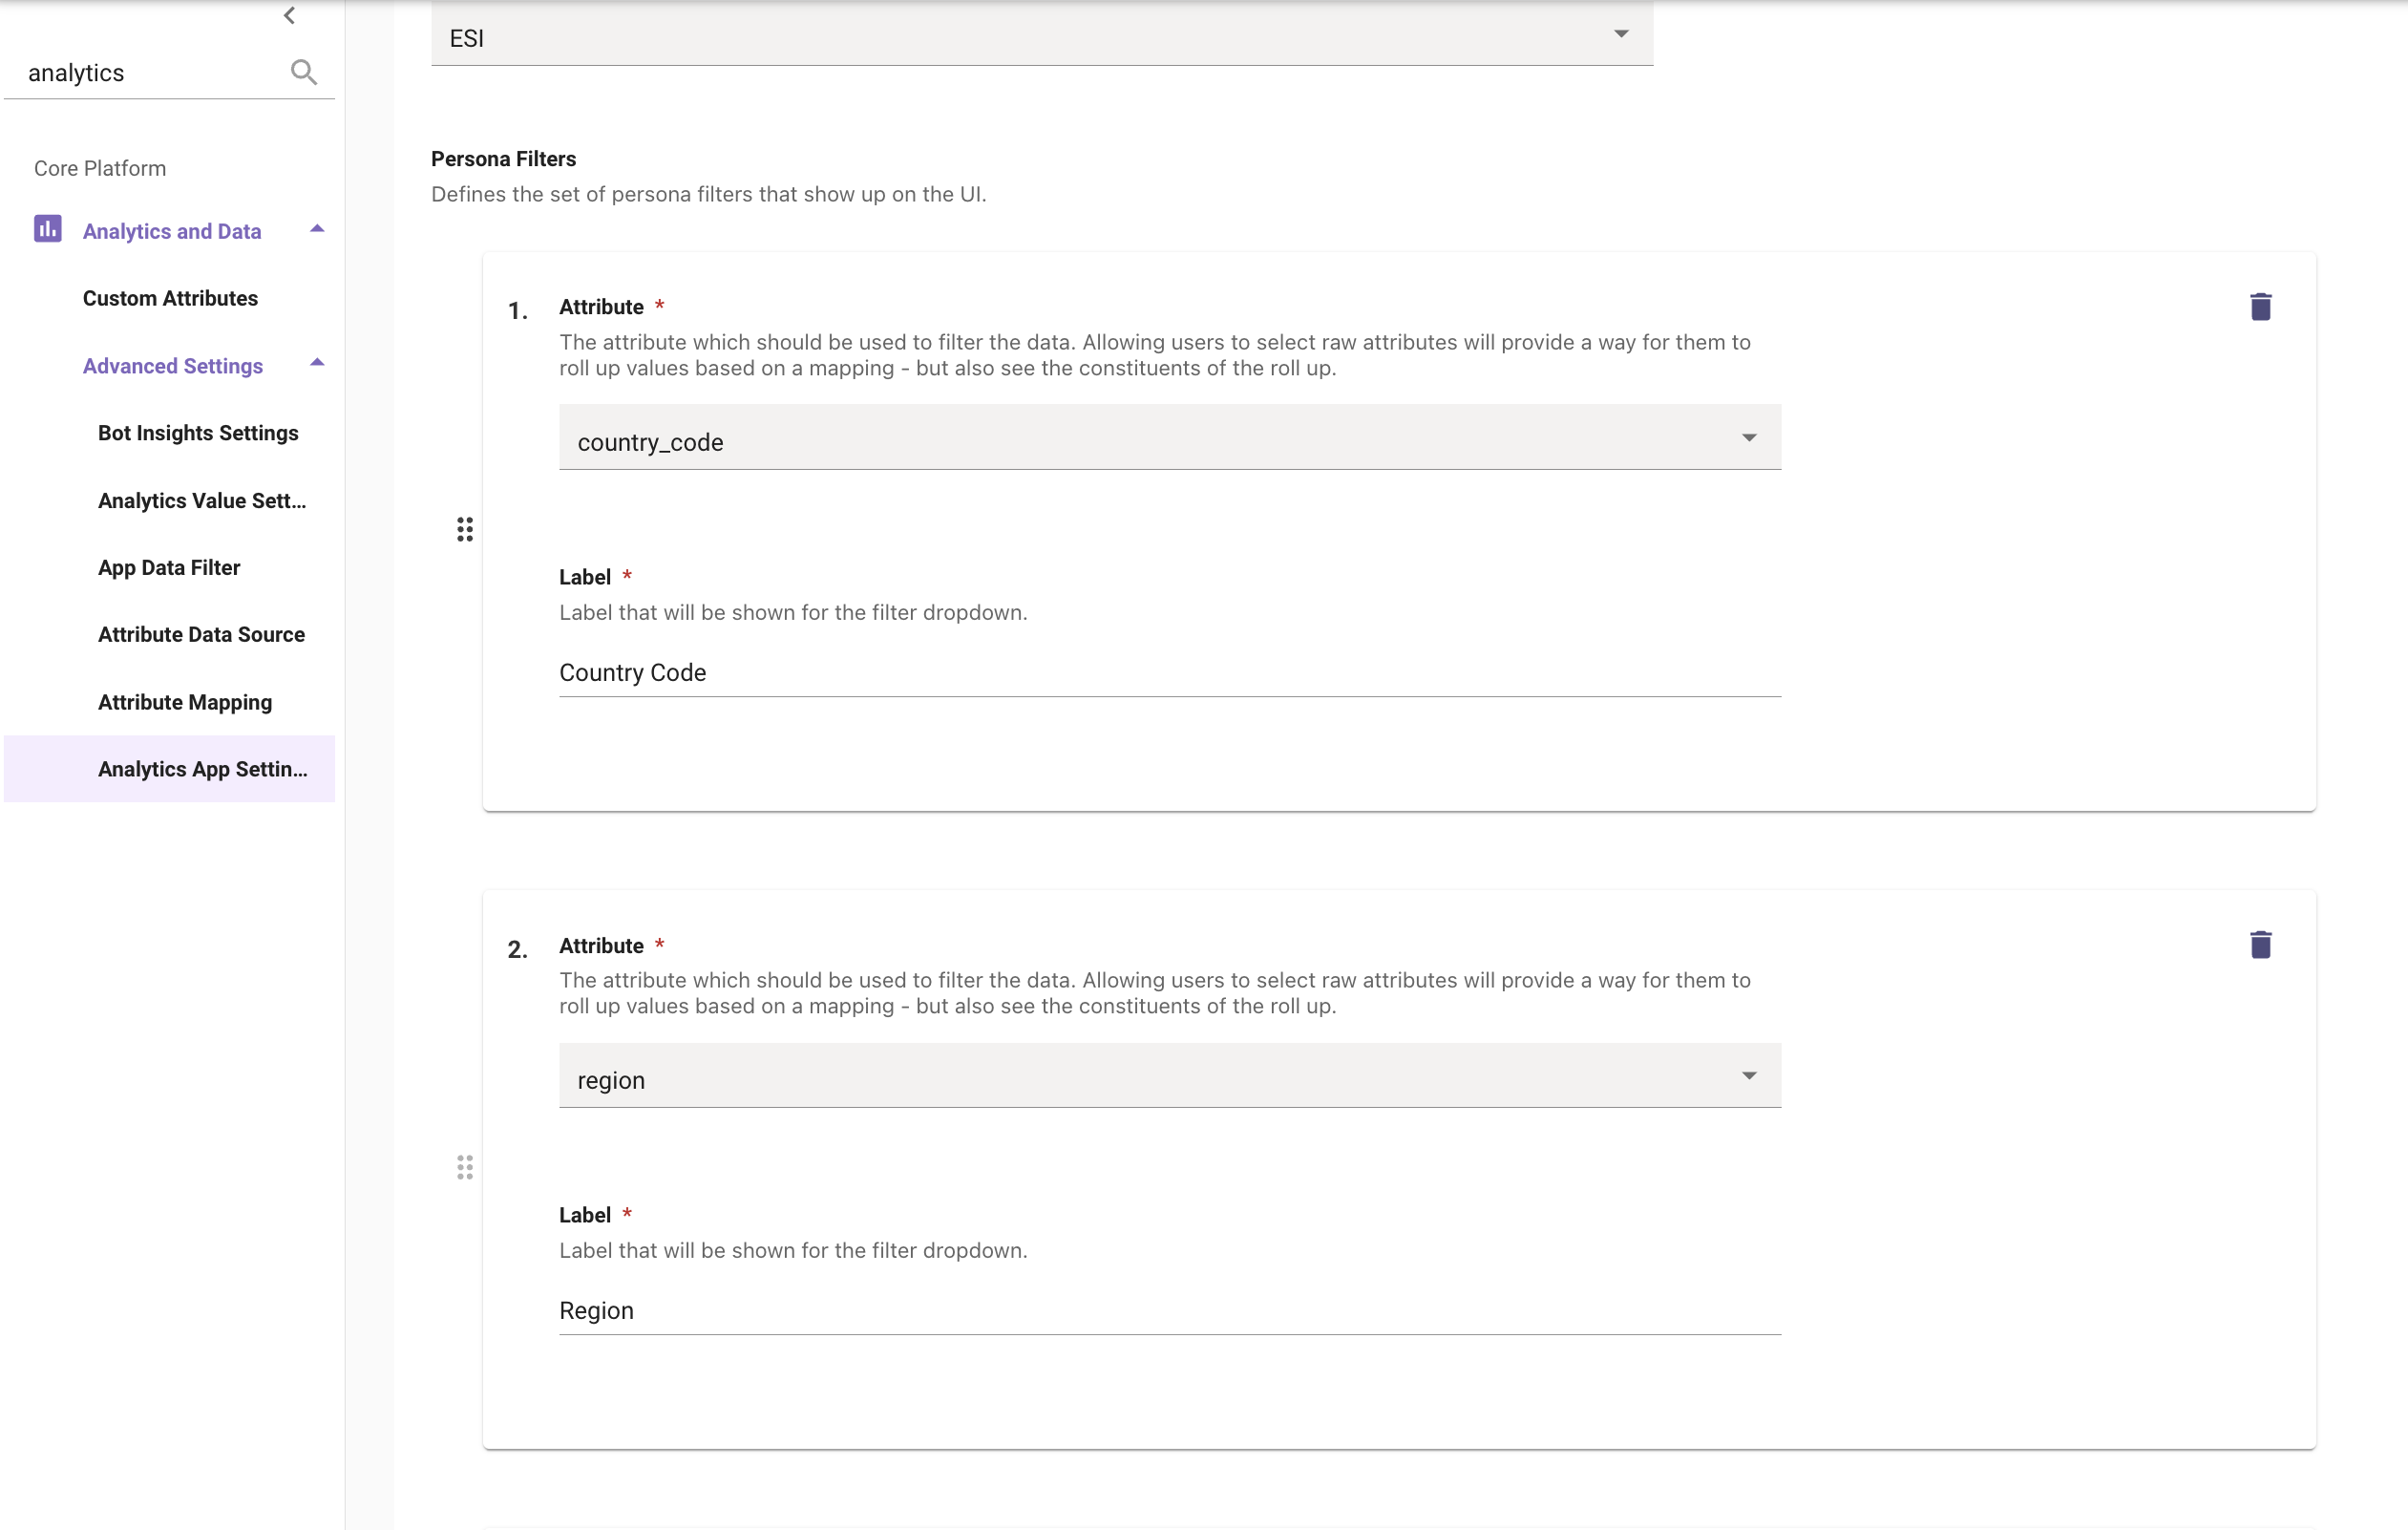
- Navigate to Analytics App Settings > Analytics and Data > Advanced Settings > Analytics App Settings
- Click Create in the upper right (If no config exists)
- Set App Namespace to ESI which stands for “Employee Service Issues” (or “Employee Issues”)
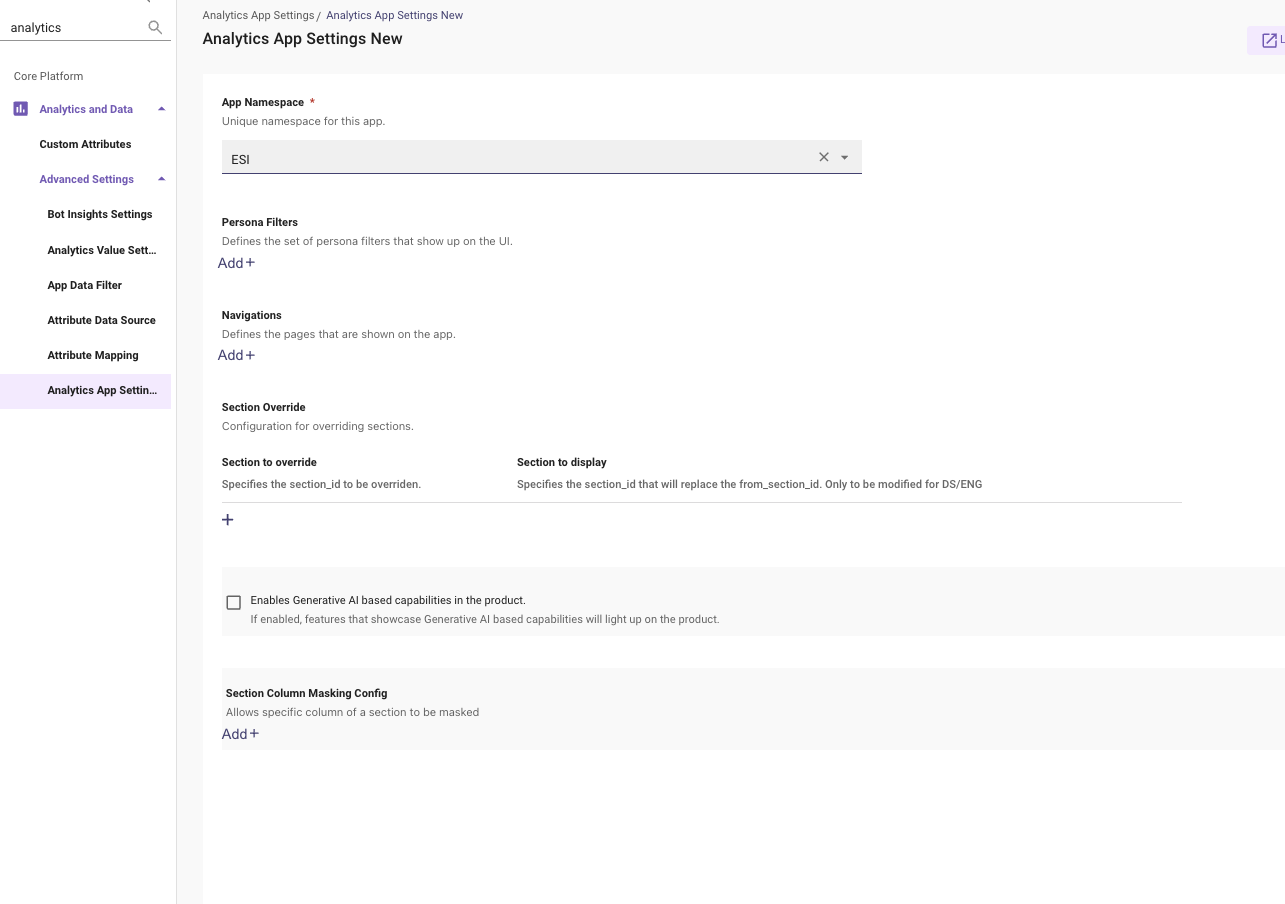
When setting the below Persona Filters, ensure that these values are indeed mapped to your user and ticket roster. If not, the filters will not behave as expected and they will not show up in the EXI Dashboard.
- Set the Persona Filters that are desired. These values will be the filters that are available within EXI. Common values are the following (max limit of 10 filters is applied):
- country_code
- department
- contact_type
- region
- division
- location
- role
- Click Submit
Step 3: Initiate Ticket Backpolling
Now that all the Configurations have been taken care of, The only thing left for us to do is Ingest the Ticketing Data which will be carried out by the Ticket Backpolling Job.
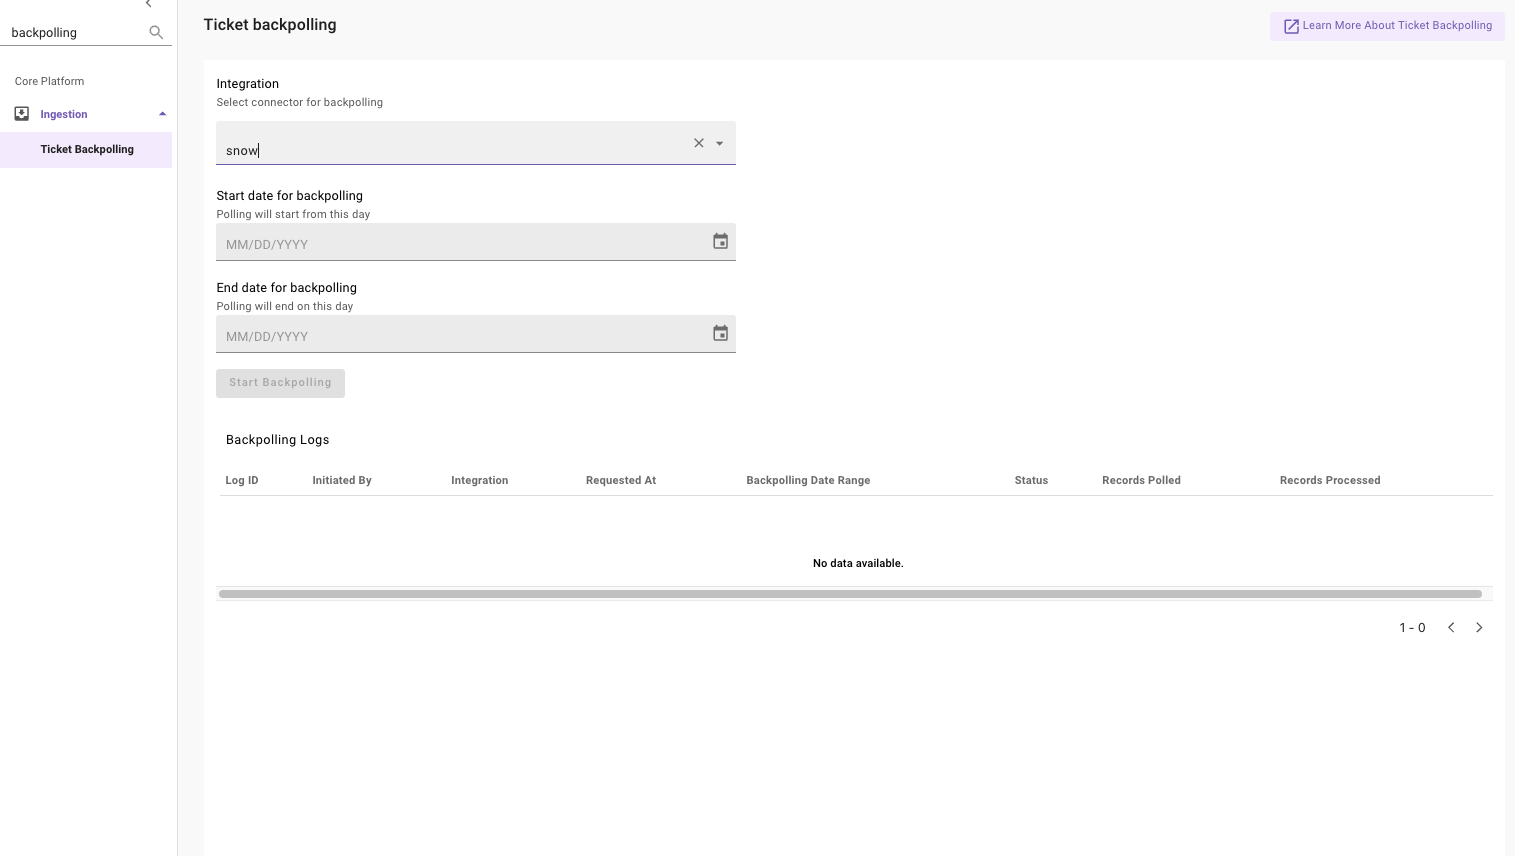
- Navigate to Ingestion > Ticket Backpolling under the Core Platform Module.
- Select an Integration. This value will be the name of your main ITSM connector (snow, jira_service_desk, etc.)
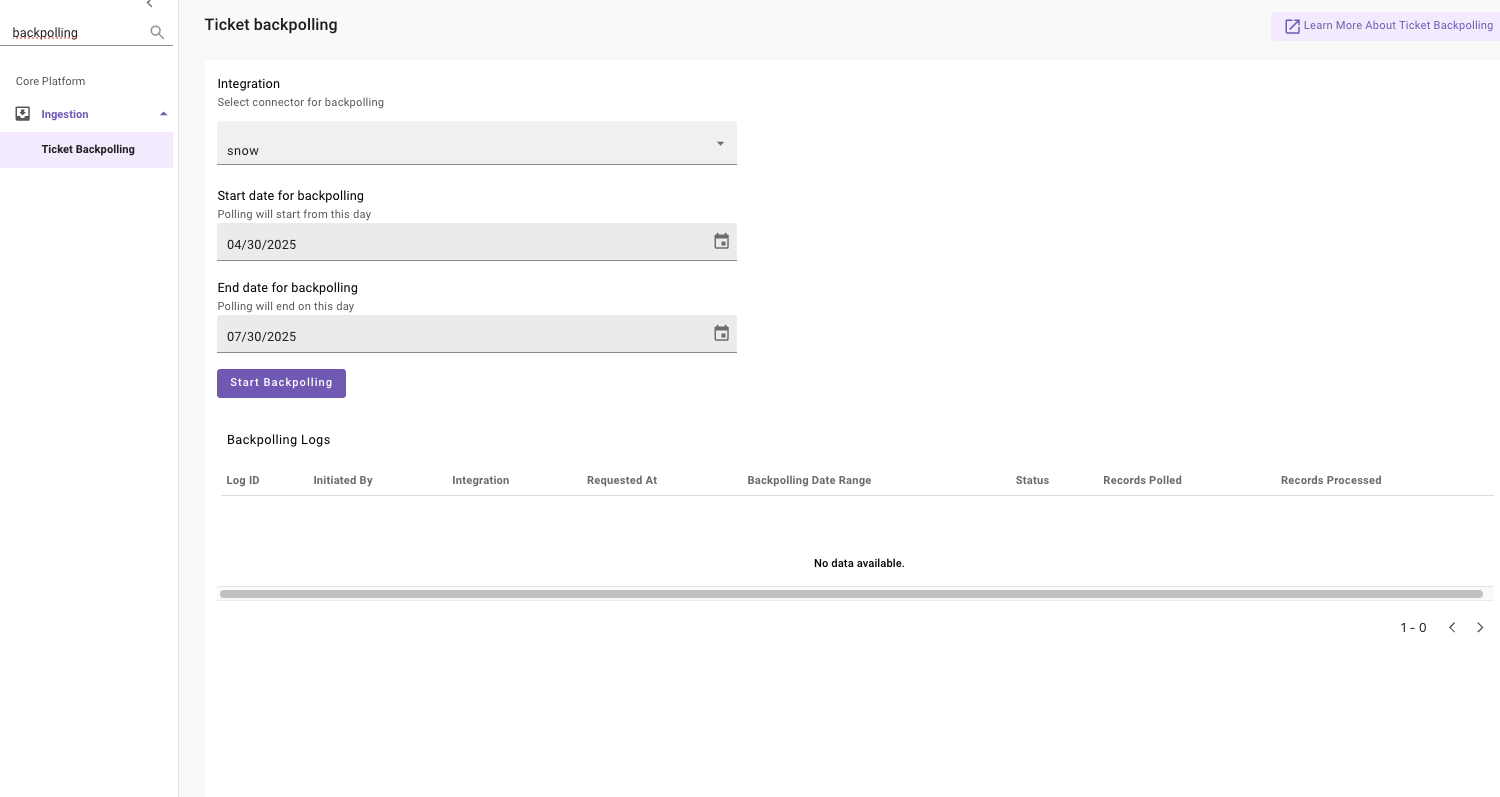
- Choose the Start date for backpolling
- Ex. 04/30/2025
- Choose the End date for backpolling
- Ex. 07/30/2025
Based on the amount of tickets in your ITSM, it is recommended to do backpolling in 3 to 6 month batches. If you need to backpoll for a whole year, it is best to do 2 6-month range backpolls.
- Click Start Backpolling
- You will now see your Backpolling job is Scheduled. This job will move to Running within 10 minutes.
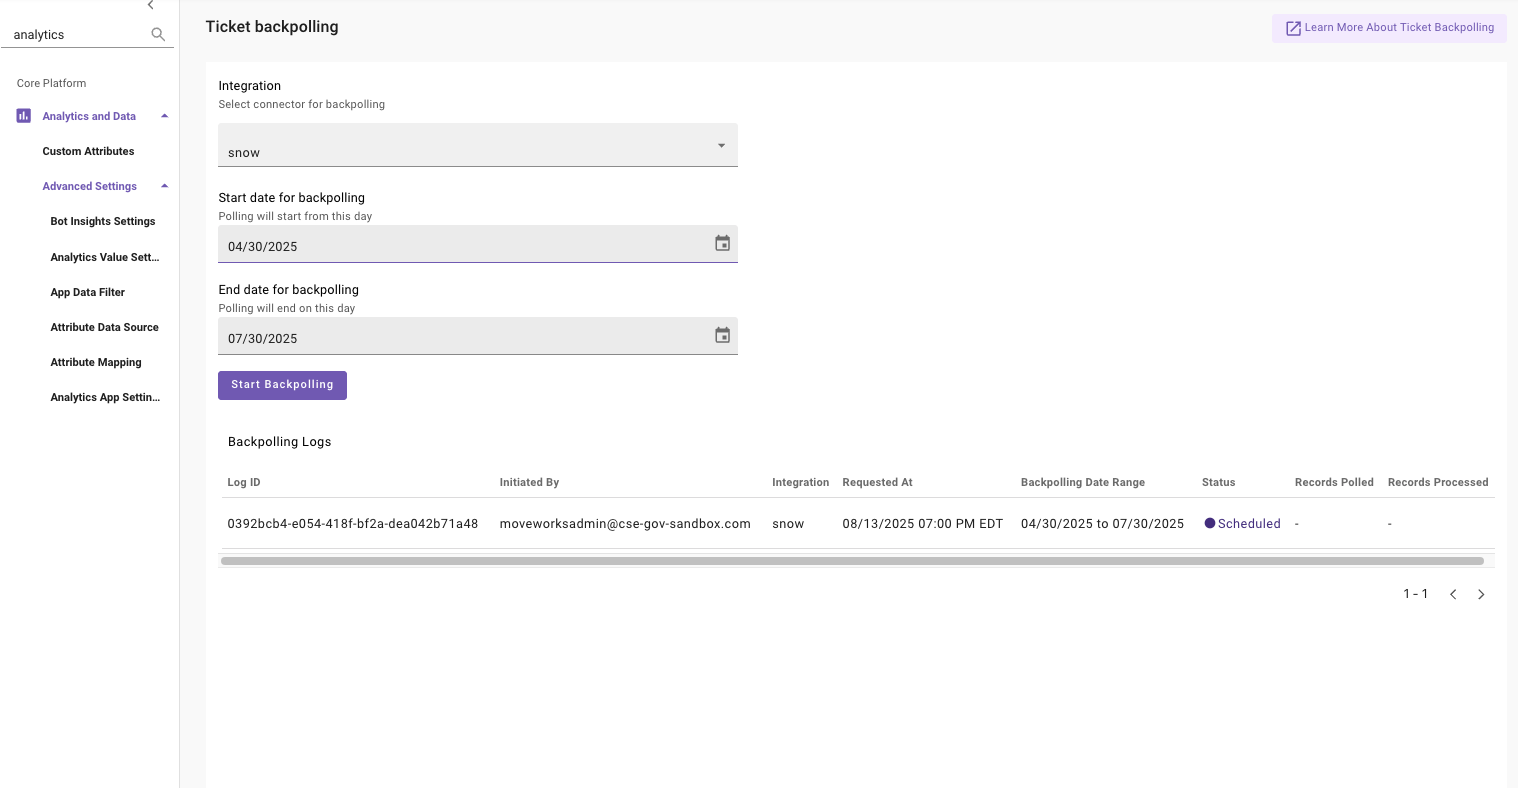
🔴 Note : If the Volume of Tickets being Backpolled has a huge count in the time frame defined, this job can take anywhere between a few days or 2 weeks to finish.
Validation
- Once the Backpolling job is marked as Complete, in the Setup UI. It will look something like below.
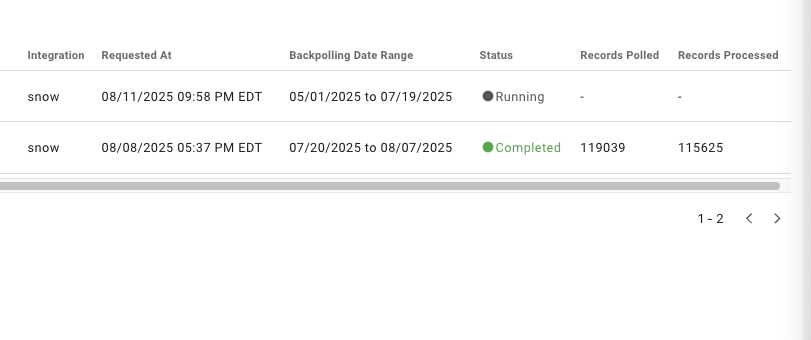
-
Now Navigate to the Employee Experience Insights Dashboard and here you will now start to see the populated tickets and data within EXI.