
Configure ServiceNow Live Agent Message Brokering
Prerequisites
- Ensure the required ServiceNow Connector has been created with the necessary permissions. Refer to the ServiceNow Access Requirements Doc for details.
- Ensure access to your tenant’s MyMoveworks portal, including the Moveworks Setup and HTTP Connectors apps.
- Verify that the Virtual Agent API plugin is installed in the ServiceNow instance.
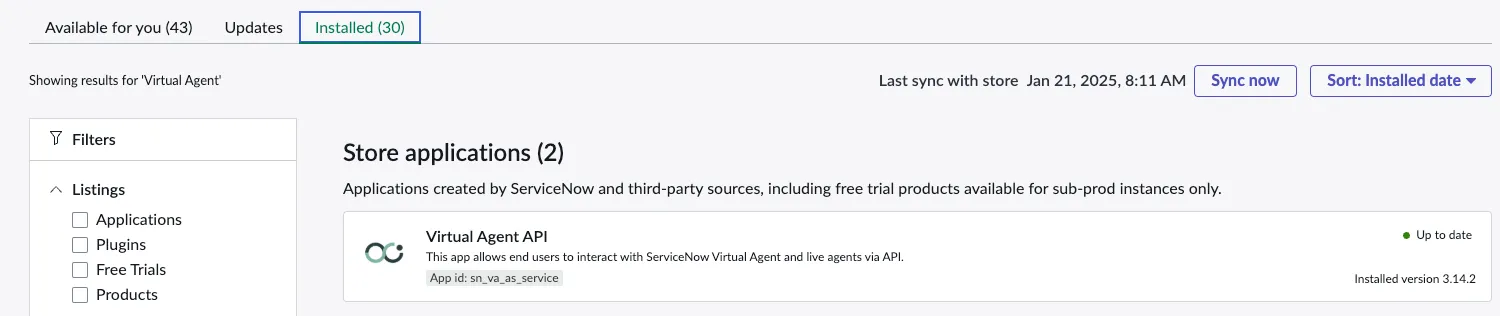
If the Virtual Agent API plugin is not available to install, your instance does not have Virtual Agent and this integration will not work. Use URL-based handoff to ServiceNow AWA instead.
- Verify that the Agent Chat plugin is installed.
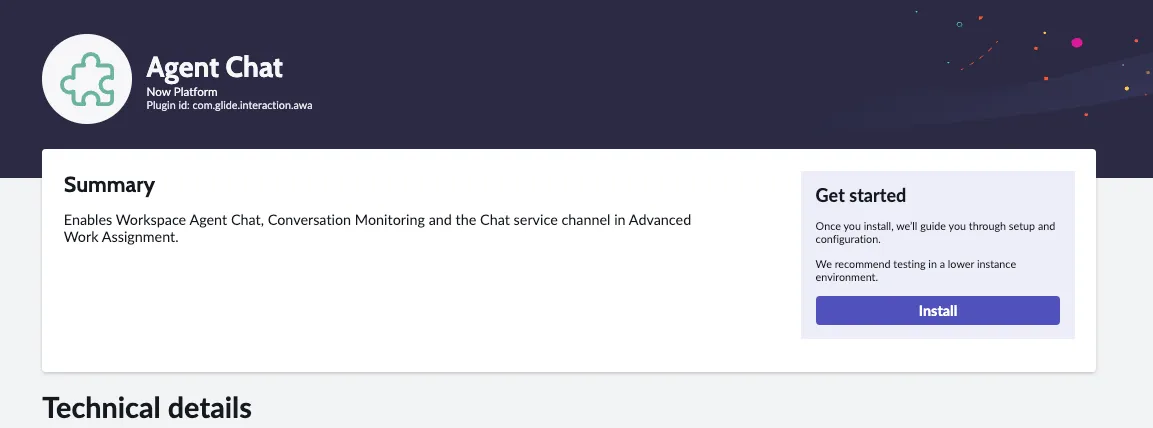
- Verify that Advanced Work Assignment (AWA) is set up for chat: a queue on the Chat service channel for each team, an assignment rule and eligibility pool for each queue, agents with Chat capacity, and a presence state that includes Chat. Set each queue’s condition with the condition builder; a queue without a condition matches no chats.
- For testing, ensure access to the Service Operations Workspace module within ServiceNow and that at least one agent is available in the queue being tested.
Configuration Steps
Step 1: Generate API Key
Navigate to the HTTP Connectors App within your MyMoveworks portal.
- Click on Credentials and click Create
- Enter a Credential Name
- Choose API Key
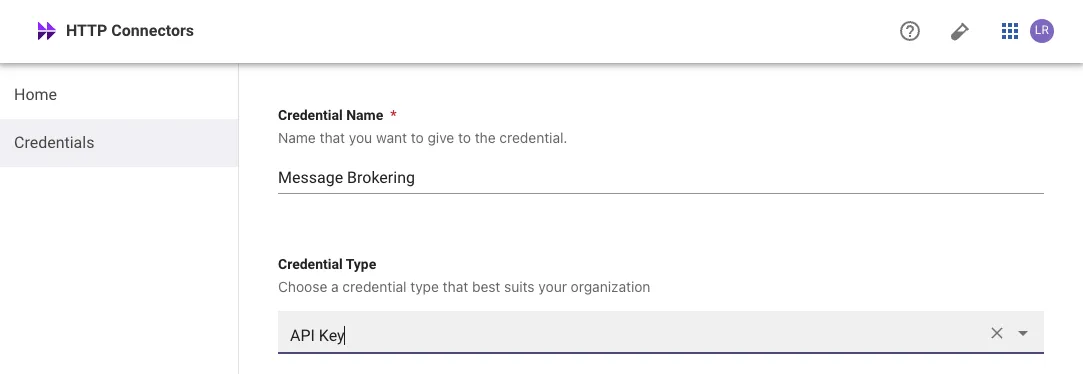
When you click Publish, save the API key somewhere safe. It is not shown again.
- Click Publish and save the API Key
Step 2: Configure Service Account Access
The service account requires the following access to support Message Brokering for Live Agent Chat.
Pre-requisite: The Virtual Agent API plugin must be installed before granting the access below.
Table Access
Grant READ access to the following tables. Moveworks reads them to check agent availability and to find the chat interaction:
awa_agent_presence_capacityawa_agent_presenceawa_agent_capacityawa_agent_channel_availabilityinteraction
Roles
Assign the following roles so Moveworks can transfer attachments between an agent and a user:
virtual_agent_admininteraction_agent
Step 3: Configure Outbound Endpoint
ServiceNow Zurich and later: Starting with the Zurich release, ServiceNow has deprecated the Outbound REST Message approach for Bot-to-Bot integrations and replaced it with a new configuration table: sn_va_as_service_outbound_configuration.
- Instances upgraded to Zurich or later: the legacy Outbound REST Message record (
sys_rest_message) is kept and still works. Use Option A. - Fresh installs of Zurich or later (including Australia): the legacy record does not exist. Use Option B.
To check, look for VA Bot to Bot under Outbound REST APIs. If it exists, use Option A.
Option A: Pre-Zurich or upgraded instances
Option B: Fresh Zurich or later installs
Navigate to Outbound REST APIs > VA Bot to Bot
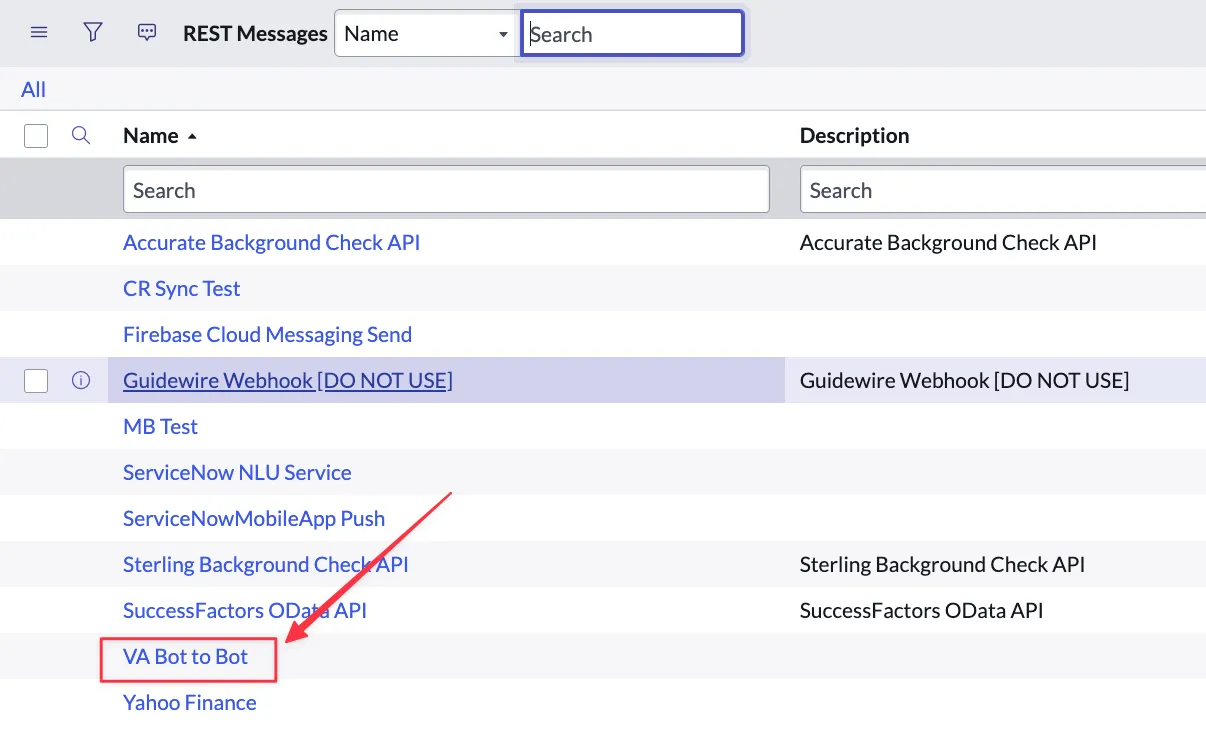
- Set the VA Bot to Bot record’s REST endpoint to the correct Rest endpoint based on the Moveworks datacenter being used:

- As part of VA Bot to Bot record you will see a POST record. Edit the associated POST record, and set the endpoint based on the Moveworks datacenter being used:

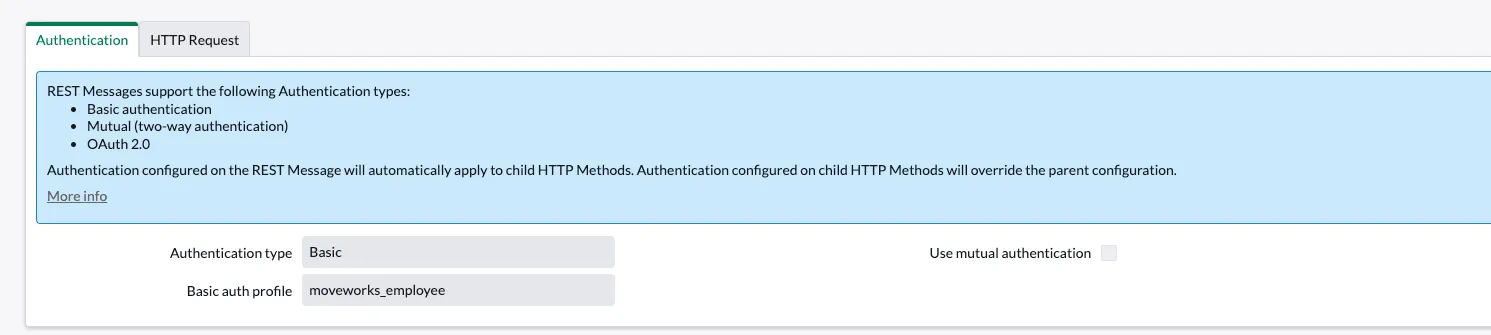
- In the POST Record you will also need to set the auth profile to a newly created auth profile for Moveworks. Create it as follows:
- Set Authentication type to Basic
- Set the
usernametomoveworks. You can use another username. - Set password to the value of the API key generated in HTTP Connectors in Step 1.
Step 4: Create the Token and Message Auth
Next, verify the token.
- Navigate to
{snow_url}/token_verification_list.doand create a new record by clicking new on the top right.
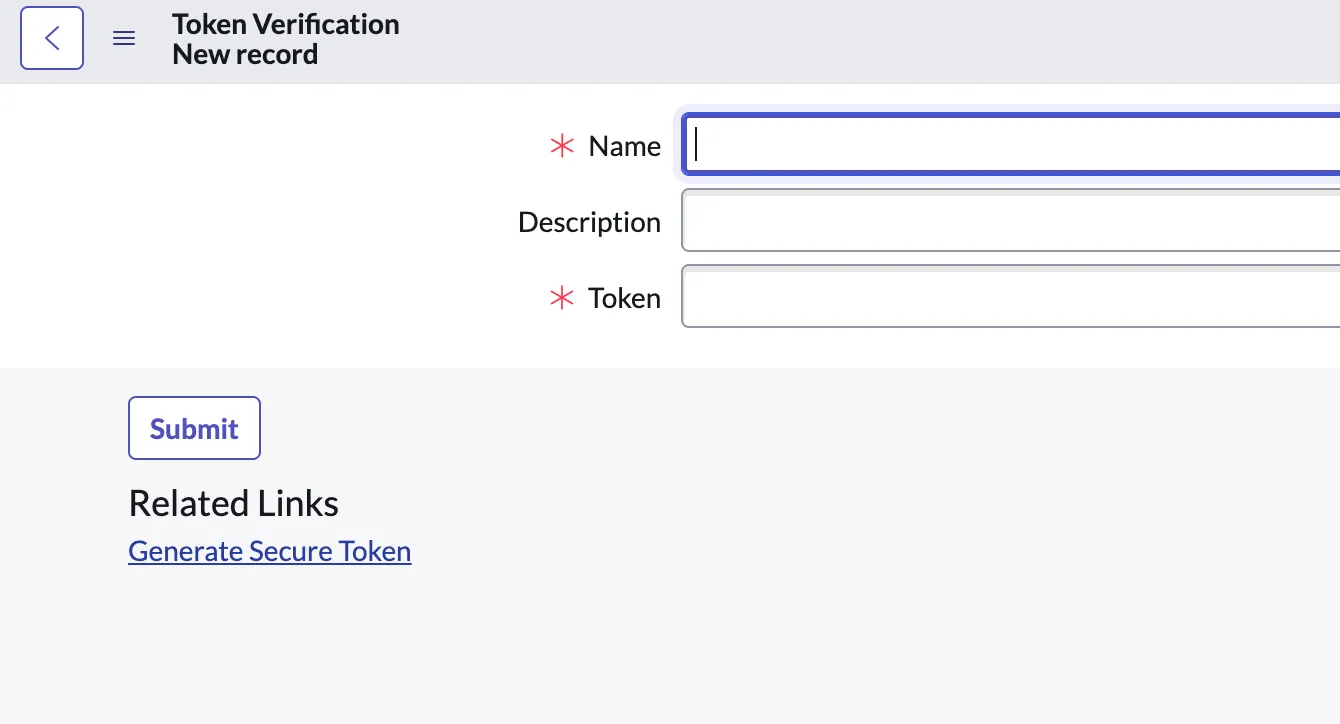
Save the token somewhere safe. You need it in Step 8.
- Enter a name, for example
Moveworks Live Agent Message Brokering, and a token value. Save the token; you enter it in Moveworks Setup in Step 8. One token covers every domain and queue on the connector.
Next, configure the message auth
- Navigate to
{snow_url}/message_auth_list.doand create a new record.
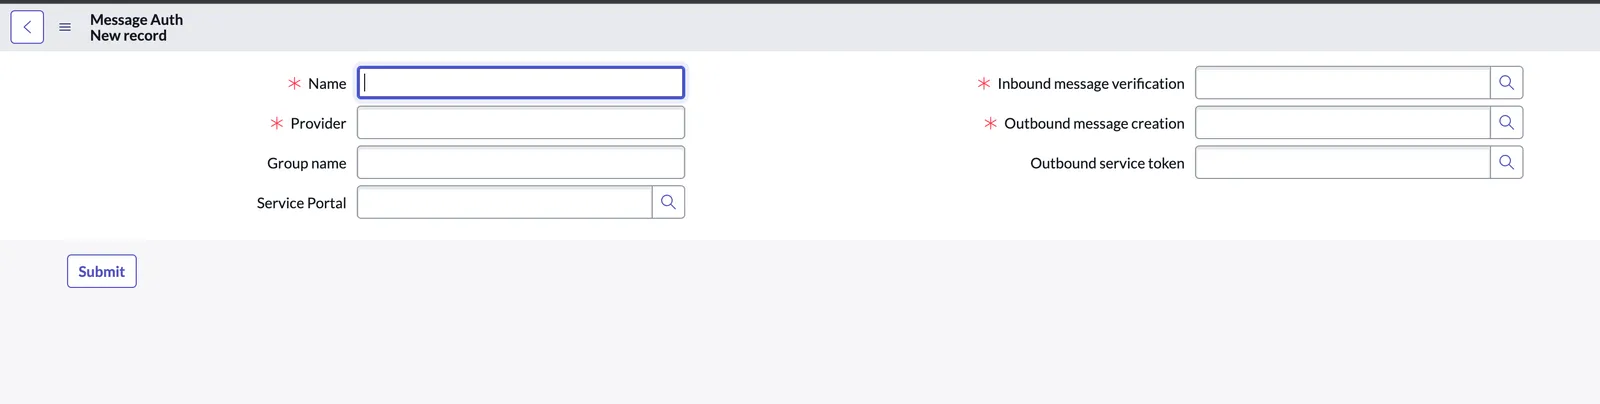
- Add the token verification you created in the previous step under Inbound message verification.
- Although Outbound message creation is not yet supported by VA API, add the same token verification here too; the field is required.
- Enter any Name and Provider. Both are required.
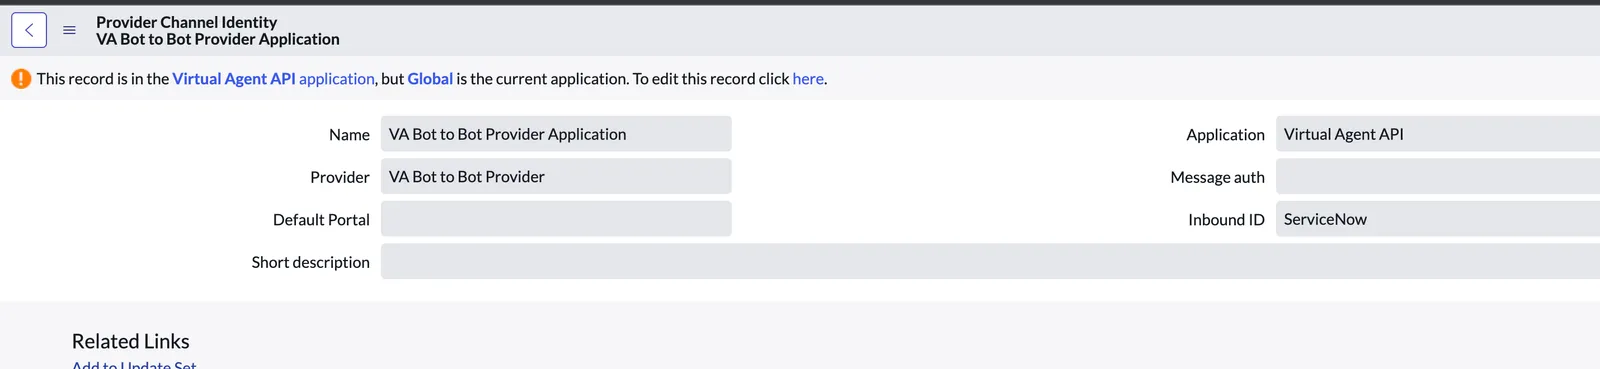
Finally, add the above message auth to VA Bot to Bot Provider Application
- Switch to the Virtual Agent API application scope and navigate to
{snow_url}/sys_cs_provider_application_list.do. You should see VA Bot to Bot Provider Application if the VA API application was successfully installed. - Open this record and under Message auth, add the message auth you configured in the previous instruction.
Step 5: Enable File Attachments
To let users send file attachments to the agent, allowlist the ServiceNow domain.
- Navigate to
{snow_url}/sys_cs_provider_application_list.do, you should be in the VIRTUAL AGENT API application scope to be able to make changes here. - Click on the gear icon at the top right and add trusted media domains to the list of selected columns.

- Double click on Trusted media domains and add
service-now.com(no quotes) as pictured below and save.

Step 6: Update Service Portal URL
Next, update the Service Portal url for KB and Ticket links.
- Navigate to
sys_properties_list.doand update thecom.glide.cs.url_redirect.default.portalsystem property with the correct service portal name (if using a service portal other than the default/sp)
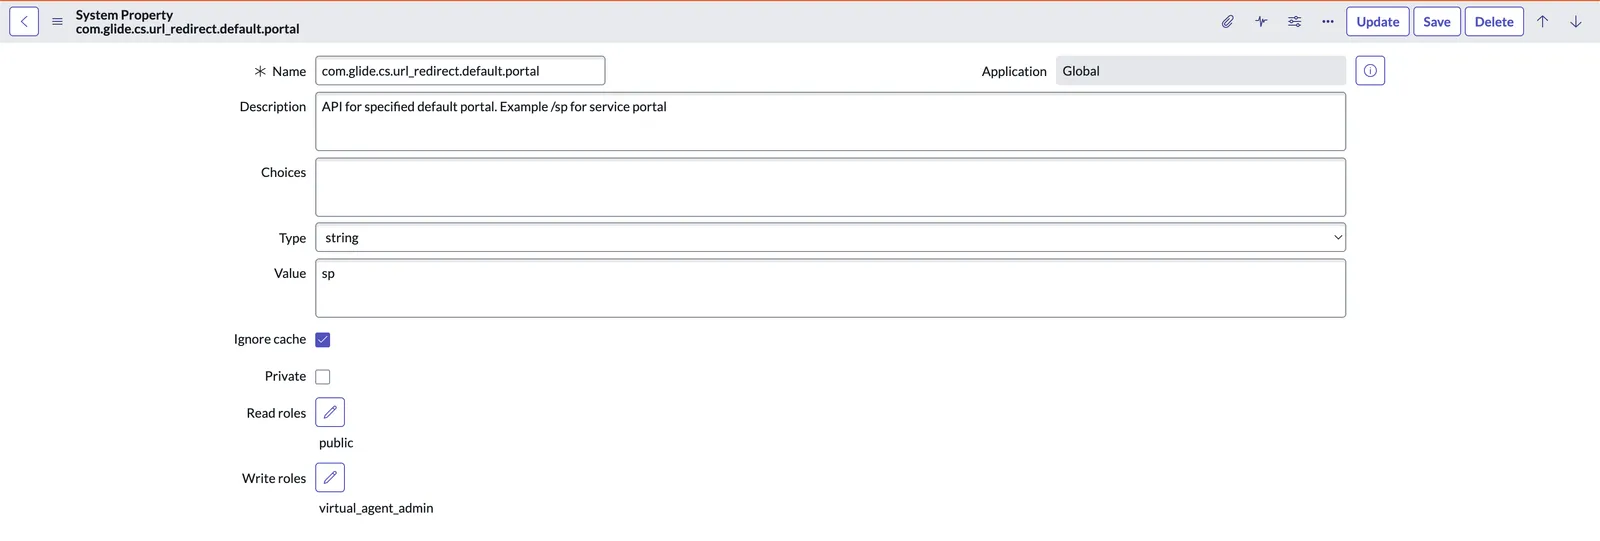
- Navigate to
sys_cs_portal_url_mapping_list.doand update the link for KBs if you use a custom url.
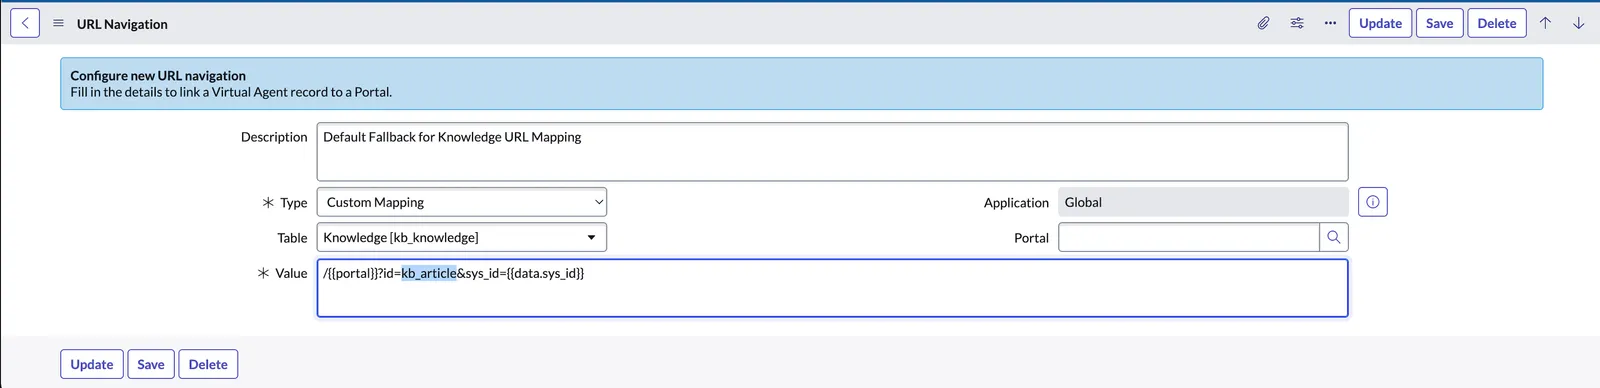
Step 7: Show Agent Names and Avatars
The ServiceNow Agent names and avatars setting controls whether an agent’s name and profile picture are shared with Moveworks. When it is off, ServiceNow sends only the agent’s ID with each agent message, so users see agent replies with no name or picture.
- In ServiceNow, navigate to Conversational Interfaces > Settings > Agent Chat > User Chat Settings.
- Turn on Agent names and avatars.
To show the agent’s name and profile picture on agent messages, also select Enable Agent Impersonation in Moveworks Setup. See Agent Name and Photo.
Each agent also needs a profile photo in ServiceNow. Moveworks fetches the photo URL without signing in to confirm it is an image, so the photo must be reachable from the internet. When an agent has no photo, or the photo cannot be fetched, the AI Assistant shows the Moveworks stock agent image instead. To show your AI Assistant’s image in that case, edit the ServiceNow connector in Moveworks Setup (Core Platform > Connectors > Built-in Connectors, the same connector you update in Step 8) and turn on Hide the default live agent stock image.
If agent replies show no agent name or picture while Enable Agent Impersonation is on, this setting is off in ServiceNow.
If you use the Conversations API, this setting is also required for the sender_info field on agent messages. sender_info also requires Enable Agent Impersonation in Ticketing Automation > Handoff > Message Brokering.
Step 8: Moveworks Setup Settings
The ServiceNow configuration is complete. In Moveworks Setup, configure these in order: Live Agent Handoff, Handoff Settings (it selects the Live Agent Handoff), Display Configurations (keyed by the Handoff Settings item), and the ServiceNow connector token. The Message Brokering page is optional; its defaults apply until you change them.
To route several teams to different queues on one ServiceNow instance, create one Live Agent Handoff and one Handoff Settings item per team, each with its own Metadata Domain. The Context Bender passes the domain to ServiceNow, and AWA routes on it.
Live Agent Handoff
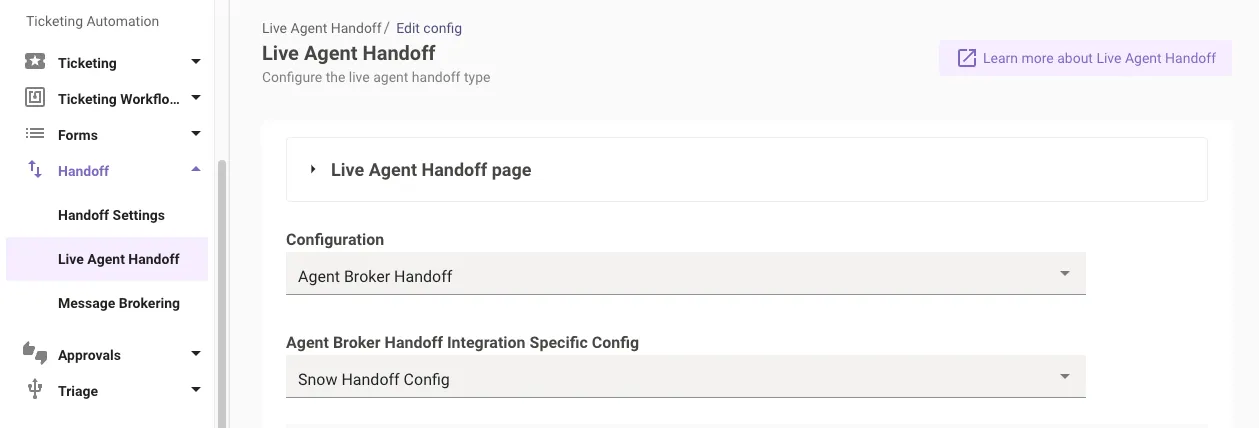
Go to Ticketing Automation > Handoff > Live Agent Handoff and create an entry.
-
Handoff Identifier: a unique name, lowercase letters, digits, and underscores (for example
snow_live_chat). -
Configuration: select Agent Broker Handoff, then Snow Handoff Config.
-
Context Bender: the context variables sent to ServiceNow for queue routing. See Route Message Brokering Chats to ServiceNow Queues. A common starting point:
-
Show Agent Wait Time (optional): show users the estimated wait time ServiceNow returns.
-
App Inbound ID (optional, under Additional Controls): set only if Moveworks should use a provider application other than VA Bot to Bot, for example when ServiceNow Virtual Agent runs alongside Moveworks. See Message Brokering Settings.
-
Select Connector: the ServiceNow connector to use for live chat. Each Live Agent Handoff can use a different connector, for example ServiceNow for IT and Amazon Connect for HR.
-
Should File Ticket On Default (optional): file a ticket for every live agent request. The ticket is filed before Moveworks checks agent availability, so it is filed even when no agent is available.
-
Live Agent Session Timeout (optional): see Live Agent Session Timeout.
-
Set Enable Live Agent to
trueand save.

Handoff Settings
Go to Ticketing Automation > Handoff > Handoff Settings. If the team’s category (for example it or hr) doesn’t exist, add it under the categories on the same page. Then add an item for each team:
-
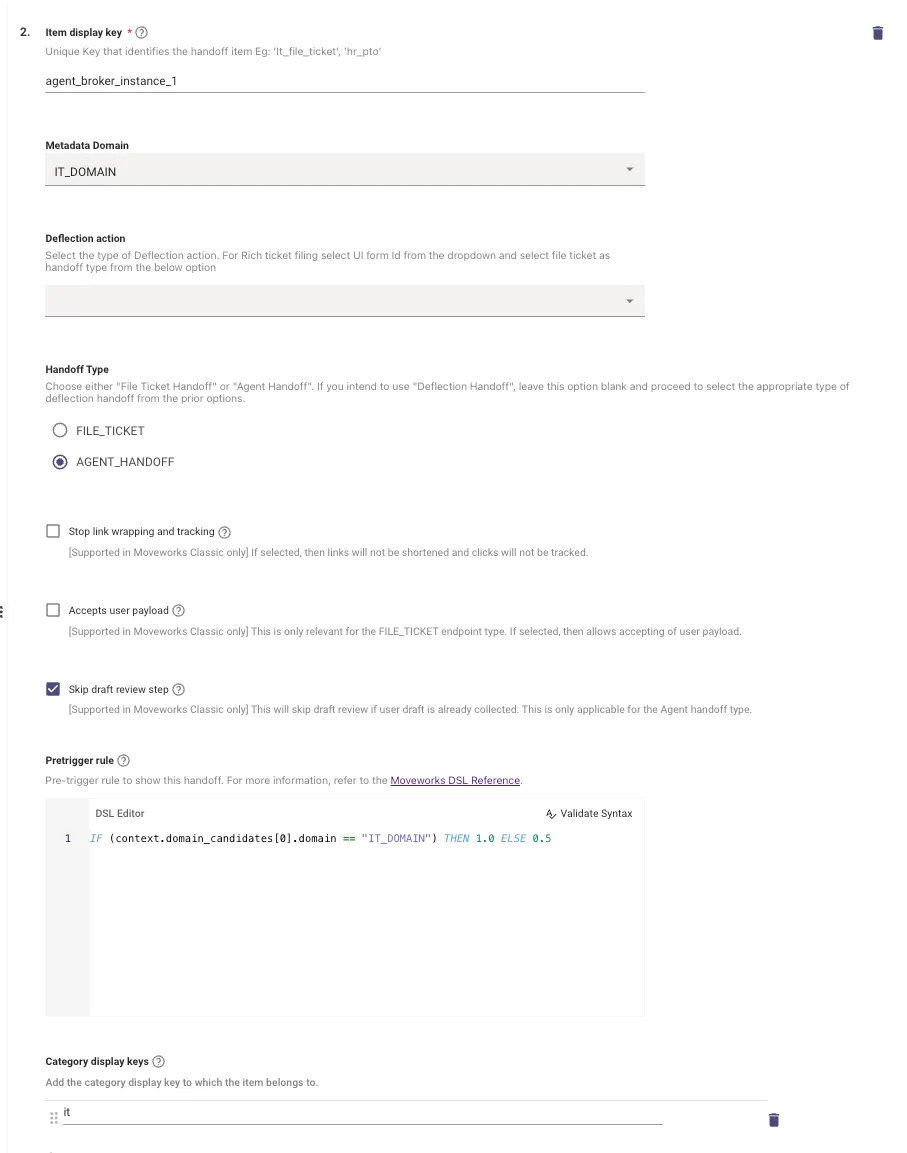
Item display key: a unique key for the menu item (for example
it_live_chat). Display labels are keyed by this value. -
Metadata Domain: the team’s domain, for example
IT_DOMAINorHR_DOMAIN. The Context Bender receives it without the suffix (IT,HR), and it sets the ticket domain. -
Handoff Type: AGENT_HANDOFF. Under Deflection action, leave URL, email, and chat channel empty. You can select a form to collect more details before the chat starts; its fields are available to the Context Bender.
-
Live Agent Handoff: select the entry you created above. This field is required for AGENT_HANDOFF items; saving fails without it. Several items can select the same Live Agent Handoff.
-
Pretrigger Rule: when the item is offered.
1.0shows it as a recommended option,0.5lists it under other help options, and0hides it. For example: -
Category display keys: the categories the item appears in (for example
it).
Display Configurations
Go to Chat Platforms > Display Configurations and, under Handoff, add entries keyed by the Item display key from Handoff Settings:
- handoff_category_names: the team name users see for a new category, keyed by category key, for example
hr→HR. - handoff_item_names: the option name users see, for example
Live Chat. - handoff_item_action_texts: the button label, for example
Start agent chat. If the item has no action text, the button does not appear.

ServiceNow Connector
- Go to Core Platform > Connectors > Built-in Connectors.
- Edit the ServiceNow connector.
- Enter the token from Step 4 in ServiceNow Virtual Agent API Token.
- Click Save.

Validation
-
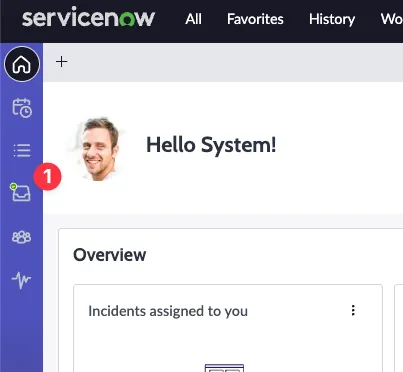
In ServiceNow, open Service Operations Workspace, find your inbox, and set yourself to Available. Your presence state must include the Chat channel.
-
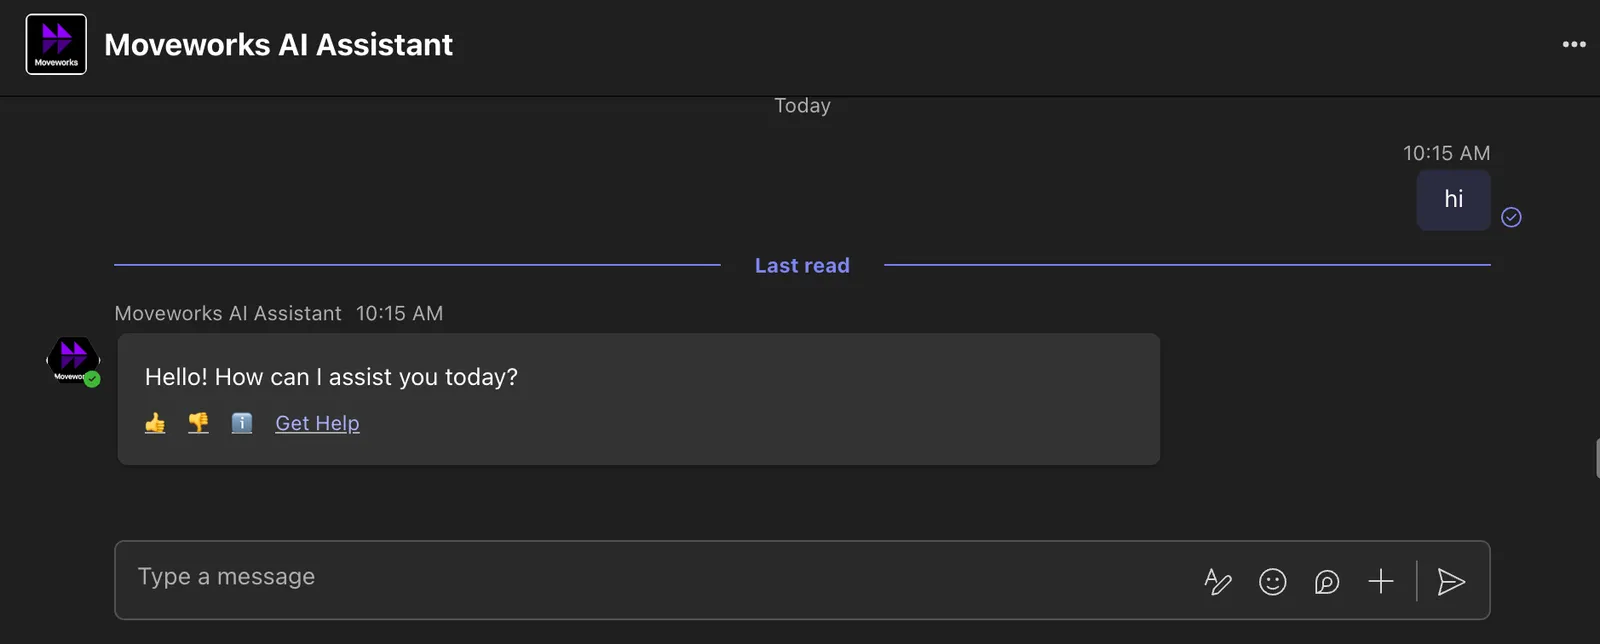
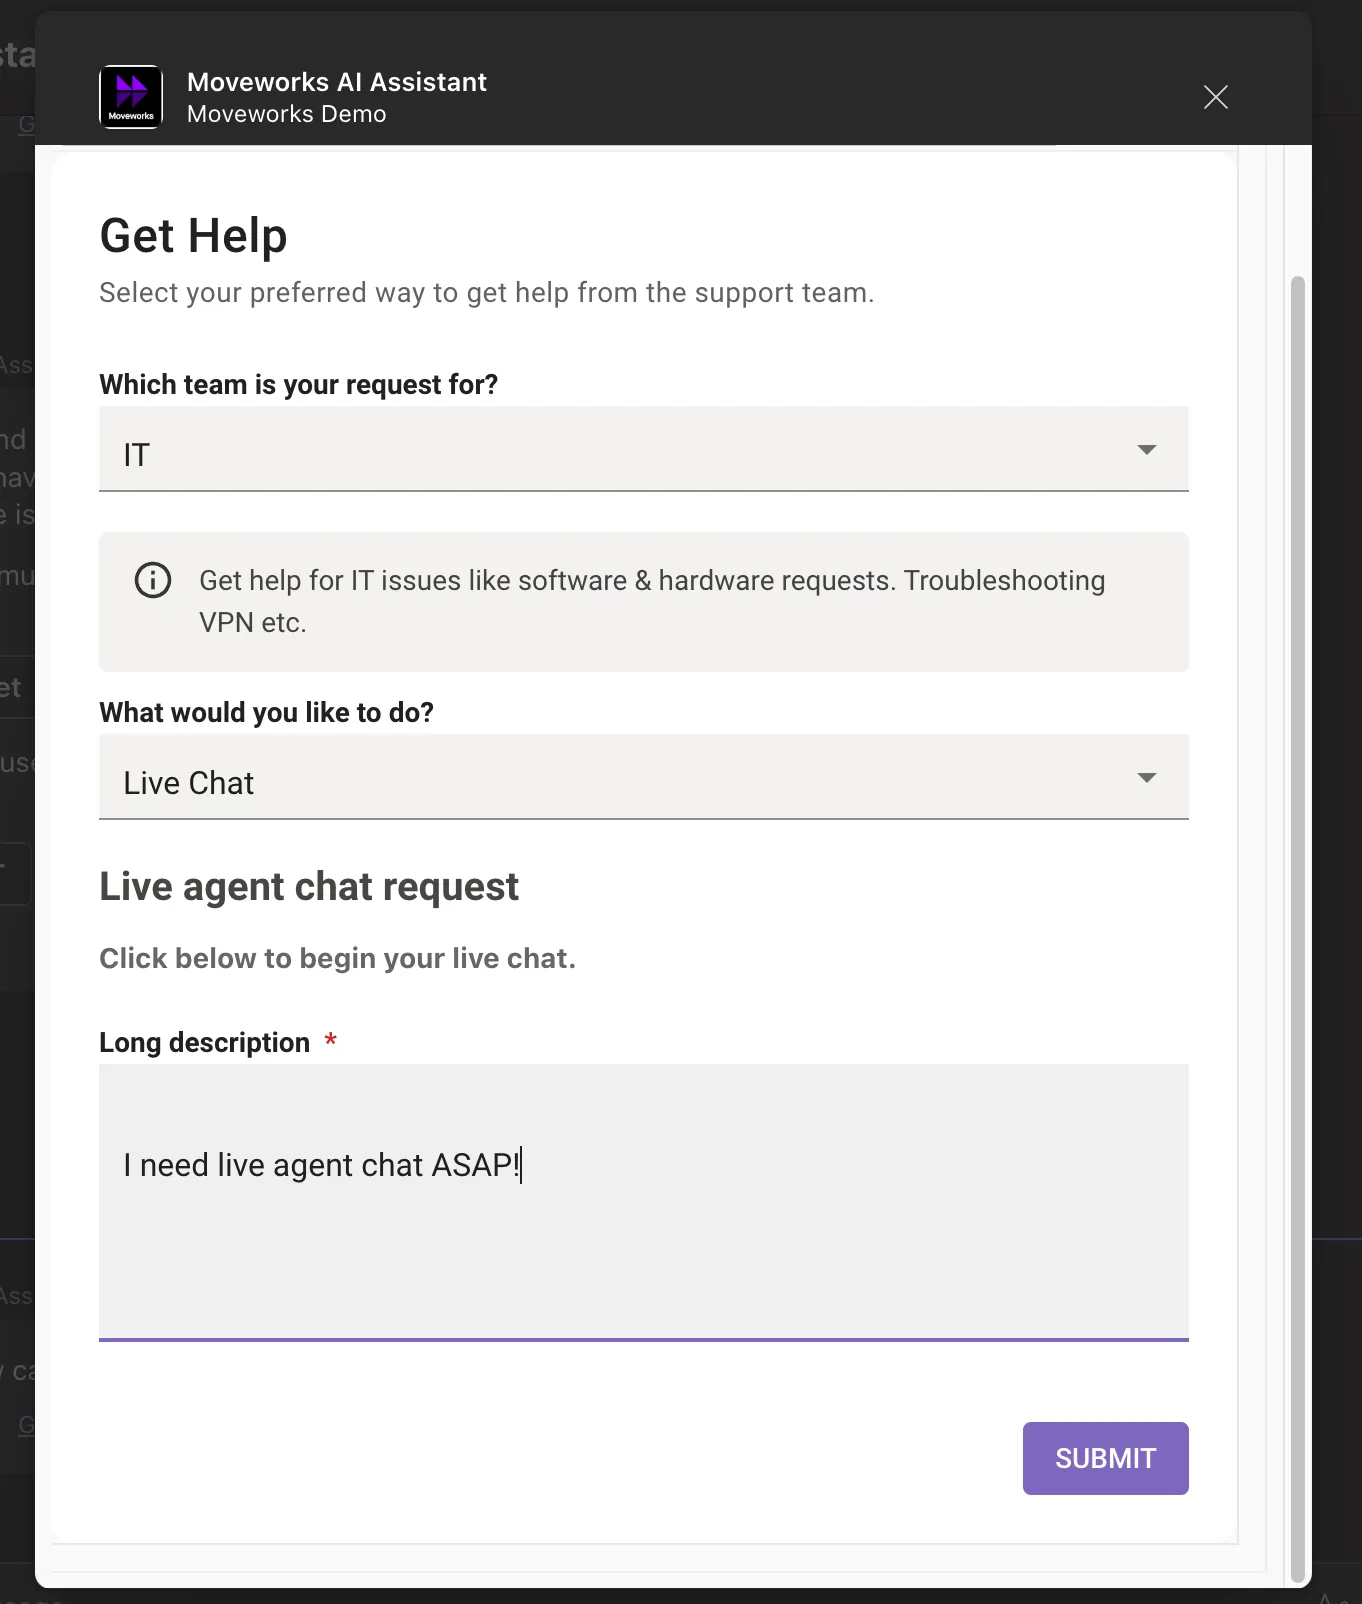
In the AI Assistant (Teams, Slack, or web), start a conversation and click Get Help.
-
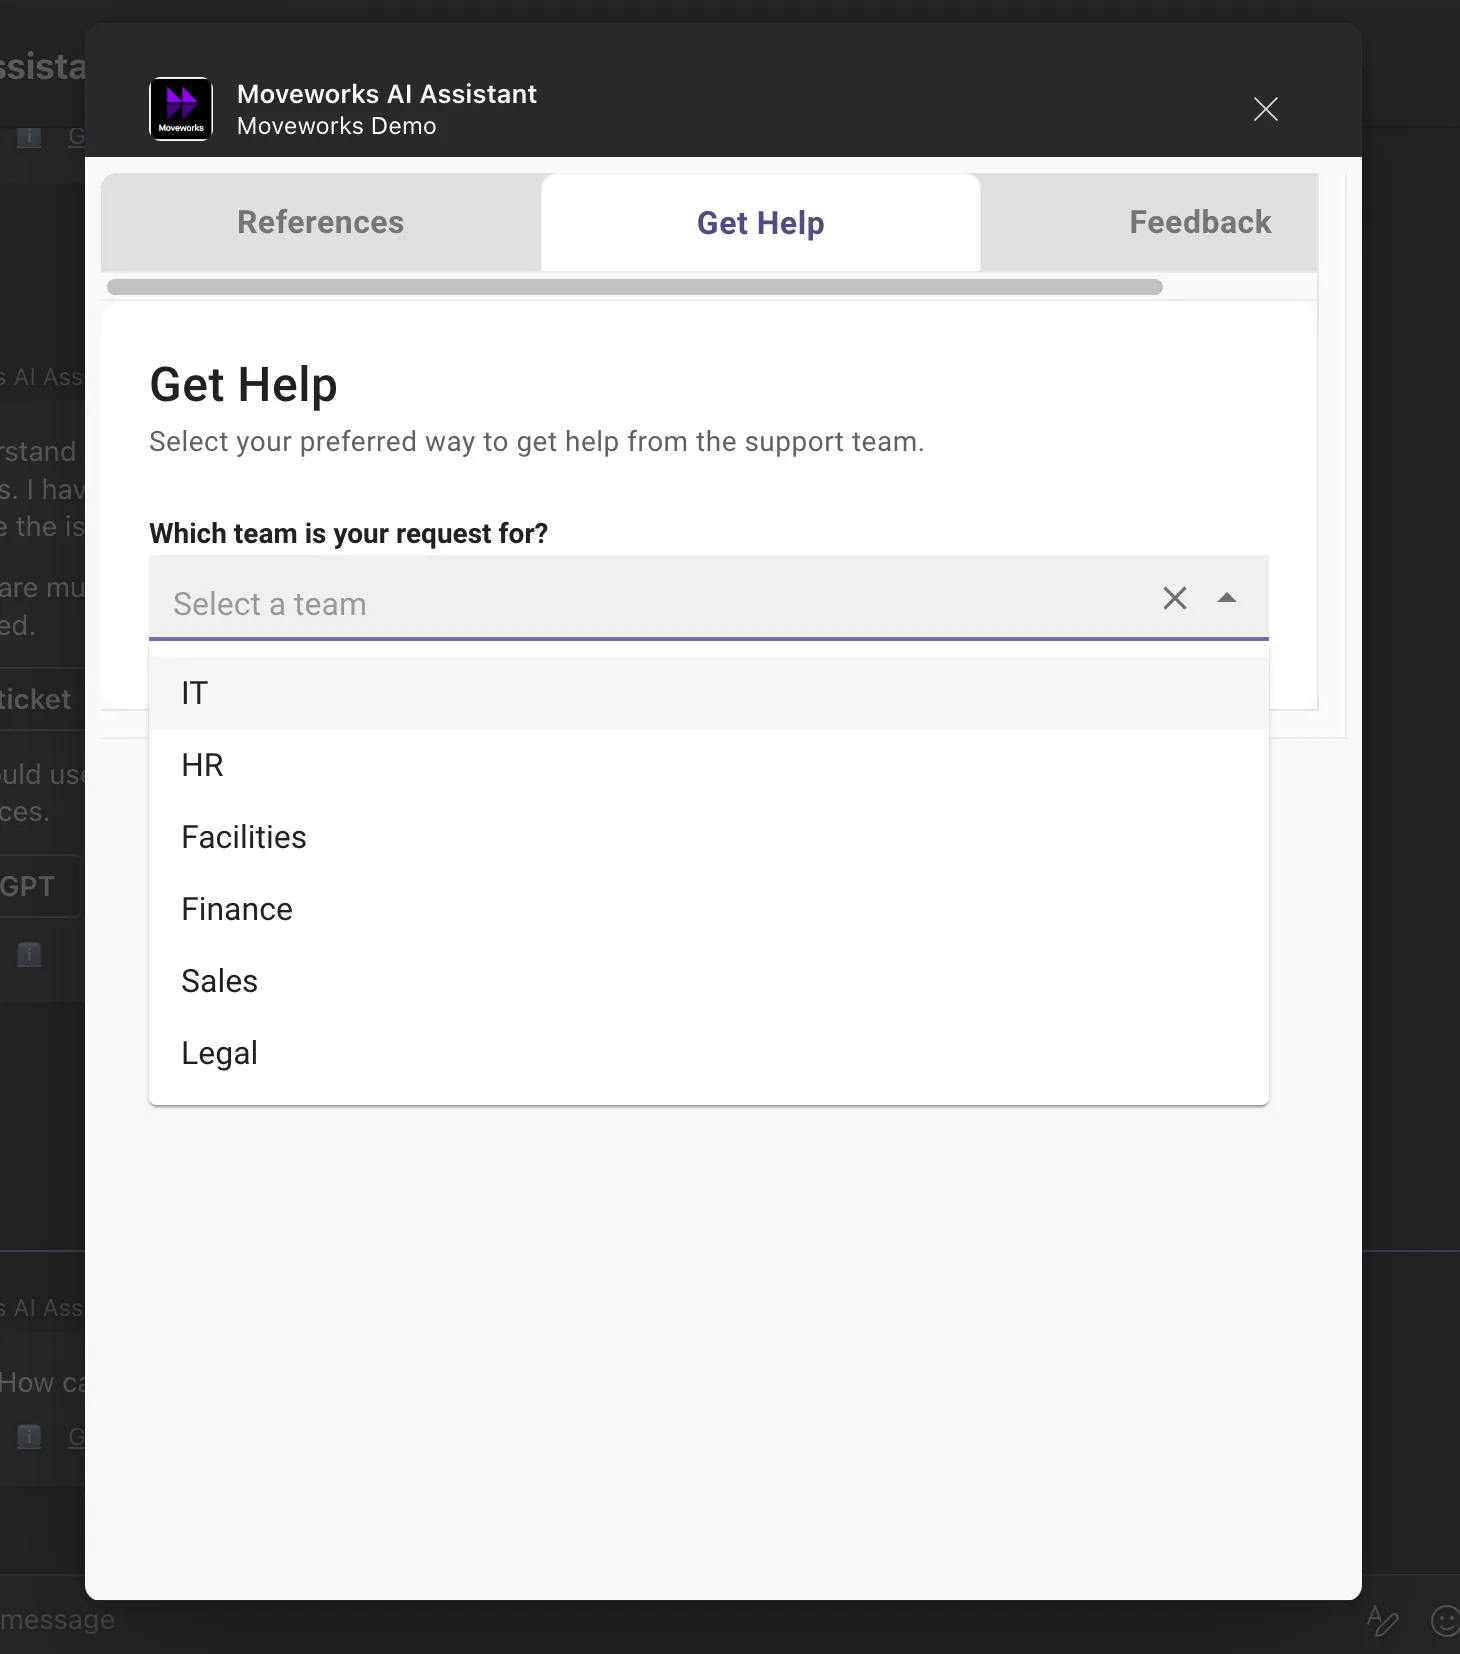
Under Which team is your request for?, choose the category from Handoff Settings (IT in this example).
-
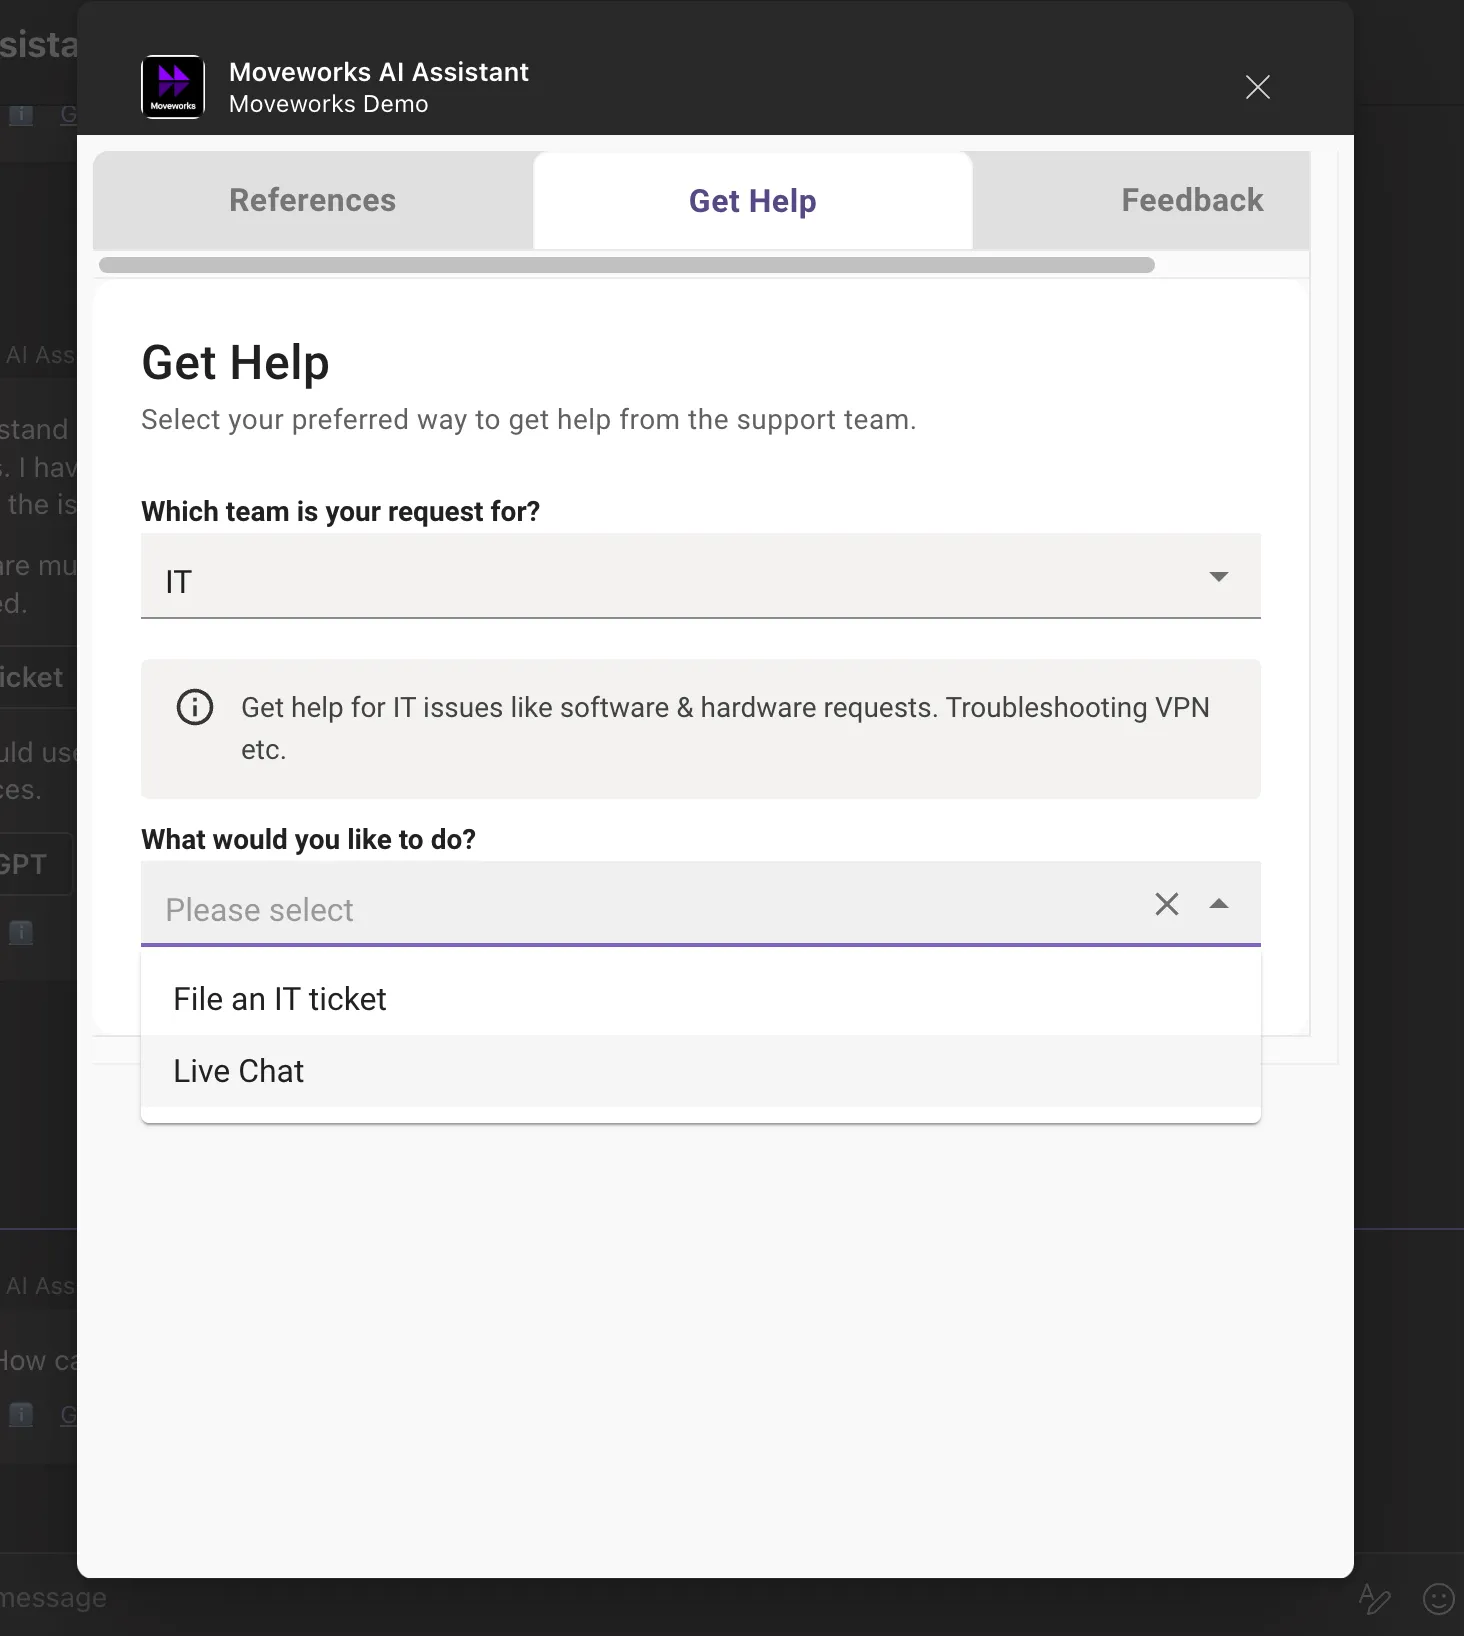
Under What would you like to do?, choose the item name from Display Configurations (Live Chat in this example).
-
Fill out the Description and click Submit.
-
The chat request appears in your Service Operations Workspace inbox. Accept it to start the session.
-
Send a reply as the agent and confirm it appears in the AI Assistant. If it doesn’t, recheck Step 3.
-
In ServiceNow, open the chat’s
interactionrecord and confirm its queue. Repeat with each team’s item.
Moveworks checks agent availability after the user submits. If no agent is available, the user sees “There are currently no agents available to handle your request” and is not added to a queue.
Troubleshoot “No Agents Available”
Next Steps
- To send different teams to different ServiceNow queues, see Route Message Brokering Chats to ServiceNow Queues.
- For every Message Brokering option, such as chat history, translation, attachments, and the session timeout, see Message Brokering Settings.