Configure Rich Ticket Filing
Moveworks helps employees solve many routine issues instantly. But often, uncategorised issues require manual support and lack a dedicated form. In such cases, employees file generic tickets via Moveworks for help (synonymous with filing tickets in the backstop/via the bot).
Without a Rich Ticket Filing form, every ticket filed via the AI Assistant only includes:
- Short Description
- More Details
- Attachments
By using Rich Ticket Filing (RTF), you can configure a form-based ticket filing experience that collects structured information from users at the time of filing. This makes ticket routing and triage far more efficient.
Configuration Steps
1. Setup Ticket Destination Mapping
Before we start setting up the RTF, we need to setup the ITSM connection for the Destination where the RTF will create the ticket.
-
Navigate to Ticketing > Ticket Settings > Ticket Mapping Configuration under the Ticketing Automation Module.
- Edit the configuration and go to the Configure Ticket Type step where you can add the new Destination table. Follow this guide to setup Ticketing for a new Table.
-
In the Create Ticket Payload, you will need to define the attributes which are required to make a successful API call to create the Ticket.
-
The Attributes in Red are what the ITSM expects to see in the Payload, while the Attributes in Blue are Moveworks based and can also be hardcoded.
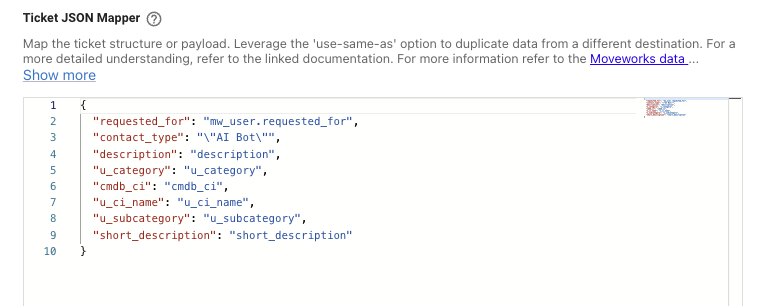
-
Here you will notice some attributes are repeated on both ends, for example
"cmdb_ci": "cmdb_ci"these are defined as placeholders which can be fulfilled when executing the Workflow. -
These Attributes can now be leveraged to create the RTF in the next step.
If you are always going to use an RTF for a specific Ticket Destination, Then it is recommended to define fallback values if a field is empty.
2. Create a Rich Ticket Filing Form
-
Navigate to Ticketing > Ticket Settings > Rich Ticket Filing Configuration under the Ticketing Automation Module.

-
Click on Create to setup a new form.
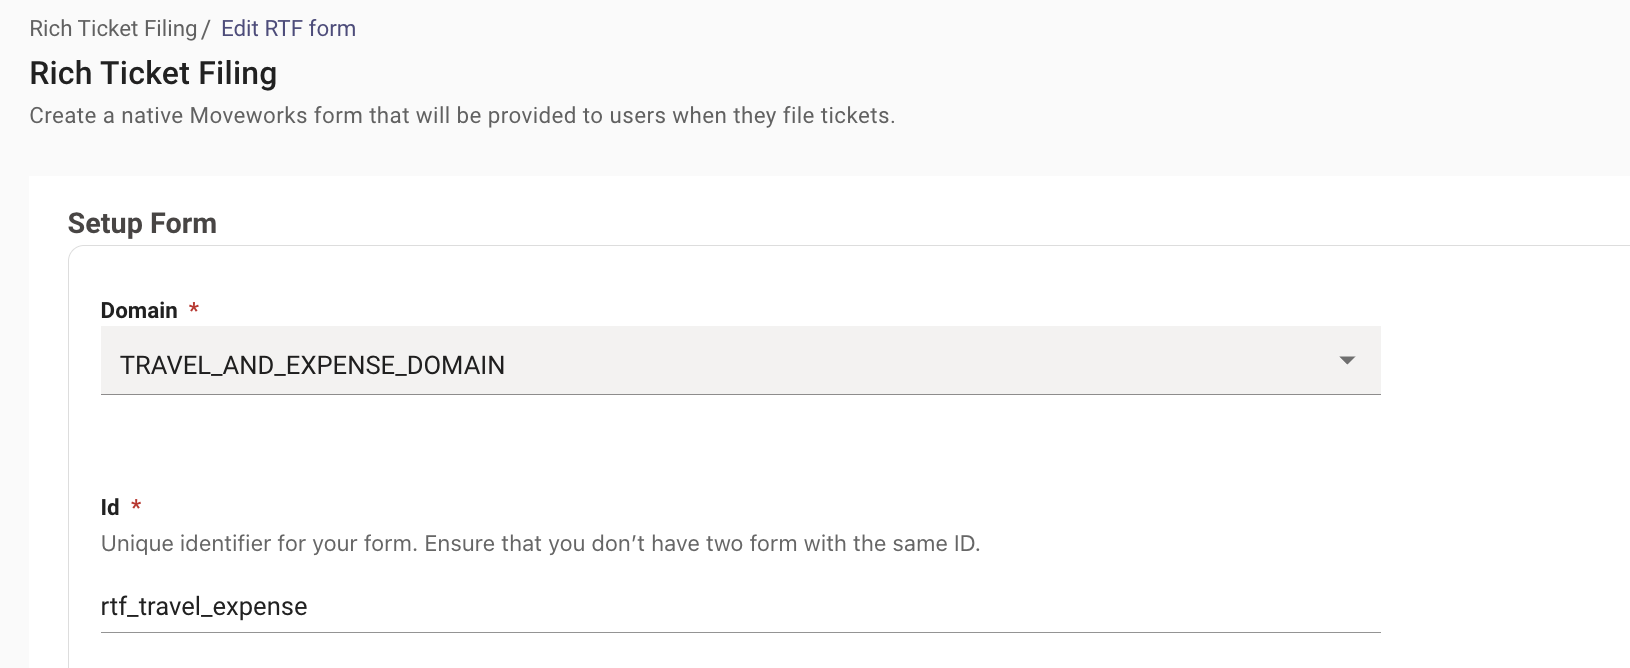
-
You will start by selecting the domain, and provide a unique ID for the form. (This ID will be used in multiple other configurations). Ensure that each form has a unique ID. Duplicate IDs will cause conflicts.
-
Add the following details:
- Form Title – e.g., “Submit a Ticket” or “Ask HR a Question”
- Description & Short Description – user-facing help text on how to fill the Form.
- Fields – information you need from the user.
️ Required fields
Rich Ticket Filing forms must have at least one field with Field Name description or short_description. If neither of these fields are included in a Rich Ticket Filing form, ticket creation will fail.
If only 1 needs to be available, use short_description, as that is required for user’s chat context to be passed into the ticket creation form.
3. Add Fields to the Form
Rich Ticket Filing supports the following field types:
- Single-line text
- Multi-line text
- Single-options dropdown (max 100 options unless the field type is USER)
- Checkboxes
- Datetime fields (MS Teams only)
- Attachments (MS Teams only)
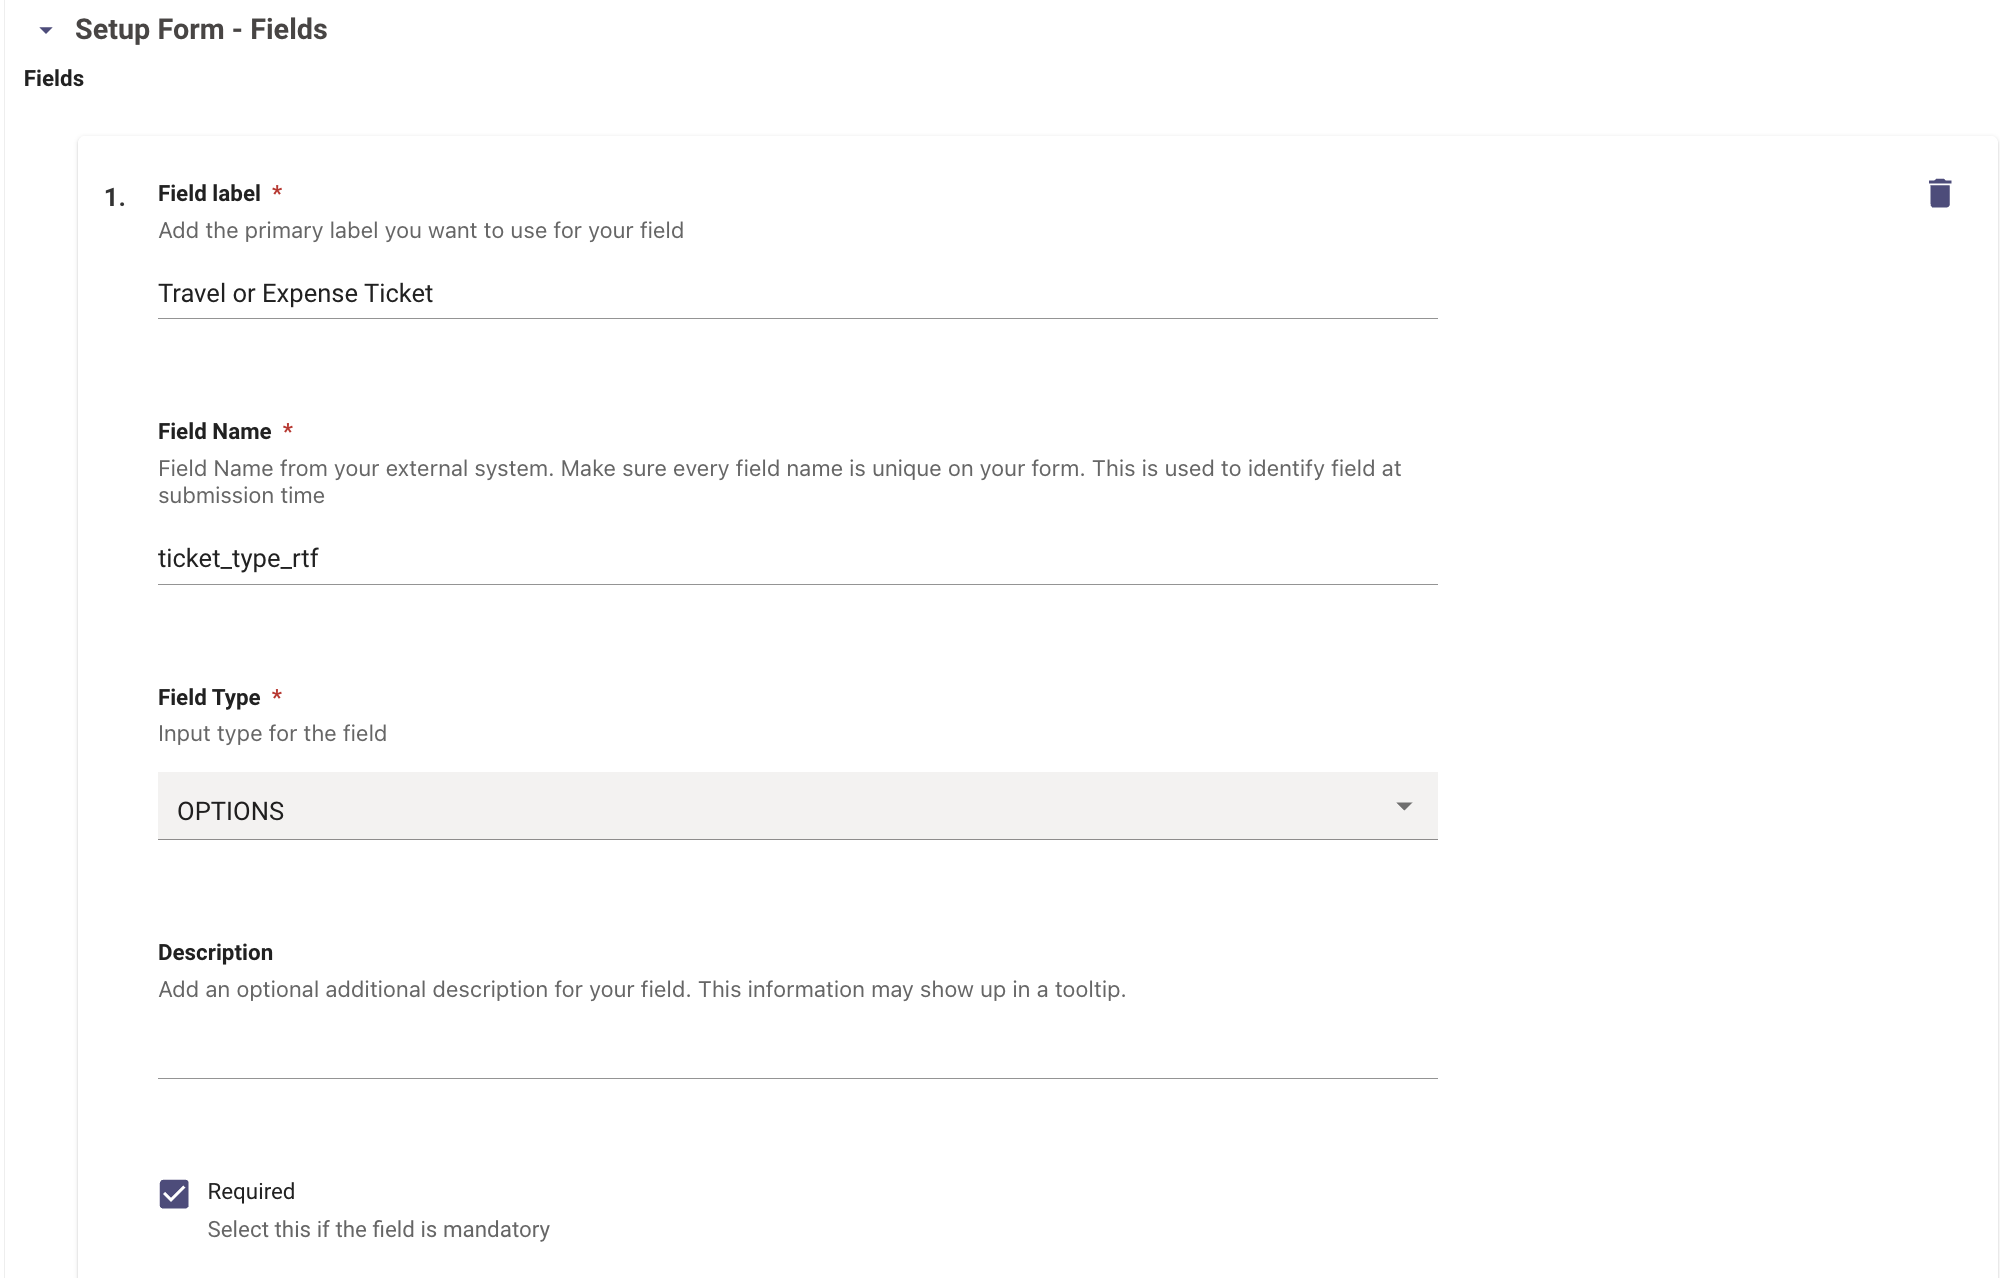
For each field, configure:
- Field Label – user-facing name.
- Field Name – internal identifier. This must be noted for mapping to ITSM fields later.
- Unmapped fields will be sent to the ticket description by default.
- Field Type
- Description– optional tooltip help text.
- Required/Read Only
- Auto-population (if any)
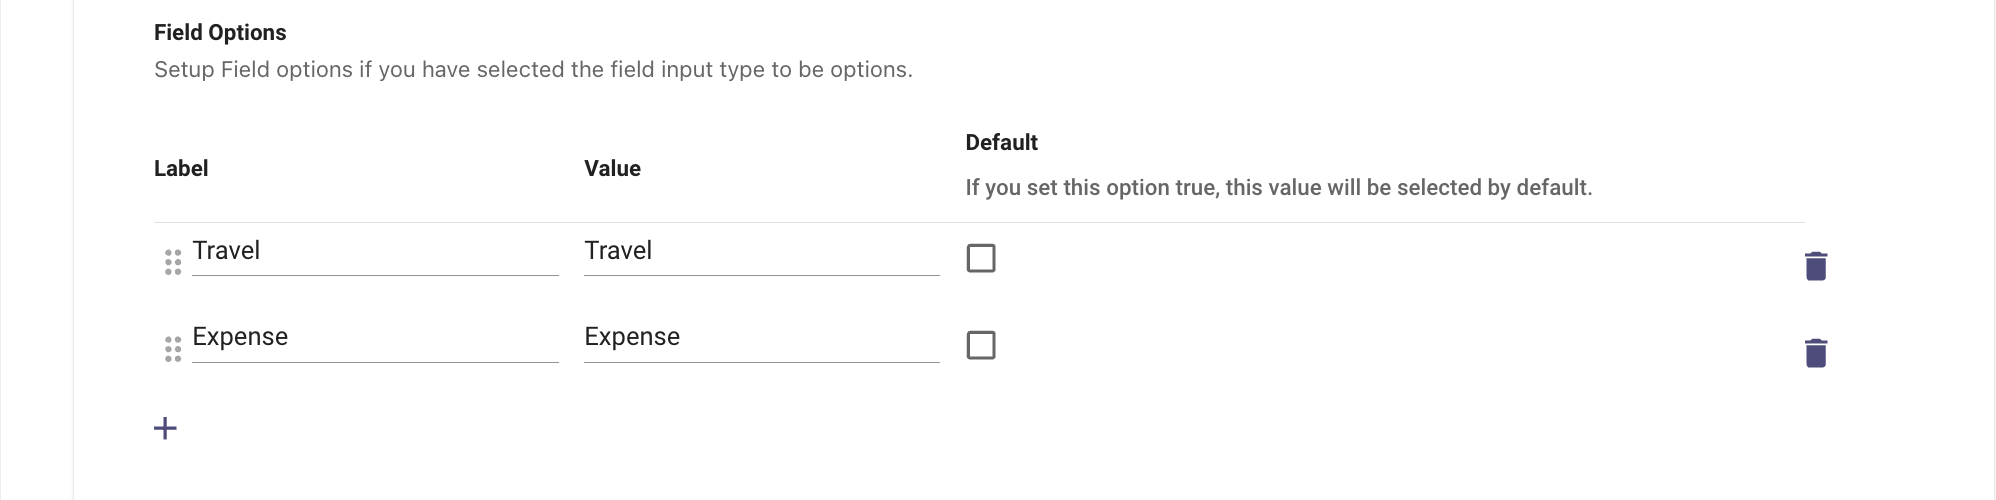
- Dropdown Options (for option fields):
- Label – shown to the user.
- Value – backend value accepted by ServiceNow (must match sys_choice or table values).
When configuring the OPTIONS field type, it is mandatory that each Label-Value pair is unique. Duplication within these pairs may lead to logic inconsistencies during system processing.
Example: For an Travel & Expense dropdown, add values for Travel and Expense. The selected value will determine which workflow runs based on the condition satisfied.
4. Linking RTF to Handoff Configuration
Now that the RTF has been configured, we need to create the display settings associated with it in order to Render it in the Assistant Chat Platform UI.
- Navigate to Handoff > Handoff Settings under Ticketing Automation.
- Create a new Category, or setup a new Item in an existing Category so we can link it to the RTF.
- Deflection Action → UI Form Id
- UI Form Id → unique ID of RTF we set earlier.

Always ensure the Pre-Trigger being provided here is based on the Domain the RTF was defined under.
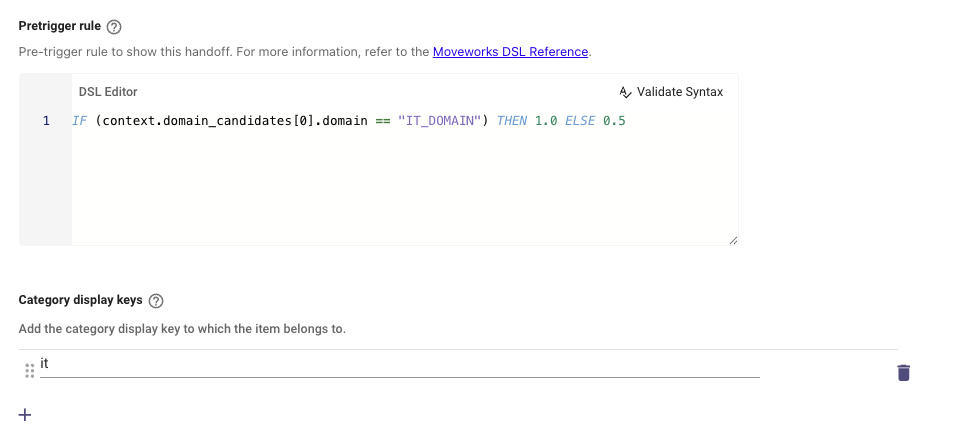
5. Setting up Display Configuration
Once the Handoff is created, We need to provide some metadata to it, in order to define the details like name and description to the Item which was created for the Handoff.
You can follow this Guide on How To Configure the Display Fields for Handoff Items
6. Configure Ticket Action Workflows
In order to define which payload is used to Generate the ticket for an RTF, we can use Ticket Workflows condition actions.
-
The Ticket Workflows have the ability to leverage the option a user has selected in an RTF by referencing the field name as part of a DSL Rule.
-
When you create a new Workflow, the Default Action will define the Generate Ticket Action with the default payload which has been set for a Destination.
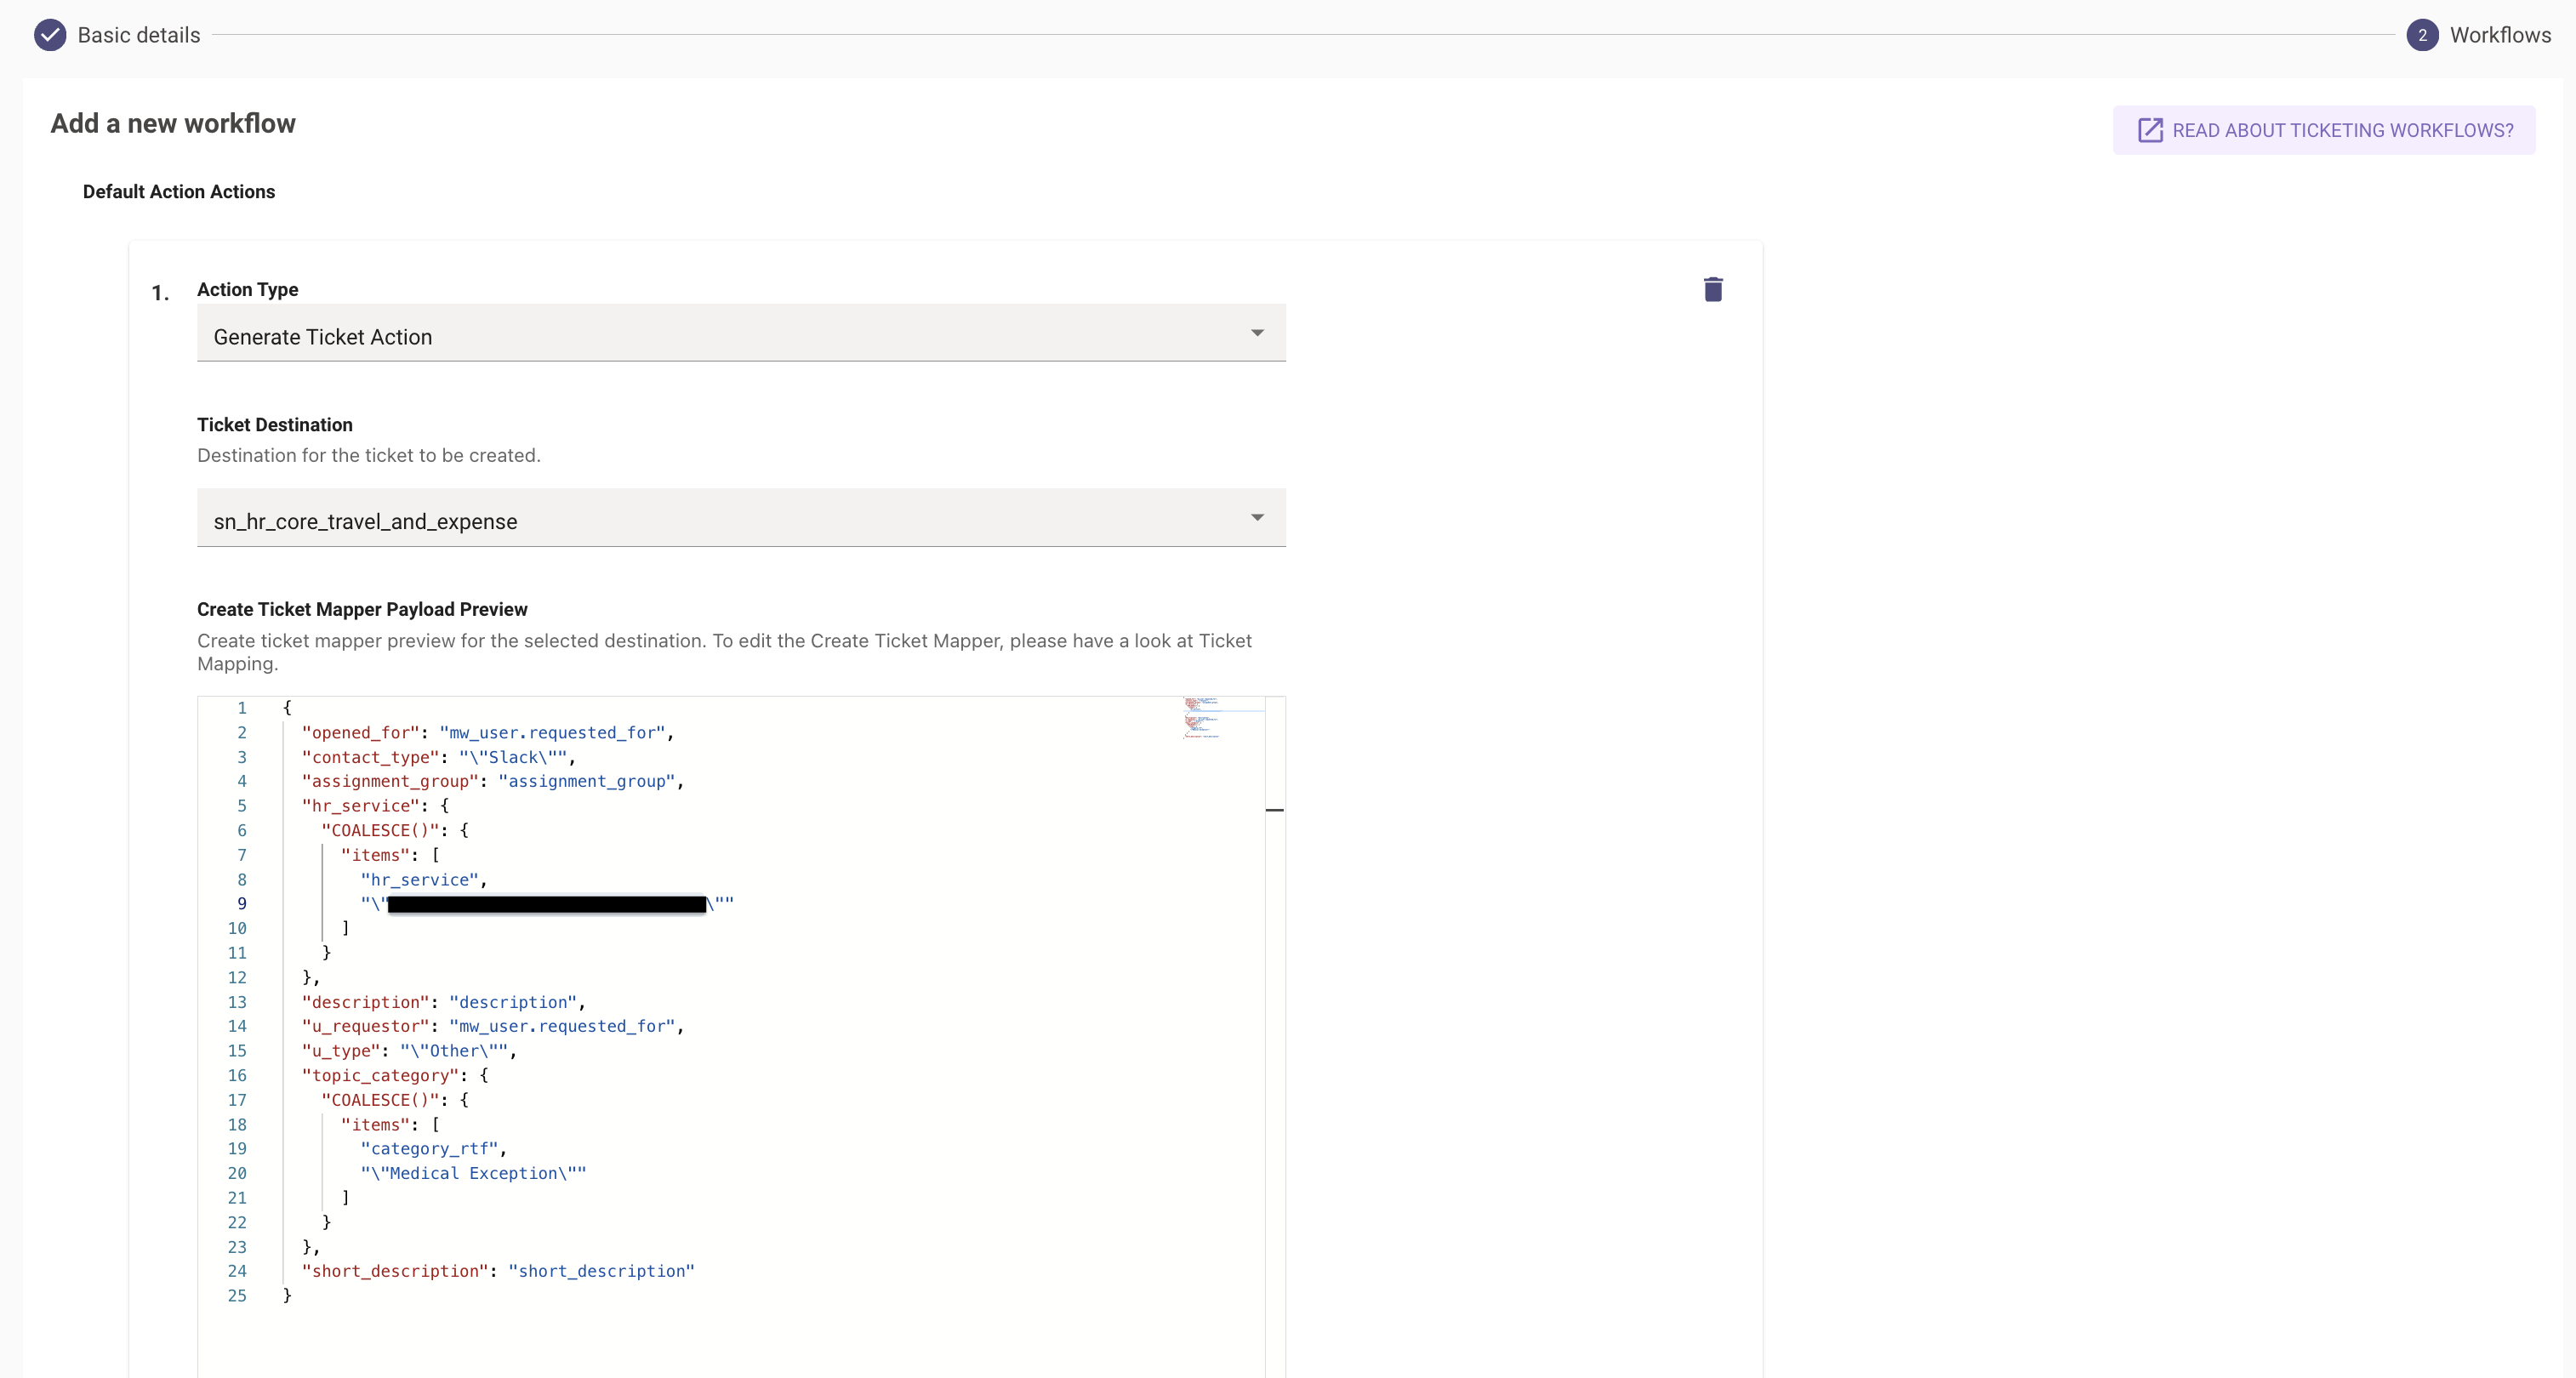
-
Then comes the Conditional Action section, which allows you to define a DSL rule, based on which you can define Generate Ticket Action with multiple different Payloads. Here we can leverage the RTF Field value which has been configured earlier.
-
In the below example,
ticket_type_rtfis the RTF field which can be used for evaluating the condition.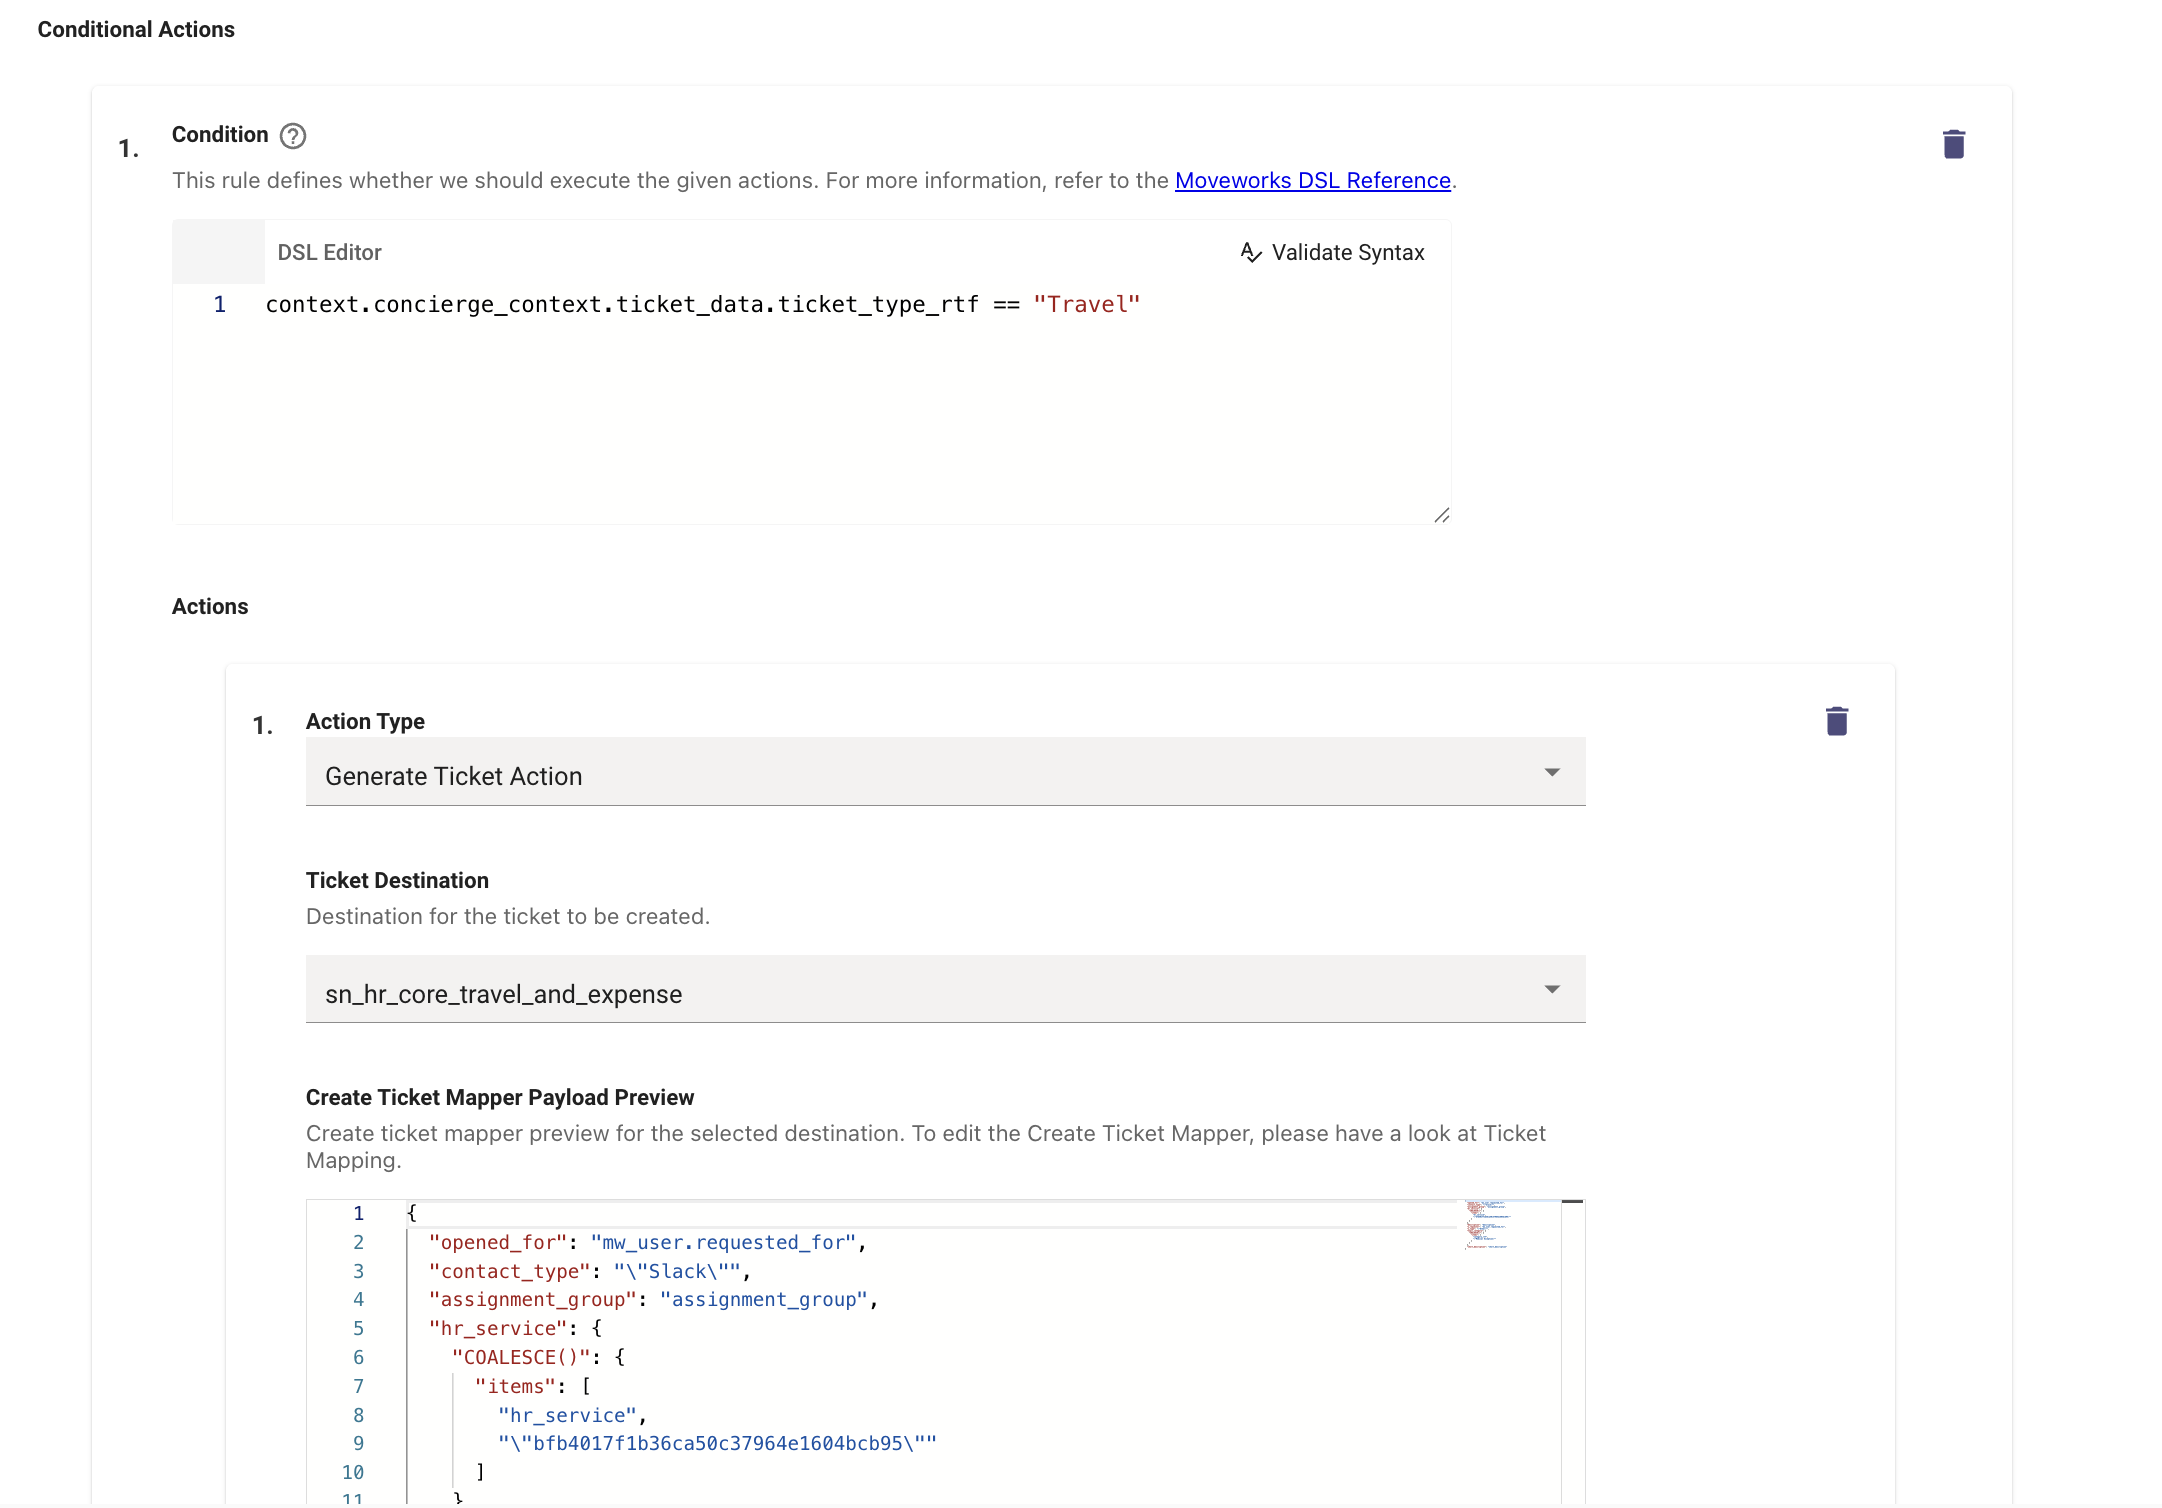
-
When writing the DSL Rule, we need to ensure both ticket_data & ticket.ticket_vars are included for the Condition to be Evaluated accurately
-
You can add more conditions here using different RTF fields in the DSL Rule in order to use the required payload.
Workflow Conditions is the only place where the RTF field context is available. These rule conventions should only be used here.
This completed the Setup process for Rich Ticket Filing.
You should now be able to test this by clicking on the Get Help option, and then selecting the Handoff Category which the RTF belongs to.
FAQ
Q: For a User Type field, what if multiple users have the same name?
A: Moveworks will show Name: <Email> for USER type fields dropdown in the form, so even if they have multiple names, you can disambiguate using name + email pair.