For AI agents: a documentation index is available at the root level at /llms.txt and /llms-full.txt. Append /llms.txt to any URL for a page-level index, or .md for the markdown version of any page.
Logo
DeveloperAcademyCommunityStatus
  • Service Management
    • Overview
    • Concierge & Ticketing Capabilities Overview
    • Forms
    • Forms - Integration Specific Guides
    • Live Agent Chat / Handoff
    • Triage
    • Approval Mirroring
    • Ticket Interception
    • Generic Ticketing Integration: Ticket Gateway
  • Administration
    • MyMoveworks
    • Organization Information
    • Roles and Permissions
      • Role Based Access Control (RBAC) at Moveworks
      • How to Assign Roles using RBAC
    • MyMoveworks SSO
  • Moveworks Setup
    • Accessing Moveworks Setup
    • First-Time Login via Magic Link
    • Moveworks Setup Modules
    • Moveworks Setup: Module How To Guides
    • Plugin Management
    • Monitor Alerts
    • Audit Logs
    • DSL Fields Defaults
    • Data Crawling View
    • API Playground
    • Setup Homepage
    • Troubleshooting Hub
    • Security and Privacy Settings
    • Configuration Delete
    • Advanced Config Editor
    • Identity configuration
    • Onboarding Stage
  • Security
    • Security
    • Hyperlink & Button Expiry
    • Attachment Handling
    • Moveworks Subprocessors
  • Provision Management
    • Overview
    • Access Software
    • Access Groups
    • Access Account
  • Access Requirements
    • Overview
    • Update Set Modules
    • Ticketing Systems & ITSMs Access
    • Identity and Access Management Systems Access
    • Multi-Factor Authentication (MFA) Systems Access
    • Knowledge Access Requirements
    • Email Distribution List Systems Access
    • Facilities Management Access
    • Live Agent Chat Access
    • HR Information System Access
    • Expense Management Access
    • Calendar Management Access
  • Core Platform
    • User Identity
    • Moveworks On-Prem Agent
    • Approvals Engine
    • Entity Catalog
    • Configuration Languages
    • Moveworks Data Objects
    • SIEM
  • Employee Experience Insights
    • Overview
    • Breaking Down the Dashboard
    • Understanding Industry Benchmarks
    • Apps & Services
    • Impact Module
    • EXI Common Use Cases
    • Configure EXI
    • Ticket Backpolling
  • Knowledge Studio
    • Overview
    • Knowledge Studio Configuration
    • AI Powered Recommendations
    • Inspecting & Verifying Sources
    • Publishing Articles
    • Creating Knowledge Articles
    • Resolving IT Tickets Guidance
DeveloperAcademyCommunityStatus
On this page
  • Prerequisites
  • Step 1:
  • Step 2:
  • Step 3:
  • Step 4:
  • Step 5:
AdministrationRoles and Permissions

How to Assign Roles using RBAC

||View as Markdown|
Was this page helpful?
Edit this page
Previous

MyMoveworks SSO

Next
Built with

Role based access control (RBAC) in Moveworks Setup, offers you control over security and governance. To assign, edit and downgrade roles for your users follow the steps below.

Prerequisites

  1. User Identity to Ingest users needs to be setup prior to assigning roles to users, only then will you be able to search and assign roles to users. Head over to this guide to learn more about Identity Ingestion and it’s detailed configuration guide.
  2. Ensure that you have appropriate roles to make changes. You can either be a Super admin or a Moveworks Setup admin to assign roles to other employees of your organization.

Step 1:

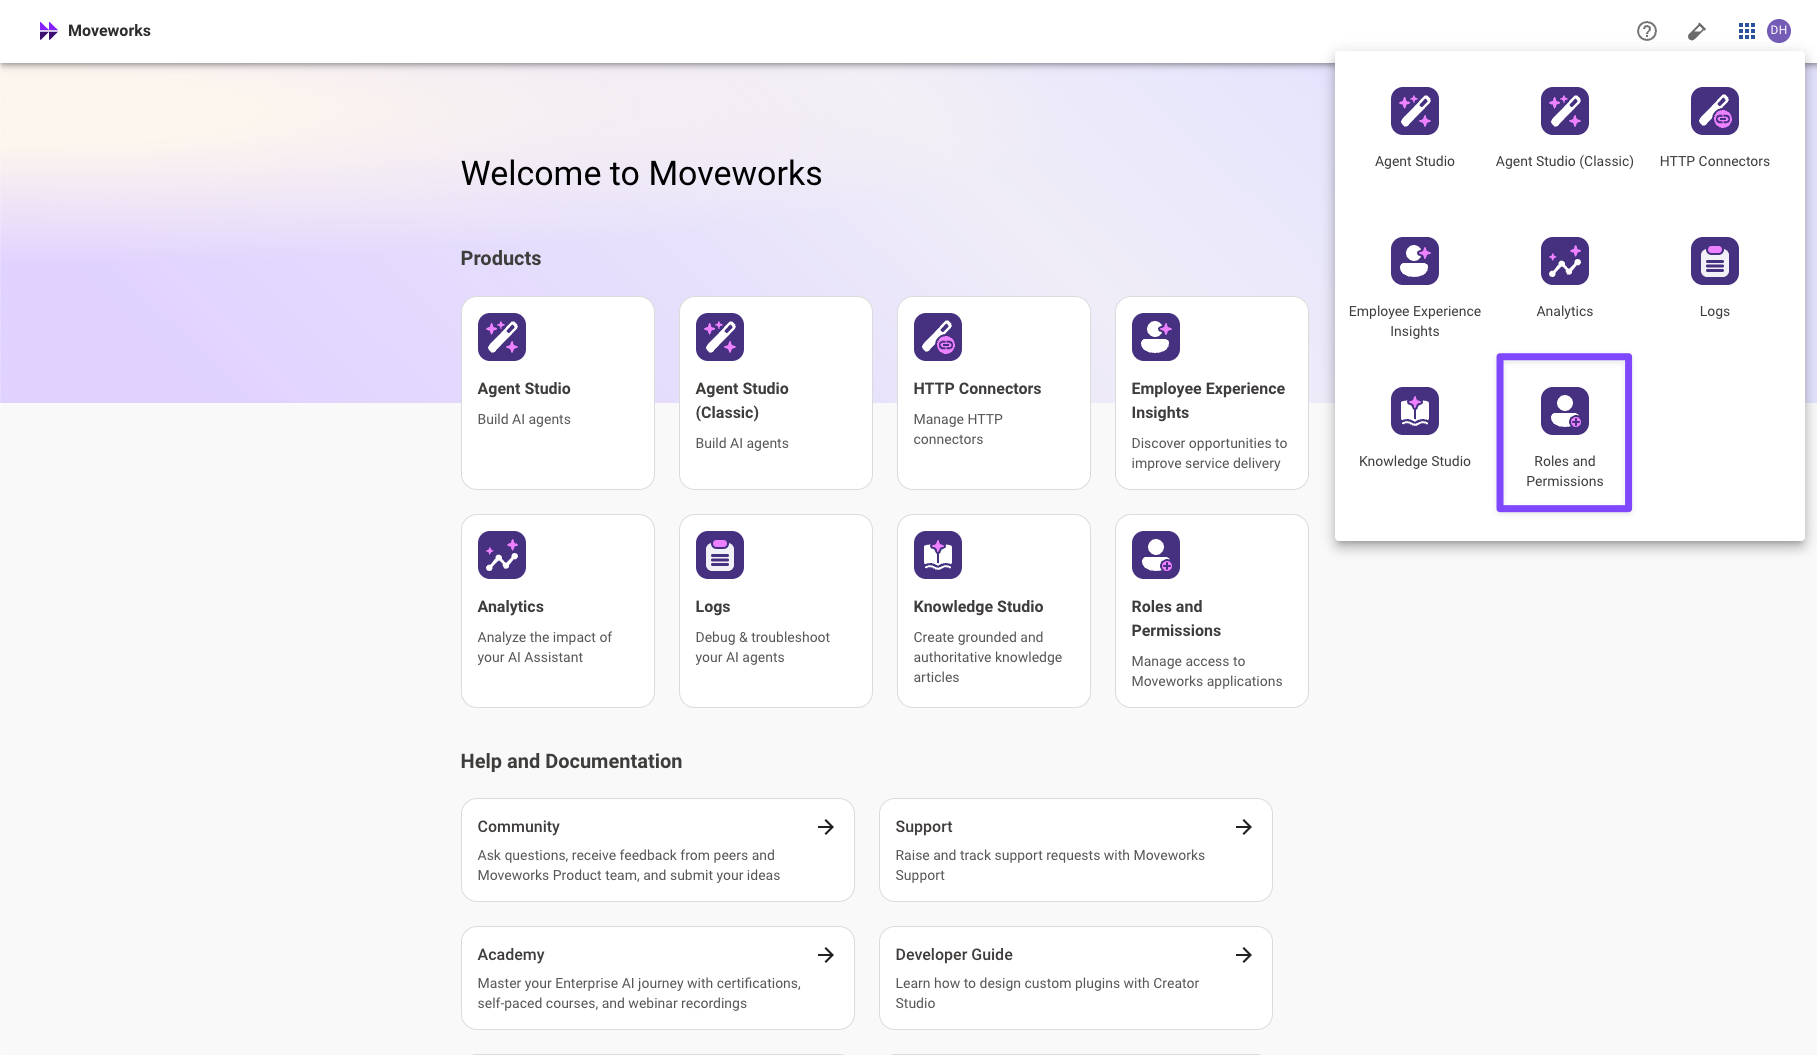
Head over to Roles and Permissions under Company Settings in the left navigation bar.

Step 2:

This screen is a view of all the users and the Roles assigned to them in the Environment. You can filter down users and the Apps on this page by using the following options :

  • You have a “Search icon” on the right side which can be used to search for specific users.
  • On the top left side, you will find a drop down that says “Active app users”. Click on this drop down select the applications that you want to add roles for.


Step 3:

Once you selected all the applications that you want to consider, you will see a list of users having any level of access to those applications listed down in a table. On the top right side, you will find a button named “Add User” Click on it. You will land to a screen where you can search for employees that belong to your org.

Step 4:

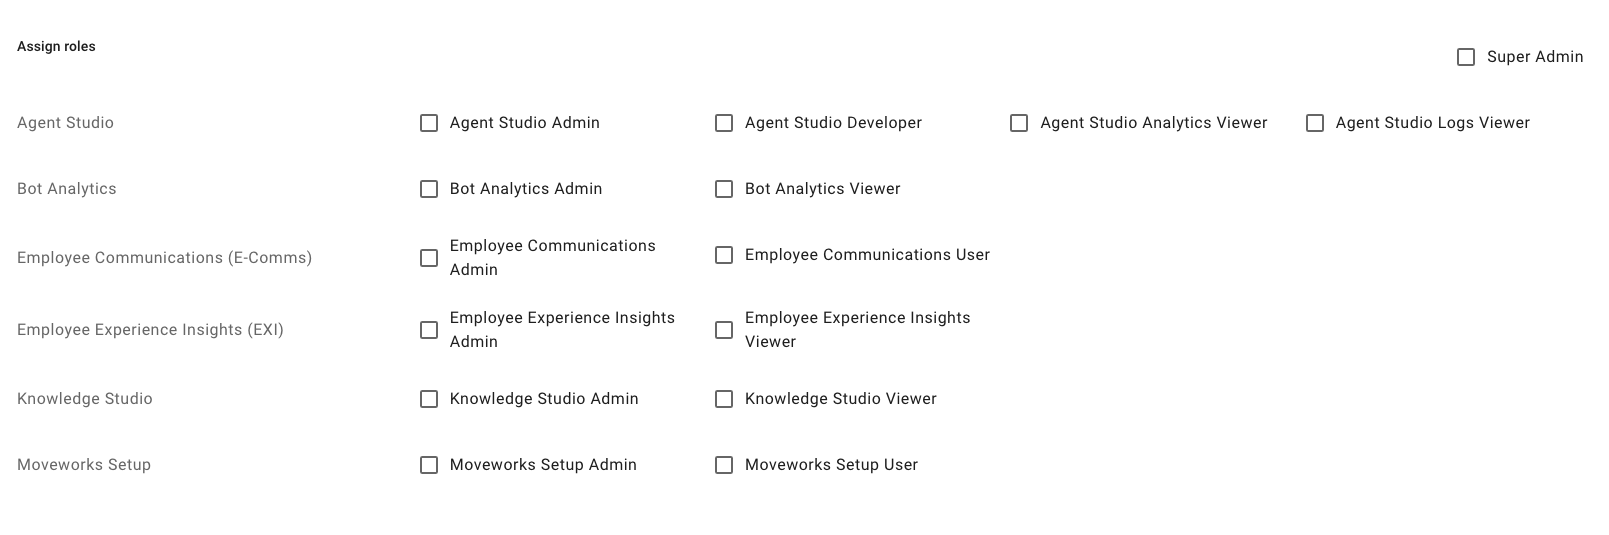
Search for the user whom you want to assign roles. Once you click select the user, all the applications that you had selected in the previous step and their respective roles are shown to you. Check the roles that you want to assign. Uncheck the ones for which you want to downgrade.

Step 5:

After you have assigned the roles. Hit the SUBMIT button and Voila! you are all set. The newly added users can start using the applications now.