Microsoft 365 & Azure AD Groups Access Requirements
Microsoft 365 & Azure AD Groups Access Requirements
Microsoft Graph Permissions (for Microsoft 365 & Azure AD)
Moveworks requests the following information to integrate with your tenant.
- Microsoft Graph App ID
- Microsoft Graph Tenant ID
- Microsoft Graph Secret
The Customer Success team will provide a secure email that you can use to transfer the above information to Moveworks.
NOTE: If you are already setting up the Moveworks Teams Application per this document, you can add the required permissions to the same application, and do not need to set up a separate application.
Scopes Required to Manage Groups (Create + Add)
- Group.ReadWrite.All - Allows Moveworks to add users to existing Microsoft 365 or Azure AD groups & create 365 Groups (also known as Unified Groups).
- If the Moveworks bot will not be modifying Groups and only read access is required, then Group.Read.All can be used.
- User.Read.All - Allows Moveworks to Read All User Attributes such as Email & Azure AD ID
If you use Microsoft 365 to manage email groups, we create an offline index using the Microsoft Graph API of all groups so that all “Add users to distribution list” operations are done instantaneously. If a user creates a DL in bot, we send a command to create that DL, and then we append that DL to the day’s index of distribution groups, so a user can immediately add users to that DL.
Moveworks Microsoft Graph Access - via App Registration Only Method
This guide will walk you through the process of setting up a Microsoft App Registration for Moveworks for purposes of accessing the Microsoft Graph API. You will need to capture the following information to provide to your Customer Success team.
- Microsoft Graph App ID
- Microsoft Graph Secret
The Customer Success team will provide a secure email that you can use to transfer the above information to Moveworks. Follow the below mentioned steps to create an app and provide appropriate permissions
- Navigate to https://portal.azure.com and select Create an App registration
- Type a name for the App Registration

- Add the required application permissions, this is typically User.Read.All, but clarify with your Customer Success team if other permissions are needed.
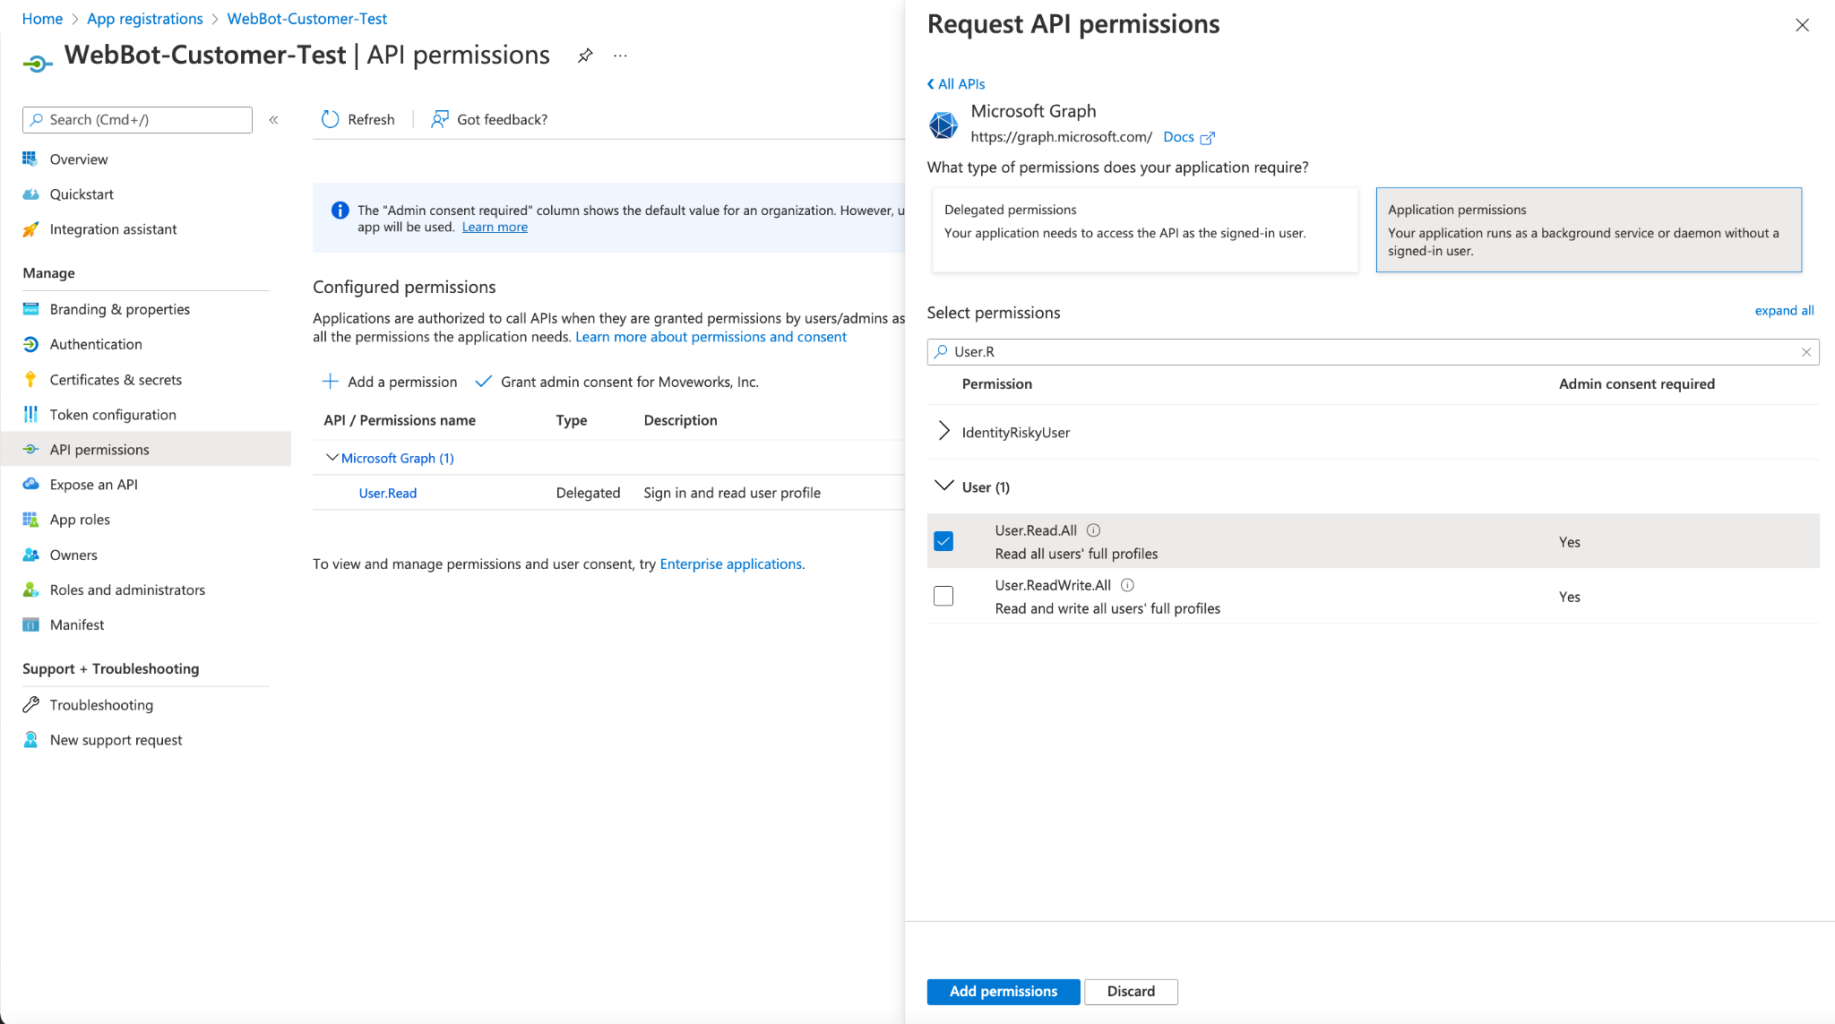
🚧
Note: It is required that the permissions are granted as Application Permissions
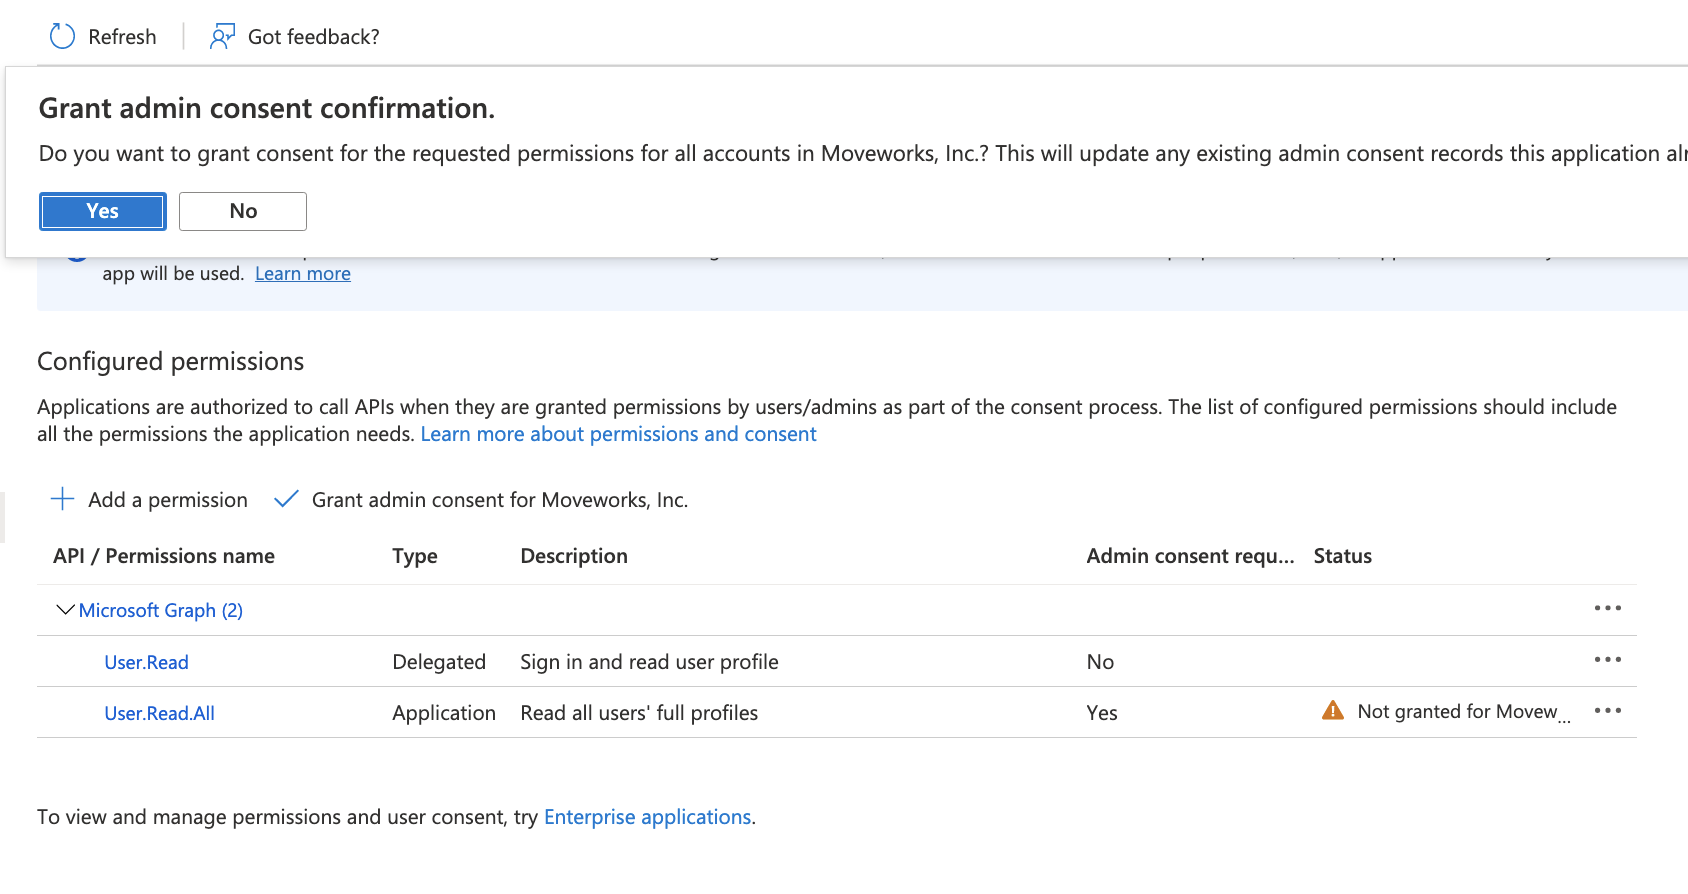
- Once you have added the permission, Select Grant Consent, and make sure you click Yes, and consent to the permission.
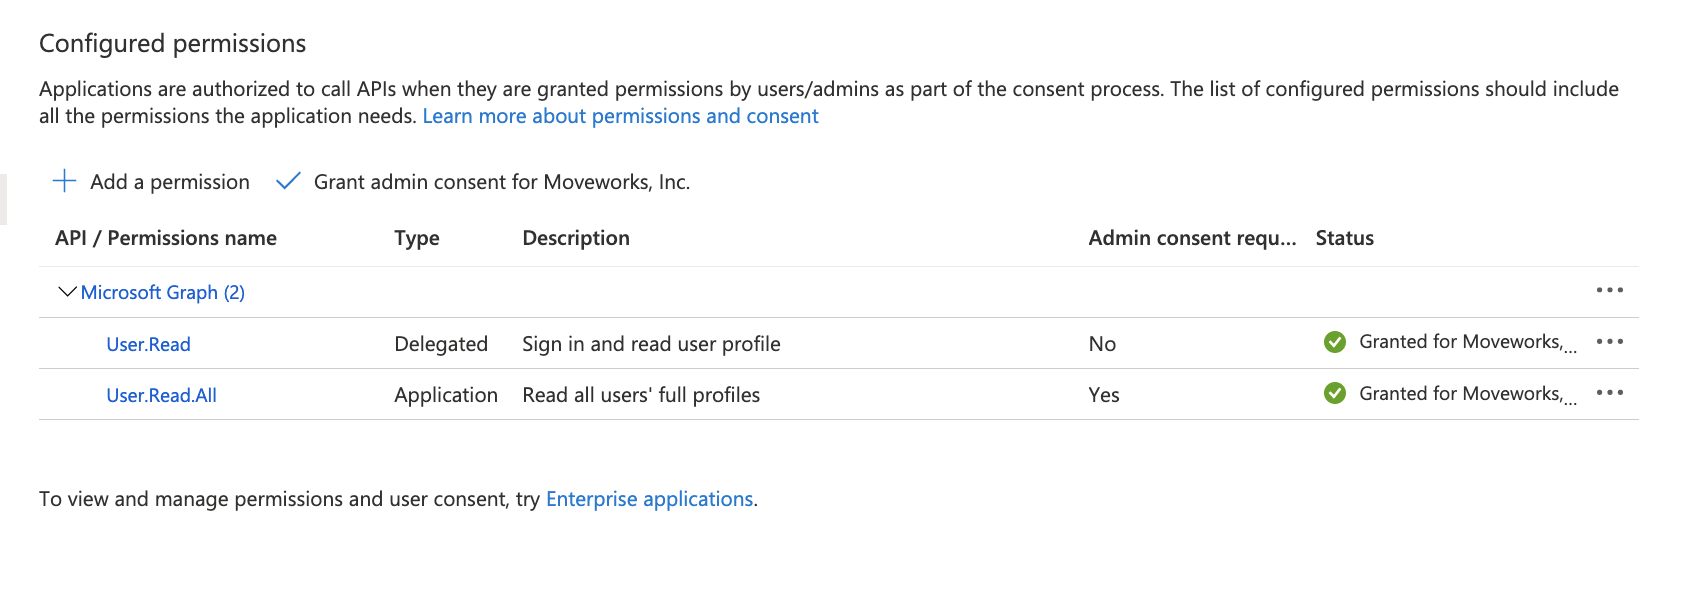
- After adding consent, you should see green check marks for the application permissions you selected.
- Create a new secret
- Securely send the App ID, and secret to your Moveworks team.
Appendix: Restricting Write Access via Administrative Units
By default, Moveworks requests Group.ReadWrite.All to support features like the Add to Distribution List and Software Access plugins. If your organization has strict security policies and cannot grant write access to the entire directory, you can instead restrict write access to specific groups using Microsoft Entra Administrative Units (AUs).
Recommended only when required
This approach requires ongoing administrative overhead — your team must manually manage which groups are placed inside the Administrative Unit. Only use this configuration if your organization cannot grant the standard Group.ReadWrite.All permission.
How It Works
This configuration splits the Service Principal’s access into two scopes:
Moveworks can look up any group in the directory, but is only authorized to add or remove members, or update group names, for groups explicitly placed in the Administrative Unit.
Setup Instructions
The Azure Portal UI typically filters out Service Principals in the role member picker, so the scoped role assignment must be done via PowerShell or Cloud Shell.
Create an Administrative Unit
In the Azure Portal, navigate to Microsoft Entra ID > Administrative Units and create a new Administrative Unit (e.g., Moveworks Admin Unit). Move the groups that Moveworks should be able to modify into this AU.
Grant read access at the App Registration level
On your Moveworks App Registration, add Group.Read.All as an Application Permission and grant admin consent. This allows Moveworks to read all groups in the directory for member lookups.
Remove Group.ReadWrite.All if it was previously granted.
Managing Groups in the Administrative Unit
Any group that Moveworks needs to modify (add/remove members) must be placed inside the Administrative Unit. Groups outside the AU remain visible to Moveworks but cannot be modified. Add or remove groups from the AU in the Azure Portal under Microsoft Entra ID > Administrative Units > [Your AU] > Members.