
Quickstart #3: Build a Plugin That Follows a Process
Build a purchase-request submission plugin with multiple slots, activities, and a decision policy.
Learning Objectives
This Quickstart guide walks you through building a plugin that helps users submit purchase requests. The plugin follows a multi-step process: collect details, classify the request, and either submit it or send the user down a different path. You’ll learn how to:
- Use a Decision Policy to control branching logic in a Conversational Process.
- Use multiple types of Activities in a Conversational Process to handle different tasks.
- Design a plugin that uses several Slots with simple Validation Policies.
Prerequisites
- Access to the “Agent Studio” App.
- Completed Quickstart #1: Build Your First Plugin.
What you’ll build
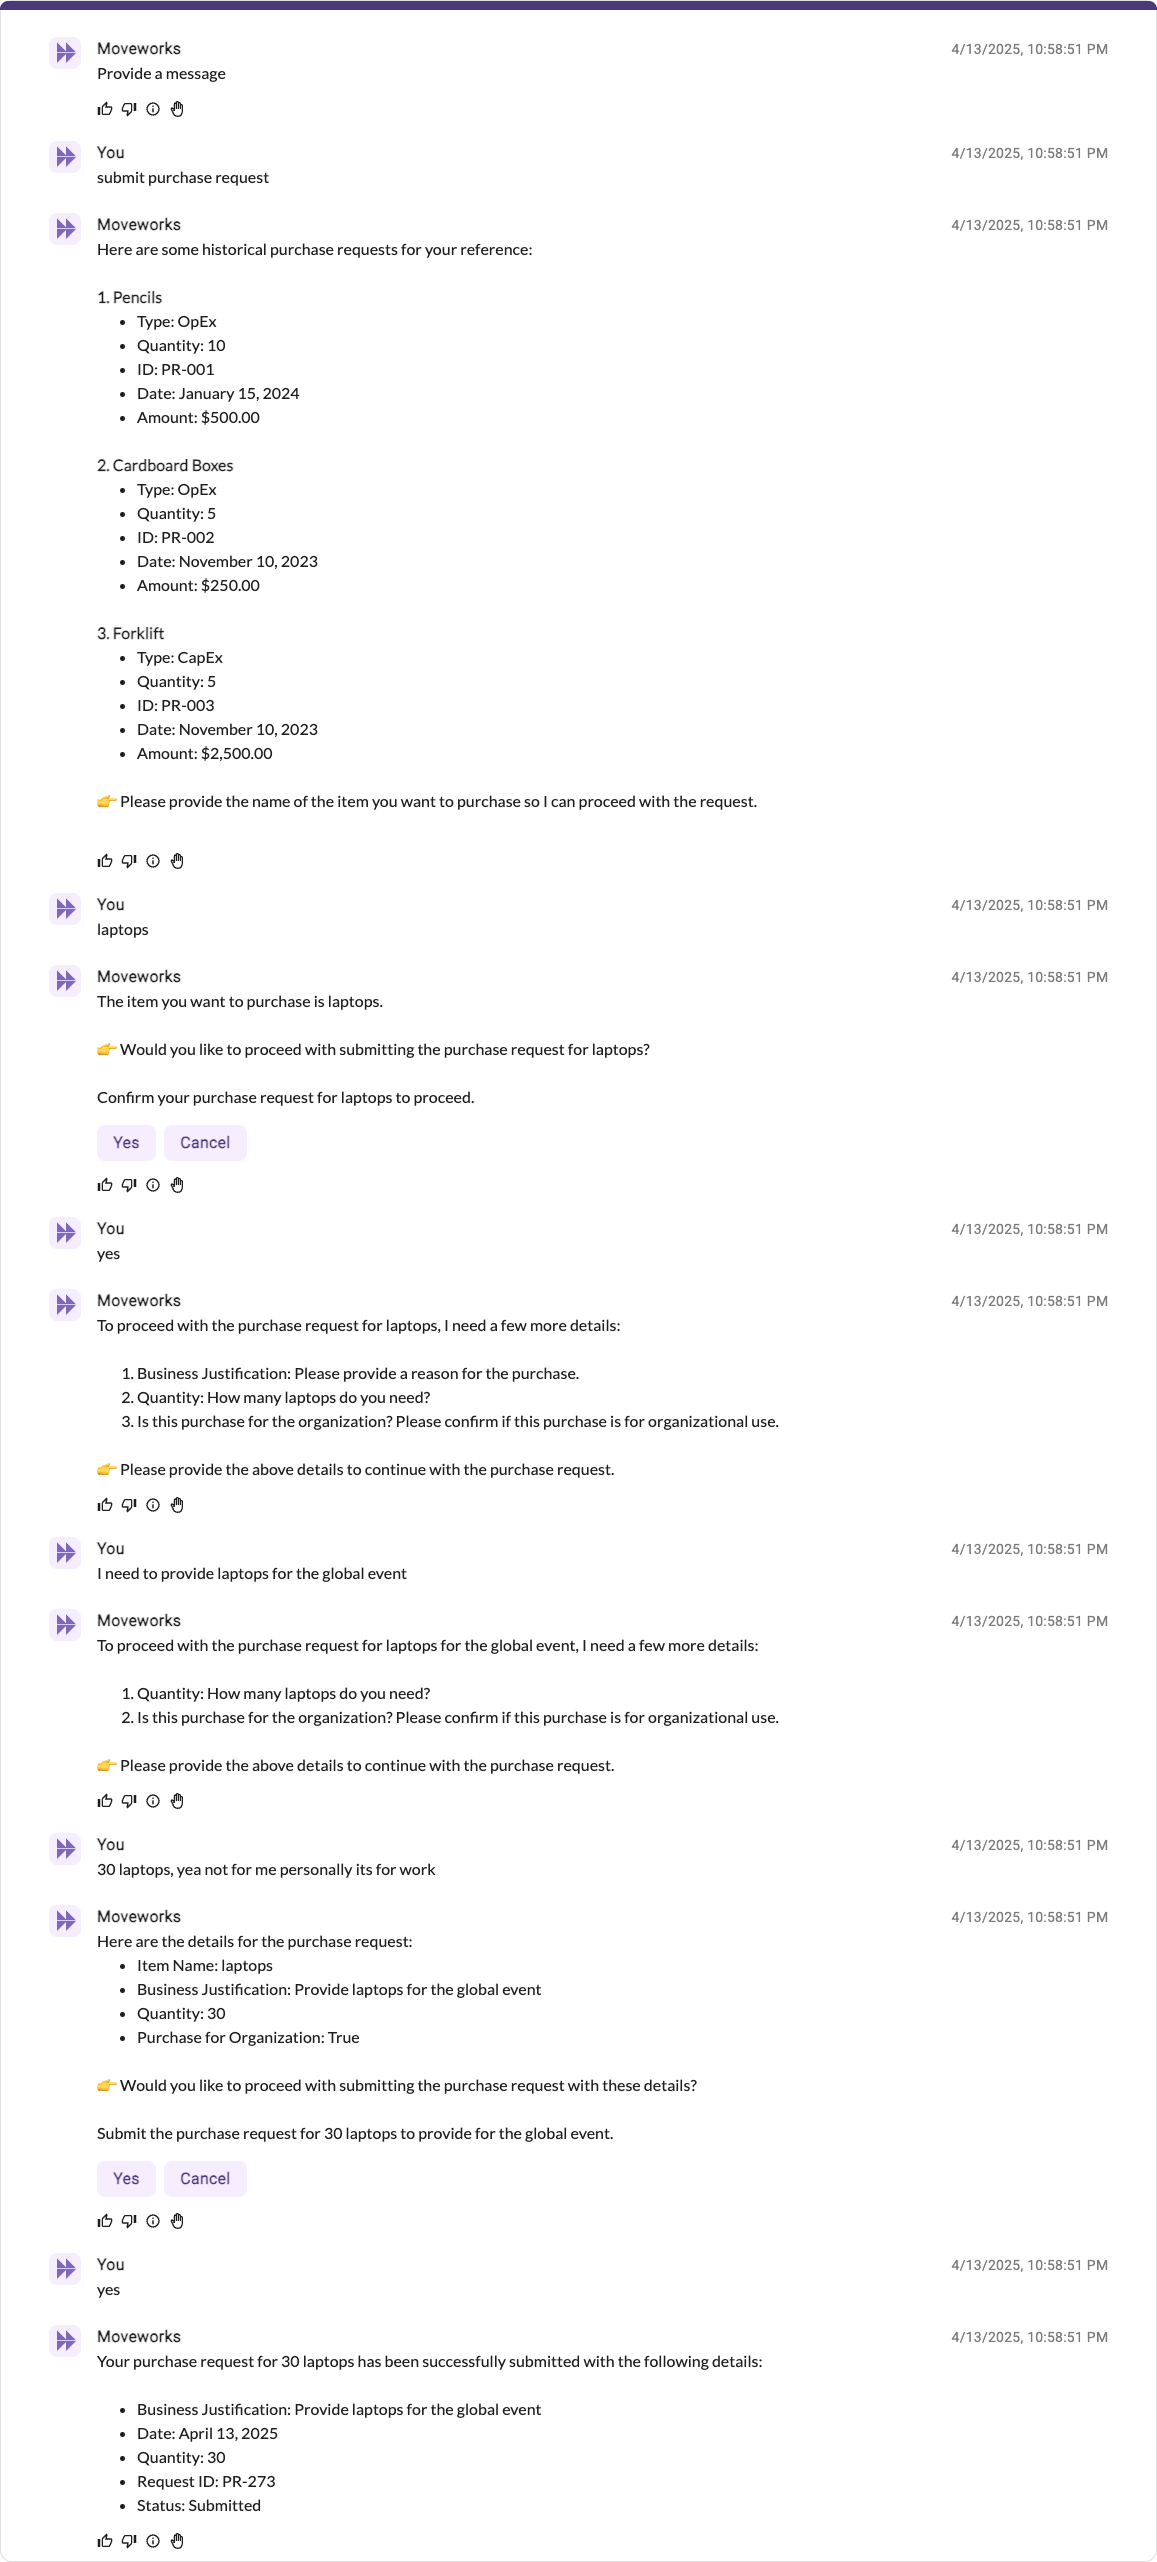
You’ll build a purchase request submission plugin. It asks the user for details about the purchase request they want to submit, compares the details against historical purchase requests, and either submits it if it can be classified as “OpEx” or rejects it if it’s classified as “CapEx”.
Here is an example of the end-user experience we hope to enable:
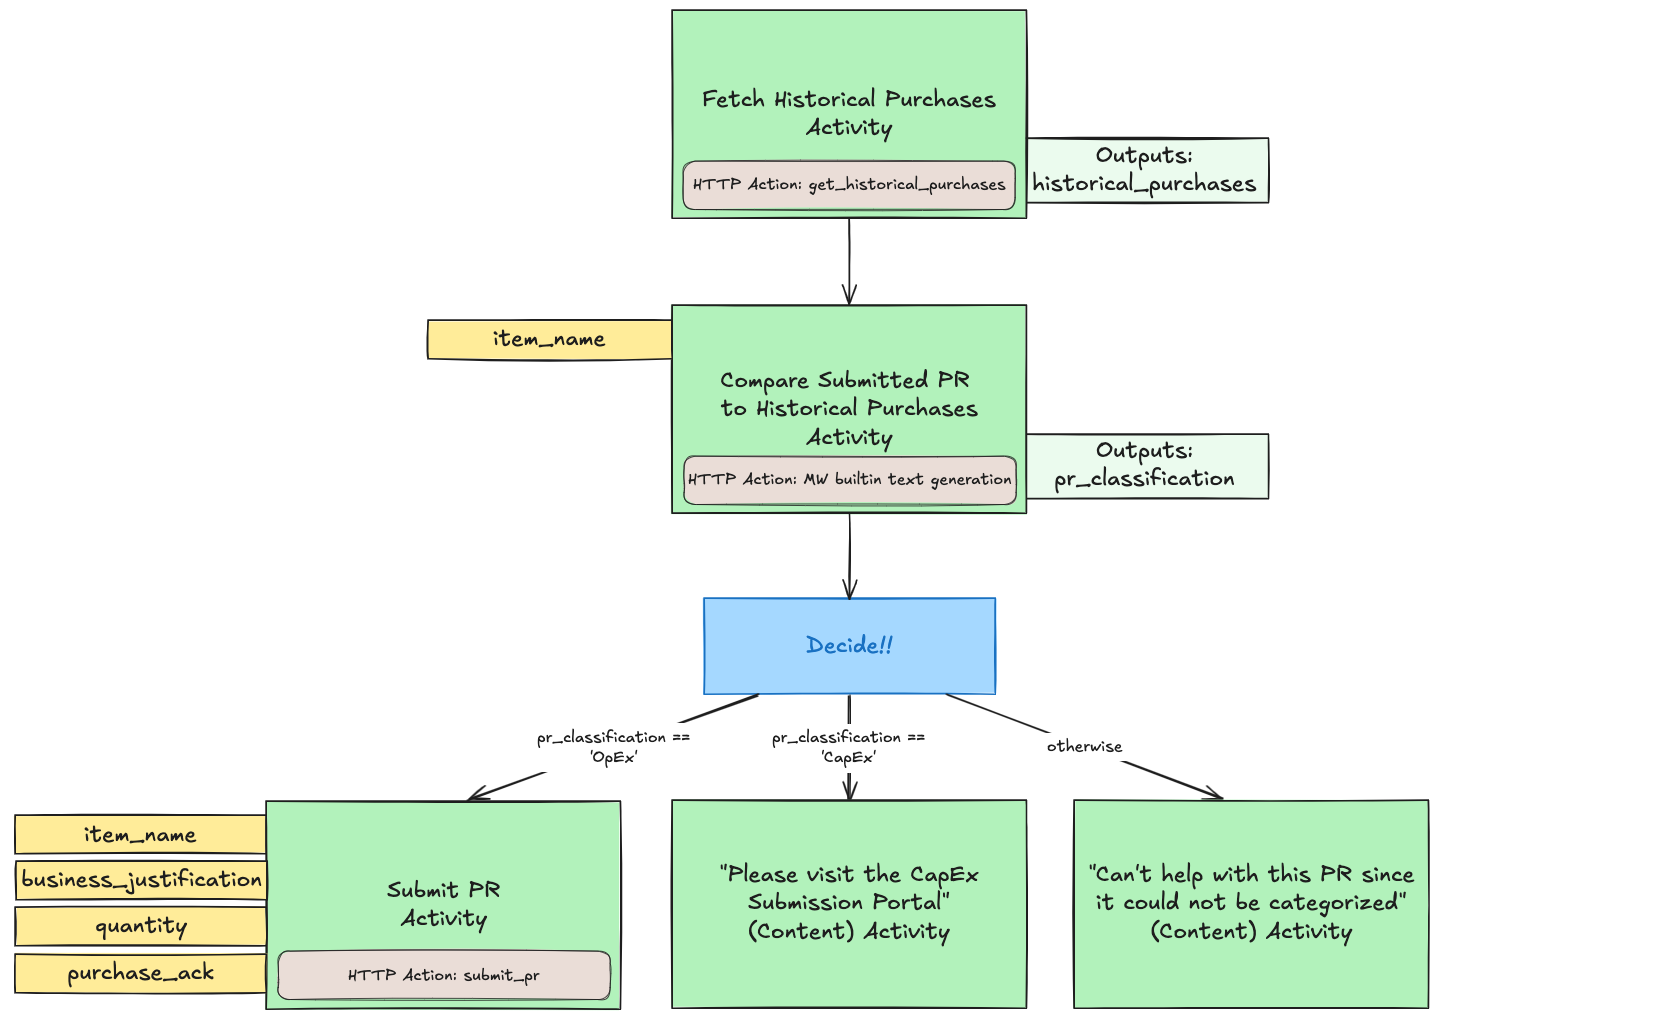
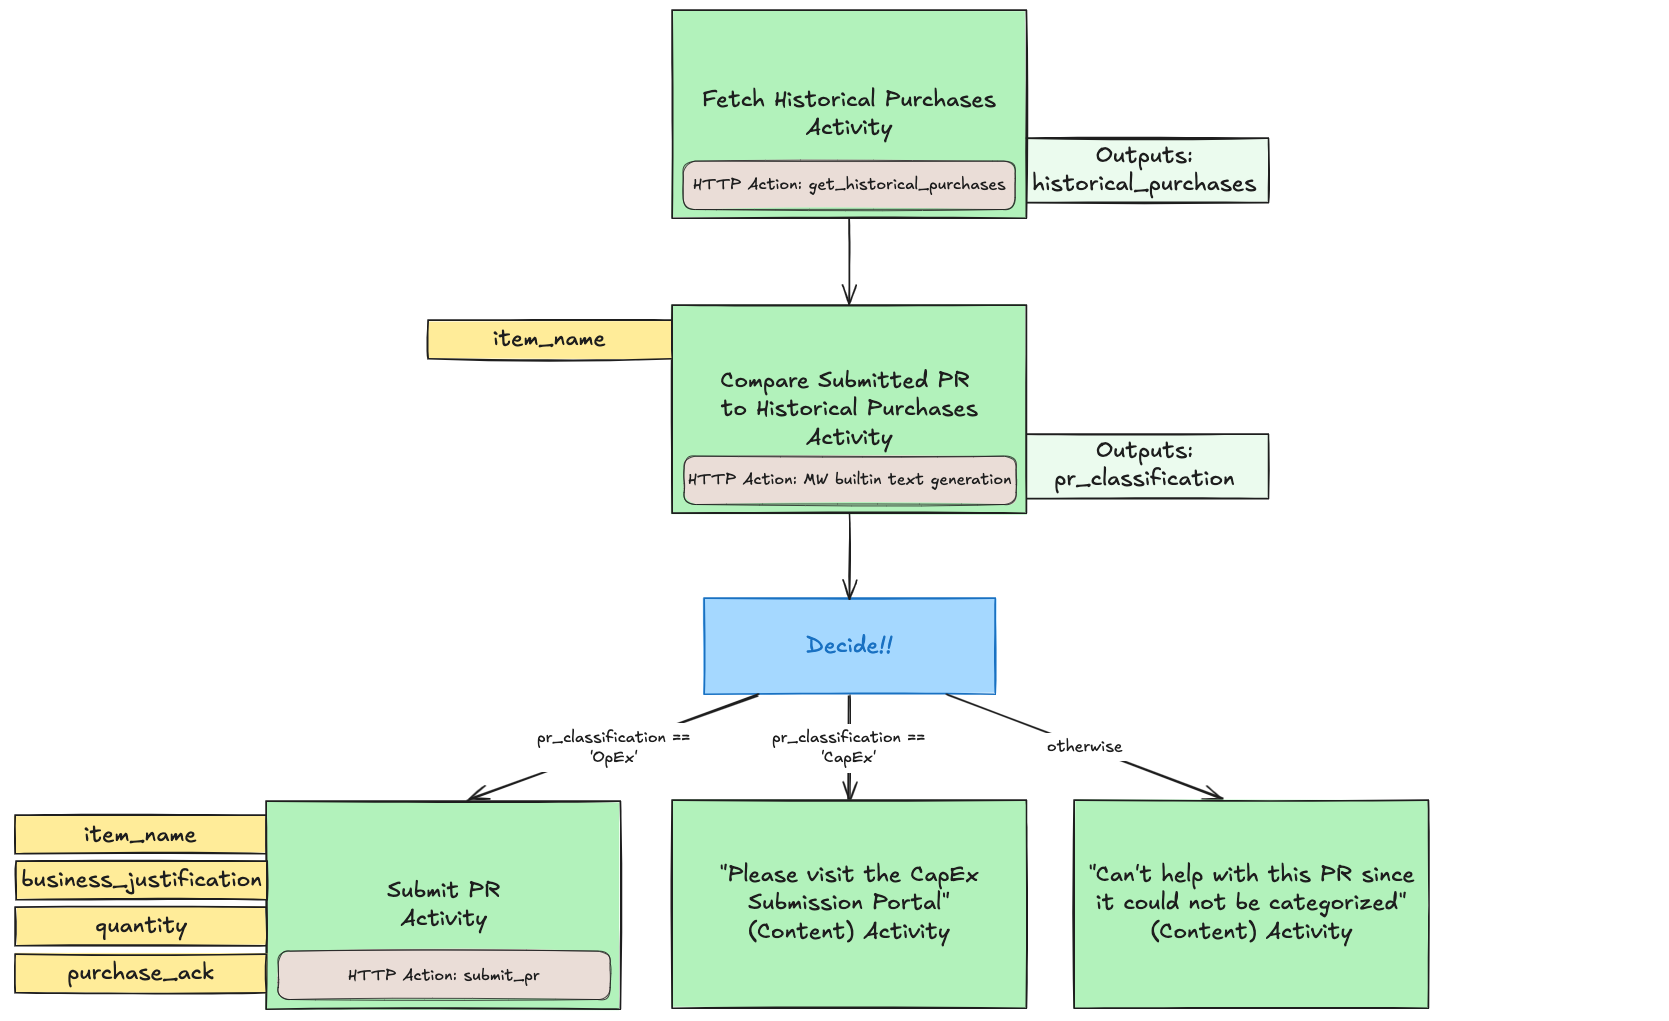
To build this, here’s one way to decompose the work into a Conversational Process, consisting of a few Activities (both Action-based and Content-based), a Decision Policy, and a few Slots to power the data needed in this process:
In this guide, you’ll work your way through these main phases:
- Set up 2 HTTP Actions: one to fetch historical purchase requests, and another to submit a new one.
- Build the Conversational Process, complete with 4 Slots, 5 different Activities, and 1 Decision Policy, as illustrated above.
- Add the Conversational Process to your AI Assistant by launching a Plugin.
Let’s get started!
Phase 0: Set Up the Purple Suite
If you’ve already completed the Purple Suite Setup and have your connector configured, skip to Phase 1A.
Follow the Purple Suite Setup guide to:
- Create a Purple Suite instance at marketplace.moveworks.com/purple-suite
- Get your Instance ID and API Token (PAT)
- Set up a connector in Agent Studio with API Key auth
Phase 1A: Set up your “Get Historical Purchases” Action
- If you are working in a Moveworks lab environment, name anything you save (Plugin, Action, Data Type, etc.) with
<fullname>_<descriptive_name>- For example:
lucasrollo_Submit_PTO_Action
- For example:
- When launching your Plugin, make sure to only launch to yourself! You can do this by going to Your Plugin > Launch Configuration > Allow Selected Users > the email on your credential card
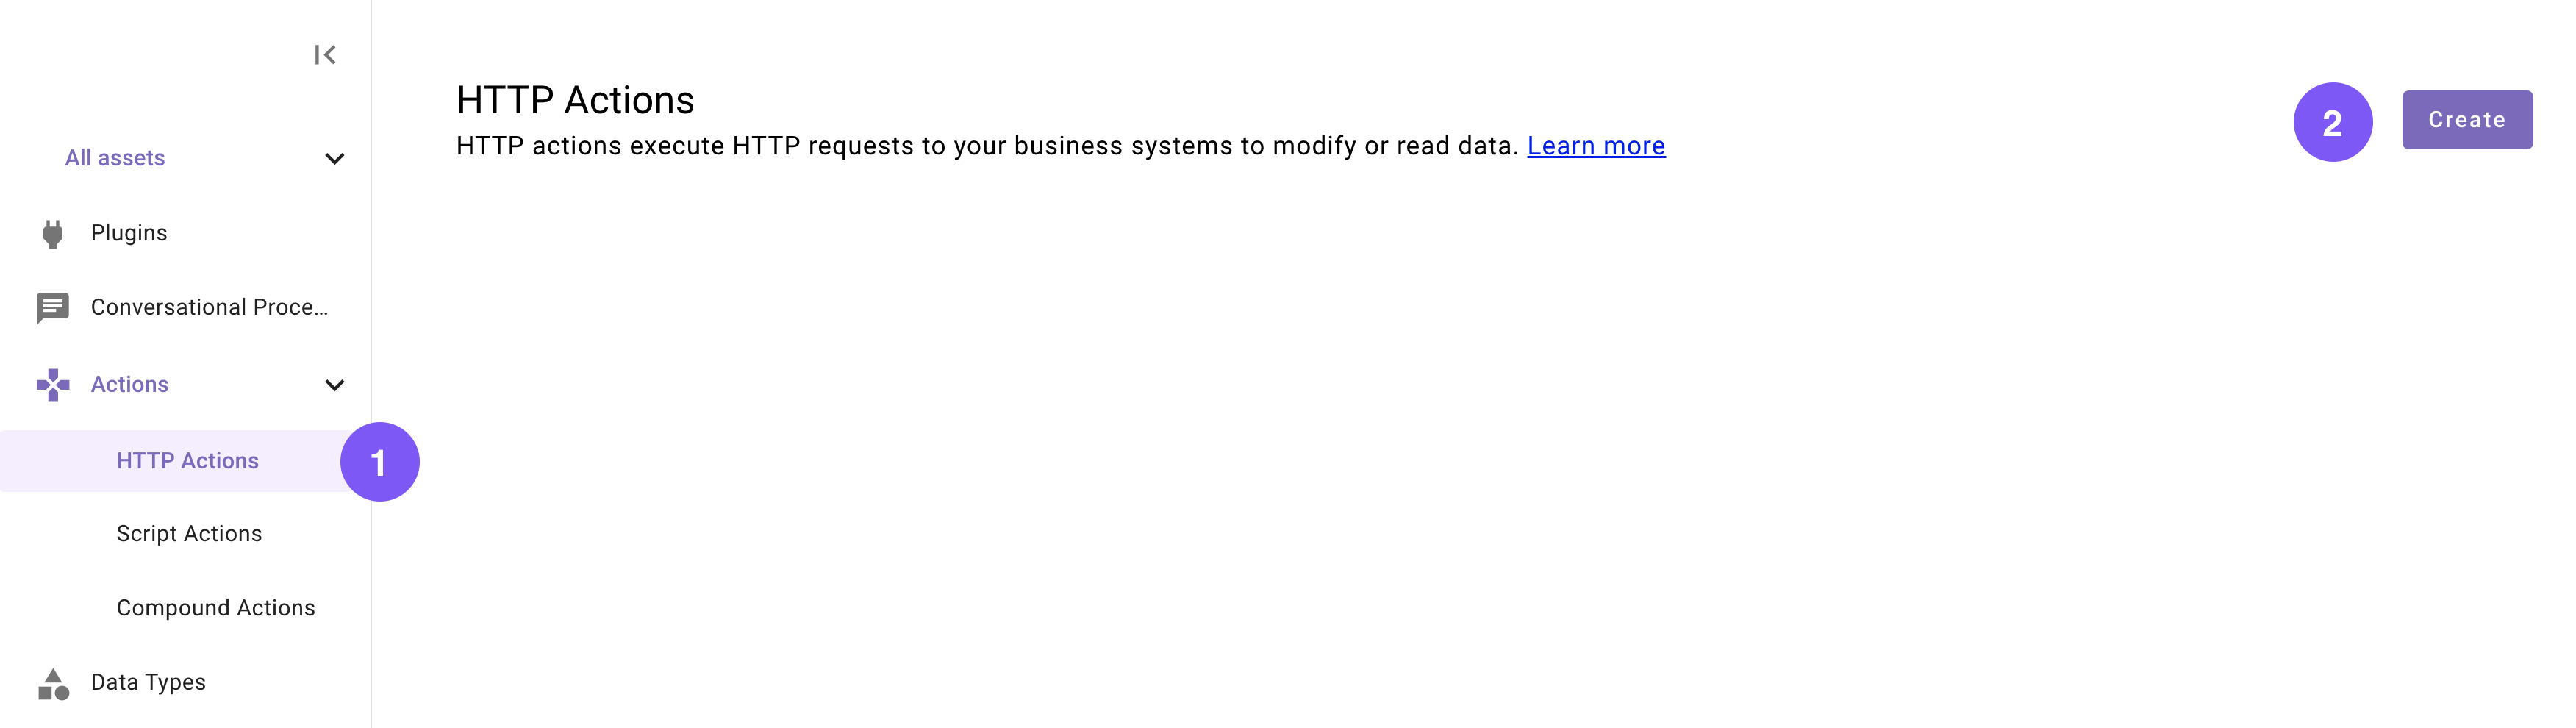
Let’s first set up an HTTP Action that will retrieve historical purchase requests. This Action doesn’t require any dynamic inputs, and will just query an external system for a list of purchase requests.
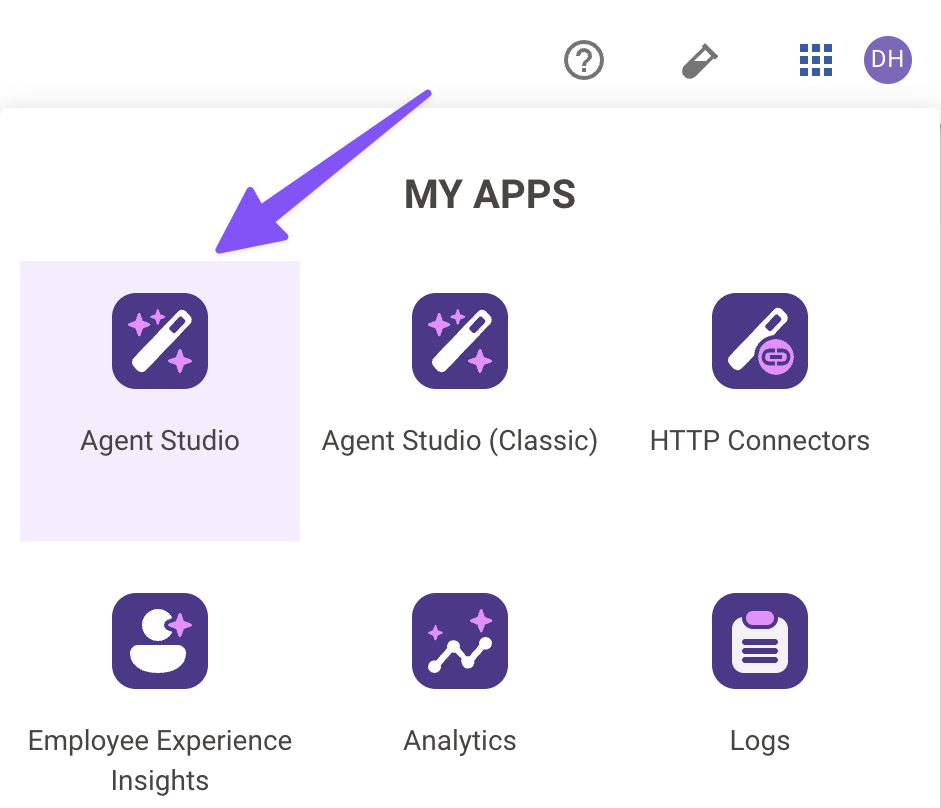
Navigate to Agent Studio
Navigate to the App Picker in the top right corner. Click on “Agent Studio”.
Set the title and description
Set the following title and description for your Action (be sure to replace “firstname” and “lastname” with your corresponding information).
Import the API details
Enter the details of your API:
-
Click on the “Import” icon to the right of the “TEST” button.
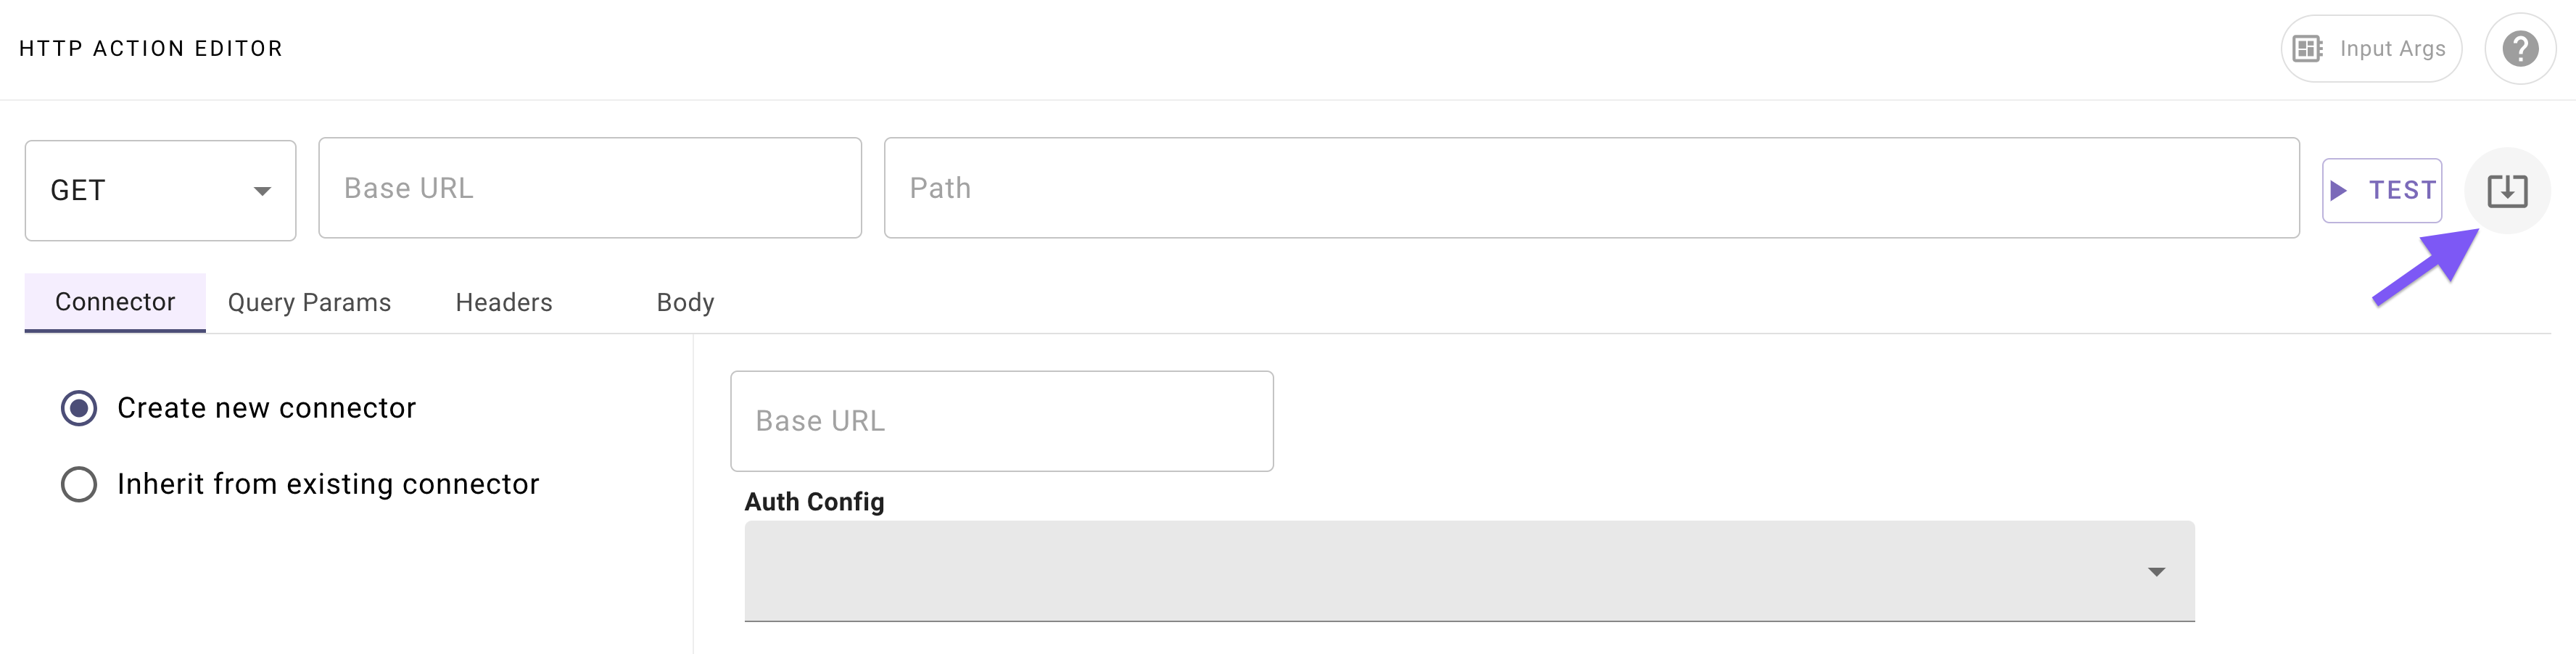
-
Paste the following cURL command:
-
Click “Import” (your Action should now be auto-populated with details).
Add your connector
Navigate to the “Connector” tab, and select your existing Moveworks Purple Connector (set up in Phase 0).
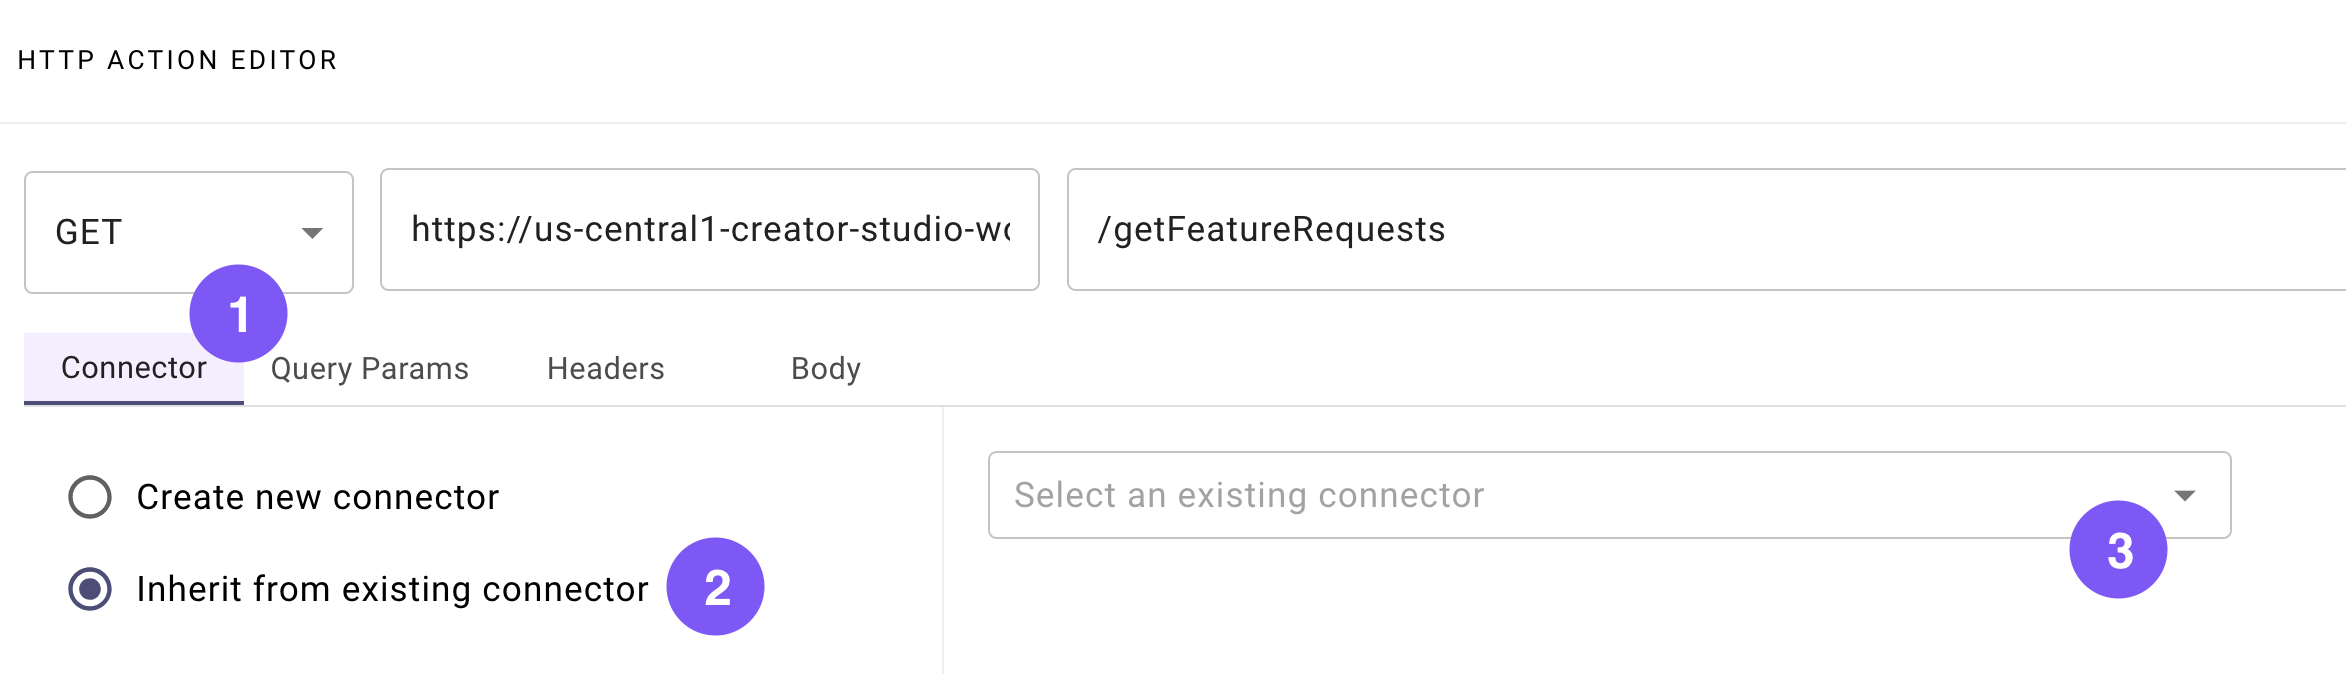
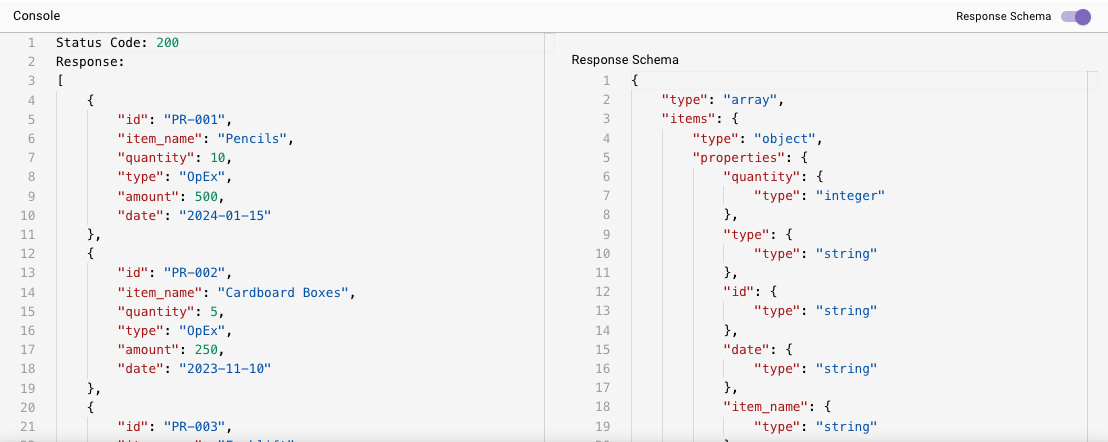
This Action will fetch the critical history of past purchase requests (that later you’ll compare a user’s new request against). Next up: setting up an action to actually submit new purchase requests.
Phase 1B: Set up your “Submit Purchase Request” Action
- If you are working in a Moveworks lab environment, name anything you save (Plugin, Action, Data Type, etc.) with
<fullname>_<descriptive_name>- For example:
lucasrollo_Submit_PTO_Action
- For example:
- When launching your Plugin, make sure to only launch to yourself! You can do this by going to Your Plugin > Launch Configuration > Allow Selected Users > the email on your credential card
The next (and final) Action to set up will add a new purchase request object (and will actually update the purchase record database in your instance!). This Action will require three dynamic inputs: item_name, quantity, and justification.
Set the title and description
Set the following title and description for your Action (be sure to replace “firstname” and “lastname” with your corresponding information).
Import the API details
Enter the details of your API:
-
Click on the import button to the right of the “TEST” button.
-
Paste the following cURL command:
-
Click “Import” (your Action should now be auto-populated with details).
Add your connector
Navigate to the “Connector” tab, and select your existing Moveworks Purple Connector (set up in Phase 0).
Define input arguments
Define 3 formal input arguments to represent the “item name”, and “quantity”, and “business justification” inputs that this Action requires:
-
Click on the “Input Args” button near the top right corner.
-
Click “Create New” in the “Input Arguments” pop up.
-
Fill out the following details for your
item_nameargument: -
Hit “Save”.
-
Click “Create New” again in the “Input Arguments” pop up.
-
Fill out the following details for your
quantityargument: -
Hit “Save”.
-
Click “Create New” again in the “Input Arguments” pop up.
-
Fill out the following details for your
justificationargument: -
Hit “Save” and hit the “X” icon to close this “Input Arguments” pop up.
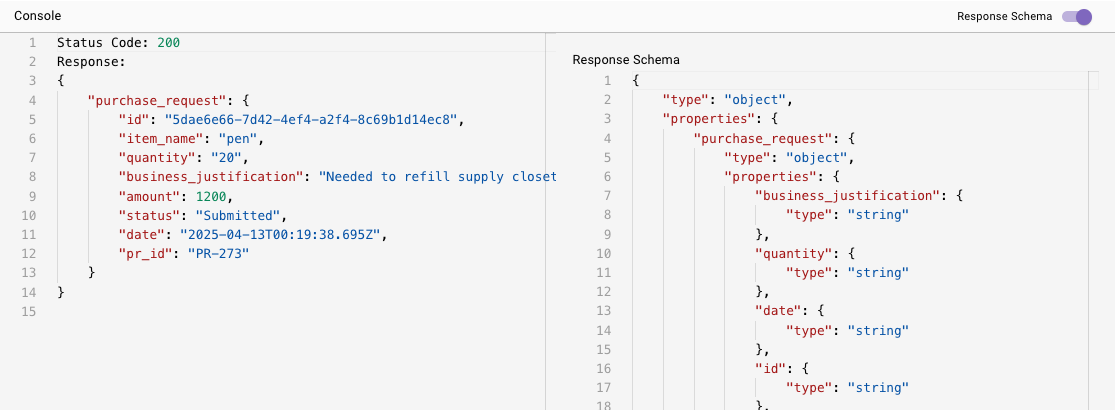
Time to construct your Conversational Process.
Phase 2: Build your Conversational Process
- If you are working in a Moveworks lab environment, name anything you save (Plugin, Action, Data Type, etc.) with
<fullname>_<descriptive_name>- For example:
lucasrollo_Submit_PTO_Action
- For example:
- When launching your Plugin, make sure to only launch to yourself! You can do this by going to Your Plugin > Launch Configuration > Allow Selected Users > the email on your credential card
Here’s a reminder of the bird’s eye view for this Submit Procurement Purchase Request Conversational Process:
Let’s build it!
Create a new Conversational Process
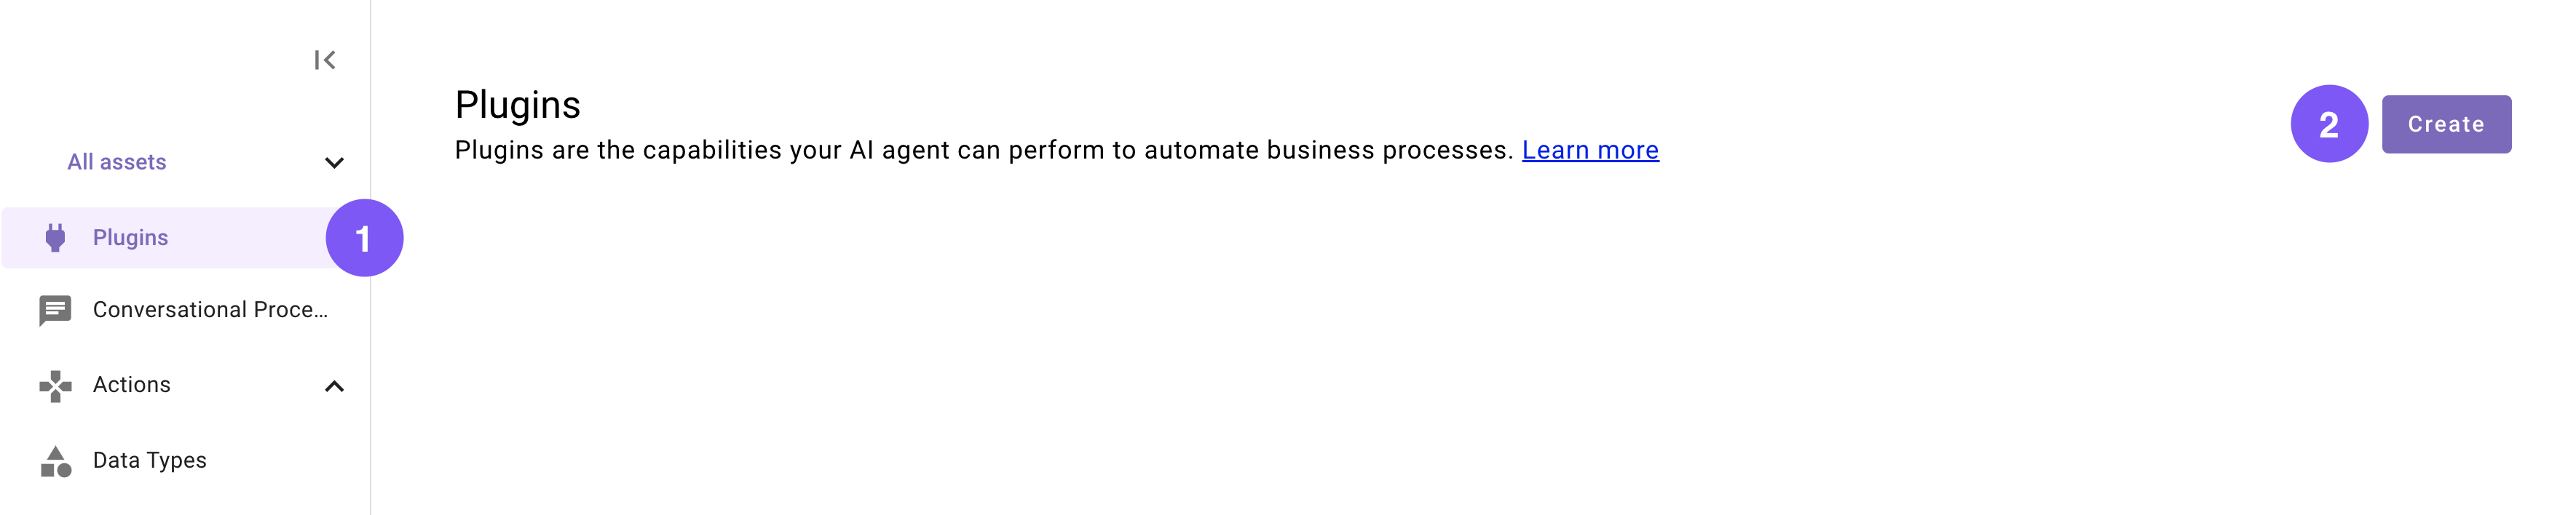
Navigate to a new Conversational Process (navigate to the library and click “Create”).

Set the title and description
Set the following title and description for your Conversational Process (be sure to replace “firstname” and “lastname” with your corresponding information).
Add the four Slots
Add the FOUR Slots that this process will need: item_name, quantity, business_justification, and is_purchase_for_organization_acknowledgement. 📖 Learn more about Slots.
-
Click on the “Slots” button near the top right corner of the editor.

-
Click “Create New” in the “Slots” pop up.
-
Fill out the following details for your first
item_nameSlot: -
Hit “Save” (scroll to the bottom of the popup).
-
Click “Create New” again in the “Slots” pop up to build your second Slot.
-
Fill out the following details for your
business_justificationSlot: -
Hit “Save” (scroll to the bottom of the popup).
-
Click “Create New” again in the “Slots” pop up to build your third Slot.
-
Fill out the following details for your
quantitySlot: -
Hit “Save” (scroll to the bottom of the popup).
-
Click “Create New” again in the “Slots” pop up to build your fourth and final Slot.
-
Fill out the following details for your
is_purchase_for_organization_acknowledgementSlot: -
Hit the “X” icon in the top right to save and close the “Slots” pop up.
Build the first Action Activity
Build the first Action Activity that fetch a list of historical purchase requests that the process will later compare against. 📖 Learn more about Activities.
-
Click on the ”+ Add a block to your process” button in the main section of the editor.
-
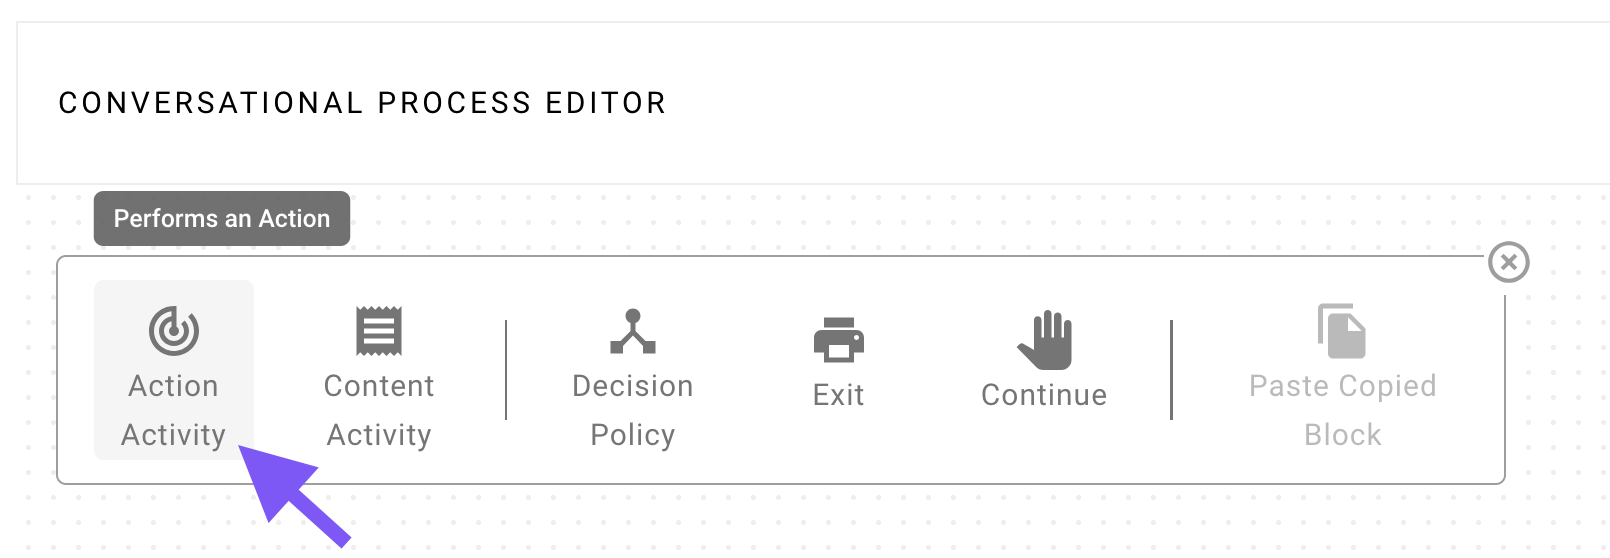
Click on “Action Activity”.
-
Fill out the following details for your Action Activity, which simply hooks up the Action you created to this Action Activity:
Build the second Action Activity
Build the second Action Activity, which will utilize a Built-in Action that can generate an output according to a natural language prompt. 📖 Learn more about the Built-in Generate Text Action.
-
Click on the ”+” icon below the previous Activity in the main section of the Conversational Process Editor.
-
Click on “Action Activity”.
-
Fill out the following details for your Action Activity, which mostly involves constructing a templated prompt to the Action, and mapping the predicted purchase request classification out of the model’s response:
Build the Decision Policy
Build your first Decision Policy, which will execute after the already configured 2 Activity blocks. This policy will allow the Process to branch its execution depending on the pr_classification returned by the generate text Action Activity. 📖 Learn more about Decision Policies.
-
Click on the ”+” square icon below the second generate text Activity in the main section of the Conversational Process Editor.
-
Click on “Decision Policy”. (No need to input anything in the panel that appears on the right).

-
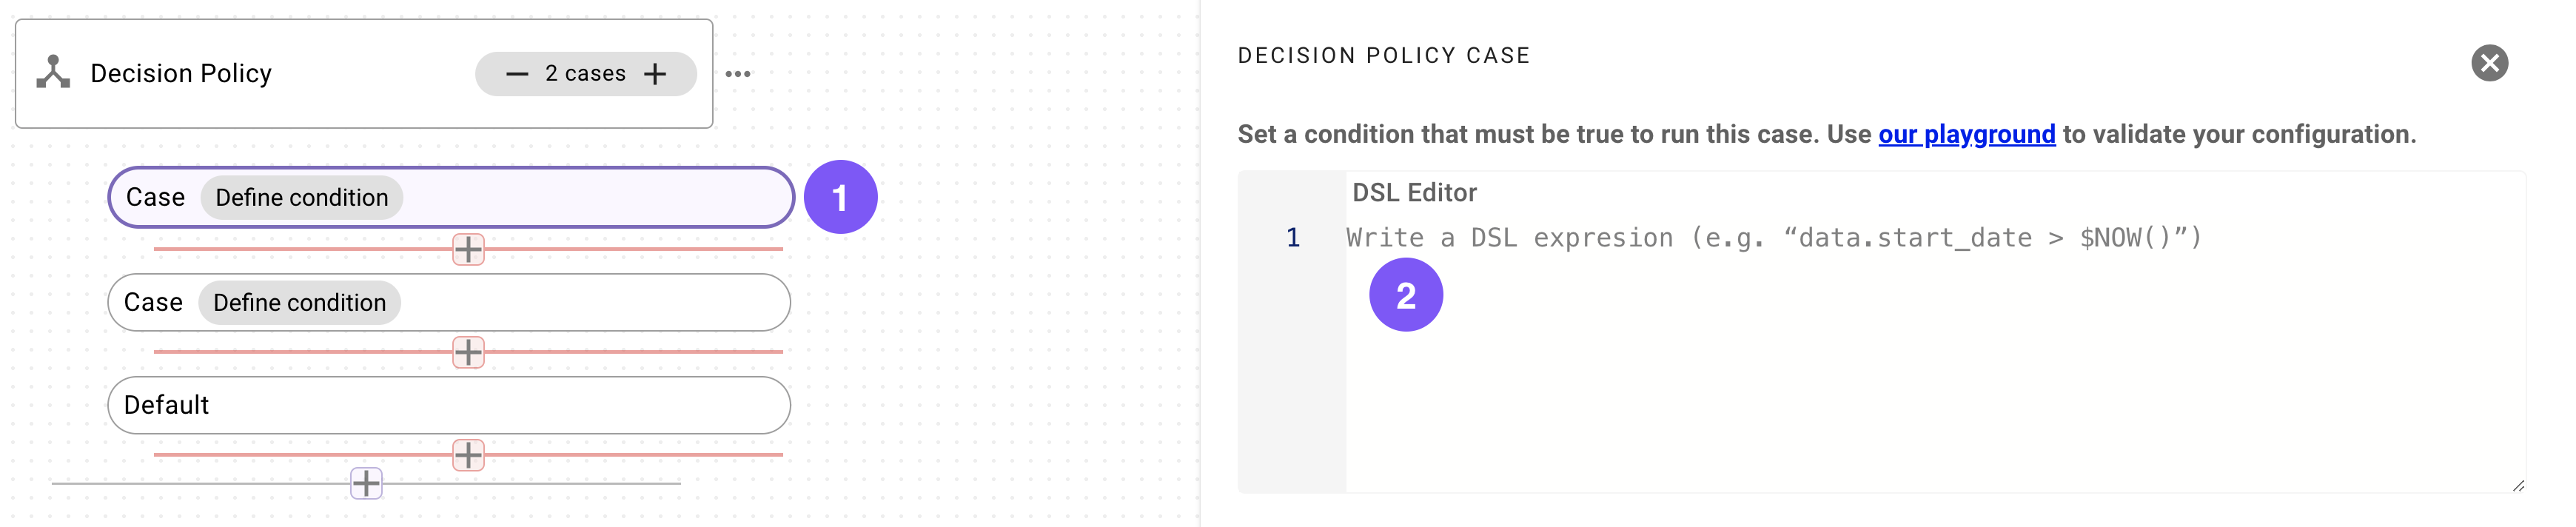
Increment the number of Cases by clicking on the ”+” button to the right of the words “1 case”.

-
Click on the first Case entry under the Decision Policy and enter the below DSL rule in the panel that appears on the right:
 DSL
DSL -
Click on the second Case entry under the Decision Policy and enter the below DSL rule in the panel that appears on the right:

Create the OpEx Action Activity
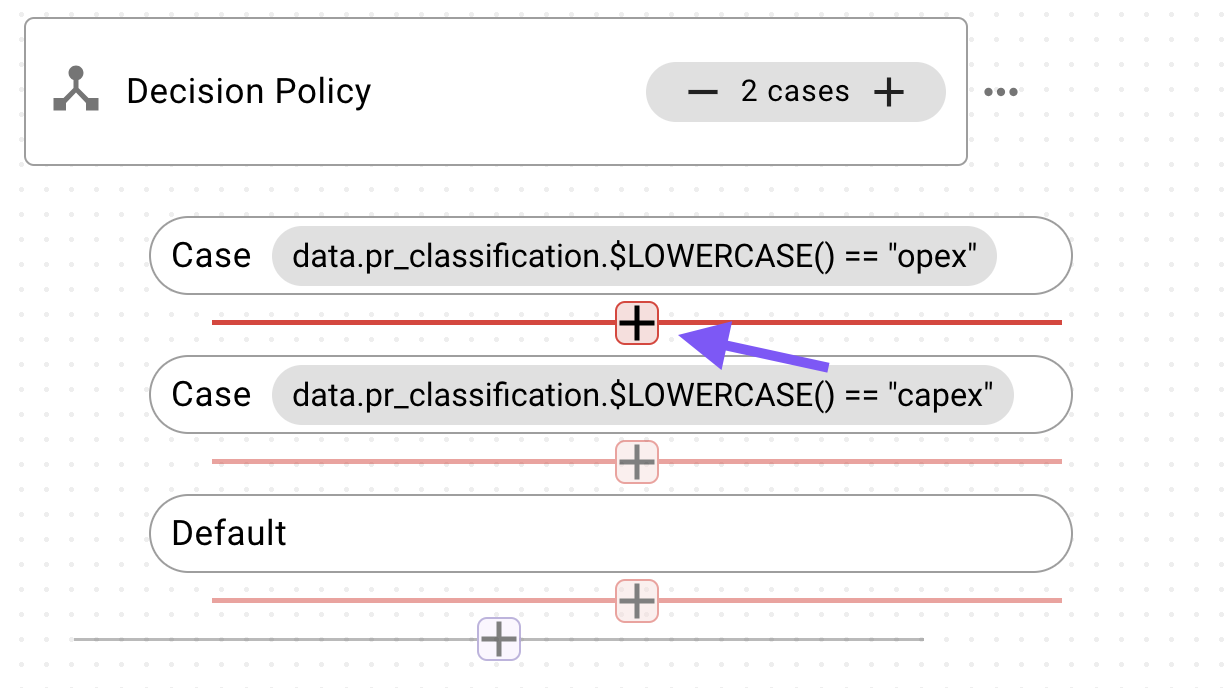
Create the Action Activity that will execute under the first Decision Policy Case (pr_classification is opex).
-
Click on the ”+” icon below the first Case entry under the Decision Policy.
-
Select “Action Activity”.
-
Fill out the following details for your Action Activity, which will connect your slots to the input(s) of the HTTP Action (and mapping the result of the Action back to the Conversational Process).
- Note that even though
is_purchase_for_organization_acknowledgementis not technically needed to invoke the submit purchase request action, marking it as a required Slot for this Activity ensures that the AI Assistant fills the Slot before executing this Activity.
- Note that even though
Create the CapEx Content Activity
Create the Content Activity that will execute under the second Decision Policy Case (pr_classification is capex).
-
Click on the ”+” icon below the second Case entry under the Decision Policy.
-
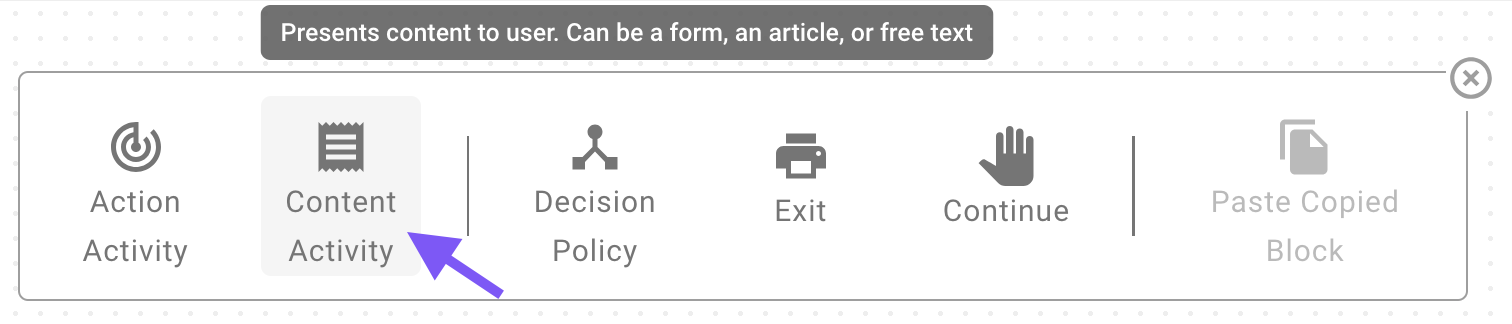
Select “Content Activity” this time.
-
Keep the “Content Type” set to “Text”.
-
Paste the following text content (which will share text instructions with the user on how to submit purchase requests that fall under CapEx).
Text Content
Create the default Content Activity
Create the Content Activity that will execute under the default branch (when pr_classification somehow is neither opex nor capex).
- Click on the ”+” icon below the second Case entry under the Decision Policy.
- Select “Content Activity” again.
- Keep the “Content Type” set to “Text”.
- Paste the following text content (which will share text instructions with the user on how to submit purchase requests that fall under CapEx).
Text Content
Way to stick through all the steps! We’re ready for the last phase: now you’ll launch a Plugin — this packages the Conversational Process into a tool that your AI Agent can use directly.
Phase 3: Launch a Plugin
- If you are working in a Moveworks lab environment, name anything you save (Plugin, Action, Data Type, etc.) with
<fullname>_<descriptive_name>- For example:
lucasrollo_Submit_PTO_Action
- For example:
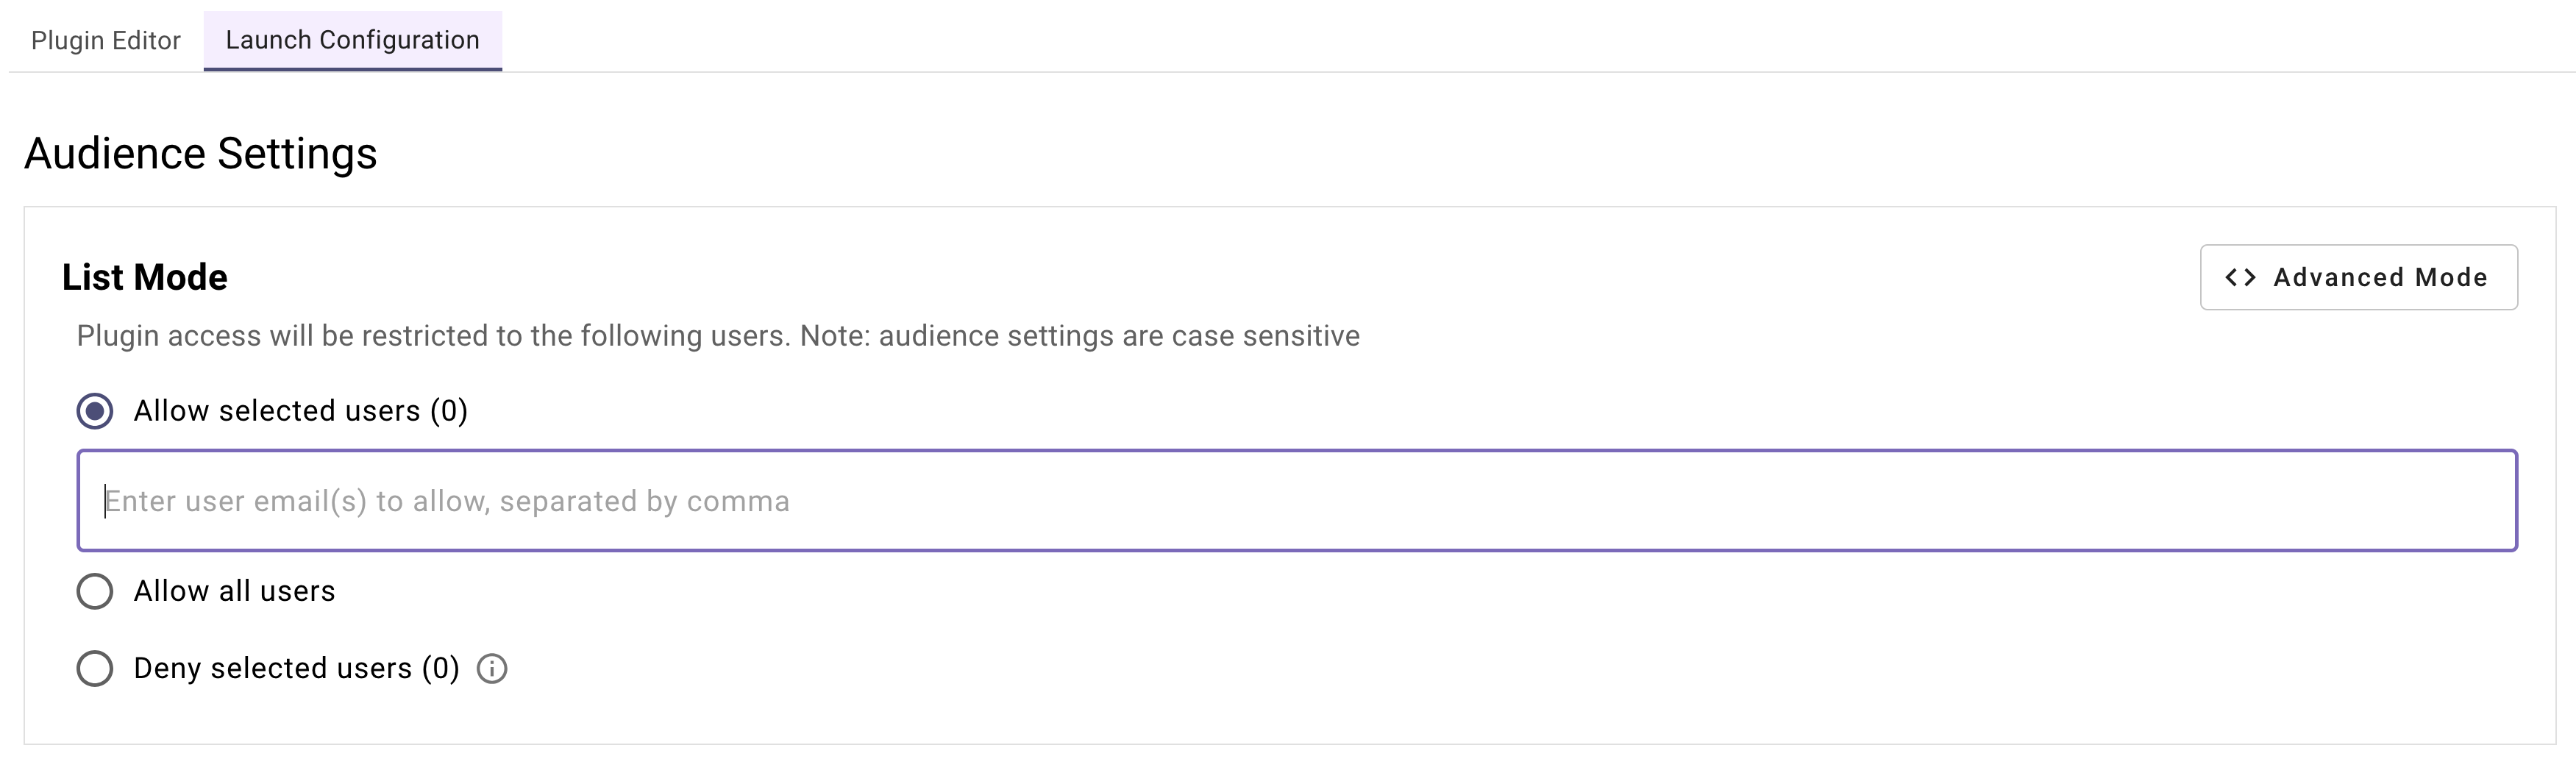
- When launching your Plugin, make sure to only launch to yourself! You can do this by going to Your Plugin > Launch Configuration > Allow Selected Users > the email on your credential card
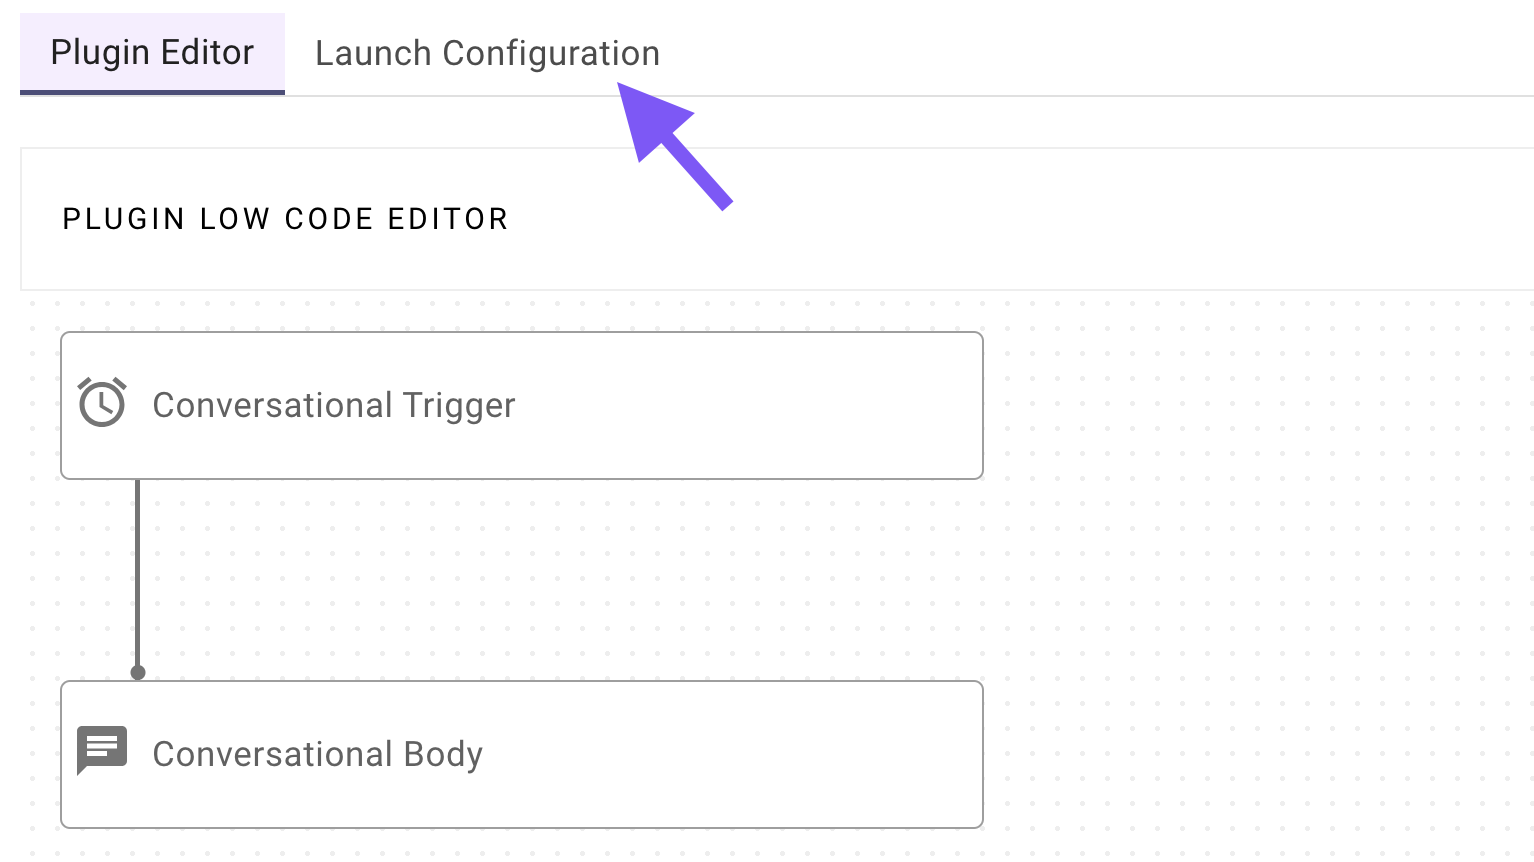
It’s finally time to add your Conversational Process to a Plugin, where you can control the Triggering scenarios of your Plugin and specify which end users are allowed to use your Plugin.
Set the title and description
Set the following title and description for your Plugin (be sure to replace “firstname” and “lastname” with your corresponding information).
Define a Conversational Trigger
Define a Conversational Trigger. 📖 Learn more about Natural Language Triggers.
-
Click on “No triggers configured”.
-
In the panel that appears on the right, either:
-
Approve (click “Trigger”) 5 of the auto-generated suggested positive examples, or
-
Add the following recommended utterances:
-
Choose your Conversational Process
Choose your Conversational Process (the one you built in Phase 2).
- Click on “No body configured”.
- In the panel that appears on the right, search for and select the Conversational Process that you built in Phase 2 (should be named
firstname_lastname_support_procurement_purchases_process)
Use one of your triggering examples (e.g. “submit purchase request”) to access the Plugin in conversation. Try refreshing your submitted purchase requests tab in your Purple Suite session to see the updates take effect in real time!
Reflecting on this Plugin
The plugin you just built contains a plethora of Agent Studio concepts, from different Activity types to Decision Policies. There’s a lot it had to take care of:
- Retrieve historical purchases from an external source.
- Perform classification on the fly to figure out how to categorize the user’s intended purchase.
- Make an informed decision on the best way to support the request, depending on the predicted classification.
- Collect critical information that’s needed for submitting a purchase request.
- Executes for the right users at the right moments via Triggering and Launch configurations you’ve set up.
Congratulations on building this powerful plugin — it’s now ready to help support users with their procurement purchase needs!
Next step: Test your plugin. See our Testing & Error Handling guide for how to test, debug, and handle errors in production.