Connecting Your Gateway to Moveworks
Overview
Once your Content Gateway server is deployed and reachable over HTTPS, follow these steps to connect it to Moveworks, verify ingestion, and configure access control.
If you haven’t deployed your gateway yet, start with the Starter Code guide.
Step 1: Create the connector
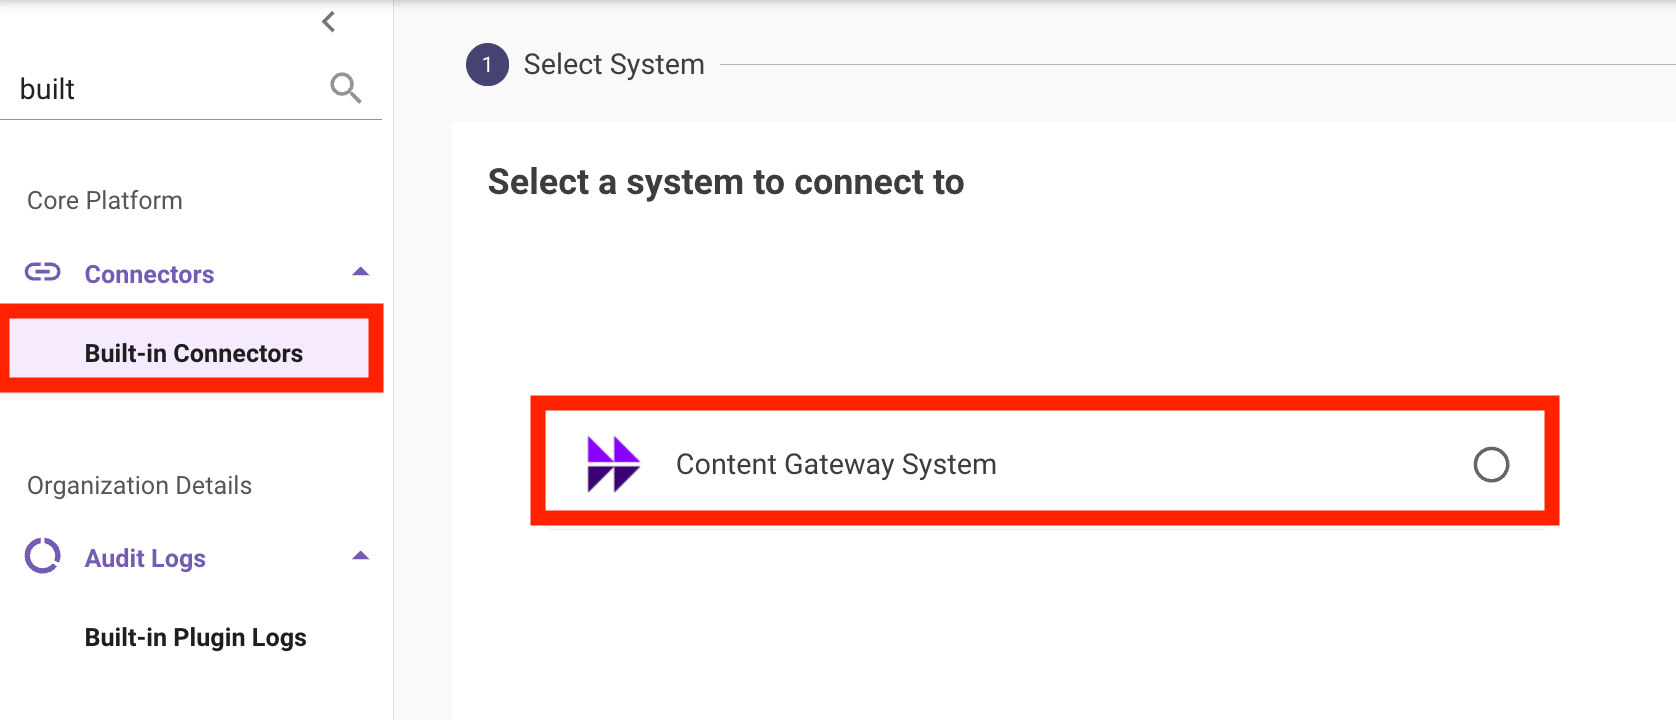
- In Moveworks Setup, navigate to Core Platform > Connectors > Built-in Connectors.
- Select Content Gateway System.
- Enter your gateway’s public base URL, set the authentication type to API Key, and paste the value of your
GATEWAY_API_KEY. Save.
Step 2: Configure ingestion
- Navigate to Enterprise Search > Configure Search > Classic Ingestion > Files.
- Click Create to configure a new ingestion using the connector you just created.
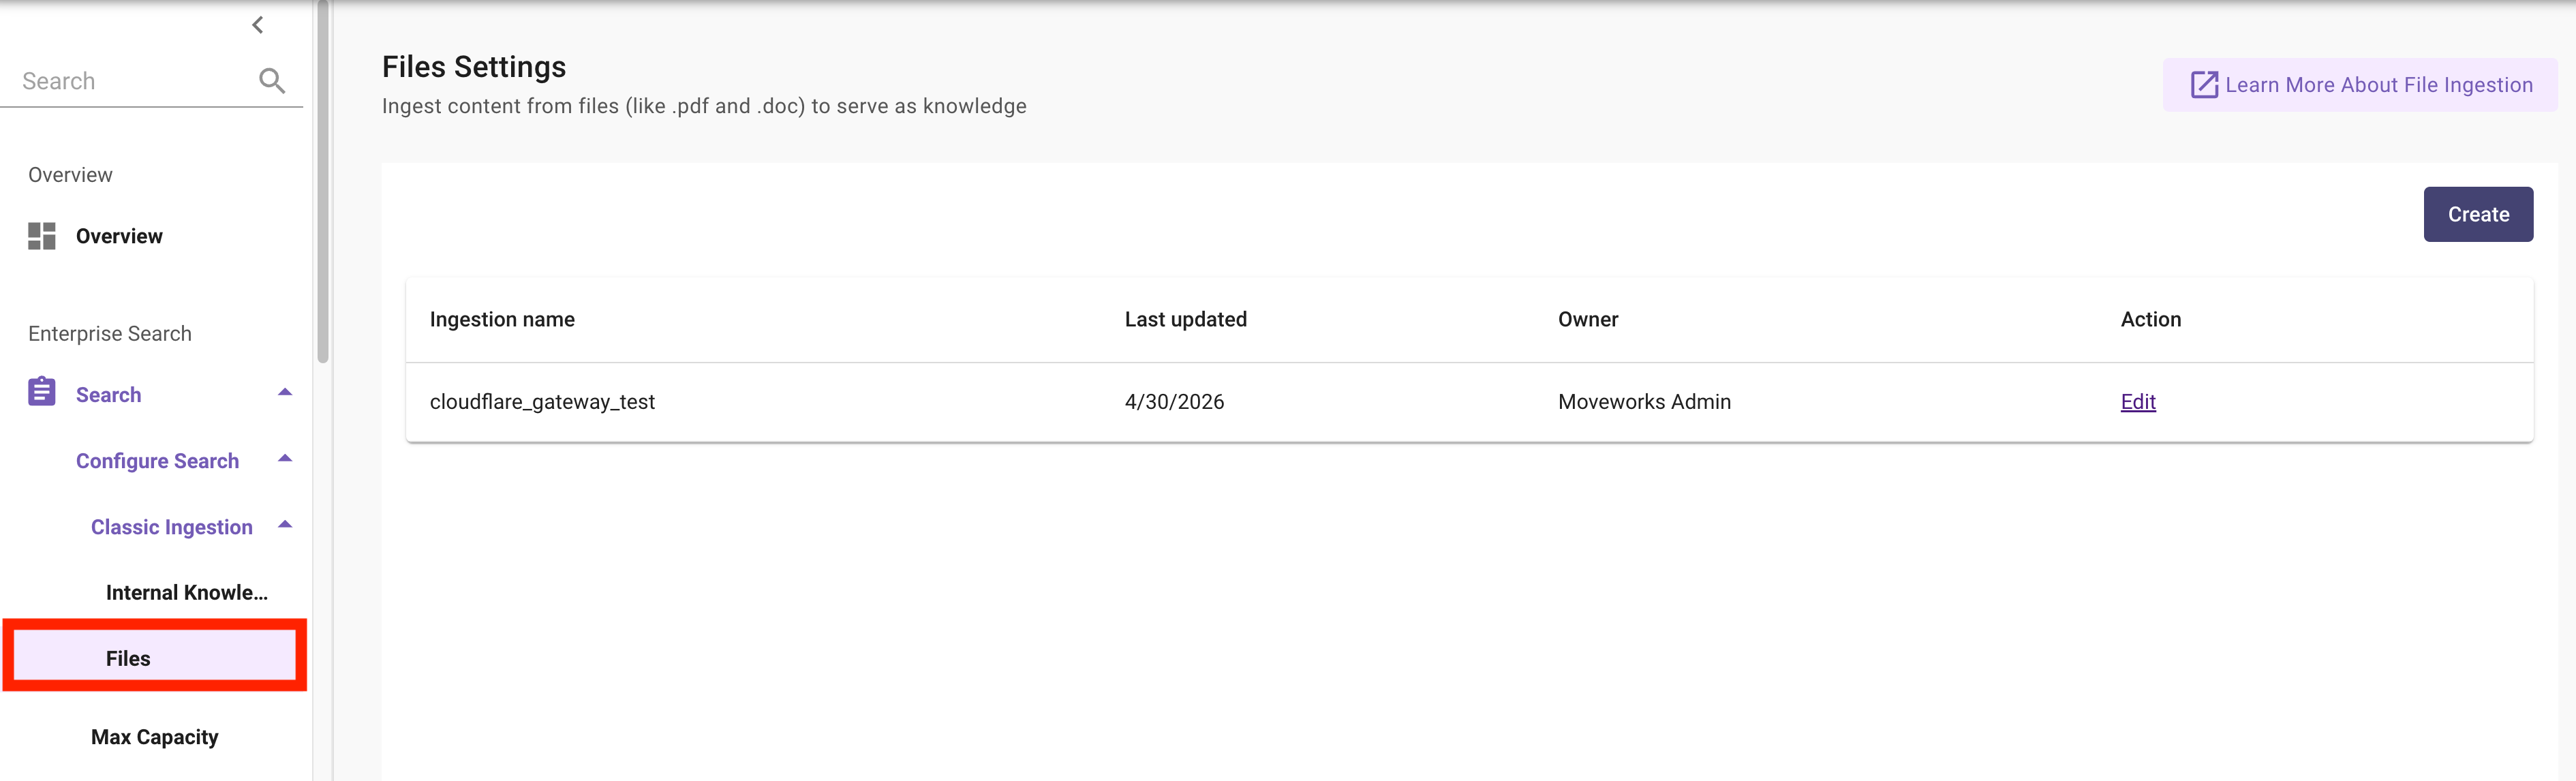
- Save and trigger an initial sync.
To verify, navigate to Enterprise Search > Indexed Content > Files. Your documents should appear with Content Status and Permission Status of Indexed.

Initial ingestion typically completes within 30 minutes depending on document volume.
Step 3: Configure resource permissions
Create a permission rule to tell Moveworks how to enforce access control on the ingested content.
- Navigate to Enterprise Search > Resource Permissions > Permission Rules.
- Click Create.

- Set Integration Id to your Content Gateway connector and Resource Type to
file. - Choose a Strategy Config based on your access requirements:
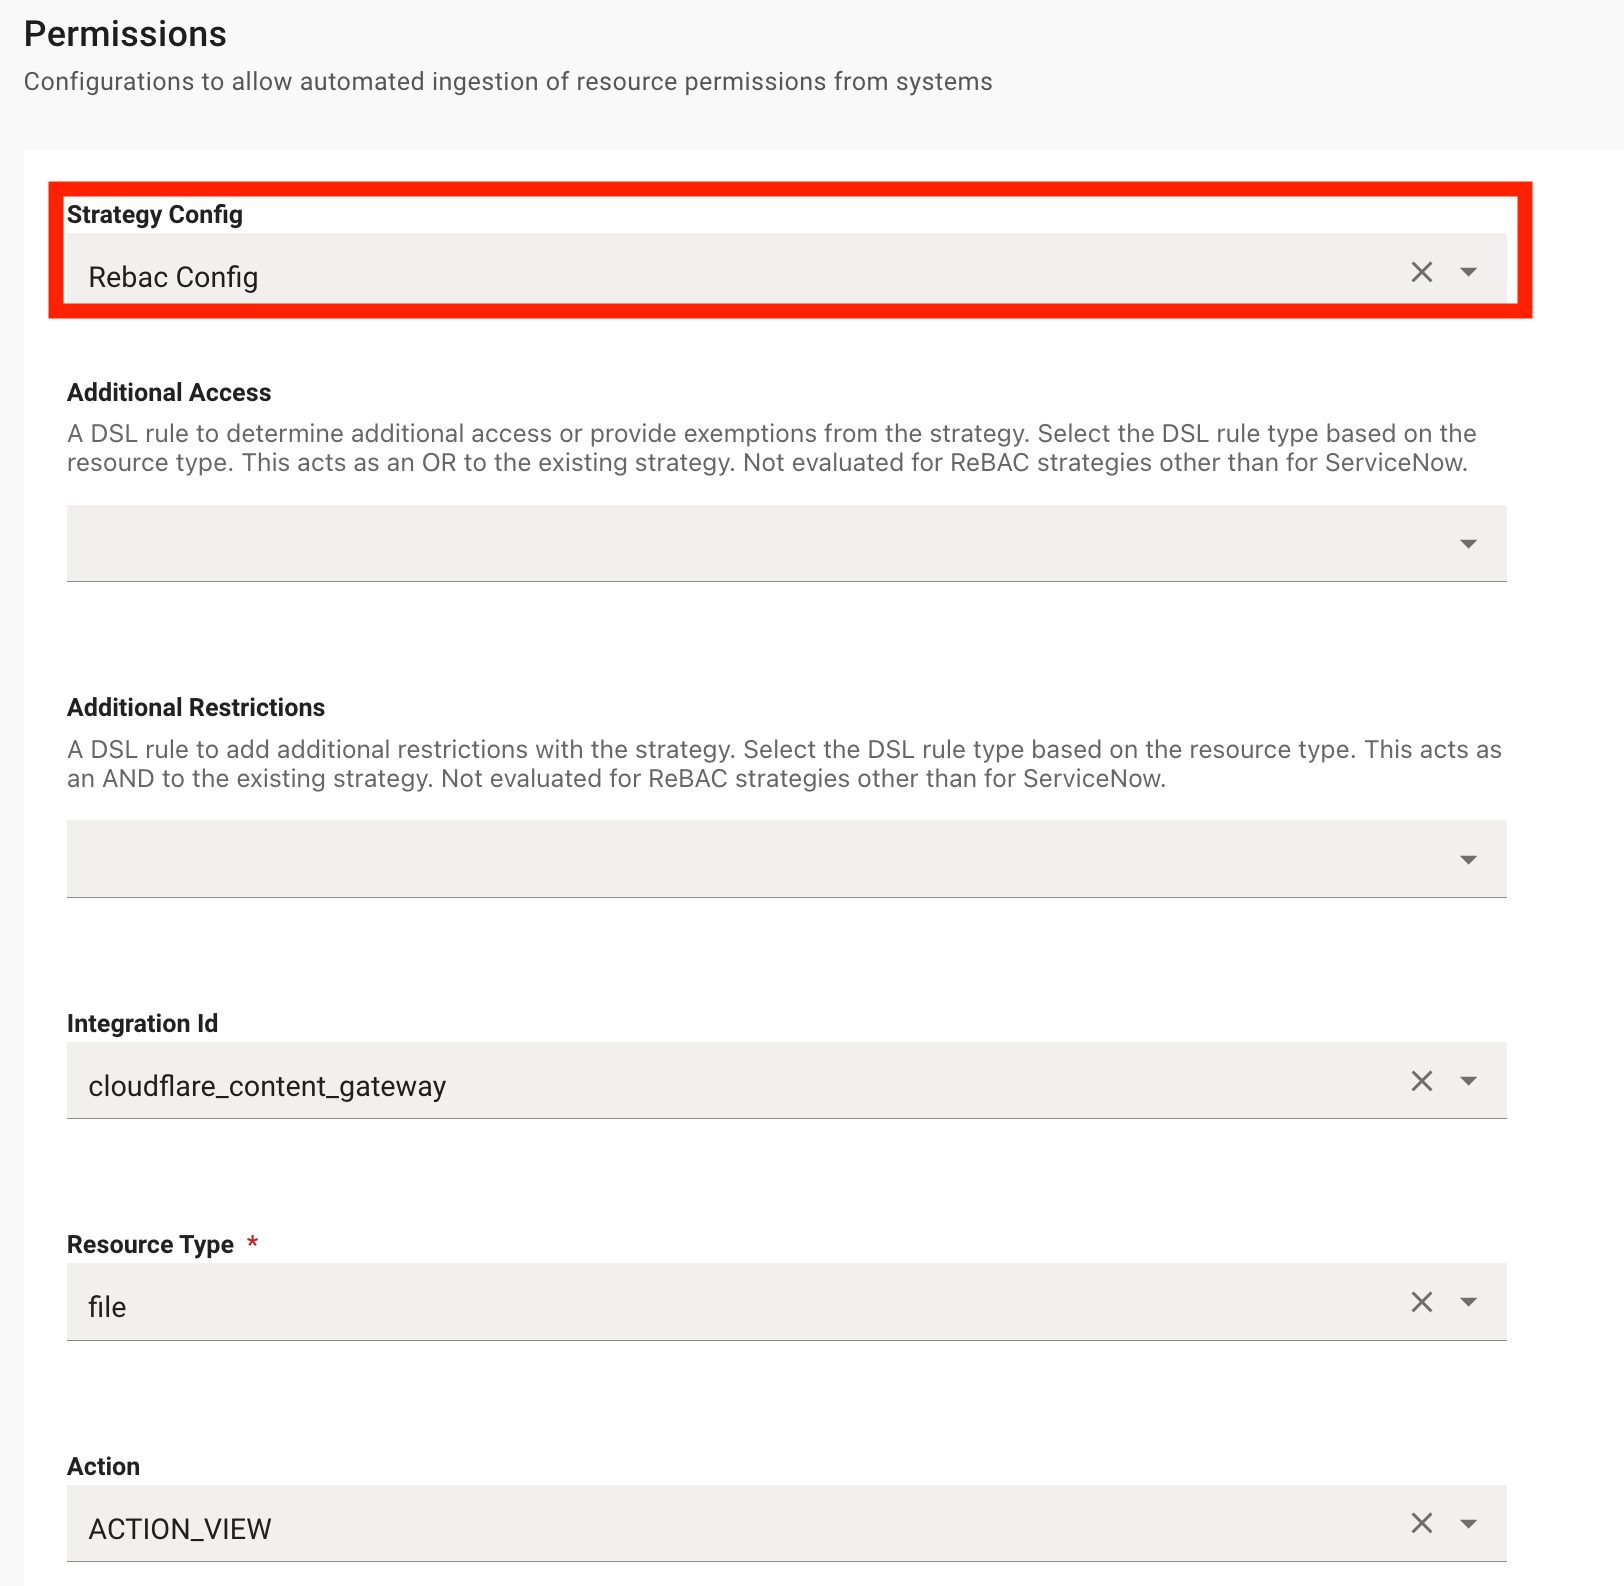
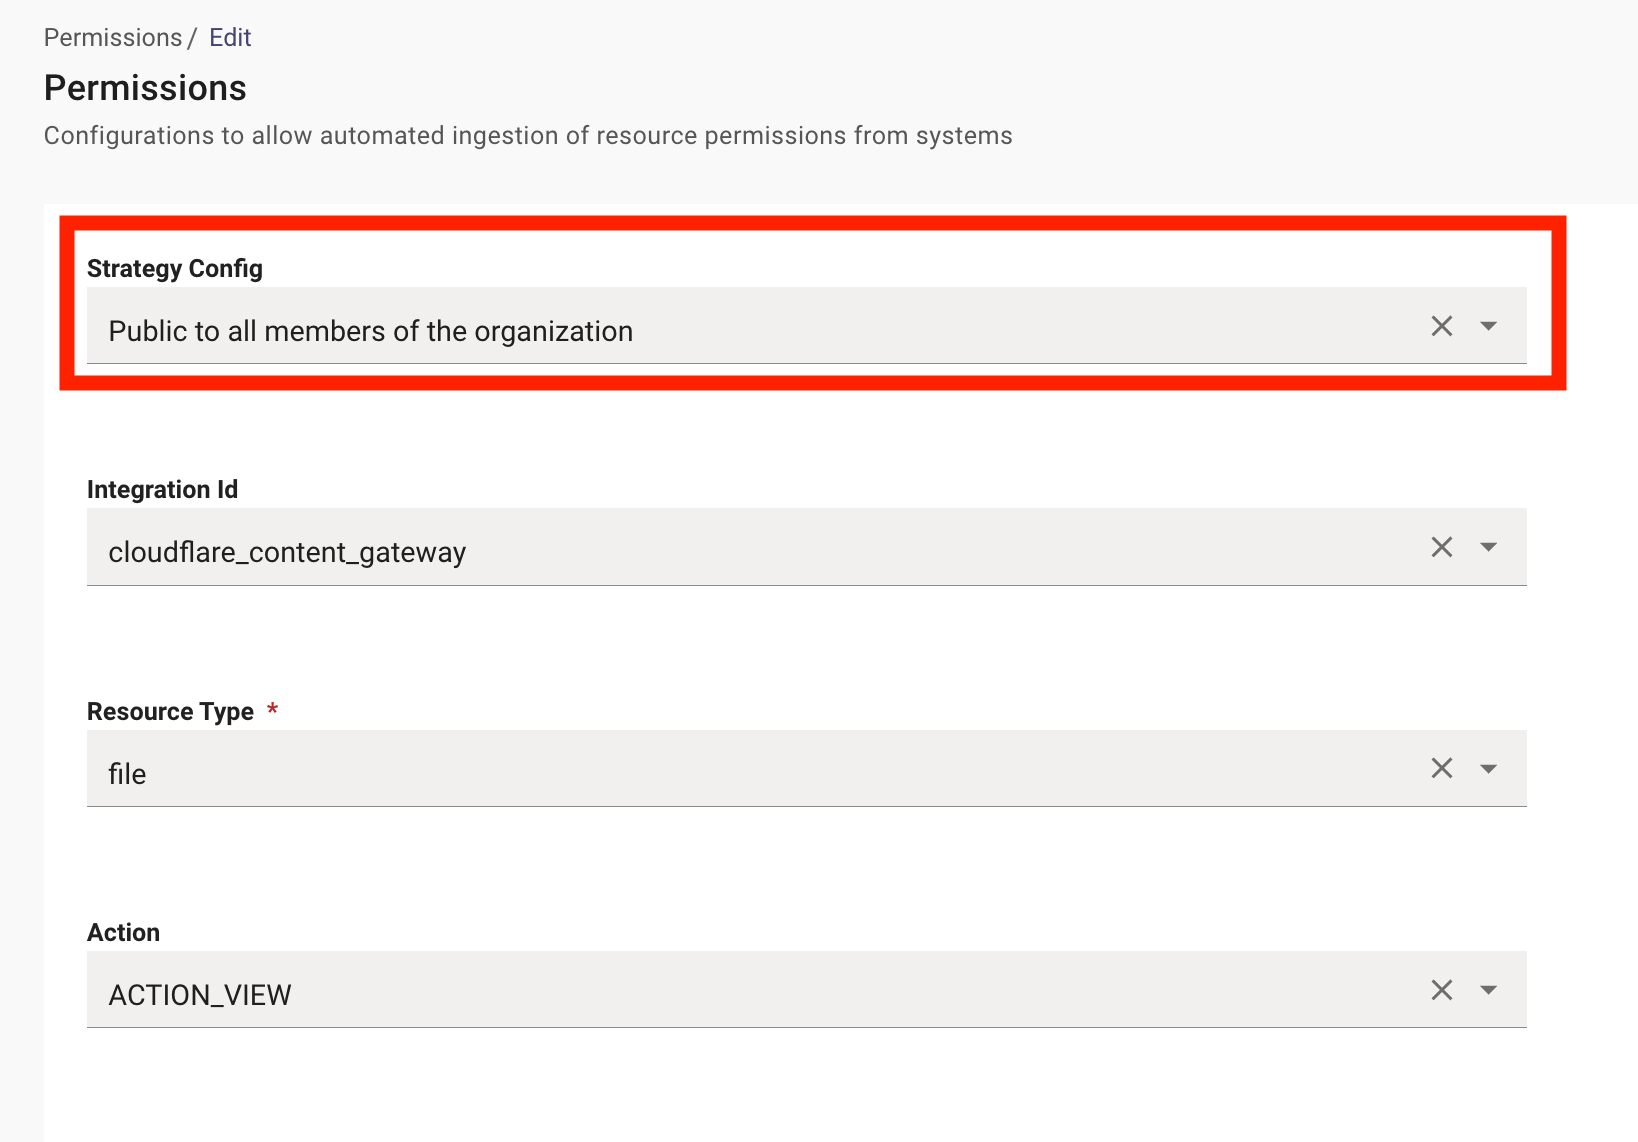
- Save.
Step 4: Add your gateway to the User Identity flow
If you chose ReBAC in Step 3, Moveworks needs to map the user identities in your gateway’s permission entries to authenticated Moveworks users.
- In Moveworks Setup, go to User Identity.
- Add your Content Gateway as an identity source.
- Save and trigger a sync.
Once configured, Moveworks will use the primary_email_addr field from your gateway’s /v1/users endpoint to resolve identities when checking document permissions.