***
title: Installing AI Agents
position: 1
excerpt: ''
deprecated: false
hidden: false
metadata:
title: ''
description: ''
robots: index
next:
description: ''
---------------
# Installation Help Documentation
### Step 1: Start the installation Process
* Click the “Install Button” at the top of the marketplace listing.
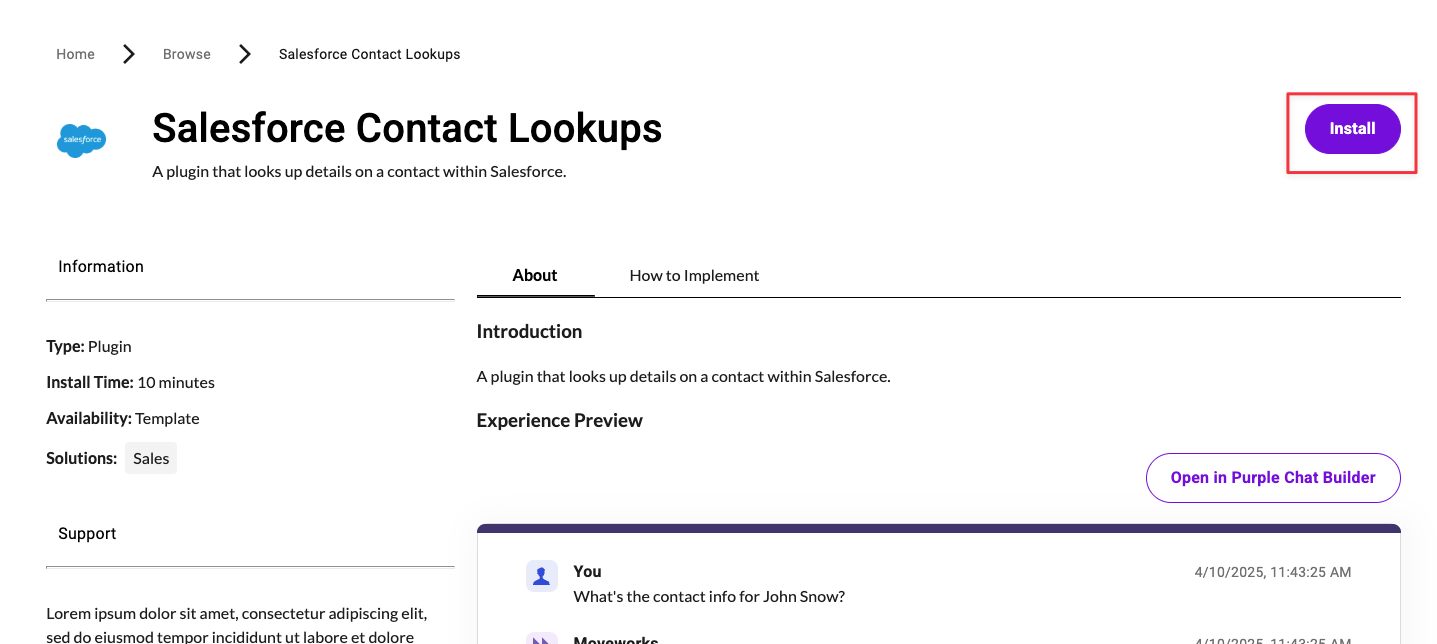
* You will prompted to log into your Moveworks tenant. Select the instance that suits your needs
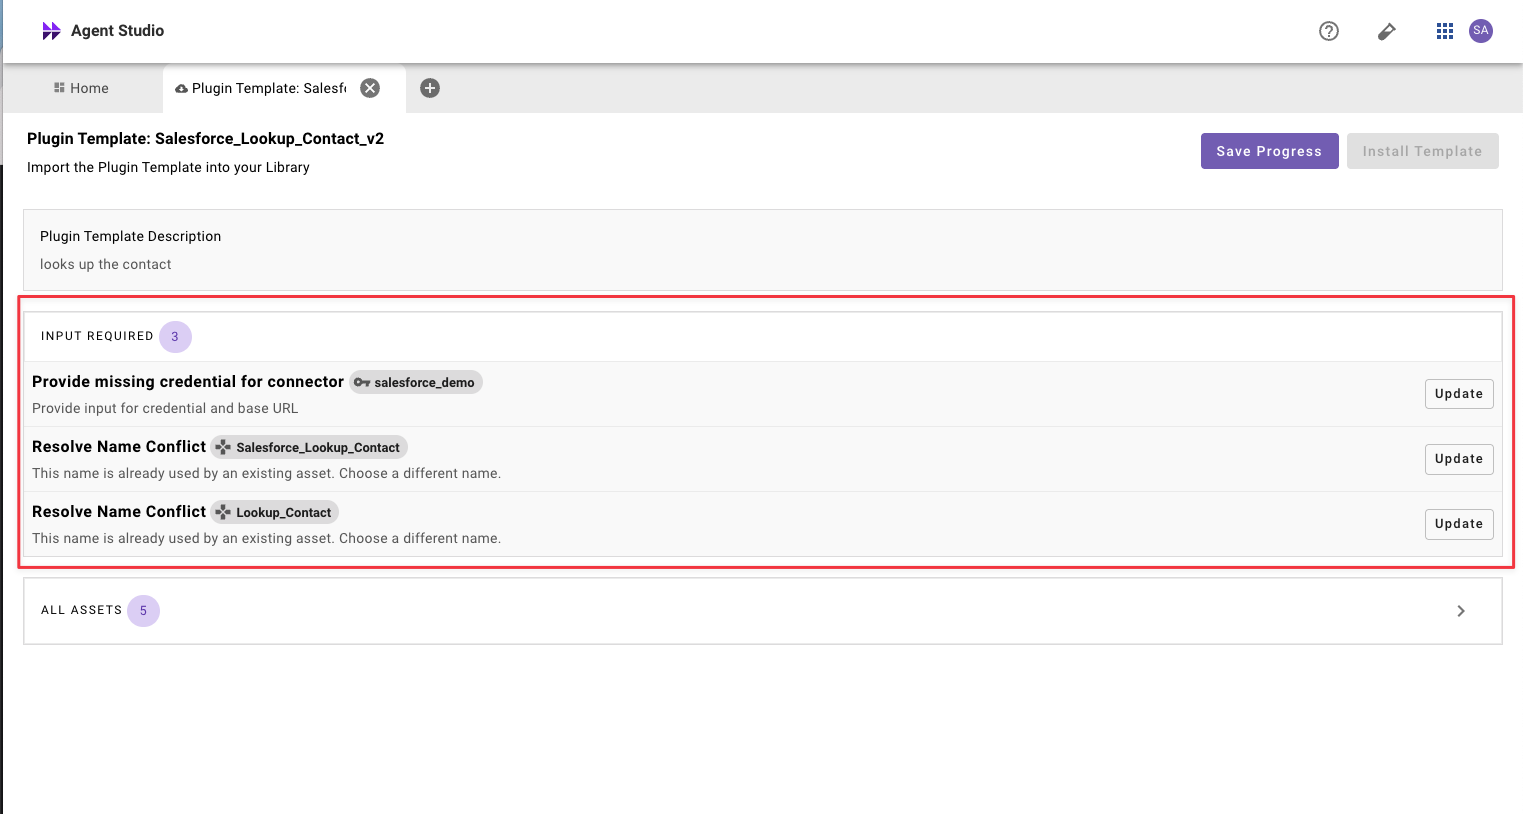
* You will now see that this plugin has 1 or more installation steps.
### Step 2: Installation Steps
* For each installation step, please click on the "update" button
* There are two types of installation steps: Update Connector or Update Name
| Installation Step | Rationale | Potential Actions: |
| :---------------- | :---------------------------------------------------------------------------- | :----------------------------------------------------------- |
| Update Connector | There is an action that requires authentication to a third party system. | 1. Choose an existing connector 2. Configure a new connector |
| Update Name | There is an asset in your Agent Studio Tenant that already has the same name. | 1. Enter a new unique name for the asset. |
### Step 3: Confirm Installation
* Please review all of the components being installed.
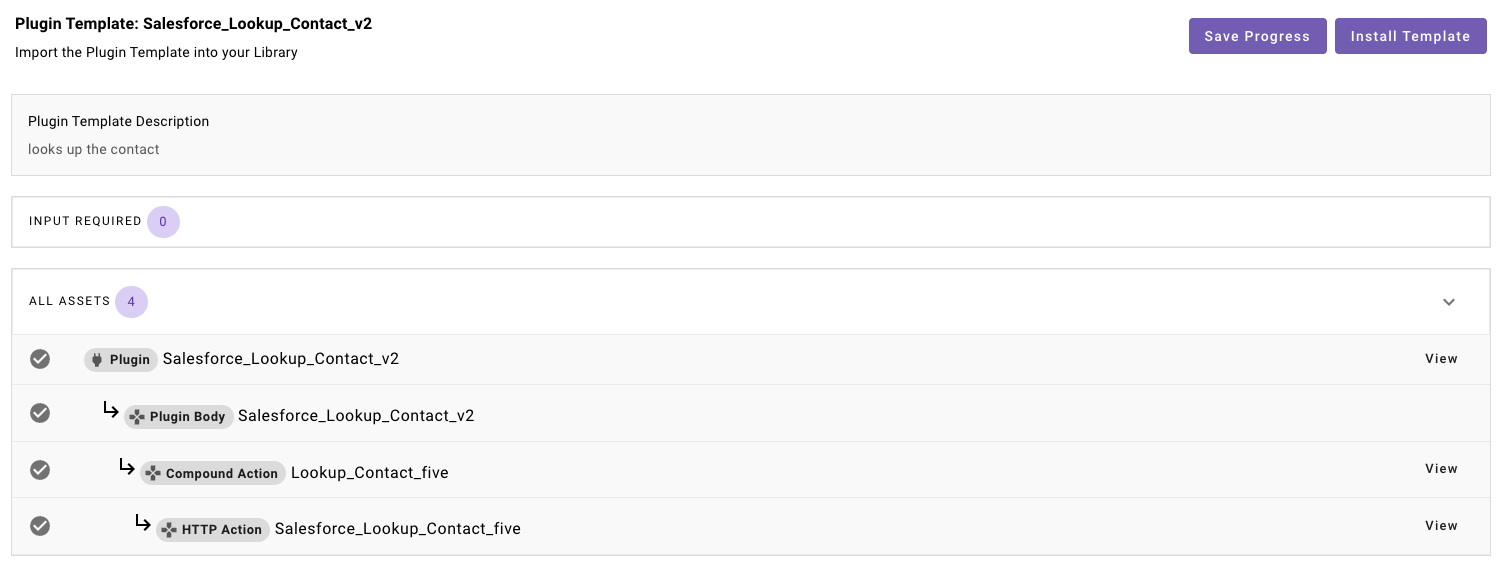
* After you have reviewed the components, proceed with installation by clicking the the "Install Template" button.
### Step 4: Launch your plugin!
* After the installation is complete, you will be redirected to plugin workspace and can view or edit any of the assets that have been installed.
* You will now have to launch your plugin and to test it’s functionality. See [our guide](https://developer.moveworks.com/creator-studio/administration/launch-options/) on Launch Rules.
* If you wish, feel free to customize any descriptions and triggering examples. However, these should work out of the box.
* If you run into any issues:
1. Check our [troubleshooting guides](https://developer.moveworks.com/creator-studio/troubleshooting/support/)
2. Understand your issue using Logs
3. Reach out to Support.