***
title: HTTP Actions
position: 2
excerpt: ''
deprecated: false
hidden: false
metadata:
title: ''
description: ''
robots: index
next:
description: ''
---------------
HTTP Actions make API calls to your business systems so you can build automations. They can be chained together in [Compound Actions](/agent-studio/actions/compound-actions).
HTTP Actions can be used to call both SOAP and REST APIs. Moveworks recommends using REST APIs with JSON payloads whenever possible for ease of configuration, and debugging purposes.
# Set up an HTTP Action
You are able to setup an HTTP Action two ways:
1. \[Recommended] Import the entire HTTP Request via cURL.
2. Manually select/create a connector + setup the API Request
## Import from cURL
1. Importing cURL will overwrite all of the current work you have in the HTTP Editor.
2. If the Request you are trying to import uses a 2-step Auth method like OAuth 2.0, then you will have to set up the connector manually AFTER importing cURL.
### Steps
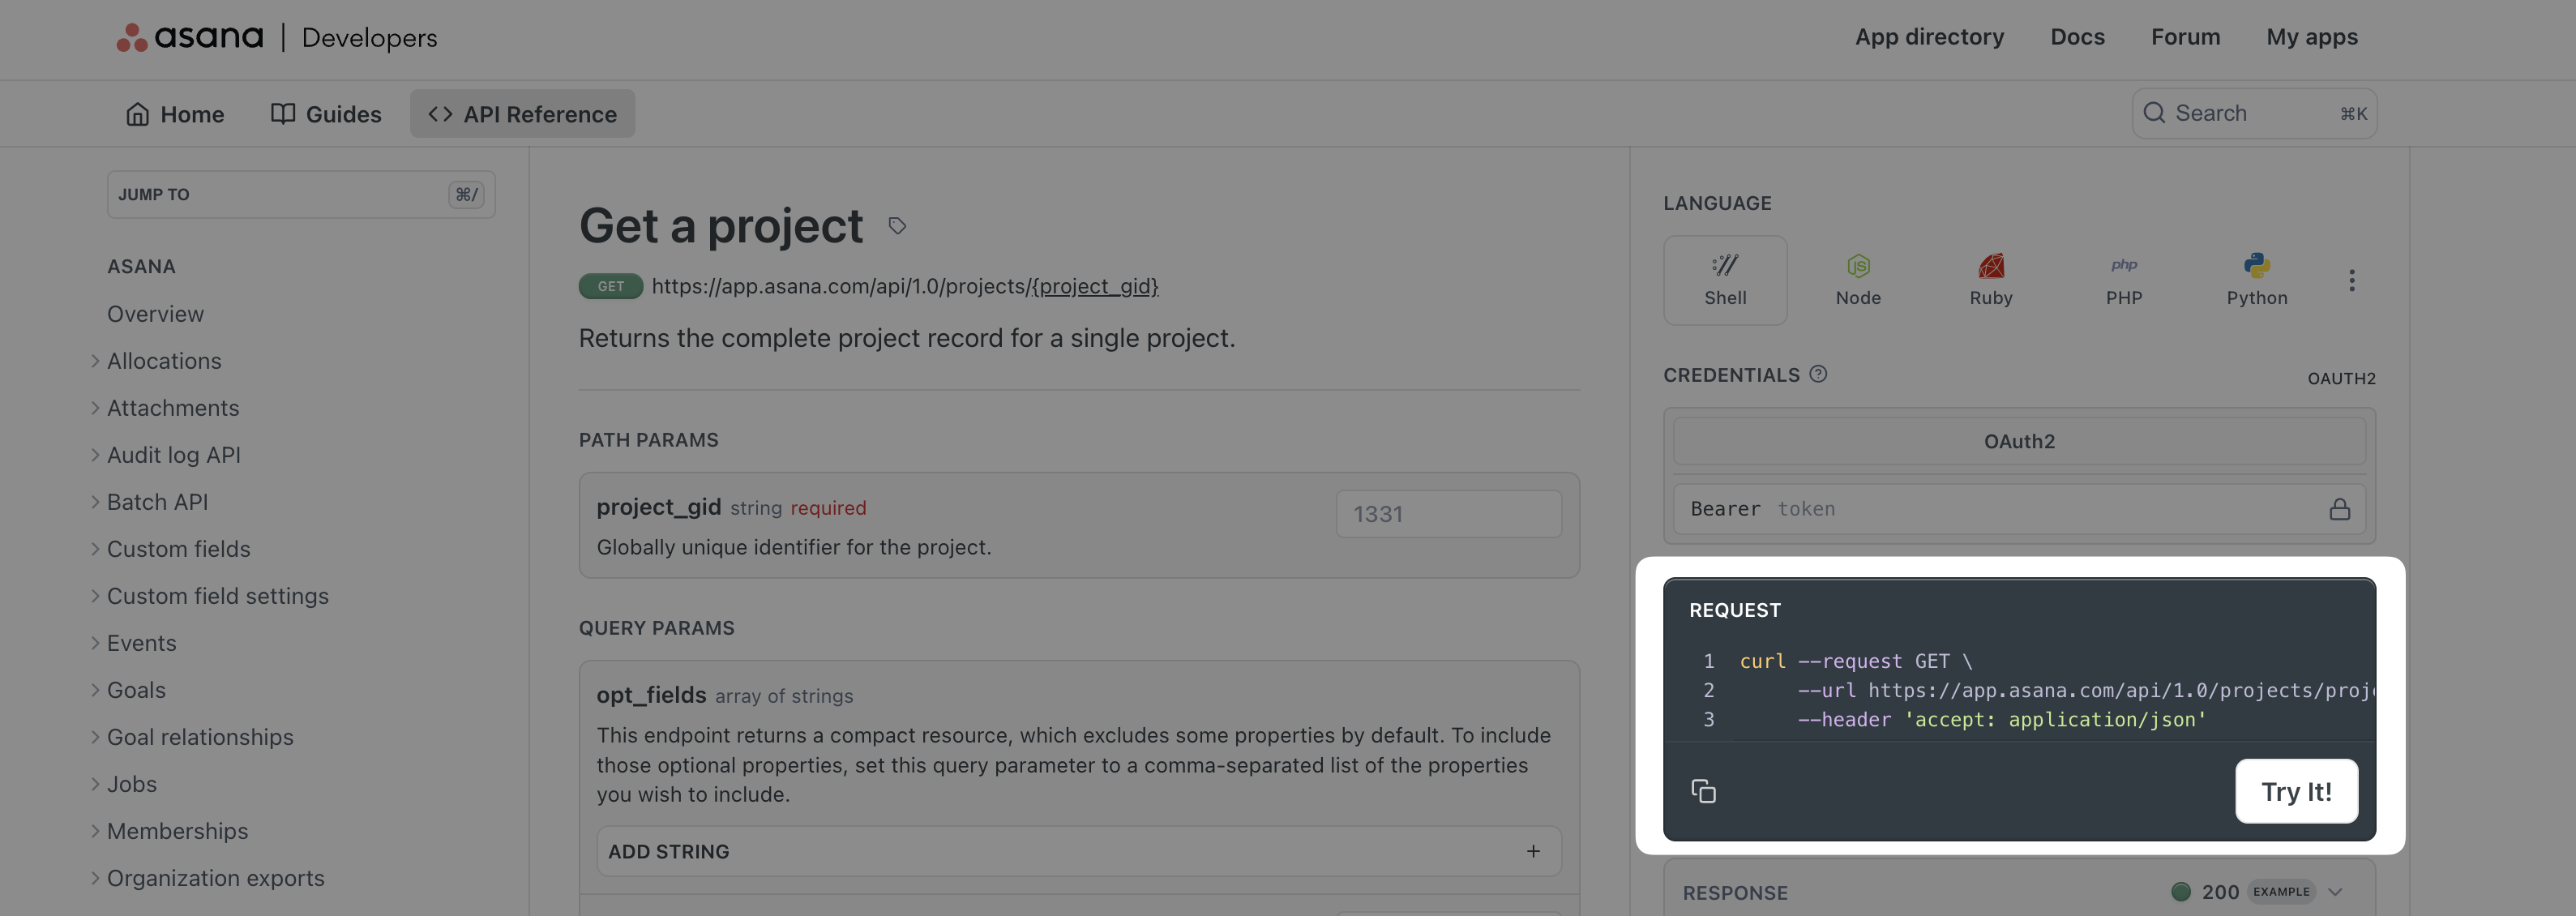
1. Get your `cURL` command:
1. You can typically find cURL commands in the API documentation for the source system you are trying to integrate with
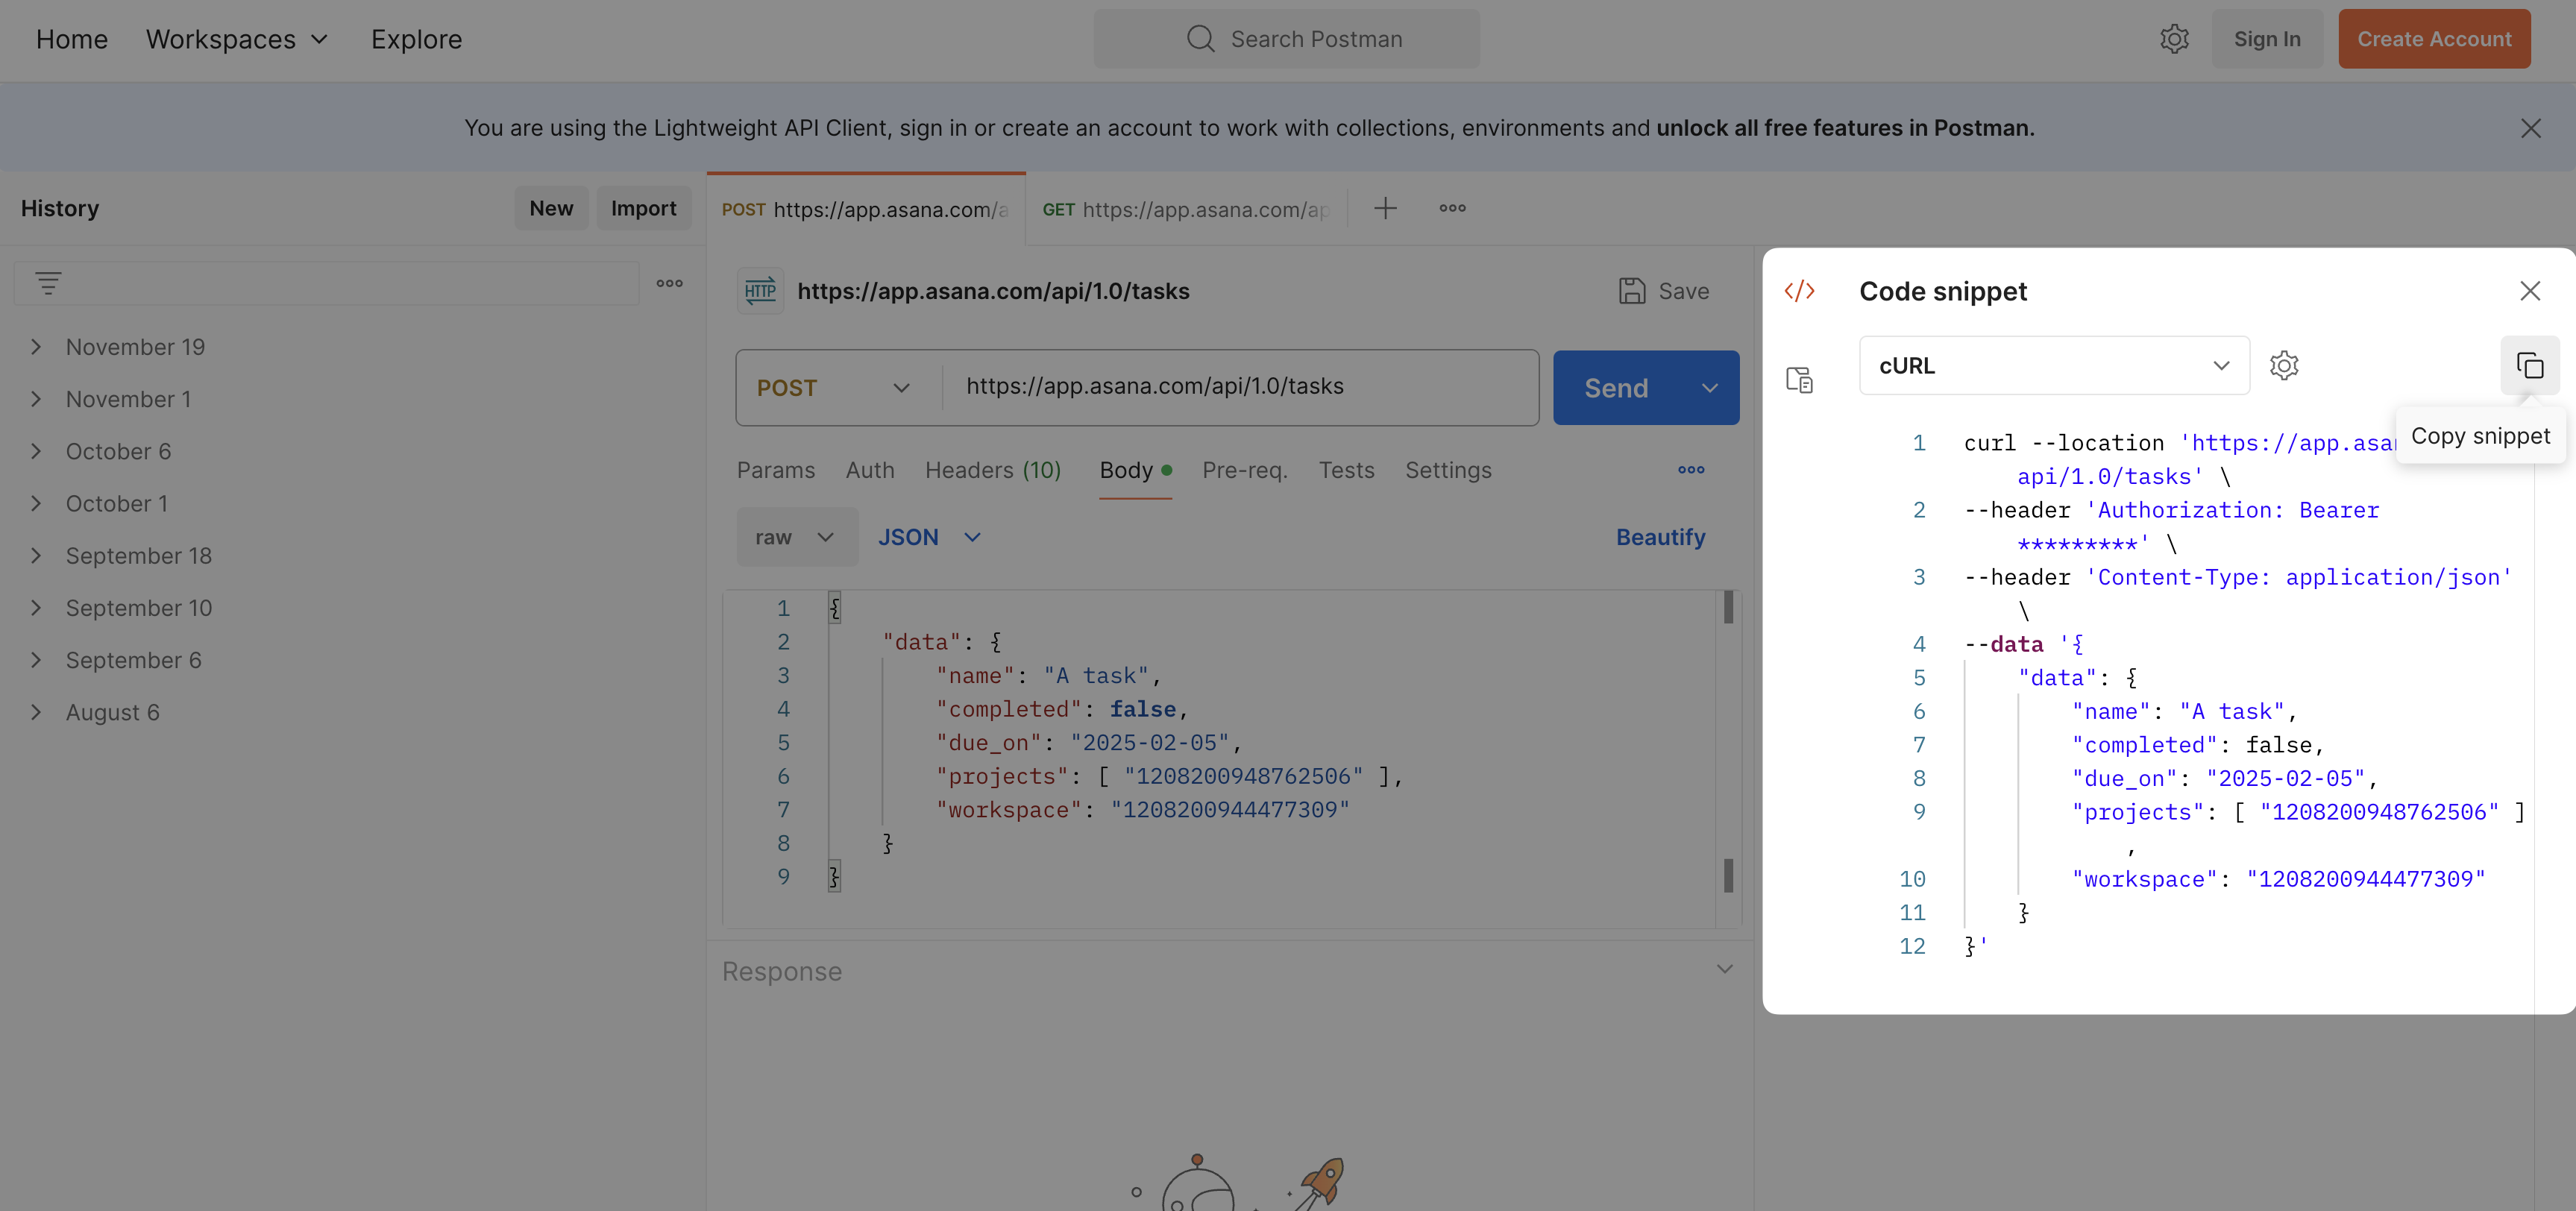
2. You can export your Postman requests to curl by clicking the `` icon on the right toolbar in Postman
2. Click **Import cURL**
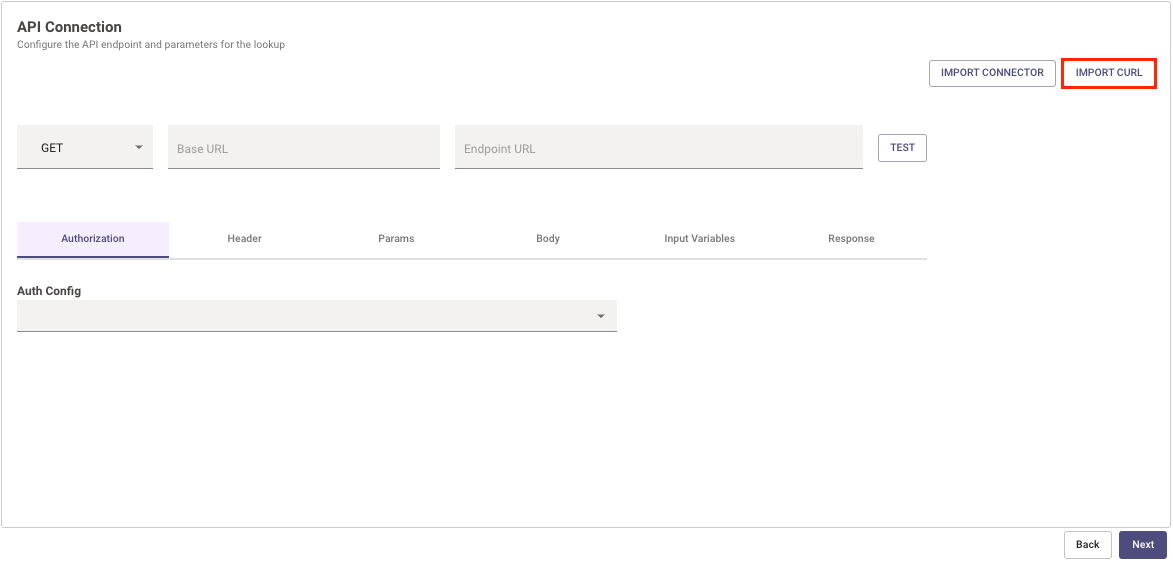
3. Paste your cURL command into the text box.
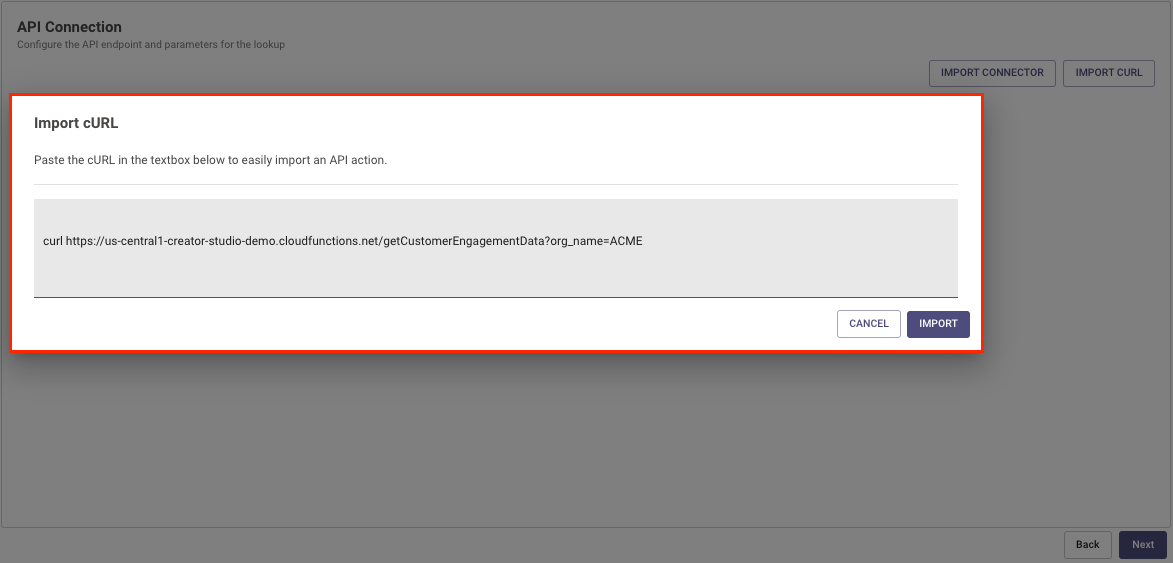
4. Double check everything is imported the way you expected.
## Set up HTTP Action Manually
### Prerequisite
Please make sure to setup the connector for this action. For more information, see [Connectors Help Documentation](/agent-studio/connectors)
### Steps
If you're manually configuring your API, you can do so by editing:
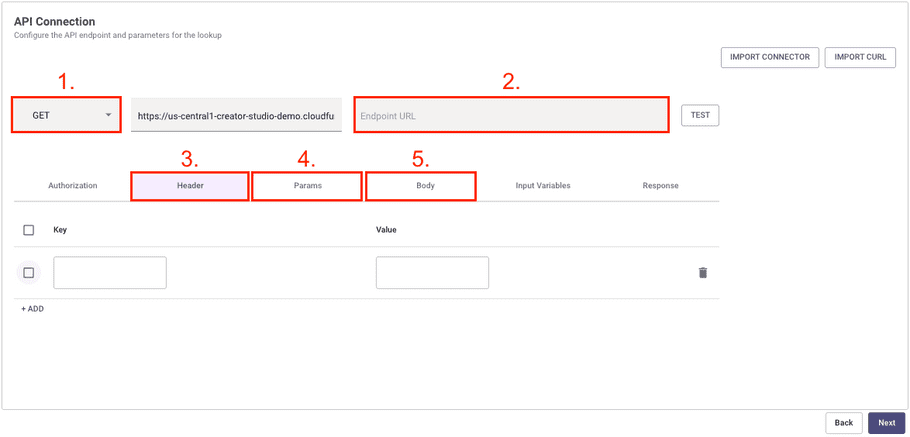
1. `Method` - We support GET, POST, PUT, DELETE, and PATCH methods.
2. `Endpoint URL` - This is the rest of the URL path starting from the end of the Base URL. It must start with a `/`.
* **Note:** The Connector's **Base URL** and the inputted **Endpoint URL** are combined to create the full Request URL.
3. `Headers` - All request headers must be added to this table.
4. `Query Params` - All query parameters must be added to this table. They cannot be saved in the `Endpoint URL`.
5. `Body` - All body content must be added to this text box.
* **Note:** If you want to use `Content-Type: x-www-form-urlencoded` , you have to convert the data to the following format: `key=value&key2=value2`
# Use Variables
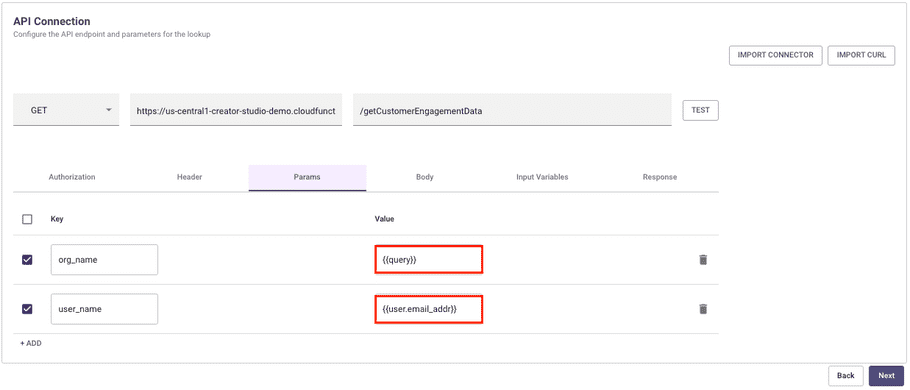
## Inserting Variables
You can use variables anywhere in the Headers, Params, Body, or Endpoint URL. They can also be used in JWT Connector Claims.
* You insert variables by using `{{{VARIABLE_NAME}}}`.
* You can also reference variables from the [HTTP Action Data Bank](/agent-studio/actions/http-actions/http-action-data-bank) (like the current user)
```
"{{{meta_info.user.email_addr}}}"
```
You can check variable names by clicking the **Input Args** button. See also our [User Attributes Reference](/agent-studio/core-platform/user-identity/user-attribute-reference).

## Variable Escaping
By default all variables will be HTML escaped. This follows the [Mustache templating language](https://mustache.github.io/).
You can use `{{{VARIABLE_NAME}}}` if you need avoid HTML escaping the content of the variable.
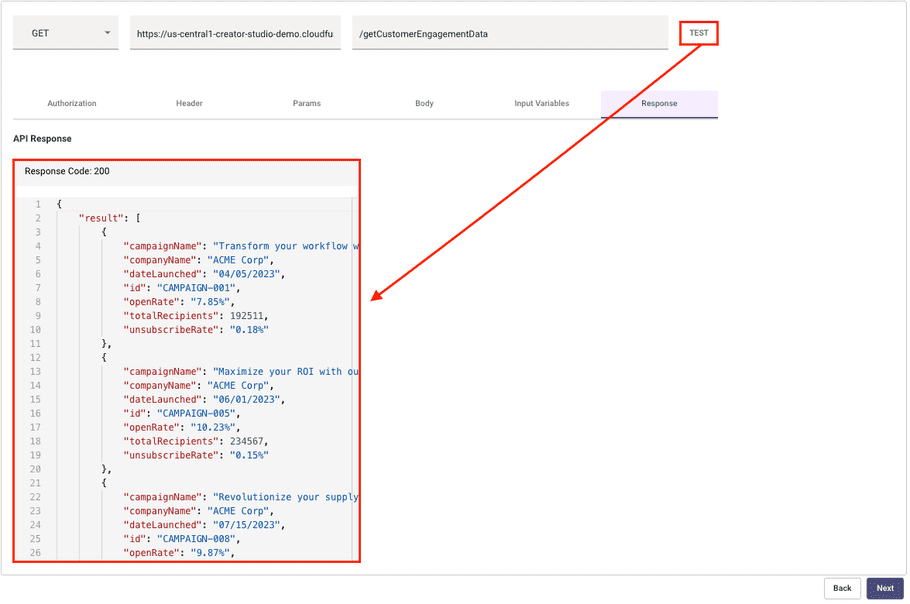
# Test your API
If you use a variable in the request and want to test your API, then you must add an example value to the variable by clicking the **Input Args** button.
This does not apply to User Attributes. User Attributes will pull from the information of the current user who is logged in and configuring the request.
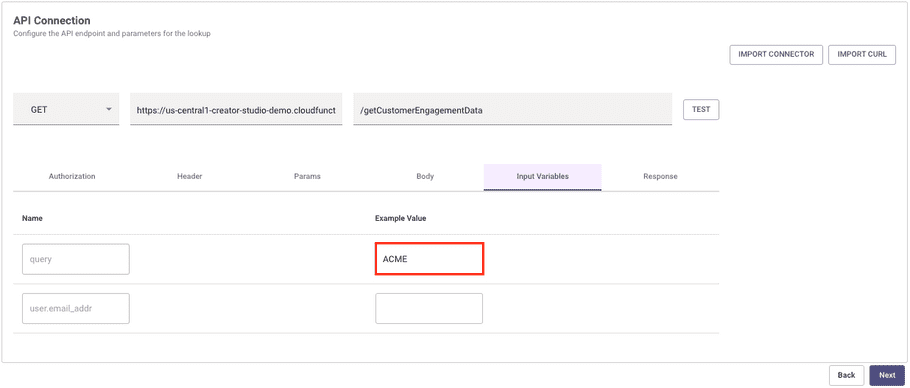
Once all your variables are configured, click **Test** to kick off a request with the example data you inputted via the **Input Args** button.
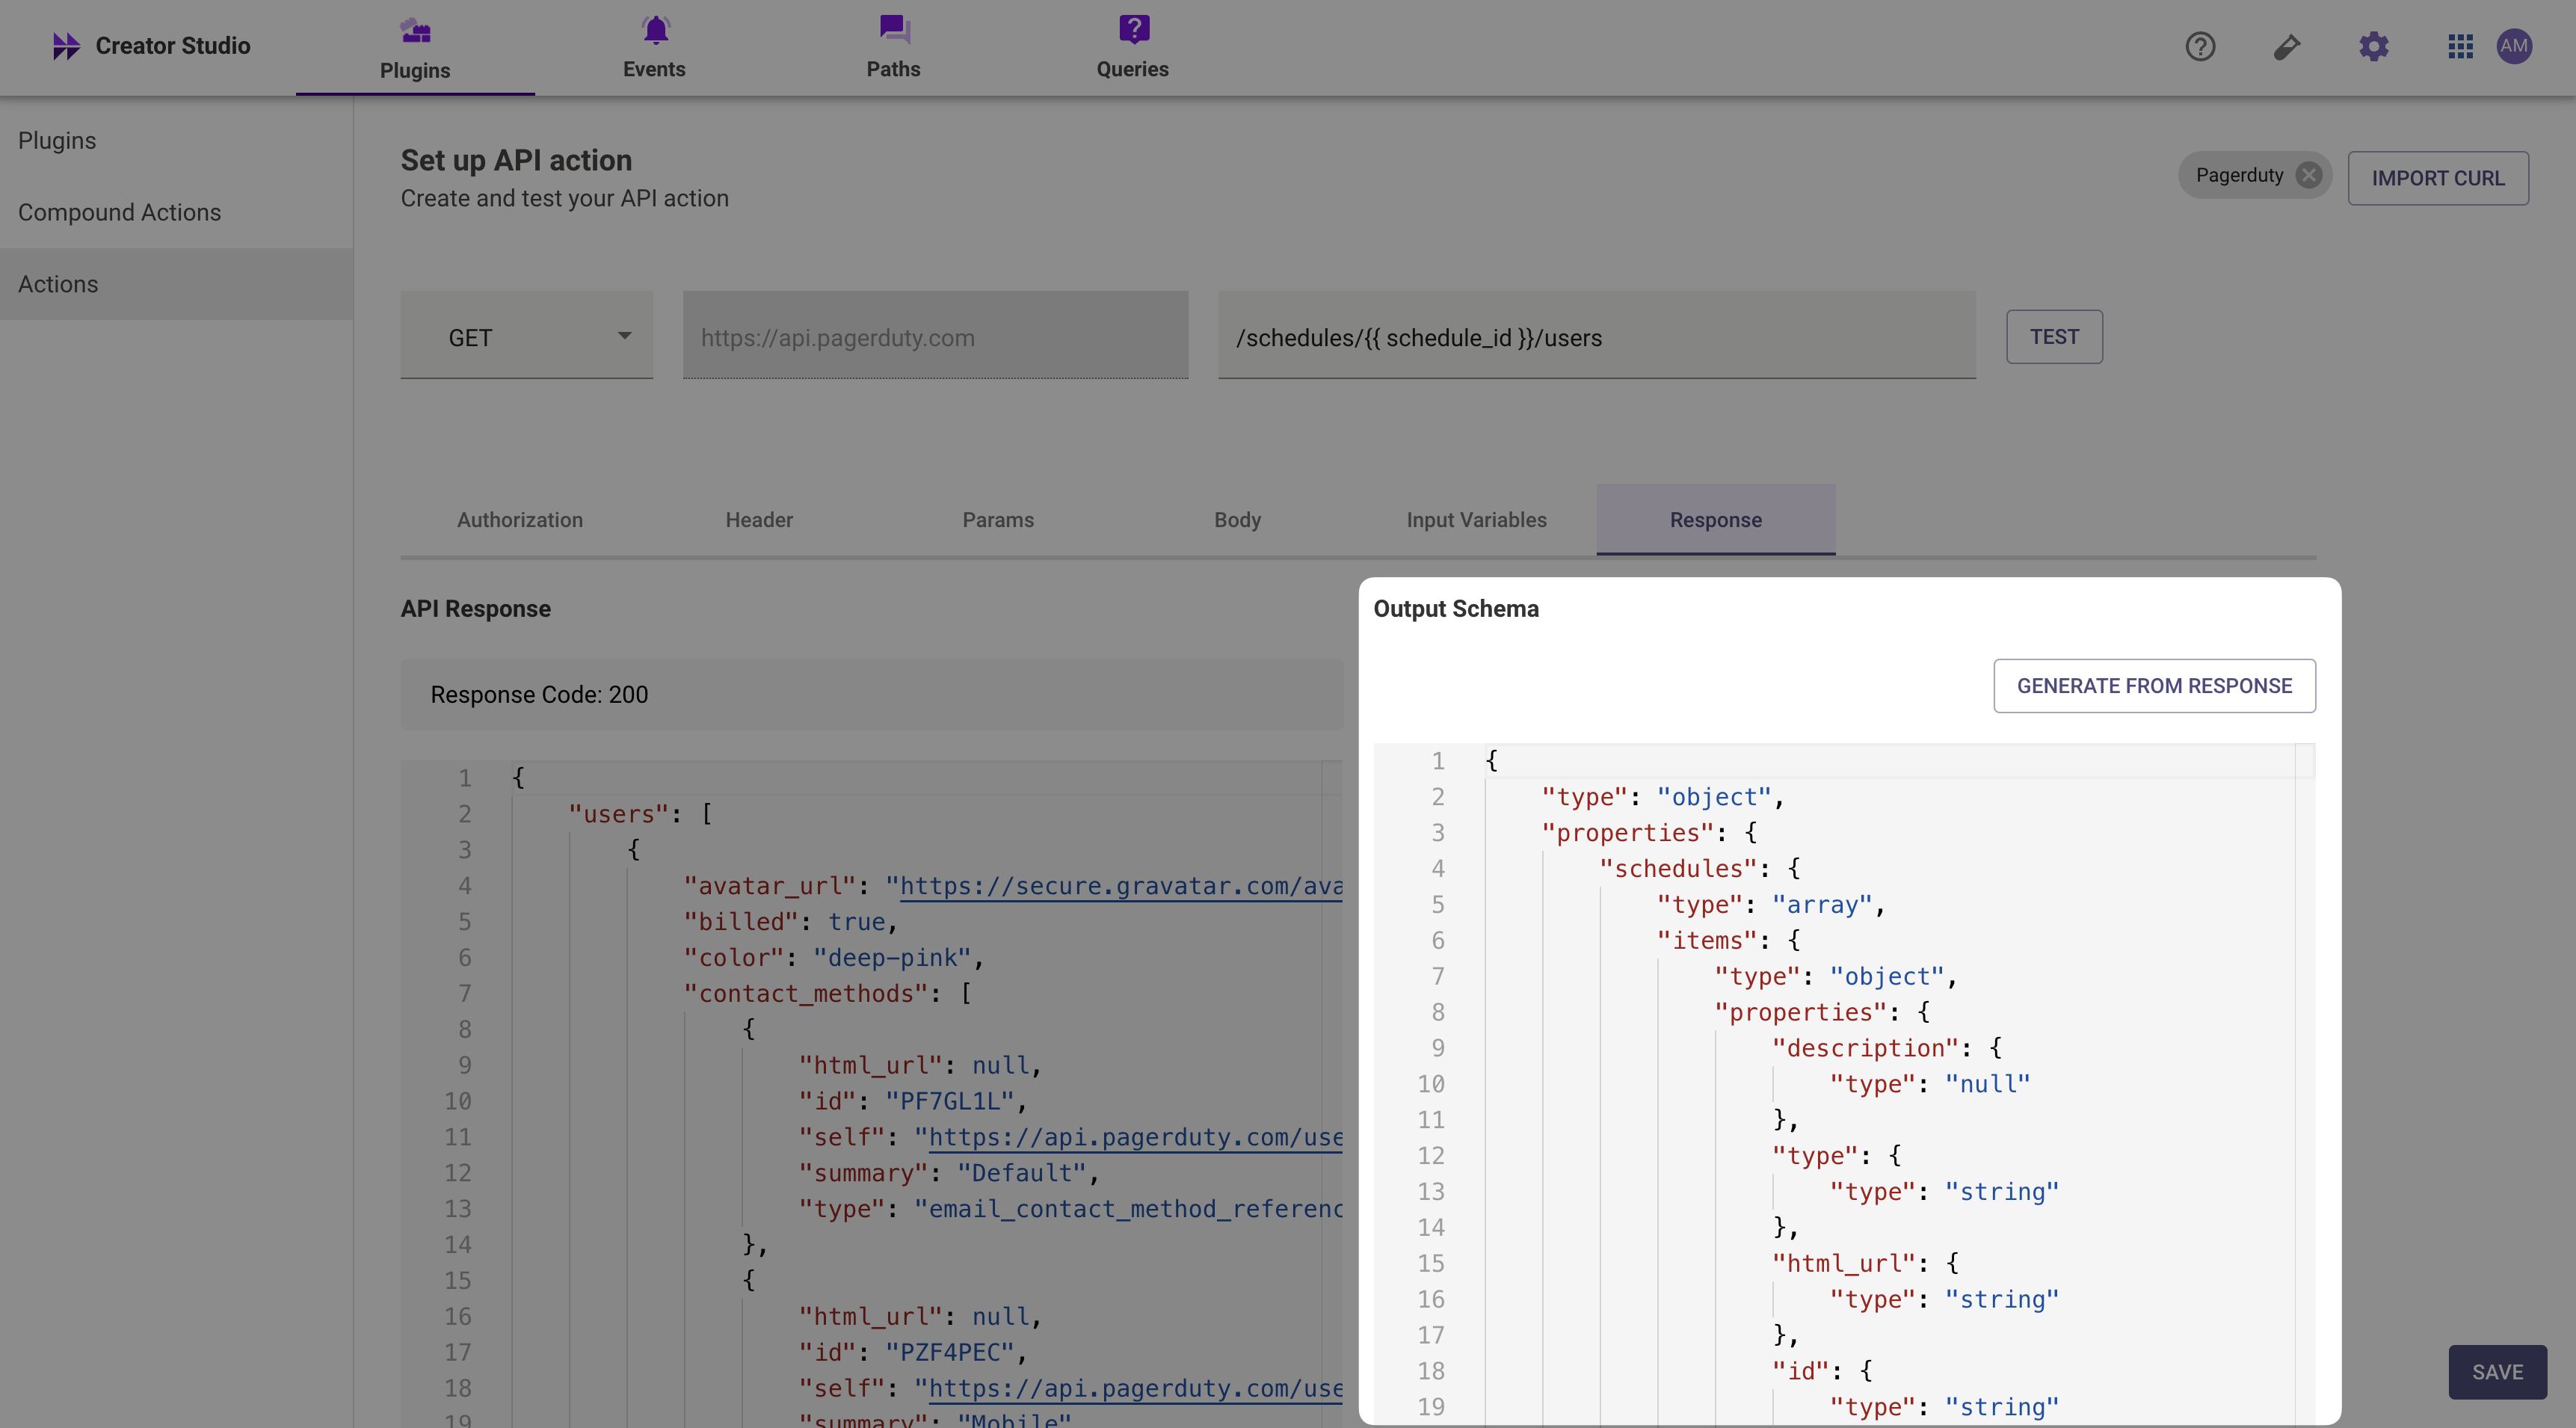
# Prune Response Schema
You can filter out attributes from your HTTP action by toggling the **Response Schema** switch in the **Response** panel, then deleting parts of the **Response Schema**. Otherwise all data will be exported to the caller of this action (e.g. the compound action).
# Save Action
When you choose to save the action, you will specify an **Action Name**. In Pre-April 2025 versions of the Plugin Workspace, you will reference this Action Name in subsequent [Compound Actions](/agent-studio/actions/compound-actions) as the `action.action_name`.
In Post-April 2025 versions of the Plugin Workspace, you will be able to either reference the action inside of a compound action, or you can reference the action directly in a plugin as an action activity.
If you created a new connector in the HTTP editor, you'll also be prompted to provide a connector name.

# Troubleshooting
## My HTTP Action is failing
1. Check our [logs](/agent-studio/development-and-testing/logs) to understand why.
2. Requests will timeout after 60 seconds with no response from the requested server.
3. Requests accept a max of 200kb responses.
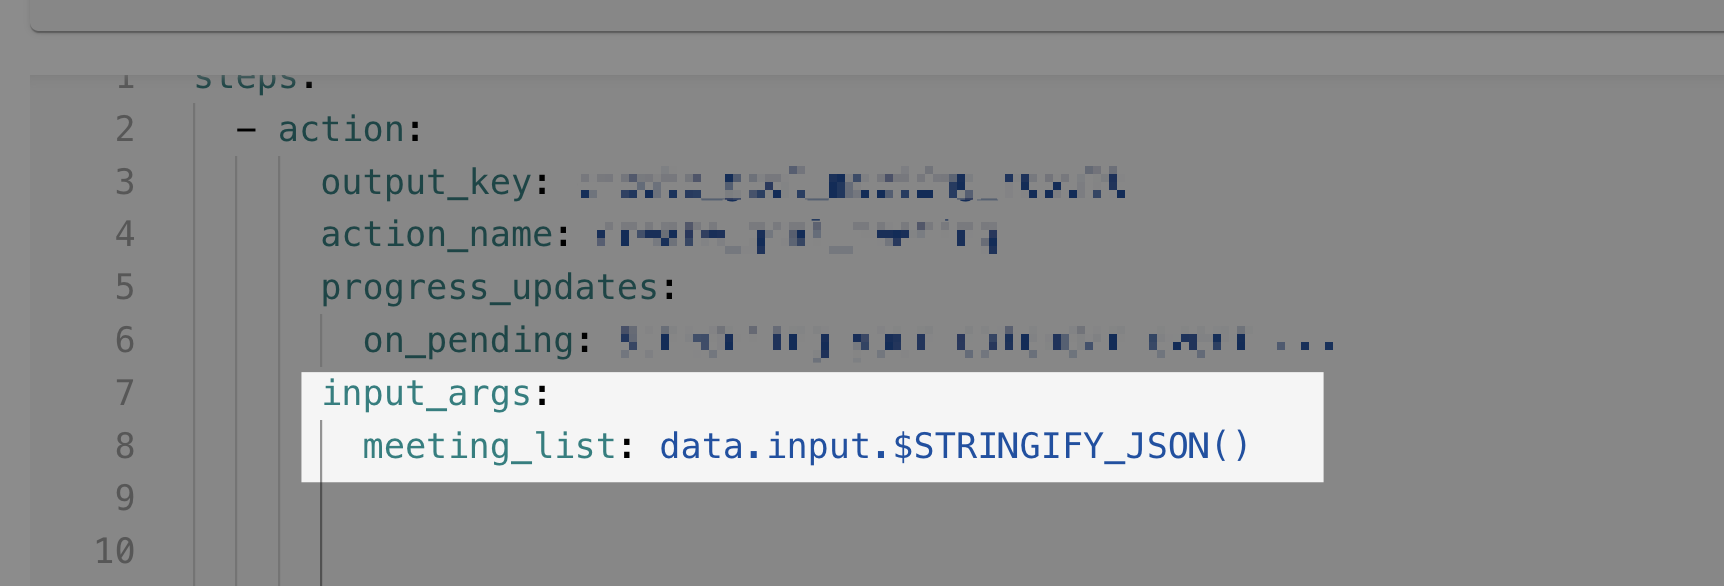
## How to pass an array through the POST Body
If you wish to pass an array through the POST body of an action, refer to the following steps:
1. In the action body itself, refer to the array in triple braces without any quotes. For example:
> \{\{\{meeting\_attendee\_list}}}
no quotes.

2. When you create inputs in the compound action, you need to stringify the array. For example your input arg would be:
```
1. data.input.$STRINGIFY_JSON()
```